DOD Technology CHIMERA Dash cam User Manual Chimera
Shenzhen DOD Technology Co.,Ltd. Dash cam Chimera
UserManual.wiki
>
DOD Technology
>
CHIMERA User Manual
User manual
Navigation menu
Upload a User Manual
Namespaces
Wiki Guide
HTML
PDF
Info
Views
User Manual
Discussion / Help
Navigation

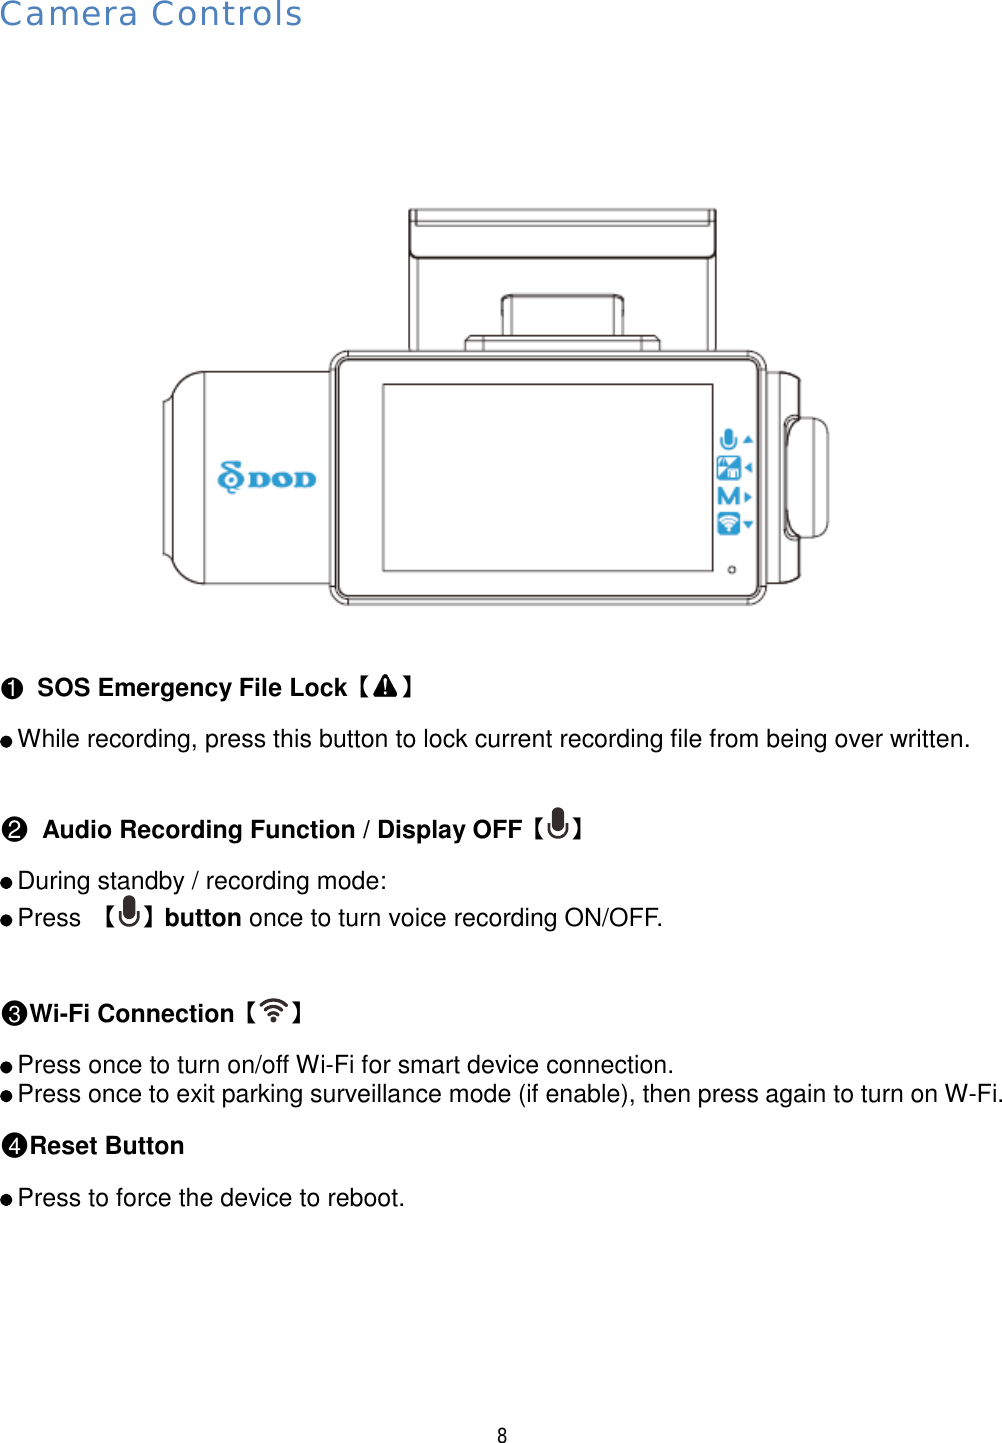
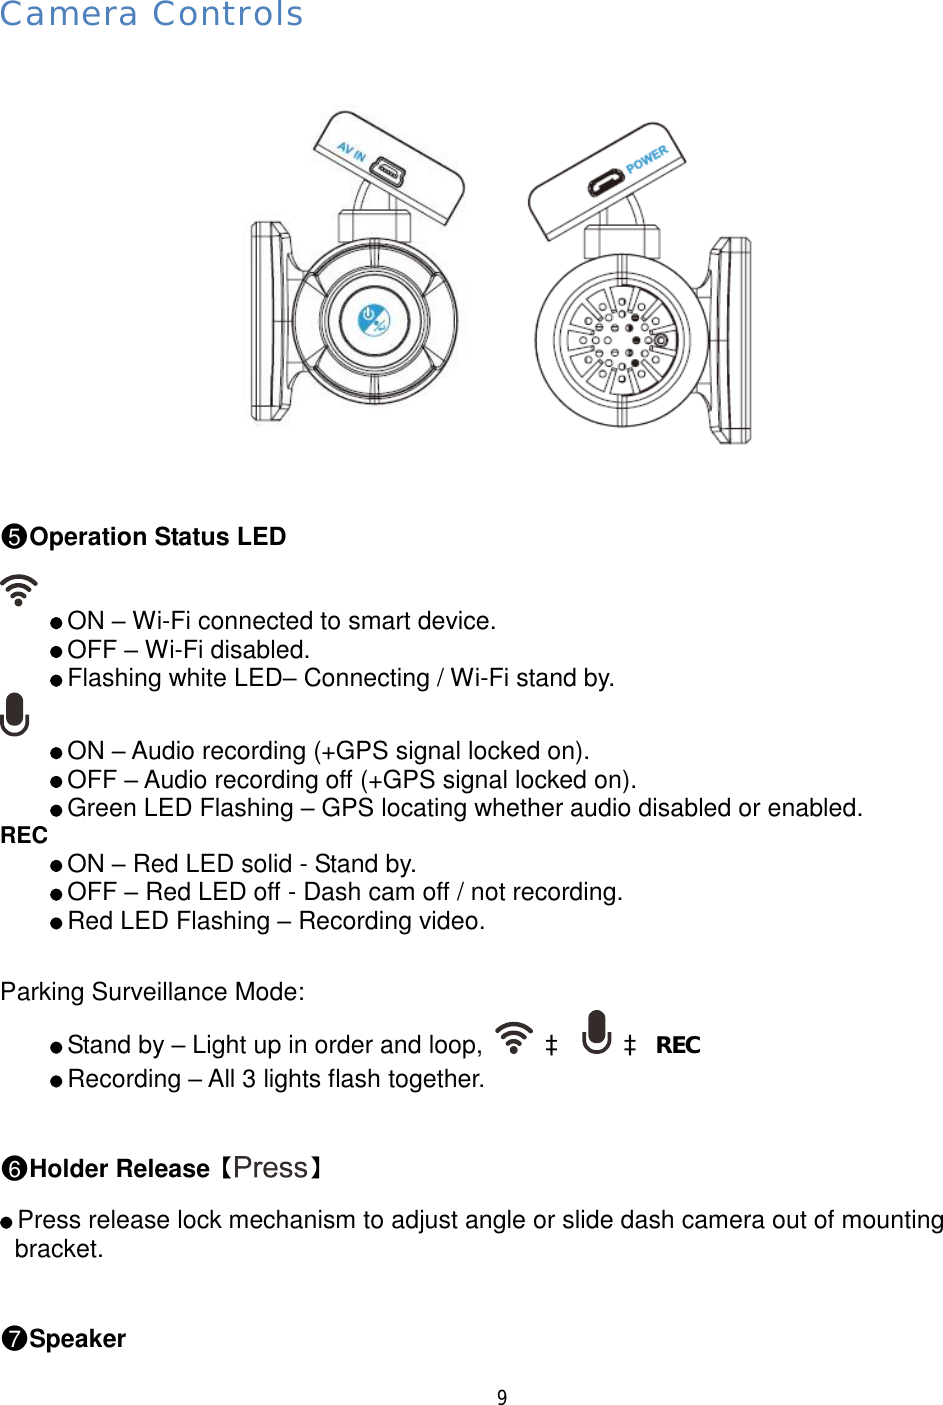
![19 ●1When dash cam is connected, please make sure to switch on then hit check mark to confirm. ●2Break camera connection. ●3Connect to switchable camera. ●4Confirm and return to previous page. ●5View connection instruction. Settings Press [ ] to enter the menu setting. Settings can only be changed when recording has stopped. The camera defaults to video recording when the camera is first turned on. Recording Mode: Press【 】to start/stop recording. File Directory: Press【 】to access recorded files directory. Settings: Press【 】to access camera setting page. Display or hide map, tap 【 】to change display style.](https://usermanual.wiki/DOD-Technology/CHIMERA/User-Guide-3808703-Page-21.png)
![20 You can access to three different functions; details as follow: Snap Shot Press【 】to take a snap shot of current camera view. Screen Brightness. Press【 】to dim the display of your smart device or press it again to resume. PIP Display Press【 】to change picture in picture display style. Audio On/Off Press【】to turn audio recording on or off. Speed Display Tap on speed display to switch between digital or speedometer. Map View: Track Path Press【】to track travel path. Screen Brightness. Press【 】to erase past path. PIP Display Press【 】to change map display mode. Playback and Download Press [ ] to enter the files of recorded videos and photos. ●1File View Mode ●2Download File to Your Smart Device* ●3All Files ●4Display Video Files Only ●5Display Photo Files Only *NOTE: After downloaded to local storage on your smart device, [] will appear, indicating the file can be share via various social network such as Facebook, Instagram, etc.](https://usermanual.wiki/DOD-Technology/CHIMERA/User-Guide-3808703-Page-22.png)
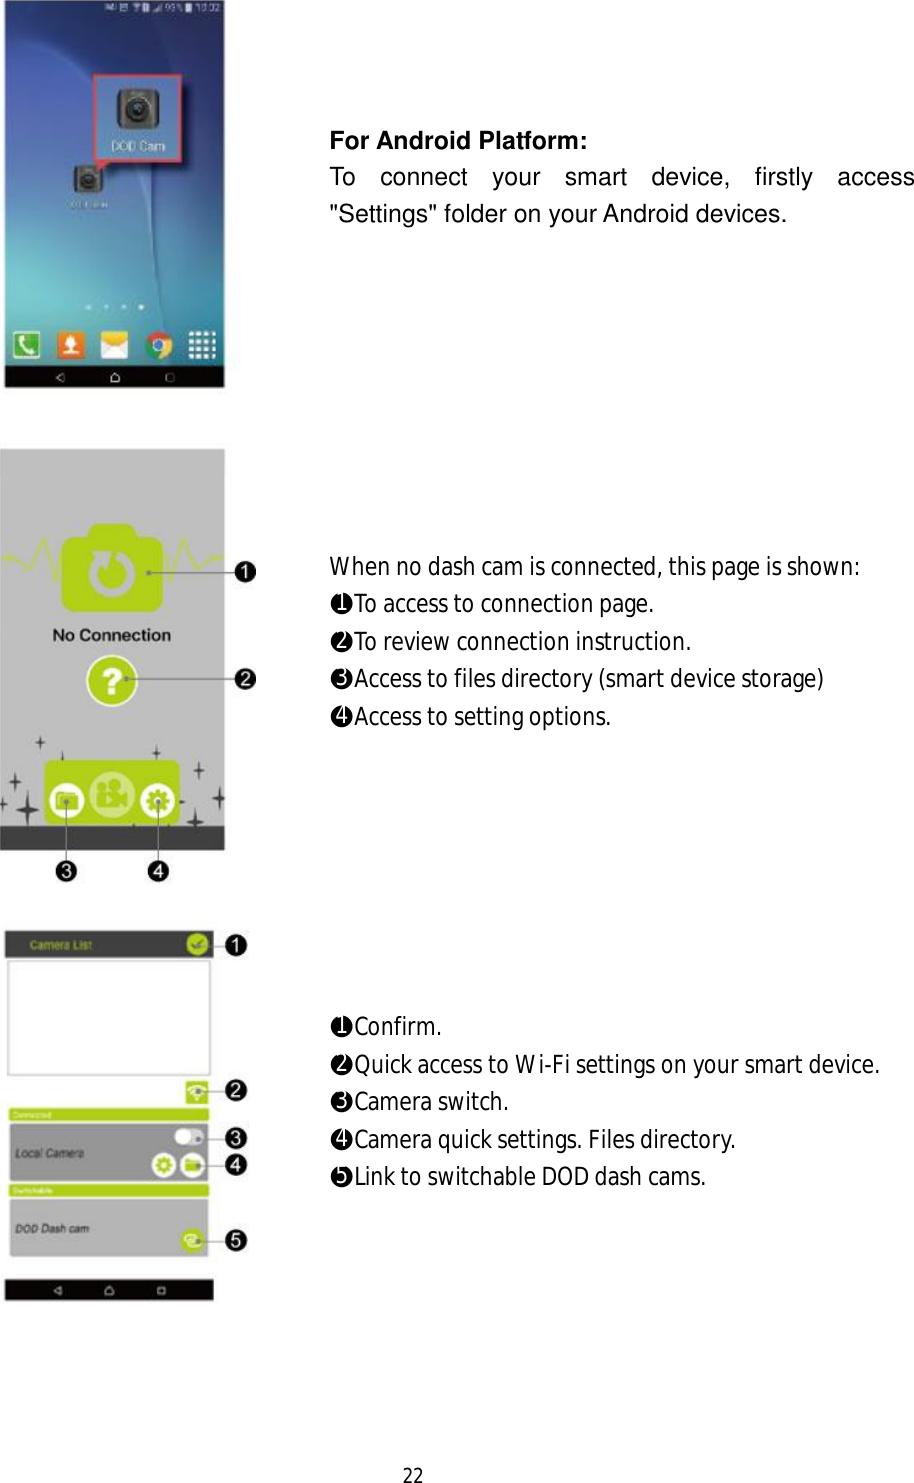
![23 ●1Confirm connection and return to previous page. ●2Quick access to Wi-Fi settings on your smart device. ●3Camera switch. ●4Camera quick settings. Files directory. ●5Disconnect from current camera. Settings Press [ ] to enter the menu setting. Settings can only be changed when recording has stopped. The camera defaults to video recording when the camera is first turned on. Recording Mode: Press【 】to start/stop recording. File Directory: Press【 】to access recorded files directory. Settings: Press【 】to access camera setting page. Display or hide map, tap 【 】to change display style.](https://usermanual.wiki/DOD-Technology/CHIMERA/User-Guide-3808703-Page-25.png)
![24 You can access to three different functions; details as follow: Snap Shot Press【 】to take a snap shot of current camera view. Screen Brightness. Press【 】to dim the display of your smart device or press it again to resume. PIP Display Press【 】to change picture in picture display style. Audio On/Off Press【】to turn audio recording on or off. Speed Display Tap on speed display to switch between digital or speedometer. Map View: Track Path Press【】to track travel path. Screen Brightness. Press【 】to erase past path. PIP Display Press【 】to change map display mode. Playback and Download Press [ ] to enter the files of recorded videos and photos. ●1File View Mode ●2Download File to Your Smart Device* ●3All Files ●4Display Video Files Only ●5Display Photo Files Only *NOTE: After downloaded to local storage on your smart device, [] will appear, indicating the file can be share via various social network such as Facebook, Instagram, etc.](https://usermanual.wiki/DOD-Technology/CHIMERA/User-Guide-3808703-Page-26.png)