Accton Wireless Broand FW638PC25000W WiMAX 802.16e Wave 2 PC Card User Manual PC200 User Guide
Accton Wireless Broadband Corp. WiMAX 802.16e Wave 2 PC Card PC200 User Guide
Contents
- 1. User manual 1 rev4
- 2. User manual 2 rev3
User manual 1 rev4

PC200
2.3/2.5/3.5 GHz Mobile WiMAX
CardBus Card
User Guide


User Guide
PC200
IEEE 802.16e-2005 Mobile WiMAX CardBus Card,
with 2.3, 2.5, and 3.5 GHz Frequency Band Models
PC200
E082008-CS-R01
149100000300W

i
Compliances
Federal Communication Commission Interference Statement
This equipment has been tested and found to comply with the limits for a Class B digital
device, pursuant to Part 15 of the FCC Rules. These limits are designed to provide
reasonable protection against harmful interference in a residential installation. This
equipment generates, uses and can radiate radio frequency energy and, if not installed
and used in accordance with the instructions, may cause harmful interference to radio
communications. However, there is no guarantee that interference will not occur in a
particular installation. If this equipment does cause harmful interference to radio or
television reception, which can be determined by turning the equipment off and on, the
user is encouraged to try to correct the interference by one of the following measures:
• Reorient or relocate the receiving antenna
• Increase the separation between the equipment and receiver
• Connect the equipment into an outlet on a circuit different from that to which the receiver
is connected
• Consult the dealer or an experienced radio/TV technician for help
This device complies with Part 15 of the FCC Rules. Operation is subject to the following
two conditions: (1) This device may not cause harmful interference, and (2) this device
must accept any interference received, including interference that may cause undesired
operation.
FCC Caution: Any changes or modifications not expressly approved by the party
responsible for compliance could void the user’s authority to operate this equipment.
FCC ID: V8YFW638PC25000W is for 2.5G only.
IMPORTANT NOTE: FCC Radiation Exposure Statement
This equipment complies with FCC radiation exposure limits set forth for an uncontrolled
environment. End users must follow the specific operating instructions for satisfying RF
exposure compliance. To maintain compliance with FCC RF exposure compliance
requirements, please follow operation instruction as documented in this manual.
This transmitter must not be co-located or operating in conjunction with any other antenna
or transmitter.
The availability of some specific channels and/or operational frequency bands are country
dependent and are firmware programmed at the factory to match the intended
destination. The firmware setting is not accessible by the end user.
SAR (Specific Absorption Rate) Compliance Statement
SAR compliance has been established in typical laptop computer(s) with a CardBus slot,
and the product can be used in typical laptop computers with CardBus slots. Other
applications, such as handheld PCs or similar devices have not been verified and may not
be in compliance with related RF exposure rules and such use shall be prohibited.
"Due to the essential high output power natural of WiMAX device, use of this
device with other transmitter at the same time may exceed the FCC RF
exposure limit and such usage must be prohibited (unless such co-transmission
has been approved by FCC in the future)."

ii
EC Conformance Declaration
Marking by the above symbol indicates compliance with the Essential Requirements of
the R&TTE Directive of the European Union (1999/5/EC). This equipment meets the
following conformance standards:
• EN 60950-1 (IEC 60950-1) - Product Safety
• EN 301 489-1, EN 301 489-4 - EMC requirements for radio equipment
• EN 50385 - Country specific SAR requirements
This device is intended for use in all European Community countries:

iii
About This Guide
Purpose
This guide details the hardware features of the PC200 WiMAX CardBus Card, including
its physical and performance-related characteristics, and how to install the device and use
its configuration software.
Audience
This guide is for PC users with a working knowledge of computers. You should be familiar
with Windows operating system concepts.
Conventions
The following conventions are used throughout this guide to show information:
Note: Emphasizes important information or calls your attention to related features or
instructions.
Caution: Alerts you to a potential hazard that could cause loss of data, or damage the
system or equipment.
Warning: Alerts you to a potential hazard that could cause personal injury.
Related Publications
The following publication gives basic information on how to install and use the WiMAX
CardBus Card.
Quick Installation Guide
Also, as part of the card’s configuration software, there is online help that describes all
management features.
Revision History
This section summarizes the changes in each revision of this guide.
July 2008 Revision
This is the first revision of this guide. This guide is valid for software version 1.0.3.0.

iv

v
Contents
Chapter 1: Introduction 1-1
Features 1-1
System Requirements 1-2
Package Checklist 1-2
Hardware Description 1-2
Antennas 1-2
CardBus Connector 1-2
LED Indicators 1-3
Chapter 2: Installation 2-1
Chapter 3: Configuration 3-1
Accessing the WCM Utility 3-1
Display Options 3-2
View Menu Options 3-3
Connection Management 3-4
Lost WiMAX Connection 3-5
Selecting Profiles 3-6
Editing a Profile 3-7
Card Settings 3-9
Network Information 3-13
WiMAX Connection Statistics 3-14
Tool Menu 3-16
Disable Menu Bar 3-16
Turning Power On/Off 3-16
Safely Remove Hardware 3-17
Lock PC Card Now 3-17
Sounds for Events 3-17
Software Upgrade 3-19
Chapter 4: Administrator Mode 4-1
Accessing Administrator Mode 4-1
Setting Profiles 4-3
Adding a New Profile 4-4
Advanced Configuration 4-8

vi
Contents
Appendix A: Troubleshooting A-1
Diagnosing LED Indicators A-1
Network Connection Problems A-1
Uninstalling the WCM Software A-2
Appendix B: Specifications B-1
Glossary
Index
1-1
Chapter 1: Introduction
The WiMAX CardBus Card is a network adapter that enables a notebook PC to
connect to a service provider’s 2.3 GHz, 2.5 GHz or 3.5 GHz mobile WiMAX
network.
The CardBus card plugs directly into a PC’s compatible card slot and includes its
own driver and configuration software for Windows XP and Windows Vista. The card
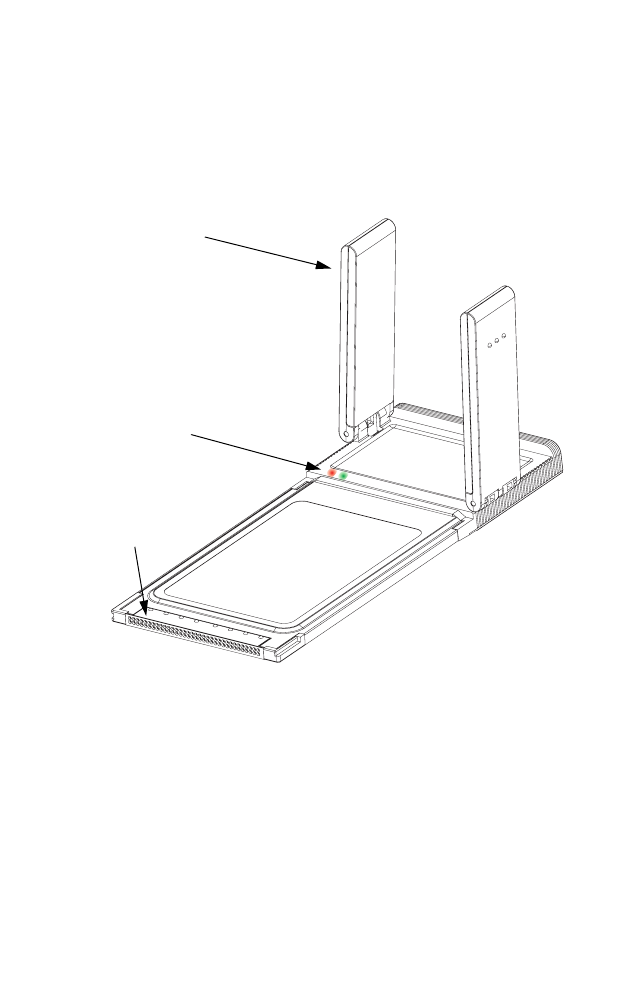
includes two folding antennas that can be adjusted for best signal reception.
Figure 1-1. WiMAX CardBus Card
Features
• Three models for 2.3 GHz, 2.5 GHz or 3.5 GHz mobile WiMAX networks.
• Two fold-out antennas for optimal signal reception.
• Two LED indicators for power and link status.
• Easy installation with a user-friendly interface for configuration.
• Driver support for Windows XP with Service Pack 2 (SP2) and Windows Vista.
• Strong network security support.
CardBus Connector
Antennas
LED Indicators

Introduction
1-2
System Requirements
Before you install the WiMAX CardBus Card, check your computer system meets
the following requirements:
• A notebook or desktop computer with a CardBus slot
• Microsoft Windows XP or Windows Vista
• Microsoft .NET Framework Version 2.0 (or higher) installed on the host computer
• A 1 GHz Pentium CPU or higher with a minimum of 256 MB of RAM
• An available CD drive
Package Checklist
The WiMAX CardBus Card package includes these items:
• WiMAX CardBus Card (PC200-2.3, PC200-2.5, or PC200-3.5)
• Quick Installation Guide
• Driver and utility CD (includes User Guide)
Inform your dealer if there are any incorrect, missing or damaged items. If possible,
retain the carton, including the original packing materials. Use them to repack the
product in case there is a need to return it.
Hardware Description
The PC200 WiMAX CardBus card enables notebook PC users to connect to a
WiMAX Internet service provider.
Antennas
Two fold-out antennas for optimal WiMAX signal reception. The antennas can be
placed in the closed position when the card is not in use.
CardBus Connector
The card can be installed in any notebook PC with a 33 MHz 32-bit CardBus slot.
The notebook PC must be running Windows XP with Service Pack 2 or Windows
Vista.
Hardware Description
1-3
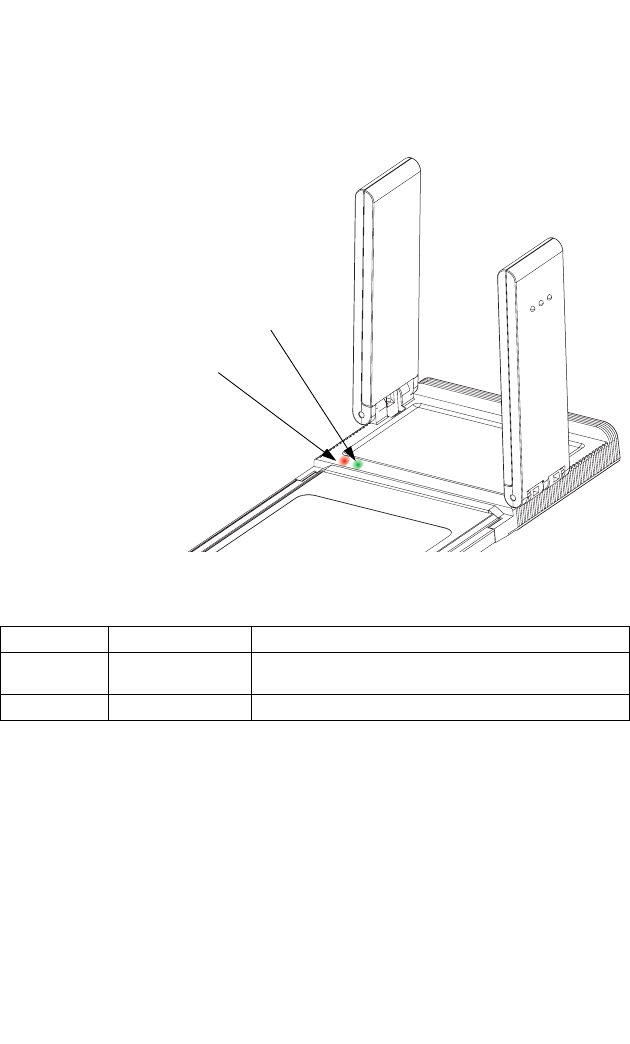
LED Indicators
The WiMAX CardBus card includes two status LED indicators, as described in the
following figure and table.
Figure 1-2. LED Indicators
LED Status Description
Green On The card is correctly installed in a slot and is
receiving power.
Red On The card has a valid link with a WiMAX network.
Power
WiMAX Link

Introduction
1-4
2-1
Chapter 2: Installation
The CD-ROM that comes with the package contains the WiMAX CardBus Card
driver and configuration software.
Caution: The WiMAX CardBus Card requires the Microsoft .NET Framework
Version 2.0 (or higher) to be installed on the host computer. If the system
does not have the .NET Framework 2.0 already installed, you must
download the software from Microsoft and install it before starting
installation.
To install the WiMAX CardBus Card driver and software utility for Windows XP or
WIndows Vista, follow these steps:
1. Turn on your notebook and wait until the Windows system has completely
started.
2. Insert the card into an available CardBus slot. When the card is inserted
correctly, its green LED turns on (see page 1-3).
When you first insert the card in a slot, the Windows “Found New Hardware”
dialog box displays. Just click Cancel.
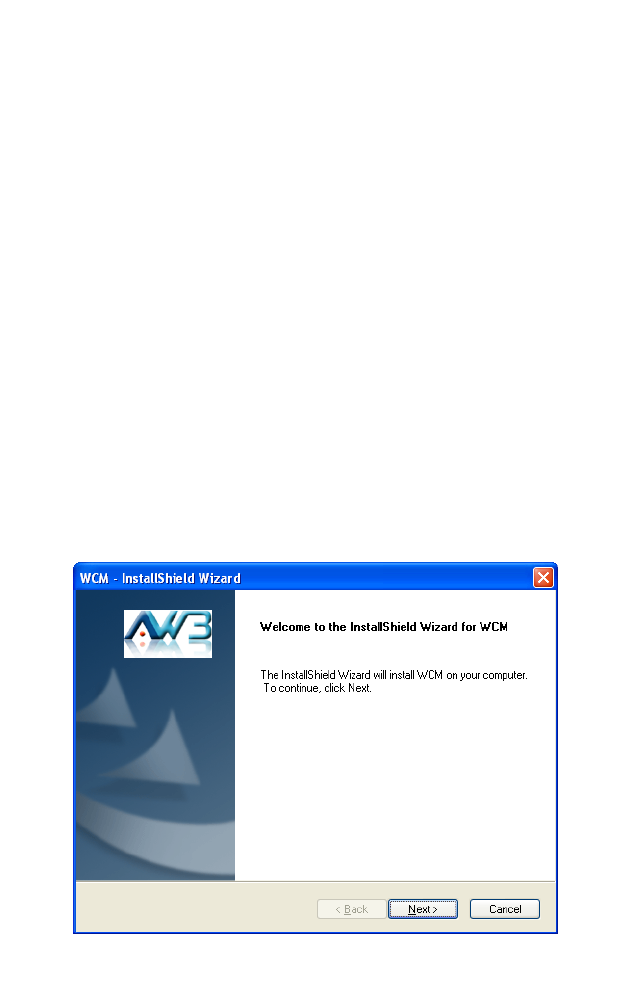
3. Load the driver and utility CD that comes with the package. The “InstallShield
Wizard” program should start automatically.
If the install program does not start automatically, open the folder that displays
the CD’s contents and find the file “Setup.exe” in the root directory. Double click
the file to start the install program.
Figure 2-1. InstallShield Wizard Start
Installation
2-2
Note: The installation interface for Windows XP is shown in this user guide. However,
the installation screens are similar for all Microsoft Windows systems.
4. Click Next to continue the installation.
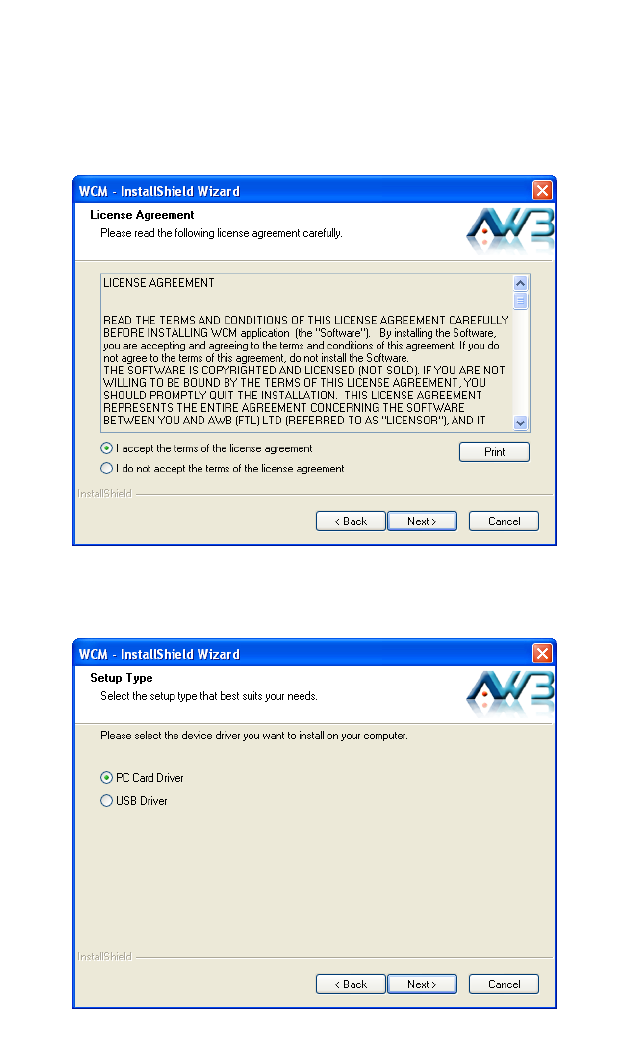
5. Select to accept the license agreement terms, then click Next.
Figure 2-2. Accept License Agreement Terms
6. Select to install the PC Card driver, then click Next.
Figure 2-3. Select PC Card Driver
2-3
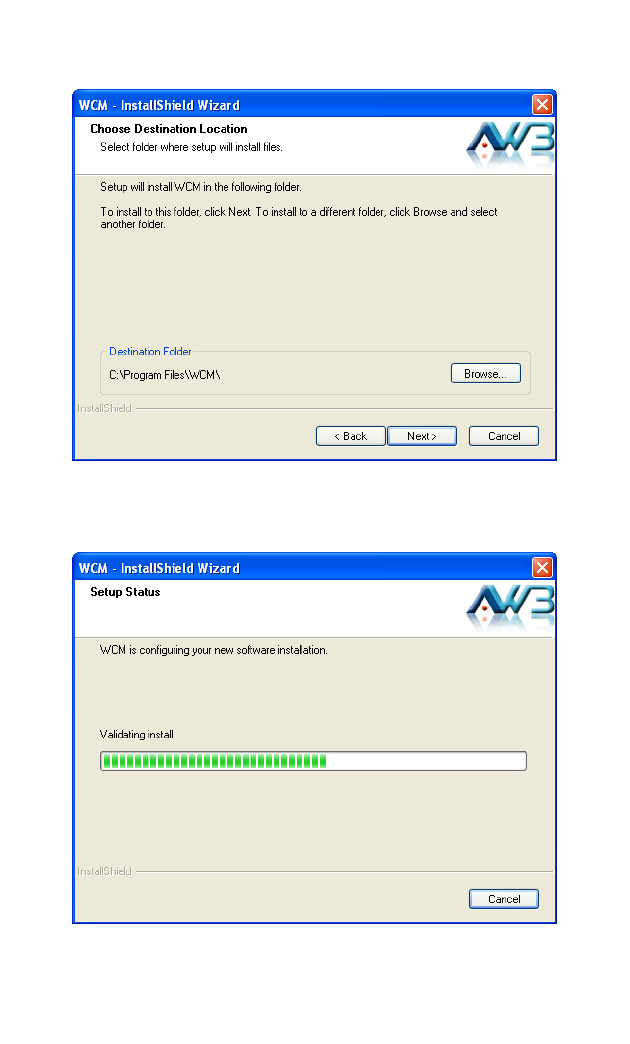
7. Confirm the location of the installation files on the PC before clicking Next.
Figure 2-4. Choose Destination Location
8. Wait for the software installation procedure to complete.
Figure 2-5. Installation in Progress
Installation
2-4
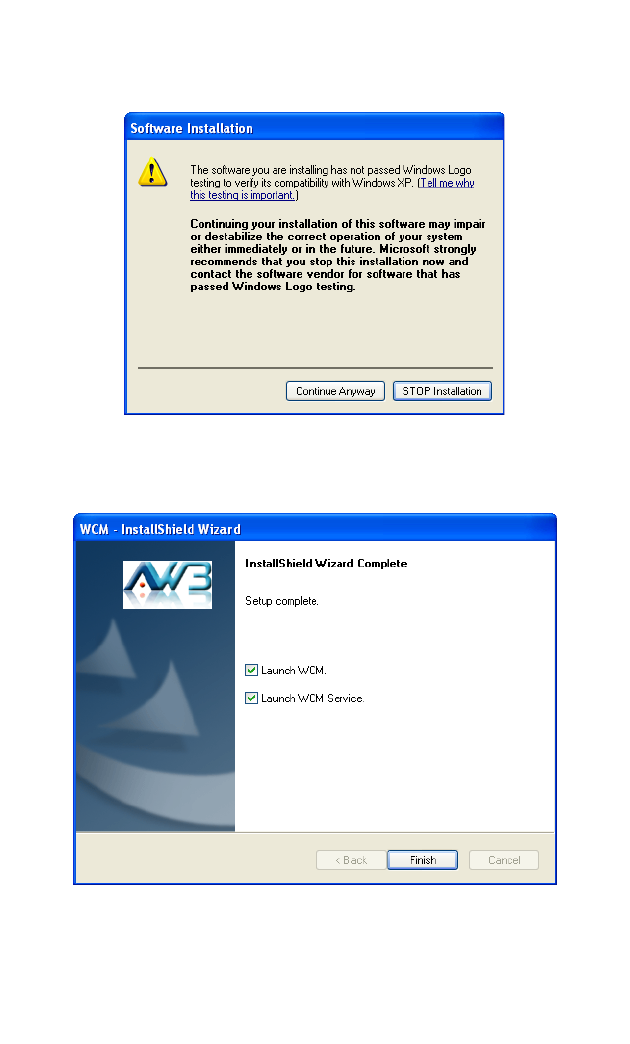
9. If the following message concerning Windows Logo testing is displayed, click
the “Continue Anyway” button.
Figure 2-6. Windows Logo Testing Message
10. When the “InstallShield Wizard Complete” message displays, click Finish.
Figure 2-7. InstallShield Wizard Complete
Note: If you encounter problems installing the CardBus card, see “Troubleshooting” on
page A-1.
3-1
Chapter 3: Configuration
The Wireless Connection Manager (WCM) software provides all the tools to manage
and monitor your WiMAX connection. After initial installation, the software starts
automatically every time you insert the WiMAX CardBus Card.
Accessing the WCM Utility
Once the utility installation is complete, there are several methods of starting the
WCM software other than by inserting the WiMAX CardBus Card.
Note: The utility screens are similar for all Microsoft Windows systems. The interface for
Windows XP is described in this user guide.
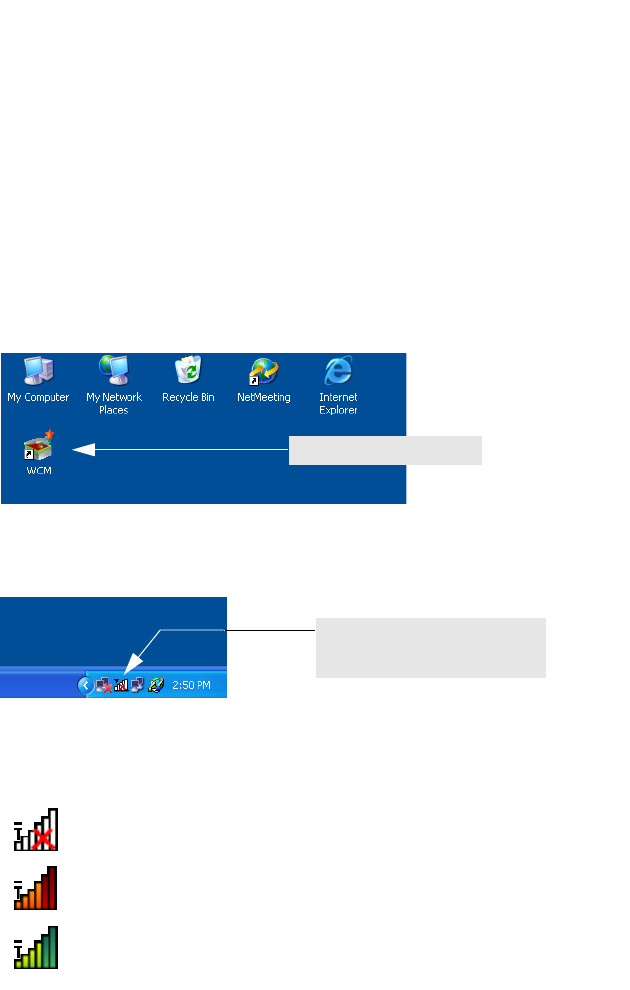
From the WCM shortcut icon on the Windows XP or Windows Vista desktop:
Figure 3-1. WCM Desktop Icon
From the WCM icon on the Windows System Tray:
Figure 3-2. WCM System Tray Icon
The System Tray icon also indicates the WiMAX connection status.
White: No connection to a WiMAX network.
Red: Connected to a network, but no IP address assigned. Lighter color
bars indicate the receive signal level.
Green: Connected to network with an assigned IP address. Lighter
color bars indicate the receive signal level.
Double click the icon to start the
utility
Double click the icon to open the
application window.
Click the right mouse button to open a
menu of configuration options.
Configuration
3-2
Display Options
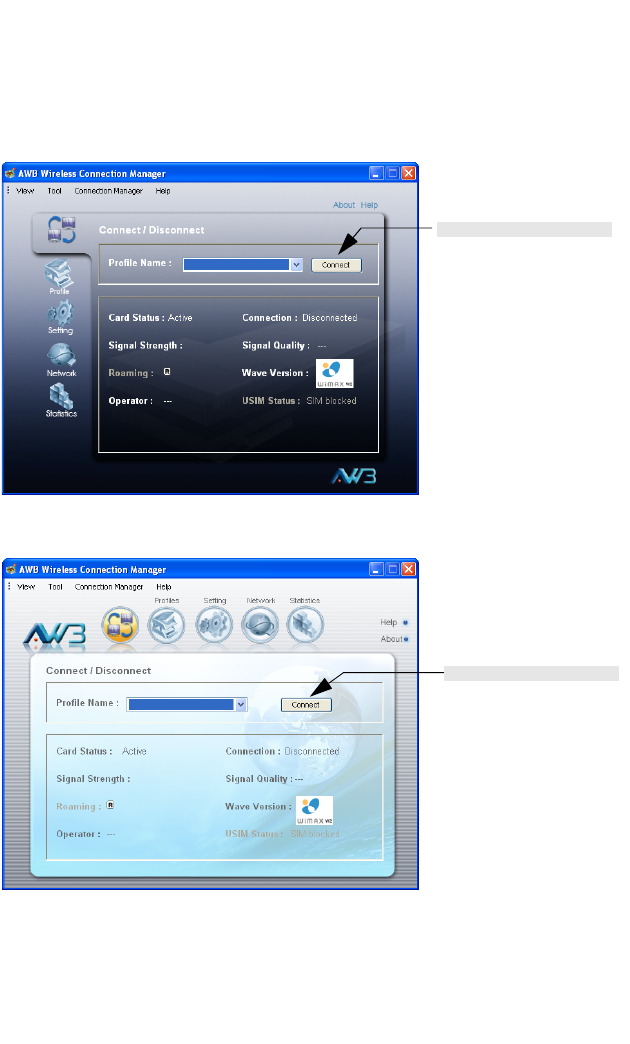
The WCM software has two display options, or “skins,” to choose from. The main
screens for the two skins are shown below.
Figure 3-3. Jet Black Skin
Figure 3-4. Sky Blue Skin
Other than the display style, there are no function differences between the default
Jet Black Skin and the alternate Sky Blue Skin. You can select the skin type from the
Tool menu.
This guide describes the WCM software for the Jet Black Skin.
Jet Black Skin
Connect/Disconnect button
Sky Blue Skin
Connect/Disconnect button

Display Options
3-3
View Menu Options
The WCM utility’s View menu includes three options that apply to the display
window:
Compact View — Displays the window in compact format that uses less screen
space. This view displays only the connection status and other indicators.
Figure 3-5. WCM Compact View
Docking — Forces the display window to “jump” to the nearest screen edge.
Always on Top — The display window always remains in front of other windows.
Indicates WiMAX Wave 2
compliant
WiMAX connection and
receive signal strength
Indicates roaming status
Configuration
3-4
Connection Management
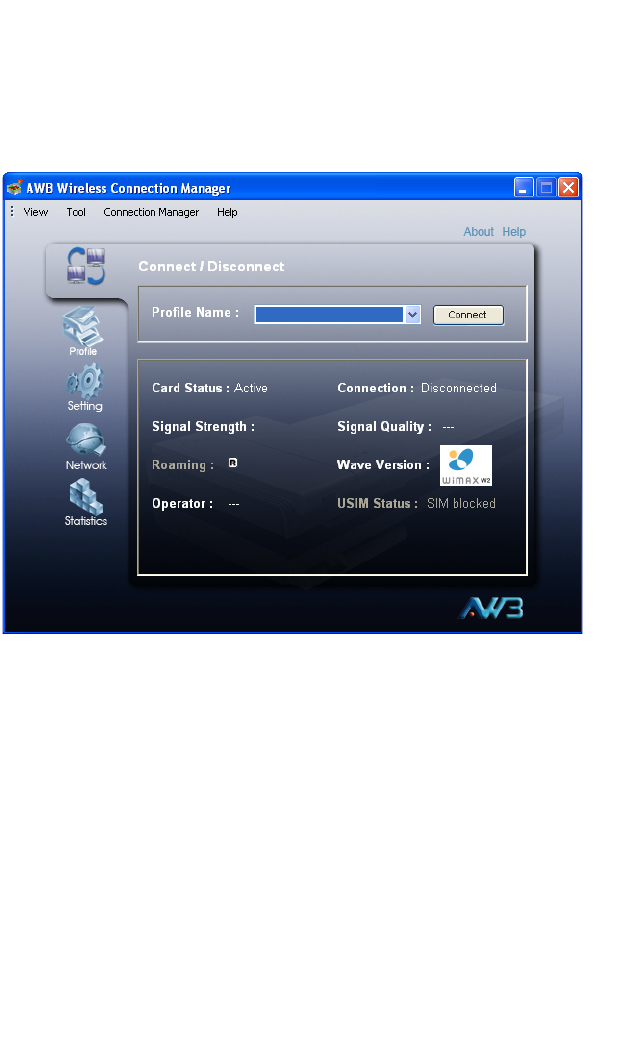
The WCM Connect/Disconnect screen displays information about the wireless link
to the service provider network.
Figure 3-6. Connect/Disconnect Screen
The displayed items on this screen can be described as follows:
Profile Name — Name of a user account profile that defines a WiMAX network
connection. When a profile is set to “Auto Connection” (see “Editing a Profile” on
page 3-7), the Profile Name cannot be changed and the utility automatically scans
and connects to the WiMAX network defined by the default profile.
Connect/Disconnect — Manually connects or disconnects to the WiMAX service
as defined in the selected profile. When a profile is set to “Auto Connection” (see
“Editing a Profile” on page 3-7), the Connect button is disabled and the utility
automatically scans and connects to the WiMAX network defined by the default
profile.
Card Status — Indicates if the card is plugged into a slot on the host PC and is
active or powered off.
Connection — Indicates the current status of the WiMAX network connection.
Signal Strength — An image that shows the current receive signal strength
indicator (RSSI) of the received WiMAX radio signal.
Connection Management
3-5
Signal Quality — A indication of the carrier-to-interference-plus-noise-ratio (CINR),
which measures the strength of the receive signal compared to other interference
and noise. There are three possible values; Excellent, Good, or Poor.
Roaming — Indicates when a user roams onto a network other than the home
network.
Wave Version — Indicates whether WiMAX Wave 1 or WiMAX Wave 2 is available
in the area.
Operator — Displays the network operator name to which the card is connected.
USIM Status — Displays the Subscriber Identity Module (SIM) or Universal SIM
(USIM) card status.
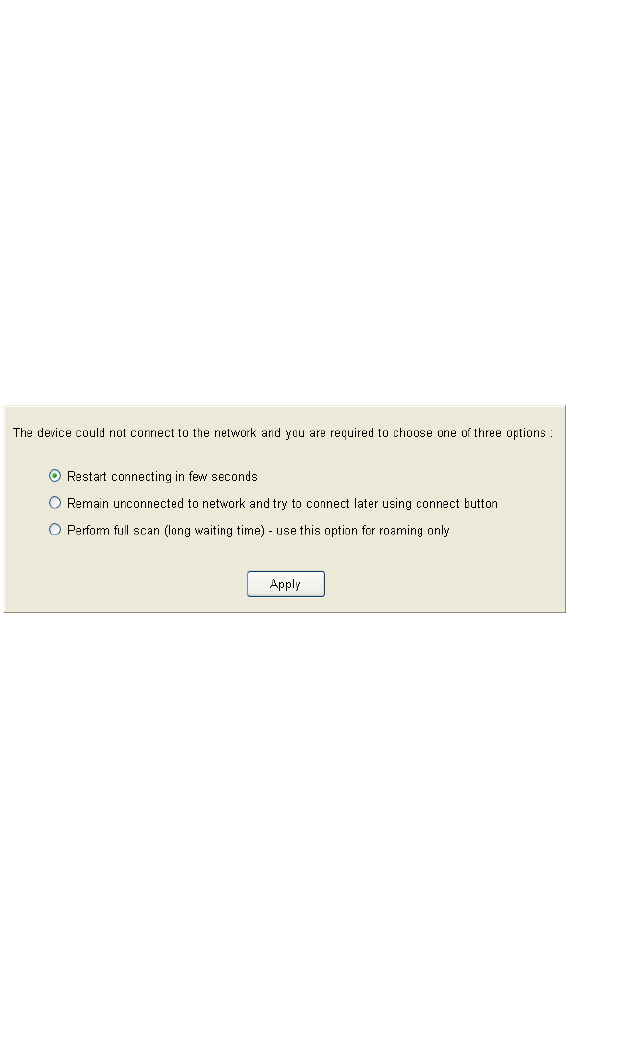
Lost WiMAX Connection
If your card does not detect a signal from a WiMAX network, the following screen is
displayed.
Figure 3-7. No Detected Signal
When you see this screen, you have three options:
•Restart connecting in a few seconds — Use this option when you are sure there
is a signal from a WiMAX network to which you want to connect.
•Remain unconnected to network and try to connect later using connect
button — Use this option if you wish to remain offline and continue working.
•Perform full scan (long waiting time) - use this option for roaming only — Use
this option if you do not know the coverage in your local area, to determine what
signals are available. Note that a full scan may take up to 30 seconds to complete.
Configuration
3-6
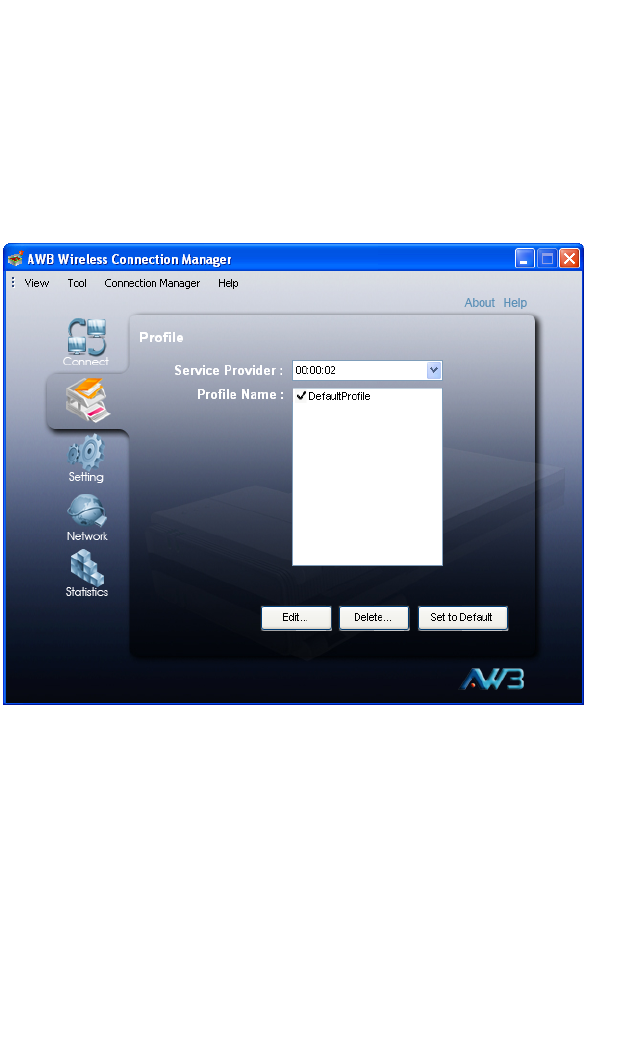
Selecting Profiles
The WCM profiles enable a user to set specific settings for connecting to a WiMAX
network. The WCM utility must have at least one profile configured and set as the
“Default Profile” to be able to connect to a WiMAX service.
The WCM utility can contain up to ten profiles, as provided by the WiMAX service
operator. One profile must be set as the “Default Profile.”
Figure 3-8. Profile Screen
Selecting Profiles
3-7
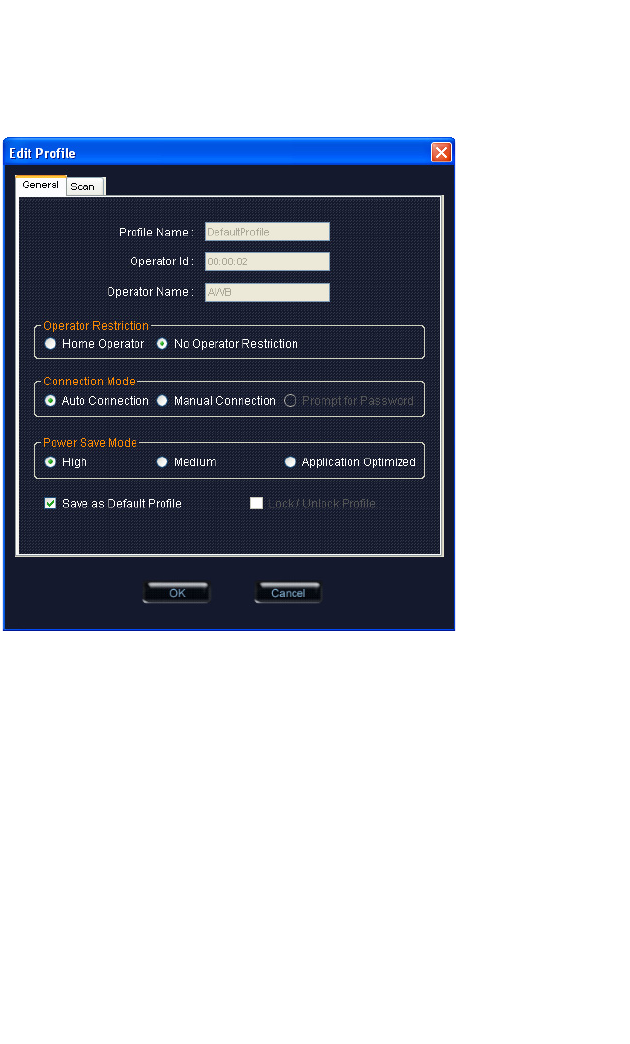
Editing a Profile
Clicking the Edit button on the Profile screen displays the Edit Profile window.
Figure 3-9. Edit Profile Screen - General Tab
The General tab on this screen displays the following items:
Profile Name — A name used to identify the new profile.
Operator ID — The ID number of the WiMAX network operator for this profile.
Operator Name — The name of the WiMAX network operator for this profile.
Operator Restriction — When set to “Home Operator,” the user can only connect
to the service provider specified in the profile. When set to “No Operator Restriction,”
the operator specified in the profile is used when the network is detected, otherwise
the user can roam to other networks.
Connection Mode — When set to “Auto Connection” the utility will use the profile
settings to automatically scan and connect to a WiMAX network.
Power Save Mode — To save power, the card can operate in one of three modes:
•High: The card will go to sleep and idle whenever it can.
•Medium: The card will go to sleep and idle only after a predefined time.
Configuration
3-8
•Application Optimized: The card will go to sleep and idle only when the PC
operating system allows it.
Save as Default Profile — Saves the profiles settings and sets it as the default.
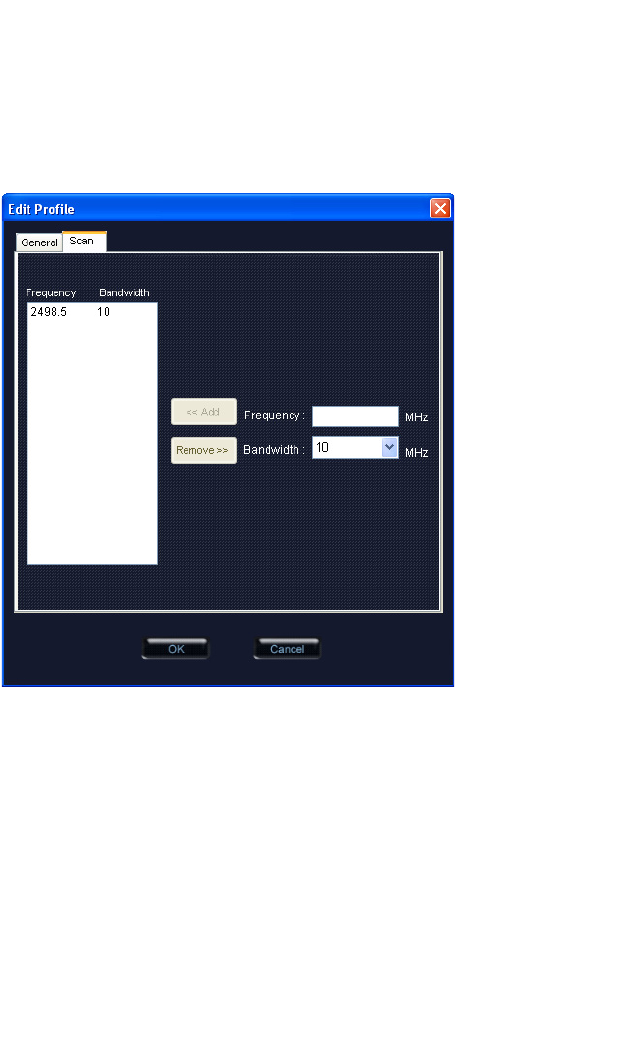
Clicking the Scan tab on the Edit Profile screen displays the profile frequency and
bandwidth settings.
Figure 3-10. Edit Profile Screen - Scan Tab
The Scan tab on the Edit Profile screen displays the following items:
Frequency — Specifies a center frequency to scan.
Bandwidth — Specifies the bandwidth of the channel; 5, 7, 8.75, or 10 MHz.
Card Settings
3-9
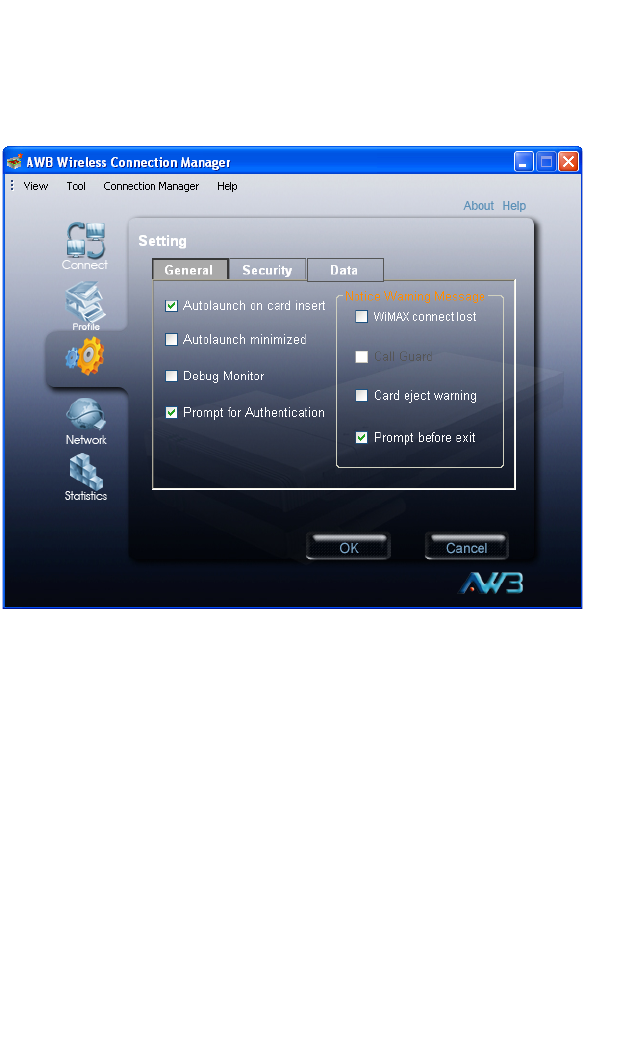
Card Settings
The Setting screen enables specific card and WCM utility features to be configured.
Figure 3-11. Setting Screen - General Tab
The displayed items on this screen can be described as follows:
Autolaunch on card insert — Automatically starts the WCM utility when the card is
inserted into a PC slot.
Autolaunch minimized — When set to automatically start WCM, the utility starts in
its Windows minimized form.
Debug Monitor — Enables logging of messages to the WCM debug monitor. The
debug monitor window is displayed when the WCM utility restarts.

Configuration
3-10
Figure 3-12. Debug Monitor Window
Prompt for Authentication — Displays a window that prompts for a user name and
password when connecting to a WiMAX network.
Notice Warning Message — Enables messages to be displayed by the WCM utility
for certain events:
•WiMAX Connect lost: The connection to the WiMAX base station was lost.
•Call Guard: Issues a warning when you are about to connect while roaming.
•Card eject warning: Displays a message to remove the card from its slot when
WCM is closed.
•Prompt before exit: Requests a confirmation to close the WCM utility.
Card Settings
3-11
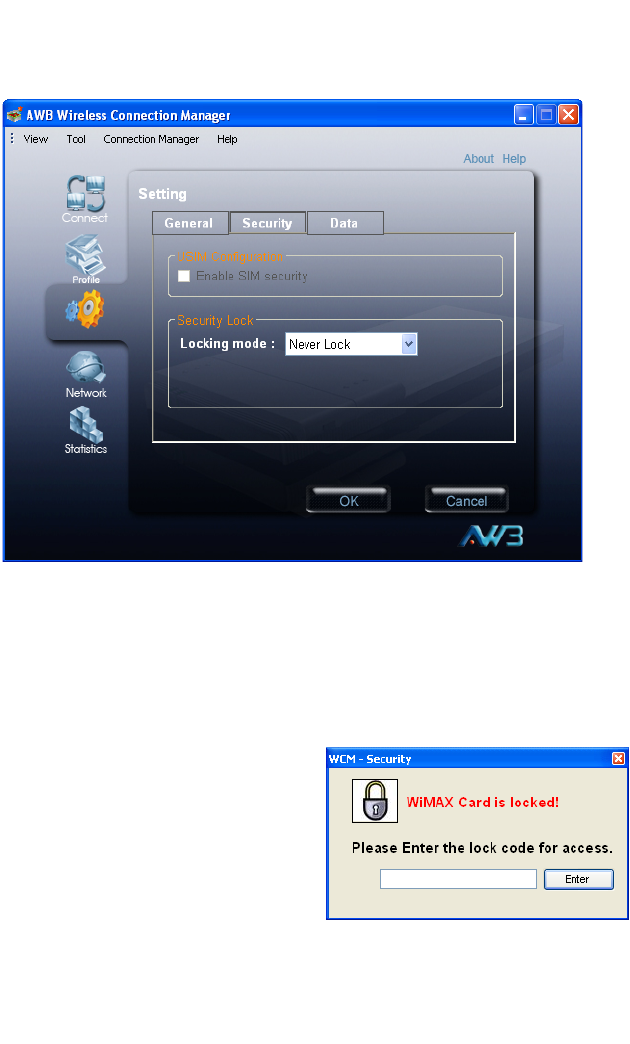
Clicking the Security tab on the Setting screen displays the card security settings.
Figure 3-13. Setting Screen - Security Tab
USIM Configuration — Enables support for SIM card security.
Security Lock — This security feature prevents others from using the WiMAX
service. When the lock mode is enabled, the WiMAX connection is terminated. The
user needs to first unlock the application to be able to use the WiMAX service.
•Never Lock – Disables the security lock of the WiMAX card.
•Lock On Power Up – When the WCM
utility is started, the card is locked. To
unlock the card, you need to enter a
user-defined lock code. You can set the
lock code when the lock option is
selected. When the WCM utility starts, a
window prompts for the lock code. Input
the lock code to enable the WiMAX
connection.
Note: If you forget the lock code, you will not be able to use WCM. Contact your service
provider for assistance.
Configuration
3-12
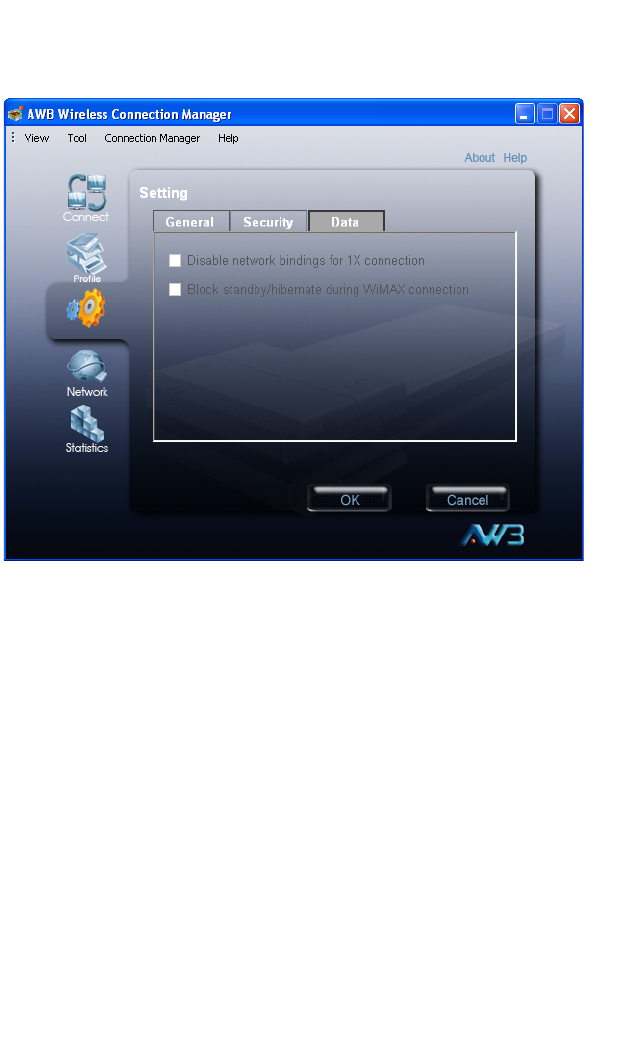
Clicking the Data tab on the Setting screen displays settings relating to the host PC.
Figure 3-14. Setting Screen - Data Tab
Disable network bindings for 1X connection — When the WiMAX card is
configured, the card resources bind to Windows networking. Hence, file and printer
sharing protocols are automatically created. These bindings are not required and
may create additional over-the-air traffic, or cause security concerns. This setting
allows you to disable the Windows network bindings for the WiMAX card.
Block standby/hibernate during WiMAX connection — The host PC may go into
standby or hibernate mode during a WiMAX connection. The WCM utility can
prevent this by blocking Windows standby or hibernate mode.
Network Information
3-13
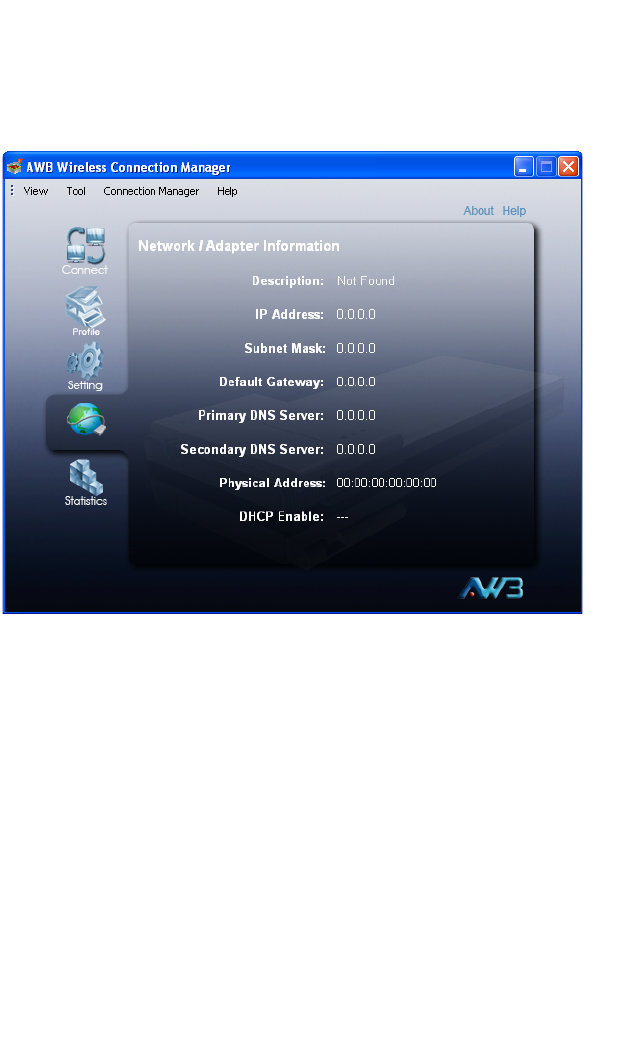
Network Information
The Network screen allows you to view the current network settings for the card.
Figure 3-15. Network Information
The displayed items on this screen can be described as follows:
Description — Displays the card’s identification.
IP Address — The IP address assigned to the card.
Subnet Mask — Indicates the local subnet mask, such as 255.255.255.0.
Default Gateway — The gateway address provided by the WiMAX service provider.
Primary DNS Server — Address of the primary DNS server, specified in the form of
0.0.0.0.
Secondary DNS Server — Address of thes econdary DNS server.
Physical Address — The physical layer MAC address of the WiMAX card.
DHCP Enable — Indicates the DHCP client status. When DHCP is enabled, the
device can automatically obtain an IP address operated by the WiMAX service
provider.
Configuration
3-14
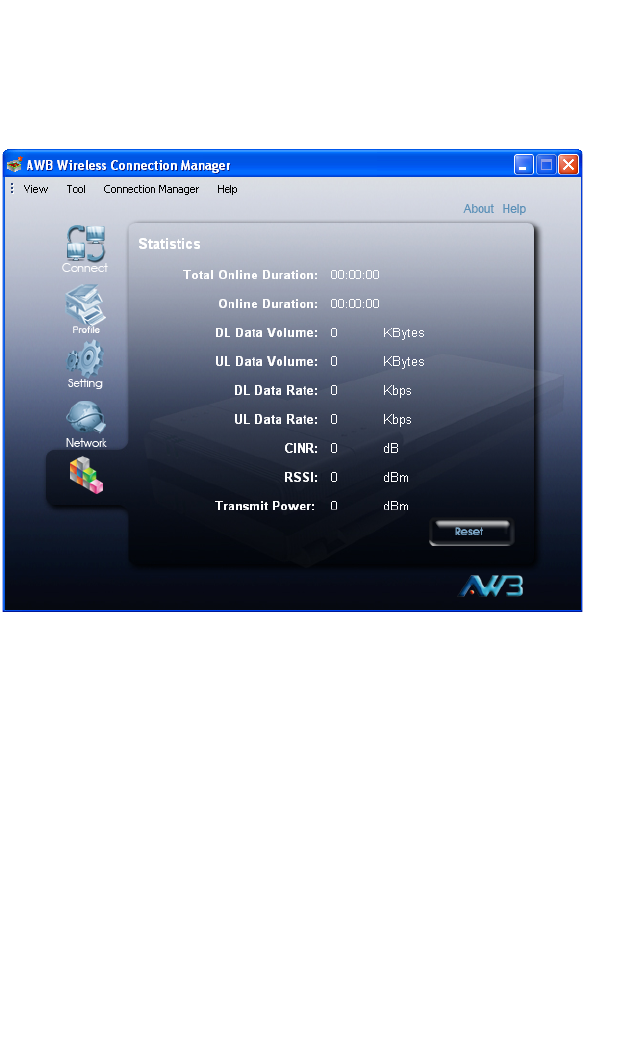
WiMAX Connection Statistics
The Statistics screen allows you to view information on the WiMAX connection.
Figure 3-16. Statistics Information
The displayed items on this screen can be described as follows:
Total Online Duration — The total accumulated time for all sessions since the unit
was powered on.
Online Duration — The time the unit has had a link with the base station for the
current session.
DL Data Volume — The downloaded data volume in Kbytes for the current online
session.
UL Data Volume — The uploaded data volume in Kbytes for the current online
session.
DL Data Rate — The current download data rate in Mbps.
UL Data Rate — The current upload data rate in Mbps.
CINR — The current carrier-to-interference-plus-noise ratio of the received WiMAX
radio signal.

WiMAX Connection Statistics
3-15
RSSI — The current receive signal strength indicator value of the received WiMAX
radio signal.
Transmit Power — The current transmit power of the WiMAX radio signal.
Reset — Click the button to reset all the counters back to zero.
Configuration
3-16
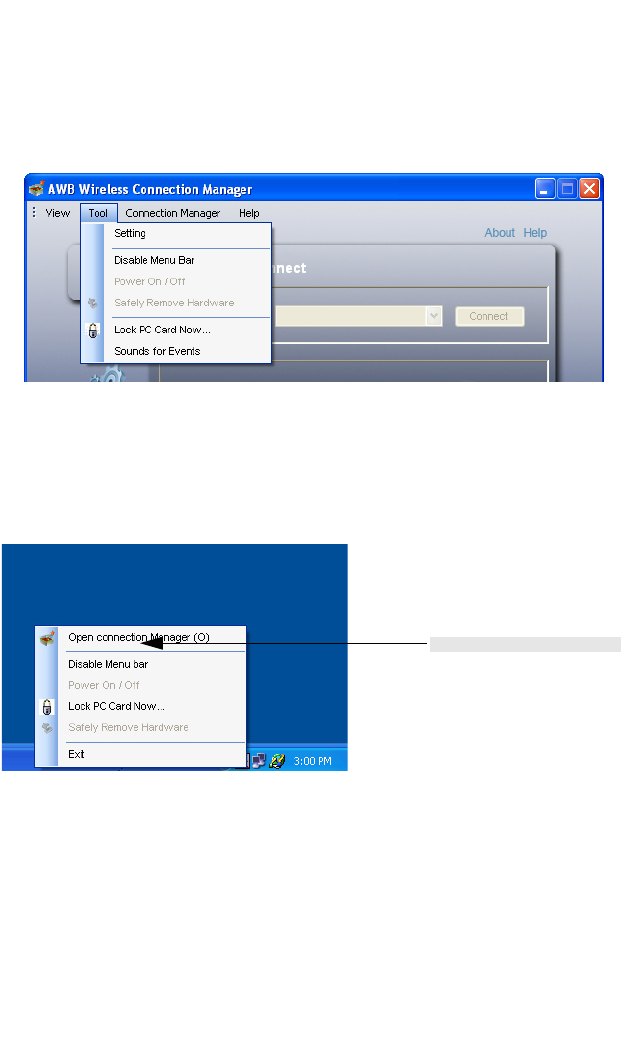
Tool Menu
In addition to the main configuration screens, the WCM utility has a number of other
features that can be accessed from the Tool menu.
Figure 3-17. Tool Menu
Disable Menu Bar
The Disable Menu Bar option on the Tool menu hides all the top-level menu options
on the screen. To enable the menu bar, use the menu from the System Tray icon.
Figure 3-18. System Tray Icon Menu
Turning Power On/Off
The WiMAX card’s power can be turned off when required. In some restricted
environments, such as on an aircraft or in a hospital, it may be necessary to
power-off the card. You can also power off the card when not in use just to reduce
power consumption form the host PC.
The card can be powered on/off from the Tool menu or from the System Tray icon
menu.
Enable/disable the menu bar
Too l Menu
3-17
Safely Remove Hardware
Provides access to the Windows control for powering off and disabling the card so
that it can be safely removed from host PC slot.
The Safely Remove Hardware option is available from the Tool menu and the
System Tray icon menu.
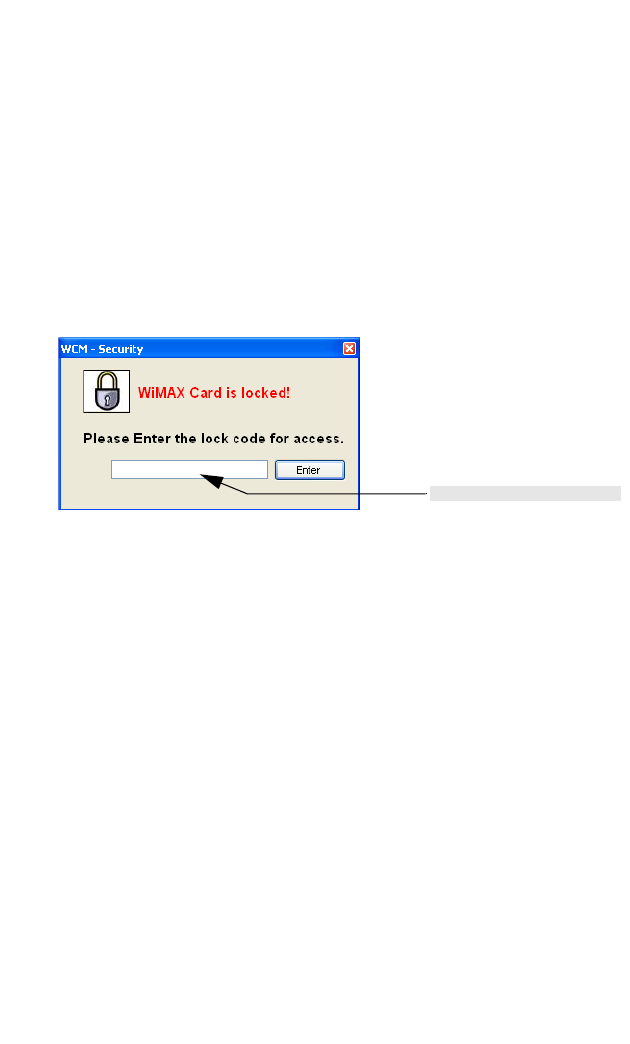
Lock PC Card Now
This locks the card and prevents others from using the WiMAX service. For the lock
mode to operate, you must first configure a lock mode and code on the Security tab
of the Setting screen. See “Card Settings” on page 3-9.
Figure 3-19. Lock PC Card
When the lock mode is enabled, the WiMAX connection is terminated. The user
needs to first unlock the application to be able to use the WiMAX service.
The Lock/Unlock option is available from the Tool menu and the System Tray icon
menu.
Sounds for Events
The WCM utility allows alert sounds to be configured for certain system events. You
can configure a sound for WiMAX connection established and connection lost.
In the configuration window, use the Browse button to locate a “.wav” sound file. The
file may be a Windows system sound file or any other you may want to select.
Enter the lock code here