Amazon com Services 2690 Electronic Display Device User Manual Final Users Manual
Hannaford LLC Electronic Display Device Final Users Manual
Contents
- 1. user manual
- 2. user manual attestation
- 3. user manualattestation
- 4. Final Users Manual
Final Users Manual
Kindle
User's Guide

Device User’s Guide
Contents
2
Contents
Chapter 1 Getting Started . . . . . . . . . . . . . . . . . . . . . . . . . . . . . . . . . . . . . . . . . . . . . . . . . . . . . . . . . . . . . . . . . . . . . . . . . . . 5
Using the controls . . . . . . . . . . . . . . . . . . . . . . . . . . . . . . . . . . . . . . . . . . . . . . . . . . . . . . . . . . . . . . . . . . . . . . . . . . . . . . . . . . . . 5
Charging the battery . . . . . . . . . . . . . . . . . . . . . . . . . . . . . . . . . . . . . . . . . . . . . . . . . . . . . . . . . . . . . . . . . . . . . . . . . . . . . . . . . 6
Status
indicators
.
.
.
.
.
.
.
.
.
.
.
.
.
.
.
.
.
.
.
.
.
.
.
.
.
.
.
.
.
.
.
.
.
.
.
.
.
.
.
.
.
.
.
.
.
.
.
.
.
.
.
.
.
.
.
.
.
.
.
.
.
.
.
.
.
.
.
.
.
.
.
.
.
.
.
.
.
.
.
.
.
.
.
.
.
.
6
Wi-Fi and WAN status indicators . . . . . . . . . . . . . . . . . . . . . . . . . . . . . . . . . . . . . . . . . . . . . . . . . . . . . . . . . . . . . . . . . . . . . . 6
Battery status
indicators
. . . . . . . . . . . . . . . . . . . . . . . . . . . . . . . . . . . . . . . . . . . . . . . . . . . . . . . . . . . . . . . . . . . . . . . . . . . . . . . 6
Activity
indicator .
.
.
.
.
.
.
.
.
.
.
.
.
.
.
.
.
.
.
.
.
.
.
.
.
.
.
.
.
.
.
.
.
.
.
.
.
.
.
.
.
.
.
.
.
.
.
.
.
.
.
.
.
.
.
.
.
.
.
.
.
.
.
.
.
.
.
.
.
.
.
.
.
.
.
.
.
.
.
.
.
.
.
.
.
.
.
.
7
Setting up your
Device
.
.
.
.
.
.
.
.
.
.
.
.
.
.
.
.
.
.
.
.
.
.
.
.
.
.
.
.
.
.
.
.
.
.
.
.
.
.
.
.
.
.
.
.
.
.
.
.
.
.
.
.
.
.
.
.
.
.
.
.
.
.
.
.
.
.
.
.
.
.
.
.
.
.
.
.
.
.
.
7
Special Offers & Sponsored Screensavers . . . . . . . . . . . . . . . . . . . . . . . . . . . . . . . . . . . . . . . . . . . . . . . . . . . . . . . 7
Screensaver .
.
.
.
.
.
.
.
.
.
.
.
.
.
.
.
.
.
.
.
.
.
.
.
.
.
.
.
.
.
.
.
.
.
.
.
.
.
.
.
.
.
.
.
.
.
.
.
.
.
.
.
.
.
.
.
.
.
.
.
.
.
.
.
.
.
.
.
.
.
.
.
.
.
.
.
.
.
.
.
.
.
.
.
.
.
.
.
.
.
.
.
.
7
Home screen. . . . . . . . . . . . . . . . . . . . . . . . . . . . . . . . . . . . . . . . . . . . . . . . . . . . . . . . . . . . . . . . . . . . . . . . . . . . . . . . . . . . . . . . . . . . 7
Chapter 2 Acquiring & Managing Device
Books
.
.
.
.
.
.
.
.
.
.
.
.
.
.
.
.
.
.
.
.
.
.
.
.
.
.
.
.
.
.
.
.
.
.
.
.
.
.
.
.
.
.
.
.
.
.
.
.
.
8
Shop the Device Store anytime, anywhere . . . . . . . . . . . . . . . . . . . . . . . . . . . . . . . . . . . . . . . . . . . . . . . . . . . . . . . 8
Managing your Device library . . . . . . . . . . . . . . . . . . . . . . . . . . . . . . . . . . . . . . . . . . . . . . . . . . . . . . . . . . . . . . . . . . . . . . . 8
Creating collections . . . . . . . . . . . . . . . . . . . . . . . . . . . . . . . . . . . . . . . . . . . . . . . . . . . . . . . . . . . . . . . . . . . . . . . . . . . . . . . . . . . . 8
Removing content . . . . . . . . . . . . . . . . . . . . . . . . . . . . . . . . . . . . . . . . . . . . . . . . . . . . . . . . . . . . . . . . . . . . . . . . . . . . . . . . . . . . . . 8
Chapter 3 Reading Device Documents . . . . . . . . . . . . . . . . . . . . . . . . . . . . . . . . . . . . . . . . . . . . . . . . . . . . . . . . . . . 10
Understanding Device display technology . . . . . . . . . . . . . . . . . . . . . . . . . . . . . . . . . . . . . . . . . . . . . . . . . . . . . . 10
Customizing your text
displa
y. . . . . . . . . . . . . . . . . . . . . . . . . . . . . . . . . . . . . . . . . . . . . . . . . . . . . . . . . . . . . . . . . . . . . 10
Zooming in on images . . . . . . . . . . . . . . . . . . . . . . . . . . . . . . . . . . . . . . . . . . . . . . . . . . . . . . . . . . . . . . . . . . . . . . . . . . . . . . 10
Interacting with your
documents
.
.
.
.
.
.
.
.
.
.
.
.
.
.
.
.
.
.
.
.
.
.
.
.
.
.
.
.
.
.
.
.
.
.
.
.
.
.
.
.
.
.
.
.
.
.
.
.
.
.
.
.
.
.
.
.
.
.
.
.
.
.
.
.
. 10
Viewing page numbers and
progress
.
.
.
.
.
.
.
.
.
.
.
.
.
.
.
.
.
.
.
.
.
.
.
.
.
.
.
.
.
.
.
.
.
.
.
.
.
.
.
.
.
.
.
.
.
.
.
.
.
.
.
.
.
.
.
.
.
.
.
. 11
When you’re finished reading. . . . . . . . . . . . . . . . . . . . . . . . . . . . . . . . . . . . . . . . . . . . . . . . . . . . . . . . . . . . . . . . . . . . . . 11
Chapter 4 Getting More
From
Your
Device
. . . . . . . . . . . . . . . . . . . . . . . . . . . . . . . . . . . . . . . . . . . . . . . . . . . . . . . 12
Customizing your Device settings. . . . . . . . . . . . . . . . . . . . . . . . . . . . . . . . . . . . . . . . . . . . . . . . . . . . . . . . . . . . . . . . . 12
The Settings Menu . . . . . . . . . . . . . . . . . . . . . . . . . . . . . . . . . . . . . . . . . . . . . . . . . . . . . . . . . . . . . . . …………….. . . . . 13
Viewing other types of
files
. . . . . . . . . . . . . . . . . . . . . . . . . . . . . . . . . . . . . . . . . . . . . . . . . . . . . . . . . . . . . . . . . . . . . . . . 13
Reading Device documents on other
devices
. . . . . . . . . . . . . . . . . . . . . . . . . . . . . . . . . . . . . . . . . . . . . . . . . . . 13
Loaning Device books . . . . . . . . . . . . . . . . . . . . . . . . . . . . . . . . . . . . . . . . . . . . . . . . . . . . . . . . . . . . . . . . . . . . . . . . . . . . . . . 13
Using Device with your computer . . . . . . . . . . . . . . . . . . . . . . . . . . . . . . . . . . . . . . . . . . . . . . . . . . . . . . . . . . . . . . . . 14

Device User’s Guide
Contents
3
APPENDIX A 15
LEGAL AND COMPLIANCE INFORMATION

Overall objective –
This short, informative guide will familiarize you with many Device features, and can generally be read in less than
10 minutes.
Press the Next Page button on the sides of the device to keep
reading.
To leave this guide, press the Home
button . If you want to read this guide again, look for Device User’s Guide on your Home screen.
Device User’s Guide
Chapter 1 Getting
S
t
ar
t
ed
5
Chapter 1
Getting S
t
ar
t
ed
Using the controls
You need to learn only a few simple controls to navigate around your Device to download
and read books,
magazines,
and newspapers.
To the sides of the screen are the Next Page and Previous Page buttons. Both buttons
are
available
on each side so you can hold your Device with either hand while reading.
Your Device has the following buttons and a micro-USB port:
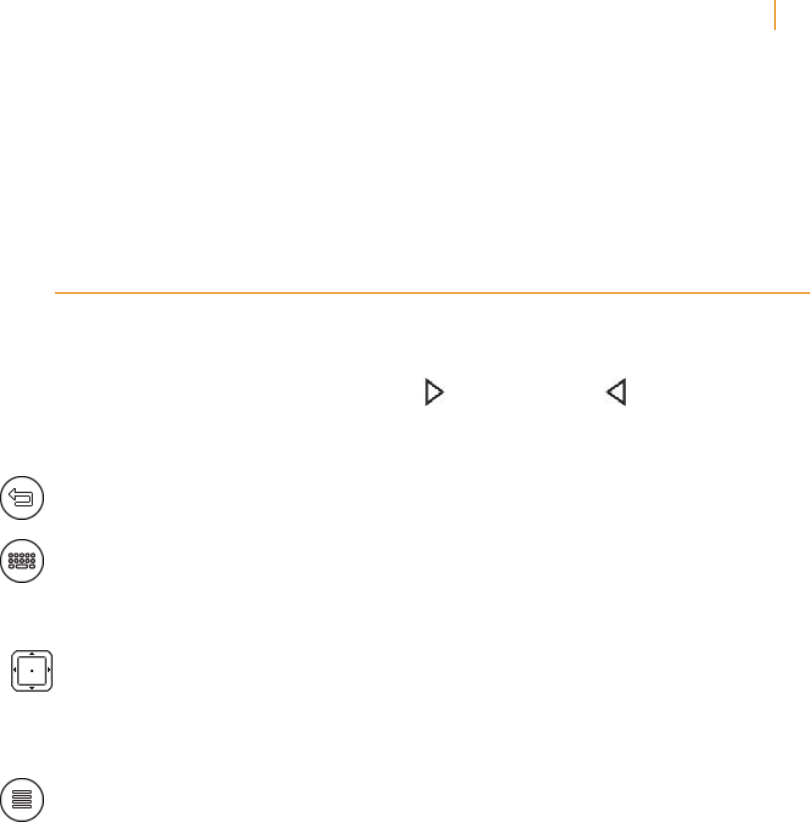
Back button: Use this button to retrace your steps. For example, you can follow a link from a
book, then press the Back button to return to your place in the book.
Keyboard button: This button brings up an onscreen keyboard for entering text. Use the
Navigator controller to navigate the
keyboard.
You can dismiss the keyboard by pressing the
keyboard button. When searching for a title or author, press the keyboard button, enter your
search string, and select the return key on the onscreen keyboard to initiate the search.
Navigator
controller:
The Navigator controller enables you to quickly perform many common
Items on your Device. It has a center select button plus four arrows. To scroll up or down on a
page, Use the Up and Down arrows. When reading a book with chapters, you can use the
Left and Right arrows to skip through chapter by
chapter.
You can also use the Left and Right
arrows to move the cursor along a line of text. To select a menu item, press the Up or Down
Arrow until the item you want is underlined, then press the center button to select
it.
Menu button: This button displays a menu of options. The menus are contextual, which
means they change to offer appropriate options depending on what you’re currently doing
with the device. For example, when you’re reading a book, the menu lets you go to another
part of the book, search its contents, add a bookmark, etc.

Device User’s Guide
Chapter 1 Getting
S
t
ar
t
ed
6
Home button: This button takes you to the Home screen, where you’ll find a list of the
books and other content stored on your Device.
Power button: To turn your Device on, press the power button. To put your Device in sleep
mode, press and release the power button; the screensaver
appears
on the
display.
To
w
ak
e
up your Device, press the power button. To turn off your Device, press and hold the po
w
er
button for seven seconds until the screen goes blank. If your Device does not power on or
is unresponsive during use, you can restart your device by pressing and holding the po
w
er
button for 20 seconds.
Micro-USB/powerport: You can use the supplied USB cable to connect your Device to a
computer for charging the battery and transferring files, including personal documents, to
your Device.
Charging the battery
Charge your Device by plugging the supplied USB cable into a power source, such as a
computer or the Device power adapter (sold
separately).
A lightning bolt should appear on the
battery icon at the top of the Home screen.
The indicator light on the bottom edge of the device will turn amber while charging and green
when the battery is fully charged.
Charging should take less than three hours. You can use your Device while it is connected via
USB and charging from your computer, by un-mounting or ejecting it so that Device exits
USB drive mode.
•
Windows Vista and 7: Click the Start button, select “Computer” from the options, right-click
on the Device drive icon, and select
“Eject”
from the pop-up menu.
•
Windows XP: Right-click on the “Safely remove hardw
are
”
icon in the lower right-hand
corner of the task bar and follow the on-screen instructions to remove Device.
•
Mac OS: Ctrl-click on the Device device icon and choose
“Eject
.
”
Your Device will then exit USB drive mode and display the Home screen. You’ll see a lightning
bolt on the battery status icon that indicates your Device is still charging. If the charge
indicator
light does not come on, make sure that the USB cable is fully inserted into your
Device and into the USB port.
Status indicators
At the top of every screen, you’ll see indicators that inform you about the status of various
device services.
Wi-Fi and WAN status
indicator
s
Your Device has a strong Wi-Fi signal and the Data network service is
active.
The more bars
that are filled in with black, the stronger the Wi-Fi signal.
Your Device is checking for
available
Wi-Fi network, or WAN network
Battery status
indicator
s
The Device battery indicator shows the various states of the battery as it discharges.
Note that subscribing to multiple blogs that update frequently may increase po
w
er
consumption and decrease the battery life. A weak Wi-Fi signal can also increase po
w
er
consumption.

Device User’s Guide
Chapter 1 Getting
S
t
ar
t
ed
7
Activity I
ndicator
This indicator
appears
in the top left corner of your Device screen when the device is busy
downloading new content, checking for new items, searching for an item.
Setting up your Device
If you’re reading this guide, you’ve probably completed the Device setup process, which
includes connecting to a Wi-Fi network and registering your Device to an account. If you
haven’t done these steps yet, go to the Home screen now, select Set Up Your Device,
follow the onscreen prompts. Once you have completed the setup process, Set Up Your
Device will no longer appear on your Home screen.
About registration: If you bought your Device online using your account, or you’ve already
gone through the Device setup process, the device is registered and ready to use. To verify
this, press the Home button and check whether your user name is in the upper left corner
of the Home screen. If it says “My
Device
”
your device is not registered.

Device User’s Guide
Chapter 2
Acquiring
& Managing Device Books
8
Chapter 2
Acquiring & Managing Device Books
Shop the Device Store anytime, anywhere
The Device Store offers a wide selection of reading material including books, newspapers,
research docs, blogs and
magazines.
To access the store, select Shop in Device Store
from any menu (make sure you have turned wireless on). Use the Navigator controller to
navigate through the store. You can search for a title, browse by category, check out the
latest bestsellers or vie
w
recommendations personalized just for you. The Device Store
lets you see details about titles, read customer reviews and even download book
samples. When you decide to make a purchase, the Device Store uses the secure 1-Click
payment method. To learn more about setting up your 1-Click payment method on your
Manage
After you order, the Book Store delivers the item directly to your Device via your Wi-Fi or WAN
connection, depending on your location and coverage of serves. Books are downloaded to
your Device immediately, generally in less than 60 seconds. Newspapers and
magazines
are
sent to your device as soon as the
y’
re published—often even before they’re
available
in print.
If your Device had wireless on prior to going to sleep, it will continue to receive your regularly
scheduled subscriptions while in sleep mode. If your Device is not connected to a wireless
network when a new issue of a periodical becomes
available,
that issue will be delivered
automatically the next time you connect.
Managing your Device library
Device can store thousands of digital books, personal documents, newspapers, blogs, and
magazines,
which are referred to collectively as
“content”
throughout this guide. To display a list
of content on your Device, press the Home button. Pressing Menu from the Home screen
displays how much free space you have
available for storing the content
.
Creating
collections
You’ll probably reach a point where you want to group items for easier
access.
The Collections
feature lets you do this. Create a new collection by pressing the Menu button while on the
Home screen. Select Create New Collection, then use the onscreen keyboard to type a name
for the collection. You can add as many items as you like to each collection, and you can add
an item to more than one collection.
Removing
content
To delete an item from your Device, underline its name on the Home screen and press the
Left Arrow on the Navigator controller. When a warning displays, press the center button of the
Navigator to confirm the deletion.

Device User’s Guide
Chapter 2
Acquiring
& Managing Device Books
9
Copies of all your books, recent issues of newspapers and
magazines,
and personal
documents are archived servers. If you wish to retrieve content that you’ve removed, select
Archived Items from the Home screen, then choose the item(s) you want to restore to your
Device. Use this same method to download previously purchased content to a new Device.

Device User’s Guide 10
Chapter 3
Reading
Device Documents
Chapter 3
Reading Device Documents
Understanding Device display technology
Device uses a high-resolution display technology called electronic paper. It works using ink
just like books and newspapers, but it displays the ink particles
electronically.
This is part of
the process of updating the electronic ink that Device uses to display text and graphics.
Customizing your text display
Device provides a quick way to adjust the
appearance
of books and
periodicals.
To access
those settings, press the Menu button when you’re reading a document and select Change
Font Size. Font selection is also available to allow better or comfortable reading experience. A dialog box will
appear that lets you change the font size, typeface, line spacing, number of words per line,
and orientation of the content on the Device screen. You can also change the orientation
when you aren’t reading a document, such as on the Home screen. Simply press the Menu
button and select Screen Rotation.
Zooming in on images
You can increase the size of an image in a Device book for easier viewing. First, use the
Navigator controller to position the cursor over the image. A magnifying glass with a plus sign
will
appear on top of it. Press the Navigator controller to zoom in. To return to your content,
press the Navigator controller or any key or button except the Home button.
Interacting with your documents
Your Device gives you access to features that aren’t
available
with printed materials, such as
instantly viewing word definitions and searching for specific content. Just as with a traditional
book, you can also highlight favorite passages, add notes, and create bookmarks.
Dictionary:
Your Device includes two dictionaries: The New Oxford American Dictionary (the
default) and The Oxford Dictionary of English. Simply place the cursor in front of any
w
ord
you want defined. To see a longer definition, press the center button of the Navigator
controller and select “full definition
”
from the displayed options and press the center button
of the navigator controller. To change the default dictionary, use the menu on the Settings
page.
Your dictionaries may differ depending upon the language you select.
Search: Press the Keyboard button to display the keyboard and type the text you want to
search for, then press the keyboard button to dismiss the keyboard. Right click the Navigator
controller to select the find option, then press the center select button of the Navigator
controller to display the search results. You can also search other content on your Device, the
Device Store,
Google,
Wikipedia, or the built-in dictionary by using the Right Arrow on the
Navigator controller to scroll past
“find”
and choosing the type of search you
w
ant.
Highlights: Place the cursor where you want to start the highlight. Press the center of the
Navigator controller and select the “start highlight” option. Scroll the cursor to the end of
the text you want to highlight and press the center button again and select the
“
end
highlight” option. The highlighted text is underlined. It is also added to a file on the Home
screen called My Clippings. If several other Device users have highlighted a particular
passage in the

Device User’s Guide 11
Chapter 3
Reading
Device Documents
book you’re reading, you’ll see that passage underlined with a note giving the number of
highlighters. You can view these popular highlights by pressing the Menu button and selecting
View
Popular
Highlights. You can also hide the display of
Popular
Highlights.
Notes: You can add notes to any content on Device. Place the cursor where you want to add
your thoughts and press the center select button of the Navigator controller and select
“create
note
”
. Press the keyboard button and begin typing your note. When you highlight the
“sa
ve note
”
option and press the Navigator to select it. Notes are added to the My
Clippings file on your Home screen. Notes appear as superscripted numbers within the text.
To view a note, use the Navigator controller to move the cursor over the notation number.
Bookmarks: Device automatically saves your place in whatever content you’re
reading.
You
can add a permanent bookmark by pressing the Menu button and selecting Add a Bookmark.
The upper right corner of the page will appear folded do
wn.
You can view and delete your highlights, notes, and bookmarks at any time by pressing the
Menu button from the book you’re reading and selecting View Notes & Marks. They are also
archived at so they won’t be lost.
Viewing page numbers and progress
To view page numbers when reading books that have them, press the Menu button. The
current page and total number of pages will be displayed above the progress bar at the
bottom of the screen. Note that not all Device books include page numbers. On the
Home screen, a series of dots display below the book title indicating how long the book
is,
with
bold dots showing how far you have read. In a book with chapters, the tick marks
in the progress bar indicate the start of each chapter.
When you’re finished reading
Your Device will automatically go into sleep mode after 10 minutes of inactivity. You can
further conserve its battery life by turning off the wireless connection when you aren’t using
it. When your Device is asleep, you’ll see an image on the screen; this static screensaver uses
no battery power. To wake your Device up, press the power button.
If you need to turn off the Device completely, such as when traveling on an airplane, press
and hold the power button for several seconds until the screen goes blank, then release the
button. When the Device is turned off, the screen will be blank.

Device User’s Guide 12
Chapter 4 Getting More
From
Your Device
Chapter 4
Getting More
F
ro
m
Your Device
Customizing your Device settings
To go to the Settings page, select Settings from the Home screen menu. Use the Next page
and Previous Page buttons to view all the options. The
available
settings are:
Registration: Indicates the account name to which your Device is registered. Use this
option to register and deregister the device.
Device Name: Lets you change the name displayed at the top of the Home screen.
Wi-Fi and WAN Networks: The number of detected Wi-Fi networks and the name of the Wi-
Fi net
w
ork you’re currently connected to, if any. WAN network symbol is also available,
depending on your location.
Device
Info:
The
Wi-Fi MAC Address, device serial number, and network capability of your
device.
Device
Language:
Shows the current language for menus, alerts, and dialog boxes, and
allows you to change to a different language.
Device
Password:
Allows you to restrict access to your Device by setting a password. You’ll
subsequently be prompted to enter the password whenever you turn on the device or wake
it
from sleep. If you forget your password, try looking at the hint you entered when you created
it. If you still don’t remember your password, you must contact Device Customer Service.
Device
Time: Lets you set the current local time to be displayed on your Device. Pressing the
Menu button from any Device screen will display the time at the top of the screen.
Dictionaries: Lets you choose which of the installed dictionaries to use for word lookups.
Popular Highlights: Allows you to enable or disable the display of passages highlighted by
others.
Public Notes: Allows you to toggle the display of notes and highlights made by people you
follow on Device..com.
Annotations
Backup:
Allows you to toggle the automatic backup on ’s servers of your
annotations, last page read, and collections. Disable this feature if you do not want your
annotations backed up or shared in
Popular
Highlights.
Personal Info: Lets you enter contact information such as an address or phone number, in
case you lose your Device.

Device User’s Guide 13
Chapter 4 Getting More
From
Your Device
The Settings Menu
When you’re on the Settings page, the menu offers some important functions that aren’t
available
from the Home screen or book menus.
Update Your Device: Installs the latest software for your Device. If there are currently
no software updates
available
on your Device, this option is grayed out.
Restart: Restarts your
Device.
You will not lose the books, clippings, or other files stored
on the device. In the event your Device freezes up, you can do a hard reset by pressing
the power button for 20 seconds.
Reset to Factory Defaults: Resets your Device to its original factory settings and restarts
it.
Before you reset your Device to factory defaults, you must back up any personal documents
as well as older issues of periodicals that you’d like to keep. Once your Device restarts, you
will need to download those items (and your Device dictionaries) from Archived Items on
’s servers. If you want to continue to password-protect your Device, you must also set
up a password again.
Legal: Provides trademark, copyright, and other notices about the software installed on your
Device.
Viewing other types of files
Device can display several types of files, including PDF
and TXT
documents. You can even
highlight and annotate PDF files just like a Device book. To add a file to your Device, simply
drag the file from your computer to the
“documents”
folder on your Device via a USB
connection, or e-mail it to your dedicated Device e-mail
address.
Your converted documents
will display on the Home screen.
can convert certain other types of files into a Device-compatible format and e-mail them
to your Device.

Device User’s Guide 14
Chapter 4 Getting More
From
Your Device
Using Device with your computer
By connecting your Device to your computer via the supplied USB cable, you can add content
to the Device without a Wi-Fi or WAN connection.
When you first connect the Device to a computer’s USB port, it will appear as an external
storage drive or volume on the computer’s desktop. You’ll see a directory or folder called
“documents.
”
You can add Device-compatible files to this directory, and you can copy,
move, or delete the files that are already there. Device is not usable as a reading device
while in USB drive mode. To read a book while charging the battery, you must eject the
Device from your computer’s desktop. The battery icon on the Device will have a lightning
bolt to indicate that its battery is still being charged.

Device User’s Guide 15
Appendix
A
Product Infor
m
a
t
ion
Appendix A
Legal and Compliance Information
FCC Compliance Statement
This device complies with Part 15 of the FCC Rules. Operation is subject to the following two conditions:
-This device may not cause harmful interference.
-This device must accept any interference received, including interference that may cause
undesired operation.
This equipment has been tested and found to comply with the limits for a Class B digital device, pursuant
to Part 15 of the FCC Rules. These limits are designed to provide reasonable protection. This equipment
generates, uses and can radiate radio frequency energy and, if not installed and used in accordance with
the instructions, may cause interference to radio communications. However, there is no guarantee that
interference will not occur in a particular installation. If this equipment does cause harmful interference to
radio or television reception, which can be determined by turning the equipment off and on, the user is
encouraged to try to correct the interference by one or more of the following measures:
-Reorient or relocate the receiving antenna.
-Increase the separation between the equipment and receiver.
-Connect the equipment into an outlet on a circuit different from that to which the receiver is
connected.
-Consult the dealer or an experienced radio/TV technician for help.
Changes or modification not expressly approved by the party responsible for compliance could void the
user’s authority to operate the equipment.
The Devices meet the FCC Radio Frequency Emission Guidelines and are certified with the FCC as the FCC ID
number found on the back of the Device.
Information Regarding Exposure to Radio Frequency Energy
Your Device is designed and manufactured not to exceed the emission limits for exposure to RF energy set by the
Federal Communications Commission of the United States (FCC). Information on your Device is on file with the FCC
and can be found under the Display Grant section of http://transition.fcc.gov/oet/ea/ after searching on the FCC ID for
your Device, which can be found on the back of the Device.
Canadian Compliance Statement
This device complies with the Canadian ICES-003 Class B specifications.
Cet appareil numérique de la Classe B est conforme à la norme NMB-003 du Canada.
This device complies with RSS 210 of Industry Canada. This Class B device meets all the requirements of the
Canadian interference-causing equipment regulations.
Cet appareil numérique de la Classe B respecte toutes les exigences du Règlement sur le matériel brouilleur du
Canada.

Device User’s Guide 16
Appendix
A
Product Infor
m
a
t
ion
This device complies with Industry Canada license exempt RSS standard(s). Operation is subject to the following two
conditions: (1) this device may not cause interference, and (2) this device must accept any interference, including
interference that may cause undesired operation of the device.
Cet appareil est conforme aux normes CNR exemptes de licence d’Industrie Canada. Le fonctionnement est soumis
aux deux conditions suivantes : (1) cet appareil ne doit pas provoquer d’interférences et (2) cet appareil doit accepter
toute interference, y compris celles susceptibles de provoquer un fonctionnement non souhaité de l’appareil.
This device is compliant with general population/uncontrolled RF exposure limits in IC RSS-102
Cet appareil est conciliant avec les limites d'exposition de RF population/non contenu générales dans IC RSS-102