Contents
- 1. user manual
- 2. User manual
user manual
1
Glow Mobile Phone
User Manual
Model name:X200
Trade name:plum
FCC ID:Y7WPLUMX200

2
Contents
Ⅰ. SAFETY PRECAUTIONS ········································································································································· 4
Ⅱ. BEFORE USE ····························································································································································· 5
1.INSTALL AND UNLOAD SIM CARD ····················································································································· 5
2.T-FLASH CARD ·················································································································································· 5
3.INSTALL AND UNLOAD BAT T E RY ························································································································ 5
4.CHARGING ························································································································································ 5
Ⅳ. QUICK USER GUIDE ················································································································································ 7
1.POWER ON/OFF ················································································································································· 7
2.TURN ON /OFF SCREEN ····································································································································· 7
3.LOCK AND UNLOCK ··········································································································································· 7
4.SWITCH DESKTOPS ············································································································································· 7
5.HOT BUTTONS ··················································································································································· 8
6.DESKTOP MENU ················································································································································ 8
7.MAIN MENU ······················································································································································ 8
8.MOVE APPLICATIONS ········································································································································· 8
9.DELETE APPLICATIONS ······································································································································ 8
10.NOTIFICATION BAR········································································································································ 8
11.STATUS BAR ·················································································································································· 9
12.ADD TO HOME SCREEN ·································································································································· 9
13.BLUETOOTH CONNECTION ····························································································································· 9
14.WLAN CONNECTION ···································································································································· 9
15.INPUT METHODS ··········································································································································· 9
16.DESCRIPTION OF KEYS ·································································································································· 9
Ⅴ. BASIC FUNCTIONS ················································································································································ 10
1.DIALER INTERFACE ·········································································································································· 10
2.DIAL A CALL ··················································································································································· 10
3.CONTACTS ······················································································································································· 11
4.CALL LOG ························································································································································ 13
5.MESSAGING ····················································································································································· 13
6.BROWSER ························································································································································ 14
7.SEARCH ··························································································································································· 14
8.EMAIL ····························································································································································· 15
9.MUSIC ····························································································································································· 15
10.GALLERY ···················································································································································· 16
11.MOVIES ······················································································································································· 17
12.CAMERA ····················································································································································· 17
13.FM RADIO ··················································································································································· 18
14.MOBILETV·················································································································································· 18
3
15.SOUND RECORDER ······································································································································ 18
16.FILE EXPLORER ··········································································································································· 18
17.LABEL ························································································································································· 19
18.CLOCK ························································································································································ 20
19.CALENDAR ·················································································································································· 20
20.CALCULATOR ·············································································································································· 20
21.SETTINGS ···················································································································································· 20
4
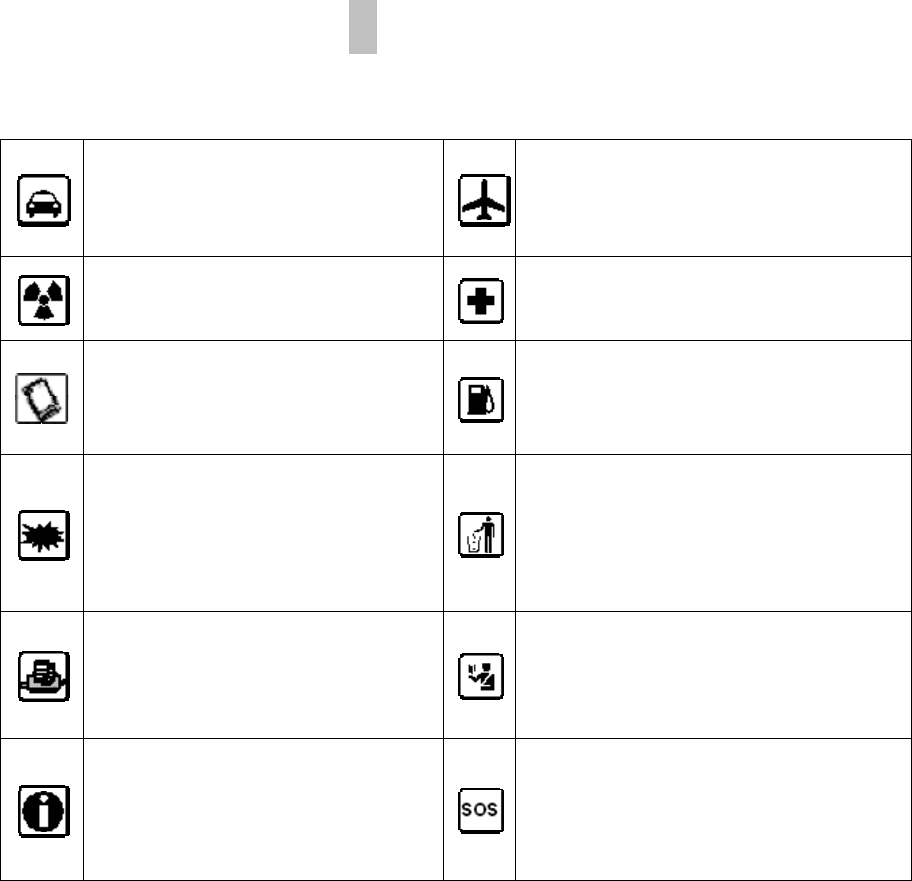
Ⅰ. Safety Precautions
Before using a mobile phone, please read and observe the following rules.
While driving or answering a call,
please use an earphone or stop
your car.
Mobile phone interferes with aircraft
communication, please ensure that
mobile phone power off during the entire
flight.
All mobile phones may be disturbed,
and affect their performance.
Please don’t use mobile phone and turn
off your phone where medical
equipments exist.
To ensure the best performance or
avoid damage to mobile phone,
please use the original accessories
and batteries.
At the gas station and close to the fuel
and chemicals and other dangerous
goods, please power off your mobile
phone to avoid explosion.
To avoid interference of the blasting
operation, In the scene of the
explosion or post "Turn off the radio"
icon in the local, please power off
your mobile phone.
Please don't burn batteries as ordinary
garbage, to avoid the risk of life and
damage to the environments. Please
abide by the local environmental policy,
timely deal with or recycle the waste
batteries.
Before your mobile phone is connect
with another equipment, please read
carefully this manual to ensure
safety.
Some small articles (such as T-Flash
card, etc.) should be placed out of
children reach, to prevent children
swallowing or other hazard.
Please backup the important
information or keep a written record,
to prevent its loss.
When sending an emergency call,
please ensure your mobile phone power
on and in a service area, inform your
position, without permission, please
don't end this call.

5
Ⅱ. Before Use
1. Install and Unload SIM Card
1.1 About SIM Card
Before using the phone, you must insert valid SIM (Subscriber Identity Module) card in the phone.
SIM card provided by network supplier.
All the information related to network connection are recorded in the chip of SIM card, also the
names, telephone numbers and SMS that storing in the name card holder of SIM card. You can
take out SIM card from your phone, and use it in any GSM mobile phone (new mobile phone can
read SIM card automatically).
In order to avoid losing or damaging the information saves in SIM card, please don’t touch the
metal contact surface, and place SIM card in the place that away from electricity and magnetic
force. Once SIM card is damaged, you can’t use the phone normally.
Prompt: Please make sure to power off the phone before taking out SIM card. It is absolutely
forbidden to insert or take out SIM card with external power supply; otherwise it may damage SIM
card and the phone.
1.2 Insert and Unload SIM Card
Metal contact surface of SIM card is easily scratched. You must take out SIM card carefully before
the assembly.
Power off the phone, remove the rear cover, battery or other external power supply.
Make the end of SIM card without cutting angle inside and aim at the card slot of the phone and
metal surface of SIM card face downward, then insert SIM card to the card slot of the phone, the
other SIM card is also inserted in this way.
When taking out SIM card, directly pull it outward and then can take out SIM card.
Prompt: Without special explanation inserting two SIM cards are defaulted in the manual. If you
just insert one SIM card, maybe some options of the menu will not be shown.
2. T-Flash Card
Aim at the T card slot and push the T card gently, and the card will be inserted correctly.
Prompt: If the memory card is failed, please check whether it is correctly placed and good contact
of metal point.
3. Install and Unload Battery
Take off the rear cover of the mobile.
Make one end of battery with metal surface aim at the battery connector.
Then gently press the battery downward using the finger, and then press the other end to install the
battery.
Prompt: Please operate correctly to avoid damaging the battery connector.
4. Charging
4.1 Charger
Insert the charger on the charging interface at the top of the phone. After inserting the charging plug,
battery strength icon stripe at the top right corner of the screen is scrolling, which means that the
6
charging is processing; when the stripe is full of the whole icon and stop scrolling, which means that
the battery charging is completed; when the charging is completed, please pull out the plug.
When electric quantity is not enough, warning message will be sent; and electric quantity shows
empty. When electric quantity is too low, the phone will power off automatically. Please don’t make
the battery in the status of not enough electric quantity for a long time; otherwise it may damage the
battery quality and service life. Please don’t charge the battery for a long time.
Prompt: In order to ensure normal operation of the phone, please make sure to use the
designated charger.
4.2 USB disk Identification
After USB disk is inserted, you can deal with data in USB disk after its light is on. Please refer to
“File Manager” for the usage of USB Disk.
Prompt: It is forbidden to remove USB disk when data in USB disk is being copied, transferred or
deleted to prevent data damage.
4.3 Transferring Data With Computer
4.3.1 Install USB
Connect mobile phone to a computer with a USB cable, drag out the notification bar. Touch “USB
Connected”, choose and click “USB storage”, then on the computer, you can view data in Device
and SD Card storage. So data transferring can be performed between this device and the
computer.
4.3.2 Disconnect USB
After data is mounted onto the computer, you can drag out the notification bar, touch to turn Off
“USB Storage”, and then disconnect with USB link.
Prompt: It is forbidden to disconnect USB link during transferring data, because it can lead to data
loss or damage.
7
Ⅳ. Quick User Guide
The phone has not only the basic functions of mobile phone, but also support rich, practical and
rapid feature functions, can be briefly introduced as follows:
1. Power On/Off
In the power-off mode, long press [Power] key, it will power on; otherwise. In the power-on, long
press [Power] key, and choose Power off, it will power off. If you set up SIM lock or phone lock,
please input the code according to the requirements.
In any other interface, short press this button to lock the screen.
Warning: As mobile phone can cause interference and dangerous where you are prohibited to use
mobile phone, please power off your mobile phone.
2. Turn On /Off Screen
2.1 Turn Off Screen
Please short press [Power] to turn off the screen to save power.
Prompt: To save power, you can also set screen timeout time in Display Settings, when the timeout
time is up, without any operation during the standby time, the screen will shut off automatically.
2.2 Turn On Screen
When the screen is off, please short press [Power] to wake up the screen.
3. Lock and Unlock
3.1 Lock
Please press [Power] to lock this screen to prevent some unexpected operations.
Prompt: If screen timeout time is set in system settings, this computer will turn off and lock its
screen during the standby time if it is idle.
3.2 Unlock
After the screen is off, please press [Power] to wake up the screen, and then drag the slider upwards
to the green ball to unlock the screen.
Prompt: Drag the slider downwards to the white ball to switch between Sound and Vibrate state.
4. Switch desktops
In the idle mode, you can slide on the screen to switch between the 1st~5th screens.
8
5. Hot Buttons
On the shortcut bar, to touch button enters Dialer interface; to touch button enters
Contacts interface; to touch button enters Messages interface; to touch button enters
Explorer interface; to touch button enters Main Menu.
6. Desktop Menu
On the desktop, press [Menu] key, you can display options, including: Widgets, Wallpapers,
Applications, Screen editor, Desktop setting, System setting. Touch and choose one, you can
operate the corresponding functions.
7. Main Menu
In Main Menu interface, you can slide the screen left and right to browse all the applications. Touch
and choose one, you can enter and run this application.
8. Move Applications
Choose a desktop, touch button to enter Main Menu, long press an application, drag it onto the
free area of the desktop, you can create this application shortcut on the current desktop. By this
way, you can create any favorite application shortcut onto the 1st-5th desktops.
Prompt: Before creating an application shortcut, you ensure that there is free space to place this
App. on this desktop.
9. Delete Applications
On the current desktop, long press an application shortcut, drag it onto the bottom dustbin, you can
delete this application shortcut from the current desktop.
10. Notification Bar
On any interface, drag the screen downward from the top, you can display Notification bar; then
drag the screen upward from the bottom, you can hide the notification bar.
You can operate the following on Notification bar:
10.1 SIM Card Info.
You can view the operator information of SIM 1 and SIM 2 on Notification bar.
10.2 Running App.
You can view the running applications on Notification bar.
Tips: In any interface, long press
【
Home
】
,it displays the pop-up box of “Recent Apps and Running
Apps”. Touch the option of “Recent Apps” ,you can view the recently running applications, choose

9
and click one, you can enter directly this application; Touch “Running Apps” to view the currently
running applications, click one to kill it from progress.
10.3 USB Status
You can view USB connection state.
10.4 View Notifications
After dragging downward Notification bar, you can view the notifications of new SMS & Call &
Email, etc., touch an option to enter its view interface.
On notification interface, touch [Clear] button, you can clear the notifications of SMS & MMS &
Email& Missed Calls & WLAN & Bluetooth.
Tips: After touching [Clear] button, you can’t clear the notifications of the running applications.
11. Status Bar
On the LCD top of the idle interface, it is Status Bar. You can’t operate the status bar, it
displays some relevant information, including: WLAN, Bluetooth, Battery power, System time,
etc.
12. Add to Home Screen
On the desktop, long press the blank area, you can display “Main Screen”, and then operate the
following: Contacts, Folder, Widgets, Shortcuts, Wallpaper.
13. Bluetooth Connection
This device supports Bluetooth 2.1+EDR, you can listen to music with Bluetooth earphone. About
Bluetooth settings and operations, please refer to the section of Bluetooth in System Settings.
Prompt: Bluetooth function and operations are based on the real product.
14. WLAN Connection
This device supports “Wi-Fi 802.11 b/g/n”. You can access to the local network through WiFi. About
WiFi settings and operations, please refer to the WiFi section in System Settings.
15. Input Methods
This mobile phone is embedded three input methods, “Google pinyin input”, “Android keyboard”
and “komoxo inputmethod”.
Long press any input field to display the pop-up box of “Edit Text”, then touch “Input Method” to
display the pop-up box of “Select Input Method”. You can click and choose the input method. In
system settings, you can set Input languages, it supports various languages input.
16. Description of Keys
Key Function
[ Menu ] Button Short press to display options box.

10
[ Home ] Button Short press to return to the desktop. Long press to view the
latest task.
[ Back ] Button Press to return to the upper layer.
[ Volume ] Key Press [Volume+] to turn the call voice louder; press [Volume-]
to turn lower.
[ Power ] Key Long press [Power] key to power on or off mobile phone.
Short press [Power] key to end a call when a call is talking.
Or make the calling tune mute when a call is coming.
Short press [Power] key to turn off & lock the screen in any
interface. Press again to lighten screen.
Ⅴ. Basic Functions
1. Dialer Interface
In the idle mode, click to enter Dialer interface.
2. Dial a Call
2.1. Calls Category
2.1.1. Emergency Call
You can directly dial an emergency service call without SIM card.
Different network uses different emergency numbers, please consult your network operations
company for more details.
2.1.2. Domestic Call
Enter a phone number, choose SIM1 or SIM2 to make a call by SIM1 or SIM2. If you're making a
long-distance call, please add the area code before the telephone number.
2.1.3. Extension Dial
After entering a telephone number, press [Menu] to perform the following operations:
¾ Add 2-Sec Pause: Enter the host number, click “Add 2-Sec Pause”, then enter extension
number, choose SIM1 or SIM2, after dialing the host number, pause for two seconds to dial
the extension number.
¾ Add Wait: Enter the host number, click “Add Wait”, then enter extension number, choose SIM1
or SIM2 after dialing the host number, pause for the waiting time to dial the extension number.
2.1.4. International call
Enter country code & area code (usually area code without "0") & telephone number, choose SIM1
or SIM2 to make an international call by SIM1 or SIM2.
2.1.5. Dial Contacts Number
After entering Contacts list, choose a contact, choose SIM1 or SIM2 to make a call by SIM1 or
SIM2.
11
2.1.6. Dial Call-log Number
After entering Call Log, choose a call record, click , then choose SIM1 or SIM2 to make a call by
SIM1 or SIM2.
2.2. Answer a Call
When an incoming call arrives, the phone will give out the corresponding prompt (such as vibration,
ringtone, and etc.); if network support, the phone screen will show the name and telephone number
of the caller, slide rightward, answer this call.
2.3. Refuse a Call
When a call is coming in, slide leftward, refuse this call.
2.4. End a Call
After finishing a call, click to end this call.
2.5. Call Operation
During a call, touch screen to operate the following:
¾ Add Call: Click , enter a phone number, add another call.
¾ Dialpad: Click to display Dialpad interface.
¾ End Call: When finishing a call, touch to end call.
¾ Speaker: Click , switch call voice to Speaker; click it again to switch call voice to
Receiver.
¾ Mute: Click to set this call mute.
¾ Bluetooth: Click , open Bluetooth device, switch call voice to a Bluetooth headset.
3. Contacts
This function could help you browse the name card holder, store, edit and delete the names and
phone numbers in the phone and SIM card. In contacts list, click “Contacts” or “Call log” or
“Favorites”, it switches among Contacts & Call log & Favorites.
3.1. Contacts List
In contacts list, press [Menu] button, perform the following functions:
3.1.1. Search
Search contacts by key words stored in phone and SIM cards.
3.1.2. New Contact
Create contacts in SIM1 & SIM2 & Phone.
3.1.3. Display Options

12
Set contact list display style.
Only contacts with phones
Only display contacts that have phone numbers in contacts list.
Sort list by
Set contact names to display by First Name or Last Name.
View contact names as
Set view style of contact names as First Name First or Last Name First.
Choose contacts to display
Set classification of contacts to display in contacts list with Phone or SIM1or SIM2.
3.1.4. Contacts Group
Set contact group, such as Student, Friend, Family, Colleague.
3.1.5. Contacts Delete
Delete one or some or all contacts.
3.1.6. More
Accounts:
Set Accounts & Sync Settings, and Manage Accounts.
Import/Export:
Import/ Export contacts from SD card, SIM1 or SIM2. Share visible contacts by Bluetooth or Email
or Messaging.
Memory Query
Show the memory query of Phone, Sim1, Sim2.
Black list:
Add some phone numbers into black list, and intercept their call or SMS.
Delete records from black list.
3.2. Long Press Options
In contacts list, long press a contact, display Options menu, perform the following: View contact,
Call contact, Text contact, Add to favorites, Import to phone, Export to SIM1/SIM2 card, Edit
contact, Delete contact, Divide, Send contact by SMS, Send contact by MMS, Send contact
by BlueTooth, Send contact by Email, Add to balcklist and so on.
3.3. Contacts View
On contacts view interface, press [Menu], perform the following functions: Edit contact, Share,
Options, Delete contact.
3.3.1. Dial Contact number
On contacts view interface, click , dial this contact phone number by SIM1 or SIM2.
3.3.2. Send Message
On contacts view interface, click , enter message edit interface, input message content, send
a message to this contact’s phone number by SIM1 or SIM2.

13
4. Call log
Enter Call log.
4.1. Call log list
After entering Call log, it displays all call records. Choose and touch one of call records, enter its
details. Click [ Menu ], choose “Search” to operate the following:
4.1.1. Search
On call-log search interface, input key words to search a call record.
4.2. Call log Details
On call record details, click to dial this call record number by SIM1 or SIM2. Click , enter
message edit interface, input message content, send a message to this contact’s phone number by
SIM1 or SIM2. Click , add to contacts.
4.3. Call Classification
On Contacts interface, click “Call Log”, enter call records list. Click “All” or “Missed” or “Outgoing” or
“Received” to switch into the corresponding interface. Press [ Menu ] to display options menu,
operate the following:
4.3.1. Display Options
Set call log display options, including: SIM1, SIM2, SIM1+SIM2.
4.3.2. Clear call log
Delete call records from Call Log.
4.3.3. Black List
Add some phone numbers into black list, and intercept their call or SMS.
5. Messaging
On Main menu interface, enter “Messaging”.
5.1. Messages List
On messages list, touch “New Message” to enter message edit interface. Touch a message to
enter its view.
5.1.1. Options menu
On messages list, press [ Menu ] to display options menu, operate the following:
Folder view/Message view: Change the view way with Folder or Message.
Compose: Enter message edit interface, enter the recipient’s number and content, choose
SIM1 or SIM2, to send message by SIM1 or SIM2.
Delete threads: Delete all messages.
Search: Search message with key words.
Settings: Set Messaging settings, include Storage settings, Text message(SMS) settings,
Multimedia message (MMS) settings, Notification settings, Forwarding settings, Font setting.
Cell broadcast SMS
The area info services send different kinds of messages. Change the settings of this service
and inquire the area info by using this function.

14
¾ Cell Broadcast SMS Enabled: Enable or Disable Cell Broadcast SMS.
¾ Read: Read the received messages.
¾ Language Setting: Set the languages of Cell Broadcast SMS.
¾ Channel: Set the channel to receive the area message.
9 Add the channel: Add the channel index and channel name.
9 Edit channel: Touch the saved channel to enter its edit interface, and edit this channel
again.
9 Delete channel: Delete all channels.
5.1.2. Long Press Menu
Long press a message, display its long press Menu.
View thread: View message content.
Add to contacts: Add the contact.
View Contact: View the contact.
Delete thread: Delete message content.
5.2. Messages View
On message list, touch a message to enter its content interface. On message view, press [ Menu ]
to display options menu, operate the following: Call, View contact*, Add subject, Attach, Insert
contacts, Insert smiley, Delete thread, All threads, Add to Contacts*.
6. Browser
On Main menu, enter and run Browser, access to the website.
Press [ Menu ] to display options menu, operate the following:
New Window:Open a new window, and view the corresponding website.
Bookmarks: Access bookmark page, add or delete bookmarks, browse “History” or “Most
Visited”.
Windows: Access to the window page, add or delete a window.
Refresh: Refresh webpage.
Stop: Stop webpage.
Exit: Exit webpage.
More: Include Forward, Add bookmark, Goto homepage, Find on page, Select text, Page
info, Share page, Downloads, Save page, Look Offline Page, Oma Download, Full screen
switcher, Settings.
7. Search
On Main menu, access to Google Search, enter key words, the matched result will display below,
click ,perform the corresponding operations. You can search All, Web, Apps or Contacts.

15
8. Email
On Main menu, nter Email. You can use (this device) it to receive or send your Email anywhere or
at any time.
Note: E-mail can be used normally when the wireless network is well connected.
8.1. Create Account
When entering Email for the first time, it will directly enter new account edit interface, input Email
address, password, choose the corresponding parameters of POP3, IMAP & Exchange Server,
then touch [Next], through POP3 and SMTP server detection, complete Email account creation.
8.2. Accounts List
After creating accounts, access to accounts list. Click "Combined Inbox", view all the mails of the
accounts; Click “Starred”, view all the starred mails; Click , access to the Mailbox list of the
current account.
8.3. Inbox
On accounts list, click an account, and enter its inbox.
8.3.1. Options menu
On inbox interface, press [ Menu ] to display options menu, operate the following: Refresh,
Compose, Folders, Accounts, Account Settings.
8.3.2. Long Press Menu
In the inbox list, long press an email, display options menu, operate the following: Open, Delete,
Forward, Reply all, Reply, Mark as unread.
8.4. View Email
In the inbox list, click an email, and enter its view interface.
On mail view interface, slide the screen up and down to view its content. Touch [ Open ] button to
play the attachment, touch [ Save ] button to save the attachment. Touch [ Reply ] button to reply
to the sender; touch [ Reply all ] button to reply to all the recipients; touch [ Delete ] button to
delete the mail.
On mail view interface, press [ Menu ] to display options menu, operate the following: Delete,
Forward, Reply, Reply all, Mark as unread.
8.5. Compose
In the accounts list or mails list, press [ Menu ], touch “Compose”, and enter mail edit interface.
Input recipient & Title & content, touch [ Send ] button to send this mail, or touch [Save as draft ] to
save it as a draft, touch [ Discard ] button to give up editing.
On mail edit interface, press [ Menu ] , display options menu, operate the following: Add Cc/Bcc,
Send, Save as draft, Discard, Add attachment
Prompt: The capacity of attachement should be less than 5M
9. Music
Music player supports various audio formats, including: Midi, MP3, amr and wav, etc.
9.1. Play Interface
16
On the play interface, when there are songs in the playlist, touch to play; touch to
pause. Drag the slider from left to right to fast-forward or rewind. Touch to play the
previous or the next song. Touch to repeat playing all songs, touch to repeat
playing the current song. Touch to set shuffle on or off. Touch to access to playlist.
Press [Volume] key to adjust the volume.
Press [ Menu] , operate the following:
Library: Access to songs library.
Party Shuffle: Set Party Shuffle on or off.
Add to Playlist: Add the current song into playlist.
Use as Ringtone: Set the current song as SIM1 or SIM2 call ringtone.
Delete: Delete the current song from T-flash Card.
9.2. Music library
Music library contains “Artists”, “Albums”, “Songs”, “Playlist”, etc. Touch a song in music library, it
will start playing.
9.2.1. Long Press Menu
In the songs list, choose and long press a song, operate the following:
Play: Touch this option, start to play the current song.
Add to playlist: Add the current song into playlist.
Use as phone ringtone: Use the current song as phone ringtone.
Delete: Delete the current song from T-Flash card.
Search: Search songs from Browser or Music library.
9.2.2. Options Menu
In the songs list, press [ Menu ] , operate the following: Play All, Party Shuffle, Shuffle All.
9.3. Lyrics Display
If there are songs and their lyrics, when playing these songs, at the meanwhile, it can display the
lyrics.
Note: The lyrics files must be stored in “Lyrics” folder of T-Flash card.
10. Gallery
On Main menu, nter Gallery. Touch to switch into Camera interface.
Press [ Menu] , operate the following:
Share: Share picture folder(s) by Messaging or Bluetooth or Email.
Delete: Delete the chosen folder(s).
More:
¾ Details: View the details of the chosen folder.
10.1. Photos
17
In the folders list, choose and touch a photo folder to enter, slide from left to right to view pictures
list. Touch a picture or photo to enter its view.
10.1.1. Picture List
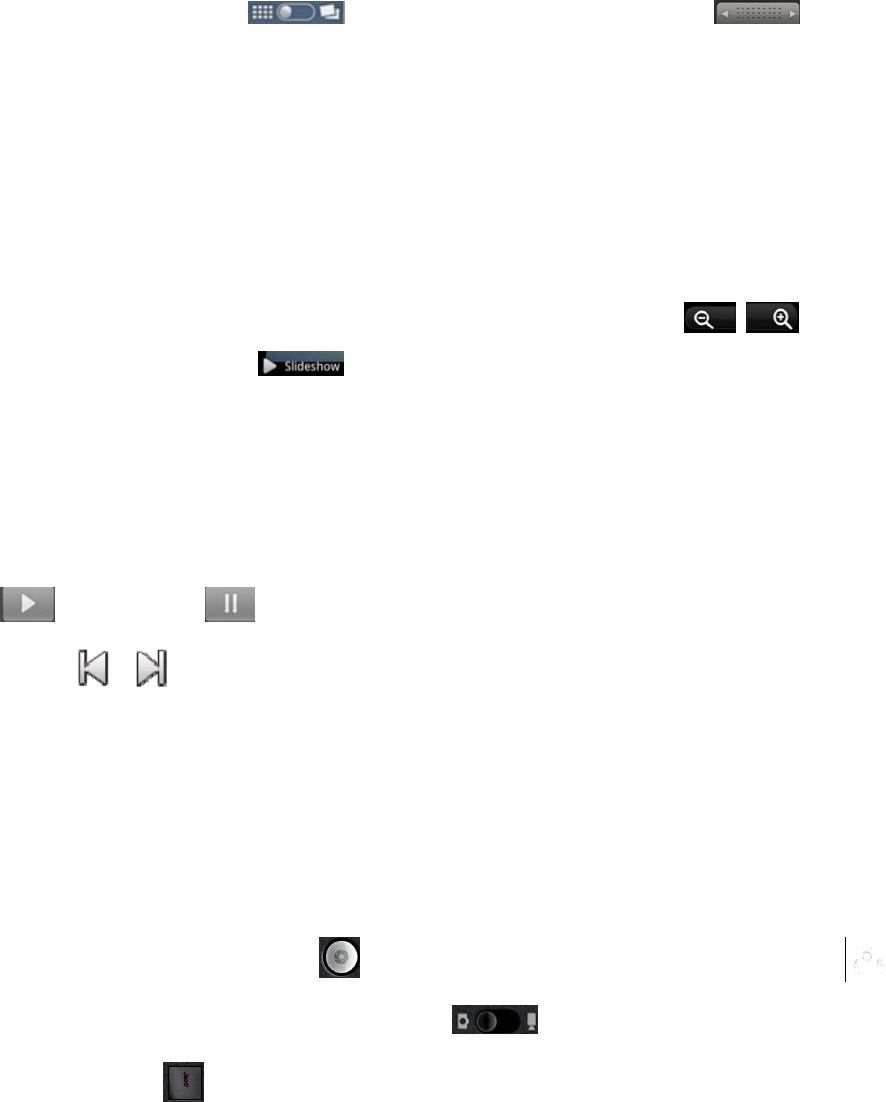
In the pictures list, touch to switch pictures display style, drag to view the
whole picture list.
Press [ Menu ] , operate the following:
Share: Share the chosen pictures by Bluetooth or Email or Messaging.
Delete: Delete the chosen picture(s).
More: include Details, Set as, Crop, Rotate Left, Rotate Right.
Select All: Select all the pictures in this list.
Deselect All: Deselect all the pictures in this list.
10.1.2. Picture View
In the pictures list, choose and touch a picture to enter its view. Touch to shrink or
enlarge this picture. Touch to play slideshow of all the pictures.
Press [ Menu] , operate the following: Share, Delete, More.
11. Movies
Enter Movies, in the folders list, choose and touch a video folder to enter, slide from left to right to
view videos list. Touch a video and choose a kind of play way, it starts to play this video. Touch
to play; touch to pause. Drag the slider from left to right to fast-forward or rewind.
Touch to play the previous or the next video. Press [Volume] key to adjust the
volume.
Prompt: During playing a video, if not touching the screen for 5 seconds, it will play in full screen.
12. Camera
On Main menu, enter Camera.
12.1. Camera
On the findview interface, touch or press [Camera] hotkey to take photos. Touch to
swith between back and front camera. Touch to switch between Camera and Video
recorder, Touch to preview the photos. Touch these icons to display the parameters box.
Include: Focus mode, Exposure, Scene Mode, Preview mode, Picture size, Picture quality,
Brightness, Contrast, Color effect, Antibanding, Capture mode, Camera Settings, White
Balance, Flash mode, Zoom.
12.2. Video Recorder
18
After switching into Video Recorder, touch begin to camcorder; touch to stop. The
other operations refer to Camera.
13. FM Radio
On Main menu, enter FM Radio interface, then you can listen to FM radio freely.
On FM Radio interface, touch to turn on/off FM radio; touch to view channels list; touch
to search available channels forwards or backwards from the current channel; touch
to switch to the previous or the next channel among the available channels list
Press [ Menu ] , operate the following: Search, Exit.
14. MobileTV
On Main menu, enter MobileTV, you can see TV freely. Press [ Menu ] , operate the following:
Scan, Set Region, Channel List.
15. Sound Recorder
On Main menu, enter Sound Recorder. The format of recording files is *.amr, the recording length
depends on the size of T-Flash card.
Touch to record, touch to stop recording, touch to play the recording file in the
list. Choose and long press a recording file to delete.
16. File Explorer
On Main menu, enter File Explorer.
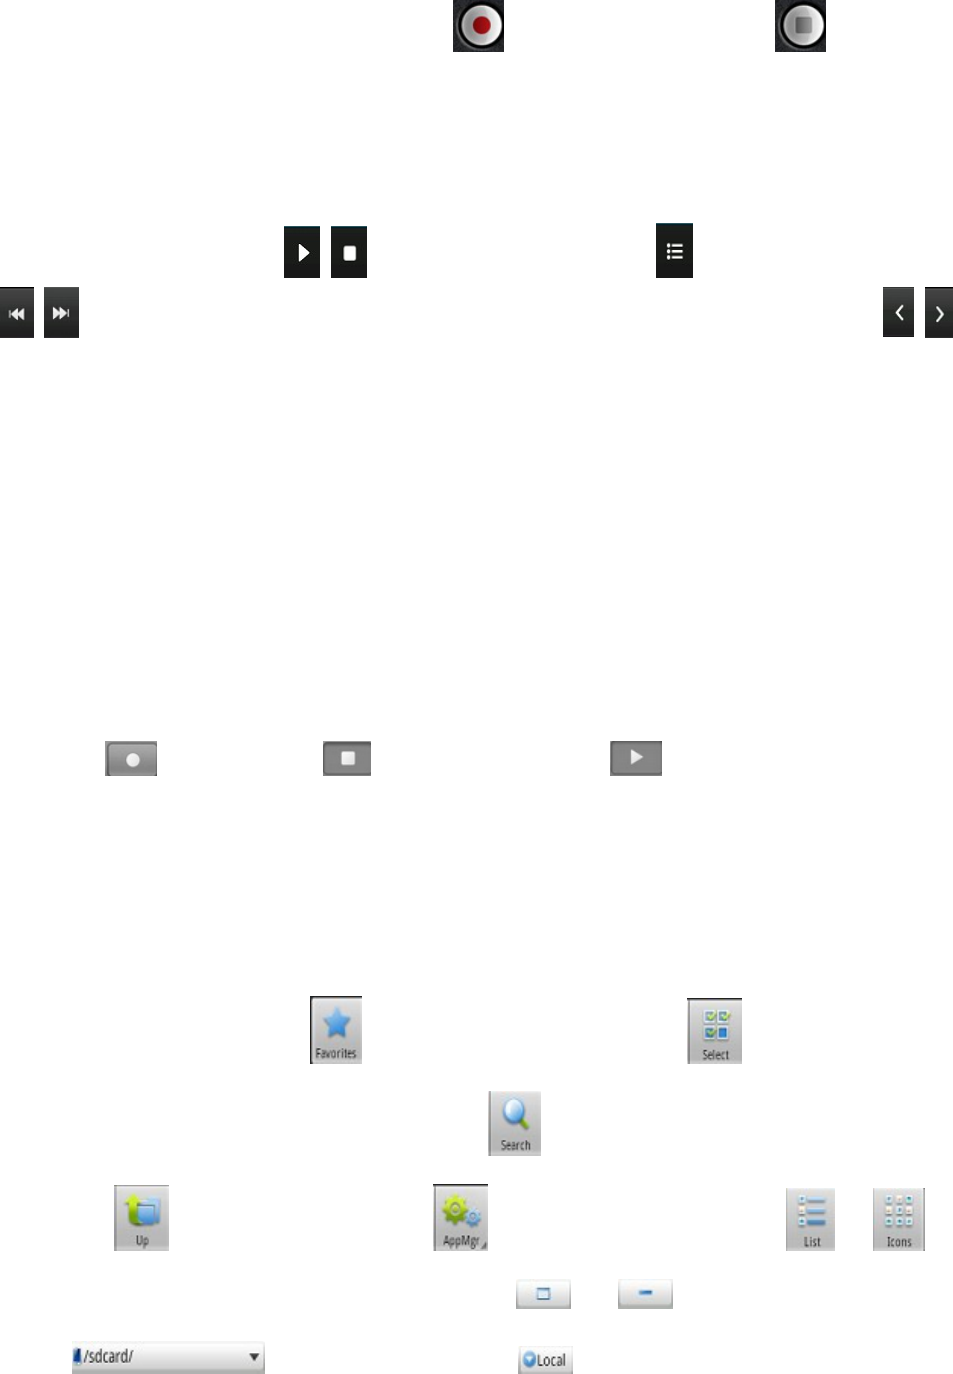
16.1. Files / Folders List
On file explorer interface, touch to choose favorites folder; touch to enter multi-select
state, and select one or more files or folders; touch to search audio or video or picture or other
files; touch to previous folders; touch to enter app manager; touch or to
switch between the list and matrix display mode; touch or to display or hide the toolbar;
touch to choose folders. Touch to display “Change View” option menu,

19
choose “Local” or “LAN” or “FTP” or “Bluetooth” or “Net”.
16.2. Option Menu
On files or folders directory interface, press [ Menu ] to display option menu, perform the following:
Operations: Display operations menu, including: Cut, Copy, Rename, Delete, Select All, Set
As Home, Properties.
New: Display options menu of New, including: File, Folder, Search.
Manager: Display options menu of Manager, including: Task Manager, App Manager, Security
Manager, Bookmark Manager, SD Card Analyst.
Show Tabs: Show the tabs of “Local” & “LAN ” & “FTP” & “Net” on the toolbar.
Settings: Access to settings interface, include Display Settings, View Settings, Path
settings, Other setting, Root settings.
More: include Refresh, Flip orientation, Help Centre, About US, Exit.
16.3. Long Press Options
On files or folders directory interface, choose and long press a file or folder to display its options
menu, perform the following:
Open As: Open this file or folder as Text or Audio or Video or Image.
Cut: Cut this file or folder.
Copy: Copy this file or folder.
Rename: Rename this file or folder.
Delete: Delete this file or folder.
Select All: Select all the files and folders (on) in the current interface.
Shortcut: Create a shortcut of this file or folder on the desktop.
Bookmark: Create a bookmark of files on the SD card or internet browser.
Compress: Compress the file or folder.
Share: Share this file by Bluetooth or Email.
Set As Home: Set this folder as home.
Properties: View the properties of this file or folder.
16.4. Open / Play
If there are some pictures & audio & video & other file formats in a folder. Choose and touch one of
them, perform the following operations:
Picture file: View the picture.
Audio file: Play the audio file.
Video file: Play the video file.
Apk file: Install or replace this *.apk file.
Other format: Unable to open the file of other format(s).
17. Label
This phone apply Note application, it is convenient for your studies and life. On Main menu, enter
memo, touch to create a note record, touch a record to view its content.
On its content view, press [ Menu ] to Delete, Refresh, Set Alarm or Save this record.

20
18. Clock
After entering Clock, touch to set Alarm; touch to access to Gallery; touch to
access to Music player; touch to return to the desktop.
19. Calendar
On Main menu, enter Calendar.
19.1. Month Display
On month display of Calendar, slide the screen up and down to view the previous and the next
month calendar. Press [ Menu ] to display option menu, perform the following:
Day: Touch this option to switch into Day display.
Week: Touch this option to switch into Week display.
Month: Touch this option to switch into Month display.
Agenda: Touch this option to switch into Agenda list.
Today: On Month calendar, touch this option, highlight the system date; On Agenda list, touch
this option to browse today’s agenda records.
More: Include New event, Select Date, Calendars, Settings, Delete all events.
19.2. Day Display
On day display of Calendar, slide the screen up and down to view the different time of the current
day; slide the screen from left to right to view the previous and the next day.
19.3. Week Display
On week display of Calendar, slide the screen up and down to view the different time of the current
day; slide the screen from left to right to view the previous and the next week.
Prompt: The operations of [Menu] for Day or Week display state, please refer to Month display.
20. Calculator
On Main menu, enter Calculator. It supports four arithmetic operations such as “+”, “-”, “x”
and “/”.Slide the screen to switch into functional operation, e.g. Sin, Cos, Tan, Ln, Log,!, π, e,
^, etc.
21. Settings
In settings, you can perform: Wireless controls, Sound settings, Display settings, Security &
location, Applications, SD Card and Local disk, Date and time, Accessibility, Speech synthesis,
About phone, etc.
21.1. Dual SIM Settings:
Standby SIM Card Setting: Set SIM1 or SIM2 or SIM1+SIM2 standby.
Data connection Setting: Set data connection of SIM1 or SIM2.
Message settings: Set message settings for SIM1 or SIM2 or Always Ask.
21.2. Wireless & networks
21
In wireless network control, you can set WiFi, Bluetooth, Networks, VPN settings, Airplane mode,
etc.
21.2.1. Airplane mode
Touch “Airplane Mode” to switch between “On” and “Off”. If Airplane mode is On, all the wireless
networks will be disconnected automatically in this mode.
Warning: Even if airplane mode is activated, it is forbidden to use (on) in plane or in some special
labs or under hospital equipments, other special environments, etc., so as to prevent the
intervention of electronic equipments to the communication or this device, you are advised to power
off this device in such environments.
21.2.2. WLAN On/Off
Touch “WiFi” to switch between “On” and “Off”.
Note: Please turn off WiFi to save power when not using.
21.2.3. WLAN Settings
Set up and manage the wireless access points.
Scan WLAN: Scan and search WiFi devices nearby.
WLAN: Same as WiFi On/Off.
Network Notification: Touch this item to switch between “On” and “Off”. If network notification
is set as “On”, the owner will be notified when an open network is available nearby.
Add WALN network: Create a new WiFi, input Network SSID and Security, touch “Save ” to
save it.
WLAN network: It lists the WiFi network devices, touch one in the list, you can perform such
operations as connection, disconnection or clear, etc.
21.2.4. Bluetooth On/Off
Touch “Bluetooth” to switch between “On” and “Off”.
Note: To save power, please turn off Bluetooth when not using.
21.2.5. Bluetooth settings
You can set Bluetooth On or off, Device name, Discoverable, Scan for devices and list the scanned
devices.
Bluetooth On/Off: Touch “Bluetooth” to switch between “On” or “Off”.
Device Name: It displays the factory device name, touch this item to edit its name.
Discoverable: Touch “Discoverable” to switch between “On” or “Off”. If it is “On”, The Bluetooth
devices nearby can detect this device.
Discoverable timeout: Set how long device will be discoverable.
Scan for devices: Touch this item to search the Bluetooth devices nearby.
Bluetooth devices List: When this device find other Bluetooth devices nearby, it will display
them in this list, you can click one and then input PIN for matching and connection.
21.2.6. Tethering
Share your phone’s mobile data connection via USB.
21.2.7. VPN Settings
In VPN settings, you can add a new VPN, set VPN server, enable Encryption, DNS search domains,
etc.
After adding a new VPN, touch it in the VPNs list, and you can connect it to network.
21.2.8. Mobile Networks
22
In Mobile Networks, you can set Data enabled or Data Roaming or Access Point Names or Network
Operators.
Data Enabled: Activate or disable data access over Mobile network.
Data Roaming: Set data roaming on or off.
UPLMN setting: Set USIM card settings.
Access Point Names: Choose Access Point Names.
Network Operators: Search networks by hand or automatically.
21.3. Call Settings
In Call Settings, you can set SIM1 or SIM2 call Setting or Voicemail or Message Reject or Other call
settings.
21.3.1. Call Settings
Fixed Dialing Numbers
¾ Enable FDN: Fixed Dialing Numbers are disabled or activated.
¾ Change PIN2: Change PIN2.
¾ FDN List: Manage phone number list.
21.3.2. Voicemail
In Voicemail, you can manage voicemail for SIM1 or SIM2.
Voicemail Service: View voicemail service of SIM1 or SIM2.
Voicemail Settings: Change voicemail number of SIM1 or SIM2.
21.3.3. Fast call
Set fast call with number 2# ~ 9#.
21.3.4. Message Reject
You can set the functions of message reject.
Reply Message Hangup: Set Reply Message Hangup on or off. When you reject an incoming
call, it will automatically send a message to the caller.
Automatically send information: Set Auto Replay Message on or off.
Edit Message Content: Edit the message content to auto reply.
21.3.5. Other Call Settings
You can set call settings, e.g. Call forwarding, Additional Settings, Call barring.
Call Forwarding:
After call forwarding function is activated, according to different forward conditions settings (Always
forward, Forward when busy, Forward when unanswered, Forward when unreachable), you can
select to switch the incoming call to voice inbox or other telephone numbers.
Call barring settings
Call barring settings include All outgoing, Outgoing international, Outgoing internation roaming, All
incoming, Icoming calls when roaming, Deactivate all, Change password.
Additional Settings:
¾ Caller ID: Display my number in outgoing calls.
¾ Call Waiting: After call waiting function is activated, during a call, notify me of incoming calls.
21.3.6. IP dialing
You can set IP dialing ON, and set the IP numbers list.
21.3.7. Vibration
If open Vibration, will vibrate when ansers/hangs up .
23
21.4. Sound Settings
In sound settings, you can set Silent Mode, Ringer Volume, Media Volume, Notification Ringtone,
Audible Touch Tones, Audible Selection, Haptic Feedback, SD Card Notifications, etc.
21.4.1. General
You can set Profiles and Volume.
Audio Profiles: You can set calling mode, e.g. General, Silent, Vibration, Outdoor.
Volume: You can the volume of Ringtone, Media, Alarm, or FM.
21.4.2. Incoming Calls
You can set phone ringtone for SIM1 or SIM2.
21.4.3. Notifications
You can set notification ringtone.
21.4.4. Feedback
You can set feedbacks, such as the following:
Audible Touch Tones: Set Audible Touch Tones on or off. It plays tones when using dial pad.
Audible Selection: Set Audible Selection on or off. It plays sound when making screen
selection.
Screen Lock Sounds: Set Screen Lock Sounds on or off. It plays sound when locking and
unlocking the screen.
Haptic Feedback: Set Haptic Feedback on or off. It vibrate when pressing soft keys and on
certain UI interactions.
21.5. Display Settings
In display settings, you can perform such operations as “Brightness”, “Auto-rotate Screen”,
“Animation”, “Screen Timeout”, etc.
21.5.1. Brightness
The screen brightness can be adjusted manually.
21.5.2. Auto-Rotate Screen
Set Auto-Rotate Screen on or off.
21.5.3. Animation
You can choose “No animations” or “Some animations” or “All Animations”. If it is “Some
animations” or “All Animations”, this device displays the animation effect when changing interfaces
or windows.
21.5.4. Screen Timeout
To save power, you can set the time of screen timeout, such as 15s, 30s, 1 min, 2 min, 10 min, 30
min, etc.
21.6. Location & security
You can set My Location or Screen Unlock or SIM Card Lock or Passwords or Credential Storage.
21.6.1. My Location
Touch this item to switch between “On” and “Off”. If it is “On”, the device location can be determined
by WLAN.
21.6.2. Screen Unlock
You can set Set up screen lock.
None: Disable screen unlock security.
Pattern: Draw pattern to unlock screen.
PIN: Enter a numeric PIN to unlock screen.
24
Password: Enter a password to unlock screen.
21.6.3. SIM Card Lock
You can set up SIM1 or SIM2 card lock.
Lock SIM1 or SIM2 Card: Set Lock SIM1 or SIM2 on or off.
Change SIM1 or SIM2 PIN: Change SIM1 or SIM2 PIN.
21.6.4. Passwords:
You can set Visible passwords on or off.
21.6.5. Device Administration
Add or remove device administrators.
21.6.6. Credential Storage
You can set Credential Storage.
Use Secure Credentials: Set Use Secure Credentials on or off, to allow applications to access
to secure certificates and other credentials.
Install From SD Card: Install encrypted certificates from SD card.
Set Password: Set a password for the credential storage.
Clear Storage: Clear credential storage of all contents and reset its password.
21.7. Applications
21.7.1. Unknown sources
The third party application can only be installed only if this function is initiated. Otherwise, the third
party application can’t be installed.
Note: When installing or using the third party applications, please take care! Only the user is
responsible to the data damage or data loss, etc. that are resulted from the installation and use of
the third party application.
21.7.2. Preferred install location
Change the preferred installation location for new applications.
21.7.3. Manage Applications
User can manage and remove the installed applications.
21.7.4. Running services
User can view and control currently running services.
21.7.5. Storage use
View storage user by applications.
21.7.6. Development
Set the options for application development.
USB Debugging: Open or close USB debugging mode when USB is connected.
USB settings: Set USB connection, Charge Only, USB tethering, USB storage, Remenber my
choice.
Stay Awake: The screen will never sleep during charging if this function is “On”; If it is “Off”, the
screen can sleep during charging.
Allow Mock Locations: The position can be simulated during debugging.
21.8. Accounts & Sync
You can perform adding accounts and Sync settings.
21.8.1. General Sync Settings
Background Data: Set Background Data on or off, and it can sync & send & receive data at
any time.
25
Auto-Sync: Set Auto-Sync on or off.
21.8.2. Manage Accounts
You can add or delete sync accounts.
21.9. Privacy Settings
21.9.1. Personal Data
You can perform Factory Data Reset.
Note: Perform factory data reset, it will clear user data in mobile phone, please be prudential to
use this feature.
21.10. Storage
21.10.1. SD Card
Total Space: View the capacity of SD card when SD card is inserted.
Available Space: View the available space of SD card.
Unmount SD Card: You can unmount SD Card for safe removal.
Erase SD Card: You can erase all data on the SD card.
Note: If you erase SD card, it will erase all the data in SD card, please be prudential to use this
feature.
21.10.2. Internal Phone Storage
Available Space: View the capacity of RAM.
Note: If you format Local disk, it will erase all the data in Local disk, please be prudential to use this
feature.
21.11. Language & Keyboard
21.11.1. Language settings
You can select language, the default language is English. Also, you can set user dictionary, press
[ Menu ] to add words to User Dictionary or delete words
21.11.2. Keyboard settings
You can set Google pinyininput, komoxo inputmethod, Android keyboard settings.
21.12. Voice Input & Output
You can perform Voice Input & Output Settings.
21.13. Accessibility
Manage accessibility options.
Note: This feature is based on the real product.
21.14. Date & Time
21.14.1. Automatic
Touch this item to switch between “On” and “Off”. If it is set as “On”, it updates the date and time
automatically. This function is based on the services provided by the network.
Note: When this item is initiated, “Set Date”, “Select Time Zone” and “Set Time” are not available.
21.14.2. Set Date
With time updating “Off”, touch it to display the dialog box of Date Setting.
Note: The date scope is from Jan. 1, 1970 to Dec. 31, 2037.
21.14.3. Select Time Zone
Touch this item to enter “Select Time Zone”, touch and select any one of world cities, and set it as
system time zone. The default time is Beijing time.
21.14.4. Set Time
With time updating “Off”, touch it to display the dialog box of Time Setting, and set system time.
26
21.14.5. Use 24-hour Format
Touch this item to switch between “On” and “Off”. If it is “On”, system time is in 24-hour format,
otherwise, it is in 12-hour format.
21.14.6. Select Date Format
Select one item to set date format.
21.15. About Phone
21.15.1. System updates
Your system is currently up to date.
21.15.2. Status
You can check and view “ Phone Number”, “Network”, “Signal Strength”, “Mobile Network Type”,
“Service state” , “Roaming”, “Mobile network state” , “IMEI”, “IMEI SV”, “Battery Status”, ”Battery
Level”, “WLAN MAC address”, “Bluetooth address” and “Up time”, etc.
21.15.3. Battery use
Check the electricity consumed by each application.
21.15.4. Legal information
Check the open source license.
21.15.5. Model number
Display the device number.
21.15.6. Android version.
Display its Android version.
21.15.7. Baseband version.
Display its Baseband version.
21.15.8. Kernel version
Display its kernel version
21.15.9. Software version
Display its software version.
21.15.10. Hardware version
Display its hardware version.
FCC RF EXPOSURE INFORMATION:
WARNING!! Read this information before using your phone
In August 1986 the Federal Communications Commission (FCC) of the United States with its
action in Report and Outer FCC 96-326 adopted an updated safety standard for human exposure to
radio frequency (RF) electromagnetic energy emitted by FCC regulated transmitters. Those
guidelines are consistent with the safety standard previously set by both U.S. and international
standards bodies. The design of this phone complies with the FCC guidelines and these
international standards. Use only the supplied or an approved antenna. Unauthorized antennas
modifications, or attachments could impair call quality, damage the phone, or result in violation of
FCC regulations. Do not use the phone with a damaged antenna. If a damaged antenna comes into
contact with the skin, a minor burn may result. Please contact your local dealer for replacement
antenna.
27
BODY-WORN OPERATION:
This device was tested for typical body-worn operations with the back of the phone kept 0.5cm
from the body. To comply with FCC RF exposure requirements, a minimum separation distance of
0.5cm must be maintained between the user's body and the back of the phone, including the
antenna, whether extended or retracted. Third-party belt-clips, holsters and similar accessories
containing metallic components shall not be used. Body-worn accessories
that cannot maintain 0.5cm separation distance between the user’s body and the back of the phone,
and have not been tested for typical body-worn operations may not comply with FCC RF exposure
limits and should be avoided.
For more information about RF exposure, please visit the FCC website at www.fcc.gov
Your wireless handheld portable telephone is a low power radio transmitter and receiver. When it
is ON, it receives and also sends out radio frequency (RF) signals. In August, 1996, the Federal
Communications Commissions (FCC) adopted RF exposure guidelines with safety levels for
hand-held wireless phones. Those guidelines are consistent with the safety standards previously set
by both U.S. and international standards bodies:
<ANSIC95.1> (1992) / <NCRP Report 86> (1986) / <ICIMIRP> (1996)
Those standards were based on comprehensive and periodic evaluations of the relevant scientific
literature. For example, over 120 scientists, engineers, and physicians from universities,
government health agencies, and industry reviewed the available body of research to develop the
ANSI Standard (C95.1). Nevertheless, we recommend that you use a hands-free kit with your
phone (such as an earpiece or headset) to avoid potential exposure to RF energy. The design of
your phone complies with the FCC guidelines (and those standards).
Use only the supplied or an approved replacement antenna. Unauthorized antennas, modifications,
or attachments could damage the phone and may violate FCC regulations.
NORMAL POSITION:
Hold the phone as you would any other telephone with the antenna pointed up and over your
shoulder.
TIPS ON EFFICIENT OPERATION:
For your phone to operate most efficiently:
• Extend your antenna fully.
• Do not touch the antenna unnecessarily when the phone is in use. Contact with the antenna
affects call quality and may cause the phone to operate at a higher power level than otherwise
needed.
RF Exposure Information:
FCC RF Exposure requirements: The highest SAR value reported under this standard during
product certification for use next to the body with the minimum separation distance of 0.5cm is
0.706W/kg; next to the head is 0.857W/kg. This transmitter must not be collocated or operating in
28
conjunction with any other antenna or transmitter.
This device complies with part 15 of the FCC rules. Operation is subject to the following two
conditions:
(1) this device may not cause harmful interference, and
(2) this device must accept any interference received, including interference that may cause
undesired operation.
NOTE: The manufacturer is not responsible for any radio or TV interference caused by
unauthorized modifications to this equipment. Such modifications could void the user’s authority
to operate the equipment.
NOTE: This equipment has been tested and found to comply with the limits for a Class B digital
device, pursuant to part 15 of the FCC Rules. These limits are designed to provide reasonable
protection against harmful interference in a residential installation. This equipment generates uses
and can radiate radio frequency energy and, if not installed and used in accordance with the
instructions, may cause harmful interference to radio communications. However, there is no
guarantee that interference will not occur in a particular installation. If this equipment does cause
harmful interference to radio or television reception, which can be determined by turning the
equipment off and on, the user is encouraged to try to correct the interference by one or more of
the following measures:
- Reorient or relocate the receiving antenna.
- Increase the separation between the equipment and receiver.
-Connect the equipment into an outlet on a circuit different from that to which the receiver is
connected.
-Consult the dealer or an experienced radio/TV technician for help
Do not use the device with the environment which below minimum -10℃ or over maximum
50℃, the device may not work.
Changes or modifications to this unit not expressly approved by the party responsible for
compliance could void the user’s authority to operate the equipment.