Chicony Electronics Co KG-1128 Wireless Keyboard User Manual UserMan E8HKG 1128
Chicony Electronics Co Ltd Wireless Keyboard UserMan E8HKG 1128
UserMan_E8HKG-1128
English
Wireless Keyboard + Mouse Kits
Getting Started
Thank you for choosing this 2.4G Wireless Keyboard and Mouse Kit. It operates with digital radio technology to ensure unhindered communication
among the keyboard, the mouse and your computer without a cable connection.
The transmission and reception of the keyboard and mouse are free from angle restrictions.
Preparing Keyboard, Mouse and Receiver
Before working with your new keyboard and mouse, please look at "Hardware Installation", and take a few steps for a one-time preparation.
Hardware Installation
Optimal usage environment
• Placethereceiveratleast20cmfromotherelectricaldevices(e.g.monitor)toachieveoptimumperformance.
• Thedistanceamongthekeyboard,mouseandreceivershouldnotexceed6Mlongindistance.
• Donotplacethereceiveronanymetalsurfaces.
• Donotmoveopticalmouseonthefollowingsurfaces- Glassoranytransparentmaterials
Darksurface
Mirroredorreflectivesurface
Mouse pad with too many colors
Rough surface
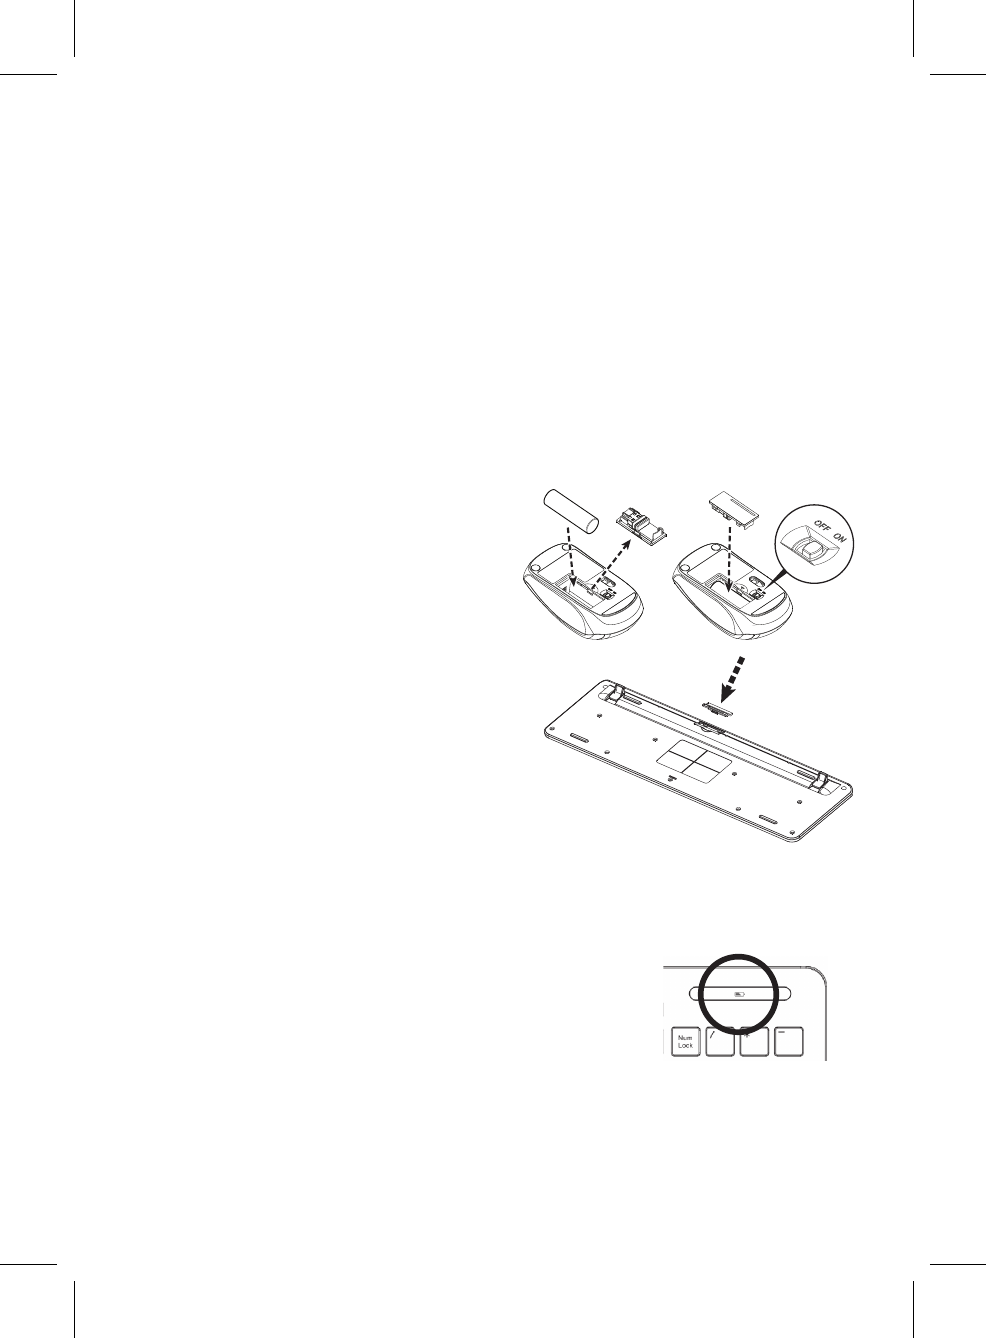
Set up the mouse
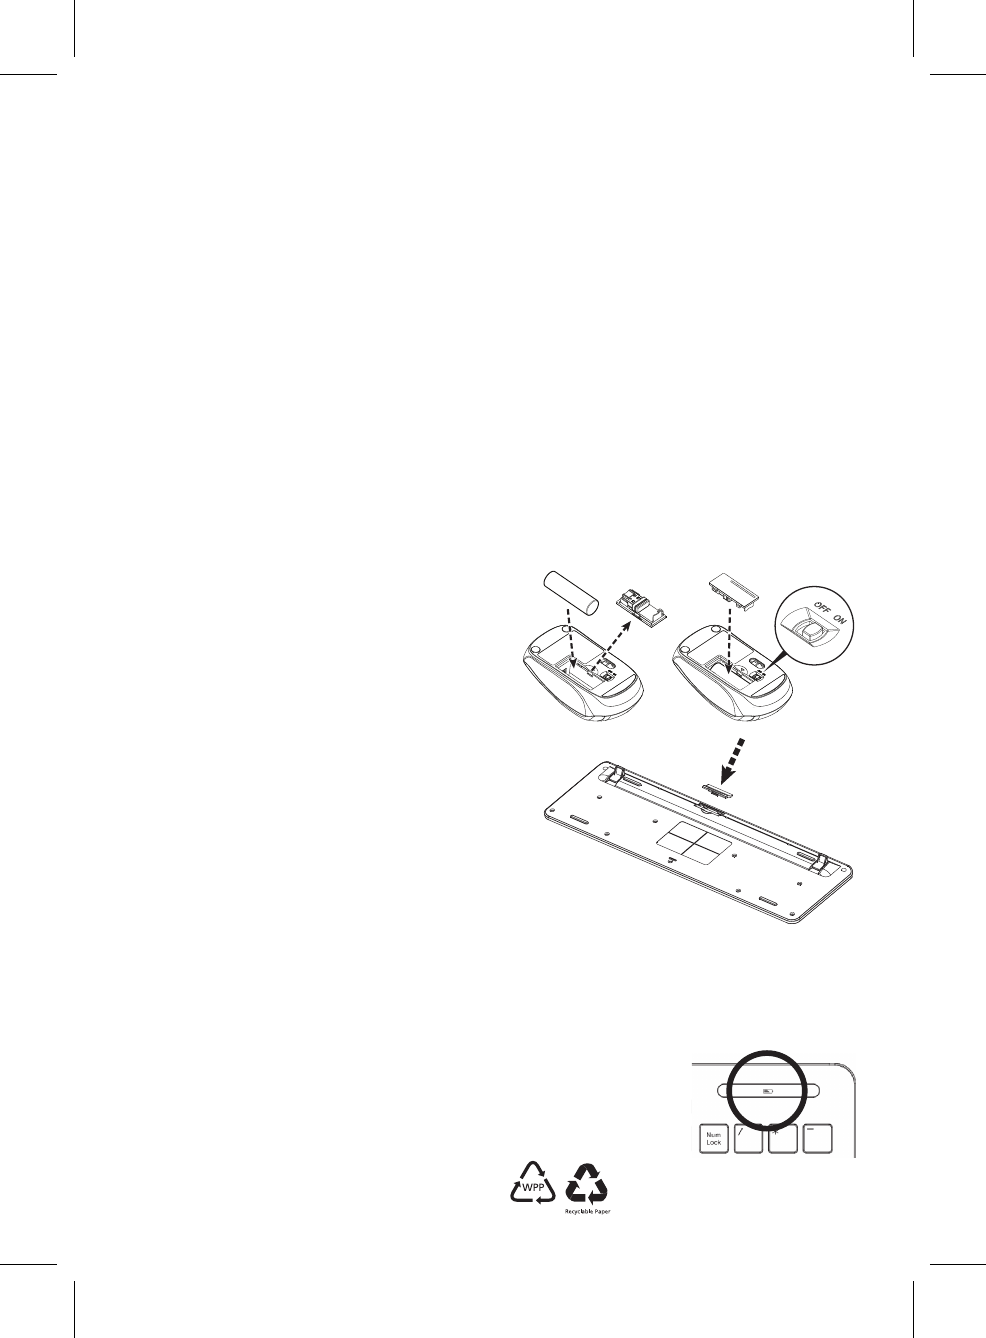
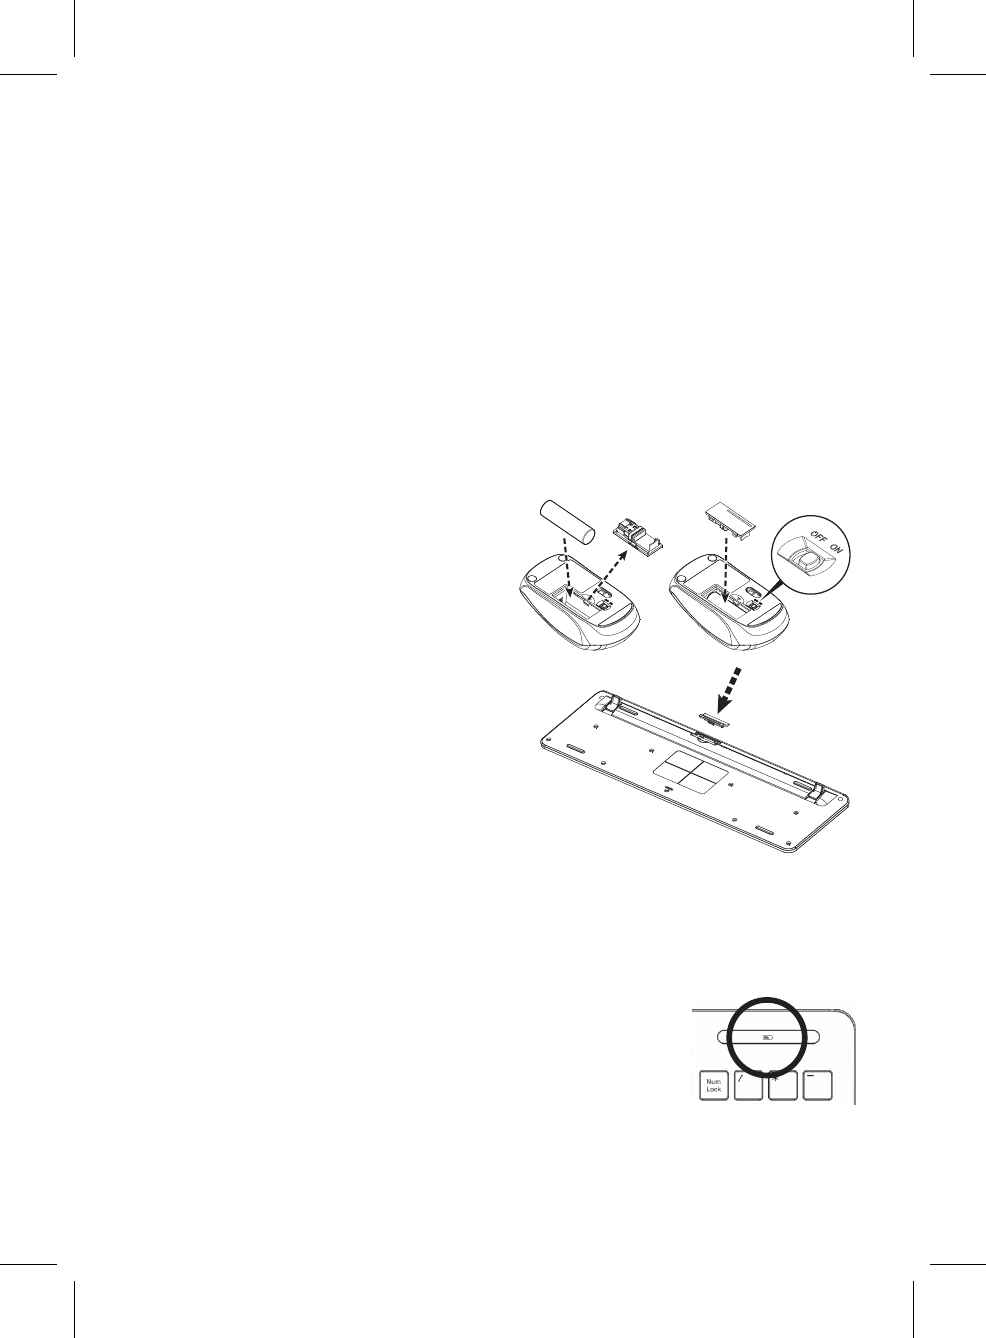
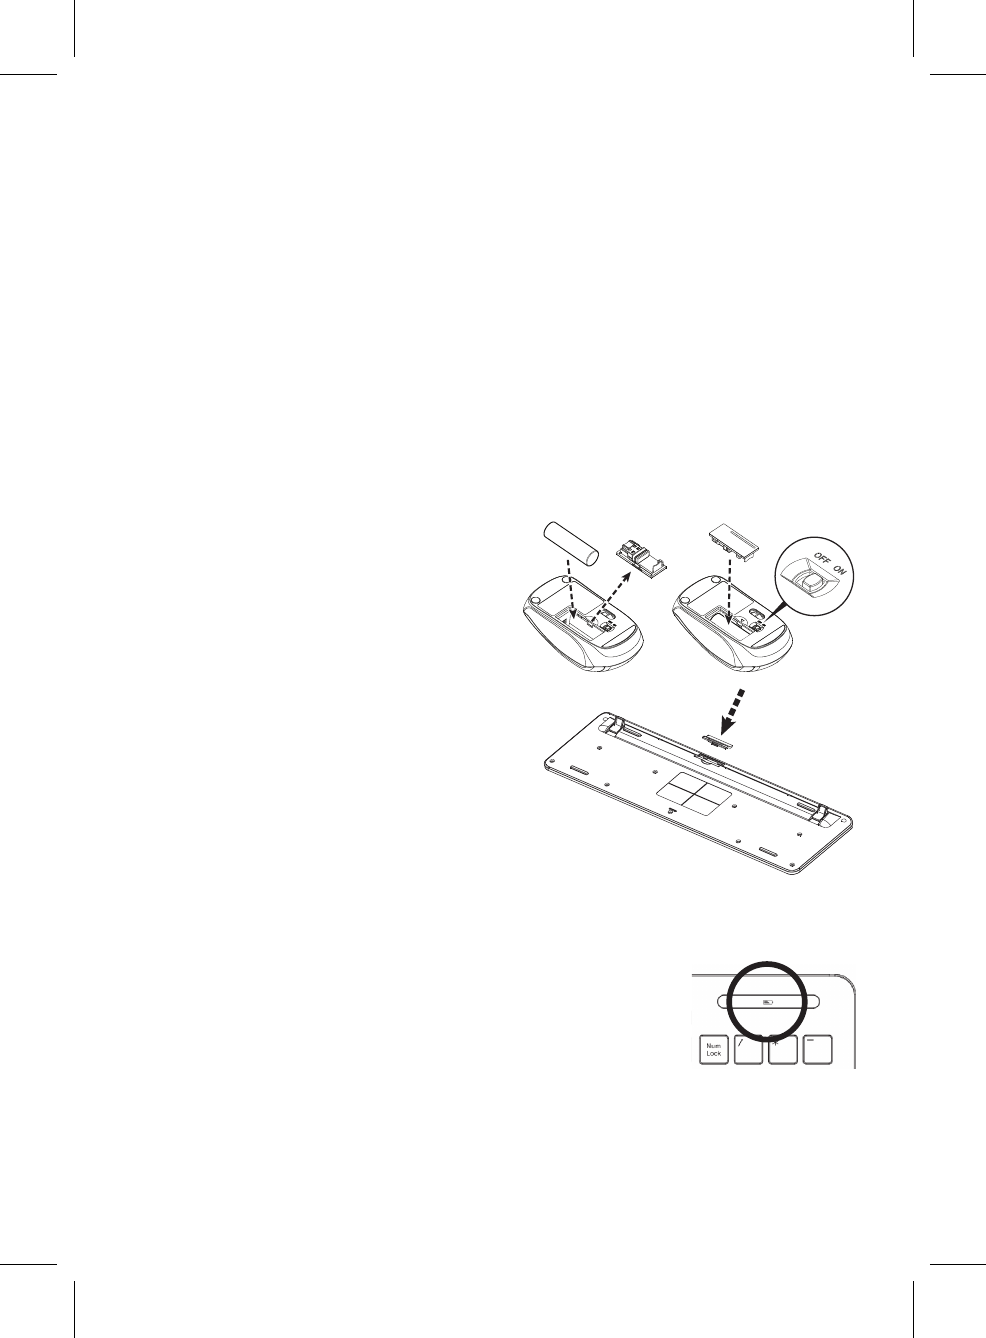
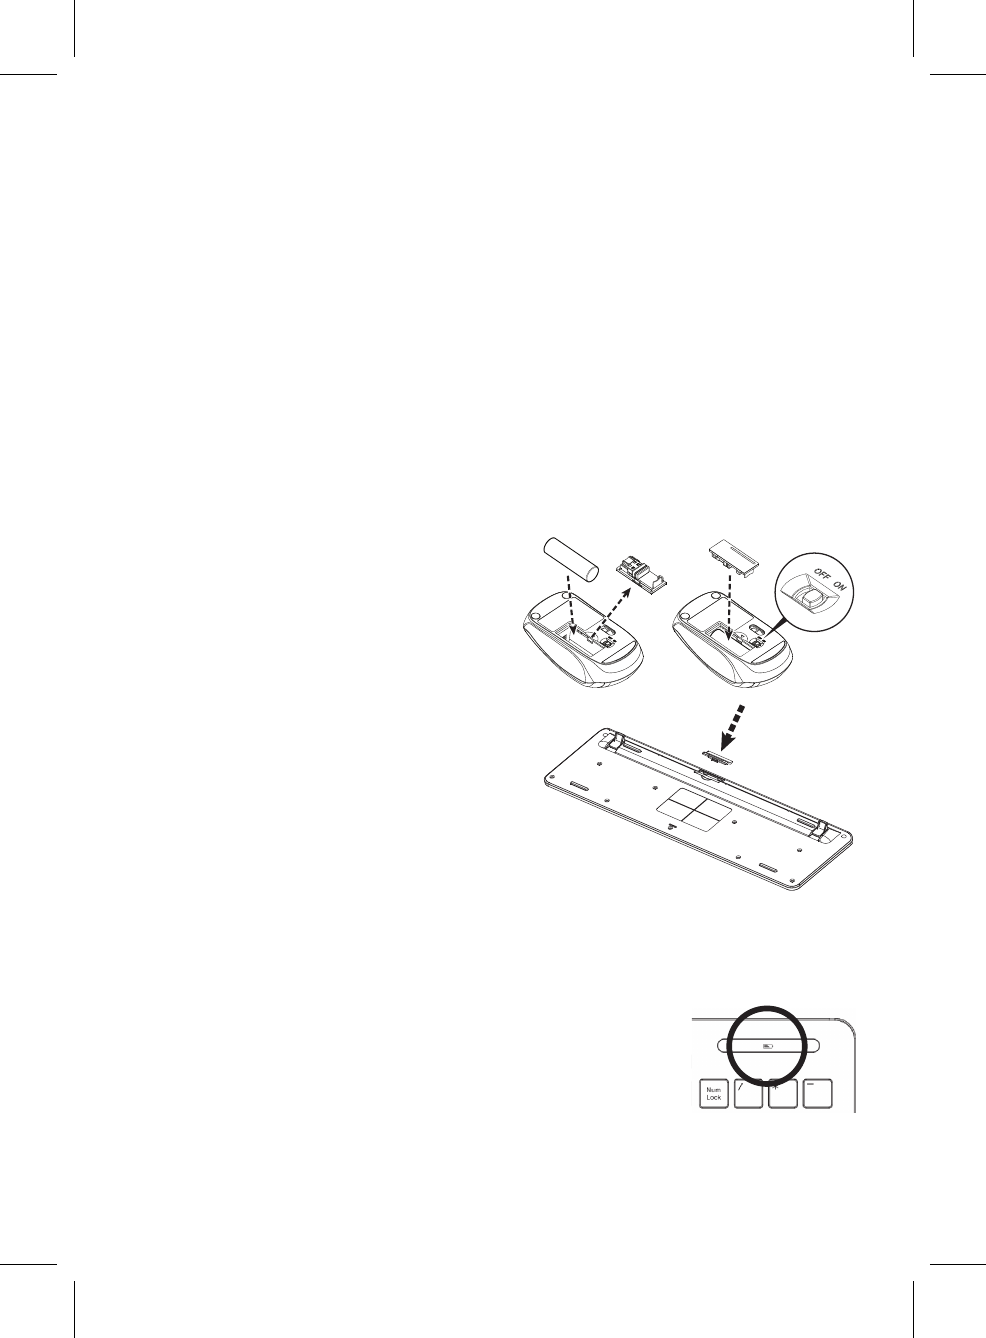
Step 1: Take out the USB receiver
• Openthebatterycompartmentcoveratthebottomofthemouse;TakeouttheUSBreceiver(1)underthebatterycover.
Step 2: Insert the battery into the mouse
The mouse requires one alkaline AA battery.
• Openthebatterycompartmentcoveratthebottomofthemouse.
• PushthebatterypullerinandtheninsertoneAAbattery(2)intothe
battery compartment.
• Replacethebatterycompartmentcover.
Step 3: Connect the USB receiver
• PlugtheUSBreceiverdongleintoaUSBportonyourPC.
• Thesystemwilltakearound10sectodetectyourkeyboardandmouse
automatically.
Step 4: Turn on the mouse
• Ensuretheswitch(3)atthebottomofthemouseis“ON”
Setting up the keyboard
Insert the battery.
• Removethebatterycompartmentcover(4)atthebottomofthekeyboardby
pushing it in the direction of the arrow.
• InserttwoAAAbatteries.
• Placebackthebatterycompartmentcover(4).
CAUTION:Riskofexplosionifbatteryisreplacedbyanincorrecttype.Disposeof
used batteries according to instructions. Refer to "Important Battery Information"
for disposal instructions.
Working with Keyboard and Mouse
The following sections contain information on using the keyboard and the mouse.
Mouse
In addition to two buttons, the mouse also has a wheel that can be used as followings:
• Asa3rdbutton:Bypressingonthewheel.
• Forscrolling,e.g.inreadingdocumentoronviewingInternetpages:Scrollthewheelforwardorbackward.
Keyboard
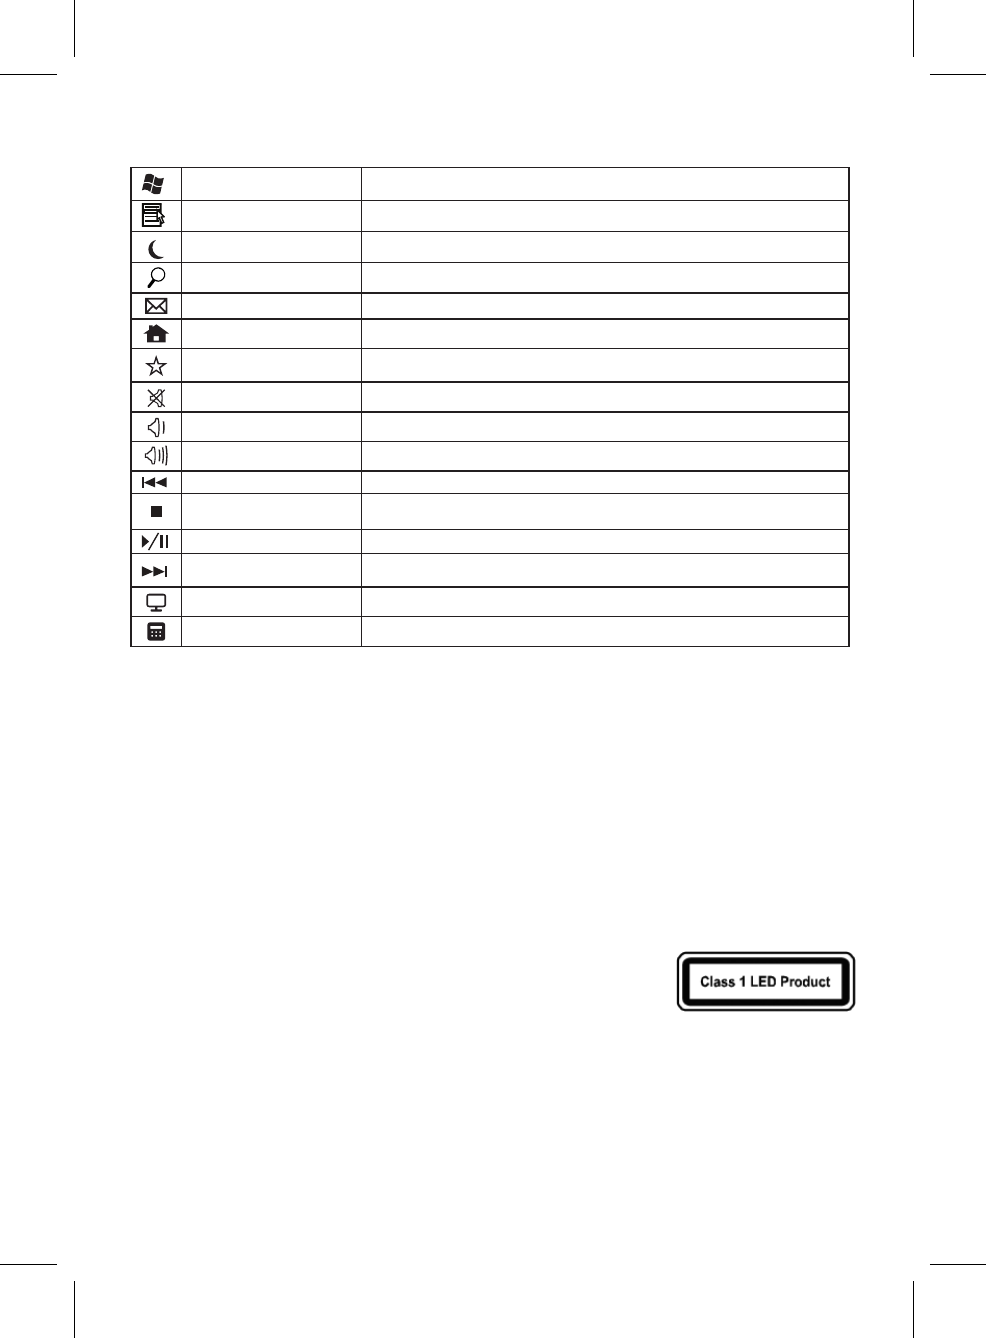
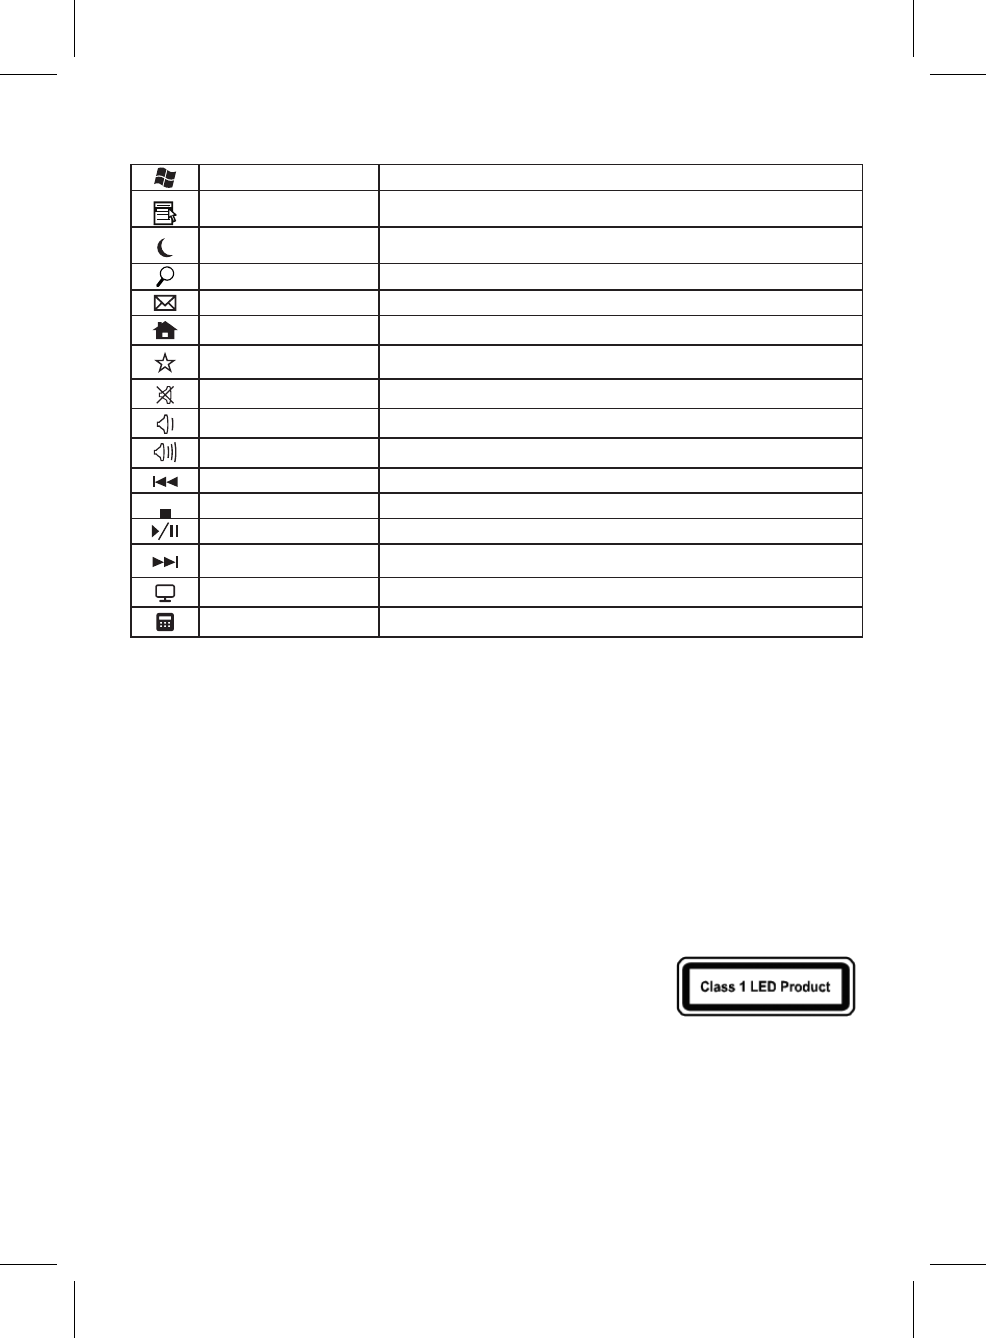
• Re-installbatteryindicator
Oneamber-coloredLEDonupper-rightedgeofkeyboardwillkeeplitupfor5secondswhenyoure-install a
new battery to the keyboard.
• Lowbatterywarning
Amber-coloredLEDonupper-rightedgeofkeyboardwillkeepflashingwhenitoperatesinlowpower.
*ST.12300.040*
ST.12300.040
1
23
4
Powerindicator
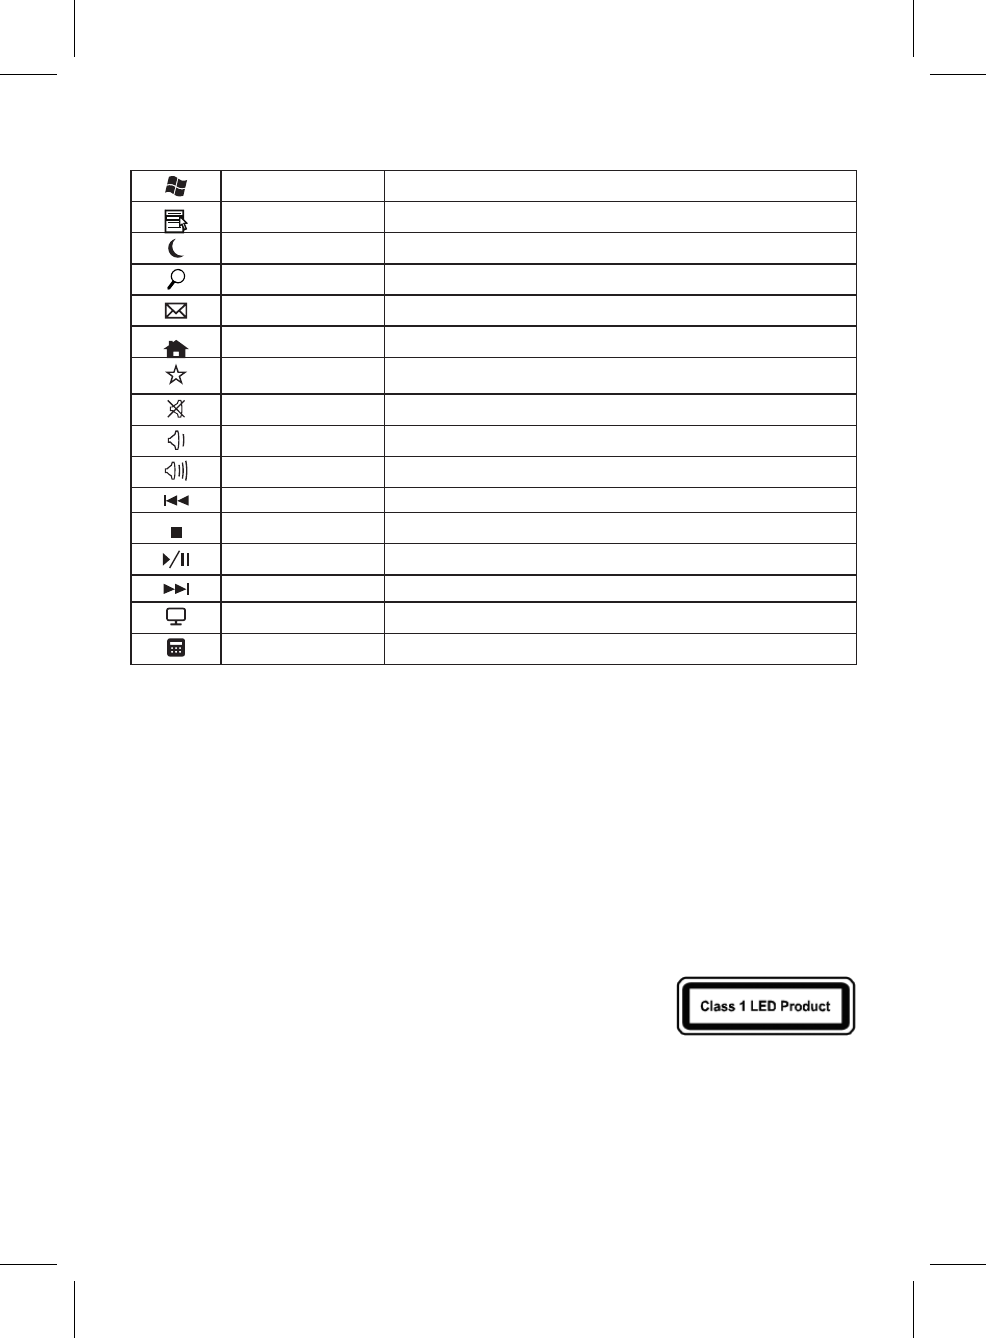
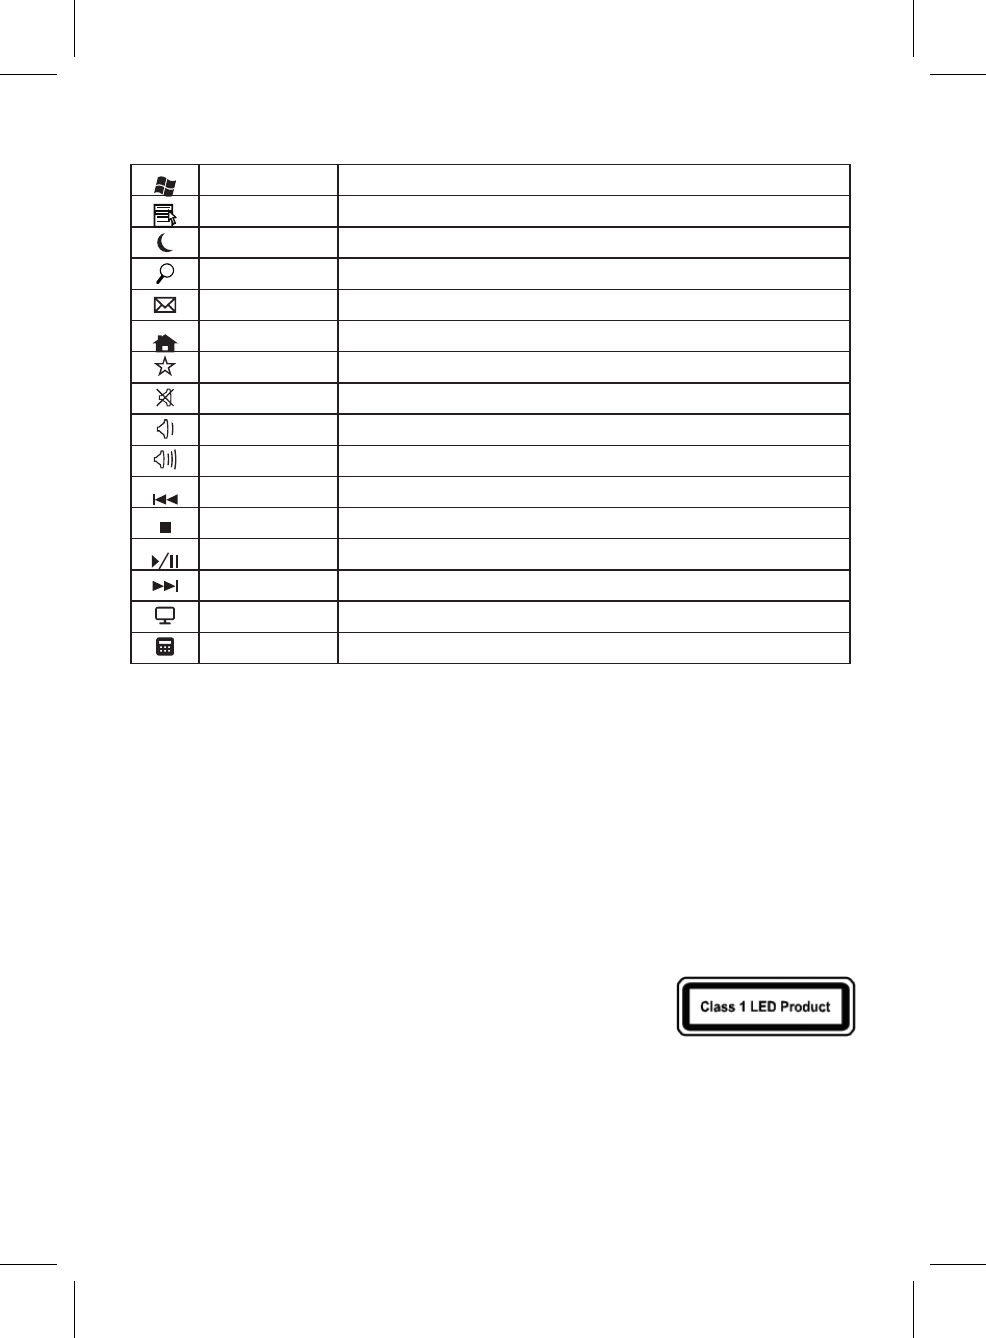
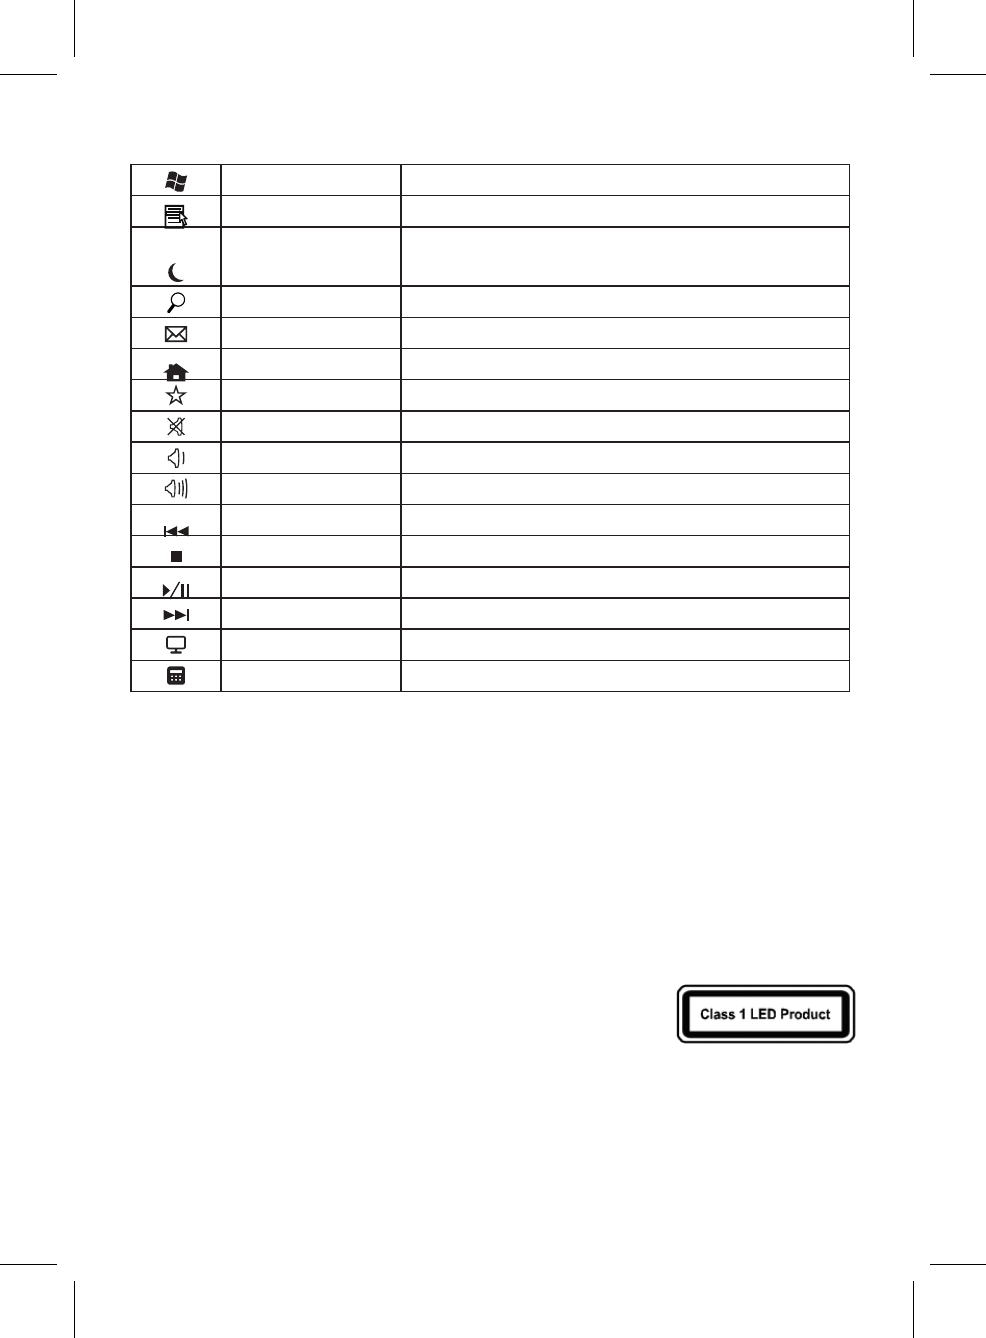
• Thefollowingdescriptionofkeysappliesfortheoperatingsystemsthatsupportthesefunctions:
(e.g.Windows2000/XP/Vista/Windows7)
Vista Key PressVistakeytoopenStartMenu.
Application Key PressingtheApplicationkeyisthesameasclickingtherightmousekeytoopenthecurrent
function menu.
Sleep (Fn+F1) DependingonthesettingsintheBIOSsetuporoperatingsystem,thecomputerswitchesto
standbymode(notunderWindowsNT)bypressingthiskey.
Search (Fn+F2) ActivatethedefaultInternet/filesearchfunction.
E-mail (Fn+F3) Usethiskeytostartthestandarde-mailforyoursystem.
Internet (Fn+F4) You can start the standard browser for your system with this key.
My favorite (Fn+F5) Youcanstartyourfavoritewebsitewiththiskey.
Mute (Fn+F6) Pressthiskeytomute/unmutetheaudio.
Volume Down (Fn+F7) Pressthiskeytodecreasethevolume.
Volume Up (Fn+F8) Pressthiskeytoincreasethevolume.
Previous Track (Fn+F9) Multimediakeytoskiptotheprevioustrackintheactiveplayer.
Stop (Fn+F10) Multimediakeytostopthetrackorvideointheactiveplayer.
Play/Pause (Fn+F11) Multimediakeytoplayorpausethetrackorvideointheactiveplayer.
Next Track( Fn+F12) Multimediakeytoskiptothenexttrackintheactiveplayer.
My Computer OpenMyComputerfolder.
Calculator OpentheCalculatorprogram.
FEDERAL COMMUNICATIONS COMMISSION (FCC) STATEMENT
ThisequipmenthasbeentestedandfoundtocomplywiththelimitsforaClassBdigitaldevice,pursuanttoPart15ofFCCrules.Theselimits
aredesignedtoprovidereasonableprotectionagainstharmfulinterferenceinaresidentialinstallation.Thisequipmentgenerates,usesand
can radiate radio frequency energy and, if not installed and used in accordance with the instructions, may cause harmful interference to radio
communications.However,thereisnoguaranteethatinterferencewillnotoccurinaparticularinstallation.Ifthisequipmentdoescauseharmful
interferencetoradioortelevisionreception,whichcanbedeterminedbyturningtheequipmentoffandon,theuserisencouragedtotryto
correct the interference by one or more of the following measures:
• Reorientorrelocatethereceivingantenna.
• Increasetheseparationbetweentheequipmentandreceiver.
• Connecttheequipmentintoanoutletonacircuitdifferentfromthattowhichthereceiverisconnected.
• Consultthedealeroranexperiencedradio/TVtechnicianforhelp.
Thisdevicecomplieswithpart15ofFCCrules.Operationissubjecttothefollowingtwoconditions:(1)Thisdevicemaynotcauseharmful
interference,and(2)Thisdevicemustacceptanyinterferencereceived,includinginterferencethatmaycauseundesiredoperation.
WARNING:
UseonlyshieldedcablestoconnectI/Odevicestothisequipment.Youarecautionedthatchangesormodificationsnotexpresslyapprovedbythe
partyresponsibleforcompliancecouldvoidyourauthoritytooperatetheequipment.
CAUTION:AVOIDPROLONGEDUSEOFTHEKEYBOARDWITHOUTBREAKS.
Takeregularbreaksandkeepagoodposture.Consultyourphysicianpromptlyifyounoticeanylossofmotionorpaininyourwristwhenusing
the keyboard.
INFORMATION FOR OPTICAL POINTING DEVICES ONLY:
ThisproducthasbeentestedtocomplywithInternationalStandardIEC60825-1:(1993),incld.Amd.2(2001).
ThisproductuserLEDsthatareinherentlyClass1.
IMPORTANT BATTERY INFORMATION
• Keepbatteriesoutofreachofchildren.
• Insertthebatteriesintheproperdirectionasindicatedbythepositive(+)andnegative(-)markingsinthebatterycompartment.
• Donotmixoldandnewbatteriesorbatteriesofdifferenttypes(forexample,carbonandalkalinebatteries).
• Alwaysremoveold,weak,orworn-outbatteriespromptlyandrecycleorproperlydisposeoftheminaccordancewithlocalandnational
disposal regulations.
• Ifabatteryleaks,removeallbatteriesandrecycleordisposeoftheminaccordancewiththebatterymanufacturer'sinstructionsandlocal
and national disposal regulations. Before inserting new batteries, thoroughly clean the compartment with a damp paper towel, or follow the
batterymanufacturer'srecommendationsforcleanup.Iffluidfromthebatterycomesintocontactwithskinorclothes,flushskinwithwater
immediately.
• Removethebatteriesifyourdeviceistobestoredforanextendedperiodoftimewithoutbeingused.
PRODUCT DISPOSAL INFORMATION
DisposeofthisproductinaccordancewithLocalandNationalDisposalRegulations.
Français
Ensembles clavier et souris sans filr
Pour commencer
Nousvousremercionsd’avoirchoisil’ensembleclavieretsourissansfil2,4G.Ilfonctionneaveclatechnologieradionumériquepourassurerlalibre
communicationentreleclavier,lasourisetvotreordinateursansconnexiondecâble.
Latransmissionetlaréceptionduclavieretdelasourissontexemptesderestrictionsd’angle.
Préparer le clavier, la souris et le récepteur
Avantdetravailleravecvotrenouveauclavieretlasouris,veillezconsulter«Installationmatérielle»,etsuivezunecourteprocédurepourla
préparation.
Installation matérielle
• Placezlerécepteuràaumoins20cmdetoutautreappareilélectrique(telqu’unmoniteur)pourobtenirlesmeilleuresperformances.
• Ladistanceentreleclavier,lasourisetlerécepteurnedoitpasdépasser6mètres.
• Neplacezlerécepteursuraucunesurfacemétallique.
• Nedéplacezpaslasourisoptiquesurlesélémentssuivants- Verreoutousmatériauxtransparents
Surfacesombre
Miroirousurfaceréfléchissante
Tapisdesourisavectropdecouleurs
Surfacerugueuse
Configurer la souris
Étape 1: Sortez le récepteur USB
• Ouvrezlecouvercleducompartimentdespilesau-dessousdelasouris;
sortezlerécepteurUSB(1)souslecouvercledelapile.
Étape 2: Insérez la pile dans la souris
La souris nécessite une pile alcaline AA.
• Ouvrezlecouvercleducompartimentdelapileau-dessousdelasouris.
• Poussezl’extracteurdepileversl’intérieurpuisinsérezunepileAA(2)
dans le compartiment de la pile.
• Réinstallezlecouvercleducompartimentdelapile.
Étape 3: Connectez le récepteur USB
• BranchezlerécepteurcléUSBàunportUSBsurvotreordinateur.
• Lesystèmeprendraenviron10secondespourtrouvervotreclavieret
souris automatiquement.
Étape 4: Allumez la souris
• Assurez-vouslecommutateur(3)au-dessousdelasourisestsur«ON».
Configurer le clavier
Insérez la pile.
• Retirezlecouvercleducompartimentdespiles(4)au-dessousduclavierenle
poussantdanslesensdelaflèche.
• InsérezdeuxpilesAAA.
• Réinstallezlecouvercleducompartimentdespiles(4).
ATTENTION : Risqued’explosionsilapileestremplacéeparuntypeincorrect.
Mettezlespilesuséesaurebutenrespectantlesinstructions.Consultezles
«Informationsimportantessurlespiles»pourdesinstructionsdemiseaurebut.
Travailler avec le clavier et la souris
Lessectionssuivantescontiennentdesinformationssurl’utilisationduclavieretlasouris.
Souris
Enplusdedeuxboutons,lasourisdisposeégalementd’unemolettequipeutêtreutiliséecommesuit:
• Entantque3ebouton:Enappuyantsurlamolette.
• Pourfairedéfiler,p.ex.lorsdelalecturededocumentsoul’affichagedepagesInternet:Faitesdéfilerlaroueavantouenarrière.
Clavier
• Indicateurderéinstallationdelapile
Unediodedecouleurorangesurlebordsupérieurdroitduclavierresteraalluméependant5secondes
lorsquevousréinstallezunenouvellepiledansleclavier.
• Avertissementdepilefaible
Unediodedecouleurorangesurlebordsupérieurdroitduclavierclignoteraencontinus’ilfonctionneavec
une alimentation basse.
1
23
4
Indicateur
• Ladescriptiondestouchesquisuits’appliquepourlessystèmesd’exploitationquiprennentenchargecesfonctions:
(p.ex.Windows2000/XP/Vista/Windows7)
Touche Vista AppuyezlatoucheVistapourouvrirlemenuDémarrer.
Touche d’application Appuyersurlatouched’applicationestlamêmechosequecliquerleboutondroitdelasouris
pourouvrirlemenudefonctionactuel.
Veille (Fn+F1) SelonlesparamètresdelaconfigurationduBIOSoudusystèmed’exploitation,lesystème
passeenmodeveille(passousWindowsNT)enappuyantcettetouche.
Recherche (Fn+F2) Activezlafonctionderecherchedefichiers/Internetpardéfaut
Courriel (Fn+F3) Utilisezcettetouchepourdémarrerleprogrammedecourrielstandarddevotresystème
Internet (Fn+F4) Vouspouvezdémarrerlenavigateurstandardpourvotresystèmeaveccettetouche.
Mon favori (Fn+F5) VouspouvezdémarrervotresiteWebfavoriaveccettetouche.
Muet (Fn+F6) Appuyezsurcettetouchepourcouper/activerleson.
Volume - (Fn+F7) Appuyezsurcettetouchepourdiminuerlevolume.
Volume + (Fn+F8) Appuyezsurcettetouchepouraugmenterlevolume.
Piste précédente (Fn+F9) Touchemultimédiapourpasseràlapisteprécédentedanslelecteuractif.
Arrêter (Fn+F10) Touchemultimédiapourarrêterlapisteouvidéodanslelecteuractif.
Lecture/Pause (Fn+F11) Touchemultimédiapourlalectureoulapausedelapisteouvidéodanslelecteuractif.
Piste suivante (Fn+F12) Touchemultimédiapourpasseràlapistesuivantedanslelecteuractif.
Poste de travail OuvrezledossierPostedetravail.
Calculatrice OuvrezleprogrammeCalculatrice.
DÉCLARATION DE LA FEDERAL COMMUNICATIONS COMMISSION (FCC)
CetappareilaététestéetreconnuconformeauxnormesapplicablesaumatérielinformatiquedeClasseB,envertudel’article15des
RéglementationsdelaFCC.Cesnormesvisentàfournirauxinstallationsrésidantesuneprotectionraisonnablecontrelesinterférences.Cetappareil
génère,utiliseetpeutdiffuserdessignauxradioélectriques.Enoutre,s’iln’estpasinstalléetemployéconformémentauxinstructions,ilpeut
provoquerdesinterférencesnuisiblesauxcommunicationsradio.Quoiqu’ilensoit,onnepeutpasgarantirquedesinterférencesneseproduiront
pasdanscertainesinstallations.Sil’appareilestàl’originedenuisancesvis-à-visdelaréceptiondelaradiooudelatélévision,cequel’onpeut
déterminerenl’allumantpuisenl’éteignant,ilestrecommandéàl’utilisateurdeprendrel’unedesmesuressuivantespourtenterderemédierà
cesinterférences:
• Réorientezouchangezl’antenneréceptricedeplace.
• Éloignezl’appareildurécepteur.
• Branchezl’appareilàunepriseappartenantàuncircuitdifférentdeceluidurécepteur.
• Consultezlefournisseurouuntechnicienradiotélévisionexpérimenté.
Cetappareilestconformeàl’article15desréglementationsdelaFCC.Lefonctionnementestsubordonnéauxdeuxconditionssuivantes:(1)cet
appareilnedoitpasprovoquerd’interférencesnuisibles,et(2)cetappareildoitacceptertouteinterférencereçue,ycomprisdesinterférencesqui
peuventprovoquerunfonctionnementnondésiré.
AVERTISSEMENT:
UtilisezuniquementdescâblesblindéspourconnecterdespériphériquesE/Sàcetappareil.Vousêtesavertiqueleschangementsoumodifications
nonexpressémentapprouvésparlapartieresponsabledelaconformitépourraitannulervotreautorisationd’utiliserl’appareil.
ATTENTION : ÉVITEZL’UTILISATIONPROLONGÉEDUCLAVIERSANSCOUPURES.
Faitesdespausesrégulièresetdemaintenezunebonneposture.Consultezvotremédecinrapidementsivousremarquezunepertedemouvement
oudeladouleurdanslepoignetlorsdel’utilisationduclavier.
INFORMATION POUR LES DISPOSITIFS DE POINTAGE OPTIQUE SEULEMENT:
CeproduitaététestépourseconformeràlanormeIEC60825-1:(1993),ycomp.Amd.2(2001).
Ceproduitutilisedesdiodesquisont,parnature,declasse1.
INFORMATIONS IMPORTANTES SUR LES PILES
• Gardezlespileshorsdeportéedesenfants.
• Insérezlespilesdanslabonnedirection,commeindiquéparlesmarques(+)positifet(-)négatifdanslecompartimentdespiles.
• Nemélangezpaslesanciennesetlesnouvellespilesoudespilesdetypesdifférents(parexemple,lespilesalcalinesouaucarbone).
• Enleveztoujourslespilesvielles,faiblesouuséesrapidementetrecyclez-lesouéliminez-lesconformémentauxréglementationslocaleset
nationalesd’élimination.
• Siunepilefuit,retireztouteslespilesetrecyclez-lesouéliminez-lesconformémentauxinstructionsdufabricantdespilesouaux
réglementationslocalesetnationalesd’élimination.Avantd’insérerdenouvellespiles,nettoyezsoigneusementlecompartimentavecune
serviettedepapierhumide,ousuivezlesrecommandationsdufabricantdespilespourlenettoyage.Siduliquidedelapileestencontactavec
lapeauoulesvêtements,rincerlapeauavecdel’eauimmédiatement.
• Retirezlespilessivotreappareildoitêtrestocképendantunelonguepériodedetempssansêtreutilisé.
INFORMATIONS SUR L’ÉLIMINATION DU PRODUIT
Éliminezceproduitconformémentauxréglementationslocalesetnationalesd’élimination.Mise en
Español
Kits de Ratón + Teclado inalámbricos
Introducción
Graciasporelegirestekitderatónytecladoinalámbrico2,4G.Funcionacontecnologíaderadiodigitalparaasegurarunacomunicaciónsin
obstáculosentreelteclado,elratónysucomputadorasinunaconexióndecable.
Latransmisiónyrecepcióndeltecladoyelratónnotienenrestriccionesdeángulo.
Preparación del teclado, el ratón y el receptor
Antesdetrabajarconsunuevotecladoyratón,consulte“Instalacióndelhardware”,ysigaunospasosparaunapreparaciónúnica.
Instalación del hardware
• Paraunmejorrendimiento,coloqueelreceptoralmenosa20cmdedistanciadeotrosdispositivoseléctricos(comoelmonitor).
• Ladistanciaentreelteclado,elratónyelreceptornodebeexcederlos6metros.
• Nocoloqueelreceptorsobresuperficiesmetálicas.
• Nomuevaelratónópticoenlassiguientessuperficies– Vidrioocualquierotromaterialtransparente
Superficiesoscuras
Superficiesespejadasoreflectantes
Almohadilla para ratón con demasiados colores
Superficiesásperas
Instalación del ratón
Paso 1: Retire el receptor de USB
• Abralatapadelcompartimientodelabateríaenlaparteinferiordelratón;RetireelreceptordeUSB(1)queestádebajodelatapadelabatería.
Paso 2: Inserte la batería en el ratón
ElratónrequiereunabateríaAAalcalina.
• Abralatapadelcompartimientodelasbateríasenlaparteinferiordel
ratón.
• EmpujeeltiradordelabateríayluegoinserteunabateríaAA(2)enel
compartimientodelabatería.
• Vuelvaacolocarlatapadelcompartimientodelabaterías.
Paso 3: Conecte el receptor USB
• EnchufeeldispositivoreceptorUSBaunpuertoUSBensuPC.
• Elsistematardaráunos10segundosparadetectareltecladoyelratón
automáticamente.
Paso 4: Encienda el ratón
• Asegúresedequeelinterruptor(3)enlaparteinferiordelratónesté
“ENCENDIDO”
Instalación del teclado
Inserte la batería.
• Retirelatapadelcompartimientodelasbaterías(4)enlaparteinferiordel
tecladoempujándolaenladirecciónqueindicalaflecha.
• InsertedosbateríasAAA.
• Vuelvaacolocarlatapadelcompartimientodelasbaterías(4).
PRECAUCIÓN:Elusodeunabateríaincorrectapuedeprovocarriesgodeexplosión.
Desechelasbateríasgastadasdeacuerdoalasinstrucciones.Paraobtener
instruccionesparaeldesechodelasbaterías,consultelasección“Información
importantesobrelabatería”.
Trabajar con teclado y ratón
Lasseccionesacontinuacióncontieneninformaciónsobreelusodeltecladoyelratón.
Ratón
Ademásdedosbotones,elratóntambiéntieneunaruedaquesepuedeutilizarcomoseindicaacontinuación:
• Comoun3erabotón:Presionandolarueda.
• Paradesplazarse,porejemplo,alleerundocumentooverpáginasdeInternet:Deslicelaruedahacia
adelante y hacia atrás.
Teclado
• Vuelvaainstalarelindicadordelabatería
UnLEDcolorámbarenelbordesuperiorderechodeltecladopermaneceráencendidodurante5segundosal
volverainstalarunanuevabateríaenelteclado.
• Advertenciadebateríabaja
UnLEDcolorámbarenelbordesuperiorderechodeltecladodestellarácuandofuncioneconbajaenergía.
1
23
4
Indicador
• Lasiguientedescripcióndeteclasseaplicaalossistemasoperativosqueadmitenestasfunciones:
(Porejemplo,Windows2000/XP/Vista/Windows7)
TecladeVista PresionelatecladeVistaparaabrirelMenúdeInicio
Tecla de Aplicación PresionarlatecladeAplicacióneslomismoquehacerclicconelbotónderechodelratón
paraabriralmenúdelafunciónactual.
Suspender(Fn+F1) SegúnlosajustesenlaconfiguracióndelBIOSoelsistemaoperativo,lacomputadora
cambiaalmododeespera(nobajoWindowsNT)alpresionarestatecla.
Buscar(Fn+F2) ActivelafunciónpredefinidadebúsquedadeInternet/archivo.
Correoelectrónico(Fn+F3) Useestateclaparainiciarelcorreoelectrónicoestándarparasusistema.
Internet(Fn+F4) Puedeiniciarelexploradorestándarparasusistemaconestatecla.
Mifavorito(Fn+F5) PuedeiniciarsusitioWebfavoritoconestatecla.
Silenciar(Fn+F6) Presioneestateclaparasilenciar/reactivarelaudio.
Bajarvolumen(Fn+F7) Presioneestateclaparabajarelvolumen.
Subirvolumen(Fn+F8) Presioneestateclaparasubirelvolumen.
Canciónprevia(Fn+F9) Teclamultimediaparasaltaralacanciónpreviaenelreproductoractivo.
Detener(Fn+F10) Teclamultimediaparadetenerlacanciónoelvideoenelreproductoractivo.
Reproducir/Pausa(Fn+F11) Teclamultimediaparareproduciropausarlacanciónoelvideoenelreproductoractivo.
Siguientecanción(Fn+F12) Teclamultimediaparasaltaralasiguientecanciónenelreproductoractivo.
MiPC AbrelacarpetaMiPC.
Calculadora AbreelprogramaCalculadora.
DECLARACIÓN DE LA COMISIÓN FEDERAL DE COMUNICACIONES (FCC)
EsteequipohasidoprobadoysehacomprobadoquecumpleconloslímitesparaundispositivodigitaldeClaseB,conformealaParte15delas
reglamentacionesdelaFCC.Estoslímitesestándiseñadosparabrindarunaprotecciónrazonablecontralasinterferenciasperjudicialesenuna
instalaciónresidencial.Esteequipogenera,usaypuedeirradiarenergíaderadiofrecuencia,ysinoseinstalayusadeacuerdoalasinstrucciones,
puedecausarinterferenciasperjudicialesalascomunicacionesporradio.Sinembargo,nohaygarantíadequenoseproduciráninterferenciasen
unainstalacióndeterminada.Siesteequipointerfiereconlarecepciónderadiootelevisión,locualsepuededeterminarapagandoyencendiendo
el equipo, se recomienda al usuario intentar corregir la interferencia de las siguientes maneras:
• Reorienteocambiedelugarlaantenareceptora.
• Aumentelaseparaciónentreelequipoyelreceptor.
• Conecteelequipoauntomacorrientediferentealqueestáconectadoelreceptor.
• Consulteopidaayudaalrepresentanteoauntécnicoespecializadoenradiootelevisión.
Estedispositivocumpleconelapartado15delasreglamentacionesdelasnormasFCC.Elfuncionamientoestásujetoalassiguientescondiciones:
(1)Esteequiponopuedecausarinterferenciasperjudiciales,y(2)Estedispositivodebeaceptarcualquierinterferenciarecibida,inclusolas
interferencias que puedan causar una operación indeseada.
ADVERTENCIA:
UsesólocablesblindadosparaconectardispositivosdeEntrada/Salidaaesteequipo.Seleadviertequeloscambiosomodificacionesquenosean
aprobadosporescritoporlaparteresponsabledelcumplimientopuedeninvalidarsuautoridadparaoperarelequipo.
PRECAUCIÓN:EVITEELUSOPROLONGADODEESTETECLADOSINUNDESCANSO.
Tomedescansosregularmenteymantengaunabuenapostura.Consulteasumédicooportunamentesinotaalgunapérdidademovilidadodolor
ensumuñecaalusaresteteclado.
INFORMACIÓN ÚNICAMENTE PARA DISPOSITIVOS SEÑALADORES ÓPTICOS:
EsteproductohasidoprobadoycumpleconelEstándarInternacionalIEC60825-1:(1993),incluyendola
enmienda2(2001).
EsteproductousaLEDquesoninherentementedeClase1.
INFORMACIÓN IMPORTANTE SOBRE LA BATERÍA
• Mantengalasbateríasfueradelalcancedelosniños.
• Insertelasbateríasenladirecciónadecuadacomoloindicanlasmarcasdepositivo(+)ynegativo(-)delcompartimientodelabatería.
• Nomezclebateríasviejasynuevasobateríasdediferentestipos(porejemplo,bateríasdecarbonoyalcalinas).
• Siempreretirelasbateríasviejas,débilesogastadasoportunamenteyrecíclelasodeséchelasdemaneraadecuadadeacuerdoconlasNormas
de desecho locales y nacionales.
• Siunabateríatieneunafuga,retiretodaslasbateríasyrecíclelasodeséchelasdeacuerdoconlasinstruccionesdelfabricantedelabateríay
conlasNormasdedesecholocalesynacionales.Antesdeinstalarunasbateríasnuevas,limpiecuidadosamenteelcompartimientoconuna
toalladepapelhúmedaosigalasrecomendacionesdelimpiezadelfabricantedelabatería.Siellíquidoprovenientedelabateríaentraen
contactoconlapielolaropa,enjuagueconaguainmediatamentelapiel.
• Retirelasbateríassivaaguardarsudispositivoporunperíodoprolongadodetiemposinserusado.
INFORMACIÓN SOBRE EL DESECHO DEL PRODUCTO
DesecheesteproductodeacuerdoconlasNormasdedesecholocalesynacionales.
Português
Kits de mouse + teclado sem fio
Introdução
ObrigadoporescolheresseKitdemouseetecladosemfio2,4G.Elefuncionacomtecnologiaderádiodigitalparagarantircomunicaçãolivreentre
oteclado,omouseeseucomputadorsemconexãoporcabos.
Atransmissãoearecepçãodotecladoedomousesãolivresderestriçõesdeângulo.
Preparação do teclado, mouse e receptor
Antesdetrabalharcomseunovotecladoemouse,consulte“Instalaçãodohardware”esigaalgunspassospararealizarapreparaçãoumaúnica
vez.
Instalação do hardware
• Coloqueoreceptorapelomenos20cmdeoutrosdispositivoselétricos(ex.:monitor)paraalcançarodesempenhoideal.
• Adistânciaentreoteclado,omouseeoreceptornãodeveultrapassar6metros.
• Nãocoloqueoreceptorsobresuperfíciesdemetal.
• Nãomovaomouseópticonasseguintessuperfícies- Vidroouqualquermaterialtransparente
Superfícieescura
Superfíciesespelhadasourefletivas
Mouse pad com muitas cores
Superfícieirregular
Configuração do mouse
Passo 1: Retire o receptor USB
• Abraatampadocompartimentodabaterianaparteinferiordomouse;RetireoreceptorUSB(1)sobatampadabateria.
Passo 2: Insira a bateria no mouse
OmouserequerumabateriaAAalcalina.
• Abraatampadocompartimentodabaterianaparteinferiordomouse.
• PressioneoextratordebateriaedepoisinsiraumabateriaAA(2)no
compartimento da bateria.
• Recoloqueatampadocompartimentodabateria.
Passo 3: Conecte o receptor USB
• ConecteodongledoreceptorUSBemumaportaUSBdocomputador.
• Osistemalevarácercade10segundosparadetectarotecladoeomouse
automaticamente.
Passo 4: Ligue o mouse
• Certifique-sedequeointerruptor(3)naparteinferiordomouseesteja
“Ligado”
Configuração do teclado
Inserção da bateria.
• Removaatampadocompartimentodabateria(4)daparteinferiordoteclado
pressionandonadireçãodaseta.
• InsiraduasbateriasAAA..
• Coloqueatampadocompartimentodabateria(4)devolta.
CUIDADO:Háriscodeexplosãoseabateriaforsubstituídaporumtipoincorreto.
Descarteasbateriasusadasdeacordocomasinstruções.Consulte“Informações
importantessobreabateria”paraobterinstruçõesdedescarte.
Trabalho com teclado e mouse
Asseçõesaseguircontêminformaçõessobreousodotecladoedomouse.
Mouse
Alémdosdoisbotões,omousetambémtemumarodaquepodeserusadadaseguintemaneira:
• Comoum3ºbotão:Pressionando-searoda.
• Pararolar,ex.:durantealeituradeumdocumentoouvisualizaçãodepáginasdaInternet:Girearodaparafrenteouparatrás.
Teclado
• Reinstalação do indicador da bateria
UmLEDâmbarnabordasuperiordireitadotecladopermaneceráacesopor5segundosquandovocê
reinstalarumanovabaterianoteclado.
• Advertência de bateria fraca
OLEDâmbarnabordasuperioresquerdadotecladoficarápiscandoquandoelafuncionarcompoucacarga.
1
23
4
Indicador
• Adescriçãodeteclasaseguirseaplicaaossistemasoperacionaisquesuportamessasfunções:
(ex.:Windows2000/XP/Vista/Windows7)
TeclaVista PressioneateclaVistaparaabriromenuIniciar.
Tecladeaplicativo PressionaratecladeAplicativoéomesmoqueclicarnobotãodireitodomouseparaabriromenu
defunçãoatual.
Suspensão(Fn+F1) DependendodaconfiguraçãodoBIOSoudosistemaoperacional,ocomputadormudaparaomodo
deespera(nãonoWindowsNT)pressionando-seessatecla.
Pesquisar(Fn+F2) Ativaafunçãodepesquisadearquivo/Internetpadrão.
E-mail(Fn+F3) Useessateclaparainiciaroe-mailpadrãodeseusistema.
Internet(Fn+F4) Vocêpodeiniciaronavegadorpadrãodoseusistemacomessatecla.
Meusfavoritos(Fn+F5) Vocêpodeiniciarseusitefavoritocomessatecla.
Semáudio(Fn+F6) Pressioneessateclaparaativar/desativaroáudio.
Abaixarvolume(Fn+F7) Pressioneessateclaparadiminuirovolume.
Aumentarvolume
(Fn+F8) Pressioneessateclaparaaumentarovolume.
Faixaanterior(Fn+F9) Teclamultimídiaparapularparaafaixaanteriornoreprodutorativo.
Parar(Fn+F10) Teclamultimídiaparapararafaixaouovídeonoreprodutorativo.
Reproduzir/Pausar
(Fn+F11) Teclamultimídiaparareproduziroupausarafaixaouovídeonoreprodutorativo.
Próximafaixa(Fn+F12) Teclamultimídiaparapularparaapróximafaixanoreprodutorativo.
Meu computador Abre a pasta Meu computador.
Calculadora AbreoprogramaCalculadora.
DECLARAÇÃO DA COMISSÃO FEDERAL DE COMUNICAÇÕES (FCC)
EsteequipamentofoitestadoeestáemconformidadecomoslimitesdeumdispositivodigitaldeClasseB,comoestabelecidonaParte15das
NormasdaFCC.Esteslimitesforamestabelecidosparaassegurarumaproteçãorazoávelcontrainterferênciasprejudiciaisnumainstalação
residencial.Esteequipamentogera,usaepodeirradiarenergiaderadiofrequênciaesenãoforinstaladoouutilizadoconformeasinstruções,
podecausarinterferênciaprejudicialàscomunicaçõesderádio.Noentanto,nãohágarantiasdequeainterferêncianãoocorreránumainstalação
específica.Seesteequipamentocausarinterferênciaprejudicialàrecepçãoderádiooutelevisão,oquepoderáserdeterminadoquandoo
equipamentoforligadooudesligado,vocêdeverátomarumaoumaisdasseguintesmedidasparatentarcorrigirainterferência:
• Reorientar ou reposicionar a antena receptora.
• Aumentaradistânciaentreoequipamentoeoreceptor.
• Conectaroequipamentoaumatomadadeumcircuitodiferentedaqueleaoqualoreceptorestáconectado.
• Consulteorevendedorouumtécnicoderádio/televisãoexperienteparaobterajuda.
Estedispositivoestáemconformidadecomocapítulo15dasnormasdaFCC.Ofuncionamentoestásujeitoàsduasseguintescondições:(1)
Estedispositivonãopoderácausarumainterferênciaprejudicial;e(2)Estedispositivodeveráaceitarqualquerinterferênciarecebida,inclusive
interferênciasquepossamcausarumfuncionamentoindesejado.
ADVERTÊNCIA:
UsesomentecabosblindadosparaconectardispositivosdeE/Saesteequipamento.Vocêficaadvertidodequealteraçõesemodificaçõesnão
aprovadasexpressamentepelaparteresponsávelpelaconformidadepodemanularsuaautoridadedeoperaroequipamento.
CUIDADO: EVITEOUSOPROLONGADODOTECLADOSEMINTERRUPÇÕES.
Façaintervalosregularesemantenhaumaboapostura.Consulteseumédicoimediatamenteseobservarqualquerperdademovimentooudorno
pulso ao usar o teclado.
INFORMAÇÕES APENAS PARA DISPOSITIVOS APONTADORES ÓPTICOS:
EsseprodutofoitestadoeestáemconformidadecomaNormaInternacionalIEC60825-1:(1993),incld.Amd.
2(2001).
EsseprodutousaLEDsinerentementedaClasse1.
INFORMAÇÕES IMPORTANTES SOBRE AS BATERIAS
• Mantenhaasbateriaslongedoalcancedecrianças.
• Insiraasbateriasnosentidocorretoconformeindicadopelasmarcaspositivo(+)enegativo(-)nocompartimentodabateria.
• Nãomisturebateriasvelhasenovasoubateriasdetiposdiferentes(porexemplo,bateriasdecarbonoealcalinas).
• Removasempreasbateriasvelhas,fracasoudesgastadasimediatamenteerecicle-asoudescarte-asdeformaadequadadeacordocomos
regulamentos de descarte locais e nacionais.
• Seumabateriavazar,removatodasasbateriaserecicle-asoudescarte-asdeacordocomasinstruçõesdofabricanteedosregulamentosde
descartelocaisenacionais.Antesdeinserirbateriasnovas,limpecuidadosamenteocompartimentocomumatoalhadepapelúmidaousiga
asrecomendaçõesdelimpezadofabricantedasbaterias.Seofluidodabateriaentraremcontatocomsuapeleouroupas,lavecomágua
imediatamente.
• Removaasbateriasseodispositivoprecisarserarmazenadoporumperíodoprolongadosemserusado.
INFORMAÇÕES SOBRE O DESCARTE DO PRODUTO
Descarteesseprodutodeacordocomosregulamentosdedescartelocaisenacionais.

日本語
ワイヤレス キーボード + マウス キット
はじめましょう
2.4G ワイヤレス キーボードおよびマウス キットをお買い上げいただきありがとうございます。デジタル無線技術により、キーボード、マウス、
およびコンピューターをケーブルなしで接続できます。
キーボードとマウスの通信および受信については、角度を気にする必要はありません。
キーボード、マウス、受信機の準備
新しいキーボードとマウスを使用する前に、「ハードウェアのインストール」をお読みになり、手順に従って準備をしてください。
ハードウェアのインストール
• 最高の性能を得られるように、受信装置は最低でも他の電気装置 (モニタなど) から 20cm 以上離した場所に設置してください。
• キーボード、マウス、受信装置の距離が 6m を超えないようにしてください。
• 受信装置を金属面の上に設置しないでください。
• 光学マウスを次のものの上で使用しないでください - ガラスや透明な素材
表面が暗い色のもの
鏡または反射性の面
カラフルなマウス パッド
ざらざらした面
マウスの設定
ステップ 1:USB 受信機を取り出します
• マウスの底にあるバッテリー コンパートメント カバーを外します。バッテリー カバーの下にある USB 受信機 (1) を取り出します。
ステップ 2:マウスに電池を挿入します
このマウスはアルカリ単三電池を 1 個使用します。
• マウスの底にあるバッテリー コンパートメント カバーを外します。
• 電池引き出しを押しこみ、単三電池(2)をバッテリー コンパートメン
トに挿入します。
• バッテリー コンパートメント カバーを戻します。
ステップ 3:USB 受信機を接続します
• USB 受信機のハードウェア キーを PC の USB ポートに繋ぎます。
• 約 10 秒後にキーボードとマウスが自動的に検出されます。
ステップ 4:マウスの電源を入れます
• マウスの底部にあるスイッチ (3) をオンにします。
キーボードの設定
バッテリーの挿入
• キーボードの底面にあるバッテリー コンパートメント カバー (4) を矢印の方向
に押して外します。
• 単 4 バッテリー 2 個を挿入します。
• バッテリー コンパートメント カバー (4) を元に戻します。
注意:
バッテリーは正しく挿入しなければ爆発する恐れがあります。使用済みの
バッテリーは指示にしたがって処理してください。処理の方法については、「バ
ッテリーに関する重要な情報」をお読みください。
キーボードとマウスの操作
次のセクションでは、キーボードとマウスの使い方について説明します。
マウス
このマウスには 2 個のボタンのほかに、次のような使い方ができるホイールも付いています。
• 3 番目のボタンとして:ホイールを押す
• スクロールはドキュメントを読んだり、インターネットのサイトを観賞したりするときに使用します。ホイールを前後にスクロールします。
キーボード
•
バッテリーの交換インジケータ
キーボードに新しいバッテリーを装着すると、キーボードの右上隅にあるオレンジ色の LED が 5 秒間点灯し
ます。
•
バッテリー低下の警告
バッテリーの残量が低下した状態でコンピュータを操作し続けると、キーボードの右上隅にあるオレンジ色
の LED が点滅します
1
23
4
インジケータ
• これらの機能に対応するオペレーティング システムを使用する場合は、キーについての次の説明が該当します。
(例:Windows 2000/XP/Vista/Windows 7)
Vista キー Vista キーを押すと、[スタート] メニューが開きます。
アプリケーション キー マウスを右クリックすると開くメニューと同じものが開きます。
スリープ (Fn+F1)
BIOS セットアップで行った設定やオペレーティング システムの設定によっては、こ
のキーを押すとコンピュータがスタンバイ モード (Windows NT ではない場合) に
切り替えられます
検索 (Fn+F2) デフォルトのインターネット/ファイル検索機能が有効になります。
電子メール (Fn+F3) システム標準の電子メール プログラムを起動します。
インターネット (Fn+F4) システムの標準ブラウザを開始します。
お気に入り (Fn+F5) 好きな Web サイトが開きます。
ミュート (Fn+F6) オーディオを無音/無音解除します。
ボリュームを下げる (Fn+F7) 音量を下げます。
ボリュームを上げる (Fn+F8) 音量を上げます。
前のトラック (Fn+F9) 使用中のプレーヤーで前のトラックに戻ります。
中止 (Fn+F10) 使用中のプレーヤーでトラックまたは動画を終了します。
再生/一時停止 (Fn+F11) 使用中のプレーヤーでトラックまたは動画を再生または一時停止します。
次のトラック ( Fn+F12) 使用中のプレーヤーで次のトラックに進みます。
マイ コンピュータ 「マイ コンピュータ」フォルダを開きます。
計算機 計算機プログラムを開きます。
FCC 規定
この装置は、FCC 規定の第 15 条に準じ、Class B デジタル機器の制限に従っています。この制限は住宅に設置した場合に有害な干渉が起きないよ
うにするためのものです。本装置はラジオ周波エネルギーを発生、使用し、さらに放射する可能性があり、指示にしたがってインストールおよび
使用されない場合、ラジオ通信に有害な障害を与える場合があります。しかし、いかなる特定の設置条件でも干渉が起きないことを保証するもの
ではありません。この装置によってラジオやテレビの受信に有害な干渉が発生する場合は (装置の電源をオン/オフすると分かります)、次の 1 つ
以上の方法で干渉をなくすようにしてください。
• 受信アンテナの方向を変えるか、設置場所を変える
• 装置と受信装置の距離を広げる
• この装置の受信装置とは別のコンセントに接続する
• 販売店またはラジオやテレビの専門技術者に問い合わせる
このデバイスは FCC 規定の第 15 条に準拠しています。次の 2 つの条件にしたがって操作を行うことができます。(1) このデバイスが有害な障害を
発生しないこと (2) 不具合を生じ得るような障害に対応し得ること。
警告:
この装置と I/O 機器を接続する場合は、必ずシールド付きケーブルをお使いください。この製品に規定への準拠に責任を負う者の文書による許可
なく変更や改造を加えると、この製品を使用する権利が失われます。
注意:
長時間キーボードをご使用になる場合は、休憩を取りながら作業をしてください。
定期的に休憩を入れて、正しい姿勢で操作してください。キーボードを使用していて手首を動かしにくくなったり、痛くなったりした場合は、直
ちに医者の判断を仰いでください。
光学ポインティング デバイス専用の情報:
この製品は、国際規格 IEC 60825-1:(1993) (追記 2 (2001) を含みます) に準拠することがテストにより確認さ
れています。
この製品は、本来のクラス 1 である LED を使用しています。
電池に関する重要な注意
• バッテリーはお子様の手の届かない場所に保管してください。
• バッテリーはコンパートメント内に記載される極性表示 (+) および (-) に従って、正しく挿入してください。
• 古いバッテリーと新しいバッテリーを同時に使用したり、種類の異なるバッテリー (カーボンバッテリーとアルカリバッテリーなど) を同時に
使用したりしないでください。
• バッテリーが古くなった、あるいは摩耗した場合は、直ちに新しいものと交換し、お住まい地域および国の法律に従ってリサイクルまたは処
理してください。
• バッテリー液が漏れた場合は、すべてのバッテリーを取り出して、バッテリーメーカーの指示、およびお住まい地域および国の法律に従っ
て、リサイクルまたは処理してください。新しいバッテリーを挿入する前に、コンパートメントを少し湿らせたペーパー タオルで拭くか、バ
ッテリーメーカーの推奨する方法できれいにしてください。バッテリー液が肌または服に付着した場合は、直ちに水できれいに洗い流してく
ださい。
• 装置を長期間使用する予定がない場合は、バッテリーを外してください。
製品の廃棄処理について
この製品を廃棄される場合は、お住まい地域および国の法律に基づいて、正しい方法で行ってください。
簡体中文
无线键盘 + 鼠标套装
开始使用
感谢您选用本款 2.4G 无线键盘和鼠标套装。它采用数字无线技术,确保键盘、鼠标与电脑之间的通信畅通而无需线缆连接。
键盘和鼠标的信号传输和接收不受角度限制。
准备键盘、鼠标和接收器
在使用新键盘和鼠标之前,请查阅“硬件安装”,一次性准备需几个步骤。
硬件安装
• 接收器需距离其它电子设备(如显示器)至少 20 厘米以获得理想的性能。
• 键盘、鼠标和接收器之间的距离不应超过 6 米。
• 请勿将接收器置于任何金属表面。
• 请勿在以下表面上移动光电鼠标 - 玻璃或任何透明材料
黑色表面
镜面或反射面
颜色过多的鼠标垫
粗糙表面
安装鼠标
步骤 1:取出 USB 接收器
• 打开鼠标底部的电池仓盖;从电池仓盖下取出 USB 接收器 (1)。
步骤 2:将电池插入鼠标
鼠标需安装一节碱性 AA 电池。
• 打开鼠标底部的电池仓盖。
• 推入电池拨出器,将一节 AA 电池 (2) 插入电池仓。
• 重新装上电池仓盖。
步骤 3:连接 USB 接收器
• 将 USB 接收器加密狗插入电脑的 USB 端口。
• 系统将需要约 10 秒钟的时间自动检测键盘和鼠标。
步骤 4:打开鼠标
• 确认鼠标底部的开关 (3) 处于“开”位。
安装键盘
插入电池。
• 按箭头方向推动键盘底部的电池仓盖 (4) 将其取出。
• 插入两节 AAA 电池。
• 重新装上电池仓盖 (4)。
注意:如果更换类型不正确的电池会有爆炸的危险。依照规定处理废弃电池。
参阅“重要电池信息”以获得处置说明。
使用键盘和鼠标
以下章节包含使用键盘和鼠标的信息。
鼠标
除两个按钮外,鼠标还配有滚轮进行以下操作:
• 用作第三个按钮:按下滚轮。
• 如需滚动,例如在阅读文件或观看网页时:向前或向后滚动滚轮。
键盘
• 重新安装电池指示灯
当您为键盘重新安装新电池时,键盘右上方的橘色 LED 灯将亮起 5 秒钟。
• 电量不足警告
电量不足时键盘右上方的橘色 LED 灯将保持闪烁。
1
23
4
インジケータ
无线键盘和鼠标用户指南
您的新电脑配有 2.4 GHz 的无线键盘和鼠标套装。它采用数字无线技术,确保键盘、鼠标与电脑之间的通信畅通而无
需线缆连接。
键盘和鼠标的信号传输和接收不受角度限制。
安装
• 接收器需距离其它电子设备(如显示器)至少 20 厘米以获得理想的性能。
• 键盘、鼠标和接收器之间的距离不应超过 10 米。
• 请勿将接收器置于金属表面。
• 请勿在以下表面上移动光电鼠标 - 玻璃或任何透明材料
黑色表面
镜面或反射面
颜色过多的鼠标垫
粗糙表面
安装鼠标
步骤 1:取出 USB 接收器
• 打开鼠标底部的电池仓盖。从电池仓盖下取出 USB 接收器 (1)。
步骤 2:将电池插入鼠标
鼠标需安装一节碱性 AA 电池。
• 打开鼠标底部的电池仓盖。
• 将一节 AA 电池 (2) 插入电池仓。
• 重新装上电池仓盖。
步骤 3:连接 USB 接收器
• 将 USB 接收器加密狗插入电脑的 USB 端口。
• 系统将需要约 10 秒钟的时间自动检测键盘和鼠标。
步骤 4: 打开鼠标
• 确认鼠标底部的开关 (3) 处于“on”位。
安装键盘
插入电池。
• 按箭头方向推动键盘底部的电池仓盖 (4) 将其取出。
• 插入两节 AAA 电池。
• 重新装上电池仓盖 (4)。
注意: 如果更换类型不正确的电池会有爆炸的危险。依照
规定处理废弃电池。参阅“重要电池信息”以获得
处置说明。
使用键盘和鼠标
鼠标
除两个按钮外,鼠标还配有滚轮进行以下操作:
• 用作第三个按钮:按下滚轮。
• 如需滚动,例如在阅读文件或观看 Internet 网页时:向前或向后滚动滚轮。
键盘
• 电量不足警告
电量过低时键盘右上方的橘色 LED 灯将保持闪烁。
• 以下按键的说明适用于支持这些功能的操作系统 (如:Windows 2000/XP/
Vista/Windows 7)。
简体中文
簡体中文
无线键盘 + 鼠标套装
开始使用
感谢您选用本款 2.4G 无线键盘和鼠标套装。它采用数字无线技术,确保键盘、鼠标与电脑之间的通信畅通而无需线缆连接。
键盘和鼠标的信号传输和接收不受角度限制。
准备键盘、鼠标和接收器
在使用新键盘和鼠标之前,请查阅“硬件安装”,一次性准备需几个步骤。
硬件安装
• 接收器需距离其它电子设备(如显示器)至少 20 厘米以获得理想的性能。
• 键盘、鼠标和接收器之间的距离不应超过 6 米。
• 请勿将接收器置于任何金属表面。
• 请勿在以下表面上移动光电鼠标 - 玻璃或任何透明材料
黑色表面
镜面或反射面
颜色过多的鼠标垫
粗糙表面
安装鼠标
步骤 1:取出 USB 接收器
• 打开鼠标底部的电池仓盖;从电池仓盖下取出 USB 接收器 (1)。
步骤 2:将电池插入鼠标
鼠标需安装一节碱性 AA 电池。
• 打开鼠标底部的电池仓盖。
• 推入电池拨出器,将一节 AA 电池 (2) 插入电池仓。
• 重新装上电池仓盖。
步骤 3:连接 USB 接收器
• 将 USB 接收器加密狗插入电脑的 USB 端口。
• 系统将需要约 10 秒钟的时间自动检测键盘和鼠标。
步骤 4:打开鼠标
• 确认鼠标底部的开关 (3) 处于“开”位。
安装键盘
插入电池。
• 按箭头方向推动键盘底部的电池仓盖 (4) 将其取出。
• 插入两节 AAA 电池。
• 重新装上电池仓盖 (4)。
注意:如果更换类型不正确的电池会有爆炸的危险。依照规定处理废弃电池。
参阅“重要电池信息”以获得处置说明。
使用键盘和鼠标
以下章节包含使用键盘和鼠标的信息。
鼠标
除两个按钮外,鼠标还配有滚轮进行以下操作:
• 用作第三个按钮:按下滚轮。
• 如需滚动,例如在阅读文件或观看网页时:向前或向后滚动滚轮。
键盘
• 重新安装电池指示灯
当您为键盘重新安装新电池时,键盘右上方的橘色 LED 灯将亮起 5 秒钟。
• 电量不足警告
电量不足时键盘右上方的橘色 LED 灯将保持闪烁。
• 以下按键的说明适用于支持这些功能的操作系统:
(如:Windows 2000/XP/Vista/Windows 7)
Vista 键按 Vista 键可打开“开始菜单”。
应用程序键 按应用程序键的作用与单击鼠标右键以打开当前功能菜单相同。
睡眠 (Fn+F1) 根据 BIOS 设置或操作系统中的设置,电脑可按 此键切换到待机模式
(Windows NT 中不可用)。
搜索 (Fn+F2) 激活默认的 Internet/文件搜索功能。
电子邮件 (Fn+F3) 使用此键可为系统启动标准的电子邮件程序。
Internet (Fn+F4) 使用此键可打开标准的浏览器。
我的收藏夹 (Fn+F5) 使用此键可打开收藏的网站。
静音 (Fn+F6) 按此键可对音频进行静音/取消静音。
调低音量 (Fn+F7) 按此键可调低音量。
调高音量 (Fn+F8) 按此键可调高音量。
上一曲目 (Fn+F9) 可跳转到活动播放器中上一曲目的多媒体键。
停止 (Fn+F10) 停止活动播放器中曲目或视频的多媒体键。
播放/暂停 (Fn+F11) 播放或暂停活动播放器中曲目或视频的多媒体键。
下一曲目 (Fn+F12) 可跳转到活动播放器中下一曲目的多媒体键。
我的电脑 打开“我的电脑”文件夹。
计算器 打开“计算器”程序。
美国联邦通信委员会 (FCC) 声明
该设备已经通过测试,符合 FCC 规则之第 15 部分的对 B 级数字设备的限制。所规定的这些限制是为了对住宅设施提供合理的保护,防止
对住宅设施造成有害干扰。本设备会产生、使用和发出无线电波。如果不按照指示进行安装和使用,可能会对无线通信产生有害干扰。但
是,本公司不担保在特定安装情况下不产生干扰。如果本设备对无线通信或电视接收造成有害干扰(关闭后再打开设备可以确定),建议
用户尝试采取以下一项或多项措施来排除此干扰:
• 调整天线方向或重新放置接收天线。
• 增加设备和接收器之间的间距。
• 对该设备的电源与接收器的电源使用不同的回路。
• 咨询经销商或有经验的无线通信/电视技术人员以获取帮助。
本设备符合 FCC 规则之第 15 部分。使用本设备应符合以下两个条件:(1) 本设备不会产生有害干扰;(2) 本设备可以承受所收到的任何干
扰,包括导致不正常运行的干扰。
警告:
只可使用屏蔽线缆将输入/输出设备连接到本设备。请注意,对合规责任方未明确认可的更改或改装,可能会导致您丧失操作本设备的权
利。
注意:避免长时间使用本键盘。
定时休息,保持良好的姿势。如果您注意到在使用键盘时出现任何腕部丧失活动能力或疼痛的情况,请立即咨询医生。
仅针对关光学定位设备的信息:
本产品经测试符合国际标准 IEC 60825-1: (1993), incld. Amd. 2 (2001)。
本产品内部使用 1 级 LED。
重要电池信息
• 请将电池放置在儿童够不到的地方。
• 照电池仓中标记的正 (+) 和负 (-) 极性的正确方向插入电池。
• 请勿混用新旧电池或不同类型的电池(例如,碳性和碱性电池)。
• 应始终即时取出旧的、电量不足或破损的电池,并依据当地和国家的处置法规进行回收或正确处置。
• 如果电池漏液,请取出所有电池并根据电池生产厂家的指示以及当地和国家的处置法规进行回收或处置。在插入新电池之前,请用湿纸
巾全面清洁电池仓,或依据电池生产厂家的建议进行清洁。如果电池液体接触到皮肤或衣服,请立即用水冲洗皮肤。
• 如果长时间不使用本设备,请取出电池。
产品处置信息
依据当地和国家的处置法规处置本产品。