DBTEL orporated DB-T302C Tri-Band GSM Mobile Phone User Manual Revised Manual
DBTEL Incorporated Tri-Band GSM Mobile Phone Revised Manual
Revised Manual

F66_ENUM_R1.0 (DBT302C.T01.CN.015.H01.S)
DBTEL is a registered trademark of DBTEL Incorporated.
Copyright © 2005 DBTEL Incorporated. All rights reserved.
No part of this publication may be reproduced or distributed in any form or by any means, or stored in a database or retrieval
system, without the prior written permission of the publisher.
DBTEL Incorporated reserves the right to make changes in technical and product specifications without prior notification.
Address: No.29, Tzu Chiang St, Tu-Cheng, Taipei, Taiwan.
Website: http://www.dbtel.com.tw
Warning: Use only approved accessories and battery. Do not connect to any incompatible products; otherwise, it will
invalidate the recognition or warranty applying to your mobile phone.
The font type of the legend, graphics or icons in the user manual may differ from that shown on the handset.
Technical specifications and certain features are subject to change in technology, design, software upgrade and availability.
USER MANUAL
F66

Safety Information
For your safety, please read the guidelines below carefully before you use your phone:
Exposure to Radio Frequency Signals
Max. SAR Measurement (1g) PCS1900
Head: 0.52 W/kg
Body: 0.61 W/kg,
Your wireless handheld portable telephone is a low power transmitter and recommendations for the protection of public exposure
to RF electromagnetic energy.
• International Commission on Non-Ionizing Radiation Protection (ICNIRP) 1996
• Verband Deutscher Elektringenieure (VDE) DIN- 0848
• Directives of the European Community, Directorate General V in Matters of Radio Frequency Electromagnetic Energy
• National Radiological Protection Board of the United Kingdom, GS 11, 1988
• American National Standards Institute (ANSI) IEEE. C95.1- 1992
• National Council on Radiation Protection and Measurements (NCRP). Report 86
• Department of Health and Welfare Canada. Safety Code 6
These standards are based on extensive scientific review. For example, over 120 scientists, engineers and physicians from
universities, government health agencies and industry reviewed the available body of research to develop the updated ANSI
Standard.
The design of your phone complies with these standards when used normally.
This device complies with part 15 of the FCC Rules. Operation is subject to the condition that this device does not cause harmful
interference
Notice
To reduce exposure to electromagnetic radiation, use the handset properly.
SAR Radiation Limit: 2.0 W/Kg
Tested SAR Rating: 0.512 W/Kg
Safety Information
DBTEL handset is the first Specific Absorption Rate (SAR) compliance in Taiwan.
Compliance with International standard
SAR Radiation Limit: 2.0 W/Kg
Tested SAR Rating: 0.512 W/Kg
Product Safety
Product Safety is always the first priority of DBTEL Incorporated. With the SAR Safety Certificate,
we show our persistence in making customer safety the paramount importance.
R&TTE Directive requirements
A declaration of conformity to the essential requirements.
Identification of the European countries in which the equipment is intended to be used.
Identification of the public telecommunication network to which the equipment is intended to be
connected.
“Hereby, we <DBTEL Inc.>, declares that this F66 is in compliance with the essential
requirements and other relevant provisions of Directive 1999/5/EC ”.

Contents
1
European Union - SAR 3
For Your Safety 4
Your F66 5
Your phone ------------------------------------------5
Specification---------------------------------------5
Key description -------------------------------------5
Function key table--------------------------------5
Display indicators ----------------------------------6
Status indicators on main display------------6
Backlight--------------------------------------------7
Installation 8
Installation of the SIM card and the battery 8
Removal of the SIM card and the battery --8
Battery Information 9
Battery charging------------------------------------9
Battery specification-------------------------------9
Notice on battery charging and discharging-9
Low battery indicator------------------------------9
Use of battery---------------------------------------9
Battery disposal ------------------------------------9
Quick & Easy 10
Menu Map 11
Call Functions 15
Turning your phone ON and OFF ----------15
When PIN is requested----------------------- 15
Unlock a blocked SIM card------------------15
Making calls ---------------------------------------16
Domestic calls-----------------------------------16
International calls-------------------------------16
Making calls via the phone book-----------16
Redial calls missed, received and dialed 16
Speed dial----------------------------------------16
Calling your voice mailbox-------------------16
Answering calls-----------------------------------17
Call waiting--------------------------------------- 17
In-call menu-------------------------------------- 17
Multiparty ----------------------------------------- 18
Other operations ---------------------------------18
Keypad lock--------------------------------------18
Input text------------------------------------------18
Smart English -----------------------------------18
Using Smart English input -------------------19
Using The Menu 20
Accessing the menu function ---------------20
Returning from menu function--------------20
Phone Book 21
View------------------------------------------------21
Add New------------------------------------------ 21
Copy Records----------------------------------- 21
Delete All -----------------------------------------21
Fixed Dial List -----------------------------------21
Speed Dial ---------------------------------------21
Handset Status ---------------------------------21
Own Numbers-----------------------------------21
Messages 22
Messages ----------------------------------------22
WAP PUSH-------------------------------------- 24
Records 25
Recent Calls------------------------------------- 25
Clear Logs --------------------------------------- 25
Call Register-------------------------------------25
Ringer 26
Volume-------------------------------------------- 26
Ringer Type-------------------------------------- 26
Call Alert ------------------------------------------26
Clock 27
Alarm ----------------------------------------------27
Time & Date Setting --------------------------27
Display Mode------------------------------------ 27
Auto Power off ----------------------------------27
Clock 28
Settings 28
Normal ----------------------------------------------28
Language-----------------------------------------28
Input Method ------------------------------------28
Backlight------------------------------------------ 28
Voice Volume------------------------------------28
Contrast-------------------------------------------28
Auto Keypad Lock -----------------------------28
Key Tones----------------------------------------28
Anykey Answer ---------------------------------28
Auto Answer ------------------------------------- 28
Connection Alert--------------------------------28
Network Beep----------------------------------- 28
Restore--------------------------------------------28
Call Setting-----------------------------------------29

Contents
2
Own No. Send ----------------------------------29
Divert ----------------------------------------------29
Barrings-------------------------------------------29
Waiting --------------------------------------------29
Minute Beep ------------------------------------- 29
Auto Redial --------------------------------------29
Network---------------------------------------------29
Security ---------------------------------------------30
PIN Control --------------------------------------30
Change PIN ------------------------------------- 30
Change PIN2------------------------------------ 30
Fixed Dial Control ------------------------------30
Time Cost------------------------------------------30
Extras 31
Calculator-----------------------------------------31
Games --------------------------------------------31
Calendar------------------------------------------31
Wall Paper ---------------------------------------31
Download-----------------------------------------31
Menu Color --------------------------------------31
WAP 32
Basic steps for activating and accessing WAP
service---------------------------------------------32
Homepage ---------------------------------------32
Bookmarks---------------------------------------32
Last Page ---------------------------------------- 32
Navigation----------------------------------------32
Empty Cache------------------------------------ 32
Network Settings -------------------------------33
History---------------------------------------------33
STK 34
Maintenance 35
Access Codes 36
PIN code------------------------------------------ 36
PIN2 code---------------------------------------- 36
PUK code ----------------------------------------36
PUK2 code--------------------------------------- 36
Reference Information 37
EFR encoding decoder function ------------37
Accessories ---------------------------------------37
Battery---------------------------------------------37
Charger -------------------------------------------37
Problem Solving 38
Problem Solving ---------------------------------38
Index 39

European Union - SAR
3
European Union - SAR
SAR (European Union)
This Model phone meets the EU Requirements for
exposure to radio waves.
Your Mobile Phone is a radio transmitter and
receiver. It is designed and manufactured not to
exceed the limits for exposure to radio frequency (RF)
energy recommended by the Council of the
European Union. These limits are part of
comprehensive guidelines and established permitted
levels of RF energy for the general public. The
guidelines were developed by independent scientific
organisations through the evaluation of scientific
studies. The limits include a substantial safety
margin designed to ensure the safety of all persons,
regardless of age and health.
The exposure standards for mobile phones employ a
unit of measurement known as the Specific
Absorption Rate, or SAR. The SAR limit
recommended by the Council of the European Union
is 2.0 W/kg.* Tests for SAR have been conducted
using normal operating conditions with the phone
transmitting at the highest certified power in all tested
frequency bands. This is because the phone is
designed to operate at multiple power levels so as to
use only the power required to reach the network. In
general, the closer you are to the station antenna,
the lower the power output.
Before a phone model is available for sale to the
public, compliance with the European R&TTE
directive must be shown. One of the essential
requirements of this directive is the protection of the
health and safety for the user and any other person.
The highest SAR value for this model phone when
tested for compliance against the standard is 0.512
W/kg. While there may be differences between the
SAR levels of various phones and at various
positions, they all meet the EU requirement for RF
exposure.
* The SAR limit for mobile phones for public use is 2.0
watts/kilogram (W/kg) averaged over ten grams of
body tissue. The limit incorporates a substantial
margin of safety to give additional protection for the
public and to account for any variations in
measurements.
For Your Safety
4
For Your Safety
Road safety
Exercise proper control of the car at all times.
Do not use handheld phones while driving,
and always use the hands free kit.
Special regulations
Always switch off your mobile wherever use
is prohibited, such as hospitals, as it may
cause interference to medical equipments.
Electronic devices
Mobile phones can interfere with appliances
such as computers, televisions and other
radio equipments.
Other medical devices
Mobiles phones can interfere with signals of
personal me dical devices, such as
pacemaker or hearing aid. Consult your
doctor for advice before using the mobile.
Aircraft
The use of mobile phones is prohibited in the
air. Switch off your phone before boarding
an aircraft.
Accessories and battery
Use only approved accessories and
batteries. Do not connect to any
incompatible product. This will invalidate any
warranty applying to your mobile phone and
may be dangerous.
Disposal
Your mobile phone and other accessories
must be disposed of properly. They must not
be thrown away in municipal waste! Please
dispose of used mobile phones and other
accessories in accordance with local
regulations.
Potentially explosive atmospheres
Switch off your phone when in or near
explosive areas petrol stations and chemical
plants.
Emergency calls
Make sure your phone is switched on and in
a service area with adequate reception.
When in idle mode, key in the emergency
call number and press to be
connected to the emergency services.
Provide all the necessary information as
accurately as possible. Do not hang up until
you are told to do so.
Note
Even when the keylock is activated,
emergency calls can still be made.
If a PIN is set when switching on the
mobile phone with SIM card inserted, you
will be asked for the PIN code. Any
emergency call can be made without
entering the PIN code. Press
followed by to make an emergency
call.
Your F66
5
Your F66
Your phone
Your mobile phone is a radio transceiver. When the
phone is turned on, it transmits and receives radio
frequency (RF) signals.
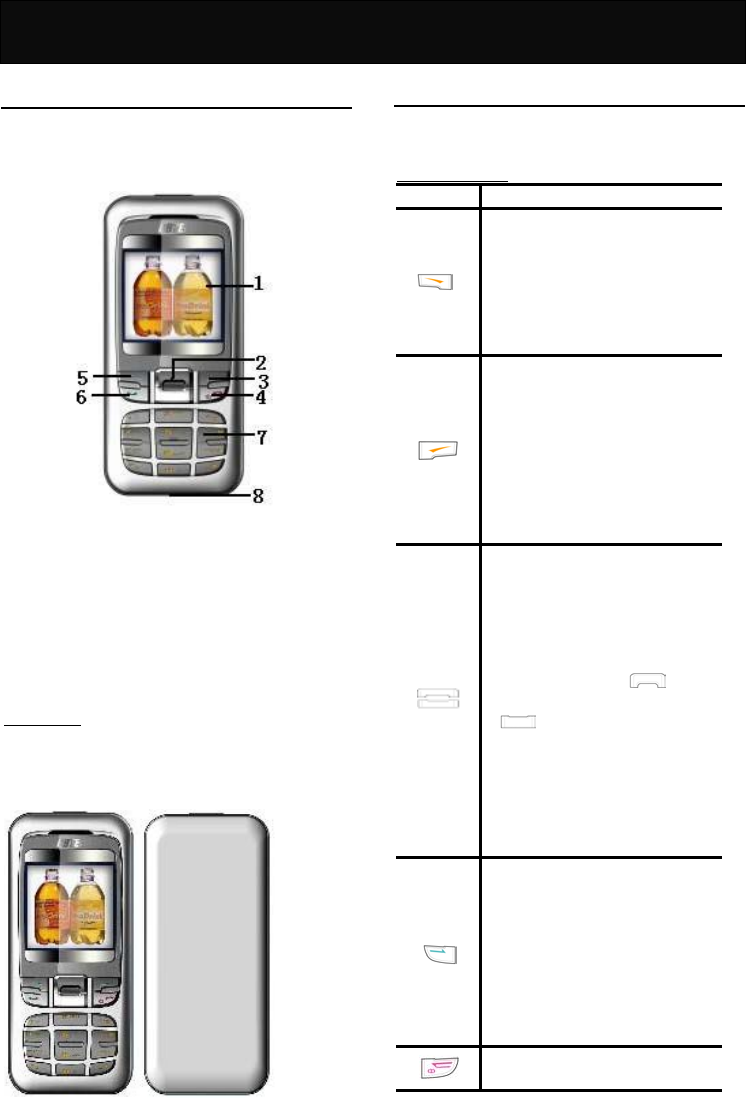
The front views of the F66 handset are shown below:
1. LCD display
2. Navigation key
3. Clear key/Phone Book access key
4. Power key/End call key
5. Soft key
6. Call key
7. Alphanumeric keys
8. Charger port /Earphone jack/data downloading
port
Specification
Dimension (with battery pack)
80 (L) x 42 (W) x 22 (D) mm
Weight (with battery pack)
75g
Key description
The following tables provide you with a description of
the keys on the keypad.
Function key table
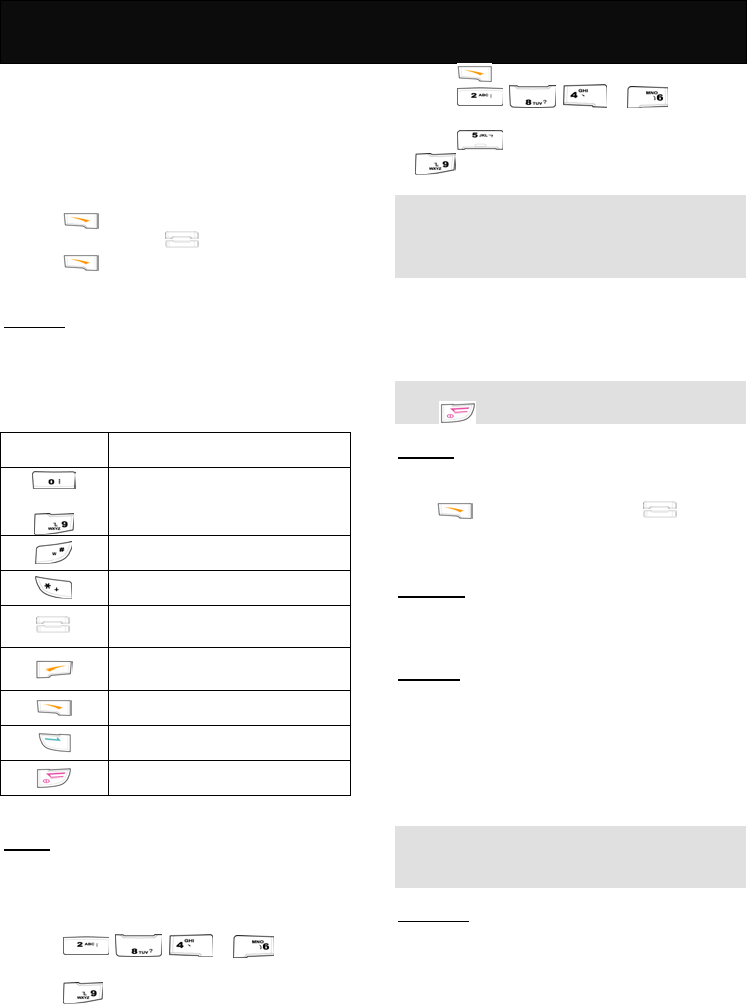
KEY FUNCTIONS
Soft key
Follow the prompt on the screen,
press to access the following
options: “Menu”, “OK”, “Options”
or “View”, etc.
Press to access the In-call menu
during a call.
Clear key/Phone Book access key
Follow the prompt on the screen,
press to access the following
options: “Names”, “Clear” or
“Back”, etc.
When in idle mode, press to
access the phone book directly to
search for a required name for
dialing.
Navigation key
Press vertically to scroll through
the lists when accessing menus.
Press vertically to move the
cursor left and right during the
editing of words.
In idle mode, press to
access Ringer Type menu, press
to access the quick access
menu, which includes 9
commonly accessed functions,
such as Alarm, Backlight, Input
Method, Wall Paper, Calculator,
Calendar, Games, Auto Answer,
Speed Dial.
Call key
Press to place a call or answer an
incoming call.
In idle mode, press to view the
latest dialed, received and missed
phone call list. Each list contains
10 entries.
Press and hold to enable the
hands free function.
Power key/ End call key
In idle mode
,
p
ress and hold to

Your F66
6
turn the phone on and off.
to
Alphanumeric key
Press to key in digits, letters or
special characters. Its functions
may vary according to the
available menu.
and
Symbol key
Press to key in the symbols
displayed on the key. Its functions
may vary according to the
available menu.
Display indicators
The following tables provide you the indicators shown
on the both main and sub LCD display.
Status indicators on main display
A number of status indicators are shown at the top of
the screen to tell you of the relevant settings of your
handset. Some of the icons listed below may not be
available at a given time and vary depending on your
local network operator.
Idle display. Shown when the
phone is not in use.
Network. Shown with the signal
strength to indicate the network
status. If no signal strength is
shown, it indicates that it is
searching for the network.
Battery charge indicator. The
more bars that are shown, the
more power is available in the
battery.
Signal strength. The more bars
shown, the better the signal
strength.
Roaming. Shown when registered
with a system other than the
original one (Inter-system
Roaming).
Short message. Shown when
there is an unread incoming text
message. Flashes when the
memory is full.
Missed call. Shown when there is
an unanswered incoming call.
Silencer. Shown when the
incoming call alert is set to quiet.
Vibrator. Shown when the
incoming call alert is set to vibrate
alert.
Alarm. Shown when the alarm is
set.
Call divert. Shown when the
unconditional divert call is
activated.

Your F66
7
Headset. Shown when the
headset is connected to the jack
and the headset function is
enabled.
Beep Only. Shown when the
incoming call alert is set to “Beep
Only”.
Backlight
When pressing a key or answering incoming call, the
backlight will automatically turn on for 10 to 30
seconds or you can define the backlight duration
(ranges from 1 0– 99 seconds) by preference. For
information on the setting, please refer to “Normal” in
“Settings”.
.

Installation
8
Installation
Installation of the SIM card and the
battery
Note
Keep the SIM card and batteries out of the reach of
small children.
Before proceeding, ensure that the phone is
switched off if a battery has been installed.
1. Press the battery cover catch downwards at the
top of the handset with one hand and remove the
battery cover with the other hand.
2. Push the battery upwards and remove the battery
from the battery slot.
3. Insert the SIM card into the SIM cardholder,
ensuring that the angled corner is on the lower
left-hand side with the gold metallic contact
surface facing downward.
4. Replace the battery with its catch pins inserted into
the catch slots and press down until it is firmly
seated in the battery slot. Then replace the battery
cover and press down the battery cover catch until
it clicks into place.
Removal of the SIM card and the
battery
Repeat the same procedures described in the
“Installations of the SIM card and the battery” to
remove the SIM card and the battery.
Note
You may access the following functions before
inserting the SIM card: Alarm, Time & Date Setting,
Calculator, Games, Calendar and Wall Paper.

Battery Information
9
Battery Information
Battery charging
Note
Use only the approved battery and charger supplied
by the phone manufacturer.
1. Plug the connector of the travel charger into the
charger port at the bottom of the phone.
2. Plug the charger into the AC power supply socket
and the battery indicator starts scrolling. The
charging message will be displayed after
connecting it to the power supply if the handset is
switched off.
3. When the battery is fully charged, the battery
indicator will stop scrolling.
4. If the battery is completely flat with the handset
switching off, the charging message will take a few
minutes to appear after connecting it to the power
supply.
Note
You can use the phone, if switched on, while it is
charging.
While charging, make sure that the charger is
firmly connected to the charger port.
When charging the battery for the first time, charge
it for at least 12 hours.
For optimum battery power performance, 5 hours
of battery charging is recommended.
Do not remove the battery while charging is in
progress, otherwise it may cause damage to your
phone.
Battery specification
Please refer to “Accessories” of “Reference
Information” or the battery label.
Notice on battery charging and
discharging
1. Your phone is powered by a rechargeable battery.
2. Use only the specified charger supplied by
manufacturer for charging. Any other type of
charger may be dangerous.
3. Please note that the new battery will only reach its
best performance after being fully charged and
discharged 2 or 3 times.
4. When the charger is not in use, disconnect it from
the power supply. Do not leave the battery on
continuous charge for more than one week, as
overcharging will shorten the battery life. If a fully
charged battery is left unused, it will slowly
discharge itself over time.
5. An environment with extremely high or low
temperatures will affect the battery charging.
Optimum charging will be achieved in moderate
temperatures.
6. If the indicator of the desktop charger does not
light up or keep flashing while charging, remove
your phone or battery and insert them to the
desktop charger again until it lights up and starts
charging.
Low battery indicator
When the power is low, with only a few minutes of
calling time left, the handset will warn you with an
alert tone and the “Battery Low” message will be
displayed.
Use of battery
1. Never use a damaged or non-recommended
charger or battery.
2. Keep the battery at a temperature between 10℃
to 40℃ (50℉ to 104℉).
3. The effectiveness of your battery is particularly
affected in temperatures below 0℃ (32℉).
Battery disposal
Do not dispose of the battery in a fire. This may cause
a serious risk of explosion and/or release highly toxic
chemicals.
C Ensure that the battery is disposed of or recycled
properly.
C The battery must not be disposed of in municipal
waste.

Quick & Easy
10
Quick & Easy
This page provides some of the basic operations for
using your phone. For more detailed information,
refer to “User Manual”.
Before Use
1. Remove the battery and insert your SIM card,
then re-install and charge the battery. For more
details, please refer to “Installation”.
2. Press and hold to turn on your phone. Wait
until the name of the network operator appears on
the screen.
Call Functions
Making calls
In idle mode, key in the area code, the phone
number and press to make a call.
Making calls fast and easy
In idle mode, press to access to the phone
book directly. Scroll to the desired name with
and press to make the call.
Answering calls
Press to answer a call.
Terminating calls
Press to end the active call.
Refusing calls
Press to refuse an incoming call.
Emergency calls
In idle mode, key in the emergency call number and
press to contact the emergency services
center.
Redialling
Press to view the recently dialed, answered or
missed phone numbers up to 10 entries each. Scroll
to the desired number with and press to
make the call.
Speed dial
Press and hold the alphanumeric keys ( to
) to call the phone numbers set in “Speed
Dial” which is up to 9 entries.
Phone Book Functions
Add new
Adding new numbers and names to handset or SIM
card.
1. In idle mode, key in the area code and the phone
number, press .
2. Scroll to either “Quick Save” or “Add Name” and
press .
3. If “Quick Save” is selected, the data entered will
be displayed for checking, press to confirm
the setting.
4. If “Add Name” is selected, perform the following
steps:
(1) Key in the name and press .
(2) Select either “Save To SIM” or “Save To
Handset” and press .
(3) If “Save To SIM” is selected, key in the location
number to where the entry to be saved and
press .
(4) If “Save To Handset” is selected, select the
desired group and press . The data
entered will be shown on the LCD display.
(5) Press to confirm the setting.
Keypad Lock
Lock keypad
In idle mode, press and hold to lock the
keypad.
After locking the keypad, the word “unlock” will be
shown on the right soft key.
Unlock keypad
Press and press accordingly to unlock
the keypad.
Other Functions
Clear screen
Press and hold to clear an entry that you are
editing.
Adjusting the earpiece volume
You can adjust the earpiece volume by pressing the
navigation key up or down during a call.
Menu Map
11
Menu Map
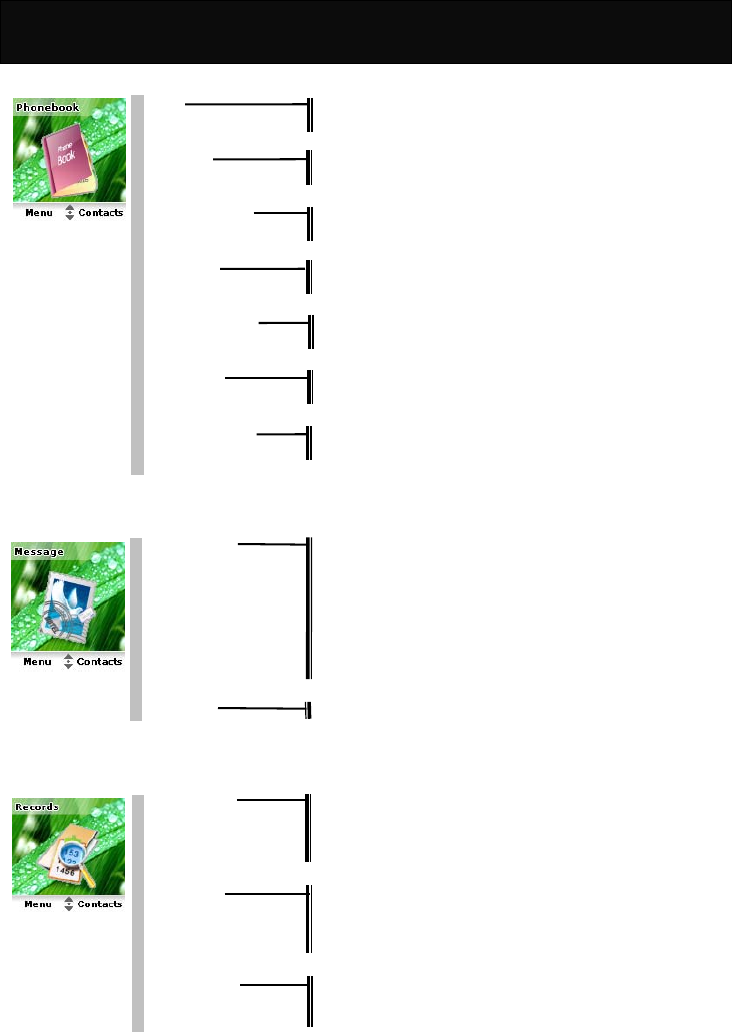
1 Phone book
View Search Name
Group
Add New Quick Save
Add Name
Copy Records SIM to Handset
Handset to SIM
Delete All SIM All
Handset All
Fixed Dial List View List
Add New
Speed Dial Edit
Delete
Handset Status
Own Numbers Edit
Delete
2 Messages
Messagess Inbox
Outbox
Send
Delete
Settings
Voice Mail
Broadcast
Capacity
WAP PUSH Service Indication
3 Records
Recent Calls Dial
Quick Save
Add Name
Delete
Clear Logs Outgoing Call
Incoming Call
Missed Call
Clear All
Call Register Call Timer
Call Cost
Call Balance

Menu Map
12
4 Ringer
Volume
Ringer Type Any Call
Phonebook Calls
Group Calls
Alarm
Message
Cell Broadcast
Power On Music
Power Off Music
Call Alert Vibrator Only
Ringer Only
Vibrator & Ringer
Vibrator Then Ringer
No Ringer & Vibrator
Beep Only
5 Clock
Alarm ON
OFF
Time & Date Setting
Display Mode Date Only
Time Only
Date & Time
No Display
Auto Power off ON
OFF

Menu Map
13
6 Settings
Normal Language
Input Method
Backlight
Voice Volume
Contrast
Auto Keypad Lock
Key Tones
Anykey Answer
Auto Answer
Connection Alert
Network Beep
Restore
Call Setting Own No. Send
Divert
Barrings
Waiting
Minute Beep
Auto Redial
Network Search Mode
Security PIN Control
Change PIN
Change PIN2
Fixed Dial Control
Time Cost Calling Display
Charge Rate
Calls Limit
7 Extras
Calculator
Games Redcap
Gobang
Settings
Calendar
Wall Paper
Download Download Melody
Download Picture
Menu Color
Menu Map
14
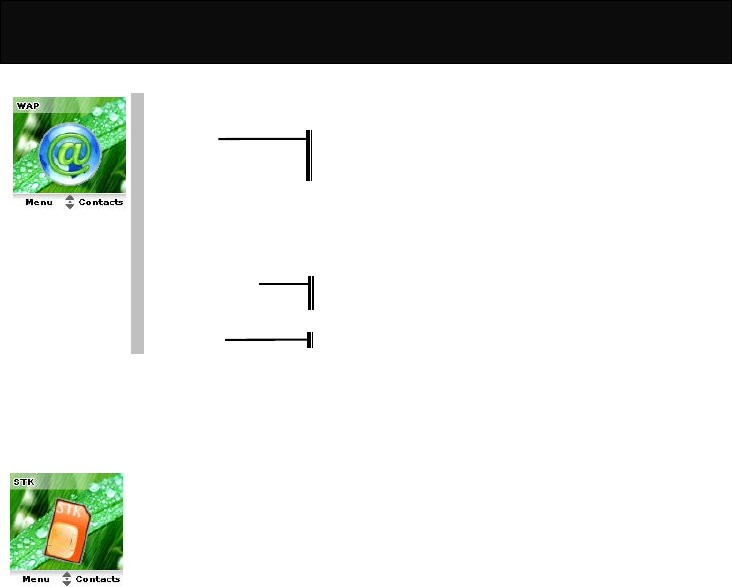
8 WAP
Homepage
Bookmarks Connect
Edit
Rename Bookmark
Last Page
Navigation
Clear Cache
Network Settings Active network settings
Edit active network settings
History GSM
9 STK
The availability depends on your network service provider.

Call Functions
15
Call Functions
Turning your phone ON and OFF
Press and hold for 3 seconds and then release
it.
Note
Always switch off your phone whenever it is forbidden
to use it or when it may cause interference or danger.
When PIN is requested
SIM cards are usually protected with a PIN code.
The PIN code usually comes with your SIM card
provided by the network operator.
1. Key in your PIN code (note that the characters in
your password are replaced with “*”).
2. After you have entered the PIN code, press .
3. If you key in a wrong number, press to
remove the last digit.
4. If the PIN code entered is incorrect, a warning
message will be displayed to notify you of the
remaining times for entering the PIN.
Note
If an incorrect PIN code is entered 3 times in
succession, your phone will automatically lock-up the
SIM card and a message will be displayed to inform
you that the SIM card is blocked.
Unlock a blocked SIM card
If your SIM card is locked, you will be asked to enter
the PUK code to unlock your phone in order to
continue using it.
To unblock the SIM card:
1. Key in the PUK code, press (check with your
network service provider for the PUK code).
2. Key in a new PIN code, press .
3. Repeat the new PIN code and press .
Note
The unblock code consists of 8 digits, and is
provided with the SIM card. If not, please check
with your network service provider for the code.
If an incorrect PUK code is entered 10 times in
succession, the SIM card will be blocked
automatically. Please consult your service provider
for the SIM card unblocked!
Call Functions
16
Making calls
1. When in idle mode, key in the area code and
phone number. To edit, press to delete the
last digit.
2. Press to dial the number.
3. Press to end an active call or stop dialing.
Domestic calls
When in idle mode, key in 02154422999 and press
to make the phone call.
International calls
1. When in idle mode, press and hold until a “+”
(the prefix for making international call) sign
appears, then key in the country code, area code
and phone number accordingly.
2. Press to place the call.
3. Press to end an active call to stop dialing.
Example:
When in idle mode, key in +862154422999 and
press to make the phone call.
Making calls via the phone book
1. Press to access the Phone Book directly.
2. Scroll to the desired entry with .
3. Press to make the call.
Redial calls missed, received and dialed
The last 10 phone calls that you dialed, answered or
missed are stored in the phone’s memory. Perform
either of the followings to redial the call.
Redial fast and easy
1. In idle mode, press to view the last phone
calls dialed, answered and missed.
2. Press to dial the selected number.
Redial via the menu
1. In idle mode, press and scroll to “Records”
with .
2. Press .
3. Select “Recent Calls” and press to view the
recently incoming and outgoing calls records.
Where:
indicates a missed call
indicates a received call
indicates a dialed call.
4. Scroll to the desired entry with .
5. Press to check the information of the call.
6. Press to continue the next operation with the
available options.
Speed dial
In idle mode, hold down the corresponding
alphanumeric keys ( to ) to dial the
preset speed dial numbers.
Note
Ensure that you have entered the settings in “Speed
Dial”.
Calling your voice mailbox
In idle mode, dial the number provided by the network
service provider to access the voice mailbox or press
and hold to access the voice mailbox directly.
Note
Obtain your voice mail number from the network
operator, and ensure that the number is set in“Voice
Mail Center”.

Call Functions
17
Answering calls
1. Press to answer an incoming call.
2. Press to refuse an incoming call.
Note
If you have activated the divert call function, any
incoming calls will be diverted to specified number.
For example, you may divert incoming calls to your
voice mail. When an incoming call is refused, the call
will be diverted too. Please refer to “Divert”.
Call waiting
If the call waiting function is activated, you may
answer a new incoming call while already on line.
1. If there is an incoming call while you are already on
line, a tone will be heard and a notification
message with the caller information will be
displayed on the screen.
2. Press to answer the new call. The active call
will be automatically placed on hold.
3. Press to refuse the new call.
4. If you want to make a new call while you are on a
call, simply key in the number, press to dial
the number. The active call will be automatically
placed on hold.
Note
The call waiting function allows you to manage up to
two calls simultaneously (1 active, 1 on hold). To
answer the third incoming call, end one of the active
calls, or establish a multiparty call for the two online
calls before answering the third call.
In-call menu
During a call, you can access to the In-call menu by
pressing . Some of the options listed in In-call
menu may not be available at a given time and vary
depending on your network operator.
Functions that are available in normal mode
Mute On
Mutes the mobile phone. When this option is selected,
if the phone is in call waiting mode, the party on the
phone will not hear you and will remain on held.
Mute Off
Cancels the mute function.
Hold Signal Call
Places an active call on hold.
Retrieve Signal Call
Resumes the conversation with the call on hold.
End Held Signal Call
Ends the call on hold.
Send SMS
Send short messages that consist of text, built-in
picture or melody to another party during calls. For
details of this function, refer to "Messages".
Save Number
Saves the important phone number during a
conversation if necessary.
Functions that are available in call waiting mode
Mute On
For details of this function, please refer to the function
described above.
Mute Off
For details of this function, please refer to the function
described above.
Swap Call
Switches between active calls and calls on hold when
in call waiting mode.
End Held Signal Call
For details of this function, please refer to the function
described above.
Send SMS
For details of this function, please refer to the function
described above.
Save Number
For details of this function, please refer to the function
described above.
Build Multiparty Call
Starts a multiparty conference call with up to 4
participants. For details of this function, refer to
“Multiparty”.
Functions that are available in multiparty
conference call mode. When the multiparty
conference call is activated, the phone gives you
access to some specific functions. The availability
depends on your network operator.
Mute On
For details of this function, please refer to the function
described above.
Mute Off
For details of this function, please refer to the function
described above.
Hold Multiparty Call
Places the current multiparty conference call on hold.

Call Functions
18
Retrieve Multiparty Call
Resumes the conversation with the multiparty
conference call on hold.
End Held Multiparty Call
Ends the multiparty conference call on hold.
Send SMS
For details of this function, please refer to the function
described above.
Save Number
For details of this function, please refer to the function
described above.
End One Call In Party
Terminates the connection with one of the
participants from the multiparty conference call.
Filter One Call In Party
Chooses a participant from the multiparty conference
call for a private conversation.
Multiparty
This option allows a conference call with up to 4
parties. Please check with your network operator for
the availability of multiparty conference calls.
1. Make sure that you have established two on-line
calls (1 active, 1 on hold), before activating
multiparty conference call.
2. Press and select “Build Multiparty Call” to
start a multiparty conference call.
3. To add a new participant to the multiparty
conference call, perform the following steps:
(1) Press to answer the new incoming call.
(2) Press and select “Build Multiparty Call”.
4. To release a participant from the conference call,
perform the following steps:
(1) Press and select “End One Call In Party”.
(2) Scroll to the desired party and press .
(3) Press to release the selected party.
5. To hold a private conversation with one of the
participants, perform the following steps:
(1) Press and select “Filter One Call In Party”.
(2) Scroll to the desired party and press .
(3) Press separate the desired party from
the conference call.
Note
The existing multiparty conference call will then be
automatically placed on hold.
6. To end an active conference call, press .
Other operations
Keypad lock
This feature locks the keypad to prevent keys from
being accidentally pressed.
1. To lock the keypad: In idle mode, press and hold
to lock the keypad. After the keypad is
locked, the word “unlock” will be shown on the right
soft key.
2. To unlock the locked keypad: Press and
press to unlock the keypad. This operation
must be completed in 3 seconds.
3. To answer an incoming call while the keypad is
locked: To answer an incoming call, press .
To reject an incoming call, press . During
calls, your mobile phone operates as if it were
unlocked.
Note
Even if the keypad is locked, an emergency call can
still be made.
Input text
The F66 model provides a number of input methods
for you to organize your phone book or write
messages.
By pressing , users may switch between the
different input methods.
Note
In idle mode, use only numbers, the international
dialling prefix code “+” (press and hold ) and
characters that are allowed for dialling. Other
letters or symbols are not allowed.
To input a specific letter or symbol, after selecting
the input style, press the corresponding key
repeatedly until the required letter or symbol
appears. For example: to input A, press
once; to input B, press twice, and so on.
To key in the same character in sequence, wait
for a second between each key press.
If you make a mistake, press to delete the
character to the left of the cursor; press and hold
to delete all characters on the screen.
Smart English
Smart English input is a much easier way to input a
text message in English. To enter each letter, just
Call Functions
19
press the corresponding alphanumeric key once. In
Smart English input, the alphanumeric keys enter
words with a single key press instead of multiple key
presses. When the first (or second) character is
entered, the display shows the most probable word in
the suggestion area. The word you select from the
suggestion area will move to the text area.
Using Smart English input
Switch to Smart English input by pressing
repeatedly until the desired input style appear.
Example
If you want to input “Telephone”, key in the following:
Press the navigation key to select the desired word
and press to pick the word.

Using The Menu
20
Using The Menu
This handset offers a range of functions that allow you
to customize the phone to your needs. These
functions are arranged in menus and submenus.
Accessing the menu function
1. In idle mode, press to go to the menu facility.
2. Scroll to the desired menu with .
3. Press to enter the desired submenu.
4. Scroll to the desired submenu with .
5. Press to access the submenu.
6. Press up or down to access the next menu of
the selected submenu.
7. Press to confirm the setting.
Returning from menu function
1. Press to return to the previous menu level.
2. Press to exit the menu and return to idle
mode without changing the menu settings.

Phone book 1
21
Phone Book
The “Phone book” is used to save phone numbers
and names in the handset or SIM card. You can save
up to 100 entries in the handset or SIM cards. The
SIM card capacity may vary depending on the
network service provider. When the memory of the
SIM card/handset is full, the data will be stored to the
handset/SIM card automatically.
In idle mode, proceed as follows:
1. Press to enter the main menu.
2. Scroll to “Phone book” with .
3. Press to access the menu.
View
You may view the names and phone numbers that
have been stored in the handset or the SIM card.
Search Name
1. Press to access the menu.
2. Key in the letter that corresponds to the first letter
of the name require in the phone book.
3. Scroll to the desired name or phone number and
press to dial the number.
Group
1. Scroll to the desired group and press .
2. Press to dial the number.
Add New
Add a new entry to the handset or the SIM card.
1. Press to access the menu.
2. Key in the area code and the phone number, press
.
Note
To key in the country code, press and hold until
the international dialing code “+” is displayed then key
in the appropriate country code. The steps for dialing
from abroad are the same as above.
3. Select either “Quick Save” or “Add Name” and
press .
4. If “Quick Save” is selected, the entry will be saved
directly to SIM card without editing.
5. If “Add Name” is selected, perform the following
steps:
(1) Key in the name and press .
(2) Select either “Save To SIM” or “Save To
Handset” and press .
(3) If “Save To SIM” is selected, key in the location
to where the entry to be saved and press .
(4) If “Save To Handset” is selected, key in the
location number to where the entry to be saved
and press .
(5) Scroll to the desired group and press .
Copy Records
This option allows you to transfer the entry from
handset to SIM card or vice versa.
1. Press to access the menu.
2. Scroll to either “SIM to Handset” or “Handset to
SIM” and press .
3. Press to keep the original records after
copying, press to cancel copying.
Delete All
This option allows you to delete the data from the
phone book in handset or SIM card.
1. Press to access the menu.
2. Scroll to either “SIM All” or “Handset All” and press
.
Fixed Dial List
The fixed dial list is to restrict the use of the SIM card.
If activated, it is only possible to make calls with
phone numbers that have been set in the list and the
emergency call number. You may view or add new
entry in the list. The PIN2 code is required to adjust
this setting.
Speed Dial
This option allows you to set the phone number up to
9 entries for one touch key dialing. When in idle mode,
press and hold the corresponding alphanumeric keys
to call the designated number.
1. Scroll to a specific key number and press .
2. Scroll to the desired entry in the phone book and
press to set the one touch key dialing.
Handset Status
You can check the memory capacity of your handset
and SIM card. For example: 45/100 means that there
is a total of 100 entries, 45 entries are saved with 55
entries of memory still available. The phone status of
SIM card may vary depending on memory capacity of
the SIM card.
Own Numbers
This option allows you to key in your own name and
the phone number for reference.
Messages 2
22
Messages
This menu allows you to send, read and write text
messages and voice mailbox as well as other
relevant features that are provided by network
service provider.
In idle mode, proceed as follows:
1. Press to enter the main menu.
2. Scroll to “Messages” with .
3. Press to access the menu.
Messages
Inbox
If a new message is received, the icon will be
shown at the top of the screen and on the sub-screen.
And notification tones will be heard.
After reading, press to access the following
options:
Delete
Delete the message.
Reply
Reply to the message by writing text.
1. Press when finish writing the message.
2. Press to key in the recipient number.
3. Press to send the message.
Call Back
Reply to the message by calling. Press to call
the person who sends the message.
Forward
Forward the received message to others. You are
allowed to edit the message before sending.
Note
The message will be stored in the SIM card (SIM
card capacity depends on your network service
provider).
If the icon flashes, it means that there is
insufficient memory for new messages. Select
“Delete” in “Inbox” to delete old messages to free
up memory for new messages.
If there is no icon shown on screen, all
received messages have been read and there is
sufficient memory for new messages.
Outbox
All the saved messages can be found via this option.
1. Press to read the message.
2. After reading, press to continue with the
following options:
Send
1. Edit the message (if necessary) and press .
2. Use the existing recipient number and press
to send the message.
3. Alternatively, you may save the edited message
and send it to others.
Delete
Delete the message.
Note
You may read through the message by pressing .
If the cursor reaches the beginning or ending of the
message, you can go on with the previous or the next
message by pressing .
Send
You may write messages of up to 700 characters in
English. For information on how to input the
characters, please refer to “Input text” in “Other
operations”.
1. Start composing message.
2. Enter the recipient number manually or press
to search for a desired name. For details of
the operation, please refer to “Send” in “Outbox”.
3. Press to continue with the next operation.
For details information, please refer to “Outbox”.
Note
If you make a mistake when writing, press to
delete the characters to the left of the cursor, press
and hold to delete all the characters.
Before sending any messages, you have to save
the message center number in the “Service
Center”. Please check with your network operator
for the number.
Delete
This option allows you to delete the old messages
with the following options.
Delete Inbox
Delete all the messages in the Inbox.
Delete Outbox
Delete all the messages in the Outbox.

Messages 2
23
Delete All
Delete all the messages in both Inbox and Outbox.
Settings
The SMS profile defines the transmission
characteristics of the SMS. The availability depends
on your SIM card. You may change the profile with
the following options.
Service Center
Enter or change the phone numbers of the service
center supplied by the service provider.
Note
Please check with your network service provider for
the number.
Voice Mail Center
This option stores the required voice mailbox number
for listening to the voice messages.
Note
Please check with your network service provider for
the number.
Valid Period
This option allows you to set the period which the
service center keeps the undelivered message.
Status Report
The service center will send you the report of the
messages sent.
Direct Reply
When activated, the service center of an incoming
SMS will be used to directly reply to the SMS and not
the SMS number contained in your handset.
Availability depends on your network service
provider.
Voice Mail
This option allows you to access the voice mailbox
directly to listen the voice messages.
Note
Ensure that you have entered the number provided
by your network operator in the “Voice Mail Center”.
Broadcast
This option allows you receive the information
broadcasted by your network service provider (such
as weather forecast or road traffic information).
Please contact your network service provider for
information on the topics available and its
corresponding index.
On
Activate the reception of all the topics defined in the
list. This function uses up the battery more quickly.
Off
Deactivate the broadcast service.
Read New CB
Read the new CB messages up 10 entries. If the CB
messages received exceed the maximum number,
the new message will replace the oldest message.
TopicList
View the broadcasting topic list or add a new topic to
the list.
You can add and set an unrestricted topic to this
personal list by choosing from the topics index. You
can preset 15 entries with their index number (ID) and
rename 5 of them, if necessary. You may activate 10
topics at a time.
To add a new topic:
1. Scroll to “<New Topic>” and press .
2. Enter the index of the topic and press .
3. Enter the name of the topic and press .
To edit an existing topic:
1. Scroll to the desired topic and press .
2. Continue the next operation with the available
options, such as “Deactivate”, “Edit”, “Delete” and
“View ID”.
Auto Display
If activated, the CB messages will be displayed
automatically and displayed longer messages in
scrolling mode.
Capacity
You can view the memory capacity for the inbox and
outbox as well as the available memory space.

Messages 2
24
WAP PUSH
This function allows services to send information
proactively to mobile subscribers. WAP Push is an
SMS within the header of which is included a link to a
WAP address. On receiving a WAP Push, the
compatible mobile handset automatically gives the
user the option to access the WAP content on his
handset. The WAP Push directs the end-user to a
WAP address where content is stored ready for
viewing or downloading onto the handset. This WAP
address may be a page or a WAP site.
WAP Push applications are being used in the delivery
of mobile related content such as polyphonic ring
tones, java mobile games, applets, weather forecasts
and stock price alerts, colour screensavers, and
picture messages, incoming email alerts and
advertising campaigns.
Service Indication
This function signals an event of which the client
should be get informed and have a message and a
URL to a WML page where more information can be
retrieved sent with the message.
Records 3
25
Records
This option provides a record of call duration, call
cost, recent calls and relevant settings.
Some of the functions require the PIN 2 code in order
to access them. For information on the PIN 2 code,
please refer to “Security”.
Availability of the call records depends on the
network service provider.
In idle mode, proceed as follows:
1. Press to enter the main menu.
2. Scroll to “Records” with .
3. Press to access the menu.
Recent Calls
You may view the call records of the phone. The
phone calls that you have dialed, answered or not
answered are listed for your review.
1. Press to dial the selected number.
2. Press to continue with the further operation.
Note
If a number existed several times, only the last entry
will be shown on the list.
Clear Logs
This option allows you to delete the records of
outgoing, incoming or missed calls. You can even
delete all call records at a time.
Call Register
This option provides you the information on the call
duration, call cost and the balance.
Call Timer
After accessing to this menu, press to view the
information on call duration of last call, outgoing and
incoming calls, and the total time of both outgoing and
incoming calls.
Call Cost
Provides you the information on the accumulated call
charges.
Call Balance
Provides you the information on the call cost limit and
balance.
Note
Availability depends on the settings in “Time Cost” in
“Settings”.
Ringer 4
26
Ringer
This option allows you to set the volume, type of the
ringing tone and the alert tones.
In idle mode, proceed as follows:
1. Press to enter the main menu.
2. Scroll to “Ringer” with .
3. Press to access the menu.
Volume
This option allows you to set the level of the ringing
volume by choosing from 5 levels with to
increase or decrease the volume.
Ringer Type
The ringing tone can be set for 8 specific categories,
which are “Any Call”, “Phonebook Calls”, “Group
Calls”, “Alarm”, “Message”, “Broadcast”, ”Power On
Music” and “Power Off Music”. For “Any Call”,
“Phonebook Calls”, “Group Calls” and “Alarm”, the
available ringing tone for setting are the 7 built-in
tones and 1 downloaded melodies (if available) or
decide not to set any ringing tones.
For “Message” and “Broadcast”, the available ringing
tones for setting are the 2 built-in ringing tones or
decide not to set any ringing tones.
For power on/off music, you can select whether or not
to set any ringing tones. Scroll to the music and press
to confirm the setting, press to cancel the
setting.
Call Alert
This option allows you to set the way the hand phone
prompts you when there is an incoming call.

Clock 5
27
Clock
This menu shows the options for setting the alarm,
auto power off, date and time and display mode (date
and time is displayed on the LCD display in idle
mode).
In idle mode, proceed as follows:
1. Press to enter the main menu.
2. Scroll to “Clock” with .
3. Press to access the menu.
Alarm
Sets the handset to ring at a specific time with the
desired ring tone.
1. Scroll to “ON” and press .
2. Scroll to either “Once”, “Everyday” or “Working
Day” and press .
Note
When the alarm goes off and no action is taken, the
alarm will ring for 1 minute. Press any key to stop the
alarm.
Time & Date Setting
Set the appropriate date and time for the phone,
using the following format DD/MM/YYYY where DD
is for day, MM is for month and YYYY is for year.
1. Press to set the date and time.
2. Key in the appropriate day, month and year.
3. Key in the appropriate time using the format
HH:MM:SS, where HH is for hour, MM is for minute
and SS is for second.
4. Press to confirm the setting.
Note
Please reset the date and time if the battery has been
detached for an extended period.
Display Mode
This option allows you to set the display format for
the date and time when the phone is in idle mode.
Date Only
It displays the date only on the LCD display when the
phone is idle.
Time Only
It displays the time only on the LCD display when the
phone is idle using either “12 Hour” or “24 Hour”
format.
Date & Time
It displays both the date and time on the LCD display
when the phone is idle using either “12 Hour” or “24
Hour” format.
No Display
No date or time is displayed on the LCD display when
the phone is idle.
Auto Power off
You may set the phone to switch off automatically at
a specific time.
1. Scroll to “ON” and press .
2. Scroll to either “Once” or “Everyday” and press
.
3. Key in the time for shutting down using the HH:MM
format, where HH is for hour and MM is for minute.
Note
Before the phone switches off, the message “Auto
Power Off” will appear. If no action is taken in several
seconds, the phone will switch off automatically.

Settings 6
28
Clock
Settings
This menu shows the options for setting the functions
related to the phone itself. The availability of some of
the functions depends on your network service
provider.
In idle mode, proceed as follows:
1. Press to enter the main menu.
2. Scroll to “Settings” with .
3. Press to access the menu.
Normal
This menu provides you the following options:
Language
This option allows you to change the language for
display message. Languages vary upon the language
package used.
Input Method
A number of input styles are provided to organize the
phone book or write message. For detailed
information, please refer to “Input text”.
Backlight
This option allows you to turn the LCD and keypad
illumination on.
You may set the duration of the illumination with the
available options or you can define the time by
yourself (ranges from 10 – 99 seconds).
Voice Volume
Set the earpiece volume at 5 levels.
Contrast
This option allows you to adjust the display contrast
by pressing .
Auto Keypad Lock
This option allows you to lock the keypad
automatically to prevent the keys from being
accidentally pressed.
Key Tones
This option allows you to set the keypad to make
sound at each key press.
Anykey Answer
If activated, press any key except and to
answer the incoming call.
Auto Answer
If activated (with headset connected), any incoming
call will be answered automatically without any
ringing or vibrating.
Connection Alert
This option allows you to set the way the handset
prompts you of the phone connection.
Network Beep
When activated, the handset will prompt you of the
network registering when powering on.
Restore
Restores some of the functions set in the phone to
their original configuration, except that the PIN code
and the PIN2 code. The data stored in the phone
book will not be affected. For detailed information on
factory default settings, refer to the table below.

Settings 6
29
Call Setting
You may set the functions related to the network
service. The availability of the functions depends on
your network service provider.
Own No. Send
Chooses whether or not your phone number is sent to
the called party.
Note
The availability depends on your network service
provider. If not available, any outgoing call is
impossible when deactivated.
Divert
This option is set to divert incoming calls to the voice
mailbox or another phone number, so as not to miss
any important calls.
There are 5 divert modes available which you can
activate, cancel. You can check its current status at
any time.
If activated, follow the prompt on the screen and key
in the phone number to which you wish the incoming
calls to be diverted.
Unconditional
Automatically divert all incoming calls.
Unanswered
Divert incoming calls when line is busy, no reply or no
response. If activated, the “When Busy”, “No Reply”
and “No Response” divert settings are activated
automatically.
When Busy
Divert all incoming calls when the line is busy (when
you are on a call) or you have rejected the incoming
call.
No Reply
Divert all incoming calls if there is no answer.
No Response
Divert all incoming calls when your phone is turned off
or out of coverage.
Clear All
Cancels all the call divert functions.
Barrings
This option provides SIM card restrictions when
making or answering calls. A network access code is
required to set all the barring functions (you must
contact your network service provider).
It contains 5 different barring modes and you can
activate, cancel or check its current status.
All Outgoing
You are not able to make any outgoing calls. Only
incoming calls can be accepted.
Outgo International
You are not able to make any outgoing international
calls. Incoming calls can still be accepted.
Outgo International Except Home
When abroad, you can only call the numbers within
that country or call to home country (i.e., the country
where the phone is registered).
All Incoming
If activated, you are not able to receive any incoming
calls.
All Incoming When Roaming
No incoming calls will be permitted while roaming.
Clear All
Cancel all the call restriction function.
Waiting
This option alerts you of an incoming call while
already on line. When activated, a tone will be heard
and the caller’s number will be shown on the main
and sub-display to notify you of a new incoming call.
Minute Beep
This option will remind you of the time elapsed. A
beep will be heard at every minute you talk on the
phone. For example, it beeps for 1 minute, 2 minutes
and so on.
Auto Redial
When activated, the phone will redial automatically
for unsuccessful call. It will repeatedly dial the
number at a fixed interval increment up to 10 attempts.
Any other use of the handset will cancel this function.
Press to cancel the dialing attempt.
Network
This is a networks related option. It allows you to

Settings 6
30
register with, search or select the available network
and some of the relevant settings.
Search Mode
The default setting is “Auto Search”. It usually
searches for the network operators using the priority
network list stored in SIM card.
Auto Search
When using auto search mode to search for the
networks, your phone will register with the priority
network list stored in your SIM card. Alternatively, you
can register with the network manually. Always select
the network operator that has a roaming agreement
with your network operator in your region/country.
Manual Search
When using the manual search mode to search for
the networks, always select the network operator that
has a roaming agreement with your network operator
in your region/country.
After selecting “Manual Search” mode, the mobile will
stay remain in “Manual Search” mode until the mode
is changed or a new SIM card is replaced.
Note
If you are not familiar with the network operator,
strongly recommended that you select “Auto Search”
mode.
Security
You can change your PIN code, PIN2 code or set
whether or not the PIN code is requested when
powering on to protect you against any unauthorized
uses of your SIM card and certain other features.
PIN Control
You are allowed to set a password to protect the SIM
card from any unauthorized use. If the PIN request is
activated, you will be asked for the PIN every time
you switch on the phone.
Change PIN
You can change the PIN code periodically in this
option.
Change PIN2
You can change the PIN2 code periodically in this
option. The PIN2 code is usually provided with the
SIM card. If this is not the case, please check with
your network service provider.
Fixed Dial Control
This option allows you to set fixed dial number. If
activated, it is only possible to make calls with phone
numbers that have been set in this function. The PIN2
code is required to adjust this setting.
Time Cost
This option allows you to set the following options:
Calling Display
This option shows you the information on call duration
during calls.
Charge Rate
Your phone will display the call cost according to the
number of units, the charge rate per unit, the currency,
and the exchange rate. The PIN2 code is required to
set the charge rate. Please check with your network
service provider for the actual rate.
Calls Limit
This option allows you to set the limit of your call cost.
The PIN2 code is required to adjust this setting. If the
phone call charges exceed the limitation, any
outgoing call is not allowed.
Extras 7
31
Extras
This option provides additional options to enable user
to personalise the phone. It may be used to simplify
the handset and includes a calculator, a calendar,
and even offers the possibility of playing games, set
up wallpaper, logo and the bottom color of menu.
In idle mode, proceed as follows:
1. Press to enter the main menu.
2. Scroll to “Extras” with .
3. Press to access the menu.
Calculator
This option allows you to make simple calculations.
Due to the limitation of accuracy, round-off error may
occur during division and any number that exceeds 8
digits is not allowed.
Press To
to
input number.
input decimal.
input negative or positive
input the operation factors such as
+,-,* and /.
erase whole entry or restart a new
calculation.
backspace
get the result after inputting.
exit calculator menu.
Games
This menu offers you some interesting games.
Redcap
1. Select whether or not to read the brief help text.
2. Input the desired level of the game before starting.
3. Press , , or to go up,
down, left or right.
4. Press to undo the previous step.
Gobang
1. Select whether or not to read the brief help text.
2. Select the difficult level of the game before starting
the game.
3. Press to start playing.
4. Press , , or to move
the chessman up, down, left and right.
5. Press to place the chessman and press
to undo the previous step.
Note
In this game, you will play against the handset. The
party who first connects a continuous five chessmen
in and direction wins the game.
Settings
For more enjoyment, you can activate the “Sounds”
and “Vibrator” function.
Note
Press to exit the game while playing.
Calendar
This option can be used to look up a date. Key in the
year and month you would like to check or simply
press and browse the date with . The
years for looking up are ranging from January, 0 to
December, 9999.
Wall Paper
This option offers you the possibility to set up a
specific picture for the handset background.
Download
This option allows you to download any favorite
melody or picture by preferences to replace the
operator name that shown on the idle display or set it
as the incoming call alert. The format supported for
melody and picture are MIDI and bmp, wbmp, gif or
jpg respectively.
Note
The availability of the download function depends on
the local network service provider.
Menu Color
This option allows you to set the bottom color of the
display by preference.
WAP 8
32
WAP
WAP (Wireless Application Protocol) is a global
wireless protocol specification for mobile wireless
terminals. WAP enables you to subscribe to certain
Internet services, for example: banking services,
news, weather forecast, flight schedules etc.
Note
You need to subscribe to the data transmission
and WAP browsing services via your network
service provider in order to access WAP services.
WAP web page adapts the Wireless Mark-up
Language (WML) technology. Web pages that
employ Hyper-Text Mark-up Language (HTML) are
not supported.
In idle mode, proceed as follows:
1. Press to enter the main menu.
2. Scroll to “WAP” with .
3. Press to access the submenu.
Basic steps for activating and accessing WAP service
The following section introduces the basic steps for
accessing and browsing the web.
Activation of WAP service
Before using the WAP service, you need to activate
the WAP connection profile first.
1. When in idle mode, press to enter the main
menu.
2. Scroll to the “WAP” menu and press
3. Scroll to “Network Settings” menu and press .
4. Select “Active network settings” and press .
5. Scroll to the desired profile with and press
.
Accessing the WAP service
You may connect to the website in either of the
following ways.
Accessing via the homepage
1. When in idle mode, press to enter the main
menu.
2. Scroll to the “WAP” menu and press
3. Scroll to “Homepage” and press .
Note
Only if a WAP website is set as homepage before.
Accessing via bookmark
1. When in idle mode, press to enter the main
menu.
2. Scroll to the “WAP” menu and press .
3. Scroll to “Bookmarks” and press .
4. Scroll to the desired bookmark (if you bookmark a
website before) with and press .
5. Scroll to “Connect” and press to start
connection.
Note
If the selected bookmark is not available as desired,
select another profile and perform the procedures
described in “Activation of WAP service” again.
Accessing via navigation
1. When in idle mode, press to enter the main
menu.
2. Scroll to the “WAP” menu and press .
3. Scroll to “Navigation” and press .
4. Enter the URL of the Website (use ,
or to key in any special character).
5. Press to link to the web page.
Note
You may skip the prefix of the URL (i.e. http://).
Press and hold to exit the website that you
are visiting.
Please check with your network operator or
service provider for the information on WAP
settings.
Homepage
This option has connectivity with WAP. It connects to
the homepage that you have set.
Bookmarks
This option allows you to store up to 10 WAP URLs as
bookmarks in your handset memory.
Scroll to the desired bookmark and press to
continue with the following options:
Connect
Link to the website that you have set the URL. Press
to start the connection.
Edit
Enter the URL for the website you want to connect to.
Rename Bookmark
Change the bookmark name.
Last Page
It takes you directly to the WAP URL that you
connected to last time.
Navigation
You may key in the URL that you want to connect to.
Empty Cache
This option allows you to clear the buffer memory of
the handset.

WAP 8
33
Cache is a buffer storage that is used to store the
data or web page that you have visited temporarily, so
that you can connect to the web site quickly and
easily next time.
Always clear the cache after you have visited any
web page that needs a personal identification number,
for example, bank account.
Network Settings
Active network settings
This option allows you to activate the connection
profile you want.
1. Press to enter the “Active network settings”
menu.
2. Select the desired profile you want to connect.
3. Press to activate the connection profile.
Edit active network settings
This option allows you to key in all the required
parameter settings, such as profile name, homepage,
IP address, IP port, data call type, according to the
information you have received from your network
operator. The availability and configuration may vary,
dependent on your network operator.
You may edit the following items:
Profile Name
Key in the name of the connection profile.
Homepage
Key in the URL of the homepage (if desired).
GSM Settings
1. IP Address: Input the IP address offered by your
network operator.
2. IP Port: Set the IP port.
3. Data Call Type: Select either “Analogue” or
“ISDN”.
4. Phone Number: Key in the phone number
required to connect to WAP service.
5. User Name: Key in the name of the user required
to connect to WAP service.
6. Password: Key in the password to connect to
WAP service.
History
This option allows you to view the records of your
connection to the GSM.
GSM
Press to access the following options:
Last Record
Check the visiting time of the last connection.
Total Record
Check the total time of the connection.
Clear Record
Clear the timer record of the connection time.

STK 9
34
STK
This menu is shown only if your SIM card provides
additional services. The name and contents of this
menu depends on the services available.
For availability, rates and information on using the
SIM service, check with your network service
provider.

Maintenance
35
Maintenance
Your mobile telephone is a radio transceiver, built
with precision electronic parts, and it needs to be
used with care. Observing the following
recommendations may prolong the phone’s life.
Please note the following points:
Keep the phone and its accessories out of the
reach of small children.
Keep it dry. Avoid contact with liquids. Humidity
and liquids contain minerals which corrode
electronic circuits.
Do not expose the phone to an extremely cold
environment, as this will cause a build-up of
moisture within the phone.
Do not expose the phone to an extreme heat as
high temperatures will shorten the life of
electronic parts, damage the battery, and cause
some plastic material parts to become deformed
or melt.
Do not attempt to disassemble the phone.
Non-expert handling of the phone may damage
it.
Do not use harsh chemicals, cleaning solvents or
strong detergents to clean the phone. The phone
may be cleaned with a soft cloth slightly
dampened in warm water.
Do not paint or otherwise coat the phone.
Do not use accessories, such as batteries
designed for other mobile phones, or any other
unapproved accessories. This will damage the
phone, violate the radio equipment regulations
and invalidate your warranty.

Access Codes
36
Access Codes
There are several codes required to access the
handset and SIM card. The access codes allow you
to avoid unauthorized use of your phone and SIM
card.
PIN code
The PIN (Personal Identification Number) protects
the card against unauthorized use. This code is
supplied with the SIM card. If the PIN is set to on,
the code is requested when the phone is switched
on.
If you enter an incorrect PIN code three times in
succession, the SIM card is blocked, key in the PUK
code.
PIN2 code
This code is supplied with the SIM cards and is
required to access certain functions, such as
accumulated costs. If your SIM card supports those
particular functions, you can activate them in your
handset. If you enter an incorrect PIN2 code three
times in succession, PIN2 code is blocked and you
will be asked for the PUK2 code.
PUK code
The PUK (Personal Unblocking Key) code is used
to unblock and change the locked PIN code. This
code may be supplied with the SIM card. If this is
not the case, check with your network service
provider for the code. If you enter an incorrect PUK
code ten times in succession, your SIM card is no
longer valid.
Contact your network service provider to replace
the SIM card.
PUK2 code
The PUK2 code is used to unblock and change the
locked PIN2 code. This code is supplied with the
SIM. If you enter an incorrect PUK code ten times in
succession, the functions that require PIN2 code in
order to be activated will no longer valid.
Contact your network service provider to replace
the SIM card.

Reference Information
37
Reference Information
EFR encoding decoder function
The F66 model (GSM/DCS) is equipped with the
latest encoding decoder and audio frequency
technology, to achieve superior audio quality.
At present, there are 3 types of encoding decoder
applied to GSM/DCS:
yEnhance full rate (EFR)
yFull rate (FR)
yHalf rate (HR)
The F66 model (GSM/DCS) mobile phone supports
the normally used EFR and FR encoding decoder.
All GSM and DCS cellular networks and phones
support FR encoding decoder.
If supported by the network operator, then the
network operator will automatically select the
relevant encoding decoder, which will be either
EFR or FR.
The F66 model is programmed to automatically
select the EFR where this is supported by the
network, allowing you to enjoy the superior audio
quality provided by EFR. Otherwise the phone will
select FR.
At present, only some networks support both the
FR and EFR encoding decoder.
If the network operator cannot support EFR, the
F66 model (GSM/DCS) mobile phone will
automatically adopt the FR encoding decoder.
Accessories
The accessories for the F66 model (GSM/DCS)
mobile phone include battery, charger and etc.
Please refer to “Battery Charging” for battery
charging method.
Battery
At present, the rechargeable battery approved by
the manufacturer is the lithium battery (LI-ION).
The standby time for a new battery is about 50-150
hours. The capacity of a battery may vary
depending on the environment, networks, SIM card
or options available.
Charger
Do not connect it to an incompatible product. It
charges the phone battery rapidly. To start
charging, plug the charger into a power supply and
insert the other end into the charge port at the
bottom of your phone.
The required charging time is approximately 5
hours. The battery charging status can be checked
on the mobile phone display.

Problem Solving
38
Problem Solving
Problem Solving
1. When you switch on your phone,
“Insert SIM card” is displayed.
a. Check that the SIM card is correctly installed.
b. Ensure that the gold chip is not damaged or
scratched.
c. Check the SIM card contact. If they are dirty,
clean them with an antistatic cloth.
2. When your phone shows “PIN”, “PIN2”,
“PUK”, “PUK2”, and “Barring code”.
a. Please contact your network service provider
for the numbers.
b. Enter the wrong PIN code three times in
succession, the SIM card will be blocked.
c. For the PUK code, check with your network
service provider.
3. No connection to network.
a. Check the signal strength meter in the display.
If the signal is weak, move to an open space
or move closer to a window and try again.
b. Contact your network service provider for
further detail.
4. Your correspondent cannot hear you.
a. Check that the network signal strength is
normal and try again.
b. Check that the microphone is unmuted.
c. Holding the phone closer to your mouth.
5. The battery won’t charge.
a. Check that the charger is properly connected.
b. The message “Charging” will only be shown
when you charge the battery with the handset
switched off.
6. You can’t make calls.
a. Check the signal strength meter in the display.
If the signal is weak, move to an open space
or, if you are in a building, move closer to a
window.
b. The network is busy, please try again later.
c. Check whether the call charge limit has been
reached.
7. The battery drains faster than normal.
a. Check whether you are in an area of variable
coverage. This uses extra battery power.
b. Ensure that the using environment is not in
extreme temperatures. At extreme hot or cold
temperatures, battery performance is
significantly reduced.
8. The LI-ION battery was being charged
overnight.
It is strongly recommended that not to charge the
battery for more than 24 hours. It may decline the
battery performance or cause damage to the
battery.
9. The headset starts beeping.
The signal is weak or out of coverage.

Index
39
Index
A
Active network settings 33
Auto Display 23
Auto Search 30
B
Barrings
All Incoming 29
All Incoming When Roaming 29
All Outgoing 29
Clear All 29
Outgo International 29
Outgo International Except Home 29
Broadcast 23
Build Multiparty Call 17
C
Call Back 22
Call Balance 25
Call Cost 25
Call Timer 25
Calling Display 30
Calls Limit 30
Capacity 23
Charge Rate 30
Clear Record 33
Connect 32
D
Data Call Type 33
Date & Time 27
Date Only 27
Delete All 23
Delete Inbox 22
Delete Outbox 22
Direct Reply 23
Divert
Clear All 29
No Reply 29
No Response 29
Unanswered 29
Unconditional 29
When Busy 29
E
Edit active network settings 33
Emergency calls 4
End Held Multiparty Call 18
End Held Signal Call 17
End One Call In Party 18
F
Filter One Call In Party 18
Index
40
Forward 22
G
Games
Gobang 31
Redcap 31
Settings 31
Group 21, 22, 33
GSM 33
GSM Settings 33
H
Hold Multiparty Call 17
Hold Signal Call 17
Homepage 33
I
Inbox 22
IP Address 33
IP Port 33
L
Last Record 33
M
Manual Search 30
Mute Off 17
Mute On 17
N
No Display 27
O
Off 23
On 23
Outbox 22
P
Password 33
Phone Number 33
Profile Name 33
R
Read New CB 23
Redial
fast and easy 16
via the menu 16
Rename Bookmark 32
Reply 22
Retrieve Multiparty Call 18
Retrieve Signal Call 17

Index
41
S
Save Number 17
Search Name 21, 33
Send 22
Send SMS 17
Service Center 23
Service Indication 24
Settings 23
Status Report 23
Swap Call 17
T
Time Only 27
TopicList 23
Total Record 33
U
User Name 33
V
Valid Period 23
Voice Mail 23
Voice Mail Center 23
W
WAP
Access via navigation 32
Access via bookmark 32
Access via the homepage 32
Accessing 32
Activation 32
Issue Jan 2005.

F10_ENUM_R1.0 (DBT301M.T01.PH.004.H01.S)
DBTEL is a registered trademark of DBTEL Incorporated.
Copyright © 2004 DBTEL Incorporated. All rights reserved.
No part of this publication may be reproduced or distributed in any form or by any means, or stored in a database or retrieval
system, without the prior written permission of the publisher.
DBTEL Incorporated reserves the right to make changes in technical and product specifications without prior notification.
Address: No.29, Tzu Chiang St, Tu-Cheng, Taipei, Taiwan.
Website: http://www.dbtel.com.tw
Warning: Use only approved accessories and battery. Do not connect to any incompatible products; otherwise, it will
invalidate the recognition or warranty applying to your mobile phone.
The font type of the legend, graphics or icons in the user manual may differ from that shown on the handset.
Technical specifications and certain features are subject to change in technology, design, software upgrade and availability.
USER MANUAL
F10

Safety Information
For your safety, please read the guidelines below carefully before you use your phone:
Exposure to Radio Frequency Signals
Max. SAR Measurement (1g) PCS1900
Head: 0.42 W/kg
Body: 0.60 W/kg
Your wireless handheld portable telephone is a low power transmitter and recommendations for the protection of public exposure
to RF electromagnetic energy.
• International Commission on Non-Ionizing Radiation Protection (ICNIRP) 1996
• Verband Deutscher Elektringenieure (VDE) DIN- 0848
• Directives of the European Community, Directorate General V in Matters of Radio Frequency Electromagnetic Energy
• National Radiological Protection Board of the United Kingdom, GS 11, 1988
• American National Standards Institute (ANSI) IEEE. C95.1- 1992
• National Council on Radiation Protection and Measurements (NCRP). Report 86
• Department of Health and Welfare Canada. Safety Code 6
These standards are based on extensive scientific review. For example, over 120 scientists, engineers and physicians from
universities, government health agencies and industry reviewed the available body of research to develop the updated ANSI
Standard.
The design of your phone complies with these standards when used normally.
This device complies with part 15 of the FCC Rules. Operation is subject to the condition that this device does not cause harmful
interference
Notice
To reduce exposure to electromagnetic radiation, use the handset properly.
SAR Radiation Limit: 2.0 W/Kg
Tested SAR Rating: 0.698 W/Kg
Safety Information
DBTEL handset is the first Specific Absorption Rate (SAR) compliance in Taiwan.
Compliance with International standard
SAR Radiation Limit: 2.0 W/Kg
Tested SAR Rating: 0.698 W/Kg
Product Safety
Product Safety is always the first priority of DBTEL Incorporated. With the SAR Safety Certificate,
we show our persistence in making customer safety the paramount importance.
R&TTE Directive requirements
A declaration of conformity to the essential requirements.
Identification of the European countries in which the equipment is intended to be used.
Identification of the public telecommunication network to which the equipment is intended to be
connected.
“Hereby, we <DBTEL Inc.>, declares that this F10 is in compliance with the essential
requirements and other relevant provisions of Directive 1999/5/EC ”.

Contents
1
European Union - SAR 3
For Your Safety 4
Your F10 5
Your phone ------------------------------------------5
Specification---------------------------------------5
Key description -------------------------------------5
Function key table--------------------------------5
Display indicators ----------------------------------6
Status indicators on main display------------6
Backlight--------------------------------------------7
Installation 8
Installation of the SIM card and the battery 8
Removal of the SIM card and the battery --8
Battery Information 9
Battery charging------------------------------------9
Battery specification-------------------------------9
Notice on battery charging and discharging-9
Low battery indicator------------------------------9
Use of battery---------------------------------------9
Battery disposal ------------------------------------9
Quick & Easy 10
Menu Map 11
Call Functions 15
Turning your phone ON and OFF ----------15
When PIN is requested----------------------- 15
Unlock a blocked SIM card------------------15
Making calls ---------------------------------------16
Domestic calls-----------------------------------16
International calls-------------------------------16
Making calls via the phone book-----------16
Redial calls missed, received and dialed 16
Speed dial----------------------------------------16
Calling your voice mailbox-------------------16
Answering calls-----------------------------------17
Call waiting--------------------------------------- 17
In-call menu-------------------------------------- 17
Multiparty ----------------------------------------- 18
Other operations ---------------------------------18
Keypad lock--------------------------------------18
Input text------------------------------------------18
Smart English -----------------------------------18
Using Smart English input -------------------19
Using The Menu 20
Accessing the menu function ---------------20
Returning from menu function--------------20
Phone Book 21
View------------------------------------------------21
Add New------------------------------------------ 21
Copy Records----------------------------------- 21
Delete All -----------------------------------------21
Fixed Dial List ----------------------------------- 21
Speed Dial ---------------------------------------21
Handset Status ---------------------------------21
Own Numbers-----------------------------------21
Messages 22
Messages ----------------------------------------22
WAP PUSH-------------------------------------- 24
Records 25
Recent Calls------------------------------------- 25
Clear Logs --------------------------------------- 25
Call Register-------------------------------------25
Ringer 26
Volume-------------------------------------------- 26
Ringer Type-------------------------------------- 26
Call Alert ------------------------------------------26
Clock 27
Alarm ----------------------------------------------27
Time & Date Setting -------------------------- 27
Display Mode------------------------------------ 27
Auto Power off ---------------------------------- 27
Clock 28
Settings 28
Normal ----------------------------------------------28
Language-----------------------------------------28
Input Method ------------------------------------28
Backlight------------------------------------------ 28
Voice Volume------------------------------------28
Contrast-------------------------------------------28
Auto Keypad Lock -----------------------------28
Key Tones ---------------------------------------- 28
Anykey Answer ---------------------------------28
Auto Answer ------------------------------------- 28
Connection Alert--------------------------------28
Network Beep----------------------------------- 28
Restore--------------------------------------------28
Call Setting-----------------------------------------31

Contents
2
Own No. Send ----------------------------------31
Divert ----------------------------------------------31
Barrings-------------------------------------------31
Waiting --------------------------------------------31
Minute Beep ------------------------------------- 31
Auto Redial --------------------------------------31
Network---------------------------------------------31
Security ---------------------------------------------32
PIN Control --------------------------------------32
Change PIN ------------------------------------- 32
Change PIN2------------------------------------ 32
Fixed Dial Control ------------------------------32
Time Cost------------------------------------------32
Extras 33
Calculator-----------------------------------------33
Games --------------------------------------------33
Calendar------------------------------------------33
Wall Paper ---------------------------------------33
Download-----------------------------------------33
WAP 34
Basic steps for activating and accessing
WAP service-------------------------------------34
Homepage ---------------------------------------34
Bookmarks---------------------------------------34
Last Page ---------------------------------------- 34
Navigation----------------------------------------34
Empty Cache------------------------------------ 34
Network Settings -------------------------------35
History---------------------------------------------35
STK 36
Maintenance 37
Access Codes 38
PIN code------------------------------------------ 38
PIN2 code---------------------------------------- 38
PUK code ----------------------------------------38
PUK2 code--------------------------------------- 38
Reference Information 39
EFR encoding decoder function ------------39
Accessories ---------------------------------------39
Battery---------------------------------------------39
Charger -------------------------------------------39
Problem Solving 40
Problem Solving ---------------------------------40
Index 41

European Union - SAR
3
European Union - SAR
SAR (European Union)
This Model phone meets the EU Requirements for
exposure to radio waves.
Your Mobile Phone is a radio transmitter and
receiver. It is designed and manufactured not to
exceed the limits for exposure to radio frequency (RF)
energy recommended by the Council of the
European Union. These limits are part of
comprehensive guidelines and established permitted
levels of RF energy for the general public. The
guidelines were developed by independent scientific
organisations through the evaluation of scientific
studies. The limits include a substantial safety
margin designed to ensure the safety of all persons,
regardless of age and health.
The exposure standards for mobile phones employ a
unit of measurement known as the Specific
Absorption Rate, or SAR. The SAR limit
recommended by the Council of the European Union
is 2.0 W/kg.* Tests for SAR have been conducted
using normal operating conditions with the phone
transmitting at the highest certified power in all tested
frequency bands. This is because the phone is
designed to operate at multiple power levels so as to
use only the power required to reach the network. In
general, the closer you are to the station antenna,
the lower the power output.
Before a phone model is available for sale to the
public, compliance with the European R&TTE
directive must be shown. One of the essential
requirements of this directive is the protection of the
health and safety for the user and any other person.
The highest SAR value for this model phone when
tested for compliance against the standard is 0.698
W/kg. While there may be differences between the
SAR levels of various phones and at various
positions, they all meet the EU requirement for RF
exposure.
* The SAR limit for mobile phones for public use is 2.0
watts/kilogram (W/kg) averaged over ten grams of
body tissue. The limit incorporates a substantial
margin of safety to give additional protection for the
public and to account for any variations in
measurements.
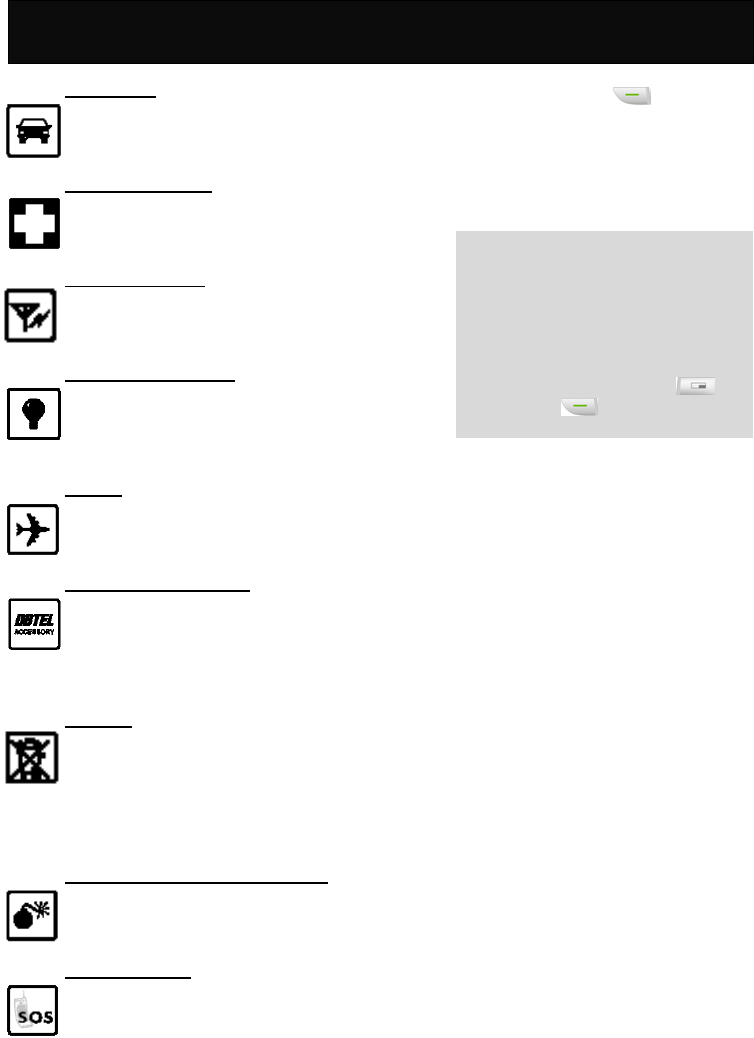
For Your Safety
4
For Your Safety
Road safety
Exercise proper control of the car at all times.
Do not use handheld phones while driving,
and always use the hands free kit.
Special regulations
Always switch off your mobile wherever use
is prohibited, such as hospitals, as it may
cause interference to medical equipments.
Electronic devices
Mobile phones can interfere with appliances
such as computers, televisions and other
radio equipments.
Other medical devices
Mobiles phones can interfere with signals of
personal medical devices, such as
pacemaker or hearing aid. Consult your
doctor for advice before using the mobile.
Aircraft
The use of mobile phones is prohibited in the
air. Switch off your phone before boarding
an aircraft.
Accessories and battery
Use only approved accessories and
batteries. Do not connect to any
incompatible product. This will invalidate any
warranty applying to your mobile phone and
may be dangerous.
Disposal
Your mobile phone and other accessories
must be disposed of properly. They must not
be thrown away in municipal waste! Please
dispose of used mobile phones and other
accessories in accordance with local
regulations.
Potentially explosive atmospheres
Switch off your phone when in or near
explosive areas petrol stations and chemical
plants.
Emergency calls
Make sure your phone is switched on and in
a service area with adequate reception.
When in idle mode, key in the emergency
call number and press to be
connected to the emergency services.
Provide all the necessary information as
accurately as possible. Do not hang up until
you are told to do so.
Note
Even when the keylock is activated,
emergency calls can still be made.
If a PIN is set when switching on the
mobile phone with SIM card inserted, you
will be asked for the PIN code. Any
emergency call can be made without
entering the PIN code. Press
followed by to make an emergency
call.
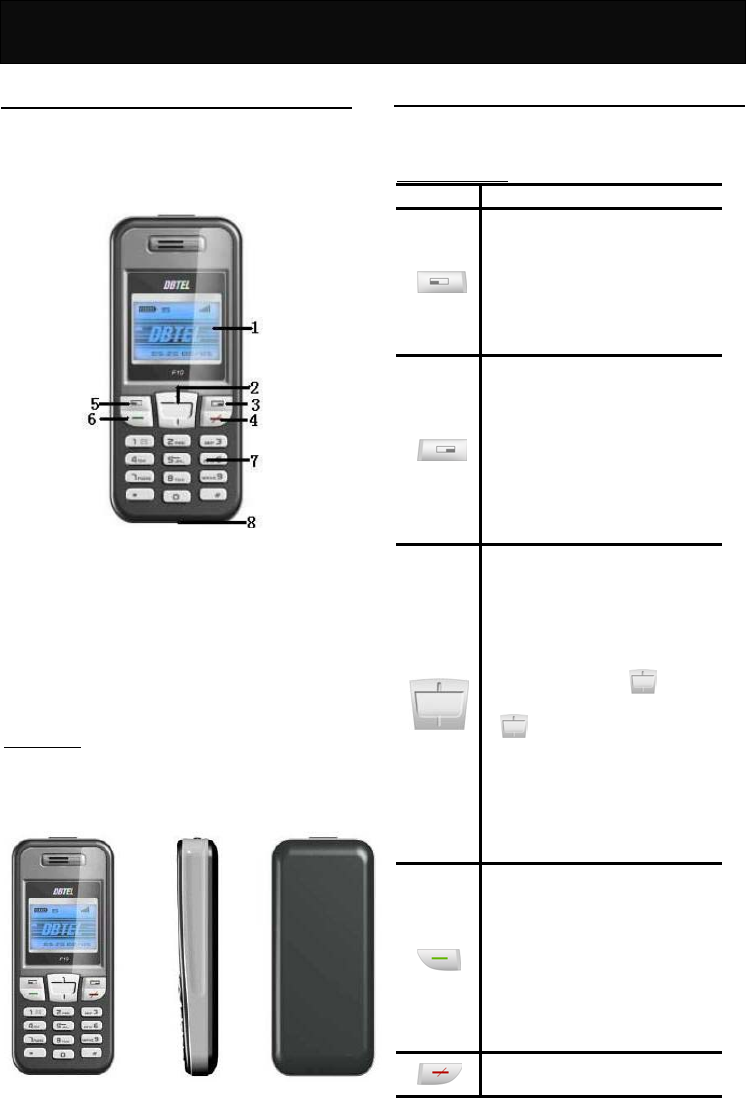
Your F10
5
Your F10
Your phone
Your mobile phone is a radio transceiver. When the
phone is turned on, it transmits and receives radio
frequency (RF) signals.
The front and back opened views of the F10 handset
are shown below:
1. LCD display
2. Navigation key
3. Clear key/Phone Book access key
4. Power key/End call key
5. Soft key
6. Call key
7. Alphanumeric keys
8. Charger port /Earphone jack/data downloading
port
Specification
Dimension (with battery pack)
80 (L) x 42 (W) x 22 (D) mm
Weight (with battery pack)
71.5g
Key description
The following tables provide you with a description of
the keys on the keypad.
Function key table
KEY FUNCTIONS
Soft key
Follow the prompt on the screen,
press to access the following
options: “Menu”, “OK”, “Options”
or “View”, etc.
Press to access the In-call menu
during a call.
Clear key/Phone Book access key
Follow the prompt on the screen,
press to access the following
options: “Names”, “Clear” or
“Back”, etc.
When in idle mode, press to
access the phone book directly to
search for a required name for
dialing.
Navigation key
Press vertically to scroll through
the lists when accessing menus.
Press vertically to move the
cursor left and right during the
editing of words.
In idle mode, press up to
access Ringing Tone menu, press
down to access the quick
access menu, which includes 9
commonly accessed functions,
such as Alarm, Backlight, Input
Method, Wall Paper, Calculator,
Calendar, Games, Auto Answer,
Speed Dial.
Call key
Press to place a call or answer an
incoming call.
In idle mode, press to view the
latest dialed, received and missed
phone call list. Each list contains
10 entries.
Press and hold to enable the
hands free function.
Power key/ End call key
In idle mode
,
p
ress and hold to
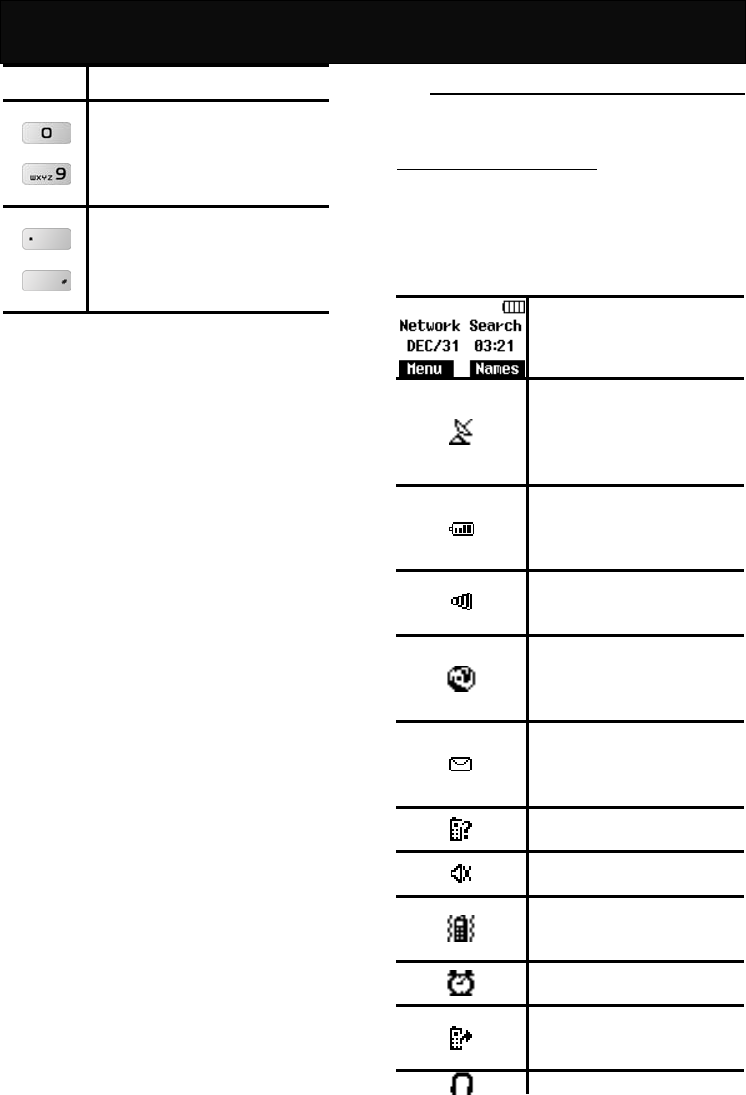
Your F10
6
turn the phone on and off.
to
Alphanumeric key
Press to key in digits, letters or
special characters. Its functions
may vary according to the
available menu.
and
Symbol key
Press to key in the symbols
displayed on the key. Its functions
may vary according to the
available menu.
Display indicators
The following tables provide you the indicators shown
on the both main and sub LCD display.
Status indicators on main display
A number of status indicators are shown at the top of
the screen to tell you of the relevant settings of your
handset. Some of the icons listed below may not be
available at a given time and vary depending on your
local network operator.
Idle display. Shown when the
phone is not in use.
Network. Shown with the signal
strength to indicate the network
status. If no signal strength is
shown, it indicates that it is
searching for the network.
Battery charge indicator. The
more bars that are shown, the
more power is available in the
battery.
Signal strength. The more bars
shown, the better the signal
strength.
Roaming. Shown when
registered with a system other
than the original one
(Inter-system Roaming).
Short message. Shown when
there is an unread incoming text
message. Flashes when the
memory is full.
Missed call. Shown when there
is an unanswered incoming call.
Silencer. Shown when the
incoming call alert is set to quiet.
Vibrator. Shown when the
incoming call alert is set to
vibrate alert.
Alarm. Shown when the alarm is
set.
Call divert. Shown when the
unconditional divert call is
activated.
Headset. Shown when the

Your F10
7
headset is connected to the jack
and the headset function is
enabled.
Beep Only. Shown when the
incoming call alert is set to “Beep
Only”.
Backlight
When pressing a key or answering incoming call, the
backlight will automatically turn on for 10 to 30
seconds or you can define the backlight duration
(ranges from 1 – 99 seconds) by preference. For
information on the setting, please refer to “Normal” in
“Settings”.
.

Installation
8
Installation
Installation of the SIM card and the
battery
Note
Keep the SIM card and batteries out of the reach of
small children.
Before proceeding, ensure that the phone is
switched off if a battery has been installed.
1. Press the battery cover catch downwards at the
top of the handset with one hand and remove the
battery cover with the other hand.
2. Push the battery upwards and remove the battery
from the battery slot.
3. Insert the SIM card into the SIM cardholder,
ensuring that the angled corner is on the lower
left-hand side with the gold metallic contact
surface facing downward.
4. Replace the battery with its catch pins inserted into
the catch slots and press down until it is firmly
seated in the battery slot. Then replace the battery
cover and press down the battery cover catch until
it clicks into place.
Removal of the SIM card and the
battery
Repeat the same procedures described in the
“Installations of the SIM card and the battery” to
remove the SIM card and the battery.
Note
You may access the following functions before
inserting the SIM card: Alarm, Date & Time Setting,
Calculator, Games, Calendar and Wall Paper.

Battery Information
9
Battery Information
Battery charging
Note
Use only the approved battery and charger supplied
by the phone manufacturer.
1. Plug the connector of the travel charger into the
charger port at the bottom of the phone.
2. Plug the charger into the AC power supply socket
and the battery indicator starts scrolling. The
charging message will be displayed after
connecting it to the power supply if the handset is
switched off. An icon indicating the charging is in
progress is shown on the sub display regardless of
whether the handset is switched off or on.
3. When the battery is fully charged, the battery
indicator will stop scrolling.
4. If the battery is completely flat with the handset
switching off, the charging message will take a few
minutes to appear after connecting it to the power
supply.
Note
You can use the phone, if switched on, while it is
charging.
While charging, make sure that the charger is
firmly connected to the charger port.
When charging the battery for the first time, charge
it for at least 12 hours.
For optimum battery power performance, 5 hours
of battery charging is recommended.
Do not remove the battery while charging is in
progress, otherwise it may cause damage to your
phone.
Battery specification
Please refer to “Accessories” of “Reference
Information” or the battery label.
Notice on battery charging and
discharging
1. Your phone is powered by a rechargeable battery.
2. Use only the specified charger supplied by
manufacturer for charging. Any other type of
charger may be dangerous.
3. Please note that the new battery will only reach its
best performance after being fully charged and
discharged 2 or 3 times.
4. When the charger is not in use, disconnect it from
the power supply. Do not leave the battery on
continuous charge for more than one week, as
overcharging will shorten the battery life. If a fully
charged battery is left unused, it will slowly
discharge itself over time.
5. An environment with extremely high or low
temperatures will affect the battery charging.
Optimum charging will be achieved in moderate
temperatures.
6. If the indicator of the desktop charger does not
light up or keep flashing while charging, remove
your phone or battery and insert them to the
desktop charger again until it lights up and starts
charging.
Low battery indicator
When the power is low, with only a few minutes of
calling time left, the handset will warn you with an
alert tone and the “Battery Low” message will be
displayed.
Use of battery
1. Never use a damaged or non-recommended
charger or battery.
2. Keep the battery at a temperature between 10℃
to 40℃ (50℉ to 104℉).
3. The effectiveness of your battery is particularly
affected in temperatures below 0℃ (32℉).
Battery disposal
Do not dispose of the battery in a fire. This may cause
a serious risk of explosion and/or release highly toxic
chemicals.
C Ensure that the battery is disposed of or recycled
properly.
C The battery must not be disposed of in municipal
waste.

Quick & Easy
10
Quick & Easy
This page provides some of the basic operations for
using your phone. For more detailed information,
refer to “User Manual”.
Before Use
1. Remove the battery and insert your SIM card,
then re-install and charge the battery. For more
details, please refer to “Installation”.
2. Press and hold to turn on your phone. Wait
until the name of the network operator appears on
the screen.
Call Functions
Making calls
In idle mode, key in the area code, the phone
number and press to make a call.
Making calls fast and easy
In idle mode, press to access to the phone
book directly. Scroll to the desired name with
and press to make the call.
Answering calls
Press to answer a call.
Terminating calls
Press to end the active call.
Refusing calls
Press to refuse an incoming call.
Emergency calls
In idle mode, key in the emergency call number and
press to contact the emergency services
center.
Redialling
Press to view the recently dialed, answered or
missed phone numbers up to 10 entries each. Scroll
to the desired number with and press to
make the call.
Speed dial
Press and hold the alphanumeric keys ( to
) to call the phone numbers set in “Speed Dial”
which is up to 9 entries.
Phone Book Functions
Add new
Adding new numbers and names to handset or SIM
card.
1. In idle mode, key in the area code and the phone
number, press .
2. Scroll to either “Quick Save” or “Add Name” and
press .
3. If “Quick Save” is selected, the data entered will
be displayed for checking, press to confirm
the setting.
4. If “Add Name” is selected, perform the following
steps:
(1) Key in the name and press .
(2) Select either “Save To SIM” or “Save To
Handset” and press .
(3) If “Save To SIM” is selected, key in the location
number to where the entry to be saved and
press .
(4) If “Save To Handset” is selected, select the
desired group and press . The data
entered will be shown on the LCD display.
(5) Press to confirm the setting.
Keypad Lock
Lock keypad
In idle mode, press and hold to lock the
keypad.
After locking the keypad, the word “unlock” will be
shown on the right soft key.
Unlock keypad
Press and press accordingly to unlock
the keypad.
Other Functions
Clear screen
Press and hold to clear an entry that you are
editing.
Adjusting the earpiece volume
You can adjust the earpiece volume by pressing the
navigation key up or down during a call.
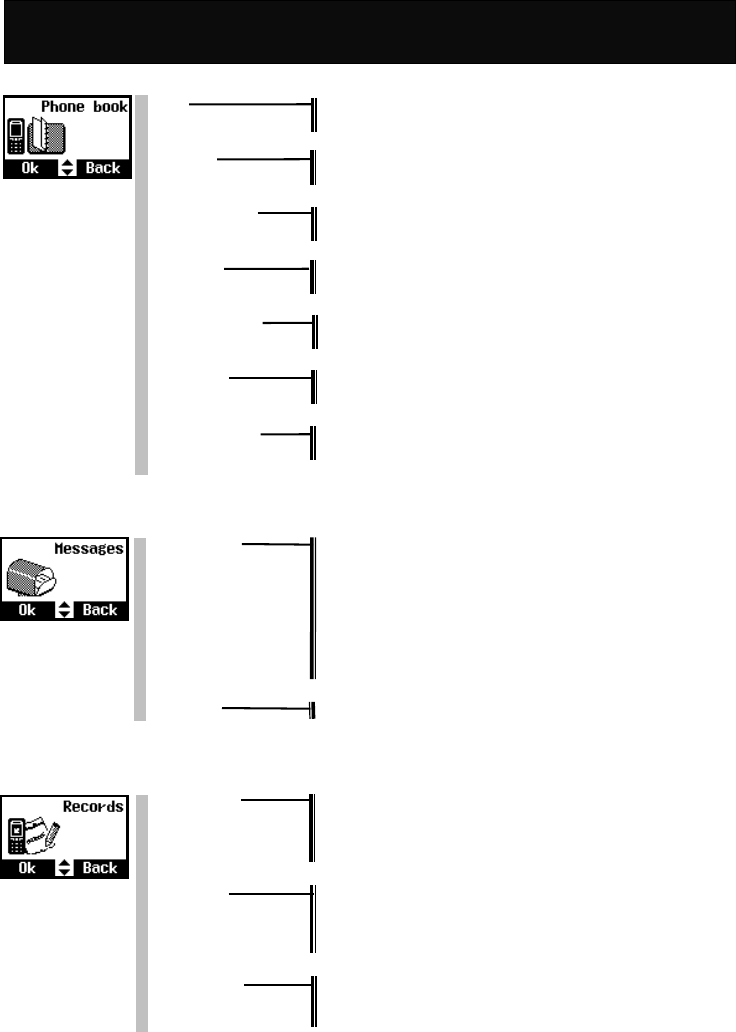
Menu Map
11
Menu Map
1 Phone book
View Search Name
Group
Add New Quick Save
Add Name
Copy Records SIM to Handset
Handset to SIM
Delete All SIM All
Handset All
Fixed Dial List View List
Add New
Speed Dial Edit
Delete
Handset Status
Own Numbers Edit
Delete
2 Messages
Messagess Inbox
Outbox
Send
Delete
Settings
Voice Mail
Broadcast
Capacity
WAP PUSH Service Indication
3 Records
Recent Calls Dial
Quick Save
Add Name
Delete
Clear Logs Outgoing Call
Incoming Call
Missed Call
Clear All
Call Register Call Timer
Call Cost
Call Balance
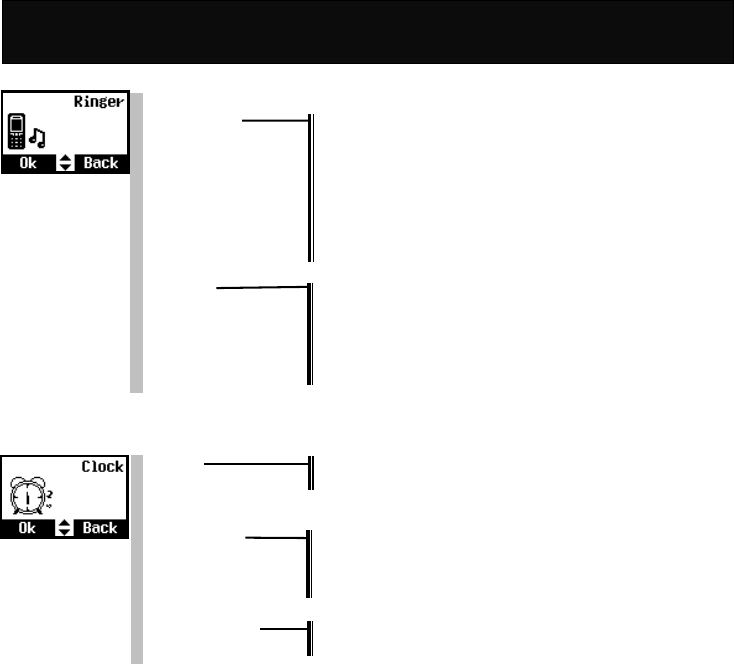
Menu Map
12
4 Ringer
Volume
Ringer Type Any Call
Phonebook Calls
Group Calls
Alarm
Message
Broadcast
Power On Music
Power Off Music
Call Alert Vibrator Only
Ringer Only
Vibrator & Ringer
Vibrator Then Ringer
No Ringer & Vibrator
Beep Only
5 Clock
Alarm ON
OFF
Time & Date Setting
Display Mode Date Only
Time Only
Date & Time
No Display
Auto Power off ON
OFF
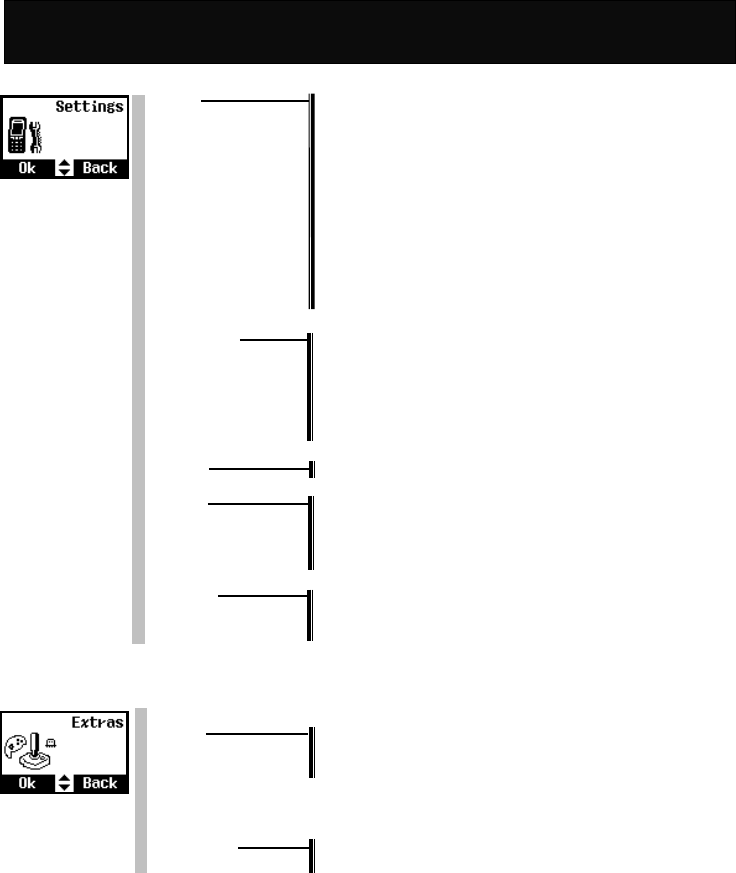
Menu Map
13
6 Settings
Normal Language
Input Method
Backlight
Voice Volume
Contrast
Auto Keypad Lock
Key Tones
Anykey Answer
Auto Answer
Connection Alert
Network Beep
Restore
Call Setting Own No. Send
Divert
Barrings
Waiting
Minute Beep
Auto Redial
Network Search Mode
Security PIN Control
Change PIN
Change PIN2
Fixed Dial Control
Time Cost Calling Display
Charge Rate
Calls Limit
7 Extras
Calculator
Games Redcap
Gobang
Settings
Calendar
Wall Paper
Download Download Melody
Download Picture
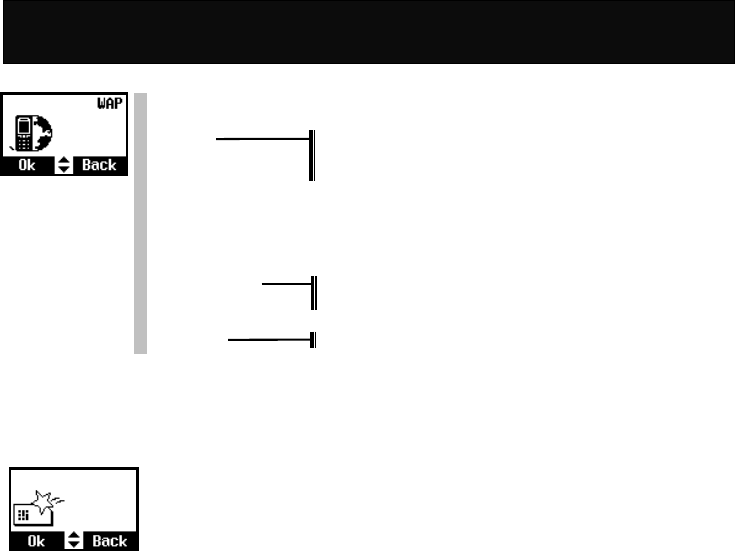
Menu Map
14
8 WAP
Homepage
Bookmarks Connect
Edit
Rename Bookmark
Last Page
Navigation
Clear Cache
Network Settings Active network settings
Edit active network settings
History GSM
9 STK
The availability depends on your network service provider.
Call Functions
15
Call Functions
Turning your phone ON and OFF
Press and hold for 3 seconds and then release
it.
Note
Always switch off your phone whenever it is forbidden
to use it or when it may cause interference or danger.
When PIN is requested
SIM cards are usually protected with a PIN code.
The PIN code usually comes with your SIM card
provided by the network operator.
1. Key in your PIN code (note that the characters in
your password are replaced with “*”).
2. After you have entered the PIN code, press .
3. If you key in a wrong number, press to
remove the last digit.
4. If the PIN code entered is incorrect, a warning
message will be displayed to notify you of the
remaining times for entering the PIN.
Note
If an incorrect PIN code is entered 3 times in
succession, your phone will automatically lock-up the
SIM card and a message will be displayed to inform
you that the SIM card is blocked.
Unlock a blocked SIM card
If your SIM card is locked, you will be asked to enter
the PUK code to unlock your phone in order to
continue using it.
To unblock the SIM card:
1. Key in the PUK code, press (check with your
network service provider for the PUK code).
2. Key in a new PIN code, press .
3. Repeat the new PIN code and press .
Note
The unblock code consists of 8 digits, and is
provided with the SIM card. If not, please check
with your network service provider for the code.
If an incorrect PUK code is entered 10 times in
succession, the SIM card will be blocked
automatically. Please consult your service provider
for the SIM card unblocked!
Call Functions
16
Making calls
1. When in idle mode, key in the area code and
phone number. To edit, press to delete the
last digit.
2. Press to dial the number.
3. Press to end an active call or stop dialing.
Domestic calls
When in idle mode, key in 02154422999 and press
to make the phone call.
International calls
1. When in idle mode, press and hold until a “+”
(the prefix for making international call) sign
appears, then key in the country code, area code
and phone number accordingly.
2. Press to place the call.
3. Press to end an active call to stop dialing.
Example:
When in idle mode, key in +862154422999 and
press to make the phone call.
Making calls via the phone book
1. Press to access the Phone Book directly.
2. Scroll to the desired entry with .
3. Press to make the call.
Redial calls missed, received and dialed
The last 10 phone calls that you dialed, answered or
missed are stored in the phone’s memory. Perform
either of the followings to redial the call.
Redial fast and easy
1. In idle mode, press to view the last phone
calls dialed, answered and missed.
2. Press to dial the selected number.
Redial via the menu
1. In idle mode, press and scroll to “Records”
with .
2. Press .
3. Select “Recent Calls” and press to view the
recently incoming and outgoing calls records.
Where:
indicates a missed call
indicates a received call
indicates a dialed call.
4. Scroll to the desired entry with .
5. Press to check the information of the call.
6. Press to continue the next operation with
the available options.
Speed dial
In idle mode, hold down the corresponding
alphanumeric keys ( to ) to dial the preset
speed dial numbers.
Note
Ensure that you have entered the settings in “Speed
Dial”.
Calling your voice mailbox
In idle mode, dial the number provided by the network
service provider to access the voice mailbox or press
and hold to access the voice mailbox directly.
Note
Obtain your voice mail number from the network
operator, and ensure that the number is set in“Voice
Mail Center”.
Call Functions
17
Answering calls
1. Press to answer an incoming call.
2. Press to refuse an incoming call.
Note
If you have activated the divert call function, any
incoming calls will be diverted to specified number.
For example, you may divert incoming calls to your
voice mail. When an incoming call is refused, the call
will be diverted too. Please refer to “Divert”.
Call waiting
If the call waiting function is activated, you may
answer a new incoming call while already on line.
1. If there is an incoming call while you are already on
line, a tone will be heard and a notification
message with the caller information will be
displayed on the screen.
2. Press to answer the new call. The active call
will be automatically placed on hold.
3. Press to refuse the new call.
4. If you want to make a new call while you are on a
call, simply key in the number, press to dial
the number. The active call will be automatically
placed on hold.
Note
The call waiting function allows you to manage up to
two calls simultaneously (1 active, 1 on hold). To
answer the third incoming call, end one of the active
calls, or establish a multiparty call for the two online
calls before answering the third call.
In-call menu
During a call, you can access to the In-call menu by
pressing . Some of the options listed in In-call
menu may not be available at a given time and vary
depending on your network operator.
Functions that are available in normal mode
Mute On
Mutes the mobile phone. When this option is selected,
if the phone is in call waiting mode, the party on the
phone will not hear you and will remain on held.
Mute Off
Cancels the mute function.
Hold Signal Call
Places an active call on hold.
Retrieve Signal Call
Resumes the conversation with the call on hold.
End Held Signal Call
Ends the call on hold.
Send SMS
Send short messages that consist of text, built-in
picture or melody to another party during calls. For
details of this function, refer to "Messages".
Save Number
Saves the important phone number during a
conversation if necessary.
Functions that are available in call waiting mode
Mute On
For details of this function, please refer to the function
described above.
Mute Off
For details of this function, please refer to the function
described above.
Swap Call
Switches between active calls and calls on hold when
in call waiting mode.
End Held Signal Call
For details of this function, please refer to the function
described above.
Send SMS
For details of this function, please refer to the function
described above.
Save Number
For details of this function, please refer to the function
described above.
Build Multiparty Call
Starts a multiparty conference call with up to 4
participants. For details of this function, refer to
“Multiparty”.
Functions that are available in multiparty
conference call mode. When the multiparty
conference call is activated, the phone gives you
access to some specific functions. The availability
depends on your network operator.
Mute On
For details of this function, please refer to the function
described above.
Mute Off
For details of this function, please refer to the function
described above.
Hold Multiparty Call
Places the current multiparty conference call on hold.
Retrieve Multiparty Call
Resumes the conversation with the multiparty
conference call on hold.
Call Functions
18
End Held Multiparty Call
Ends the multiparty conference call on hold.
Send SMS
For details of this function, please refer to the function
described above.
Save Number
For details of this function, please refer to the function
described above.
End One Call In Party
Terminates the connection with one of the
participants from the multiparty conference call.
Filter One Call In Party
Chooses a participant from the multiparty conference
call for a private conversation.
Multiparty
This option allows a conference call with up to 4
parties. Please check with your network operator for
the availability of multiparty conference calls.
1. Make sure that you have established two on-line
calls (1 active, 1 on hold), before activating
multiparty conference call.
2. Press and select “Build Multiparty Call” to
start a multiparty conference call.
3. To add a new participant to the multiparty
conference call, perform the following steps:
(1) Press to answer the new incoming call.
(2) Press and select “Build Multiparty Call”.
4. To release a participant from the conference call,
perform the following steps:
(1) Press and select “End One Call In Party”.
(2) Press .
5. To hold a private conversation with one of the
participants, perform the following steps:
(1) Press and select “Filter One Call In
Party”.
(2) Press .
Note
The existing multiparty conference call will then be
automatically placed on hold.
6. To end an active conference call, press .
Other operations
Keypad lock
This feature locks the keypad to prevent keys from
being accidentally pressed.
1. To lock the keypad: In idle mode, press and hold
to lock the keypad. After the keypad is
locked, the word “unlock” will be shown on the right
soft key.
2. To unlock the locked keypad: Press and
press to unlock the keypad. This operation
must be completed in 3 seconds.
3. To answer an incoming call while the keypad is
locked: To answer an incoming call, press .
To reject an incoming call, press . During
calls, your mobile phone operates as if it were
unlocked.
Note
Even if the keypad is locked, an emergency call can
still be made.
Input text
The F10 model provides a number of input methods
for you to organize your phone book or write
messages.
By pressing , users may switch between the
different input methods. Press and hold to
switch between the smart input and normal input.
Note
In idle mode, use only numbers, the international
dialling prefix code “+” (press and hold )
and characters that are allowed for dialling. Other
letters or symbols are not allowed.
To input a specific letter or symbol, after selecting
the input style, press the corresponding key
repeatedly until the required letter or symbol
appears. For example: to input A, press
once; to input B, press twice, and so on.
To key in the same character in sequence, wait
for a second between each key press.
If you make a mistake, press to delete the
character to the left of the cursor; press and hold
to delete all characters on the screen.
Smart English
Smart English input is a much easier way to input a
text message in English. To enter each letter, just
Call Functions
19
press the corresponding alphanumeric key once. In
Smart English input, the alphanumeric keys enter
words with a single key press instead of multiple key
presses. When the first (or second) character is
entered, the display shows the most probable word in
the suggestion area. The word you select from the
suggestion area will move to the text area.
Using Smart English input
Switch to Smart English input by pressing “ ”
repeatedly until the desired input style appear.
Example
If you want to input “Telephone”, key in the following:
Press the navigation key to select the desired word
and press to pick the word.
Using The Menu
20
Using The Menu
This handset offers a range of functions that allow you
to customize the phone to your needs. These
functions are arranged in menus and submenus.
Accessing the menu function
1. In idle mode, press to go to the menu facility.
2. Scroll to the desired menu with .
3. Press to enter the desired submenu.
4. Scroll to the desired submenu with .
5. Press to access the submenu.
6. Press up or down to access the next menu of
the selected submenu.
7. Press to confirm the setting.
Returning from menu function
1. Press to return to the previous menu level.
2. Press to exit the menu and return to idle
mode without changing the menu settings.

Phone book 1
21
Phone Book
The “Phone book” is used to save phone numbers
and names in the handset or SIM card. You can save
up to 100 entries in the handset or SIM cards. The
SIM card capacity may vary depending on the
network service provider. When the memory of the
SIM card/handset is full, the data will be stored to the
handset/SIM card automatically.
In idle mode, proceed as follows:
1. Press to enter the main menu.
2. Scroll to “Phone book” with .
3. Press to access the menu.
View
You may view the names and phone numbers that
have been stored in the handset or the SIM card.
Search Name
1. Press to access the menu.
2. Key in the letter that corresponds to the first letter
of the name require in the phone book.
3. Scroll to the desired name or phone number and
press to dial the number.
Group
1. Scroll to the desired group and press .
2. Press to dial the number.
Add New
Add a new entry to the handset or the SIM card.
1. Press to access the menu.
2. Key in the area code and the phone number, press
.
Note
To key in the country code, press and hold until
the international dialing code “+” is displayed then key
in the appropriate country code. The steps for dialing
from abroad are the same as above.
3. Select either “Quick Save” or “Add Name” and
press .
4. If “Quick Save” is selected, the entry will be saved
directly to SIM card without editing.
5. If “Add Name” is selected, perform the following
steps:
(1) Key in the name and press .
(2) Select either “Save To SIM” or “Save To
Handset” and press .
(3) If “Save To SIM” is selected, key in the location
to where the entry to be saved and press .
(4) If “Save To Handset” is selected, key in the
location number to where the entry to be saved
and press .
(5) Scroll to the desired group and press .
Copy Records
This option allows you to transfer the entry from
handset to SIM card or vice versa.
1. Press to access the menu.
2. Scroll to either “SIM to Handset” or “Handset to
SIM” and press .
3. Press to keep the original records after
copying, press to cancel copying.
Delete All
This option allows you to delete the data from the
phone book in handset or SIM card.
1. Press to access the menu.
2. Scroll to either “SIM All” or “Handset All” and press
.
Fixed Dial List
The fixed dial list is to restrict the use of the SIM card.
If activated, it is only possible to make calls with
phone numbers that have been set in the list and the
emergency call number. You may view or add new
entry in the list. The PIN2 code is required to adjust
this setting.
Speed Dial
This option allows you to set the phone number up to
9 entries for one touch key dialing. When in idle mode,
press and hold the corresponding alphanumeric keys
to call the designated number.
1. Scroll to a specific key number and press .
2. Scroll to the desired entry in the phone book and
press to set the one touch key dialing.
Handset Status
You can check the memory capacity of your handset
and SIM card. For example: 45/100 means that there
is a total of 100 entries, 45 entries are saved with 55
entries of memory still available. The phone status of
SIM card may vary depending on memory capacity of
the SIM card.
Own Numbers
This option allows you to key in your own name and
the phone number for reference.

Messages 2
22
Messages
This menu allows you to send, read and write text
messages and voice mailbox as well as other
relevant features that are provided by network
service provider. You can also download some EMS
pictures and ring tones from the relevant webs.
In idle mode, proceed as follows:
1. Press to enter the main menu.
2. Scroll to “Messages” with .
3. Press to access the menu.
Messages
Inbox
If a new message is received, the icon will be
shown at the top of the screen and on the sub-screen.
And notification tones will be heard.
After reading, press to access the following
options:
Delete
Delete the message.
Reply
Reply to the message by writing text.
1. Press when finish writing the message.
2. Press to key in the recipient number.
3. Press to send the message.
Call Back
Reply to the message by calling. Press to call
the person who sends the message.
Forward
Forward the received message to others. You are
allowed to edit the message before sending.
Note
The message will be stored in the SIM card (SIM
card capacity depends on your network service
provider).
If the icon flashes, it means that there is
insufficient memory for new messages. Select
“Delete” in “Inbox” to delete old messages to free
up memory for new messages.
If there is no icon shown on screen, all received
messages have been read and there is sufficient
memory for new messages.
Outbox
All the saved messages can be found via this option.
1. Press to read the message.
2. After reading, press to continue with the
following options:
Send
1. Edit the message (if necessary) and press .
2. Use the existing recipient number and press
to send the message.
3. Alternatively, you may save the edited message
and send it to others.
Delete
Delete the message.
Note
You may read through the message by pressing .
If the cursor reaches the beginning or ending of the
message, you can go on with the previous or the next
message by pressing .
Send
You may write messages of up to 700 characters in
English.
1. Start composing message.
2. Enter the recipient number manually or press
to search for a desired name. For details of
the operation, please refer to “Send” in “Outbox”.
3. Press to continue with the next operation.
For details information, please refer to “Outbox”.
Note
If you make a mistake when writing, press to
delete the characters to the left of the cursor, press
and hold to delete all the characters.
Before sending any messages, you have to save
the message center number in the “Service
Center”. Please check with your network service
provider for the number.
Delete
This option allows you to delete the old messages
with the following options.
Delete Inbox
Delete all the messages in the Inbox.
Delete Outbox
Delete all the messages in the Outbox.

Messages 2
23
Delete All
Delete all the messages in both Inbox and Outbox.
Settings
The SMS profile defines the transmission
characteristics of the SMS. The availability depends
on your SIM card. You may change the profile with
the following options.
Service Center
Enter or change the phone numbers of the service
center supplied by the service provider.
Note
Please check with your network service provider for
the number.
Voice Mail Center
This option stores the required voice mailbox number
for listening to the voice messages.
Note
Please check with your network service provider for
the number.
Validity Period
This option allows you to set the period which the
service center keeps the undelivered message.
Status Report
The service center will send you the report of the
messages sent.
Direct Reply
When activated, the service center of an incoming
SMS will be used to directly reply to the SMS and not
the SMS number contained in your handset.
Availability depends on your network service
provider.
Voice Mail
This option allows you to access the voice mailbox
directly to listen the voice messages.
Note
Ensure that you have entered the number provided
by your network service provider in the “Voice Mail
Center”.
Broadcast
This option allows you receive the information
broadcasted by your network service provider (such
as weather forecast or road traffic information).
Please contact your network service provider for
information on the topics available and its
corresponding index.
On
Activate the reception of all the topics defined in the
list. This function uses up the battery more quickly.
Off
Deactivate the broadcast service.
Read New CB
Read the new CB messages up 10 entries. If the CB
messages received exceed the maximum number,
the new message will replace the oldest message.
TopicList
View the broadcasting topic list or add a new topic to
the list.
You can add and set an unrestricted topic to this
personal list by choosing from the topics index. You
can preset 15 entries with their index number (ID) and
rename 5 of them, if necessary. You may activate 10
topics at a time.
To add a new topic:
1. Scroll to “<New Topic>” and press .
2. Enter the index of the topic and press .
3. Enter the name of the topic and press .
To edit an existing topic:
1. Scroll to the desired topic and press .
2. Continue the next operation with the available
options, such as “Deactivate”, “Edit”, “Delete” and
“View ID”.
Auto Display
If activated, the CB messages will be displayed
automatically and displayed longer messages in
scrolling mode.
Capacity
You can view the memory capacity for the inbox and
outbox as well as the available memory space.

Messages 2
24
WAP PUSH
This function allows services to send information
proactively to mobile subscribers. WAP Push is an
SMS within the header of which is included a link to a
WAP address. On receiving a WAP Push, the
compatible mobile handset automatically gives the
user the option to access the WAP content on his
handset. The WAP Push directs the end-user to a
WAP address where content is stored ready for
viewing or downloading onto the handset. This WAP
address may be a page or a WAP site.
WAP Push applications are being used in the delivery
of mobile related content such as polyphonic ring
tones, java mobile games, applets, weather forecasts
and stock price alerts, colour screensavers, and
picture messages, incoming email alerts and
advertising campaigns.
Service Indication
This function signals an event of which the client
should be get informed and have a message and a
URL to a WML page where more information can be
retrieved sent with the message.
Records 3
25
Records
This option provides a record of call duration, call
cost, recent calls and relevant settings.
Some of the functions require the PIN 2 code in order
to access them. For information on the PIN 2 code,
please refer to “Security”.
Availability of the call records depends on the
network service provider.
In idle mode, proceed as follows:
1. Press to enter the main menu.
2. Scroll to “Records” with .
3. Press to access the menu.
Recent Calls
You may view the call records of the phone. The
phone calls that you have dialed, answered or not
answered are listed for your review.
1. Press to dial the selected number.
2. Press to continue with the further operation.
Note
If a number existed several times, only the last entry
will be shown on the list.
Clear Logs
This option allows you to delete the records of
outgoing, incoming or missed calls. You can even
delete all call records at a time.
Call Register
This option provides you the information on the call
duration, call cost and the balance.
Call Timer
After accessing to this menu, press to view the
information on call duration of last call, outgoing and
incoming calls, and the total time of both outgoing and
incoming calls.
Call Cost
Provides you the information on the accumulated call
charges.
Call Balance
Provides you the information on the call cost limit and
balance.
Note
Availability depends on the settings in “Time Cost” in
“Settings”.
Ringer 4
26
Ringer
This option allows you to set the volume, type of the
ringing tone and the alert tones.
In idle mode, proceed as follows:
1. Press to enter the main menu.
2. Scroll to “Ringer” with .
3. Press to access the menu.
Volume
This option allows you to set the level of the ringing
volume by choosing from 5 levels with to
increase or decrease the volume.
Ringer Type
The ringing tone can be set for 8 specific categories,
which are “Any Call”, “Phonebook Calls”, “Group
Calls”, “Alarm”, “Message”, “Broadcast”, ”Power On
Music” and “Power Off Music”. For “Any Call”,
“Phonebook Calls”, “Group Calls” and “Alarm”, the
available ringing tone for setting are the 7 built-in
tones and 1 downloaded melodies (if available) or
decide not to set any ringing tones.
For “Message” and “Broadcast”, the available ringing
tones for setting are the 2 built-in ringing tones or
decide not to set any ringing tones.
For power on/off music, you can select whether or not
to set any ringing tones. Scroll to the music and press
to confirm the setting, press to cancel
the setting.
Call Alert
This option allows you to set the way the hand phone
prompts you when there is an incoming call.

Clock 5
27
Clock
This menu shows the options for setting the alarm,
auto power off, date and time and display mode (date
and time is displayed on the LCD display in idle
mode).
In idle mode, proceed as follows:
1. Press to enter the main menu.
2. Scroll to “Clock” with .
3. Press to access the menu.
Alarm
Sets the handset to ring at a specific time with the
desired ring tone.
1. Scroll to “ON” and press .
2. Scroll to either “Once”, “Everyday” or “Working
Day” and press .
Note
When the alarm goes off and no action is taken, the
alarm will ring for 1 minute. Press any key to stop the
alarm.
Time & Date Setting
Set the appropriate date and time for the phone,
using the following format DD/MM/YYYY where DD
is for day, MM is for month and YYYY is for year.
1. Press to set the date and time.
2. Key in the appropriate day, month and year.
3. Key in the appropriate time using the format
HH:MM:SS, where HH is for hour, MM is for minute
and SS is for second.
4. Press to confirm the setting.
Note
Please reset the date and time if the battery has been
detached for an extended period.
Display Mode
This option allows you to set the display format for
the date and time when the phone is in idle mode.
Date Only
It displays the date only on the LCD display when the
phone is idle.
Time Only
It displays the time only on the LCD display when the
phone is idle using either “12 Hour” or “24 Hour”
format.
Date & Time
It displays both the date and time on the LCD display
when the phone is idle using either “12 Hour” or “24
Hour” format.
No Display
No date or time is displayed on the LCD display when
the phone is idle.
Auto Power off
You may set the phone to switch off automatically at
a specific time.
1. Scroll to “ON” and press .
2. Scroll to either “Once” or “Everyday” and press
.
3. Key in the time for shutting down using the HH:MM
format, where HH is for hour and MM is for minute.
Note
Before the phone switches off, the message “Auto
Power Off” will appear. If no action is taken in several
seconds, the phone will switch off automatically.
Settings 6
28
Clock
Settings
This menu shows the options for setting the functions
related to the phone itself. The availability of some of
the functions depends on your network service
provider.
In idle mode, proceed as follows:
1. Press to enter the main menu.
2. Scroll to “Settings” with .
3. Press to access the menu.
Normal
This menu provides you the following options:
Language
This option allows you to change the language for
display message. Languages vary upon the language
package used.
Input Method
A number of input styles are provided to organize the
phone book or write message. For detailed
information, please refer to “Input text”.
Backlight
This option allows you to turn the LCD and keypad
illumination on and off.
After selected, you may set the duration of the
illumination with the available options or you can
define the time by yourself (ranges from 1 – 99
seconds).
Voice Volume
Set the earpiece volume at 5 levels.
Contrast
This option allows you to adjust the display contrast
by pressing .
Auto Keypad Lock
This option allows you to lock the keypad
automatically to prevent the keys from being
accidentally pressed.
Key Tones
This option allows you to set the keypad to make
sound at each key press.
Anykey Answer
If activated, press any key except and to
answer the incoming call.
Auto Answer
If activated (with headset connected), any incoming
call will be answered automatically without any
ringing or vibrating.
Connection Alert
This option allows you to set the way the handset
prompts you of the phone connection.
Network Beep
When activated, the handset will prompt you of the
network registering when powering on.
Restore
Restores some of the functions set in the phone to
their original configuration, except that the PIN code
and the PIN2 code. The data stored in the phone
book will not be affected. For detailed information on
factory default settings, refer to the table below.
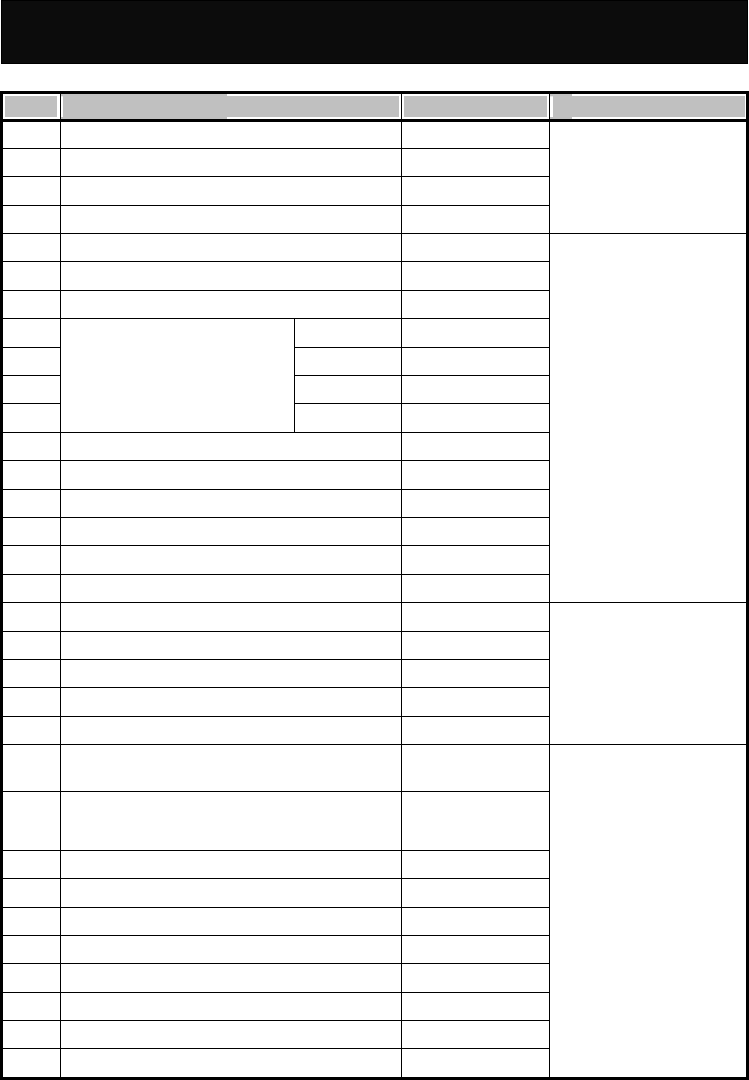
Settings 6
29
Items Setting Options Default Settings References
1 Status Report Off
2 Direct Reply Off
3 Broadcast Off
4 Auto Display (Broadcast) Off
Refer to “Messages” menu
5 Volume Level 5
6 Any Call (Ringer Type) Melody 1
7 Phonebook Calls (Ringer Type) Melody 1
8 Family Melody 1
9 Friend Melody 1
10 Workmate Melody 1
11
Group Calls (Ringer Type)
VIP Melody 1
12 Alarm (Ringer Type) Melody 1
13 Message (Ringer Type) Ring 1
14 Cell Broadcast (Ringer Type) Ring 1
15 Power On Music (Ringer Type) Ring 1
16 Power Off Music (Ringer Type) Ring 1
17 Call Alert Vibrator & Ringer
Refer to “Ringer” menu
18 Alarm Off
19 Date & Time (Display Mode) 24 Hour
20 Time Only 24 Hour
21 Display Mode Date & Time
22 Auto Power Off Off
Refer to “Clock” menu
23 Language Varies by language
package used
24 Input Method Varies by language
package used
25 Backlight On (10 Sec)
26 Voice Volume Volume 5
27 Contrast 79﹪
28 Auto Keypad Lock OFF
29 Key Tones Click1
30 Anykey Answer Off
31 Auto Answer Off
32 Connection Alert Tones
Refer to “Settings” menu

Settings 6
30
33 Network Beep On
34 Own No. Send On
35 Minute Beep Off
36 Auto Redial Off
37 Search Mode (Network Settings) Auto Search
38 PIN Control (Security Settings) Off
39 Fixed Dial Control (Security Settings) Off
40 Calling Display (Time Cost) On
41 Sounds (Games) On
42 Vibrator (Games) On
43 Wall Paper Wallpaper1
Refer to “Extras” menu
Table of factory default settings

Settings 6
31
Call Setting
You may set the functions related to the network
service. The availability of the functions depends on
your network service provider.
Own No. Send
Chooses whether or not your phone number is sent to
the called party.
Note
The availability depends on your network service
provider. If not available, any outgoing call is
impossible when deactivated.
Divert
This option is set to divert incoming calls to the voice
mailbox or another phone number, so as not to miss
any important calls.
There are 5 divert modes available which you can
activate, cancel. You can check its current status at
any time.
If activated, follow the prompt on the screen and key
in the phone number to which you wish the incoming
calls to be diverted.
Unconditional
Automatically divert all incoming calls.
Unanswered
Divert incoming calls when line is busy, no reply or no
response. If activated, the “When Busy”, “No Reply”
and “No Response” divert settings are activated
automatically.
When Busy
Divert all incoming calls when the line is busy (when
you are on a call) or you have rejected the incoming
call.
No Reply
Divert all incoming calls if there is no answer.
No Response
Divert all incoming calls when your phone is turned off
or out of coverage.
Clear All
Cancels all the call divert functions.
Barrings
This option provides SIM card restrictions when
making or answering calls. A network access code is
required to set all the barring functions (you must
contact your network service provider).
It contains 5 different barring modes and you can
activate, cancel or check its current status.
All Outgoing
You are not able to make any outgoing calls. Only
incoming calls can be accepted.
Outgo International
You are not able to make any outgoing international
calls. Incoming calls can still be accepted.
Outgo International Except Home
When abroad, you can only call the numbers within
that country or call to home country (i.e., the country
where the phone is registered).
All Incoming
If activated, you are not able to receive any incoming
calls.
All Incoming When Roaming
No incoming calls will be permitted while roaming.
Clear All
Cancel all the call restriction function.
Waiting
This option alerts you of an incoming call while
already on line. When activated, a tone will be heard
and the caller’s number will be shown on the main
and sub-display to notify you of a new incoming call.
Minute Beep
This option will remind you of the time elapsed. A
beep will be heard at every minute you talk on the
phone. For example, it beeps for 1 minute, 2 minutes
and so on.
Auto Redial
When activated, the phone will redial automatically
for unsuccessful call. It will repeatedly dial the
number at a fixed interval increment up to 10 attempts.
Any other use of the handset will cancel this function.
Press to cancel the dialing attempt.
Network
This is a networks related option. It allows you to

Settings 6
32
register with, search or select the available network
and some of the relevant settings.
Search Mode
The default setting is “Auto Search”. It usually
searches for the network operators using the priority
network list stored in SIM card.
Auto Search
When using auto search mode to search for the
networks, your phone will register with the priority
network list stored in your SIM card. Alternatively, you
can register with the network manually. Always select
the network operator that has a roaming agreement
with your network operator in your region/country.
Manual Search
When using the manual search mode to search for
the networks, always select the network operator that
has a roaming agreement with your network operator
in your region/country.
After selecting “Manual Search” mode, the mobile will
stay remain in “Manual Search” mode until the mode
is changed or a new SIM card is replaced.
Note
If you are not familiar with the network operator,
strongly recommended that you select “Auto Search”
mode.
Security
You can change your PIN code, PIN2 code or set
whether or not the PIN code is requested when
powering on to protect you against any unauthorized
uses of your SIM card and certain other features.
PIN Control
You are allowed to set a password to protect the SIM
card from any unauthorized use. If the PIN request is
activated, you will be asked for the PIN every time
you switch on the phone.
Change PIN
You can change the PIN code periodically in this
option.
Change PIN2
You can change the PIN2 code periodically in this
option. The PIN2 code is usually provided with the
SIM card. If this is not the case, please check with
your network service provider.
Fixed Dial Control
This option allows you to set fixed dial number. If
activated, it is only possible to make calls with phone
numbers that have been set in this function. The PIN2
code is required to adjust this setting.
Time Cost
This option allows you to set the following options:
Calling Display
This option shows you the information on call duration
during calls.
Charge Rate
Your phone will display the call cost according to the
number of units, the charge rate per unit, the currency,
and the exchange rate. The PIN2 code is required to
set the charge rate. Please check with your network
service provider for the actual rate.
Calls Limit
This option allows you to set the limit of your call cost.
The PIN2 code is required to adjust this setting. If the
phone call charges exceed the limitation, any
outgoing call is not allowed.
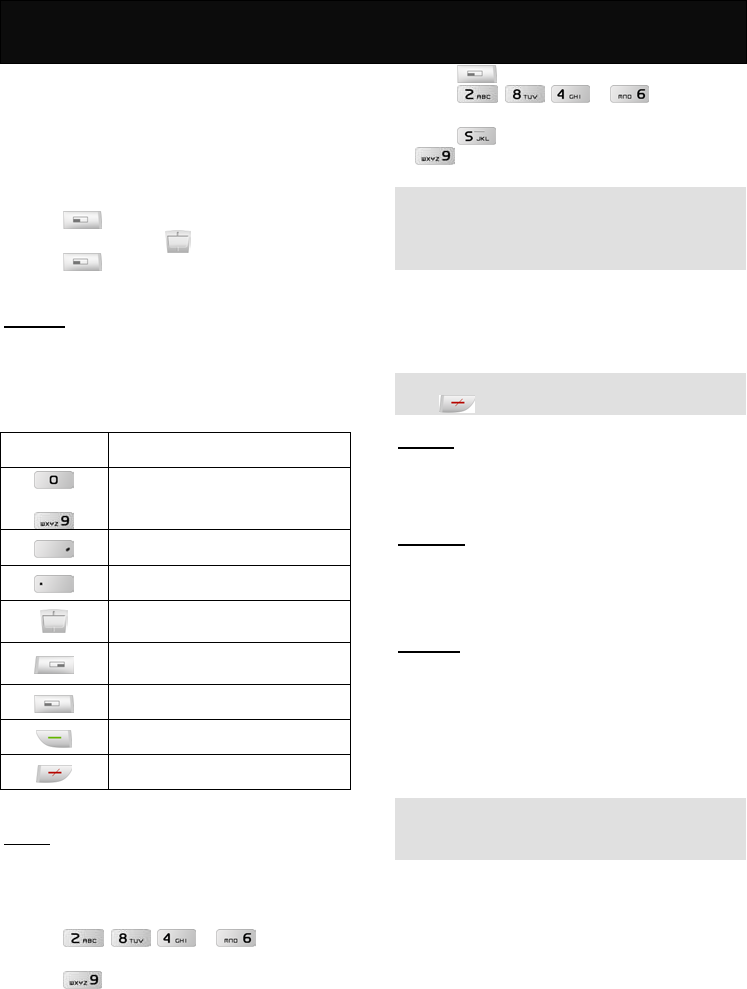
Extras 7
33
Extras
This option provides additional options to enable user
to personalise the phone. It may be used to simplify
the handset and includes a calculator, a calendar,
and even offers the possibility of playing games, set
up wallpaper, logo and the bottom color of menu.
In idle mode, proceed as follows:
1. Press to enter the main menu.
2. Scroll to “Extras” with .
3. Press to access the menu.
Calculator
This option allows you to make simple calculations.
Due to the limitation of accuracy, round-off error may
occur during division and any number that exceeds 8
digits is not allowed.
Press To
to
input number.
input decimal.
input negative or positive
input the operation factors such as
+,-,* and /.
erase whole entry or restart a new
calculation.
backspace
get the result after inputting.
exit calculator menu.
Games
This menu offers you some interesting games.
Redcap
1. Select whether or not to read the brief help text.
2. Input the desired level of the game before starting.
3. Press , , or to go up,
down, left or right.
4. Press to undo the previous step.
Gobang
1. Select whether or not to read the brief help text.
2. Select the difficult level of the game before starting
the game.
3. Press to start playing.
4. Press , , or to move the
chessman up, down, left and right.
5. Press to place the chessman and press
to undo the previous step.
Note
In this game, you will play against the handset. The
party who first connects a continuous five chessmen
in and direction wins the game.
Settings
For more enjoyment, you can activate the “Sounds”,
“Backlight” and “Vibrator” function.
Note
Press to exit the game while playing.
Calendar
This option can be used to look up a date for both
solar and lunar calendar. You may set an event for
reminder also.
Wall Paper
This option offers you the possibility to set up a
specific picture for the handset background when the
phone is idle.
Download
This option allows you to download any favorite
melody or picture by preferences to replace the
operator name that shown on the idle display or set it
as the incoming call alert. The format supported for
melody and picture are MIDI and bmp, wbmp, gif or
jpg.
Note
The availability of the download function depends on
the local network service provider.
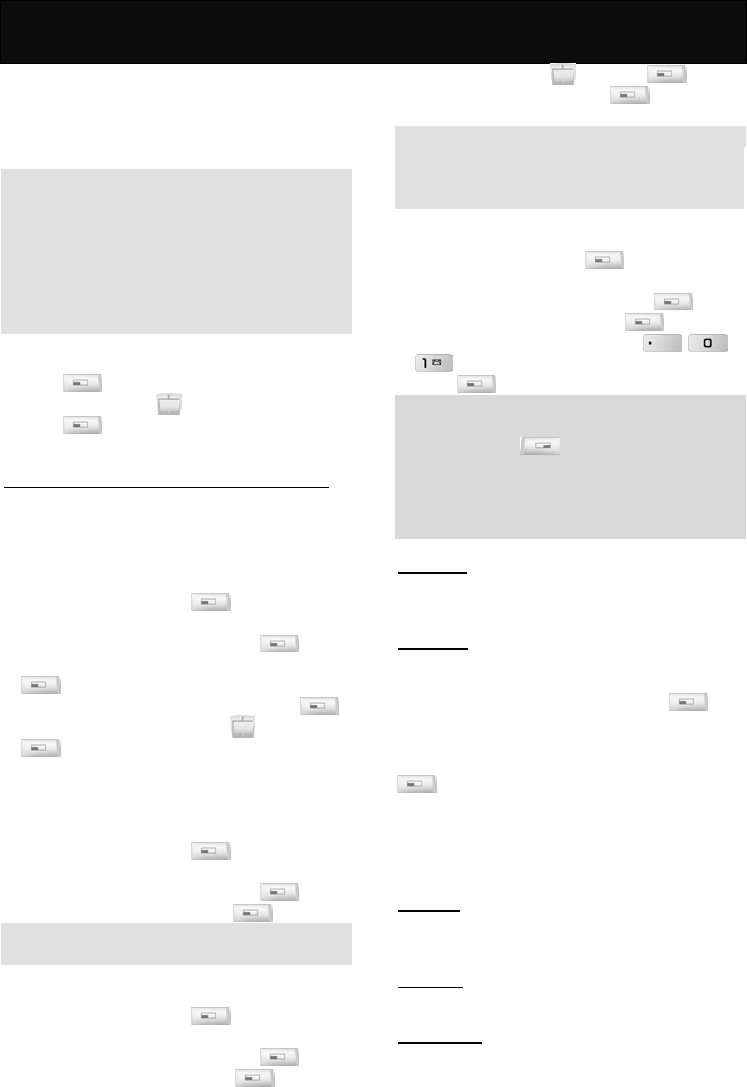
WAP 8
34
WAP
WAP (Wireless Application Protocol) is a global
wireless protocol specification for mobile wireless
terminals. WAP enables you to subscribe to certain
Internet services, for example: banking services,
news, weather forecast, flight schedules etc.
Note
You need to subscribe to the data transmission
and WAP browsing services via your network
service provider in order to access WAP services.
WAP web page adapts the Wireless Mark-up
Language (WML) technology. Web pages that
employ Hyper-Text Mark-up Language (HTML) are
not supported.
In idle mode, proceed as follows:
1. Press to enter the main menu.
2. Scroll to “WAP” with .
3. Press to access the submenu.
Basic steps for activating and accessing WAP service
The following section introduces the basic steps for
accessing and browsing the web.
Activation of WAP service
Before using the WAP service, you need to activate
the WAP connection profile first.
1. When in idle mode, press to enter the main
menu.
2. Scroll to the “WAP” menu and press
3. Scroll to “Network Settings” menu and press
.
4. Select “Active network settings” and press .
5. Scroll to the desired profile with and press
.
Accessing the WAP service
You may connect to the website in either of the
following ways.
Accessing via the homepage
1. When in idle mode, press to enter the main
menu.
2. Scroll to the “WAP” menu and press
3. Scroll to “Homepage” and press .
Note
Only if a WAP website is set as homepage before.
Accessing via bookmark
1. When in idle mode, press to enter the main
menu.
2. Scroll to the “WAP” menu and press .
3. Scroll to “Bookmarks” and press .
4. Scroll to the desired bookmark (if you bookmark a
website before) with and press .
5. Scroll to “Connect” and press to start
connection.
Note
If the selected bookmark is not available as desired,
select another profile and perform the procedures
described in “Activation of WAP service” again.
Accessing via navigation
1. When in idle mode, press to enter the main
menu.
2. Scroll to the “WAP” menu and press .
3. Scroll to “Navigation” and press .
4. Enter the URL of the Website (Use , or
to key in any special character).
5. Press to link to the web page.
Note
You may skip the prefix of the URL (i.e. http://).
Press and hold to exit the website that you
are visiting.
Please check with your network operator or
service provider for the information on WAP
settings.
Homepage
This option has connectivity with WAP. It connects to
the homepage that you have set.
Bookmarks
This option allows you to store up to 10 WAP URLs as
bookmarks in your handset memory.
Scroll to the desired bookmark and press to
continue with the following options:
Connect
Link to the website that you have set the URL. Press
to start the connection.
Edit
Enter the URL for the website you want to connect to.
Rename Bookmark
Change the bookmark name.
Last Page
It takes you directly to the WAP URL that you
connected to last time.
Navigation
You may key in the URL that you want to connect to.
Empty Cache
This option allows you to clear the buffer memory of
the handset.
Cache is a buffer storage that is used to store the
WAP 8
35
data or web page that you have visited temporarily, so
that you can connect to the web site quickly and
easily next time.
Always clear the cache after you have visited any
web page that needs a personal identification number,
for example, bank account.
Network Settings
Active network settings
This option allows you to activate the connection
profile you want.
1. Press to enter the “Active network settings”
menu.
2. Select the desired profile you want to connect.
3. Press to activate the connection profile.
Edit active network settings
This option allows you to key in all the required
parameter settings, such as profile name, homepage,
IP address, IP port, data call type, according to the
information you have received from your network
operator. The availability and configuration may vary,
dependent on your network operator.
You may edit the following items:
Profile Name
Key in the name of the connection profile.
Homepage
Key in the URL of the homepage (if desired).
GSM Settings
1. IP Address: Input the IP address offered by your
network operator.
2. IP Port: Set the IP port.
3. Data Call Type: Select either “Analogue” or
“ISDN”.
4. Phone Number: Key in the phone number
required to connect to WAP service.
5. User Name: Key in the name of the user required
to connect to WAP service.
6. Password: Key in the password to connect to
WAP service.
History
This option allows you to view the records of your
connection to the GSM.
GSM
Press to access the following options:
Last Record
Check the visiting time of the last connection.
Total Record
Check the total time of the connection.
Clear Record
Clear the timer record of the connection time.

STK 9
36
STK
This menu is shown only if your SIM card provides
additional services. The name and contents of this
menu depends on the services available.
For availability, rates and information on using the
SIM service, check with your network service
provider.

Maintenance
37
Maintenance
Your mobile telephone is a radio transceiver, built
with precision electronic parts, and it needs to be
used with care. Observing the following
recommendations may prolong the phone’s life.
Please note the following points:
Keep the phone and its accessories out of the
reach of small children.
Keep it dry. Avoid contact with liquids. Humidity
and liquids contain minerals which corrode
electronic circuits.
Do not expose the phone to an extremely cold
environment, as this will cause a build-up of
moisture within the phone.
Do not expose the phone to an extreme heat as
high temperatures will shorten the life of
electronic parts, damage the battery, and cause
some plastic material parts to become deformed
or melt.
Do not attempt to disassemble the phone.
Non-expert handling of the phone may damage
it.
Do not use harsh chemicals, cleaning solvents or
strong detergents to clean the phone. The phone
may be cleaned with a soft cloth slightly
dampened in warm water.
Do not paint or otherwise coat the phone.
Do not use accessories, such as batteries
designed for other mobile phones, or any other
unapproved accessories. This will damage the
phone, violate the radio equipment regulations
and invalidate your warranty.

Access Codes
38
Access Codes
There are several codes required to access the
handset and SIM card. The access codes allow you
to avoid unauthorized use of your phone and SIM
card.
PIN code
The PIN (Personal Identification Number) protects
the card against unauthorized use. This code is
supplied with the SIM card. If the PIN is set to on,
the code is requested when the phone is switched
on.
If you enter an incorrect PIN code three times in
succession, the SIM card is blocked, key in the PUK
code.
PIN2 code
This code is supplied with the SIM cards and is
required to access certain functions, such as
accumulated costs. If your SIM card supports those
particular functions, you can activate them in your
handset. If you enter an incorrect PIN2 code three
times in succession, PIN2 code is blocked and you
will be asked for the PUK2 code.
PUK code
The PUK (Personal Unblocking Key) code is used
to unblock and change the locked PIN code. This
code may be supplied with the SIM card. If this is
not the case, check with your network service
provider for the code. If you enter an incorrect PUK
code ten times in succession, your SIM card is no
longer valid.
Contact your network service provider to replace
the SIM card.
PUK2 code
The PUK2 code is used to unblock and change the
locked PIN2 code. This code is supplied with the
SIM. If you enter an incorrect PUK code ten times in
succession, the functions that require PIN2 code in
order to be activated will no longer valid.
Contact your network service provider to replace
the SIM card.

Reference Information
39
Reference Information
EFR encoding decoder function
The F10 model (GSM/DCS) is equipped with the
latest encoding decoder and audio frequency
technology, to achieve superior audio quality.
At present, there are 3 types of encoding decoder
applied to GSM/DCS:
yEnhance full rate (EFR)
yFull rate (FR)
yHalf rate (HR)
The F10 model (GSM/DCS) mobile phone supports
the normally used EFR and FR encoding decoder.
All GSM and DCS cellular networks and phones
support FR encoding decoder.
If supported by the network operator, then the
network operator will automatically select the
relevant encoding decoder, which will be either
EFR or FR.
The F10 model is programmed to automatically
select the EFR where this is supported by the
network, allowing you to enjoy the superior audio
quality provided by EFR. Otherwise the phone will
select FR.
At present, only some networks support both the
FR and EFR encoding decoder.
If the network operator cannot support EFR, the
F10 model (GSM/DCS) mobile phone will
automatically adopt the FR encoding decoder.
Accessories
The accessories for the F10 model (GSM/DCS)
mobile phone include battery, charger and etc.
Please refer to “Battery Charging” for battery
charging method.
Battery
At present, the rechargeable battery approved by
the manufacturer is the lithium battery (LI-ION).
The standby time for a new battery is about 50-150
hours. The capacity of a battery may vary
depending on the environment, networks, SIM card
or options available.
Charger
Do not connect it to an incompatible product. It
charges the phone battery rapidly. To start
charging, plug the charger into a power supply and
insert the other end into the charge port at the
bottom of your phone.
The required charging time is approximately 5
hours. The battery charging status can be checked
on the mobile phone display.

Problem Solving
40
Problem Solving
Problem Solving
1. When you switch on your phone,
“Insert SIM card” is displayed.
a. Check that the SIM card is correctly installed.
b. Ensure that the gold chip is not damaged or
scratched.
c. Check the SIM card contact. If they are dirty,
clean them with an antistatic cloth.
2. When your phone shows “PIN”, “PIN2”,
“PUK”, “PUK2”, and “Barring code”.
a. Please contact your network service provider
for the numbers.
b. Enter the wrong PIN code three times in
succession, the SIM card will be blocked.
c. For the PUK code, check with your network
service provider.
3. No connection to network.
a. Check the signal strength meter in the display.
If the signal is weak, move to an open space
or move closer to a window and try again.
b. Contact your network service provider for
further detail.
4. Your correspondent cannot hear you.
a. Check that the network signal strength is
normal and try again.
b. Check that the microphone is unmuted.
c. Holding the phone closer to your mouth.
5. The battery won’t charge.
a. Check that the charger is properly connected.
b. The message “Charging” will only be shown
when you charge the battery with the handset
switched off.
6. You can’t make calls.
a. Check the signal strength meter in the display.
If the signal is weak, move to an open space
or, if you are in a building, move closer to a
window.
b. The network is busy, please try again later.
c. Check whether the call charge limit has been
reached.
7. The battery drains faster than normal.
a. Check whether you are in an area of variable
coverage. This uses extra battery power.
b. Ensure that the using environment is not in
extreme temperatures. At extreme hot or cold
temperatures, battery performance is
significantly reduced.
8. The LI-ION battery was being charged
overnight.
It is strongly recommended that not to charge the
battery for more than 24 hours. It may decline the
battery performance or cause damage to the
battery.
9. The headset starts beeping.
The signal is weak or out of coverage

Index
41
Index
A
Active network settings 35
Auto Display 23
Auto Search 32
B
Barrings
All Incoming 31
All Incoming When Roaming 31
All Outgoing 31
Clear All 31
Outgo International 31
Outgo International Except Home 31
Broadcast 23
Build Multiparty Call 17
C
Call Back 22
Call Balance 25
Call Cost 25
Call Timer 25
Calling Display 32
Calls Limit 32
Capacity 23
Charge Rate 32
Clear Record 35
Connect 34
D
Data Call Type 35
Date & Time 27
Date Only 27
Delete All 23
Delete Inbox 22
Delete Outbox 22
Direct Reply 23
Divert
Clear All 31
No Reply 31
No Response 31
Unanswered 31
Unconditional 31
When Busy 31
E
Edit active network settings 35
Emergency calls 4
End Held Multiparty Call 18
End Held Signal Call 17
End One Call In Party 18
F
Filter One Call In Party 18

Index
42
Forward 22
G
Games
Gobang 33
Redcap 33
Settings 33
Group 21, 22, 35
GSM 35
GSM Settings 35
H
Hold Multiparty Call 17
Hold Signal Call 17
Homepage 35
I
Inbox 22
IP Address 35
IP Port 35
L
Last Record 35
M
Manual Search 32
Mute Off 17
Mute On 17
N
No Display 27
O
Off 23
On 23
Outbox 22
P
Password 35
Phone Number 35
Profile Name 35
R
Read New CB 23
Redial
fast and easy 16
via the menu 16
Rename Bookmark 34
Reply 22
Retrieve Multiparty Call 17
Retrieve Signal Call 17
Index
43
S
Save Number 17
Search Name 21, 35
Send 22
Send SMS 17
Service Center 23
Service Indication 24
Settings 23
Status Report 23
Swap Call 17
T
Time Only 27
TopicList 23
Total Record 35
U
User Name 35
V
Validity Period 23
Voice Mail 23
Voice Mail Center 23
W
WAP
Access via navigation 34
Access via bookmark 34
Access via the homepage 34
Accessing 34
Activation 34
Issue Jan 2005.