D T Systems RAPT remote control for a canine training collar User Manual RAPT Manual SmartLED 2013 03 15
DT Systems Inc remote control for a canine training collar RAPT Manual SmartLED 2013 03 15
UserManual.wiki
>
D T Systems
>
RAPT User Manual
user manual
Navigation menu
Upload a User Manual
Namespaces
Wiki Guide
HTML
PDF
Info
Views
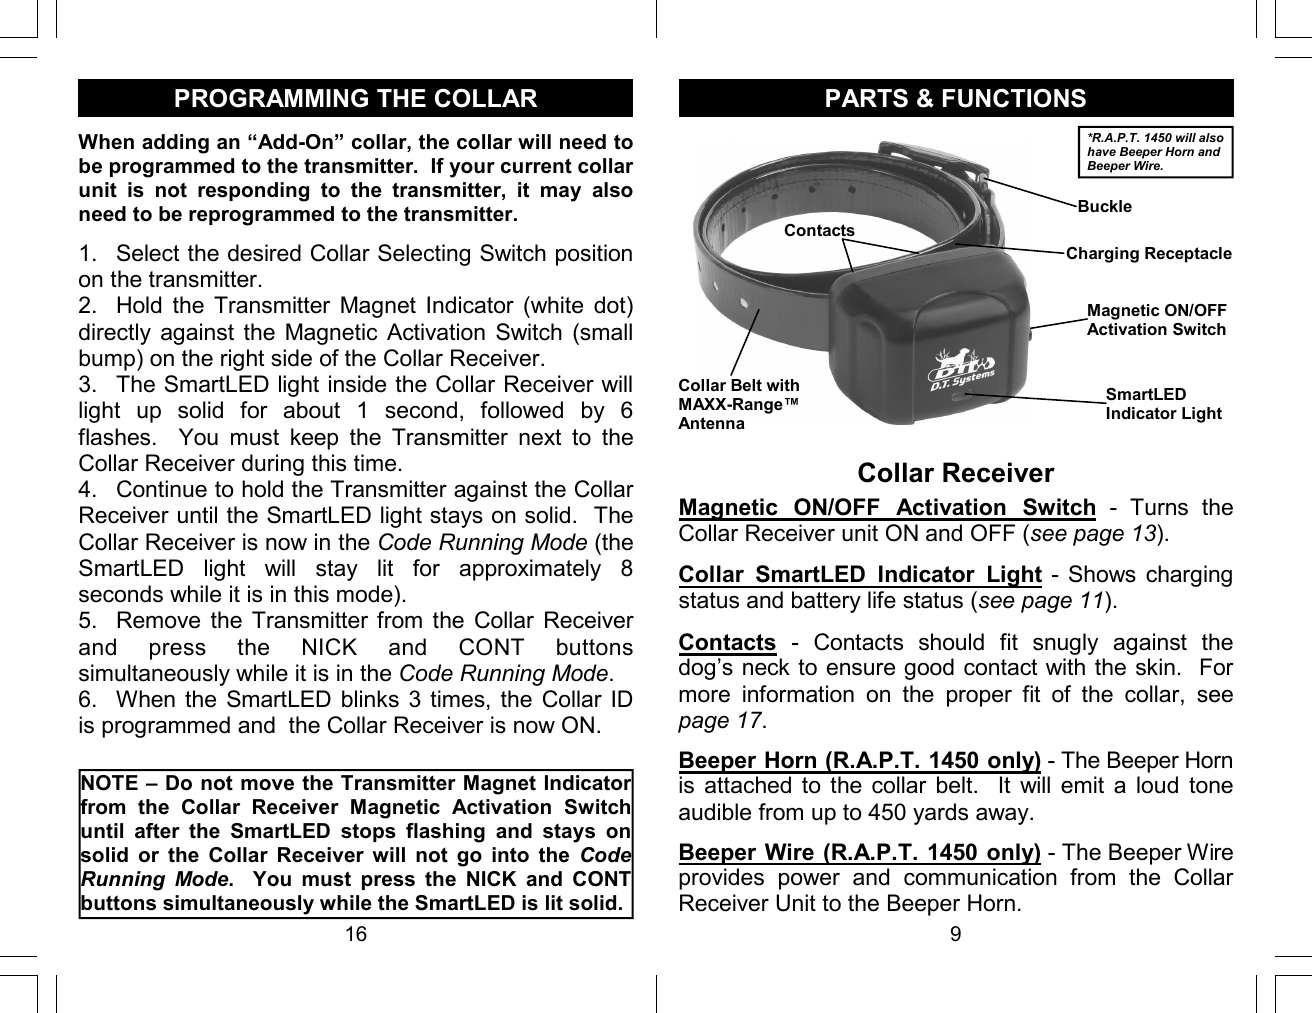
User Manual
Discussion / Help
Navigation