TECHNICIANS&NETWORK ENGINEERS EEI Service Desk User Manual V1.0
User Manual:
Open the PDF directly: View PDF ![]() .
.
Page Count: 30


EEI CORPORATION
ONLINE SERVICE DESK SYSTEM
USER MANUAL
ABOUT THIS DOCUMENT
This user manual contains all the necessary information for the technician/network
engineer to make full use of the Service Desk System. This also includes a description of
the system functionalities and step-by-step procedures for system access and use. A
glossary of terms as well as screen images are provided for better visualization of the
system’s functionalities.
TABLE OF CONTENTS
GETTING STARTED 4
What is this system? 4
Who are the different users of this system? 4
What are the severity levels? 4
What are the ticket categories? 5
What are the different ticket statuses? 5
What will be the general process with this system? 6
Glossary of Terms 6
GENERAL 8
Log In 8
Update Password 9
Forgot Password 10
My Profile 11
Notifications 12
Log Out 13
TECHNICIANS/NETWORK ENGINEERS 14
Navigation 14
Submitting a New Ticket 14
My Tickets 19
Assigned Tickets 20
Resolve Ticket 20
Add Activity Log 23
Return to IT Group Manager 25
1 of 29


I. GETTING STARTED
A. What is this system?
EEI Corporation’s Online Service Desk System serves as the main
point of contact between all users outside of the IT department and the IT
Service Team as the service provider. This platform is a ticketing system
which allows proper documentation of all user requests for the benefit of all
parties involved.
B. Who are the different users of this system?
1. Requestor
2. Technicals Group Manager
3. Access Group Manager
4. Network Group Manager
5. Technicians
6. Network Engineers
7. Administrator
C. What are the severity levels?
Priority
Name
Description
Resolution
Time
SEV1
Critical
Interruption resulting to a complete
operation interruption of the entire
company having a severe impact on IT
services availability.
4 hours
SEV2
Important
Incident reports that resulting to
interruption of operation of a specific
department/project having a severe
impact on IT services availability.
6 hours
SEV3
Normal
Non critical interruption that will not
allow the user to use the IT resources
and possible workaround is available.
8 hours
SEV4
Very Low
The defect that does not interrupt nor
damage the usability of the IT
system/facilities/resources, and the
desired results can be easily obtained
by working around is stated as minor.
24 hours
SEV5
Low
Any cosmetic issue on application of
upgrade hardware or special request
that have very minimal effect in any
operation of the company.
48 hours
3 of 29
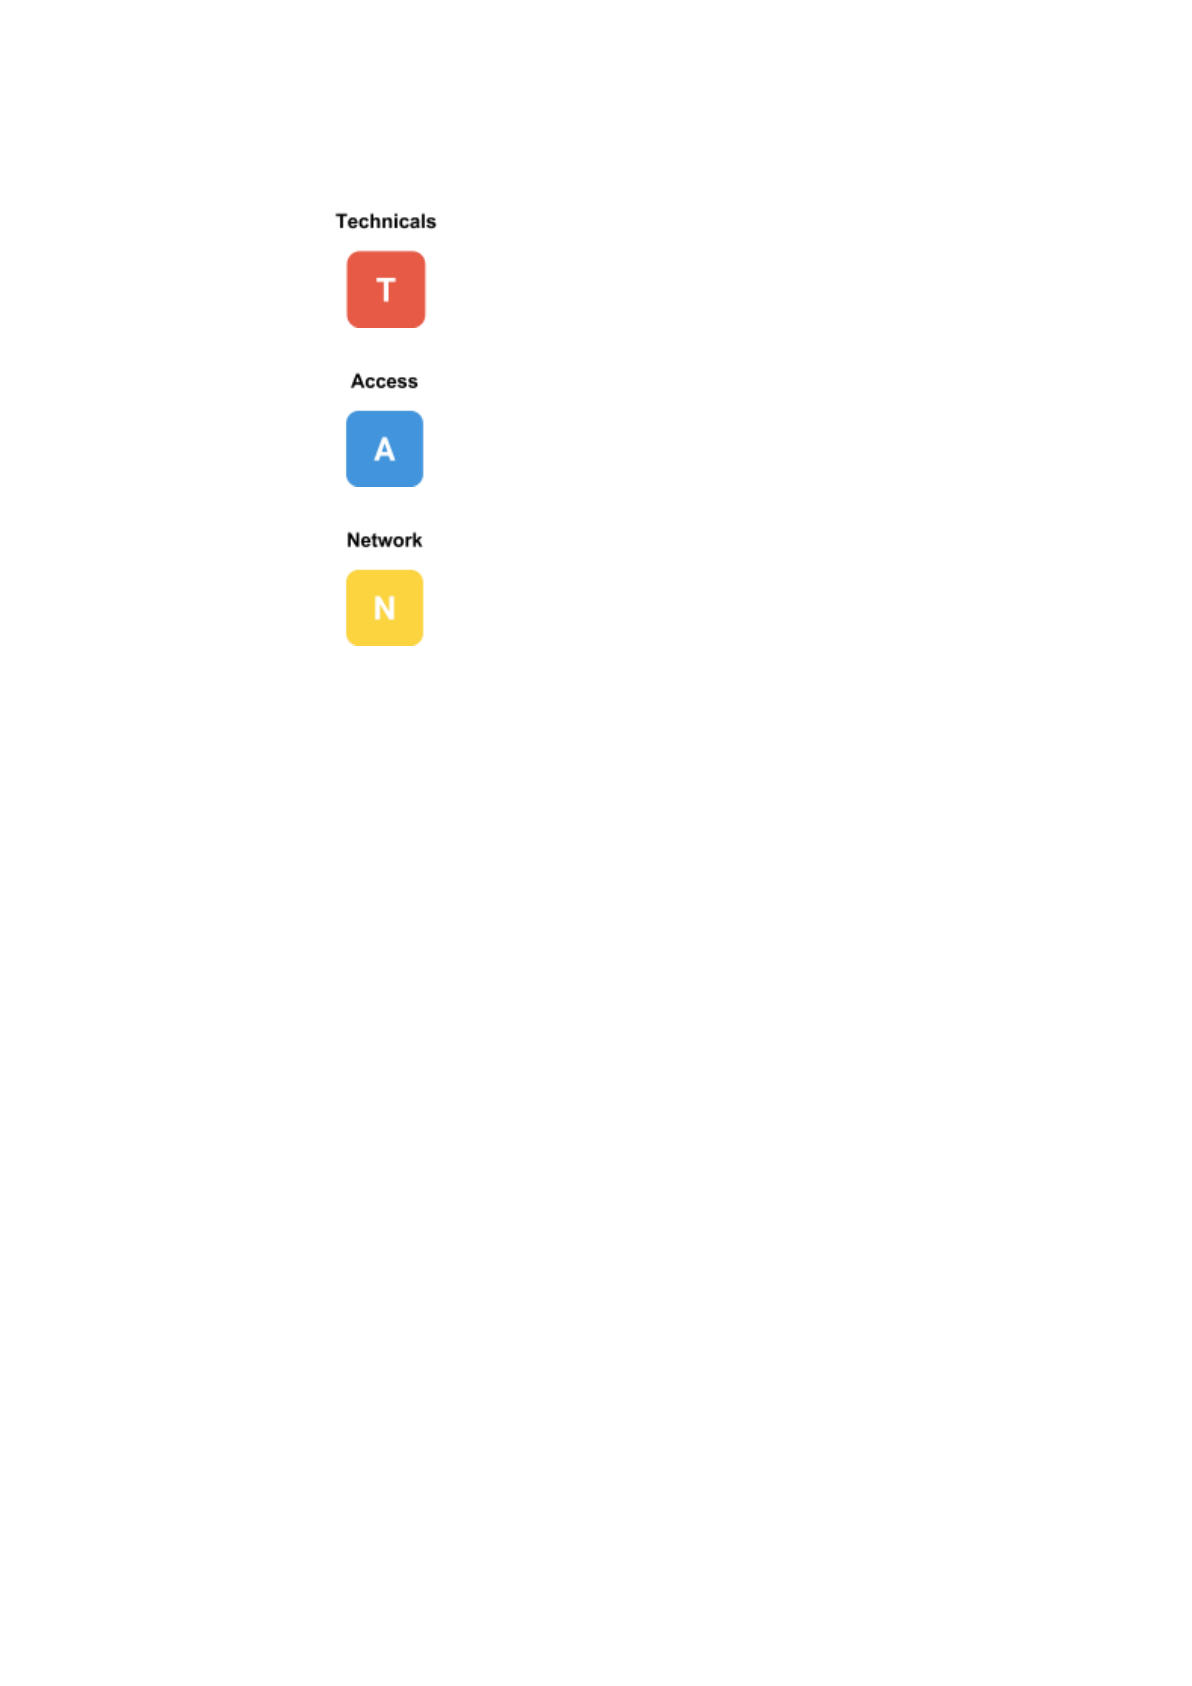
D. What are the ticket categories?
TECHNICALS TICKETS
Tickets concerning hardware issues such as monitor,
CPU, printer, scanner, keyboard, etc.
ACCESS TICKETS
Tickets concerning application access, password,
account deactivation, etc.
NETWORK TICKETS
Tickets concerning network access and network
hardware issues such as network outage, WiFI
connection, etc.
E. What are the different ticket statuses?
1. New
● A new ticket is a newly submitted ticket which has neither been
approved (for user access tickets) nor assigned a severity level
and a category.
2. Checked
● A checked ticket is a ticket which has been reviewed by the
designated checker. This is only applicable to user access
tickets
3. Approved
● An approved ticket is is a ticket which has been reviewed by
the designated approver. This is only applicable to user access
tickets
4. Rejected
● A rejected ticket is a ticket which has been reviewed by a
checker or approver but has not passed the said reviewing
5. Pending
● A pending ticket is a ticket which has been assigned a severity
level and a category
6. Assigned
● An assigned ticket is a ticket which the respective IT group
manager has assigned to a specific ticket agent
(technician/network engineer)
7. Resolved
4 of 29
● A resolved ticket is a ticket which the ticket agent assigned
has successfully
8. Closed
● A closed ticket is a ticket that has been resolved and
confirmed by the requestor. This indicates that no further
actions can be taken with the ticket.
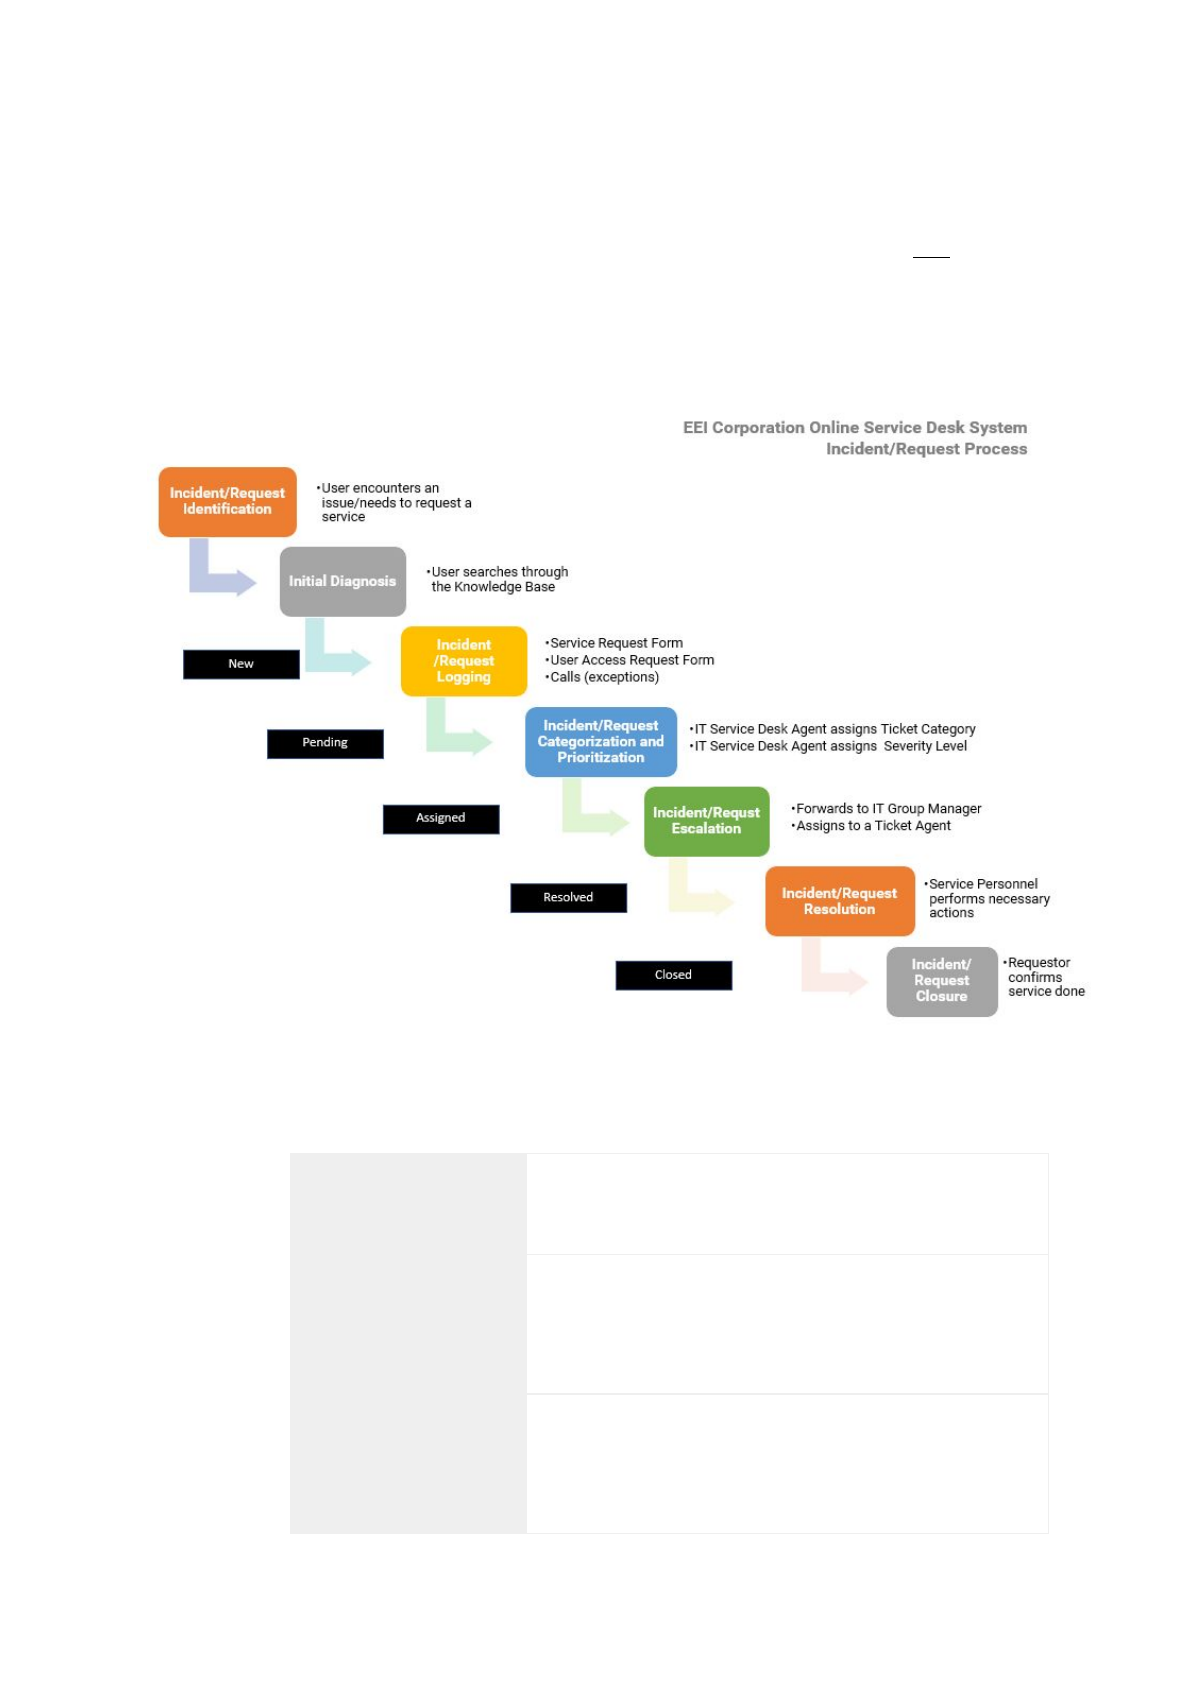
F. What will be the general process with this system?
G. Glossary of Terms
Ticket
An electronic documentation of a concern or an
issue
Service Ticket
A ticket for technical concerns including: printer,
hardware, scanner, mouse, keyboard among
others
User Access Ticket
A ticket for application or network access; includes
the signatures of the approver (required for all) and
checker (optional)
5 of 29

Ticket Agent
The service team member assigned to resolve a
ticket
Checker
The assigned person to check the ticket details
before the ticket is forwarded to the approver.
Usually applicable for projects
Approver
The assigned approver of a user access ticket after
it has been checked by the checker (if there is).
Usually the project manager or the direct
supervisor of the employee.
Open Ticket
A general term which refers to tickets that have the
status of: Pending, Assigned and Resolved.
Closed Ticket
Refers to tickets that are already closed.
6 of 29
II. GENERAL
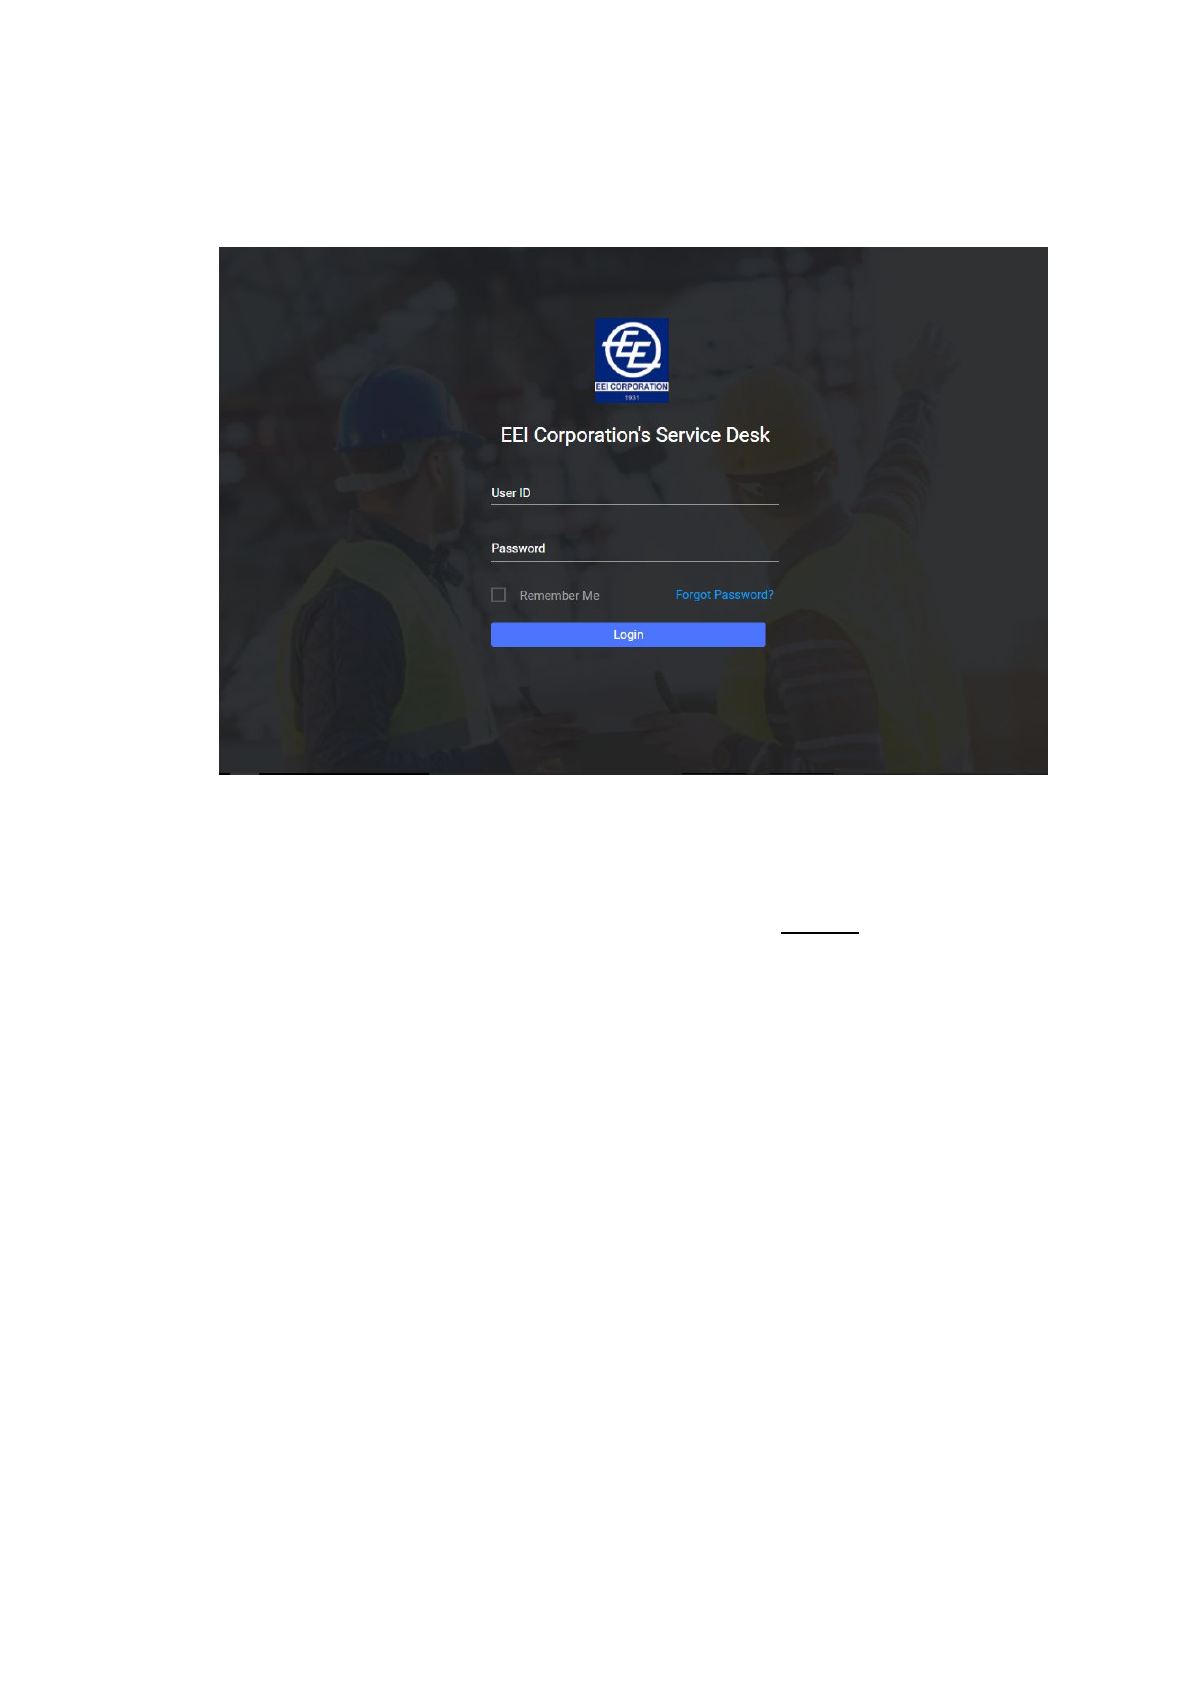
A. Log In
1. Enter your official EEI user id and password
a. What is my official EEI user id?
i. Your official user id is the first letter of your first name and your
full last name (or your email handle
without
@eei.com.ph)
ii. Example:
1. Name: Juan B. Dela Cruz
2. Username: jbdelacruz
2. Click “Login” to proceed
7 of 29
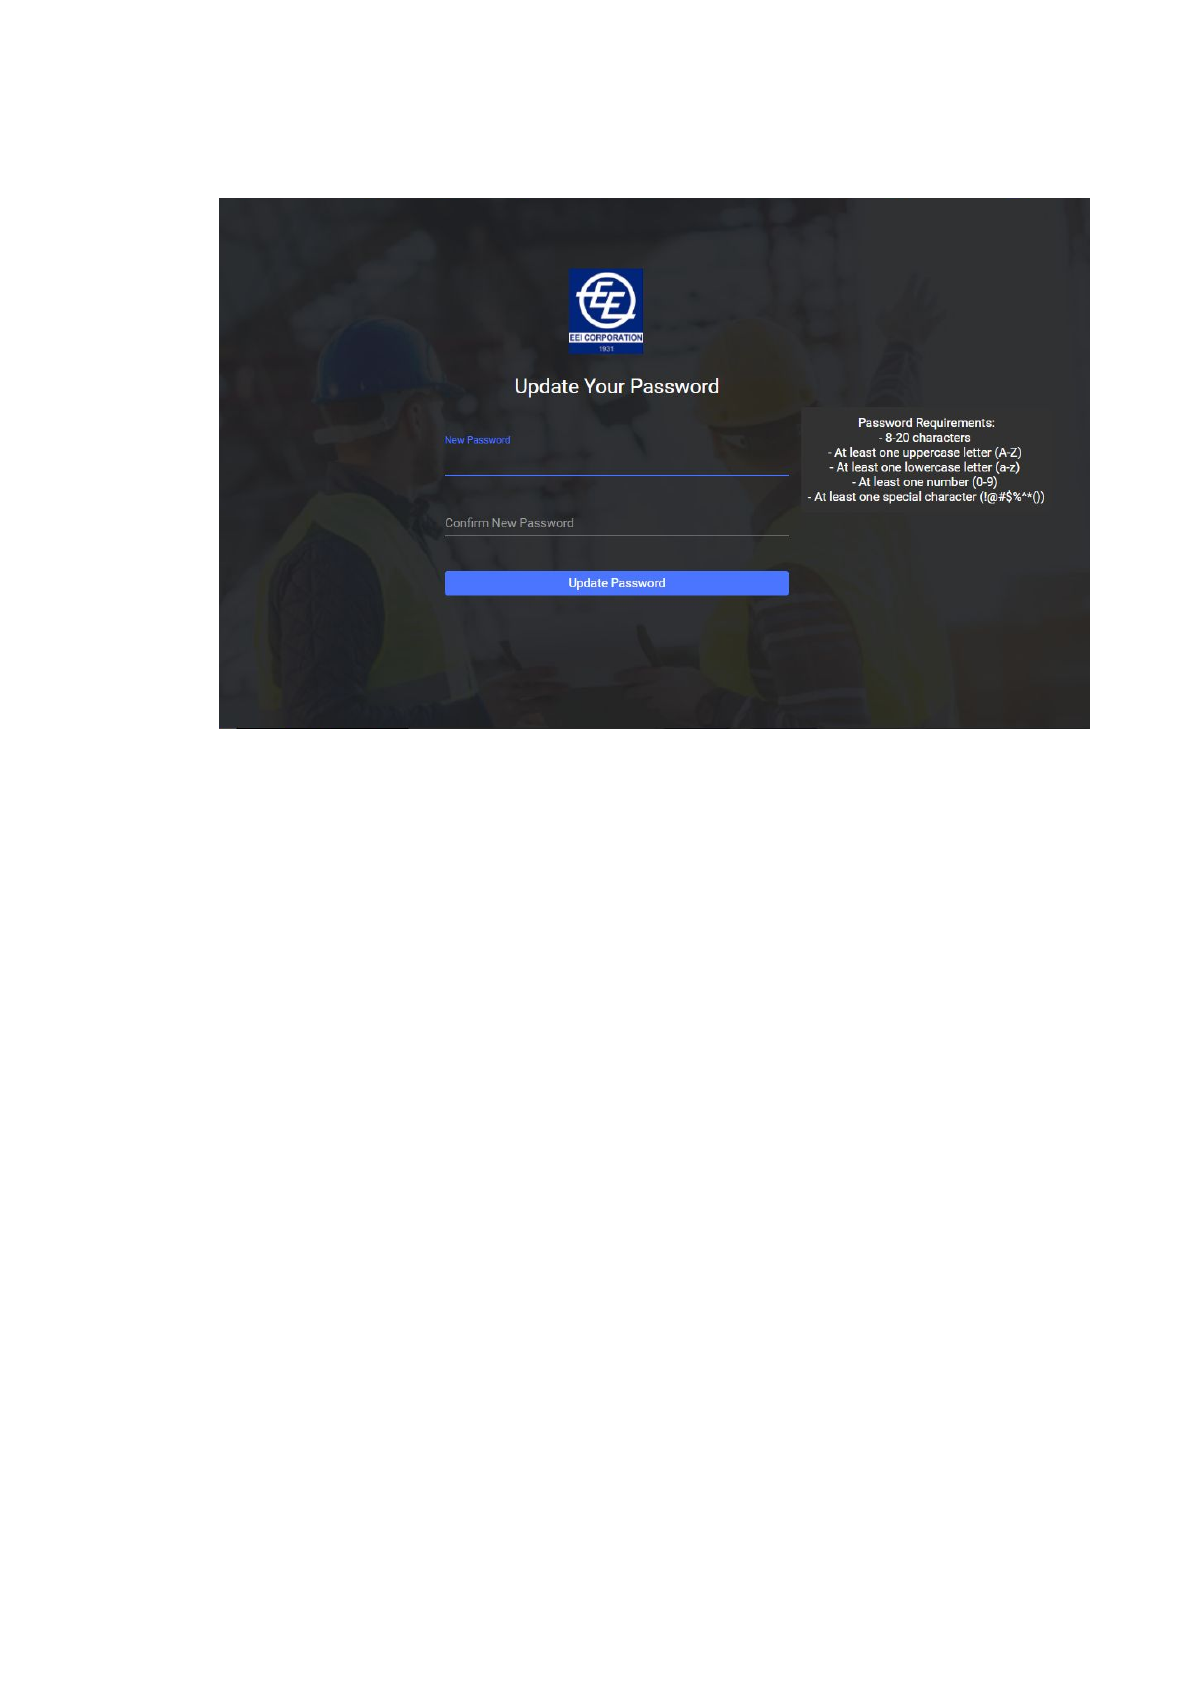
B. Update Password
1. On your first login, you will be required to change your password
2. Password requirements are as follows:
a. 8-20 characters
b. At least one uppercase letter (A-Z)
c. At least one lowercase letter (a-z)
d. At least one number (0-9)
e. At least one special character [!@#$%^&*(]
3. Retype the password you first entered to confirm
4. Click “Update Password” to proceed
8 of 29
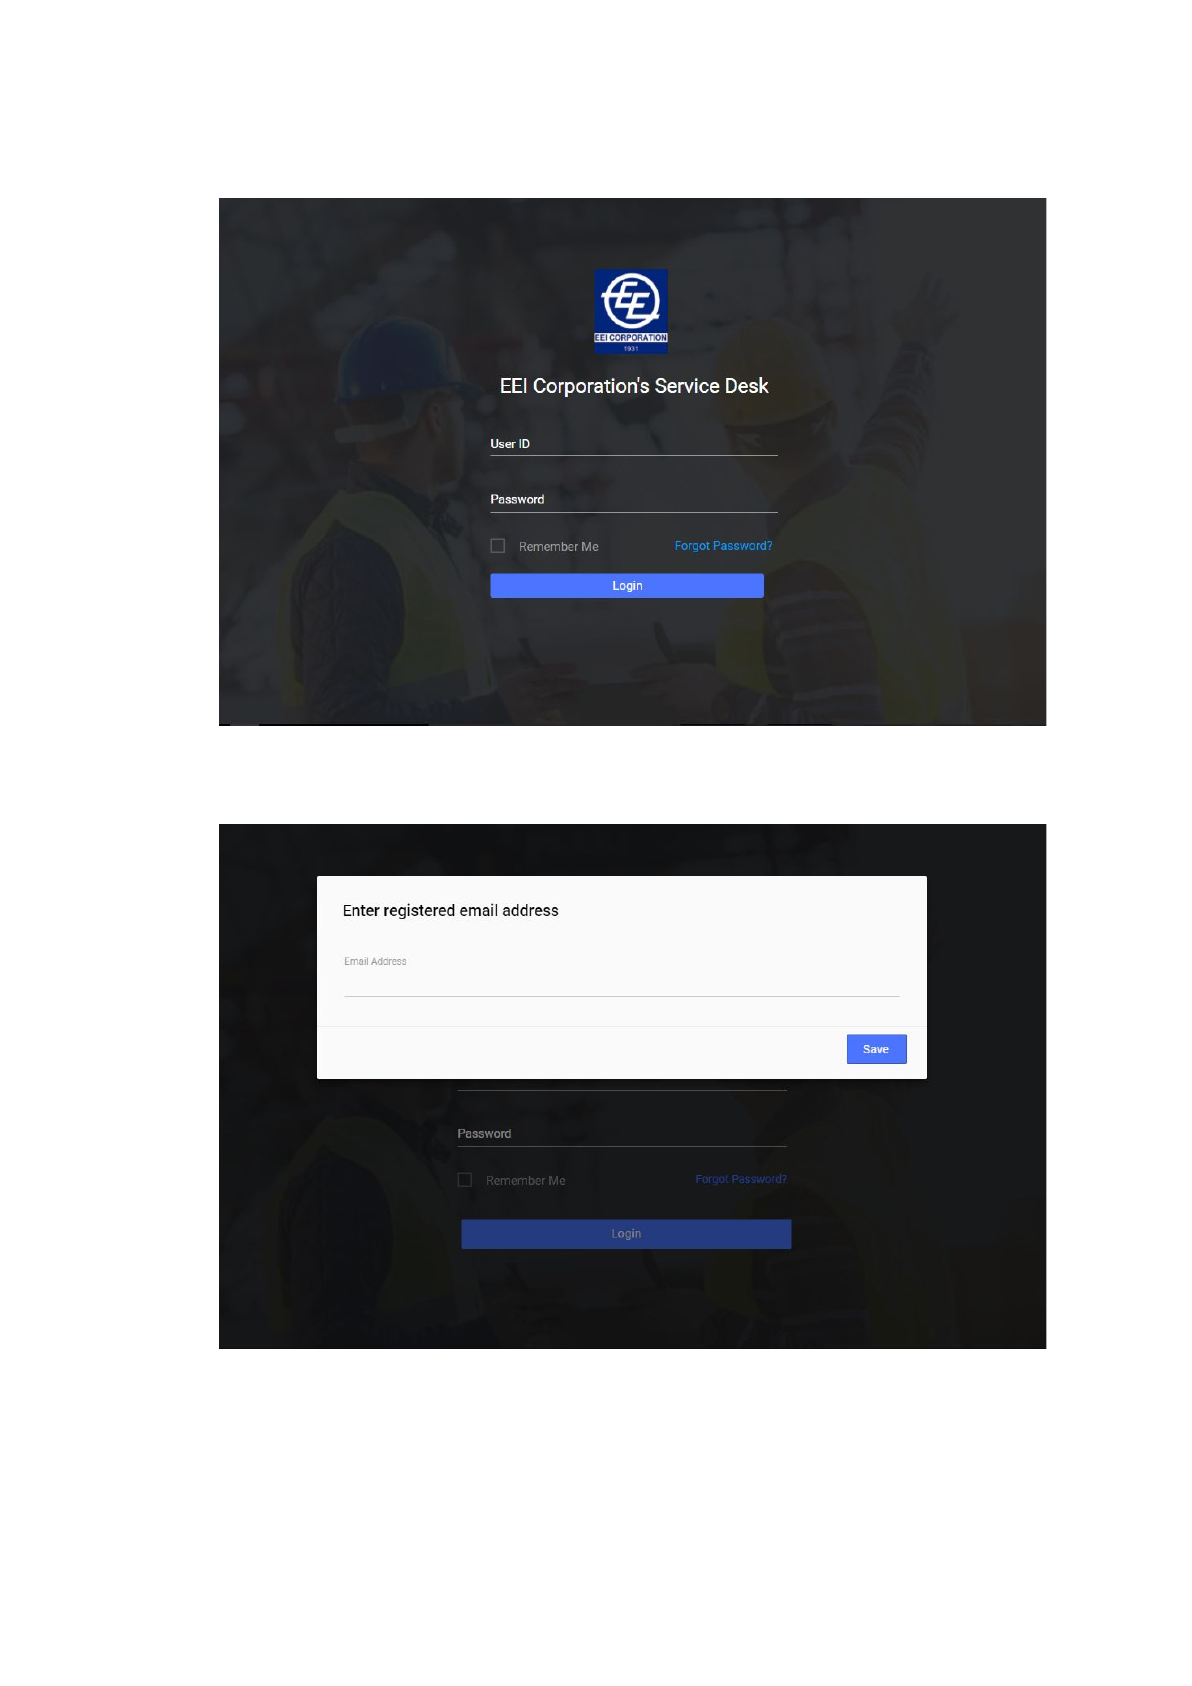
C. Forgot Password
1. On the login page, click “Forgot Password” link above the login button
2. Enter your registered EEI e-mail address
3. Click “Save”
4. An e-mail will be sent to the e-mail address you entered for instructions on
resetting your password.
9 of 29
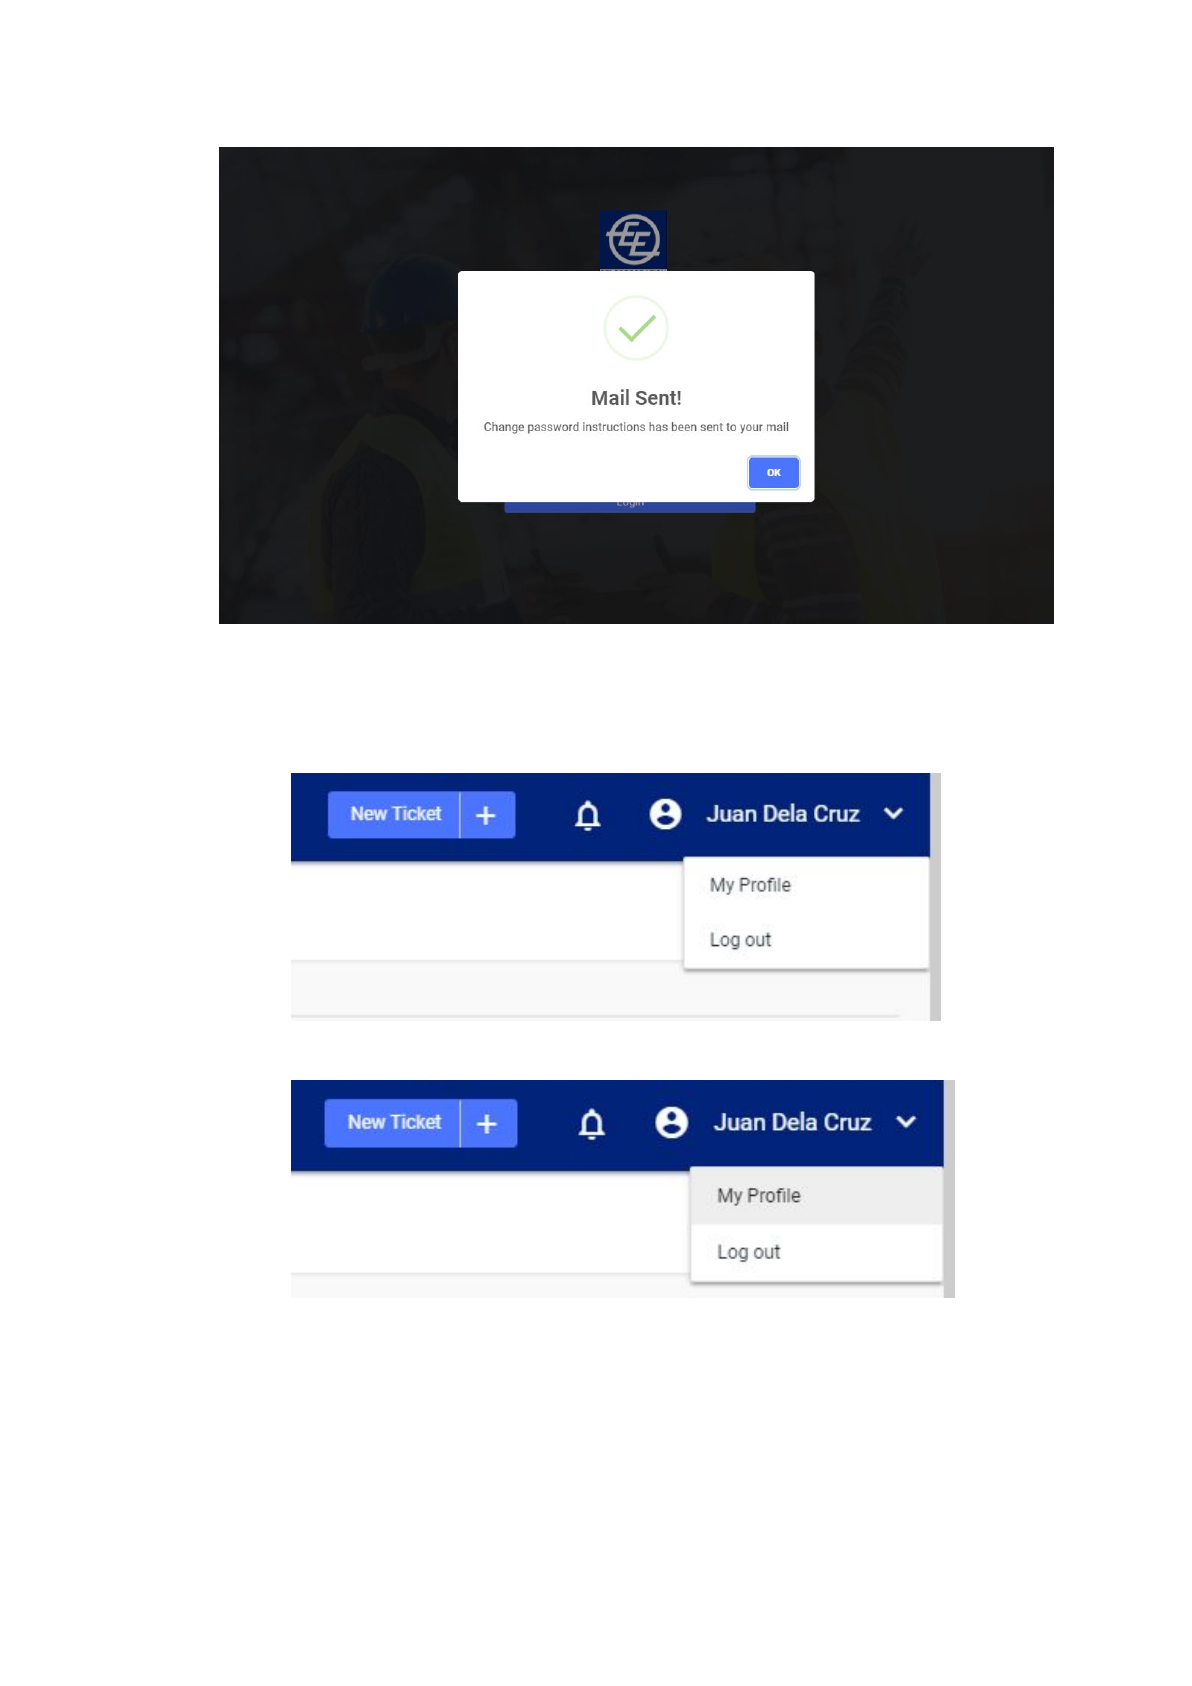
D. My Profile
1. Click your name on the upper right hand corner of the screen
2. Click “My Profile” to view your account and basic information
10 of 29
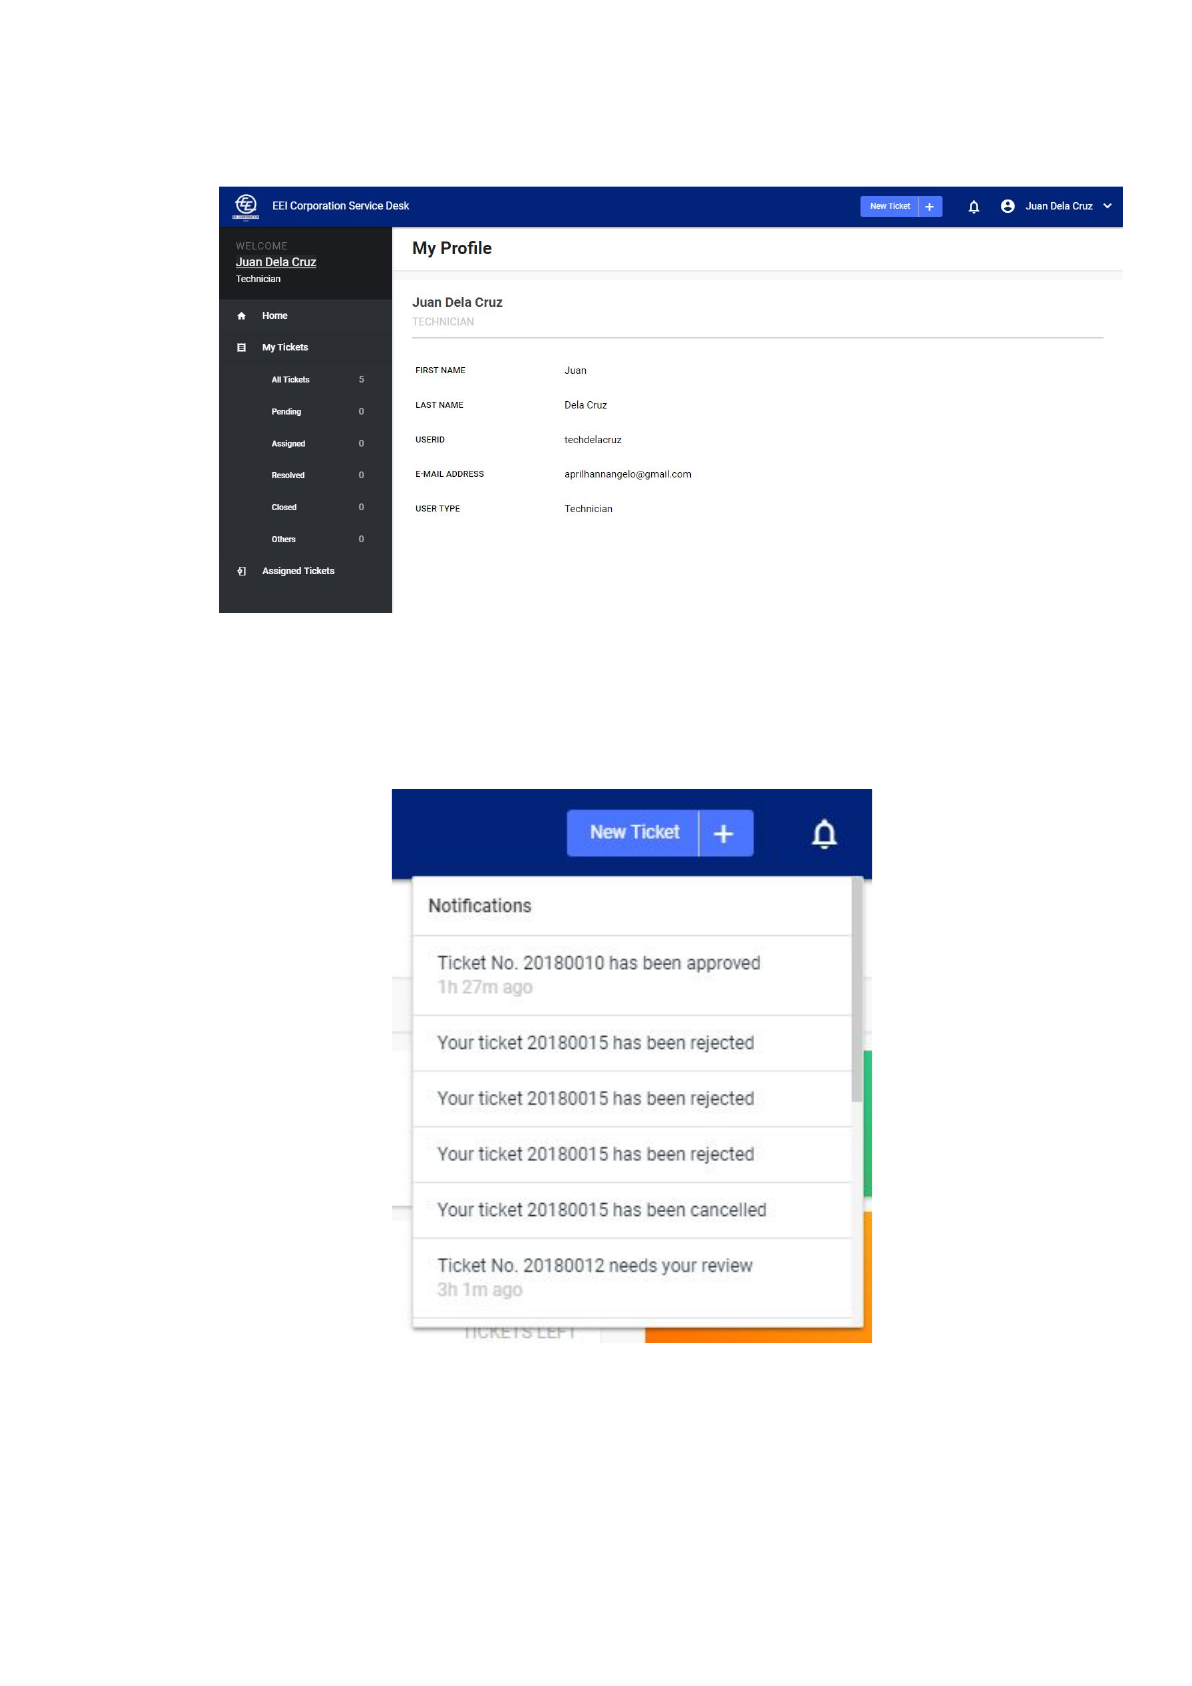
3. You will be redirected to “My Profile” page
E. Notifications
1. To view all notifications, click on the notification bell icon.
a. Clicking the notification will redirect you to the ticket details page
11 of 29
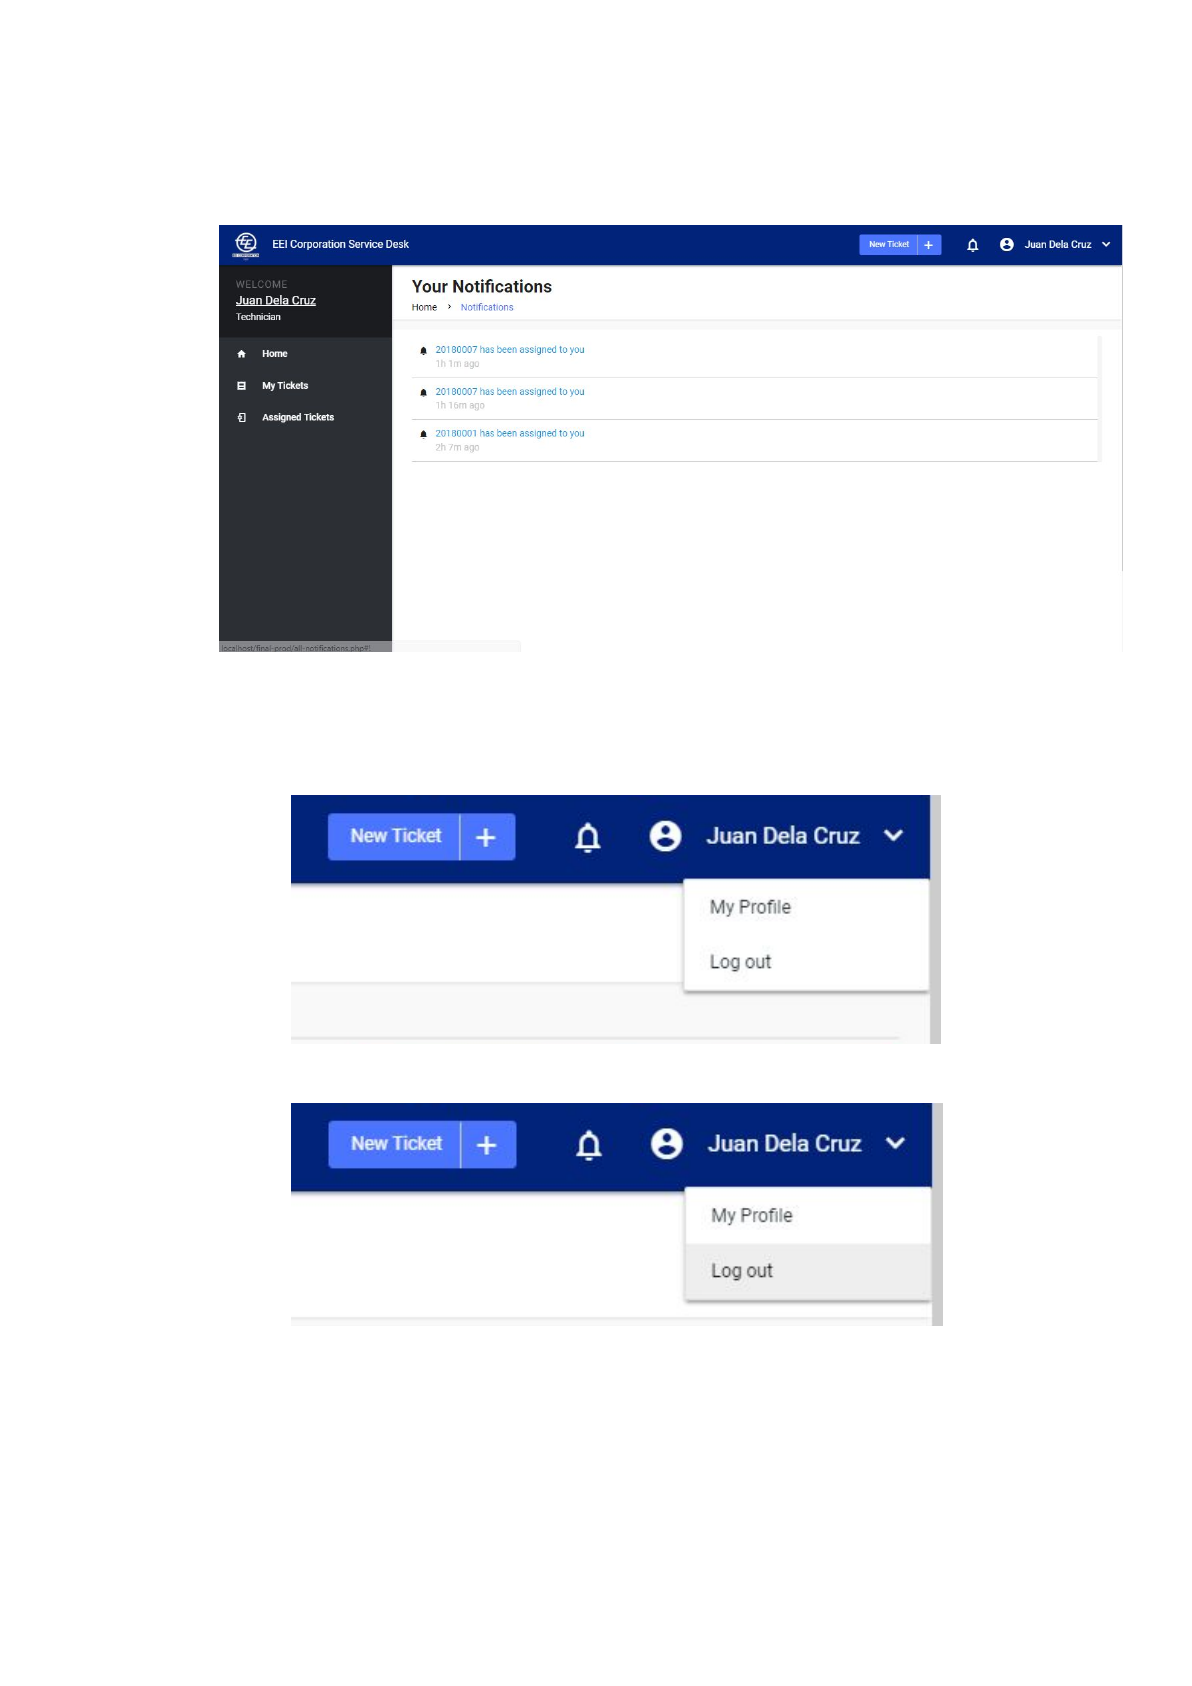
2. To view the complete list of all your notifications, click “View all
Notifications”
F. Log Out
1. Click your name on the upper right hand corner of the screen
2. Click “Logout”
12 of 29
III. TECHNICIANS/NETWORK ENGINEERS
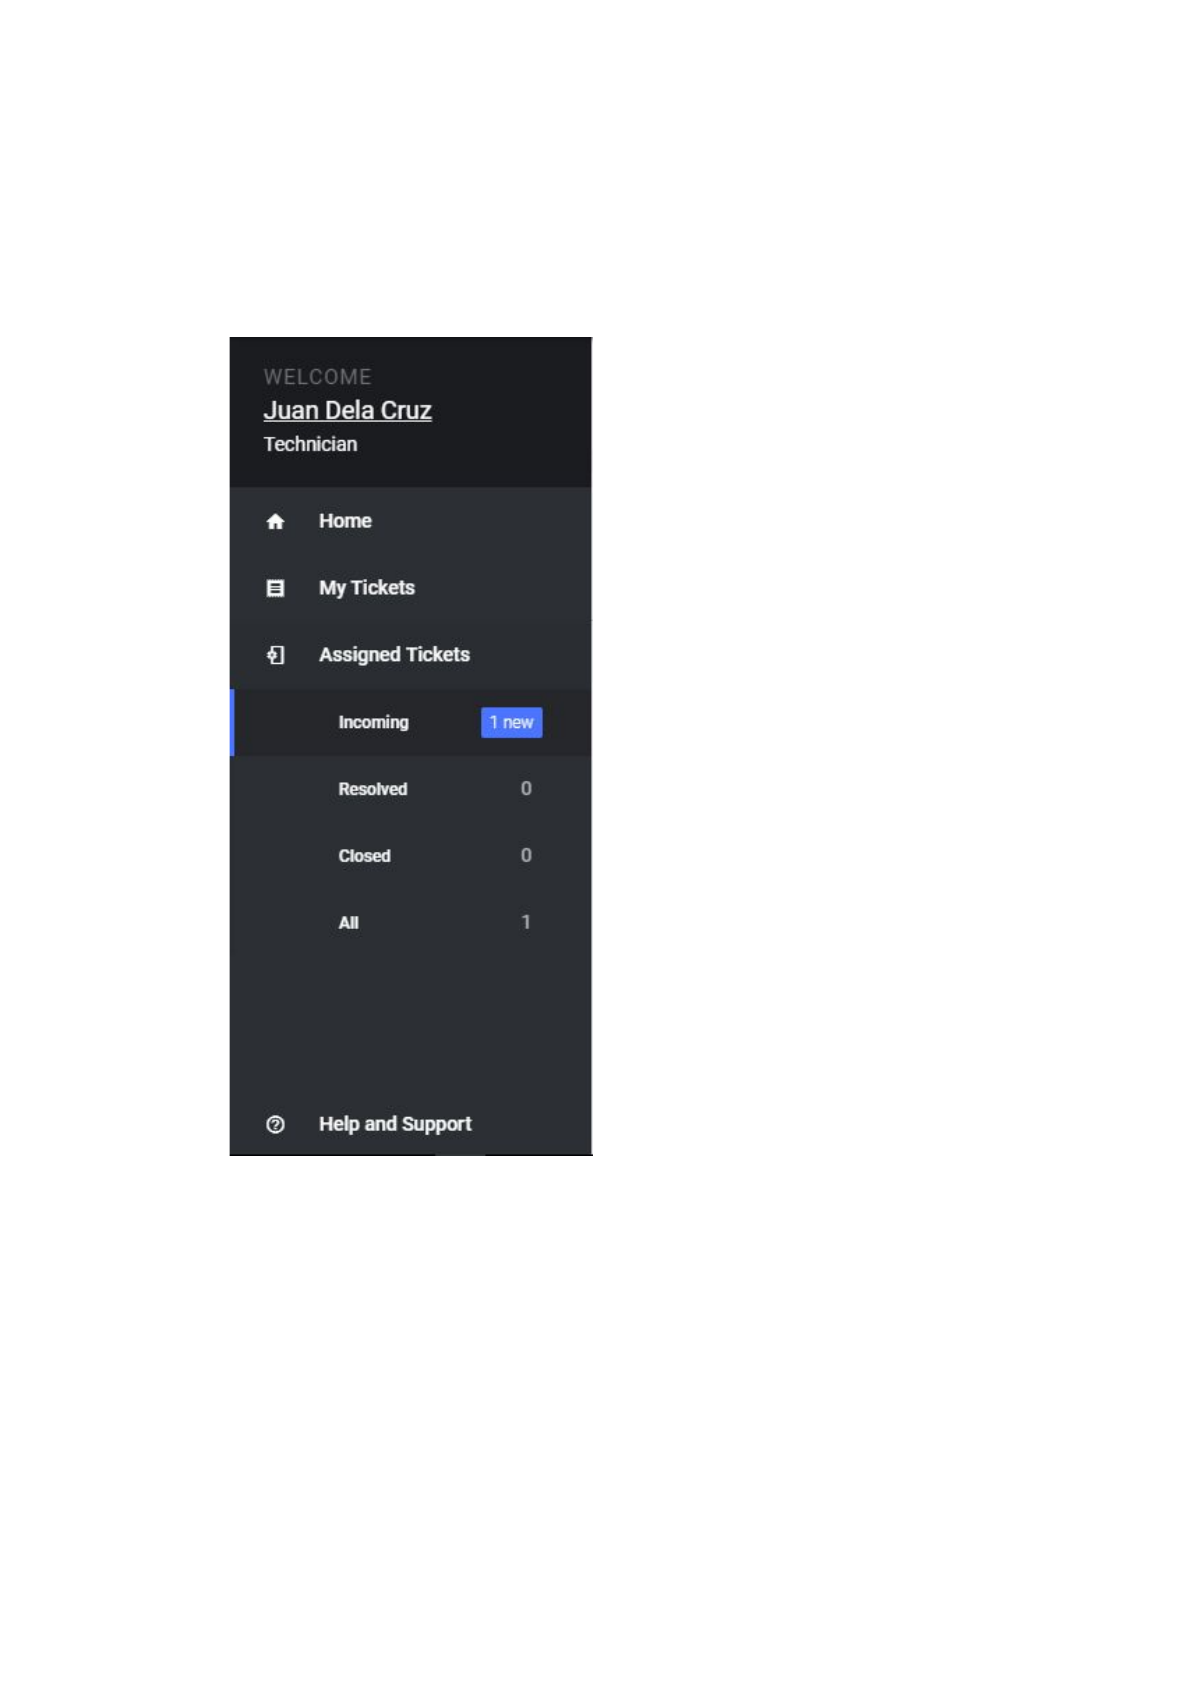
A. Navigation
● Note: Technicians and Network Engineers have the same
functionalities
Home
● Page showing a list of all Frequently
Asked Questions with solutions
which can be performed by the
general users
My Tickets
● Displays all tickets you submitted
Assigned Tickets
● Displays all tickets assigned to you
for resolution
Help and Support
B. Submitting a New Ticket
To submit a ticket, click “New Ticket” button on the top navigation bar and select
the corresponding type of ticket for your need
13 of 29
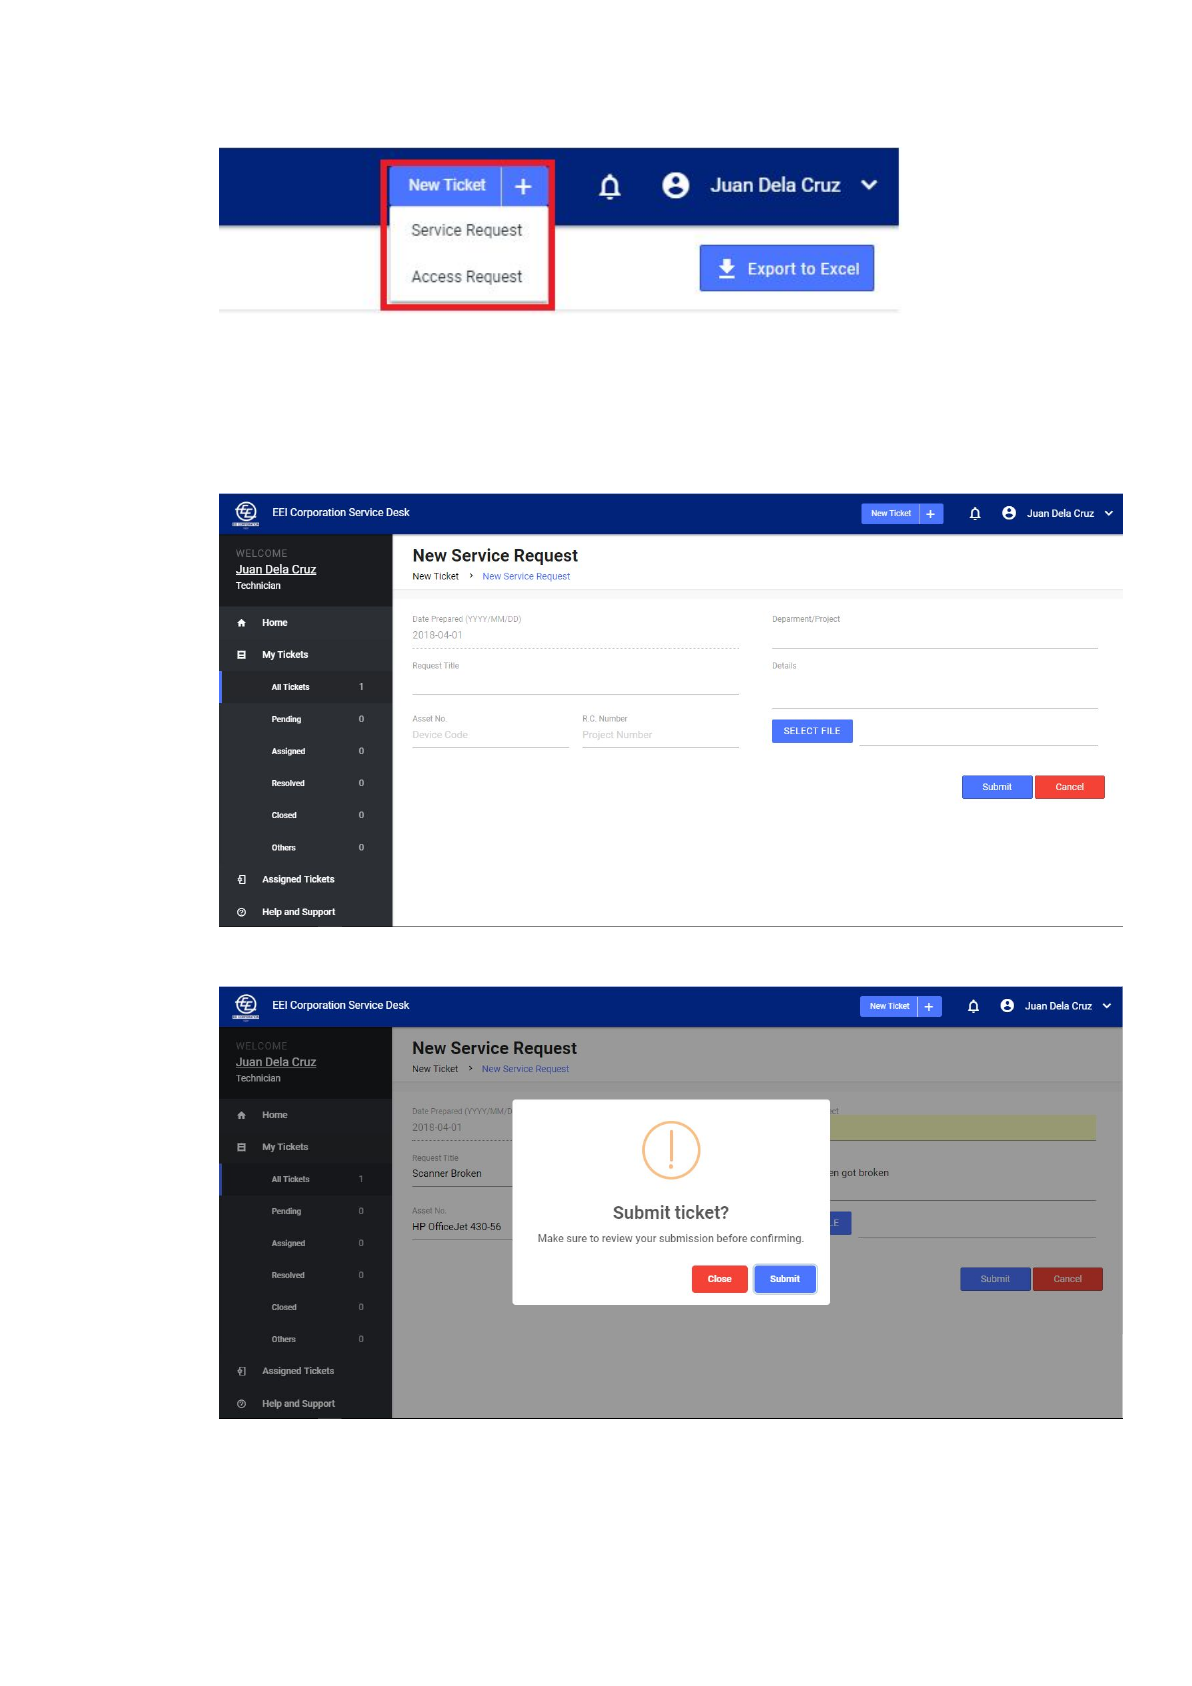
For Service Request:
1. Fill out the digital service request form.
2. Attach a file or screenshot if possible.
3. Click “Submit”. Make sure to review the details before submitting.
4. A confirmation box will pop out after you click the “Submit” button.
14 of 29
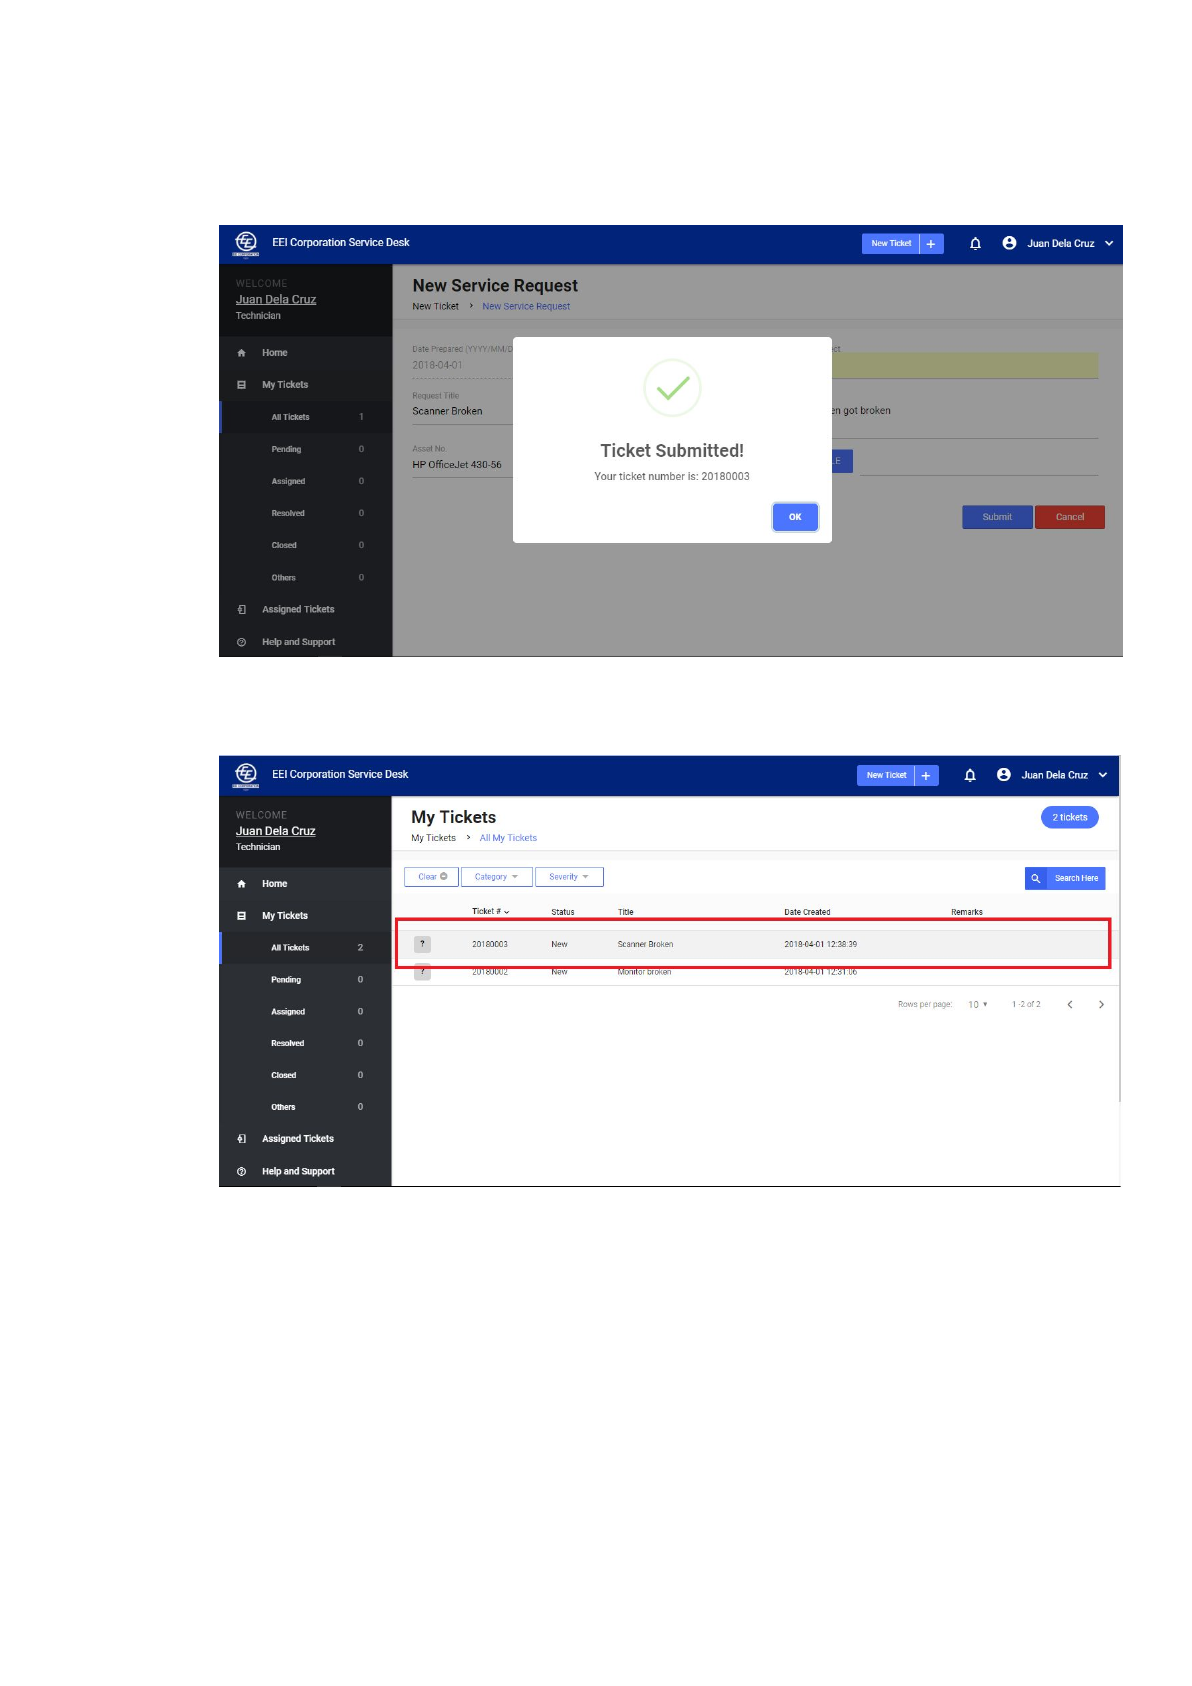
5. To finally confirm your submission, click the “Submit” button again. A ticket
number will be assigned to your request
6. Your newly submitted ticket can be found on “My Tickets” page
15 of 29

For User Access Request:
1. Fill out the digital service request form. The form has 3 sections: Requestor
Details, Reviewed By and Request Details
a. If needed, fill out the checker and/or approver fields under the
“Reviewed By” section of the form
● Note: checker and approver must also have an account
● Checker is an optional field, approver is required
b. Type the details of the people to be granted access to by clicking
“Add Row” in the “Request Details” section of the form.
2. Click “Submit”. Make sure to review the details before submitting.
16 of 29
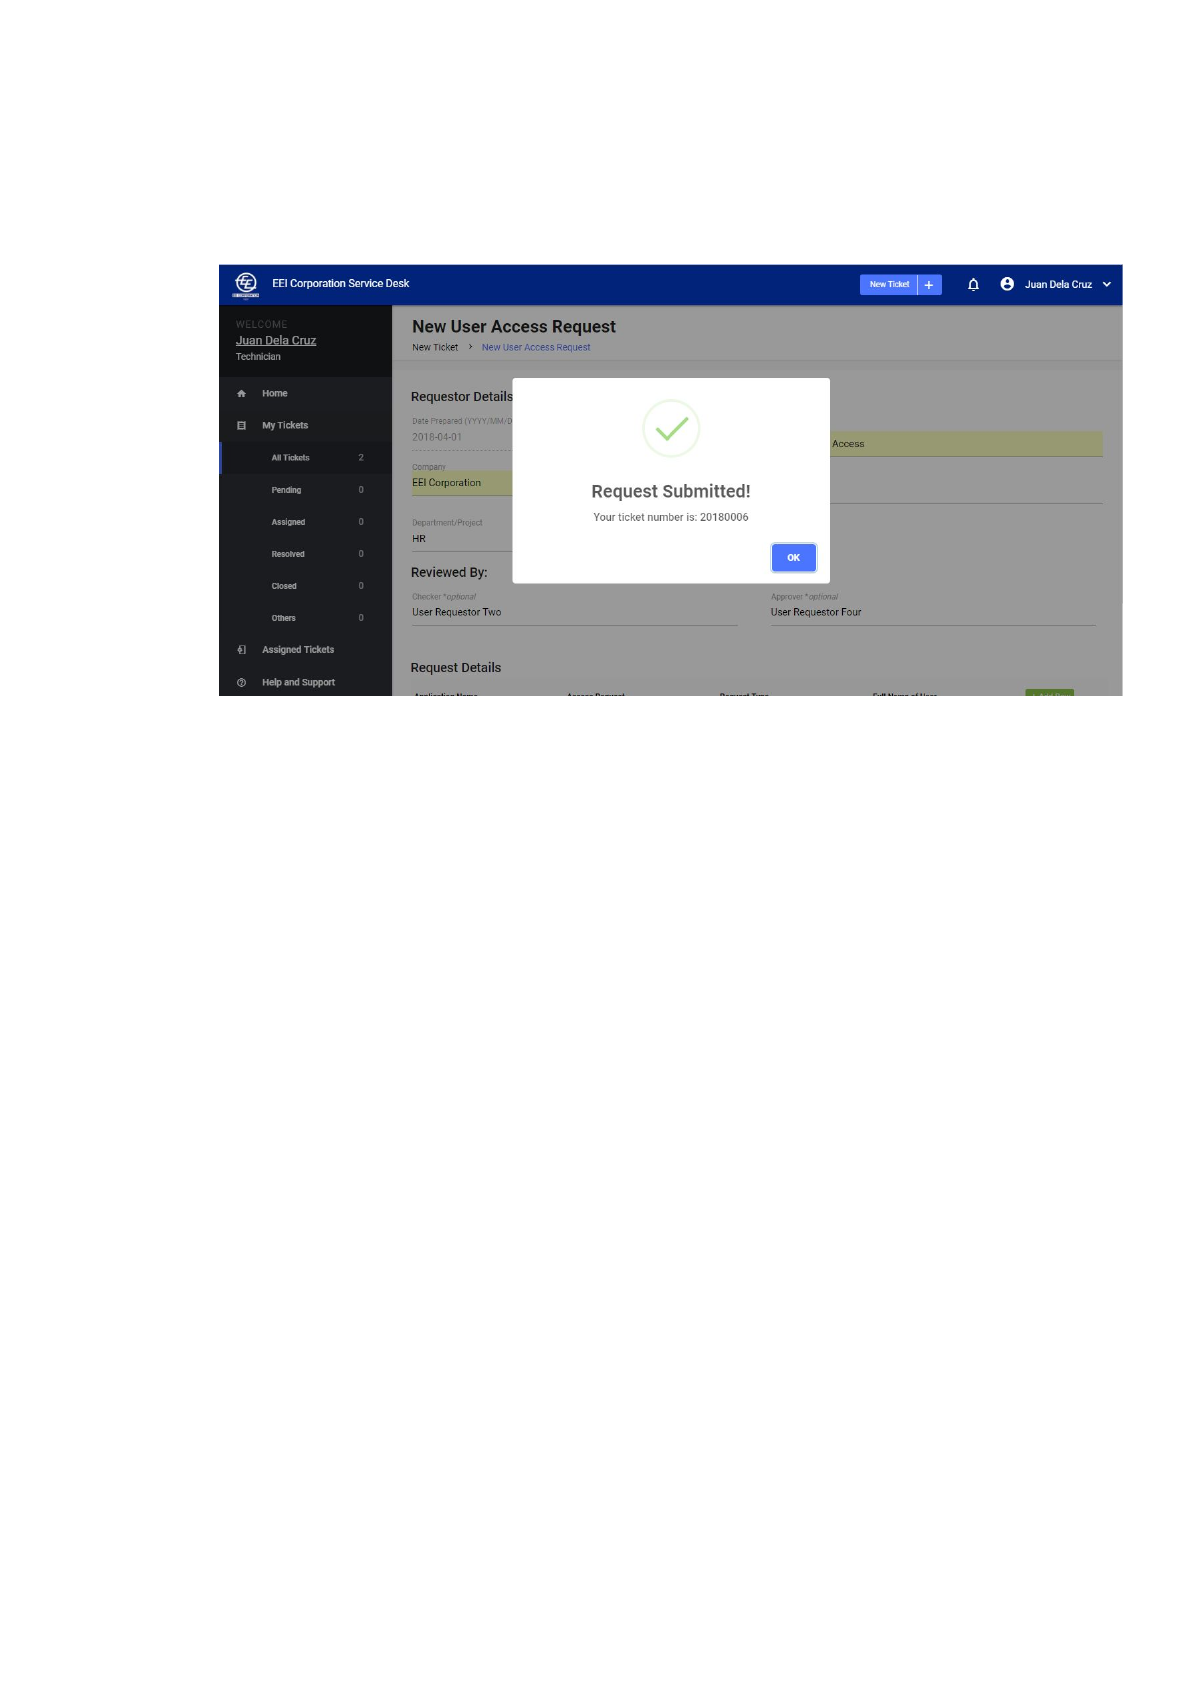
3. A confirmation box will pop out. Click “Submit” again to finally confirm your
submission.
17 of 29
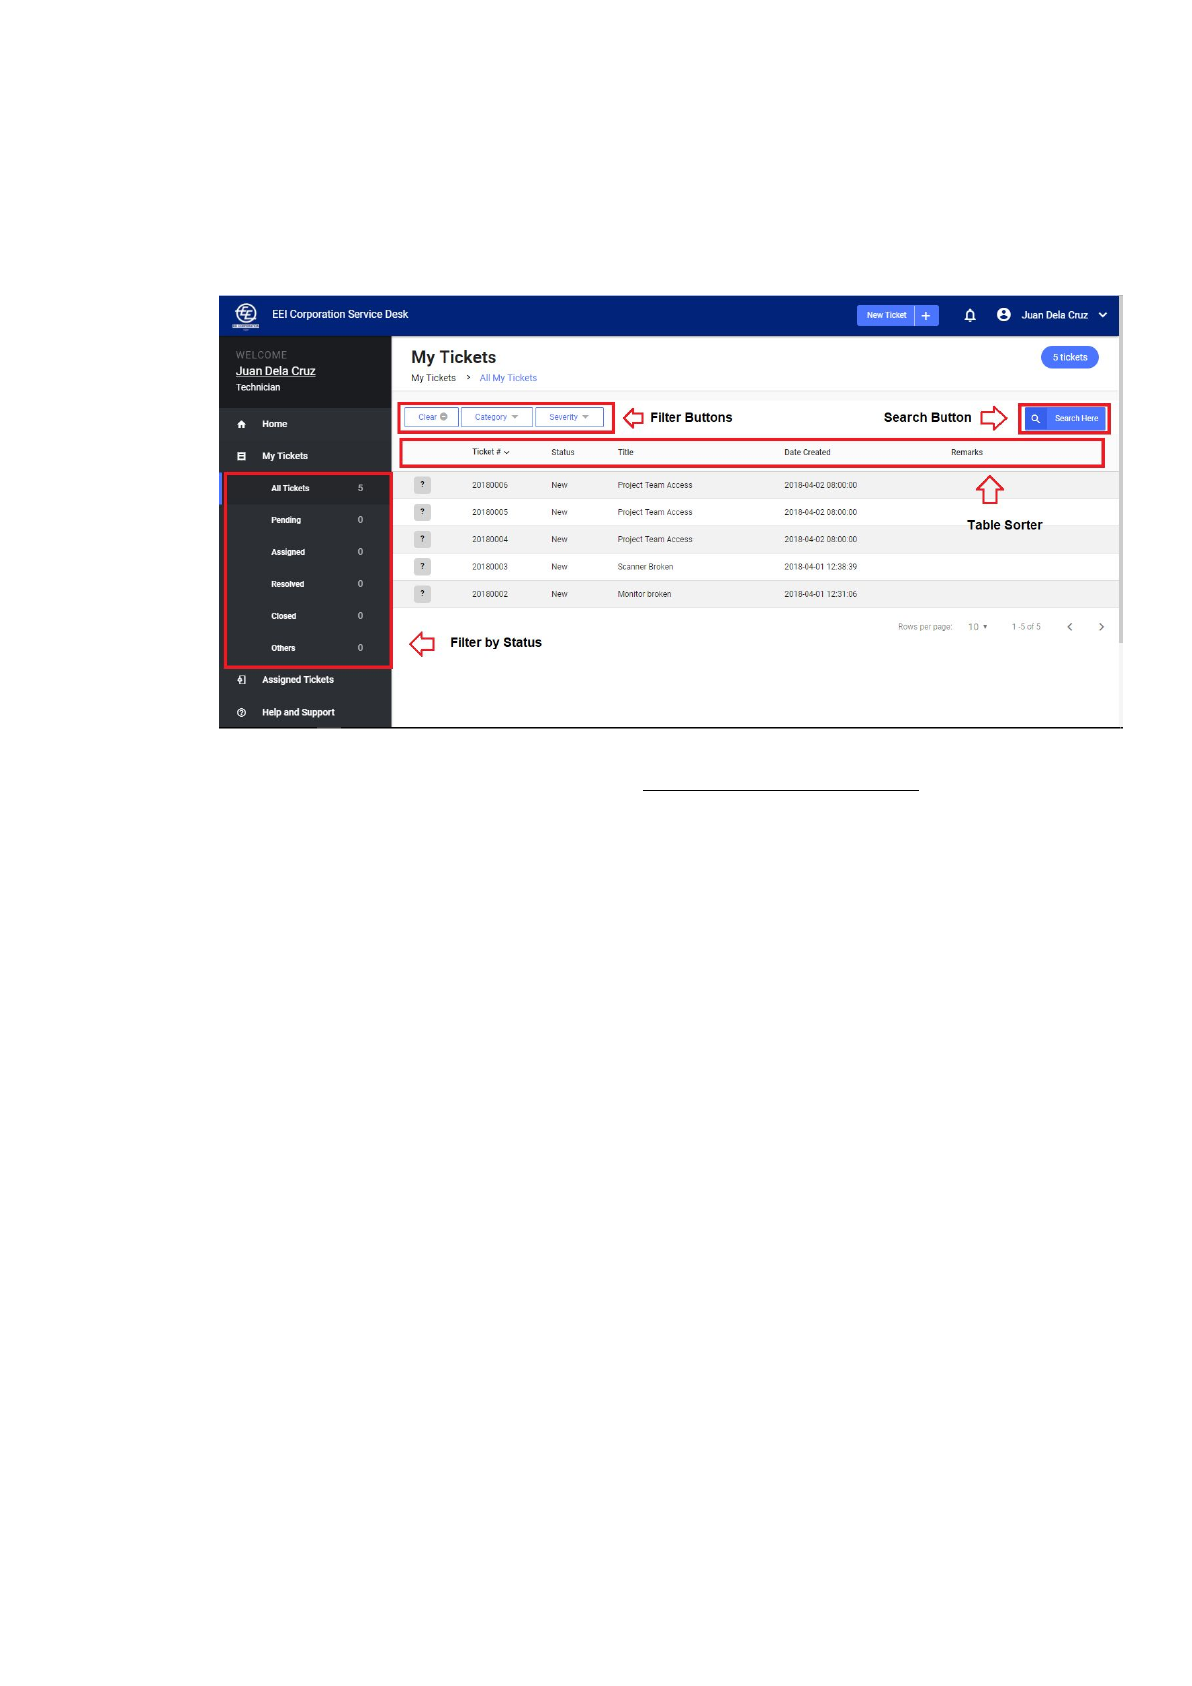
C. My Tickets
My Tickets page shows the list of all the tickets you submitted. You can filter your
view by status, category or severity.
●To view the details of each ticket, click on the row of the ticket.
●Filter Buttons *also applicable to all other tables
A. By Status - refer to the side navigation for the links.
B. By Category - “Category” dropdown button is visible on the page
before the table
C. By Severity Level - “Severity”.dropdown button is visible on the
page before the table
D. Clear Filter - “Clear” button is visible on the page before the table
●Search Button *also applicable to all other tables
● To search for any ticket or ticket detail, click the “Search Here” button
on the right side of the page
●Table Sorter *also applicable to all other tables
● To arrange the rows by column in ascending or descending, click
on the table header of the column you wish to be the basis of
arrangement. .
18 of 29
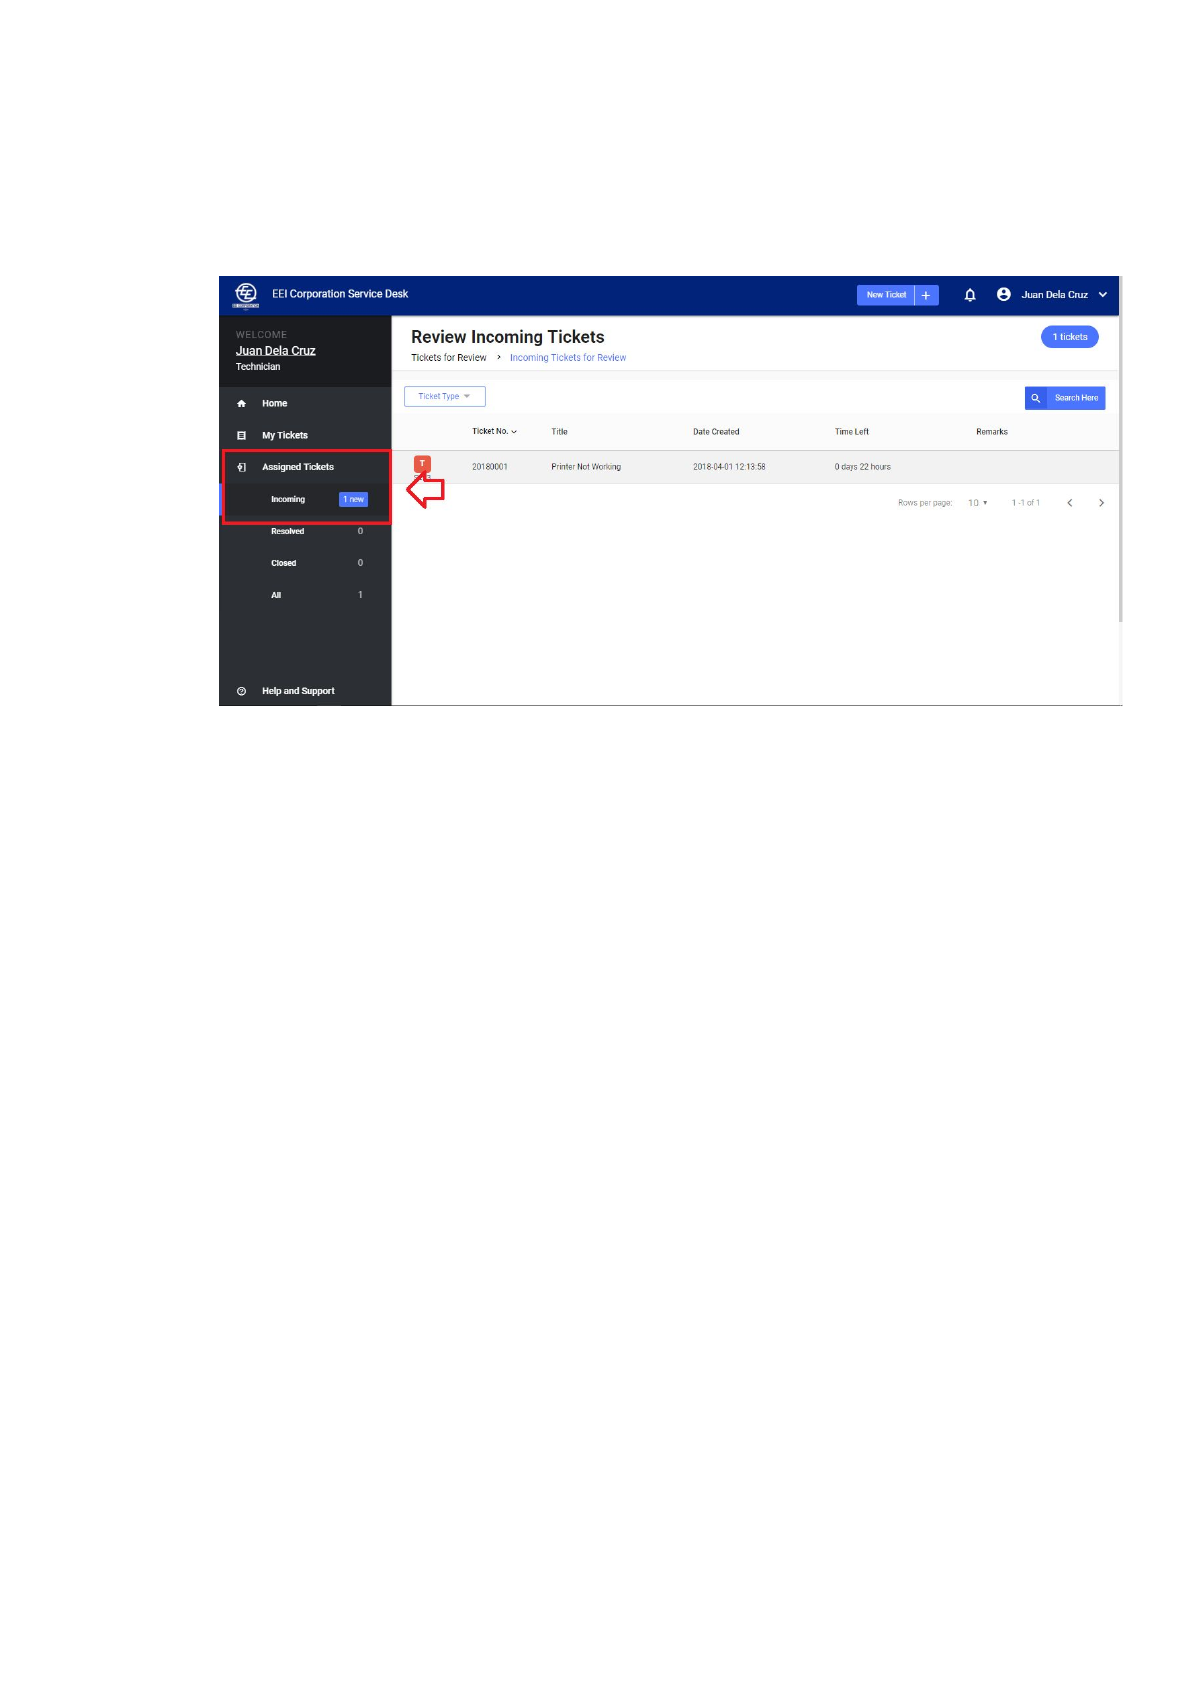
D. Assigned Tickets
I. Resolve Ticket
1. Click “Incoming” under “Assigned Tickets”.
19 of 29
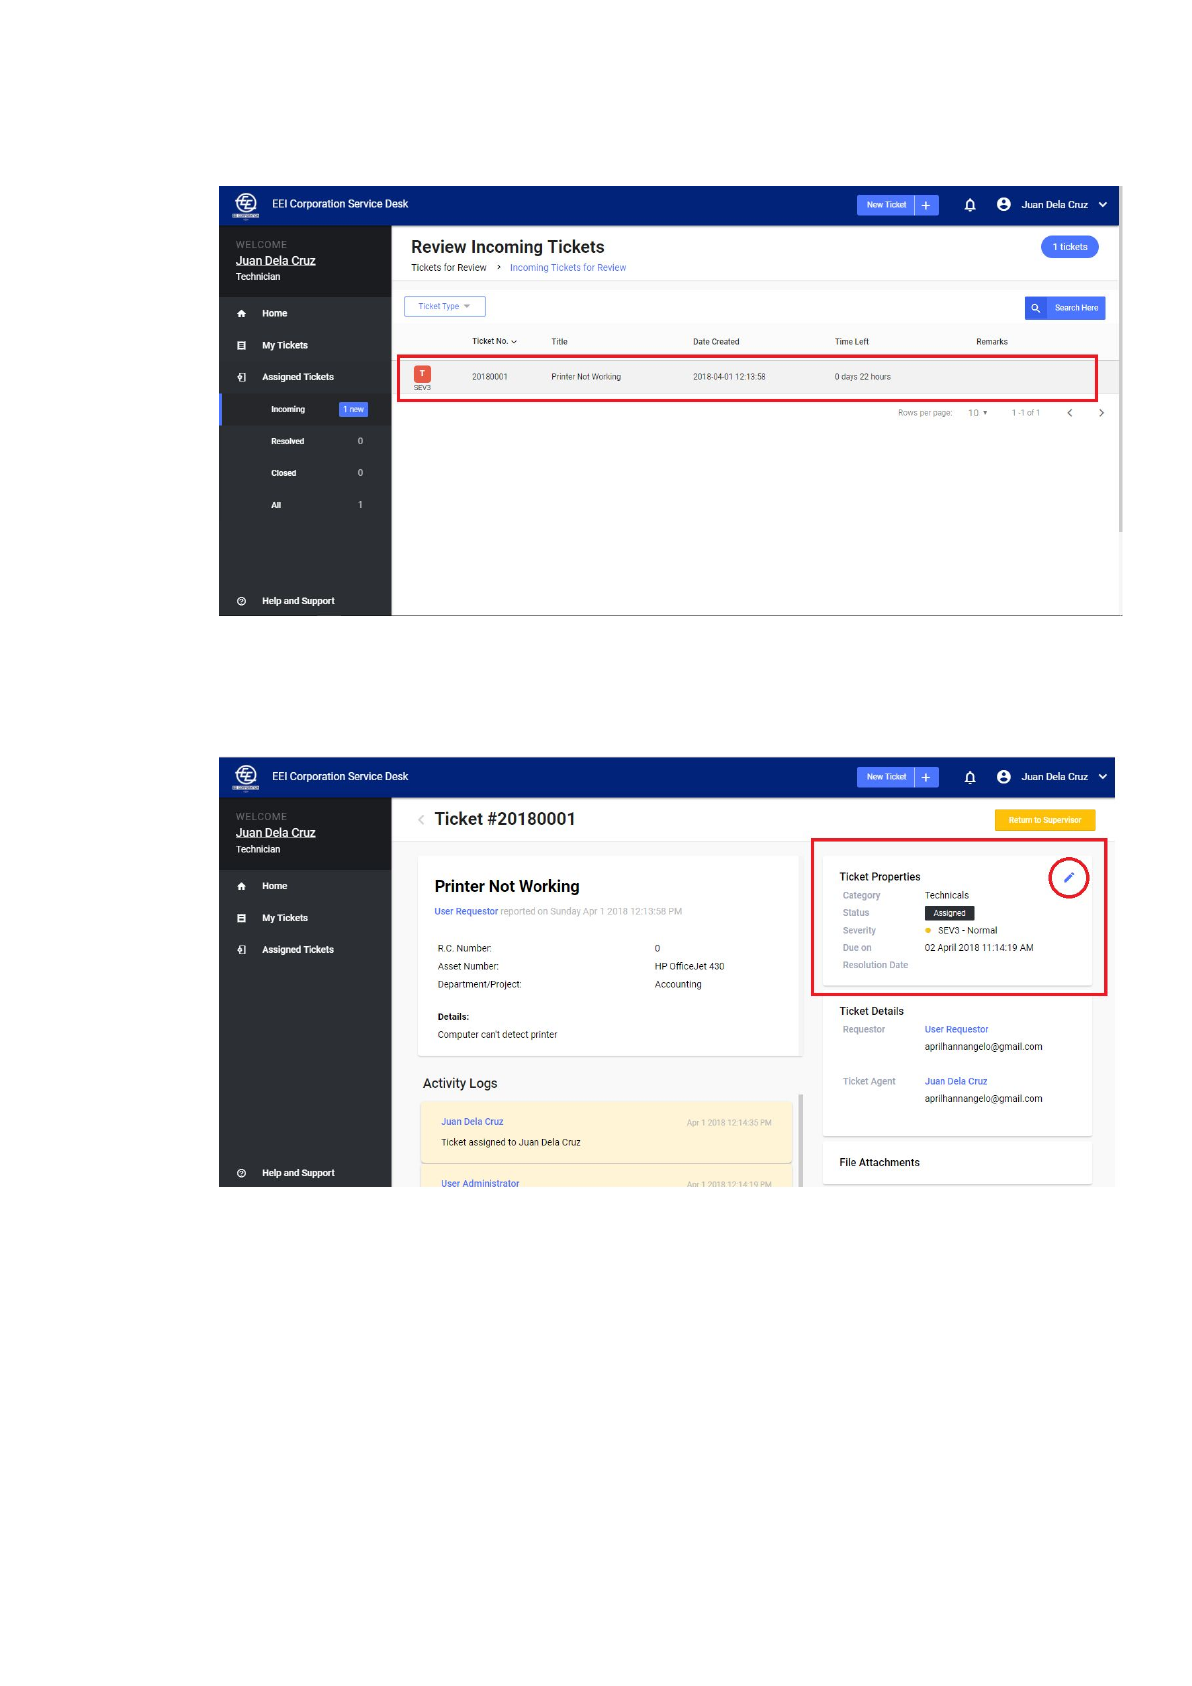
2. Click the table row of the ticket to be edited view its details page
3. On the upper right hand corner of the ticket properties panel, click the
blue pencil button to edit the ticket properties
20 of 29
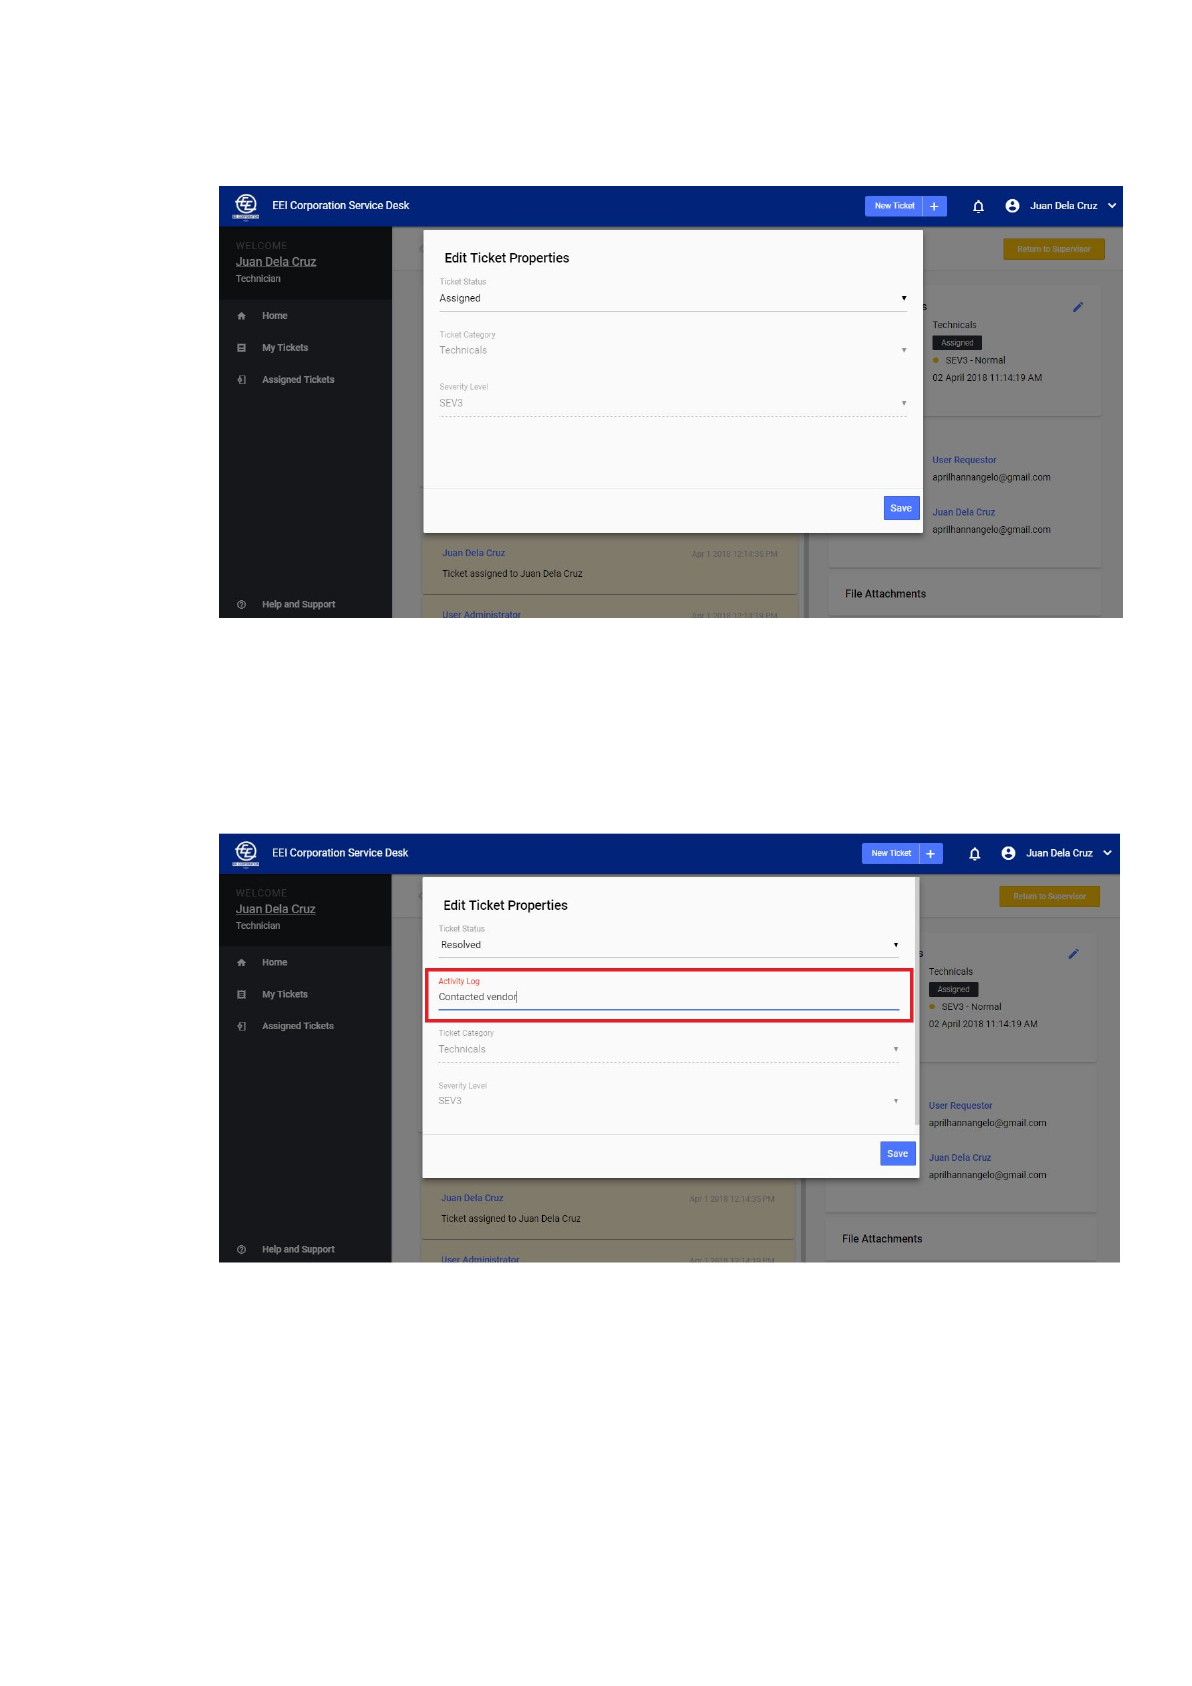
4. A modal will open for the Edit Ticket Properties form.
5. Change the selected value of the ticket status dropdown to
“Resolved”.
6. An input field will appear which will require you to log the action you
performed to resolve the ticket.
21 of 29
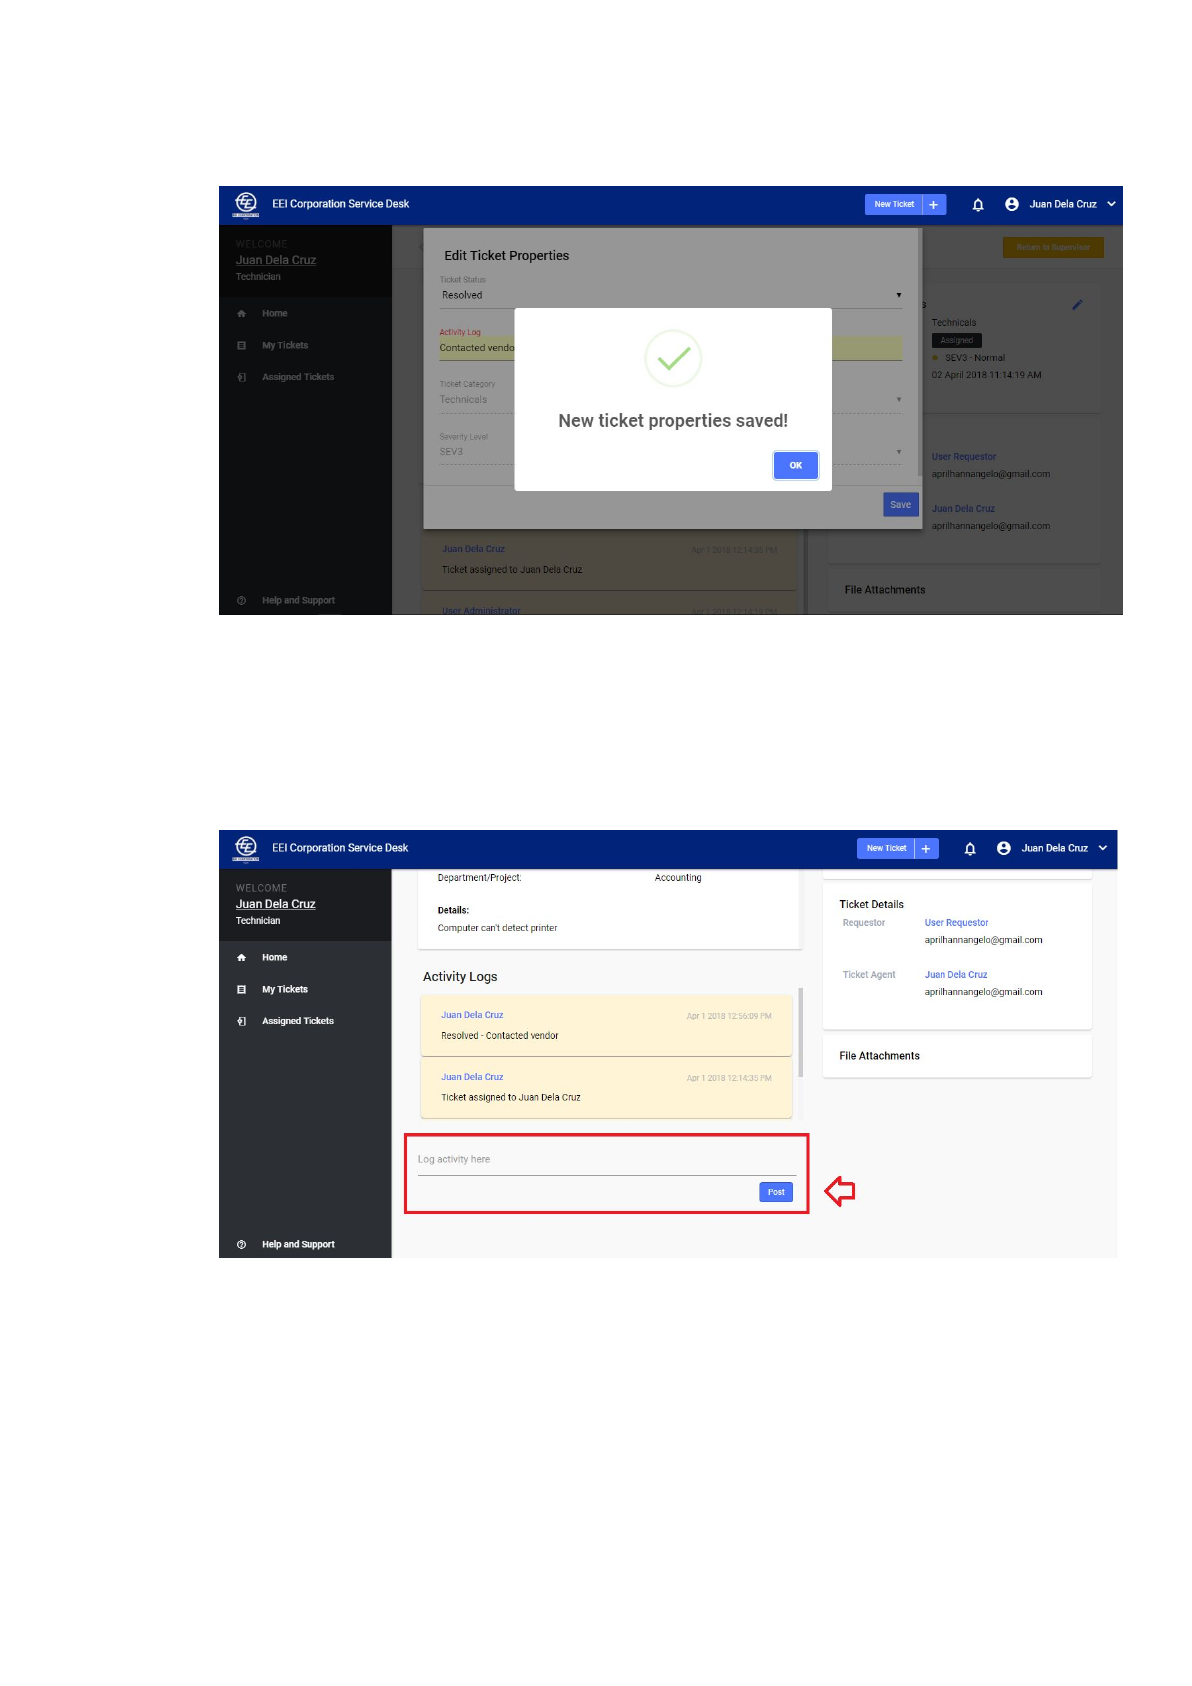
7. Click “Save”
II. Add Activity Log
1. Under “Activity logs”, click the text field that says “Log activity log
here”
2. Input your activity log
22 of 29
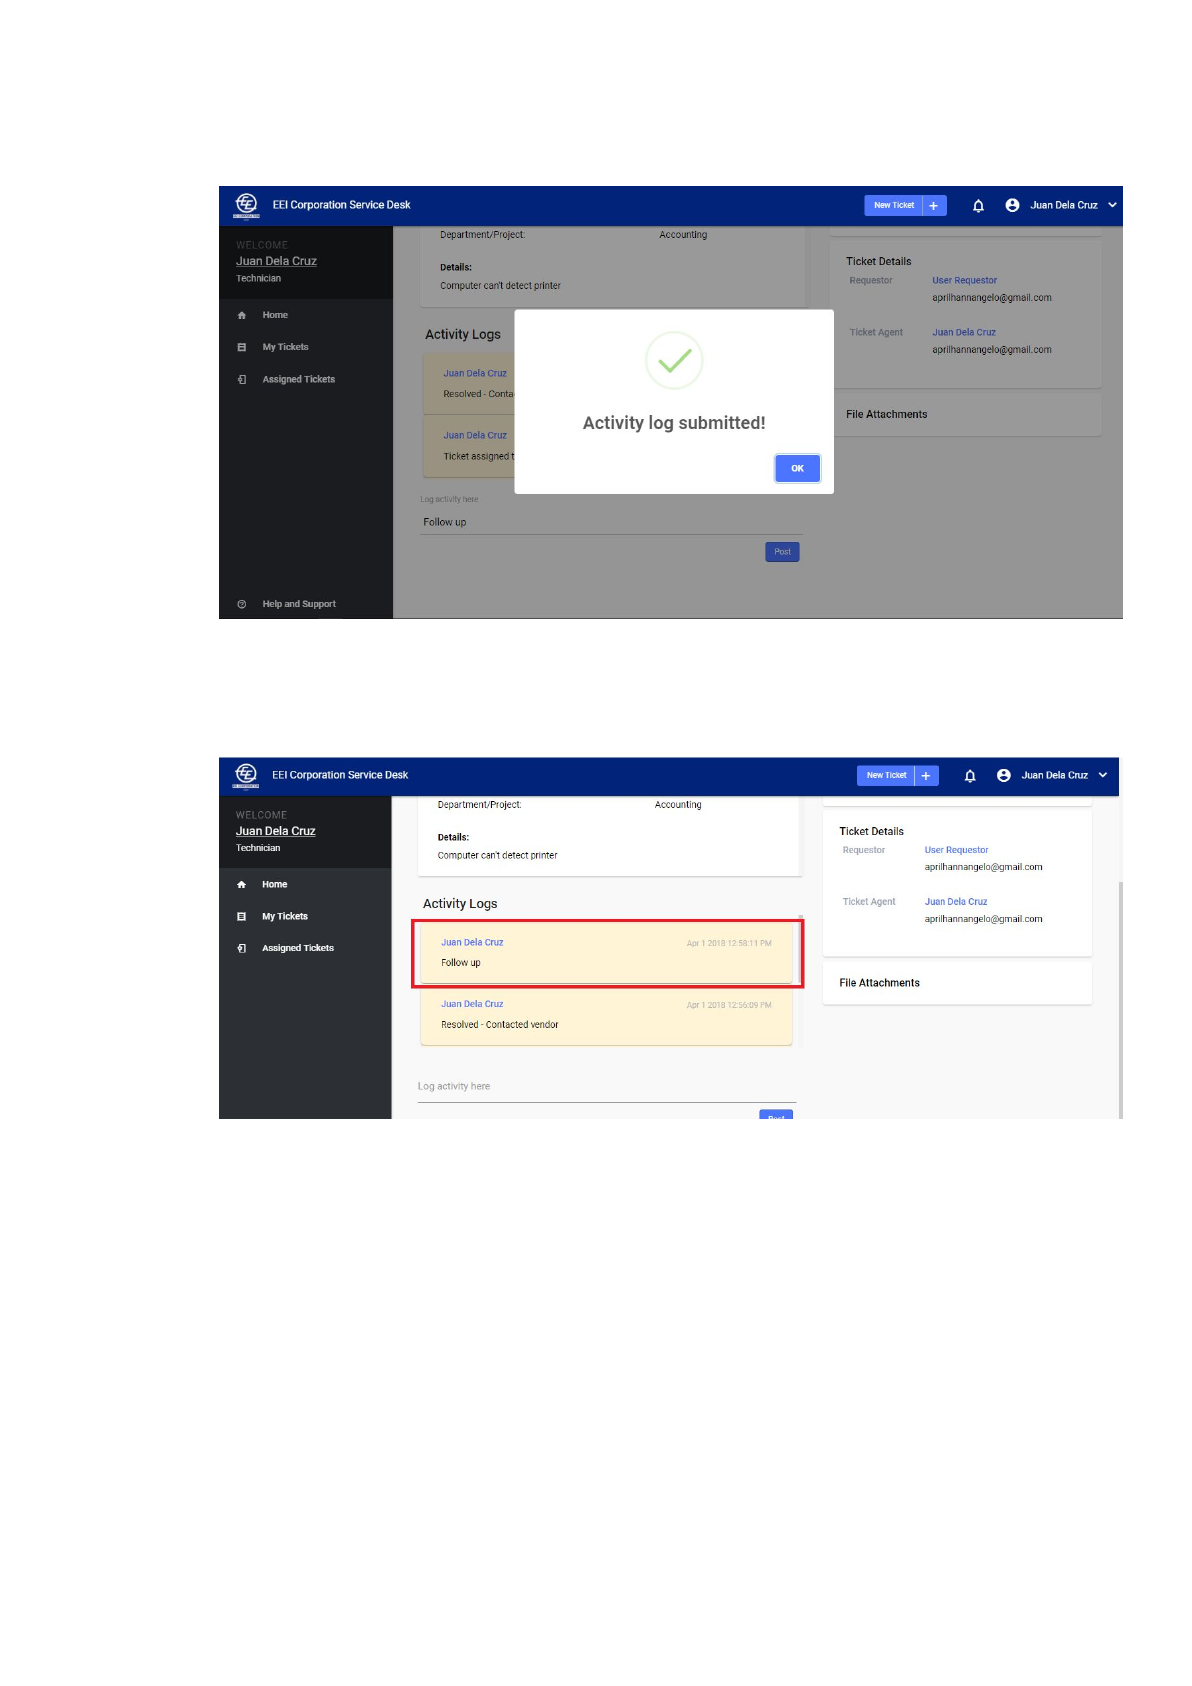
3. Click “Post” or press enter to submit activity log
4. Your activity log is submitted and now will appear on top of the
previous activity logs
23 of 29
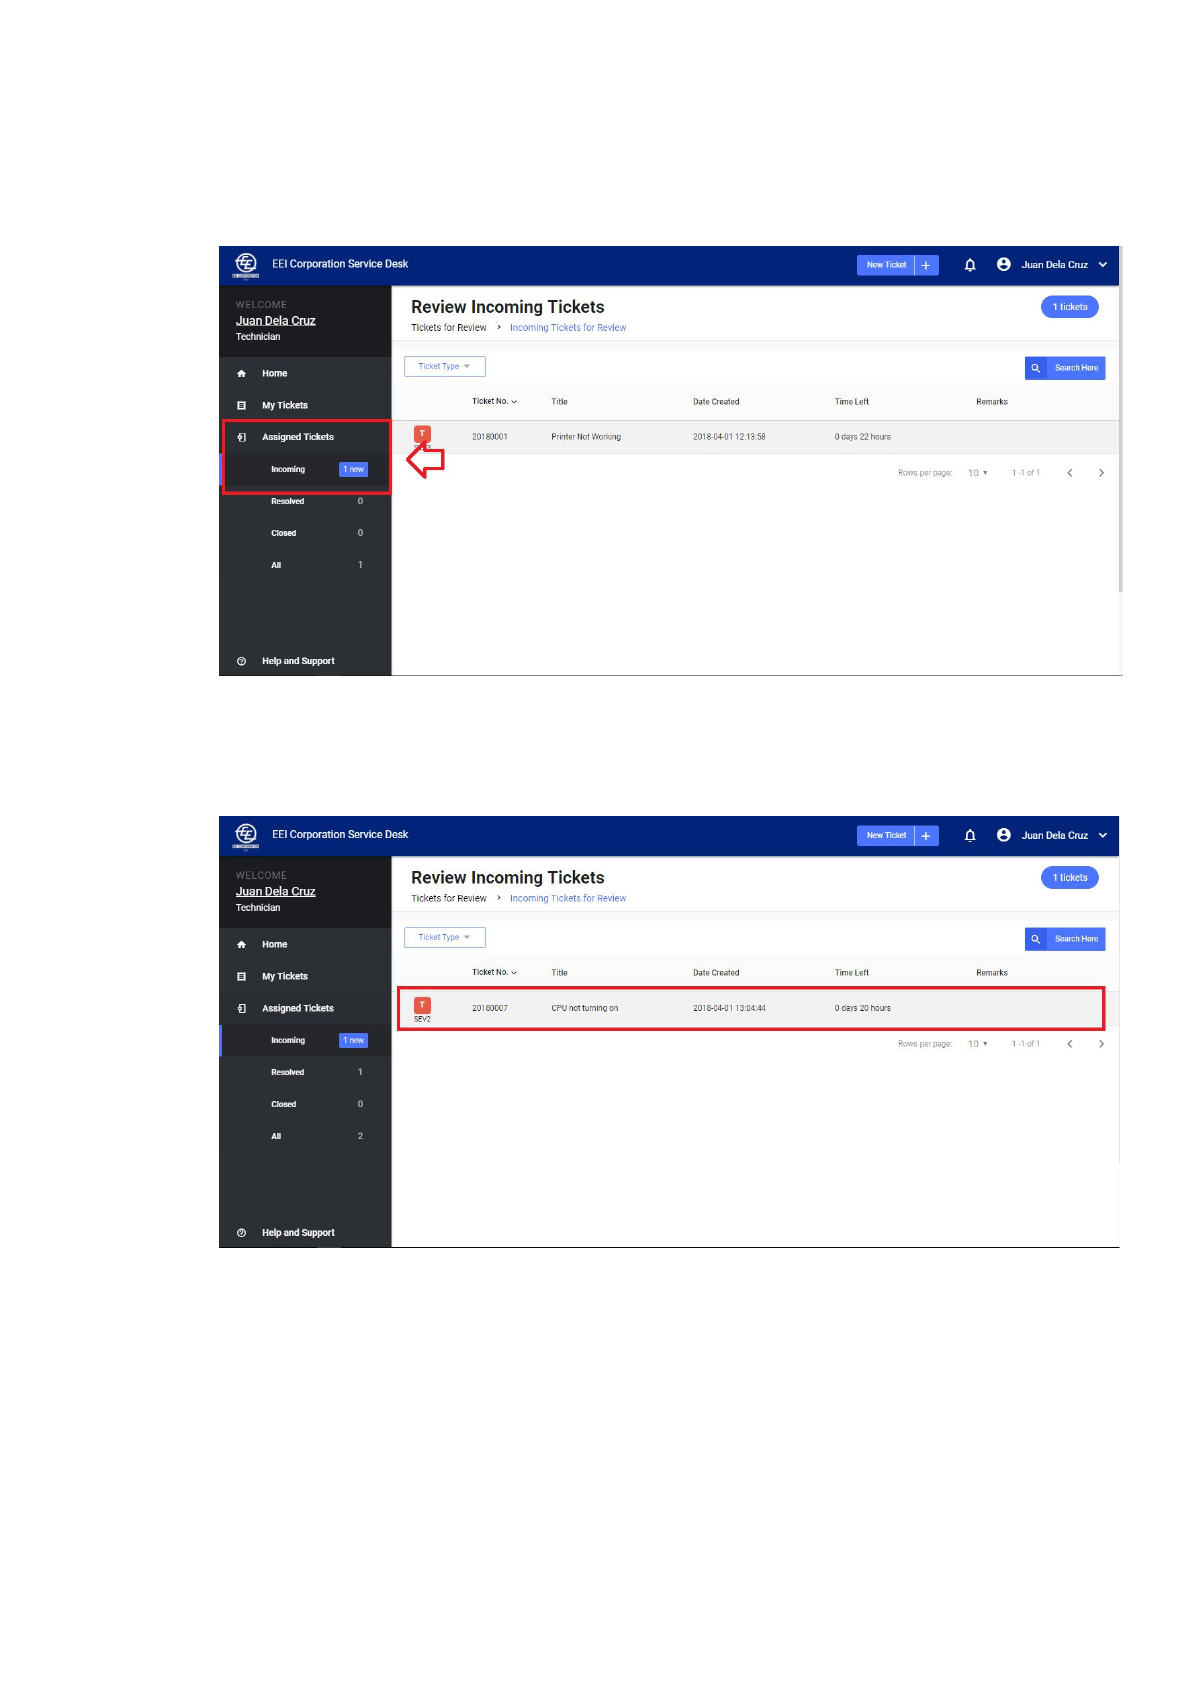
III. Return to IT Group Manager
1. Click “Incoming” under “Assigned Tickets”
2. Click the table row of the ticket you want to review to see all of its
details
24 of 29
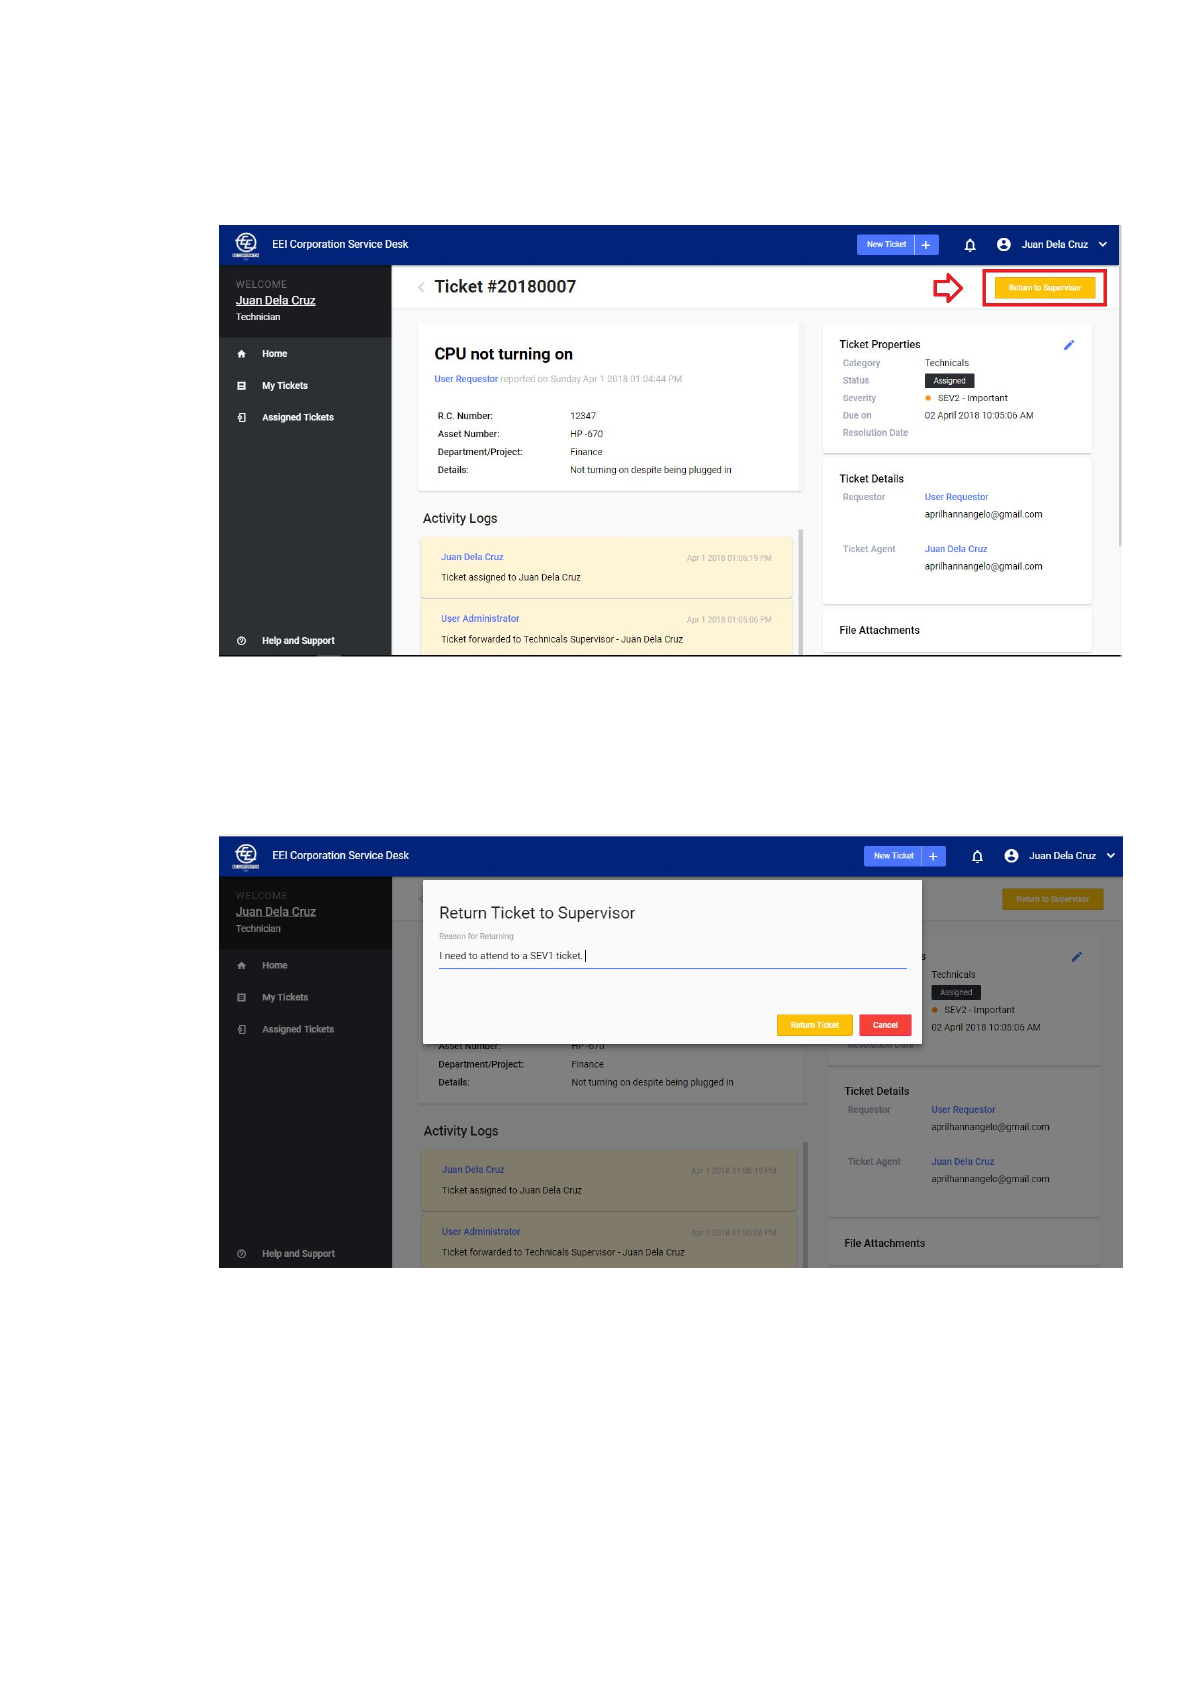
3. On the upper right hand corner of the details page of the ticket, click
“Return Ticket”
4. On the pop up, input reason for returning ticket to IT Group Manager
Note: Only tickets with valid reasons will be returned back to
the IT Group manager
25 of 29
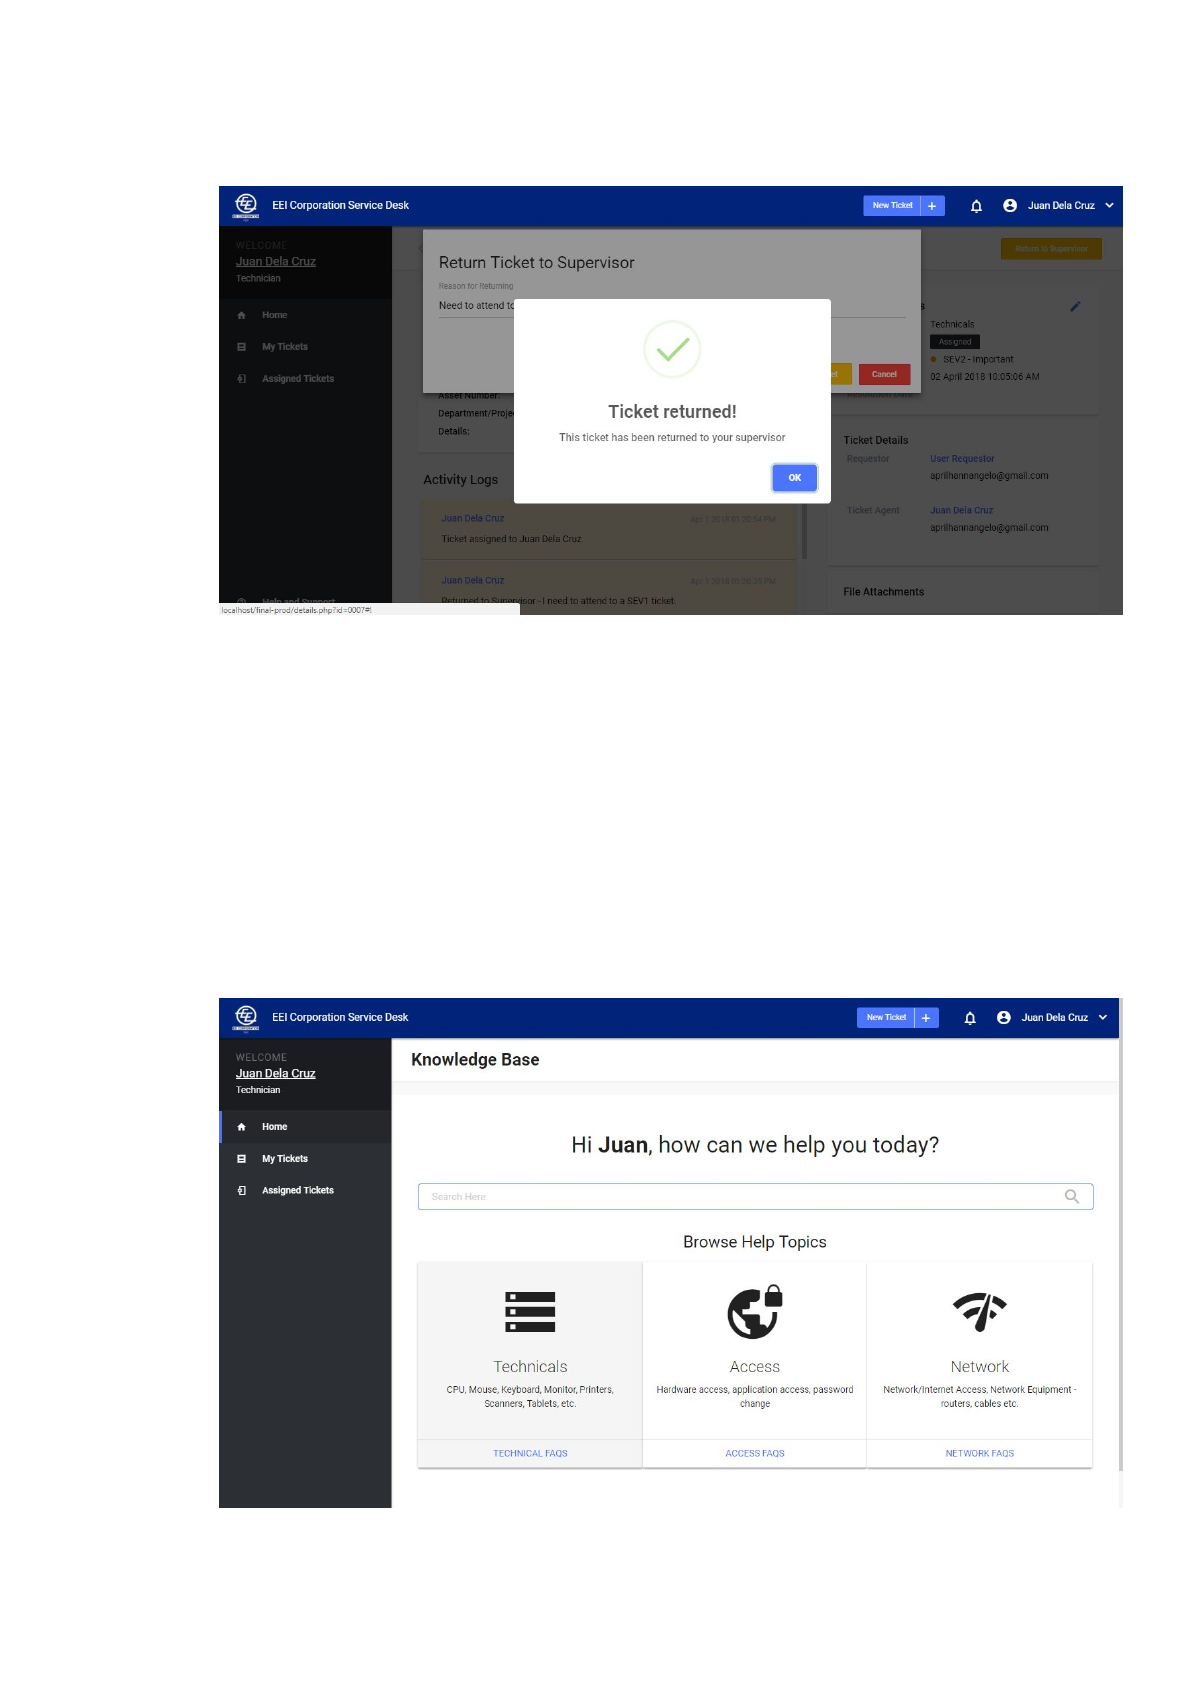
5. Click “Return Ticket”
6. The ticket must not be in your Incoming Assigned Tickets
E. Knowledge Base
The Knowledge Base Section for the Technician and Network Engineer is
similar to that of a regular user. He/She can search and view the list of articles. Any
new article suggestions should be discussed with the administrator of the system for
consideration.
26 of 29
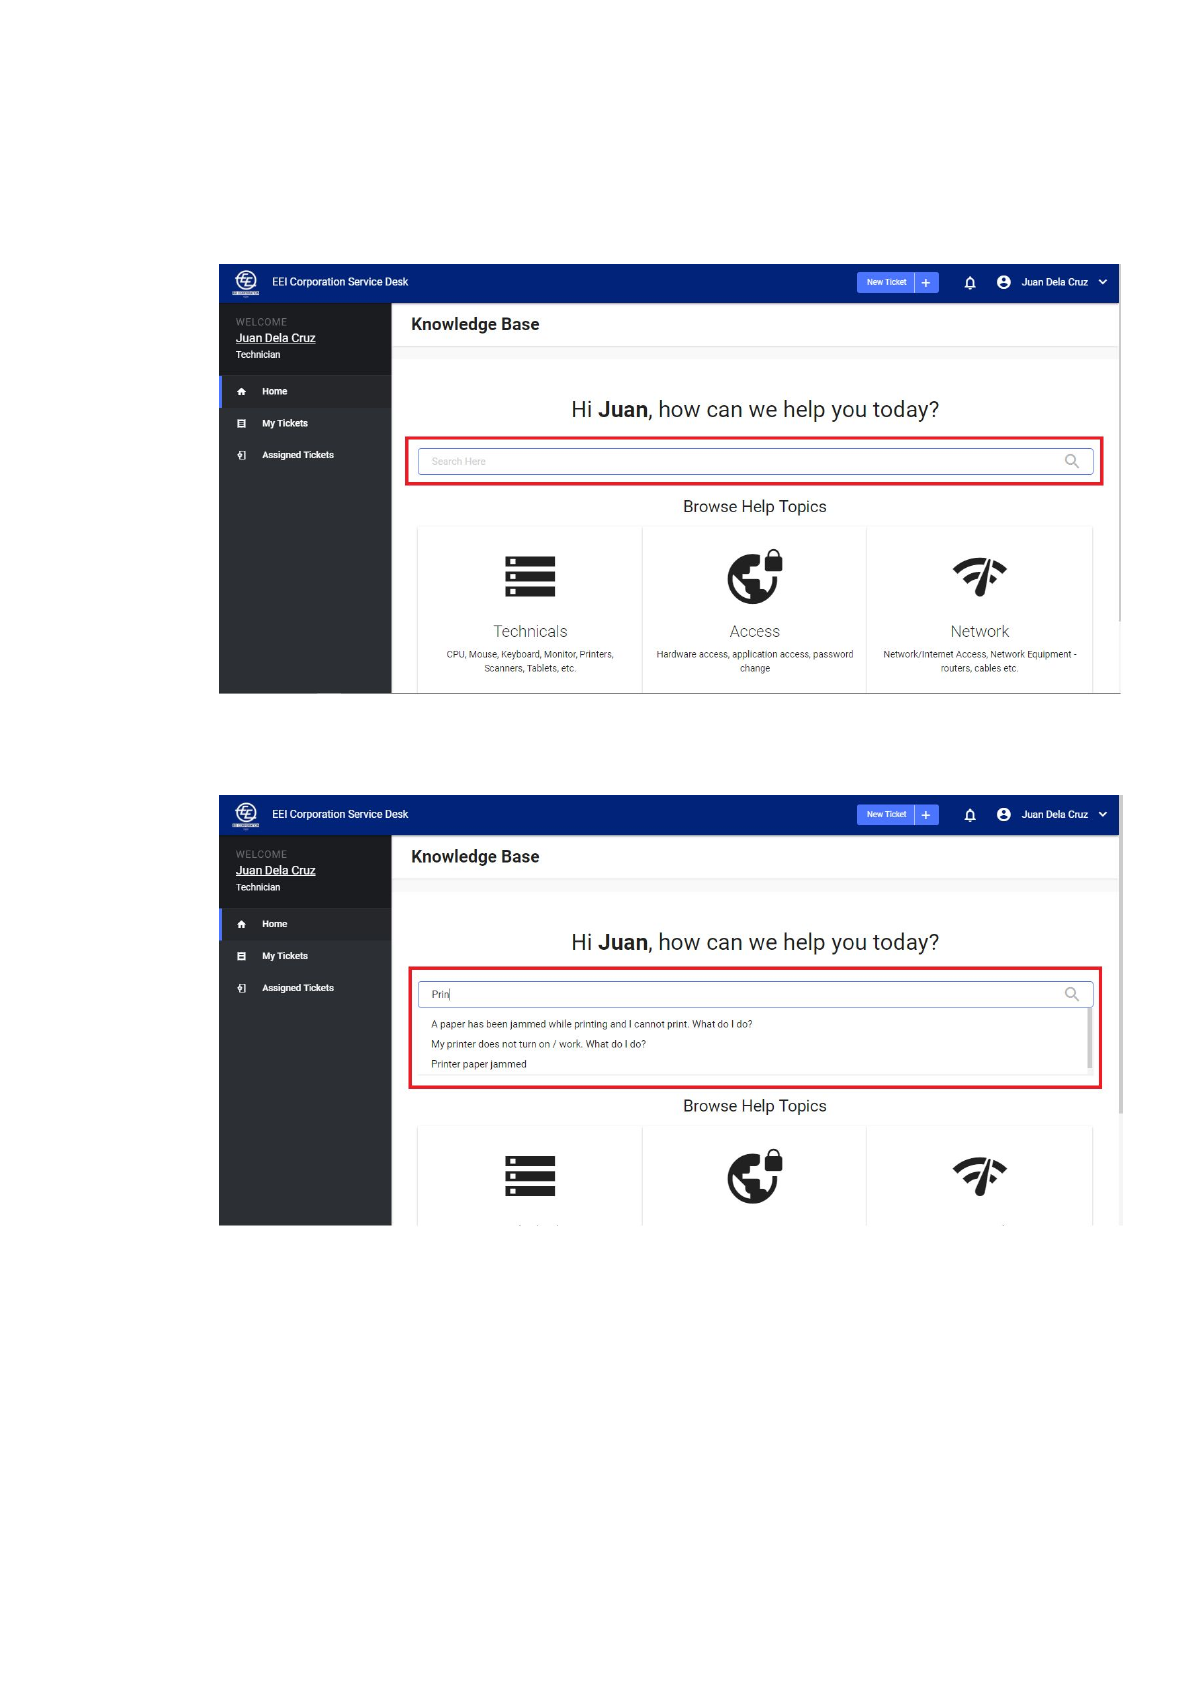
I. Search Article
1. To search for an article, type the keywords in the search bar.
2. Click the article title you wish to view
27 of 29
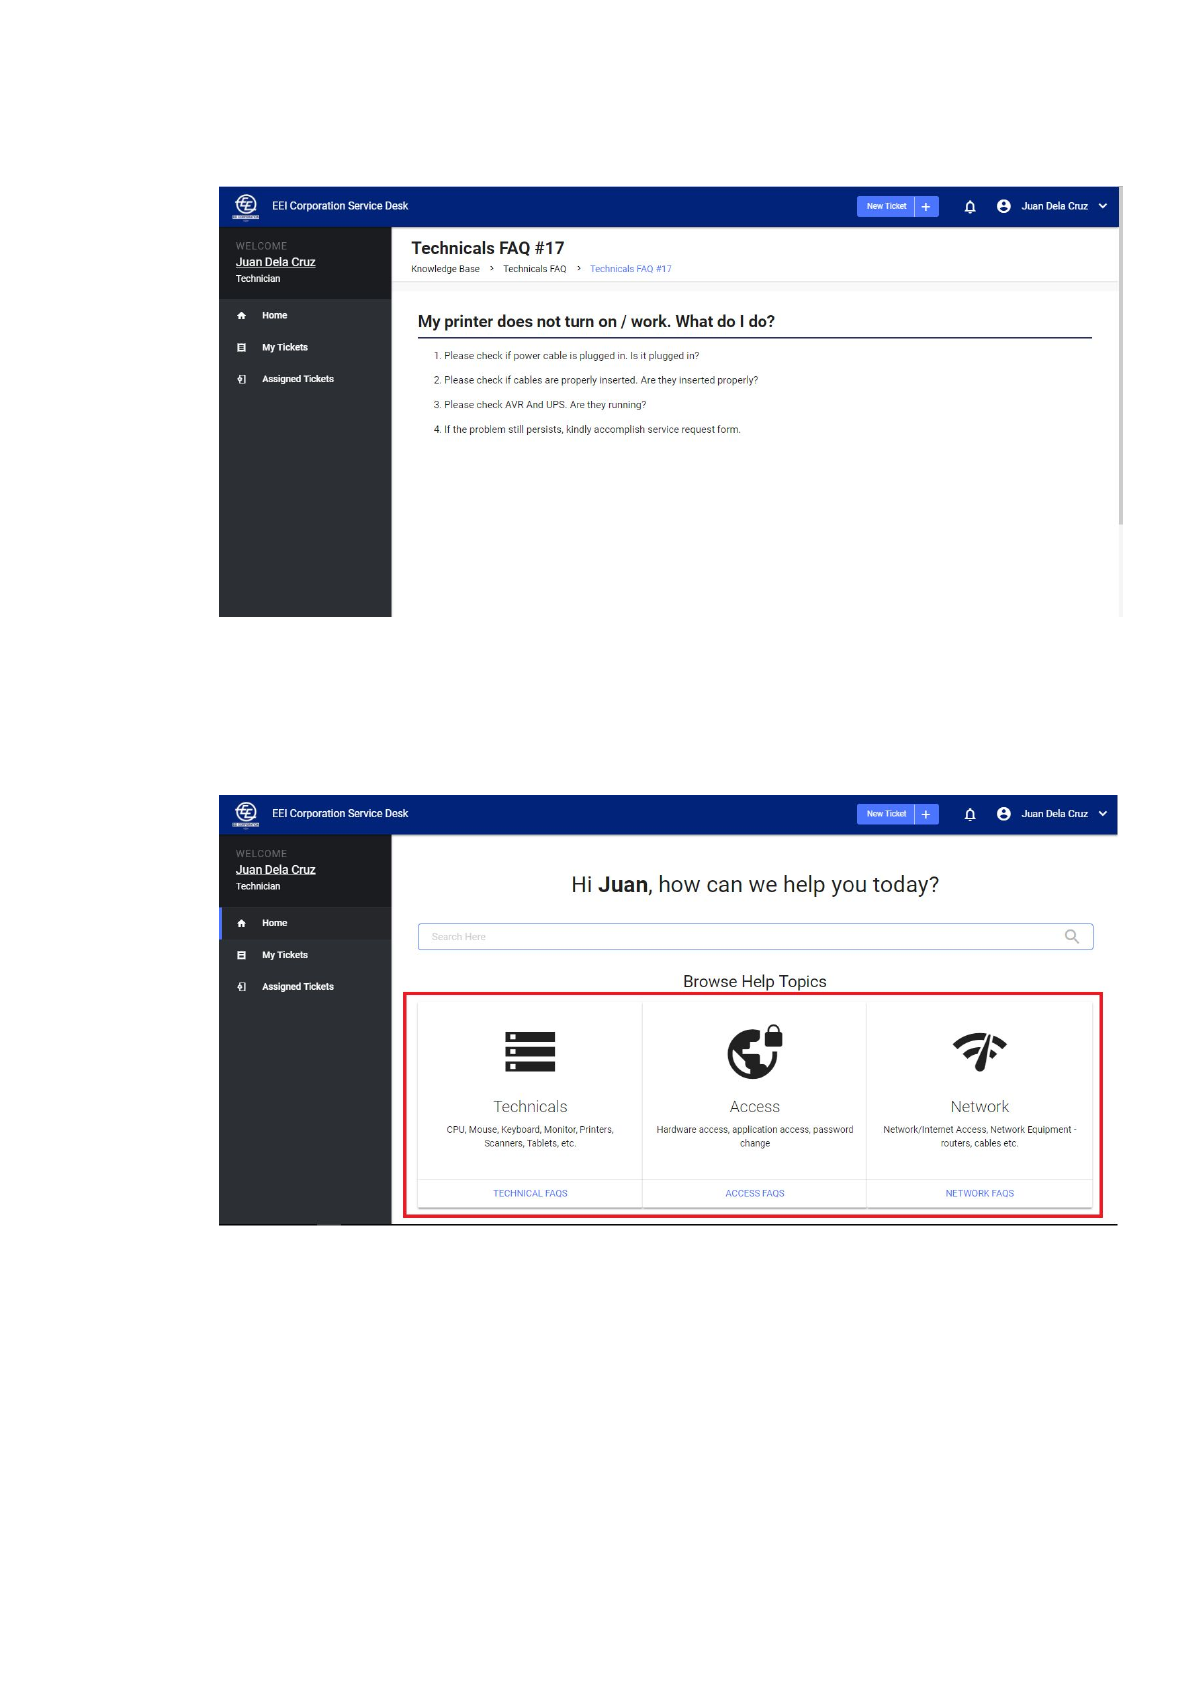
3. Follow the steps found in the article page
II. View Article List
1. In the knowledge base main page, click the category you wish to view the
articles.
28 of 29
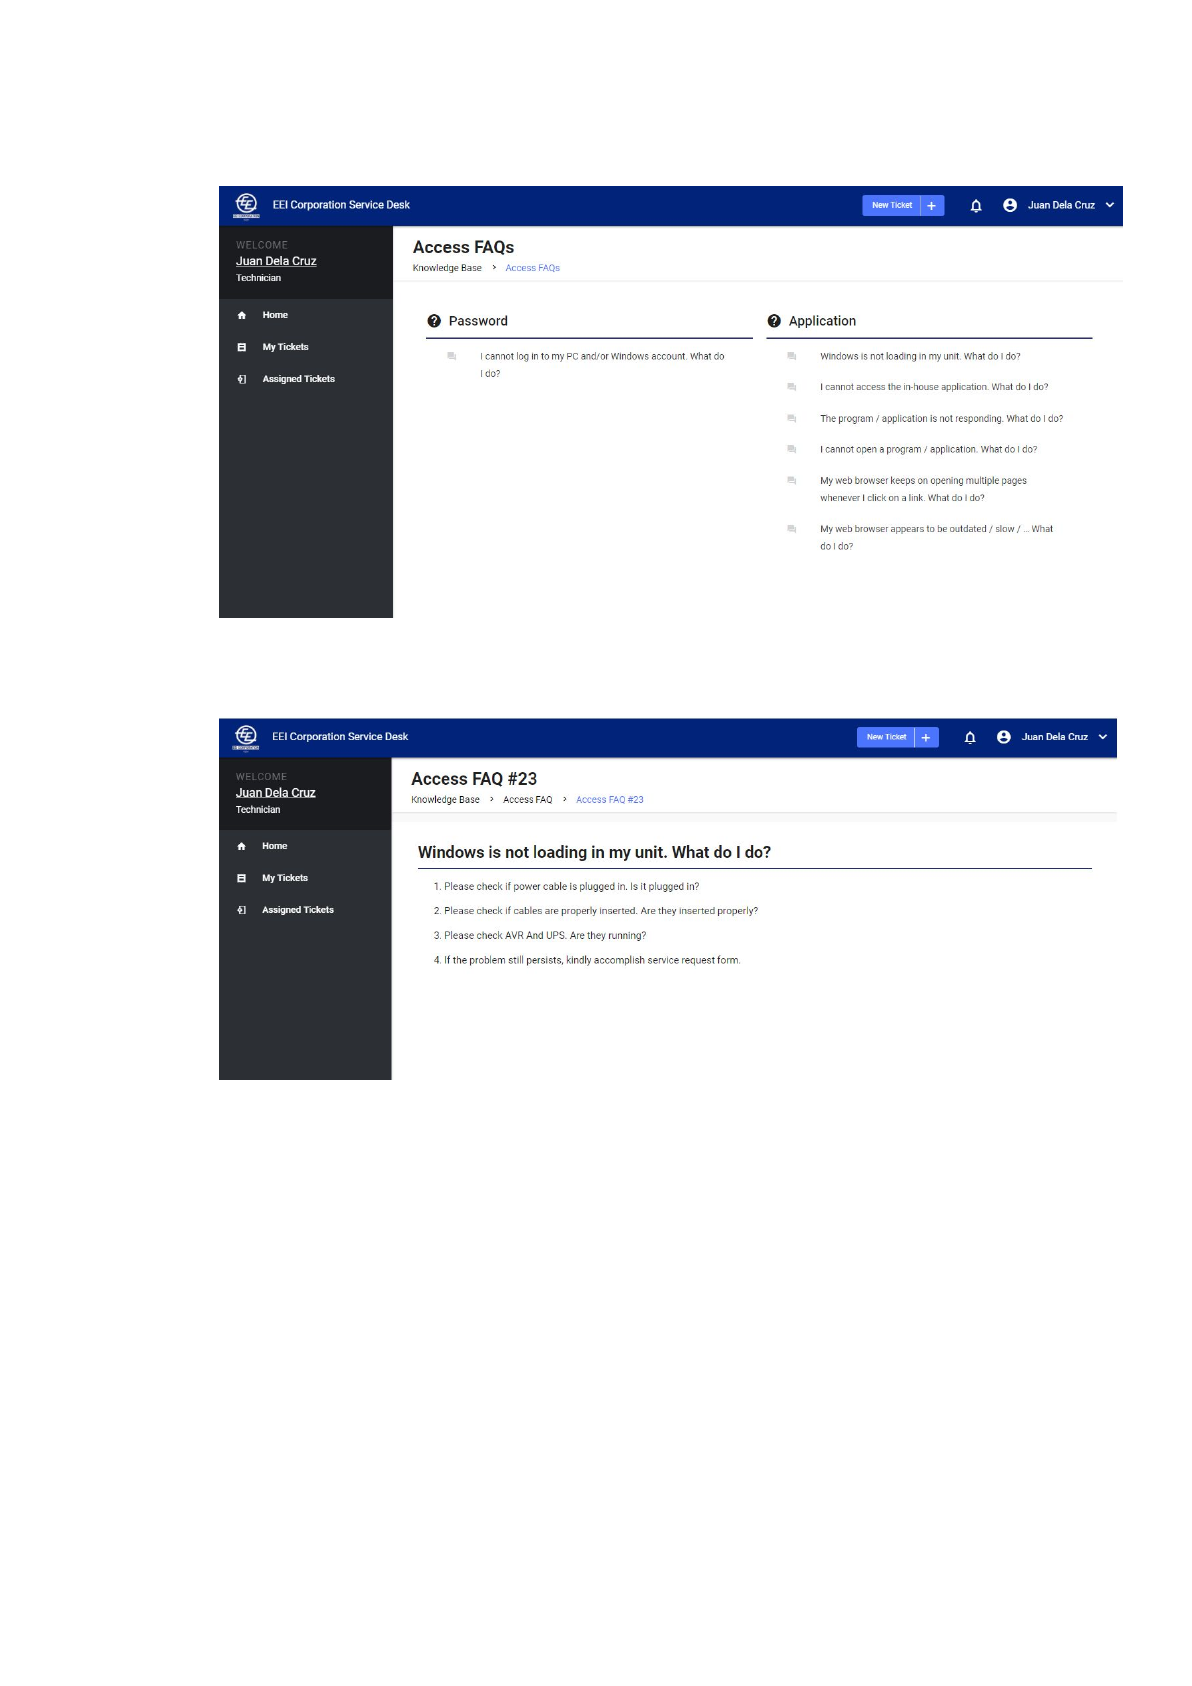
2. You will be redirected to the article list page of the category you selected
3. Click on any article title to view the whole article
29 of 29
