MANUAL

USER GUIDE
Transformix Engineering Inc.
50 Grant Timmins Dr, Unit 3
Kingston, Ont.
K7L 4V4

E.T.M Industries User Guide
Transformix Engineering Inc. i
TABLE OF CONTENTS
GENERAL DESCRIPTION:.......................................................................................................................... 1
SIGNAL LIGHT OPERATIONS: .................................................................................................................. 1
REPLACEABLE COMPONENTS: ............................................................................................................... 4
Taillight LED board:.................................................................................................................................. 4
Taillight Computer/Battery Module:.......................................................................................................... 5
Keypad unit:................................................................................................................................................ 7
TAILLIGHT/KEYPAD BATTERY REPLACEMENT:................................................................................ 8
Taillight unit battery replacement: ............................................................................................................. 8
Keypad unit battery replacement: .............................................................................................................. 9
ELECTRICAL SPECIFICATIONS:............................................................................................................. 10
Keypad unit:.............................................................................................................................................. 10
Taillight unit: ............................................................................................................................................ 10
MECHANICAL SPECIFICATIONS: .......................................................................................................... 11
Keypad unit:.............................................................................................................................................. 11
Taillight unit: ............................................................................................................................................ 11

E.T.M Industries User Guide
Transformix Engineering Inc. 1
GENERAL DESCRIPTION:
The FARM ALERT system provides a farmer with a wireless lighting system for
use on agricultural implements. This wireless system allows the user to control the
turn signals, hazard lights, brake lights, and running lights all from a keypad unit
located near the driver. Each signal is simply activated by pressing the
corresponding key on the keypad. Lights on the keypad unit will indicate that a
signal has been sent and received. These lights will continue to operate until a
signal is sent to cancel the operation by simply pressing the same corresponding
button on the keypad unit.
SIGNAL LIGHT OPERATIONS:
Sufficient LED lighting is used to ensure running light visibility at 150 meters on
a clear night.
Signal Type Result
Left Turn: Left Side, Bright, Flashing
Right Turn: Right Side, Bright, Flashing
Brake Lights: Left and Right Side, Bright
Hazard Lights: Left and Right Side, Bright, Flashing
Running
Lights: Left and Right Side, Dim
Bright - All LEDs on Dim - Half of the LEDs on
E.T.M Industries User Guide
Transformix Engineering Inc. 2
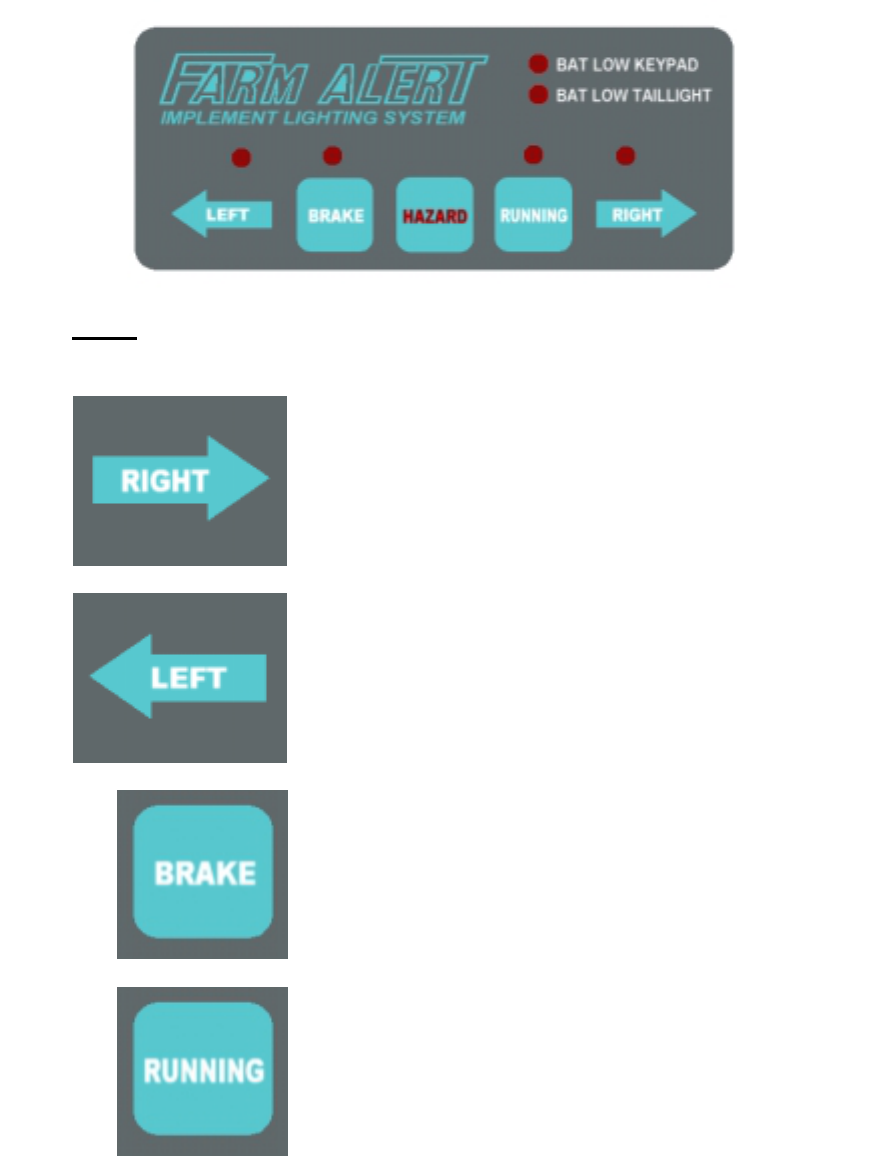
KEYPAD OVERVIEW:
Note: The selected function will continue to operate until a signal is sent to
cancel the function by simply pressing the same corresponding button.
Right button: By pressing the RIGHT button on the
keypad a signal is sent to the taillight unit to activate the
right turning lights, a red confirmation light located above
the button will let the user know that the signal was sent
and received by the keypad unit.
Left button: By pressing the LEFT button on the keypad
a signal is sent to the taillight unit to activate the left
turning lights.
Brake button: By pressing the BRAKE button on the
keypad a signal is sent to the taillight unit to activate the
brake lights. The brake lights will continue to operate
until a signal is sent to cancel the operation by simply
pressing the same corresponding button.
Running button: By pressing the RUNNING button on
the keypad a signal is sent to the taillight unit to activate
the running lights.
E.T.M Industries User Guide
Transformix Engineering Inc. 3
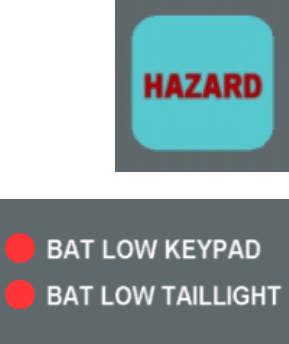
Hazard button: By pressing the HAZARD button on the
keypad a signal is sent to the taillight unit to activate the
hazard lights. Both lights above the RIGHT and the
LEFT buttons will flash as a confirmation that hazard has
been selected.
Low battery keypad/taillight: A warning light will
activate if the battery level for the keypad or the taillight
drops below a certain level letting the user know that the
batteries will have to be changed.
E.T.M Industries User Guide
Transformix Engineering Inc. 4
REPLACEABLE COMPONENTS:
The replaceable components that make up the electrical hardware are:
1. Taillight LED board
2. Taillight Computer/Battery Module
3. Keypad unit
Taillight LED board:
The taillight lens module consists of a red molded lens cap, three screws and a
LED circuit board. If the LED circuit board needs to be replaced, a new board can
be easily installed.
LED board removal
To remove an LED board:
1) Remove the three lens screws from the red lens cap and then remove the lens
cap.
2) Remove the two screws securing to the LED board.
3) Remove the LED board by pulling up on the LED board so that it disconnects
from the connector located just underneath the board.
LED board replacement
To replace an LED board:
1) Take the new replacement LED board and by pushing down fit the board into
the connector insuring that the connector is in the correct position.
2) Reinstall the two LED board screws.
3) Then place the red lens cap back over the main housing and reinstall the three
lens screws.
4) Make sure that the drainage lip on the red lens cap is facing down on the
taillight unit.

E.T.M Industries User Guide
Transformix Engineering Inc. 5
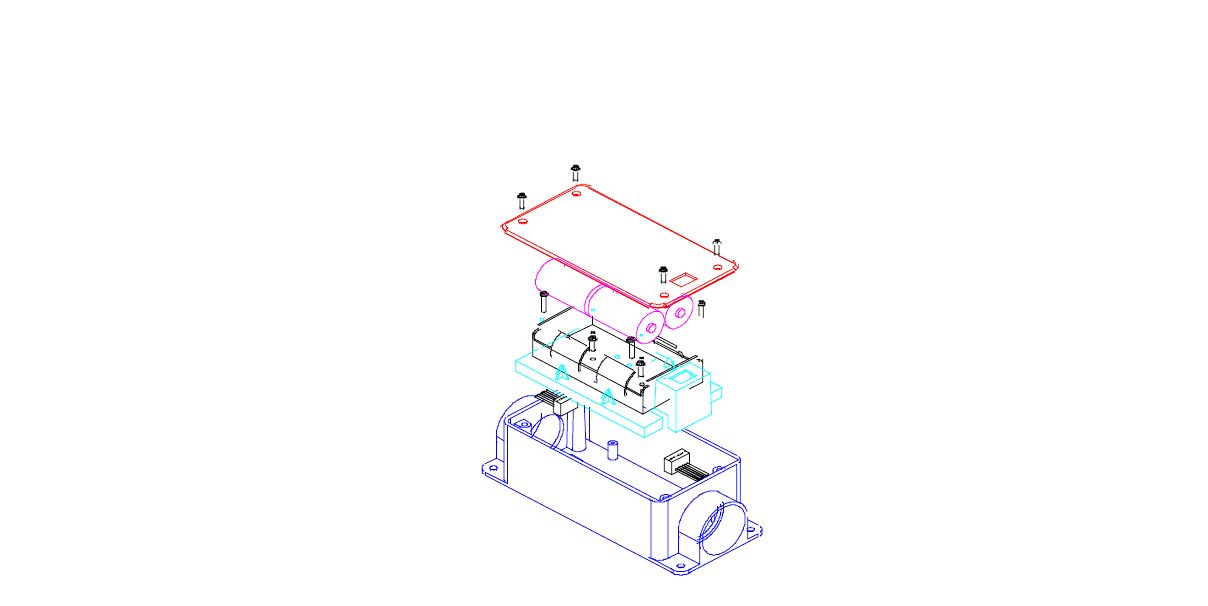
Diagram 1: LED Board Assembly
Taillight Computer/Battery Module:
The Taillight Computer Module consists of an ON/OFF switch, battery
compartment and submerged electronics. If the Taillight Computer Module needs
to be replaced, a new module can be easily installed.
Taillight module removal
To remove the Taillight Computer Module:
1) Remove the four cover screws, then remove the cover.
2) Remove the four screws located at the top and the bottom of the Computer
Module.
3) Remove the Computer Module by pulling up on the Module so that it
disconnects from the two connectors located to the left and right side of the
module just underneath.
E.T.M Industries User Guide
Transformix Engineering Inc. 6
Taillight module replacement
To replace the Taillight Computer Module:
1) Take the new replacement Taillight module and by pushing down fit the
module into the connectors insuring that the connectors are in the correct
positions.
2) Reinstall the four screws located at the top and the bottom of the Computer
Module.
3) Replace the cover insuring that the ON/OFF switch fits properly with the space
provided in the cover, then reinstall the four cover screws.
4) Make sure that the switch is on the right side of the taillight unit.
Diagram 2: Taillight Housing Assembly
E.T.M Industries User Guide
Transformix Engineering Inc. 7
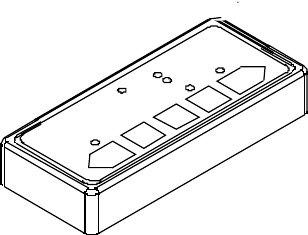
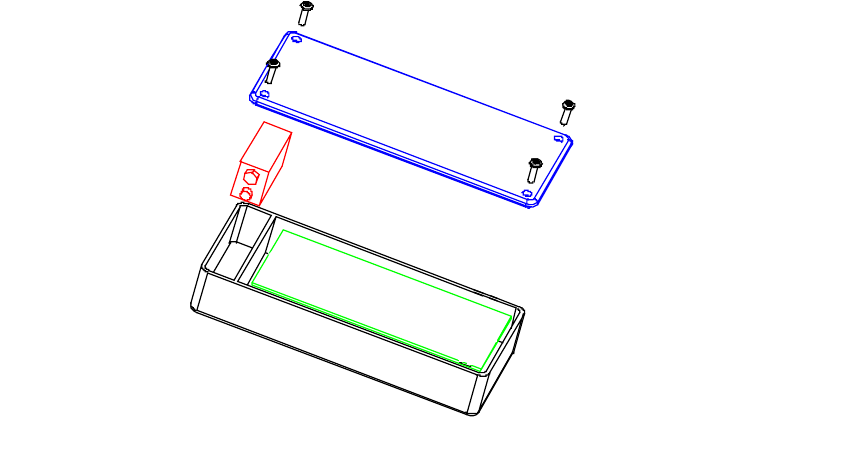
Keypad unit:
The Keypad unit consists of five membrane push buttons, four confirmation lights
and two low battery indicator lights. The Keypad unit is automatically turned on
when a button is pushed. If the Keypad unit needs to be replaced because of a
problem, the entire Keypad unit has to be replaced. (No serviceable parts inside
the Keypad unit, except for the battery.)
Diagram 3: Keypad Replacement
E.T.M Industries User Guide
Transformix Engineering Inc. 8
TAILLIGHT/KEYPAD BATTERY REPLACEMENT:
Taillight unit battery replacement:
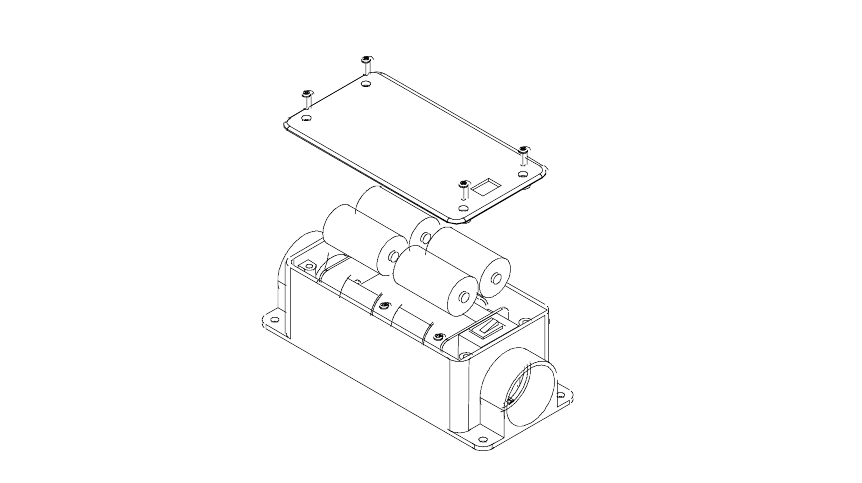
The batteries that are used in the taillight and the keypad are easily found at
convenience stores (4 x ‘D’cells, 1 x 9V cell). The main taillight section uses four
D cell batteries that can be changed by first removing the four cover screws, and
then removing the cover. The old batteries can now be removed and replaced.
Replace the cover ensuring that the ON/OFF switch fits properly with the space
provided in the cover, then reinstall the four cover screws.
Diagram 4: Taillight Battery Replacement
E.T.M Industries User Guide
Transformix Engineering Inc. 9
Keypad unit battery replacement:
The keypad unit uses one 9 volt battery that can be easily changed, by first
removing the four back cover screws, and then removing the back cover. The old
battery can now be removed and replaced. Replace the back cover, then reinstall
the four cover screws.
Diagram 5: Keypad Battery Change
E.T.M Industries User Guide
Transformix Engineering Inc. 10
ELECTRICAL SPECIFICATIONS:
Keypad unit:
RF Range: 100 Ft
Battery type: One 9 volt
Battery life: Approximately 200 hours of normal operation at 25° C with
alkaline
(under use) batteries.
Taillight unit:
RF Range: 100 Ft
Battery type: Four D cell’s
Battery life: Approximately 200 hours of normal operation at 25° C with
alkaline
(under use) batteries.
A low-battery detector is built into the keypad/taillight system. There are lights on
the keypad unit to indicate a low battery condition for both the keypad unit and
the taillight unit. Each unit is designed to withstand a temperature range between -
20° C and +50° C. Both the keypad unit and the taillight unit are also designed to
withstand impact, vibration and to protect the electronic components from the
elements such as wind, water and dust.
E.T.M Industries User Guide
Transformix Engineering Inc. 11
MECHANICAL SPECIFICATIONS:
The mechanical system is made up of 2 assembled parts. One part is a hand held
keypad unit that can be mounted in the cab of the vehicle. The second is a taillight
unit that can be mounted on the rear of the implement under tow. Both units are
designed to withstand impact and vibration loading and will protect the electronic
components from the elements.
Keypad unit:
Temperature range: -20° to +50°
Height: 3.1”
Width: 7.3”
Weight: 250g
Taillight unit:
Temperature range: -20° to +50°
Height: 4.3”
Width: 72”
Weight: 1950g
THIS DEVICE COMPLIES WITH PART 15 OF THE FCC RULES.
OPERATION IS SUBJECT TO THE FOLLOWING TWO CONDITIONS: (1)
THIS DEVICE MAY NOT CAUSE INTERFERENCE, AND (2) THIS DEVICE
MUST ACCEPT ANY INTERFERENCE, INCLUDING INTERFERENCE THAT
MAY CAUSE UNDESIRED OPERATION IN THE DEVICE.
L’UTILISATION DE CE DISPOSITIF EST AUTORISEE SEULEMENT AUX
CONDITIONS SUIVANTES: (1) IL NE DOIT PAS PRODUIR DE BROUILLAGE,
ET (2) L’TILISATEUR DU DISPOSITIF DOIT ETRE PRET A ACCEPTER TOUT
BROUILLAGE RADIOELECTRIQUE RECU, MEME SI CE BROUILLAGE EST
SUSCEPTIBLE DE COMPROMETTRE LE FONCTIONNEMENT DU
DISPOSITIF.