FISHERPAYKEL Residential Dryer Manual L0907206
DE62T27GW1-96140A DE62T27GW1-96140A FISHER & PAYKEL RESIDENTIAL DRYER - Manuals and Guides L0907206 View the owners manual for your FISHER & PAYKEL RESIDENTIAL DRYER #DE62T27GW196140A. Home:FISHER & PAYKEL:/ Dryer Parts:FISHER & PAYKEL dryer parts:#DE62T27GW196140A FISHER & PAYKEL dryer parts:#DE62T27GW196140A FISHER & PAYKEL residential dryer manual
User Manual: FISHERPAYKEL FISHERPAYKEL Residential Dryer Manual FISHERPAYKEL Residential Dryer Owner's Manual, FISHERPAYKEL Residential Dryer installation guides
Open the PDF directly: View PDF ![]() .
.
Page Count: 55

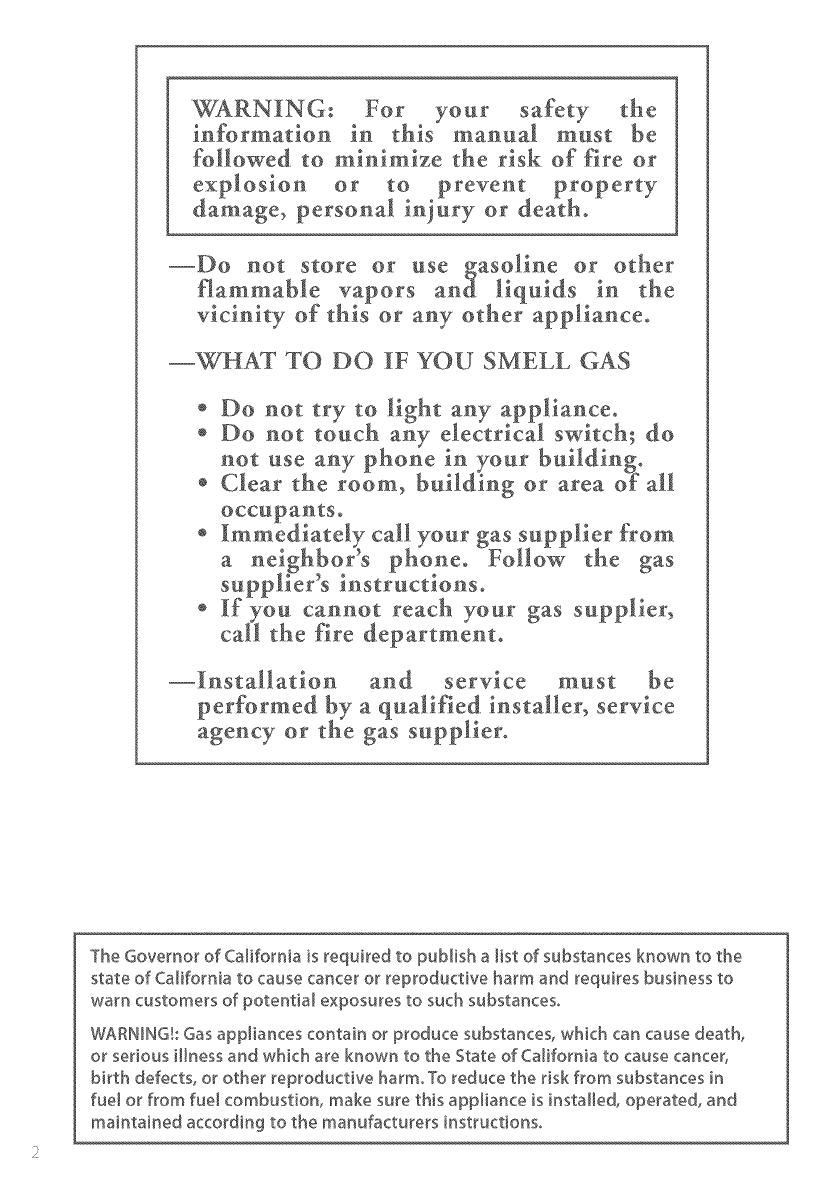
the
in must be
followed to minhnize the .risk of fire or
--\VHAT TO DO IF YOU SMELL GAS
° Do not try to light any appliance°
÷ Do not touch any electrical switch_ do
not use. any phone _oinyour°....building.
÷ Clear the room> baddmg or area o_ all
occapaatso
÷ Immediately call your gas supplier from
a neighbors phone° Follow the gas
supplier's instructiOnSo
÷ If you cammt .reach your gas supplier,
call the fire departmemo
must be
per_brmed by a qualified installer, service
agency or the gas supplier°
The Governor of California [s required to publish a [[s't of substances known to the
state of California to cause cancer or reproductive harm and requires business to
warn customers of potential exposures to such substances,
WARNING!: Gas appliances contain or produce substances, which can cause death,
or serious illness and which are known to the State of California to cause cancer,
birth defects, or other reproductive harm, To reduce the risk from substances in
fuel or from fuel combustion, make sure this appliance is ins'tailed, operated, and
maintained according to the manufacturers instructions,
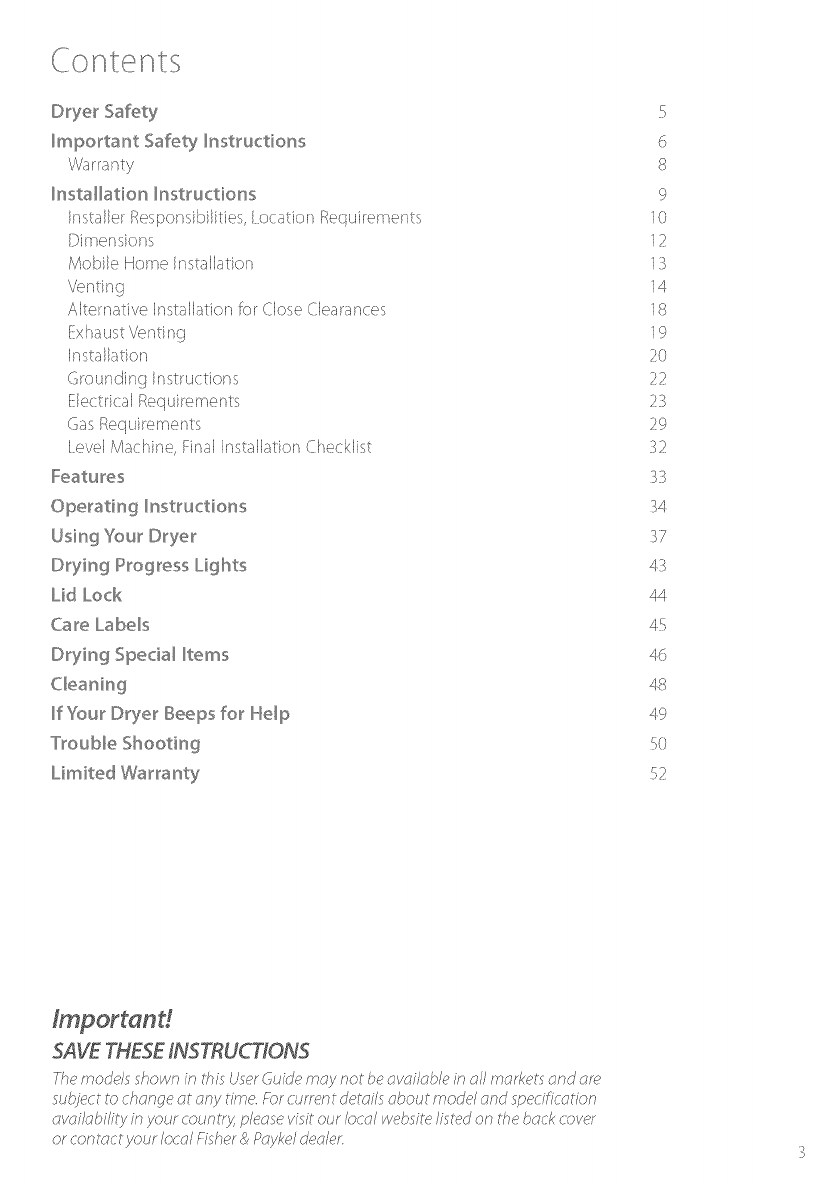
DryerSafety
ImportantSafety_nstructio_]s
VVa_anty
Installation_nstructions
instaiJerResponsibiiities,locationRequirements
Dimensions
MobileHomeinstallation
n_Im':J
Akema1:ivei!/st_ibIJor_ for (iose (iea_ances
inKaiBtior_
G-ou!@inq instructions
F-ie<itrkaiRequirements
Gas Requh-emen1:s
ieveJ MacNne, Fins instaiJallio!/Ci_eckiist
Features
Operating k_structions
Using Your Dryer
©tying Progress Lights
Lid Lock
Care Labels
Drying Spedal _tems
If Your Dryer Beeps for Help
Limited Warranty
5
6
8
9
_0
12
"E£
19
2O
q
zz
2_
29
_q
) z
);)
34
37
4;
44
45
4_
4A
49
<0
J J
52
SAVE THESE INSTRUCTIONS

]hank you i_}r buying a Fisi_er5 Paykei<Jm_Hrl/o_J_'_dryer.
We hope you enjoy using tile <_mt_rllo_JUT''dryer as muci/as we i_aveenjoyed designing it. We've
deveioped ti_i dryer to treat your cioti_es witi_ ti_e utmost care, dryinc/ li_em gentiy so li/ey
wiii iook better for ionger_We know you'ii enjoy the benefits of its easy ioading drum, revere
lumbiing and iinl removai sytem
Pieasetake ti_etime 1:oread this UserGuide carefuiiy it wiii heip you 1:ooperale and maintain
your new <Jm#Hrl/o_JT'_dryer
Your saf_ty, and the sai_,tyof others is very importanL iocated on your dryer and ti_roughout ti%
guide are saf_,tymessages and in truction ; it is imporlanl lhal you under tand and foiiow them

Dr e, Safet /
,7-,, .....
Symbols well be useci in tiffs Guide to highiigi_t wi_en extra (:are is required, Abide by these at
all times to _,nsu!eyOUand you! family a_enot ha_rn_dwhik, operating you! d_yer
it is important to always act witi_ (autioh and usecommoh sense when operating your dry_'r
[Jse only as per instrtJctt,d by the riser Guide
This is ti_esafi,ty alert symbol Ti_issymbol alerts you to i_azardsthat can kill
or iiurt you and others
The saf,,-'tyaiert symboi and the word DAN(£R or WARNiN(_wiii precede aii
saf(_tymessagesTi_esewords mean:
You can be killed o_ seriously inju_'ed if you don't
immediate!y follow inst_uctionso
You can be killed or seriously injured if you don't
follow instructionso
All saft_tymessageswill identify ti_ehazard, tell you i_ow to reduce the chance of i!_jciry,
and sellyoti wi_asca!_i_appen if siseinssructions are not followed

n" por an Fiaf y : str clior s
Electric Shock Hazard
Follow the safety precautions outlined in this User Guide°
Failure to do so can result in death or electric shock.
Safety Precautions
F_eadaHinstru :tions car_,fuiiy b_%r_ uinq thi dryer
ii_ ti_i dry_r only for its int_ndod purpos_ a d_scrib_J in ins ij_r (}uid_
]b minimiz_ th__pos ibiJity of _bctric _i_<)ck,unpiuq ti% dryer from ti__ power suppiy or
disconnect ti_edryer at ti_e i_ousei/o!d di tribution panei (by removing ti_erue onswitching off
the circuit breaker) before attempting any user mair_tenance or (lea!ring
instaiiatior/s and service mu_t be per/ormed by a quaiified or iicen ecicontractor} piumber or
gasfitter quaiified or iicen ed by the stale, province, on regior_where this appiiance is being
in taiied
]i_is dryer must be properiy instaiied and iocated in accordance with the instaiiatio!_ instructions
before it is used
]his dryer must be properiy grounded to co!_form witi_ aii governing codes and ordinances
Foiiow detaiis i!/ i!/staiialk)r/ instructions
Do not instaii or store ti_edryer where it wiii be exposed to water on exposed 1:o1:i_eweati_er
Connecl to a properiy protecled, raled and sized power suppiy circuit 1oavoid eiectricai overioad
Do not repair or repiace any part of ti_eappiiance or attempt any servicing, unies _pecificaiJy
recommended in the pubiished uer repair imtructior/s that you under tand and have the skiiis
Io carry out_
Wi_en di (or/!_ecting the dryer, puii by ti_epiqg rati_erti/an the cord orjunctio!/of the cord plug,
I:oavoid damage to the cord or junctk;n of the cord piug_
i_ake sure ti_e cord i iocaled so lhal it wiii not he stepped on, tripped over onotherwise subject
Io slress or damage
Do not tamper witi/ti_e (onlro!s or the iid iocZ
Note: Pre sing ti_e POWEA bulton does NOTdisconnect the dryer from the power suppiy, even
lheugi_ ti_e iighl are out_
Do not operate tiffs dryer if it i damaged, maifunctior/ing, partiaiiy disa sembied or ha missing
or broken parts, including a damaged cord or piug_
]i_is dryer rout be directiy connected Io an approved fixed eiectricai ouliet it cannot he
plugged inlo an exten io!/cord

rnpor, Safe 7 : str clior s
Fire Hazard
Only dry fabdcs that have been washed with water°
Do not use heat to dry articles containing foam rubber or
similarly textured rubber4ike materials° Dry on the Air Dry cycle°
A clothes dryer produces combustible lint and must be
exhausted outdoors, Take care to prevent the accumu[a'tion of
lint around the exhaust opening and in the surrounding area°
Do not use fabric softeners or products to e[imina'te static
unless recommended by the manufacturer of the fabric softener
Failure 'to follow these instructions can result in death or
persona[ injury,
To Reduce the Risk of Fire in aTumb[e Dryer the Following Should
be Observed:
Do not place items in a tumbie dryer ti_at i_avepreviousiy been cieaned in, wasi_ed in, soaked
in, or spot cieaned witi_ fiammabie iiquicis or soiids Ti_ey are a fire or expiosion i_azard Hiqifiy
flammable substances commoniy used in domestic environments include acetone, denatured
akoi_u!, r/aso!ine, kerosene, some b_andsof spot removers and dry ciear_ing solvents, turpentine,
waxes,wax remuvers, vegetable oii, fisi_oil, massage oii, and cooking oii
o Do not ieave i_ut oii afq<ted items in _,pile or stack Ti% con prevent i_eatfrom escaping and
can create a fire haz_:;r&Oil afflicted i_emsc_,nignite spontaneousiy, especially when exposed to
heat sources such asa tumble dryer Ti_e items become warm causin,_]ic,noxidation reaction in
the oiJ Ti_isoxidation (_eates heat if the heat cannot escape the i_emscan become hot enougi_
to catch fire
Do not qse i_eatto dry items containinrl rqbber, foam rubber} plastic or similar materials, (suci_as
padded bras, bati_ mats, furls, bibs, baby pants, pias_i( baqs, pillows etc), as ti_ese rnateriaB rni(ii_t
melt or burn Some rubber materials when i_eated(:an under certain cir( umstances produce ih-e
by sponlaneous (:ombu tioh Dry oniy on ti_e AIR DRYcycie
iiniess specific:aiiyrecornrnended by ti/eir manufacturer, do not ue fabric softener or similar
products in a tumble dryer
Do not tore or use ga oii!/e or oti/er fiamrnabie gasesand iiquids near this or any other appiiance
Keep ti_e area around and undemeati/your dryer free from the accumuBtior_ of cornbu tibie
maledais such as lint, paper, rags,ci_emicais etc
Do nut store ahy items that may bum or meit (such a paper maleriais, piastics or pia tic
cohlainers etc) next 1o the dryer
F-mptyfile iinl bucket before the iinl reaches the lop of the Iran parenl sectio!/(usuaiiy once
a week)

I Q.ir:'_,I::;_or an Saf_ 7 n _:,ru(:ion_:,/Warran 7
]i_e dryer must be e×hausted I:othe outside (arefuiiy foiiow the venting detaiis in the
in taiialion f!_itruction_i
Keep the fEoorarou!_d your dryer ciea!_a!_d dry to reduce the pos'_ibiiity of _iiippinG
if your ciryer i ru!_nin I a!_dyou want to unioad or add cioti_es, pres'_START/PAUSEand wait
unlii the machine i_a'i u!_iocked tile iid [)o not force it open
Do not reach into ti_e appliance if li_e drum i moving.
.Close _iupervi ion is !_eces_aryif ti_is dryer i u_ed by or !_earchildren [)o not allow children 1:o
play inside, around or witi/till dryer or any other appliance
Never climb or/, climb into, or _itand or/ti_e dryer top, lid or drum
Under_larrnents that contain metal reinlorcement_ si_ouici not be placed directly in ti_e dryer
Damage to ti_edryer can result if ti_e metal reinforcements come
]i_e interior of ti_eappliance and exhau t duct houid be cleaned periodically by qualified
service per_io!/nek
i-_eforethe app%nce is removed from service or discarded remove the lid and the drum door 1:o
the drying compartment
SAV E,TIligE,SlieIiiNSTII]UCTIiiONS
Yourdryer ha_ been made to ti_e i_i(ii/e t tandarci Y_,ar of development and ricioroiJ_te_iti!/g
en_iureti/at you i_avebougi/t a world cia_ product, in tile lJniii(eJyeve!it ti_a1:a problem should
occur, rel_,rIo the Warran17section al the back of Ibis Guide (ref_,rIo page 5_,_)
if yotJ i_avea probiem witi_ yo_Jrdryer rei_r to our trotJbiesi_ooting sectior/, if your probiem is riot
ref(,re!/ced, piea_ieaiway_ contact your Fi i_er8_PaykeiAuti_orized !:}erviceAccentor our Cu tomer
CareCenter (To!i Free ] 888 f} FNi>Ii<}A(] 888 f}_} 7,'67_'))rather than attempting I:ofix
it your eif

C_othesdryer"installationmustbeperformed by a qualified installe_,
hstall the clothes dryer according to the manufacturer's instructions and _oca_codes°
Do not install a clothes dryer with flexible plastic venting materia[so If flexiNe meta_
(foil type) duct is installed, it must be of a specific type identified by the appliance
manufacturer as suitaNe for use with clothes dryers° Flexible venting materials are known
to collapse, be easily crushed, and trap ]intoThese conditions will obstruct clothes dryer
airflow and increase the risk of fire°
To reduce the risk of severe injury or death, follow aHinstallation instructions°
SAVE THESEINSTRUCTIONS
Read the Important Safety Instructions on pages 6- 8 before you start
installing the dryer.
( i_eck1:omake sure you have aii the 1:ooJsand pa_1:snecessary 1:ocor_ectiy in taii this appii_nce
Tools Required
7¢ nut driw,r <)r_ock(*twren( h
Phiiiips screwdriver
Fiat blade screwdriver
Adjustabie wrenci/8" or 10"(20(m or _5cm) for gas connectiom
Pipejoint compnu!_d (pipe dope or tape) f,orga pipe connection lhal is resistanl Io [ P Propane,
Butane and Naturai Ga (Ga mndeis orfiv)
[ evei
Cauikinq qdn and compoc_nd (for in taiiir_g new exhau t vent)
Oiove
Safi,t7 gia sea
Duct tape
Parts Supplied
2 fi_otinserts for front fe_t
A power suppi7 cord i suppiied airead7 connected 1:othe g_ dryer (Ga mndeis orfiv)
Ci_eckto make ure aii part have been suppiied
Accessories
MobiJe Home installation Kit Part No 395488
N_;turai(,as to [ P Conversion Ki_:Part No 3f)548f; (()as models only)
o [ pto N_;turalG;s ConversionKit P_;_tNo 3f;54f)O(Gasmodelsonly)
Kit EJement 208V Pa_tNo 395500 (Electric modeJs onJv)
Parts Needed
(ii/eck with k;cai codes and read eJectricai,!p_ and ventinq requirement_i before purci_asinq pa_ts
if you neeci to purci_ase a power suppi7 cord kit or power suppi7 cabie, they must meet the
requiremenls on page ;'4

.......1-0t Ihe InstaIiIier
]h__(om_c1:in dJ%on of th__dryor is your !_sponsii:)iJity
i% sur_ you r_wi d_e fo!iowin I imtru(tion c_,iu........ y .........b_do_you stuartto _n,a, ,,_ dryer ] h_,se
instruction should be bfi: with the, hnrn_, own_,r for future, r_,fer_,n_
It is Your Responsibility to:
= Observe aii qoveminq codes and ordinances
=Che(k code requirements. Sor;qecodes limit or do not perrnis inssaiJationof (ioti_es dryers in
garages,closets, mobiie i_ornesor sieepi!/g quarter (orffact your iocai buiiding in pector:
Adi_ere to these imitaiiation imitru(tiomi
Aiiow for sparing requirements with side by side in taiiatior/s (re/(_rpage 11)
Make sure you i_aveail items necessary for correct in taiJalion
=Properiy instaii ti_edryer
Conta(t a quaiified imitaiier to enure ti_at ti_eeiectdcai and ga in taiialior_ meets aii nalionai
and iocal codes and ordinances (See page _;)
Location F%quiremeNtS
E×plosion Hazard
Keep flammable ma'teda[s and vapors, such as gasoline, away
from the dryer,
Place dryer at [east 18 inches (46 cm) above the floor for a
garage installation.
Failure to do so can result in death, explosion, fire, or burns.
]-he riryer must be instdieri or stored in an area which is not exposeri 1:owater or weal:her
it is extremeJy important that the dryer is instaiied in a weJJventiJate(:i ioca1:ionThis dryer mqst
exi_auq ah"outdoor i)o not in taii the dryer in any room or closet which dines not permit 1:he
fr_,__ flow of !epiacemen1:air
Ti_e free area of any openin<] for the introriuctior_ of outsirie air si_ail not be iess than twice the
area of the dryer exhau t outiet
Befi:)ie installing ti_e dryer enSLre ti_at ti/ere is sufficient i_eigi/t to fully <}pen ti_e lid. Aik_w
sufficient room bei_ind ti_e dryer for ti_e exh_wst.Ti_eair intake is _,tti_e re,,_rof ti_eriryer Fnsure
*_-, e,-eis a suffident ah-possaqe on each skie of ti_e dryer for intake oh-
FoF ..... ,..,
I 0

]he_eainwi_ich_i_edryerisiocc_,_,edrnus_be ................,_
ke_)t tie,-_,r c_,nd free from corn Dustii:>Jern_,_ei'iais, ][i
gasoiine and oti/er flarnrnabie vapors and iiqui__,s
A dryer _>roducesc:,:>mr,_,_s_iDleAn_so _i_e_,,'ea I I I I ...._%_S
]his dryer can only be ven_ed fror_ _he _ea_and
must be exhaus_:ed_:o_:heou_:__oors _ ....... >
I_i S'_si_,:,, j
]"2) ]"2) ]"2) _i_i\d2"(,)) _ri _"76) I
"_ s'l" i ,:)<:)
I I1 [
___________

L)il'T___I_'Ts io I"_!i
Lid Clearance
Check that there is enoclgk/ciea_ance iOr tile iid to iuiiy open
i÷
/):if) { II;
Exhaust Outlet Location
rl
llY'{"( 2} Ii',"( 3 )
12

..... _._...._,,
_i Ii///./"/._lO/'IF>
Mobile Home Installation
]i_e i!_st.iiation of the dryer in _;mobiie i_<_mem_/t corfform to ti_e Manufi;ctured Home
Construction and Safi,ty Standard Title 24 CFR,Part 3280 {formeriy the Federal Standard for
Mobiie Home (on truction and Safi,ty,Tide ;'4 HIj[} (Part h80), 1975} for the United Stales or
Standard (AN/CSA Zh4OMH fi)r Canada
Wi_en ir/staiiing a dryer in a mobiie home, provisions fi)r anchoring the dryer to the fi_or must
be made
A MobiJe i4ome a!_chodn i instaiiation kit is avaiiabie witi_ instructions (see Accessories
page f)) [ocate it/an area that i_a_adequate outside make up air (a minimum of 7;' square
inches of unob tructed opening is required)
MobiJe i_ome instaiJations must be exhausted to ti_e outdoors witi_ ti_e exhaust duct
termination se(ureiy fastened Io the mobiie home structure, uing maledais lhal wiii not
]i_e exi/auct duct rout not terminale beneath the mobiie home Seethe section on exhau ting
for more in/ormalior_
le dtT_ t it
/)tt! _
I I b :r /(::It, :_(: t(> i
__p-__..--..-.-._ .-._ .........................

Ver" Tt ir Tg
Fire Hazard
The dryer must be vented to the outdoors°
Use rigid or thick wall flexible metal exhaust duct only,
Do not use a p[as'dc exhaust duct°
Do not use a me'ta[ foil exhaust duct°
Failure to follow these instructions can result in death or fire°
]he dryer exhaust must be vented to ti_e outcioors Ti_iswill prevent ti_e build up of lint and
mois1:u_ein the _oo!n in which ii is located and reduce the _iskof ih-e
Exhaustducting products can be purchased from your local Appliance store or Hardware store
Never use plastic or metal foil flexible duct. Ti_isducti!/g can kink, sag, be punctured, reduce
airflow, extend drying limes and affect dryer operalion
A minimum of 4 inch (l O0 ram) thick waii fiexibie metai or rigid gaivanised metai duct must be
u_ed. Uqnq duct iarqer titan 4 ir_ci_e (] O0ram) dbmeter may resuit in more lint accumubtirx}/.
in Canada,the exhau t duct rout be 40_' inches (lO__ram) in diameter
rising strak_i_trkiid metal ducting will minimize lint accumuBtion Tifick wail flexible metal
ductinr i may be u_ed but care rout be exercised 1:oavoid si/arp bend which may squasi_the
duct and caue blockages
rise duct tape to securejoints Do not use screws or any other fastening device which will
extend inlo the duct, a they will collect iinl.
Keep ducdng as si_ort arx:istraigi_t as possibie [)o not exceed ti_e maximum exhaust duct
ienqtivi stated iater in ti_ese in taiiation instrqclion ]he 1otai iength of fiexibie metai duct used
si_ouid be no io!/ger than f_45 inches (_4 m)
Do not vent ti_e dryer into any oti_er cJ_Jct,ci_imney or gas vent because accumulated lint and
oti_er material i a potential fire i_azard [)o not venl the dryer into any ceiiinri, attic, crawl space,
under floor space, wail cavity, window well or any other concealed cavity that will accumuBte
iinl
Fit an exi_aust hood witi_ a swing out damper to ti_e outside
end of ti_eexi/aust duct to prevent back drafts and entry of wiid
iff(_.Never use exi/aust i_ood with a magnetic damper. Ti_ei_ood
shouid i_aveat iea_t 12 i!/ci_e (}05 ram) ciearance between ti_e
bottom of tile i_ood and tile ground or oti_er ob truction Ti_e 2 ( ()',, ,)
hood opening si_ouid point down Never i!/staiJa screen over
14 ti_eexi_au_toutlet

]br_ducocond_nsalion,inuiatoanyductinqwhici_p_,¢s_sti_rouyi_uni_4_-,daroos
S[op_ti_oductciontl7downwardtoth_i_ood,todr_4ncondenationandr_ducolintbuildup
Avoidsagorloopsin_h_,du(_as_h_,vmay(o!J_ctandstor_,wa_randa(cur,_wia_oiin_
Beforeusinganexistingexi_austductsystemforadryerensureti_at:
= Nopiacticorotherpotentiaiiycombutibieductorfiexibiemetaifoiiductinghabeenued
= ]heductisnotpierced,kinkedorcrubed
]heductdoesnotexceedtilemaximumrecommendedlengthforthenewdryer
= ]heexhaucthooddamperopensand(:;losesfreelyandwiti_cufficientmovement.
Staticpressureinti_eexhauctductingdoenotexceedI inchofwatero:::>[umn(PSOPa),ori not
ie_iti/an0i!/cheofwatercolumn(ienegativepresure),wi_e!/measuredwithamanometer
inti_e_,_inchesoftheductnearestthedryer,withtheemptydryerrunningonAir[)rv(noheal)
setting.
]heexhautductsytemmeetsallrelevantlocal,stateandnationalcodes
Ailductini chouidbein pettedandcieanedatieaqonceayeartoremoveaccumulatediinl
Freque!/ti7ci_eckthatthedampero!/theexhauthoodmovessufficientivandopenand
shutsfreeiv

Ve t g
Ci_oosea rou1:e1:hatwill provide, :he straightest and most dh-_,ctpa1:hout:doors Pian 1:h_,
ins1:aii%on1:ouse1:h_,f_,w_,s1:numb_,r of _,ii:)owsand 1:u_!_s
VVi_er_usinq eibows (ri_lid duct) or makinci turns (ti_ick waii fiexibie m_a_ Ed'lJ_-_;,_ aiiow as muci/
room a_ possibie With 1:hick waii fiexiDie metai duct b_,nd duct _lraduaiiv I:o avoid kinkin_l and
avoid f_O° 1:um
Maxirr urr L_nT,gtlh of Exhaust Duct
]h_, maximum i_nqti/of 1:h_, .... ,_,xnads,duct sys_t_mdt_)t_nds uld)or_:
]-hl, 1:vpeof ducts (!igid or 1:hickwaii_,d fiexibi_, m_,tai)
]i_e number of elbows or bend ued
i:tef_r to ti!o" ......... _ r _- ,y!.... _1 ma×imum du(1e×_ads, dd(_ _e.],:_,_chart 1:hal:malci]e your i]ood _'ne for *Le
let/cities you can uce. E)o not use duct run longer 1:han specified in 1:he exhau t duct length
re er
charts (, f ..... o next page)
Exhaustduct systems longer than specified will:
Accumuiale lint creating a potenliai fire hazard
Si_orte!/tile iff__of the dryer
i:teduce performance, resuiting in io!/ger drying times and an increa ed energy usage
2
3
Determine tile number of eibowsibends you wiii need
in ti_e column listing ti_e type of metal duct 7ou are using (rigid or thick wail fie×ibie metai), find
the maximumiengti/ofmetaidu(tonti/esameiineasti/enumberofeibowibend 1:obeued
(re/_,rto ne×t page)
16

Maximum Ler" gtli- ,of Exlhaus£Duc£
Maximum iengti_ ors ...... _÷_
Number of 90+ TiNt::kVVaiiFbxibie Metal
0 04ft 19.5m 8ft 2.4m
2 ,. _t 1:_4m 8ft 24m
_m I 0.din 8ft 2.4m
4 27ft 8.2m 8ft 24 m
xx: !___y_!_i_ii]i_j}_s_q_i_ ii=_ii _ii//_i_?i/iiiiiiiiiiiiiiiiiiiiiiiiiiiiiiiiiiiiiiiiiiiiiiiiiiii _
Maximum ier/_}thof 4"diameter rnetS duct. }
N, rn_e off)O ,. . c<Wa rexbeMeta ,,
b[igld . i t
eibows!bends : (tuib' t,xtendt÷d)
0 sSft _7.._m 8i_ _.4m
._ .,• , _ _ 8 _
29ft 88m 8ft 2.dm
2i ft 64m 8ft 2._m ]
_:,'ex_astsytems_ot(overedbyt_eex_a_td_ct e_ t_ _a_ts{ _ha m_i-bie _n_ii_ k-_ps
............................................ g .................... k .................. , , i
plenums, and power a_si t L-_,m),c_'iiot_r Ci_torqer Care Center: :!:}
___________

Ve!/d!/ci systt,ms (omu it/many vai'i(,tk,s Sebct the 1:ype,)s, for YOU!instaii_1:io!/
A close cba_ance instaii_1:io!_issi_own
itti !!
S / /I /
',;// I<OI}
,'/8 {Ott '<!<>t
,d{!(s
;_1,_}'/', {(>1
_s sl s:<:>_s
]i_e maximqrn iengti_ usinq a 2"x d" (Scm x 15cm) !ectangui_ duct with two elbows and a
;' !,O'(d_cm) _,xha(Jsthood is 8fi: (}_4m)
Refer I:o the ven1:in_/system kit manufacturers instructions
18

Failuretodosocanresultindeathorfire° i)i[
Readti_eexi_aqtection(paqe_4 18)beioreinsaiJinqtheexhautsysem1:odetermine1:he
Dono_usesi/eetmetaisc!-ewswi_enassembiinqductin<]Aiwavsusesuitabie<-](act1:ape
Nev_ru_t__)i_¢ticorthinmetaifoi[fi(_xibk__xhaut p:_at_qal
2]i_eexi/autou1:ieti locatedck->setoti_ecenteroftilerearoftiledryeri_akesureyoujoi!_ti_e ]
exi/austducttoti_edryerwiti_ducttapeoniy]hiswiiipreventiin1:and<`]uI:fromescapingfrom
1:hedryerandexhaut svs1:em ]_
iiiiiiiiiiii
.!x/a_
r--
l
9 :::::/ k>o:
,,:,(!_i2r rr) I !;'(!_)3rrr ) ii
3 ]i_e exhaust vent can be !ou1:edtalc),down, left, !igh1:or s1:!-ak]h1:out the back of the d!ve!-
Refer 1:oAb qram
...... . _......... ....,<"" < 40........ // _[
<;+ ,_
I<'
___________

Instaliliation
Parts and iimratur_,art, pa<kaq_,d ir_sid_,ti_ drT_,rdrum
Excess Weight Hazard
Use two or more people to move and install the dryer°
Fa/ure to do so can result in back or other [njuryo
(."" _ Js_oflne.. prorr%t,s
_ _7remove ti_e packagin{i at _,_ c, * rs,
]his will <_nur_ tim appiia!<e _mi\/_,sin prislin_, <ondition and r_,du<esl:h_,risk of dama_]_wh_,n
1:ransportin_ I:o the customer% home
Unpacking
t0h]Scaw)u(J_]
MaK sure dryer is i!/a _witabie ioca,tion for _ * _ *
Consk%r instaiiing tile dryt_r bt,fom ti_e washing mac:i_W/ein a skde bv skdeinstaii_lion Ibis wiii
allow E,)e<,e,_1,-access 1oeie:trkai an<]exhaust cor/nectior_s
Remove Packaging
2
: tJ_fol< tl bott:>r fl{l:_
)1 7 >t)r
:g
tJtfcl{ t t< flJpsot
t[ (a <>h 'I<)V{ ()[)
[)}1(i/<{_1
_t....I ,rov tl'{7 ,<:t_rto Itq_,':<;e I;h} b,;_sr_p;_<k}t 7 liar or< tl'{7 JtlI _;_',_ r
/:) Ii(h?i oi 1"7 171ilir<! /,i:)<):t](: :st / ], !i:),fi<:)l [,
I:)t > / /<:1:{/(:b r) <:It [ :J<:k:_ :] ',,,/!Akir 7!tl'7 Ih :oll 7:t<:< [ tJc/<Tt h
I- <:srt<)r :) ) i:)ro;!t.!<l <)ft 11"7 ;!rt/r _
20


Grour dir g r struc:tior s for Gas arid Electric: E)rTerF
£_ectrica_ Shock Hazard
Make sure appliance is wired or plugged into a grounded
outlet,
Do not use an adaptor,
Do not use an extension cord,
Failure to follow these instructions can result in death, fire,
or electrical shock,
Electrical Shock Hazard
Check with a quabfied electddan or serv[ceperson if you are
in doubt as to whether the appliance is properly grounded.
Do not modify the plug if it will not fit the out[e't,
Have the proper outlet installed by a qualified electrician.
Failure to follow these instructions can result in death, fire, or
electrical shock,
Grounding for a Cord-Connected Appliance
]hi appii_-mcemu_it be grnur_ded in ti_e event of maifi/!_ction or breakdow!_ groundir_g wiii
reduce ti_e risk of eie(tdc _ii_nckby provk::iinga pati_ of iea_itre istance for _iectric ¢:urrent
VVi_entiffs appiianc:e isequipped with a cord i_aving an equipment_(irour/ding cer/ductnr and a
groundir_g piug, tile piu_j mu_¢be piug<]ieciinto an appropriate outlet ti/at i properiy in taiied
and qrou!_ded in accor(:ia!_cewfti/a[i _o(a_.... (:ode and ordinances, or ir_ti_eir absence, w,th tile
Nationai F-iectricaiCode ANSiiNFPA7(),or ti_e(anadian F-iectricai(ode, (SA (_Vi Do not cut or
remove tile grounding prong frnrn tills piug
Improper connection of the equipment-grounding
conductor can result in a risk of e[ectdc shock, Check with
a qualified electrician or service representative if you are in
doubt as to whether the appliance is properly grounded,
Re[<,rto pages 2_ 28 k>r wiring (iet_iJsfor eiectric dryers, inciuding the grounding requirements
for a direct wired appii_nce
ZZ


Power SUplO"7Cord [Iequiremen s for jo_ioA
'C_I I
for _liectic Mod .Is()nTl,_/
= Oni7 a Ui iited power uppF7 cord kit _;<iuit_;bFeie!/gti_ fi_r
lh__ir_ ail_4ior_and rated I _,_0/240V rain, _0 A and marked
with u__for cioti_s dryors _i_aiib_,u_d
o ]hi si_aiiha\/_ rinq _,rrr_inal to conn__ctto th__dryor
= ]h_, Ui :rat_,d tr_,inrdi_f inciuded with ir si_aiibe suitable ior
a i /_"()_8 5rnm) hole
'_wr .......
z W
Connecting by Direct Wire
Power suppiy (abie rnu_itrnatci_ power suppw (4wire or 3 wire) and be:
Fie×ibie armoured or non metaiiic _ii_ea1:k/edcopper cabie (with ground wire) Ail current carrying
wires rnu_itbe in uialed
10gauge AWGsolid copper wire (do not use aiuminium wire)
Suitable iengti_ for ti_e in_itaiJalion
A tii approved strain relief must be used
Grounding for a Direct Wired Appliance
]i_i appiiance muq be conn.,,cted t<; a groundeci met_;i permonent wirir ci ystem, or an
equipment qroundir_q conductor muq b_ run witi_ the (ircuit (ondu(tors and connected 1:othe
equipmenl grounding lerrninai on the appliance
24

Pleaseread Electricalrequirements and grounding instructions on pages22- 23first,
F-iectrk:modeisof the di'yei"a_emanufacturedfor o'_-wireco!_nectionsystemTile dryerfi'_;me
is groundedby _ link to _-i/eneutr_Acondu_xoron tile d_yerterr/i!/ai bio_ik.if io_iaicodesdo i/[_
not pei'mitciroundingti/i'ougi/tile nei£i>;i,tile g!ounding linkf!om the terminalblockmust be ]
removedand _;sep_!!>;te<irourd wi remus_be useal
]he grounding linkon _-i_edi'yermust be removedfor all4 wire ins dictions including new,
remodelledconsruction,o_mobile homes
_ h_'_e Eie_tricai <o!/_wtio!/i!/stru :tions provide fo_ im <>qii_gth__dryer i_ the foiiowino sitclatio!/ :
} W _@ ror/f]eC1 O I whe_e iOta rO(ieS ermit q_oundinq t/'ouq / t/e /eUtra
.................................. P ...... : ' ' ........ /i/i
° 3 wire cor_nectior_pbs separategroundingconne<torwhere iocaicodesdo not permit
groundingti/!ougi/the neutrai
= 4 wire connection
i:gci_of ti_eaboveconne_:tionsc<;nbe m_,dewi_,i__;n_;ppi'ovedpower supplycord of by direct ;]
wiring. E<_,ci/connectioninstructionidentifiesti_eapproprio,te PowerSupplyCordandcovers [
requirements for direct wirinq.
For 3-Wire Connections by Power Cords !'/:ii
3wire powersupplycord must have1:h_ee_0AWGco_}_}erwi_-esand mar:oha 3w_rereceptacle i!l
ofnM AType-0 :s0i< ' ' ://
111111
[I (,/ f! ',if! g (}t I C "0 i]U) ) zl '_"() ()t) (]0"£} () I ,') ]
_,ilit: [:!_< vii _(i/)1 Js:i:> ; d ) ,,':);,':_;I , S i:; i _s_I 7i:)b d< 1' li
h'h _o:/sd/),, i_, i_s_l,d,'> !_,,,Ji_<:,bl<v,'i 9o _/,,,_,',
'( 1 _ :'# _ )...... ; I :;¢' "/ si ) '_" ; i q
if : ....... : ...... "..................................... ; i
, h -li-'f o s';:;:, I_ ][]
x>x _.................................... ,,',,'k< <> ¢._-_ i;i]l
_).f 1 I > '> ,cs >Iv,,' , 11
, "- i o ">oq iiJ
}aa_< ,, ,' ,,,,/__ q :" " I I
4-w r co°° t o°sb>, Cords
4 wire powersuppiycord muq i_avefou_'_OAWGcopperwiresand matci/a ,_wire i'eceptacieof /}'
NMiA iyp_ i4-s0r:/]i/#_fourti/wire (ground(ondcl(tor) mdt beidentified by aoreen(over and
the neutralwire bv a wi/isecover
4-wir co°= io°sbx Wiring
, 4" ;i
,, : z ," [ ; ,-_\;< ¢o f >[
U IS?:'q -.......... ; .... 1
; ','_ )1 ) I /)l 0 !)a(}{ )
iiliiii!ii
>>x ,,',1w'. _"
I I ,d;..¢,,_," {
'" I ;:'_'_x ..... >s_ : ,'x_d ............... ____> . }
"< .... ....... ...... Zi:
___________

1
2
3-Wi e ° i ....,<....n. (_IO/"/I,'T .( 1,0/,/.>
For use where local codes permit grounding through the Neutral wire,
Useapproved :7wire Power Supply Cord or a 3 wire Cablefor Direct Wiring asdescribed on page 24
Remove ti_eterrninai block (over pFate
inert ti_e power (ord with a UL iisted strain reiief through the i_o!e provided in ti_e (abinet near
the lerminai bfocL Do not ligi_len strain relief screw unlil wiring connectior_ are complete
No're: a strain reiief rout be used
SC'/'iS ...........................[[1:::.:..:.:..:...'..[]............
s {oosen or remove tile center terminal block screw Connect Ii_e neutrai wire (center) of the power
suppJycord to ti_e center lerminai screw of ti_e terminai bk)cL ]igi_len screw
4 Cor/ne(t tile oti/er wires 1othe upper and lower lerminai block screw marked with the
letter { ]ighlen screw
.E,_ (_ . _e _koaneloft:he dryer Secure5 Refit terminal ,,o K cover bv inerting 1:hetwo 1:absfirt on 1:he. a.. .....
(o\/_;r wiIP_ so( t.l_i!/q scr_;w
6]igi/ten strain reNer<s(rews_

- W II _ _i o r/r] _ c t i o r/s pl LIS____p_r_t _ g roLInd in_ co n nect o r
1
2
For use where local codes do not permit grounding through the Neutral wire.
tP;e _;pproved wire Power Supply C::ordor _;:7wire Cabie fi'r Direct Wiring adescribed on page 2_
A separate I OAWGcopper q_ounding wire is required
Remove ti_e terminai bk)ck cover pbte
inert the power suppiy cabie witi/a Ui iisted strain reiief ti/rougi_ ti_e hoie provided i!/ti_e cabinet
near ti_e terminai biock. Do not tigi_ten strain reiief €crew t_ntiiwiring connection are complete
Notesa trair relief melt be uced
3 i:_omovo cor]t(,r t_rrNi!/ai biock scrow
4 Remove appliance ground iink by removing ti_e ground c:or/nector screw (Green screw)
s Cor/r ect a eparate copper ground wire (!ireer/witi/yeiiow tripe) using ti_e qround connector
screw (Green screw). Make co/rea ring terminai is L/sedwi_en connecting the ground wire and that
the wire isfirmly secured I:oan adequate grounding path iiiiiiiiiiii
',/(;: I 6
' s
!::_ _:o I ao <
',:'._ >v I_k 7
Conr/ec:t ti_e neutrai wire (center) of the power suppiv cord 1:othe center terminal sc!ew of 1:he ;:
r" i i _ r _.-_......
7 Connect the other wire to tile upper and lower terminai block crew marked with the
It÷ r i El(, 1 ",
i(_ t( _, f f i_!] c011 SO, OWS ii1
8 7:_ffitW,rminai block covor by ir__,rtir_qthe two 1:aDrift or_the rear panel of the dryer and s(,Ct.lm ill
cov+,rwith s_,curinq ¢cr_\u. i1!iiii
,, ], _.... _ ..............
c ,'4i i/qvii'< -- _ ]]J
___________

4-Wi <eH_ (Jo r//</e(i o r/Fi
Useapproved 4-wire Power SuppViCord or a 4-wire CaMe for Direct Wiring as described on page 25,
Remove the terminai bio<k cover piate_
2 insert the power supply cabie wisi_ a tJi iistecistrain relief tbougi_ ti_e i_o!e provided in ti_e cabinet
near ti_e termina[ biock Do not li(ii_len strain reiief screw unlii wiring connection are complete
Note:a trair relief rout be used
3 F_(,r/()ve (e[iter W_rrNi!/ai bio(k s(rew
4 F_emoveappiiar <:egi'<-)t_!_diink by removing 1:i')eground connector screw ((Jreenscrew)
4
f',< I::1¢ ,,>plir<:,i!,l_<:>v_<{ back o ; 7 iiir linf,l:<,ll:¢i )n groun/link tit/[;>, 17fi 17_(J J
I r _,'elh/<
5(or_nect <jround wire (qreen) of the power St.li.')i.')iycord to the (jrot.lrsd condt.lctor (jreen screw+
] i(Thten screw
6 Connect ti_e neutral wire (wi_ite) of the power suppiy cord 10the cenler lerminai screw of the
termi!/a[ bfoci<Ti(Thte!/crew
7 Cormect li_e red wire and biack wire to the upper and lower lerminai biock screw marked with the
letter [ Tigi_te!/screws.
28
-7
8
cover with s(<t.lri!/q s( rew_
9]i(: i_ten Strain Relief screws
....Refitterminal block cover by.inserting 1:hetwo 1:absfirst on _'<ne.....,ea,,,panel of 1:hedryer and secure
/

Gas FIeq . in_nn s
n ,n ,aH_,o _r_u<;tconform wi_:i_iocai (iories, or in ti_ abs_n(_ of iocai Cock,, to ti_e Nationc;i
Furl (i_s Code ANSi z_"__'iNFPA $4or the ( anariian Natural Gasand Propane,.............ins aiB1ion (ode,
CSA B149i
£×Dlos[on Hazard
[nsta[Ja'tions must be performed by a qualified or licensed
contractor, plumber; or gasfitter qualified or licensed by
the state, province, or region where this appliance is being
ins'talledo
Use a new AGA or CSA approved gas supply lineo
Install a shuboff valve in an accessible place°
Only use a gas shuboff valve approved for use within the state,
province, or region where this appliance is being installed°
Securely tighten all gas connections°
If connecting to LP Gas, have a qualified person make sure
gas pressure does not exceed 13" (33 cm) water column°
Failure to fo[bw these instructions can result in death,
Gas type
You: d:yer mqst i_avethe cor:ect bume: for ti_etype of qas in your i_ome Bume: inh)rmatinn is
io(ated on ti_e ralinq plate in(ated on ti_e rear of ti_e(onsoie if ti_i in/,ormation does not ariree
witi_ the type of ga avaiiabie in your home, co!_tact your iocai Fisi_er& Paykeisuppiier or service
cent(,r
Natural Gas
]his ridge: is supplied ready for usewilh Natu_ai Gas
it is desklin certifieri by Ui in1:ematio!_aifor i P (Propane or Butane) Gaseswith the appropriate
com/er ion
LP Gas Conversion

I
,!j .I s
ij_ (ompound or ti_r_,adtap___,ppropriat__to ti__ga type, that is to be u_,d (Natural or rP(}a),
o!/the maie thread of aii no!/fitted connection
Never use an open fi_me to test for _t_s leaks
]his dryer wiii operater atisfa(toriJy ' _,_ a_t_,_]a'es ....... ,h
,h, _o of 6_OOft(;,_O00rr0aLove sea ieveJat _'_
BTUrating indi(ated on ti_e model/serial plate Burner inDdt (.4,, e _", , add,m n,,_ may be required if
operating above this eievatio!/
]he dryer, musl be disconnected from the g_s supply,..... svslem during any _p,ressd_e......._es,Fn]:
Gas Ignition
]i% dryer ha an automatic i_)niiyionsyst_,m1:oignite the bu!ner ]here is no pilot fi_me burning
in this dryer
Connecting to the Gas Supply
1 ]i_e qa_iuppiy ii!/e si/ouid De ,,i,i!/ci_
2 An individual manu_,i shutoff valve must be instaiied on ti_eg_s supply line witi_in c)ft(18m) of
the dryer, in accordance witi_ tile Nalionai Fuel GasCode ANSi Z;?_ iiNFi>A 54 for the iinited
States or in accordance witi/tile B149i Naturai Ga_iand Propane instaiialion Code for Canada
s An 7_inci_ NPTpiug(ied tapping rout De instaiied to aiiow tile ga_ iniet pre sure to be ci_ecked
it mug De accessibie for the lest gauge conneclion and immedialeiy up tream of the gas
connection to ti_e dryer
3O

....... . o ....... _ ._ _ _ i_iiW'i'
" <.... I < <....... F ) F ¢' <........ < "....
tOYoul [ i)/el ModeL.
4 A iisb<J connuc1:orirhcor,_piiar_c(_with ANSi Z2i .24/CSA0.i0 must be used to conr_e(t the d!w>!-
I:o1:h<_qa¢ ¢uppi7 iii
5 if fiexibie tubinq i u_eci,an eibow sh<>uidbe in taiied on the pipe at the back of ti_e dryer for
.................................................... ; ................... }/ .....
moved back Usea fiexibie tubinq connection kit that i_asde iqned for bse or/a cioti/es dryer
ir_tructio!i¢ ¢uppik,d with I:11<,kit.
Copp_,r tubi!/O houid r_oti)_,u_,d for bia1:u_ai(;a arid if u_,d for i P(;a, ii: rout be i P (;a
<o r<,patii:S,
7 [}ist:or/!/<,(t and dis<a!d o!d fbxibk' tublnq.
s The qas pipe timt comes out of tile rea_of vou_drve_ i_asor/it a/_" NPTmaie ti_read Remove
1:heprotective cap and appiy ceaAngcompound or tape I:othe 1:hread] hread seai_n1:shouid be
appropriatei<)rthe1:w)eofg_ 1:obeued ]
/, ..........
@ "%<_)... /
?<,q "-- // b
<>
Comple = Coone< o
9 is(_wr(<]c/(% o iq[stt_]a o ] s )J do ]( o\/o'tqi/t,]
.................. ' ...... ] ...................... ' .... 1
lo Open t _e<_assupp y va ve a/d chef <a o its by b'u_/ir]r or] a r]c)r]c()r'o ve ea<detett ng ii:
, ...... = , ,- ................ ] _ .......... } ............................... (
SOt/tOt] Bubb n_ w }dtatea e:_k _fa_ e:_<sa'e[ound cioselhevaive_mmed_aleivand
coned the ieaks Relest and repeat untii no ieaksa!e fi)und
SS
___________

Leveil MacIhi/r_T,e
Ci/e<kthe dryer i ievei, and mak(-,!_e<e saryadjustments to the fro!it
ieveiiing feet ]he, a, ....... ...... }/ieveiiing/#,__tart, self adlus in_
Fi_r_T,aIi_r_staIiIiatiorr_(h ecIi<List
Check ti_at:
No I _t
r..)_a_i,_or flexible me_,a_foil i used i!/ti_e exi/aust dueling _
F-xi/austi rigid ducting or ti/ick waii fiexibie metai ducting_
Aiijoints in ti_eductinq are made witi_ duct tape_it must not he connected with screws or other
fa tening devices wi%i_ extend into the inside of the duct
Ducting is ciean and iscormected to the dryer
in errs are fitted to ti_etwo front f(_et
Dryer i ievei across the fro!<
Additionally for Electdc Dryer Models Only, Check:
if instaibtior_ is 208V,specbi (qoment kit i_asbeon fitted (se(,paqe 2_)
Dryer is piuq(ied or directly wh-ed into an approved fitting and is properly grounded
Dryer starts, i_eats,cools and siml oE
Customer has been shown how to use the dryer
Additionally for Gas Dryer Models Only, Check:
Dryer i piuq(]_*dinto an approved fittinq and i properiy grounded
Aii fitting in the ga iine are tested for leaks
F-xhausttemperature increa es, to confirm ignition i_a_occurred
if ignition doe not occur initia[Jy,it may be due to air in ti_egas line or low voltage power suppiy
]i_e ias reqiuiator vaive may faii to open if file power supply faiis beiow] 05Vo!ts
if the gas fails to flow or doe not ignite, tile dryer wiii aulomalicaliy switch oE
Cu tomer i_asbeen si/own how to ue the dryer
Note;
Aii dryers have a drum fever ai f_atqre to reduce ciothe tar/riie Throuqhout the drying cycie
Ik_emotor wiii run for four minules, then stop and run in tk_eopposite direction for forty seconds
before reversing agai!<
% ",
i
Electric Shock Hazard
Read and follow the Important safety instructions outlined in this User
Guide before operating this appliance, pages 6 - 8,
Failure to do so can result in death, electric shock fire or injury to persons,
(iose supervision is necessary ifti/is dryer isused by or near ci_iidre!/i)o not aiiow ci_iidre!/to
pby inside, around or witi/ti/is dryer or any oti_er appiiance_

Smart Loading
]he new erqonomic design of ti/i dryer means iess be!/dir/ci Simpiy
move ciothes flora the wasi_er I:othe d_yerwiih minimai ei/ort
Superior Clothes Care
Superior (bd_es _.a_eis accompiisi_ed by an e[ficient i_iqh airfiow fan
and carefui i_eat contro! Ti_e _i/3dJrtLoo{:/T'ciryer provid:iesti_e dgi/t
heat for temperature sensitive deiicate articies whiie sdii ei1]dentiy
drying more robust reguBr and denim bad
Reverse Action Tumbling
]he drum reverses re_juia_iy,so you_ ciothes d_y more eveniy without
roping or tangiing
Lint Bucket
]i_e ii!/t fiiter is automati(aliy s(raped (iean dud!/q ti_e dryi!/q cycie
and ti_e iint i deposited into ti_e lint bu(ket No touci_ing or _<raping
lint any more Airflow is more efficienl a it is never restricted by a
biocked fiiter
Perfect with the Fisher & Paykel Smart Drive _'_Washer'
]he dryer combined witi_ the <,mdJrtDr/vc,"w_, i_er' superior pin
performance and qukk cycle times will cut laundry turn _,round time
by up to one thh-d,redudng the dine you spend doing Bund_y
Stainless Steel Drum
Beinq stainiess steei, ti% d_qm is not oniy more hygienic, ii"saiso
more _esiJienland easier 1o keep iooking good
3_

A. Sorting
<n,-*_.,.,(ioti_es of similar types and ioads that take simiia_times I:od_v
(ReferI:oSortinc; pale _7)
B. Loading
load cio i_esno i_igi_elti_n ti_e t_an pa_ent section of the iint
bud<e,: (ReferI:o i oading pa]e _7)
C. Lint Bucket
{he(kto seeifthe iint E, , t
ed(Ke, needs emptyinq_ Empty befoi'e
the iintreaci_esthetopofthelranspa_enlsection(, f .....o[int
Bucket page 38)
[!iiiiiiiiii!!iiiiiiiii;_,_,,,_,,...........
(7_\i s ;s*/ ....
H
_POW_t Drying Frofftess
D ............................... i ..........
ffryH_g Da,ssp Dry Ex_t_ _ry [/_fll f_
E
$m_t 7_¢h Cycles
Air Bry Defi_'ate Petmat_nt Regular Denim
D. Press Power'
B Wrinkle Free
Ti% option reduces ti_e _' ....... d<e,n,o_ of wdnkies forrsinq in qai'ments wi_en tile dryinq cycie
r,_e _nesw ,nod, heat.ibis fea1:u_ecan be used inhasfir/isi/ed by periodically turnbiing *' c <>*_ :t'
4 _
coqunction with any cycle (Re[er to pade ,0)
R Smart Touch Cycles
{i_oose ti_eSmart iouci_ cy(ie ti_at most i'epresents ti_e items in your ioad You_d_yer defauits I:o
the REGULARcycle,,1:oci'/ange it .Press.... any,oi; the other cycle. _''}4,,o._st

(o n roIIPan II
G. Auto Sensing
] i_ereare five automatk: dryness ievei: DAMP, DAMP/DRY, DRY,DRY/EXTRADRYAND EXTRA
DRY Ti_esefive <ietting d_yyou_ clothes I:odiM,rent de_jre_,sdepending on the iovef of d_yness
you would iike
_ _ (,( /_..... r
EXTRA DRY ]i% is mainly for items na y_J wa,_, ,o store (ie_ pi_(:ein a drawer, (:upboard or
wardrobe) By usinq ti% settin i you eiimina1:ethe p }ssi }iiity of'musty smeiis'1:ha1:commonly
occu_ when items a_estored in a damp, s<a_ _e....
DRY Dries clothes I;o a ievei where they are co!/sidered 'dry', so g_rrnents can be worn
DAMP Dries tile ciothes to a level wi_ere riley are considered 'moistt it is designed for dentate,
iigi_t weigi_t fabrics and rarities ofci<:>ti_ingwhich you want to _,-_ d_y
hO,] _,
[
0 E_b'a atyO 8_lm_x
0 Dry 0 40mA_
Dry Dry
I
\\
H. Drying Progress
]hese lights show the drying procjressso you can see at a cji_nce where the d_yeris at
I.Time Dry
<_m,_;rtLo_;d_''i_asti_ee timed (y(ies ]bese (y(ies have set dryinq times of either JO,40 or 80
minutes and include a COOL DOWN function if seJected,yotJ_d_yerwin d_y for the specified
period of time
J. Start
PressSTART/PAUSEI:o start your machine >

(! uicI!<Sta:t
Fire Hazard
Only dry fabdcs that have been washed with water°
Do not use heat to dry articles containing foam rubber or
similarly textured rubber.4ike materia[so Dry on the Air Dry cyc[eo
A clothes dryer produces combustible lint and must be
exhausted outdoorsoTake care to prevent the accumulation of
lint around the exhaust opening and in the surrounding area°
Failure 'to follow these instructions can result in death or
persona[ injury°
E×p[osion Hazard
Keep flammable materials and vapors, such as gasoline, away
from dryer°
No washer can comp[etdy remove o&
Do not dry anything that has ever had gasoline, o[[ or anything
flammable on it (including cooking o[[s)o
Failure 'to follow these instructions can result in death or
persona[ [njuryo
1 PressPOWER 2 _ F_, Cycie 3 Ci_ooe i_uw d_yyou 4 ihes'_START
want vou_ ciothes
o #_,,,_ o 2o m#J
L....... _ry B_y
if you :__"
_:',,I_,o r_,<iu_owrinkbs
lores'-,WRINKLEFREE

Using Your Dryer
Ci_e(k11/_,care _..... _ _ _.....
...... aoe s ,_ c_e, _eqarr_ent to determine whether the g_rrnent manufacturer
r_corr_ m_nci ..... 4 r
:qm,)e (,, y_ncj(ee care iabeJsectiorO.
1. Sorting
it is best ti_,t you soft your <i<-_,rmentsbe[ore pi<>dnqthem
into ti_edryer_Sort into load of simiiar types, and load lhal
lake similar limes Io dry
Heavier items (e.c7 towels, t-shirts and fiannei sheets) are
best dried separateiy from iigi_tweigi_t items (e.g_<iynti_etics,
po!y cotton si_eet<_and <d_irt<OThis prevent<_tl_e pos ibihty of
some item becoming over dried whiJt oti/ers are <_tiJJdamp
it wiff also help 1:oextend the iife of your clothing and iinen
Dryin<7your ciothes as soon as the wasi_er i_asfinisi_ed wiff
decrease the (bance of wri!/kies and ti_e ci_ance of dye
<,anf, t, },n colored item 1:owhite item
We recommend ti_at article of d __ ( ,_'0,1 !,, ulung
a_eturned insicie out to ensure ti_e screen printinq does
not stick to the d_um Garments with hooks or zippers need
to be ;sstened and where possible turned inside out Pb,ce
underg_,_merits in a net bag 1:oprovide protection flora other
i_ems in the load
2. Loading
Garmer_t need to be loaded properiy to reduce ti_e
iikeiii_ood of ti_em wrinkiin<-_and to ensure ti_e load is drk,d
evenly Make sure there i ample room for ti_e garments to
tumbie freeiy wi_iJedryi!/g, load i!/terms of tile <_paceti_e
garmenls lake up when dry, ralher than when they are wet
]he general rule isone wash load one dryer load
Oniy ioad ti_edryer up to ti_e top of the transparent
section of ti_e iint bu(ket_ i oading any i_k}her may result in
uneve!/drying, tangJing, wrinkling and the dryer becoming
overloaded
it is a good icieato dry'permanent press'type garments
1o_]eti_erin a separate (ycJe witi_ the WRINKLE FREE
option turned on ]his win heJp reduce wnnkfes and the
need for ironing
t }l
7

T,gYour Dryer
3. Lint Bucket
]i_e <,m_JrtLodJdT''dryer' iint removai syqem i unique
iMiike oti_er dryers, ti_e <JrrldJrtLood_''dryer automaticaiiy
_emovesthe iint ibr you aiJyou have to do is tip the iint
out!
]he iir/t filter is i_id(:ier/bei/ind ti_e iint bucket As tile air
passe througi_ ti% filter ti_e iint i (aucii_t on ti_e fine
mel_ O!_(e the iint is about ,'_'(2ram) ti%k it (omes
into (onlact witi_ a scraper wi%i_ depo its it into ti_e
bu(ket ]hi pro(ess is automaticaiiv per/ormed every
limeiinl buiid upohlhefiiter
Apart from the benefit of not i_aving to scrape ti_e iint
after every (v(ie, it aio meam ti_e drying efficien(v i
not af/_,cted bv lint build up during the drying cvcie
The ii!/t bucket is iocated inside tile dryer on tile iefi
hand side You (an remove it by ge!/tiy puiii!/q ti_e
handie and iifting outward it siots easiiv back into piace
]his iint bucket does not need 1:obe cieaned as reguiariv
a other dryer'_ lint filter _The lint bucket or/iv needs
1obe emptied be[ore the iinl reaches the lop of the
tran parenl section
_p!:y/_efoet s
ev, I is ea_ ed
It is important that you run your dryer with the lint bucket in place at all times,
4. Power
To turn on your dryer, press ti_e POWERbutton iocated at the top
Jeff:hand corner of the contro! paneJ
Powsr
38

UsirTgYour Dr,7er_
5oSelecting a Cycle
You_dryer i_asa Number of SMARTTOUCH CYCLESti/at can be used 11od_ydii%rent types
Smart Tout# Qycles
Air Dry Delicate Permanenf Regular Denfm
P_'ess
Sei_c:ta drying cycle,ti_at rnatci_esti_e type of load you artsdryin i. [:)i/:fl÷_rt_ntfabrics i_avt_diff_rent
dryin(i requh-t,ments, so it is important to ( hoost_ti_e cycle ti_at best dt,sc_ibesthe load if y()u_
Mad contains mainly delicate items it is best yOt select ti_e DELICATEcycle.
if you are unsure of ti_etemperature to seiec:tfor a ioad, it's best 1o seiect a lower i_eat rather
than a higher heat, eg the DELICA-[Eor PERMANENTPRESScycie in tead of the REGULARcycie
AIR DRY Foritems requiring drying witi/out i_eat Perlt,ct/or airing cioti'/es or 1:ofreshen up
garmenls lhal have been packed in a suitcase or drawer
DELICATE For i_eatsensitive items, rids cycie usesa low i_eat.Use tiffs setting wi_e!/(:are iabeJs
recommend low i_eat setting or 1orgarmenls with a synlhetic fiber conlenl, where overheating
couid cause damage 1:ofiber
PERMANENT PRESS Fordrying iightweigi_t fabrics. A medium i_eatis used to reduce
wrinkles Meal for iightweigi/t cotton, (auai and items iabelled 'tumbie dry witi_ a medium
hea11]his cycie aulomalicaliy seiects li'/e WRINKLEFREEoption 1o reduce wrinkies
REGULAR For drying cienerai cottor/s suci/as si_eets, sweats and knits.This cycie uses a high
heat 1:odry ciothes quickiy Suitabie ik)r garment iabeiied 'tiJmbie dryt
DENIM For drying denims or simiiar i_eavywei_-ii_titems like jeans and tMck toweis wMch are
buik_Jor have thick earn ]he DENIM Cycie ha been taiJored 1:oadequateJy dry these item
39

T,gYour Dryer
Wrinkle Free
Minimizes ti_e iikeiihooci of wrinkles forming in ciothes if you are not
able 1ounload the dryer straigi_1away
WRINKLEFREErotates ti_e drum periociicalJy after tile cy(ie i_as
fi!%i_ed, tumbling and biowinq (ooi air ti_rougi/ti_e (ioti/e to ensure
ti_ey remain wrinkle free WRINKLE FREEuses very little power and
will continue Forup to }_4hrsor until tile dryer i turned of After
completinq each tumble Sm_JrtLo_;d_"will give an find of Cycle' beep
I:oremind you that the load is dry and can be removed
Wdnkle Free
To stop WRINKLEFREEpress eiti_er POWERor START/PAUSE
<;m,_;rlLo_d_''wiJJopen the drum door and uniock the iid so you can
remove you_ clothes
WRINKLEFREEcar/be seJectedor/any cycie and (:an be turned ON or
OFFat any time during ti_e (y(ie ]his option isaulomalicaiiy seiected
o!/the Permanenl Presscy(ie
Wi_iJeWRINKLEFREEis in motion, only ti_e WRINKLEFREEiight, the
CYCLEiigi_t and the LID LOCKED iight wiii be iit
6° Selecting the Dryness Level
]i_e desired d_ynessieveJcan be aiiered ]here a_eiive d_ynessieveJs1o choose beiween
EXTRA DRY
DRY EXTRA DRY
DRY
DAMP DRY
o DAMP
Ref(,rto page 35 fi}r Dryness [evd descriptions
]i_e dryer de[auits I:o the DRY setting_io ci_ange ti%, press
eiti_erti_e tip or down arrow to move Io your tie ired dryne s
ievei if you (hoose ti_e DAMP/DRY or DRY/EXTRA DRYsetting,
two iights wiJJbe dispJayed
0Dam#
At ti_e end of ti_ecycie, if the cioti_es are stiiJdamp or are too
dry, next time just adjust ti_e dryness ievd on the touch pad to
meet your per onai prel_,rences Auto
Dry
4O

) r_ _
Using Your [ n);er
7° SeHecting the Drying Process
] i_ere_,retwo ways in which you_ d_yeris abie to d_yciothes; by usinq AUTO SENSINGor by
using THMEDRY
AUTO SENSIW}
When AUTO SENSINGis selected Smt;rtLod£:/T''aut<::xmaticaily
sense ti_e dryness ieveJof tile load and turn off wi_en tile
ciothes are dry Sm#;rtLo_,dT"sinternai (ornputer meacures
ti'/e moisture conte!/t of ti_e load using metai censing bars
and together witi_ a temperature sensor determine wi_en the
ciothes i_avereached tile _eiected dryness ieveJ(Rel_,rto page
40 Seiecting ti'/e Dryness ievei)
For optimum (ioti_es (ai% mat(h ti_e(y(ie to ti_eioad AUTO
SENSINGoften provide tile Ee '
, Ds, _esultsand ieads to iower
energy costs than TB4EDRY
Auto $ensing
0Extra Dry
°,
_{ Dry
0Damp
"TIMEDRY
] i_ereare three timeci cycies You (_,n ci_oose between 20,
40 and 80 minutes. A COOL DOWN period of 10 minutes is
included in ti_e80 minqte _-_,nd40 minute cycle ]he 20 minute
cycle hasa 5 mir ute COOL DOWN pe!iod
Auto
Dry
0 41 m_n
020 rain
To seiect a timed (ycie, press ti_e down arrow on ti_eTIME DRY
seie_:tion Ti_eAUTO SENSINGlight wiii switch off Now seiect
the time you want you_d_yer to _un for
Ti_rougi/out ti_ecycie, the progress iigi/ts above ti_e SMART
TOUCH CYCLEbutton ifinai your k:_ad'_progres ]his i an
in@cation of i_ow dry your ioad is Ti_ebad wiii continue drying
unlii the lime you have set i_a¢eiapsed
During TIME DRY,the dryer does not sense when the clothes are dry, This may cause over-drying,
We recommend that you dry your clothes for a slightly shorter time than you think they need,
or check on them regularly (to avoid over-drying),
8. Beginning Drying Cycle
()nee yo/i_ave (:i_osena[[yocl! desired e_ ,s ,,_nIs, press START/PAUSE(located on the _ight hand
skie of the control panel)
You wilei_ear a few new sounds ti_a1:you may not i_aveheard from your previous dryer. These
noises are normal an<]are related 1:o .:>rncArtLocA7'__''locking 1:heik] an<] closing 1:hedrum door
41

U T,gYour Dryer
9. Stopping Your Dryer
Your <_rn_rtlo_JdTM dryer can be * , : o_'s,opp 1 during any stage of the d_ving process, to allow you I:o
check on your load or add/remove clothes
]b do tills, press START/PAUSE] i_erewiii be a siigi_t deEay L_ Lo_k_
asti_e drum <i[ow<idown and <_topsin the open positior_
(approximateiy 15seconds)Duri!/g ti_eopeni!/g <_eqt/e!/ce,ti_e
LID LOCKEDikyi_twin fiasi_,once ti_e drum i statior/ary the
iight win be extinguisi/ed, you can then open the iid
Ho'te:
if the cVde is interrupted before it progresses into COOL DOWN, pa_tsof the d_um may be hot
To start your dryer again, press START/PAUSE
10. Changing Cycles Dunng Operation
if you wish to ci/anqe the dryi!/<] cycie you i_'.veci_oso!/after tile maci/ir/e i_a<i_'.ireadybe(Tun
dryinc7,press your new (y(ie eiectior/on tile control par/eL if tile pro_]res iicyhtshave begun I:o
advance through the cycie, you win need I:oturn the dryer off and start afresi_
11° Fabric Softener Sheets
if you want to u<i__fabric softener si_e_t, you rout enu_e ti/at they a_eiabeibd 'dryer saf_,'t
Aiways fi;iiow the instructiord orsthe packa 7incj.Do not place them in a d_ve_with warm clothes
a<iti_ere i a ci_ance the fsbric softener may stain clothes
Only use a softener si_eetonce, then discard it
12. Beeps
At the end of ti_ecycle, ti_e dryer wiii beep to let you know ti_at ti_e load isfini hed Ti_edrum
win at£omalicaiiy come Io rest in the open position, aiiowing you Io open the iid and remove
your load
] 3. Finishing your Cycle Early
NormaNy <im_;rtLoc_d_''win advance ti_rou<]htile ploqress b_ht a it d_k,sand
wiii switci_ off once it has(ornpiete(:i COOL DOWN
if you wish to finisii you_dryinq cvcie ea_iv7ou can pressAIR DRY1:oadvance
ii I-oti% COOL DOWN mode_
]i_e COOL DOWN mode means tile eiernents wiJJswitci/off and tile cioti/es
are tumbied witi_out i_eat Wi_en <,/'r_c;rtLoc;cJ_''<_enesti_e(ioti_es are (ooi it Air Dry
wiii _,,utomaticaiiy si_utdown (this takes J 70 minutes d%)endin_] on the siz(_
of your load)
Noto:
The COOL DOWN rnodt_is oniy a(tivat_,d if your dryt_r i_aspro(yressedpast ti/<_DRYING pro(p,ss
iigi/t if die DRYINGpro(Iress iight is s1:iiigiowi!/g and you pr_,ssAIR DRYyou_ dryer win swit(h
I:oti_e AIR DRY(y(it _and will dry (or 80 mir/ut_d (the default AIR DRYsetting)YotJ can stop vot.l!
d_verat any stag__bV pressing START/PAUSE
42

Dryii, g P/,ogH Liglhts
Drying Progress Lights
] i_ereare five pro(7_essiiqhts io(>;ted above ti_e SMART
TOUCH CYCLESti_a1:let you rnor/itor ti_e progress of you_ load
so you can 1:eJJat:agJance where the d_yer is up to
VVi_enti_e dryer is started, ti_e DRYINGiigi_t appears,
you know that the d_yeris in the process of d_ying the load
D_y/ng Frog_es$
Drying D_mp Dry Exlr_ Dry ¢_el D_,w_
Wi_en ti_e dryer senses ti_at the load is begin!_inc71:odry, the
DAMP iicTi_twin qiow (ti_e DRYING iiqi_t wiii ssiii be on) Once
tile DAMP ievei is reached, the DRYING iight win be turned of[,
leaving oniy ti_e DAMP iiqi_t on At I:i% sta<3e,ti_e dryer win
sound a coo/pieof beep 1o indicate ti_at deiicate, ikyhl weighl
fabrics and garments can be removed from the dryer
Dryf_g Progress
Drying D_mp Dry Exfr_ Dry £e_l Deem
DryMff Preg_ess
DtyM_ Damp Dry Extra Dry Coo} D_w_
When the dryer senses that load is DAMP/DRY, both the
DAMP and DRY lights win be o!/
fl_'yi_ff Progress
DryMg D_mp Dry Ez_r_Dry Co_I De_rs
]i_e DAMP ik]ht win be exti!/7uished when tile _
_(,aqi dry,
ieavinq only the DRY _M_,:_n, <,,_[f you have ci_osen the DRY
settin_ the d_yer will progress to COOL DOWN
f you i_aveseiected a ar_[_errsetting oti_er titan ._e"qefa_ 4,"
s ,_,/_ (e. DRY)ti_e iights will continue through the _emaining
progress iigh1:s Referto pac;e 40
DrFM_ Damp Dry E_r_ Dry Cee_D_w_
DryD_ D_mp Dry Extra Dry Cee_D_wn
D_yi_ Pr_ff_ss
OrpMg D_mp Dry Exfr_ Dry C_I Dow_
]i_e COOL DOWN light wiii come on wi_en <;m_;rlLo#;d_' is in
ti_e process of cooiinq down ti_e dry io_;dThis is wi_ere ti_e
io<-;dis turnbied witi_ no heat, decre<:_sinc7ti_e need for ironing
COOL DOWN wiiJ continue until ti_e dryer senses ti_ecio_hes
have been cooied down sufficiently ]he exception isTIME
DRY which has a fixed COOL DOWN period
DryD_#
Drying PrD#_eSS
Damp Dry Exfra Dry C_#_D_w_
47

Lid Lock
Your _rrltJrtLo_JdT' dryer iocks its iid at ti_t,start of ti_e drying cycle,
proviciing added safety for you and your family wi_iit, it is opt_rating
]-his lock _nsu!_s 1:h_lid cannot be opened whii_ the drum is
rotating
]i_e LID LOCKEDi[gi/t (above tile START/PAUSEbutton) (omes on
wi_en the lid i k;ckeci
ifti_e LID LOCKEDiigi/t i fia_ii_ing,ti_e LID LOCKis i!/ti_e proce of
locking or unlocking During this stage, the lid still cannot be lifted
]i_e iid must be (iosed before ti_e drying (y(ie (an start if STAAT/
PAUSEi pres'_edwith ti_e i[d open, tile maci_ine wiJJbeep, to qgnai
that tile i[d neecis1o be (iosed. Once the i[d i_a_been (iosed and
START/PAUSEi pre sed,the LID LOCKwiJJbe activated and the
drying cycle wiii begin
_,,,,,,,,,, Md Locked
Power Faihre
if the power i cut wi_ik' your <Jmd_rtLo_d_''dryer is op_rotinci, the
lid will be unlocked in some circumst,_nces ti_e drum door m_,y
not be _wtomaticaiJ7 opened if ti% occurs it is besl if ti_e dryer
is not inter;_,red wi_h When the power is restored the d_yer will
automatically resume operating. However if it does not _,utomaticaJly
open, firq ciose the iici and _tarl ti_edryer in the usuai manner, after
5 secor/ds pres_iSTART/PAUSEThis wiii caue <Jm#HrtLo_d_''1:oopen
correctly with the lid unlocked
if it isabso!utei7 necessary to remove some items belore power is
restored foiiow tile _itepsbeiow:
1 F-murelhedryeri diconnectedfromlhepowersuppi7
2 Open tile iid (ti_i wiJJairead7 be u!fio(ked)
3 ()n tile Jeffi_and sicieof the dryer ti/ere isa ti_umb tab ti_at
appears whe!/the drum i (iosed Pressti_e ti_umb tab, while
rotati!/ci ti_e drt/m by i_and away from you (pui_ the drum toward
the back of tile dryer)
4 Ho!d the li_umb tab down untii ti_e drum starls opening.
Keep totaling li_e drum unlii it is fuii7 open and it comes 1oa stop
Now you can remove items from ti_e dryer drum
7 Ciose the iid once you i_averemoved desired item
Fieconnect the power supply 1oyour dryer
]i_e drum door wiii automaticaii7 dose and the dryer wiii resume
normai operalion when power is restored
44

Ca'e _'eliH_Lab_ s
Bebw i a seiection of (:are iabei ymbo[ tidal garment m,mufaclurers use to si_ow i_ow ti_eir
qarme!/t shouid be dried We've cor_verted thee symbol into tile (y(qes and i_eat settir/qs that
we recommend you qse in ti_e Srr_;rlioc;o'T''dryer Bv fo!iowing our recommendation, you (::an
enure lhal your clothes win retain ti_eir appearance over time
T, F _I
d,rhJ e Normai i)_rrNaN{_N_ Pres% i)eiicate [)o not
Any Heat low No Meat
Additionai [)ryi!_g
instruclions
MangI:o [)rv _)_-i Shade
,y ,r] [DryFiat
45

..... "e-i ¸ e,
EHyli/, Sp_ all It_ms
]her_ _artssome artick,s ti_at need to be drieci a special way i-Mforeyou dry any item that is
not dt_scribed it/_l'rldJrtLocJd_"scycbs (pag_ 3()), ref_,r1:othe tabb below Always _ern_mbt_rto
ik0iiowthe ma!_ufactur_u-'sinstrqctions
Pillows Check the care label can the pillow be dried in ti_edryer?
bo not d_y f,oamn./bber pillows
it is important ti_at before _>bcin<]_,piiiow in ti_e dryer you cite( k
Blankets
P_astic
Foam mbbe_
Rubbe_-backed products
Check the pillow at regular intervais
Note: it i important to completely dry ti_e pillow to prevent
mildew from/orming,
Check ti_e care label can the bianket be dried in the dryer?
include 4 - S medium sized towel along witi_ tile blanket for
cushioning Ti% will help stop shrinkage from over tumbling
if you are drying morelhan one bBnket, enurelhey do not sit
higher than the top of the lint bucket, otherwise there will not
be enougi_ space for ti_em to tumble
Choose the DELICATEcycle and set 20 minutes drying dine
On completion, remove ti_e bBnket, q/ake and, if neecied,
stretci_the blanket back to its original q_ape Placeit back in the
dryer and repeat until ti_e bianket is dry,
Note: it i important 1ocompieteiy dry ti_e bianket to prevent
miidew from/orming,
Do not dry products (ontaininci foam rubber_plastic or rubber
or a!_ycycle other than AIR DRY,
Dryinc/theetypesofgarmenl on any cycle otherlhan AIR DRY
isa FIRERISK
4_

I_ - _ r" ""¸¸ CDrying Sp ciall It
Ext_a _arge items Check ti_ecare Jabei- can item be dried in the dryer?
(i_cludi_g bedspreads tJ_;ea i(_wheat _;etting We recommend the DELICATEcycle and
a_d comfo_ters) AUTO SENSING.
Seiect the DRY/EXTRADRYDryness Levei
it is best to ( i_eck the item i_aifw_y thouqi_ the cycle to enst re
even dryinq
if ti_eitem contains; ff,ati_ers add a i_eavyitem (e_qa wet towel
tied in a krot) to the load to help fluff the comforter.
F-nure ti_e load does not sit i_igi_erthan ti_etop of ti_e lint
bucket beiore qarting ti_e cycie_
"_[} Dryer" Dry_Clea_it_g Fnsure ti_edry cieaning prod_ ct is recommended for :e in a
P_'oduc'ts domestic dryer.
Follow the manufacturers instructions for how to prepare the load
Set ti_e dryer to ti_e PERMANENTPRESScycie, ti% cycie usesa
medium heal Seiect TIME DRY[,,}r40 minutes_
At ti_e end of ti_e cycie remove ti_e d_y cie,-;ning product from
the machine and continue 1:ofollow ti'/e d_y cleaning product's
instructions_
Drying Times
Dryinq tim<,s can be af[(,cted by a number of factor inciuding:
]he cycie chosen
i oad size
Size of tile item
]ype of fi, bric
i oad wetness
i ocation of ti_edryer
Venling meti_od
Heat u_ied(electric, naturai ga or i P ga)
Condition of exhau t ducts
47

(ban your dry_u-vviti__ _ofi damp cloth _mdvqp_-,dry Do not uv_
scouring cieaners as they can damage the paint and plastic surfaces
Removing the Lid
You can remove ti_e iid for cie_-_,ni!/c;.Opt,!/ti_e iid fuiiy, i/o!d one side
witi_ one i_andand tap ti_e other qde witi_ an upwards motion, ib
replace tile lid, i_oid tile lid verticaiiy and align both hinges before
clicking back iNtO place
Pre-Treatment Sprays
Do not uv_ pre treatme_ t pr_,y or iiquids on or neor your dryer a_thoy <:andamac/o your
machine's contro! panel _,_swell as _,nyof its pbstk p_u'ts Damage 1:oyou_ dryer caused by pre
treatment products will not be covered by you_ wa!!ant,
Stains
if _tains appear inide ti_e drum of your machine, mix a detergent and waler paqe (or u_e a non
flammable iiquid cleaner) and wipe over tile stain witi/a _oft cioti/]Xen tumble o!d toweJs for
;'0 40 minules o!/the AIR DRYsetting 1o remove aii traces oflhe cieaner
Lint Bucket
]he ii!/t bucket wiii ne_<i 1:obe empti_<:i be[ore the ii!/t reaci_esti_e top of tile tr_,n parent
section A lint bucket ti4at isnot fuii ensures your cJoti4e'swiii remain lint free and your dryer wiii
operale al maximum efficiency
Reguiarly inspect the outdoor exhaust opening Remove any accumuiated iint from this area and
any surrounding area
Ensurethat tile areaarour/d tile dryer is kept ciear and free from combustibie materials, gasoiine
and oti/er flammable vapors or liquid F!/sureaio that ti_edyer area is kept clear and free from
item lhal wouid obstruct the fiow of combustior_ and venliialion ah-
48

f ) Ser eeps For Hel!p
, _t I iYour _,mtJr;Locr/TMdryer is caoabie of diac/nosing it own _.o_r;es. if your dryer give a muqcai
series of beeP every Second, it's te[Jinc_ ,L......,you _a, it ha_a warning wi%h you _/igi_1:be able to
solve t.I iN(} 1:hechecklist below (it' 1:hesame sound _JmcJrlLo_r/T''makes when yot.i pit.lrj it iN)
ook a...../ .............. of iigh1:son , find out: what: Drobiem your dryer is experiencing
if you are '4nar}__ ,o solve,1:he,Drobiem from 1:heci_eckiist below tail for service
]i% ik]ht indicales ti_ere is an airflow restrictk;n and your ciothes wiii take ionger to dry.
?ossibie reason for the airflow re trictior/couid inciude:
Your lint bu(ket i too full i_emove ti_e lint from ti_e iinl bu(ket, then run ti_e dryer on any
cycle for a few mint tes with no load to remove any lint till trapped in the dryer. Empty the lint
Ci_eckti_eexi/aust system Ti_edueling could be restricted, squasi_edor biockt<i_ is tile piping
bert, kinked or (iog(led? [)oe_ it need to be cleared?
Ciose the lid and press STAfiWPAUSE.
if ti_e lid isairead},,closed, open the lid and close it again then press START/PAUSE
Disconnect from the power (either by unpiuggin i the dryer or turning off the _.ir_.uit breaker
that uppiie it)Wait iO seconds, reconnect and tryturning it on again
]he machine is unabie to ciose the drum ciue to (ioti/es i!/terlerir/g witi/ti_e closing
me( ha!_isrn.F_emoveany articies that are interiering with the drum door and dry thee in ti_e
next ioad
isyour ioad higher than tile top of tile ii!/t bu(ket? i:_emove_iomearti(ies and dry ti/ese i!/tile
next load
i" it( 4_ Gt 7o_ _,7 :i (onti!/uaiiy beeping and one or more oft:he progress iigi/1:sis fishing, a fauit ha
occurred whici'/requires !epair from your Service Agenlx
P_es'<......../q:tile POWEA r}j_E,*, r),/once will stop, ti_e 'beeph_,:__'_ but: wiii stiii display ti_e fault code_ We
recommend ie_winc/the maci_ine in _i_is mode as 1:he fal.lit code wiii enable 1:heservice person I:o
quickly k4en1:ify 1:hecause of 1:he problem
49

.......ouIbII Shoo ir" T,ft
isthe dectricai cord piugged in? if not plug the cord ir
if ti_de is a switch, is it switched on?
Could your i_ousehoki pow_,r supply be,at fault? (if your pkg is suitable, t_y pk gginci anoth_r
eb,ct_icaf appliance into the same outlet)
(heck you_ house circuit breakersand ft/ses if ti/ey are,at fault contact an eiect_k:ian.
isthe dry_r set to the ,giFtDRYcycb?
isthe gas turntd on? (GasiLPGdryo_so!iy)
Hasthe drye_ progressed to COOL DOWN (Cii_ck tile Progress Jigiits)_
if the probbm persists c_il for service
is ti_e dryer set on DAMP?
T_yselecting a i_igher d_yness Jevek
isthe drum warty'; If not, is ti_e d_yerset to AIR DRY?
if you i/ave _"gas dryer, istile gas turned on? isyour i PG bottle empty?
Try drying similar weight clothes togeti_er_
if the probJem persists c_,iJ]t}r service.
isthe lid open? Shut ti_e iid and press START/PAUSE
isti/er(_ a ]%uit dispiay_,don ti_o panel? i_%r I<7page 4J if Your Dryer Beeps For Heip
isthe iint bucket fuii? If so empty it to improve performance.
isthe airflow system flee from obstruction?
Hasti_e dryer been ventt<i conecdy? istho venting distanc<_too g_eat?
if you i_avea gas dryer, is ti_e gas turned on ?Isyour i PG bottle empty?
isti_e machine ovid ioaded?
Are ti_e cioti/es very wet wi_er/they are removed from the washing machine? increase yotr
washer's spin speed
Are you using the AIR DRYcycle?
i yomr dryer or/DELICATE?
Your dryer i_asa reverse action tumbie_ Wi_en it ci_angesdirection it wi[i pause momentariiy
and wiii start again in the opposite direction this is normal
HasWRINKLE FREEbeen turned on?
_0

.......o bI! hoo ir
isli_e lint bucket full? When iint reaches li_e top of the tran parent section of ti_e bucket it
needs emptying,
Have,you st_pa_at_-_diint shodding gal mt_r/ts(_£1town'is) flora iint recoiving gatm_,nts (t-_g
Have you checked your pockets lot tissues or oti_er items that could i_avebeen left in them?
Have you overloaded your dryer? Over loadi!_ci (a!_ result in iinting problem due to redt ted
airflow and lint not being able to collect on d_e fiiter_
Have you over drieci your ioad? Over dryinq can cau<_eiint attracting static eiectridty. Try a
iower dryness setting or use AUTO,_SENSINGinstead of TIME DRY_
istile iint bu(ket in place?
Have your clothes been over dried? I%duce ti_edryness settir_g,
Have you used f_bri( oftener? Piacefabric offerer i_eets in the dryer
Hasthe load been over dried? Choose a lower dryr_esssetting_
istumble drying recommended? Ch_ck care iabeis inside garments
if you selected TIME DRY did you set it to dry for too long?
Hasti_ecorrect temperature bee! used to dry the garment? Check ti_e (:are iabei,
i)oes the load sit i_ighertitan ti_elint bt_ ket?Yot_rdryer isover loaded, de_tea e the load size
Did you remove your (ioti_e as soon as ti_edryer wa finished? Usethe WRINKLEFREEopdor,
if you car not return to the dryer in tim<-,.
Have your (ioti/es been over dried? Seiect a lower dryness level Ci_e(k your garments tare
iabeis.
Ref(,rto page 44 Power Faiiurefor more in!._ormatior_,or contact your Fisi_er_t_Paykei
isthe WRINKLE FREEbutton seiected? PressSTART/PAUSEto open ti_e iid.
Y<;urdryer may be experie!_cing a iow vo!tage supply Witi_out enou_lh electricity it (armor
function Once li_e iine voltage returns to normal the dryer wiii recommence the inlerrupted
if tile probiem persist (aiJ/or service_

Li ited Warr t 7
Wi_en you purci_ase c_,nynew Fishe' & F%ykeJwhkeware prociuct for persom_,ior consumer use
you automotk>NJy receive _,one ye<_,rlimited wa'ranty covering parts _,nd i<-_,borfor servicing
witi_in the 48 maink, nd Unised States,Hawaii, Woshington DC and £anad<-_,in Abska the limited
wc_,rrantyis the same except th+,tyou mus pay to si_ip ti_e prociuct to ti_e service shop or ti_e
service teci_nid<-_,n'stravel to your i_orne. Products for use in Canada must be pu_<hasedtNough
the danadian distribution channel to enstl_eregulatory compliance
if tile product is i!/staiied i!/a motor vei%ie, boat or similar mobile facility, you receive ti_e same
one year iimited warranty, but you muq brinl the vei%ie, boat or mobile facility containing ti_e
prodt/c t to ti_e service si_opal yotir expen e or pay the service lechnidan's travel 1othe iocalio!/
of the product
Fisher & Paykel Undertakes to:
Repair witi_out cost to tile owner eiti_er fix materi<dor labor _,nypa-t of ti}e product, ti/_* serial
number of wi%i/appear on tile prociuct, wi%i/is found to be deibctive_ in AJaska,you rout
pay to si_ip ti_e product to the <_ervice<ihopor for ti_e <_ervicere( hr_ician'stravel 1o your home
if ti_e product i in taiied in a motor vei%ie, boat or simiJarmobile facility, you must bring it Io
the <iervi(e shop at your expen e or pay (or ti_e <_erviceteci_nkian's traveJ1othe iocatior_ of the
product_ if we are unaNe to repair a de[_ctive part of tile product after a tea onaNe number of
altempts, at our option we may repiace ti_e part or ti_e product, or we may provide you a fuiJ
refund of the purchase price of the product (not including in taiJation or other charges)
]his warranty extends 1:oti_eorigins purci_aserand any succeeding owner of the product/or
products purcha ed ibr ordinary singie family home tie
Aii service under tills iimited warranty shaiJbe provided by Fisi_er& Paykeior its Authorked
Service Agent during normal bu iness hour
How long does this Limited Warranty Last7
Our ibbiiky u!@er till iimited worranty _,xph-esONF-YAR flora the da1:_of pu_cha e of
the product by the fh-stconsumer
Our iiabiiity under any impiied warranties, inciudhg ti_e impiieci warranty of merci_antabifit7
(an unwritte!/warranty ti/at ti_e product i fit for ordinary u<_e)aio expire ()NF-YAiR (or su(i/
ion let pedod as reqc/ired by appiicabie law) from ti_edate of pc/reha<ieof ti_e product by ti_e rift
con umer Some States do not aibw iimitalion on how long an implied warranlv lasts, so this
iimit on implied warranlies may not apply Io you
_2

Li , Warrar t7
This Warranty Does Not Cover
A Service c/is ti_at a_enot reJ_tedto any deflect in ti_e product Ti_ecost of _',servict* call will be
charged if ti_e problem i not found to be a de[_ct of the product. Forexample:
I Correct faulty in taiiation of ti_e producl.
_' instruct you i_ow Io use ti_e product
3 i:_epiacei_ou_ierues, reset circuit breaker, correct houe wiring or plumbing, or repiace
4 Correct fauit(s) caused by ti_e user
5 Ci_an(ie the set up of the product
G Unauti_orized modificalion of ti_e product
7 Noie or vibration ti/at is cot/ idered normai, for exampie, drain/fan sound, refrigeratior_
noises or uer warning beeps
8 Correcting damage caued by pests,for exampie, rats, cockroaches etc.
B De/_,ct caued byfactor otherlhan:
I Normai dome tic use or
_ U1e in accordance witi/tile product' u_ierguide
c [)e/_,cl Io the producl cau_iedby accidenl, negiecl, misu e,fire, fiood or Act of God
o ]i_e cost of repairs carried oul by nob aulhorized repairer or the cost of correcting such
unauti_orized repair_
E ]ravei/(_es and a sociated charges incurred when the product is in taiied in a iocatior_with
iimited or restricted access (eg alrpiane fii_]id:s,l(_rryci/arges, i oiated geographic area)
F Normairecommendedmaintenancea set forth in the product' uerguide
if you i_avean i!/staliado!/probiem contact your deaier or instaiier. You are respo!/sibie fibr
providing adequate eiectricai, exhau tinci and oti_er connection faciiitie
We are not respor/sibie for (or/ eqiJentiai or incidental damage (the cost of repairing or
repiadng oti/er property damaged if ti_e product i def<_ctiveor any of your expe!/ e cau_iedif
the product is defi,ctive) Some States do not aiiow li_e exciu_iion or iimitation of in(idenlai or
cor_ equenliai damages, so the above iimitalior_ or exciusior_may not appiy Io you
53

Lira,t d Vfarr ,:ti,t 7
How to get Service
Pleaseread your U<ierGuide_if yotJ then have any que dora about operating the product,
need the name of your local Fisher_ PaykeiAuti/orized Service A(lent, or believe ti_e prociuct i
defective and wii_ <ierviceunder Ibis iimited warranl 7, please cor_lact your dealer or calf tJ at:
USA a_'_dCa_ada
TO[[ Fi:_ri:1o888ogoFNRUSA (1o888o936o7872)
or ue the iir_kat: wwwofish÷_paykelocomilocatoUs÷_vic÷U
You may be requireci to provide reasonable proof of the date of purchase of the product before
the product will be serviced under this limited warranl]<
Commercial Use
if yotJ are u<ii!/gtile product in a (omrnerciai settir/g (any use other titan a <iingief<_,rniiydweiiing),
we agree to repair or repiace, witi_out cost t() you for part<_only, any de/<_ctiveparts, ti_e seriai
number of wi%i_ appear on tile product Our iiabifity for these repair ex_)ires()NF-VAi:t from
the date of original purchase
At our option we may repiace the part or tile prodtJct, or we may provicie yotJ a fc/ii refu!_d of
the purci_ase price of the prociuct (not i_ciudi_g i!/<itaiiation or other (i/arges)Aii <_erviceunder
thi iimited warranty <ii_aifbe provided by Fisi_er_ Pavkeior its Authorized Service Agent during
normal bu<iine<i<ihour<i
No Other Warranties
ibis iimited warranty i the (ompiete and e×ciu ire agreement between you and Fiber ¢_Paykei
re(yardi!/q any de[_,ct in tile product. None of our employee (or our Auti_orized Service Agents)
are authorized to make any addition or modificalio!_ Io this limited warranlv
Warrantor: Fisi_er_ PavkeiAppliances, inc
if you need furti/er i_eipc:onceming this iimited warranl}<,please calf us at above number
write to:
Fi i_er_ PaykeiAppliances, inc
5900 Skyiab i:toad
Huntington i%ach
CA fJJ_47
or
]i% Nrnited warranty gives you spedfic legal rights, and you may also have other rights which
vary from stale Io stale
_4

