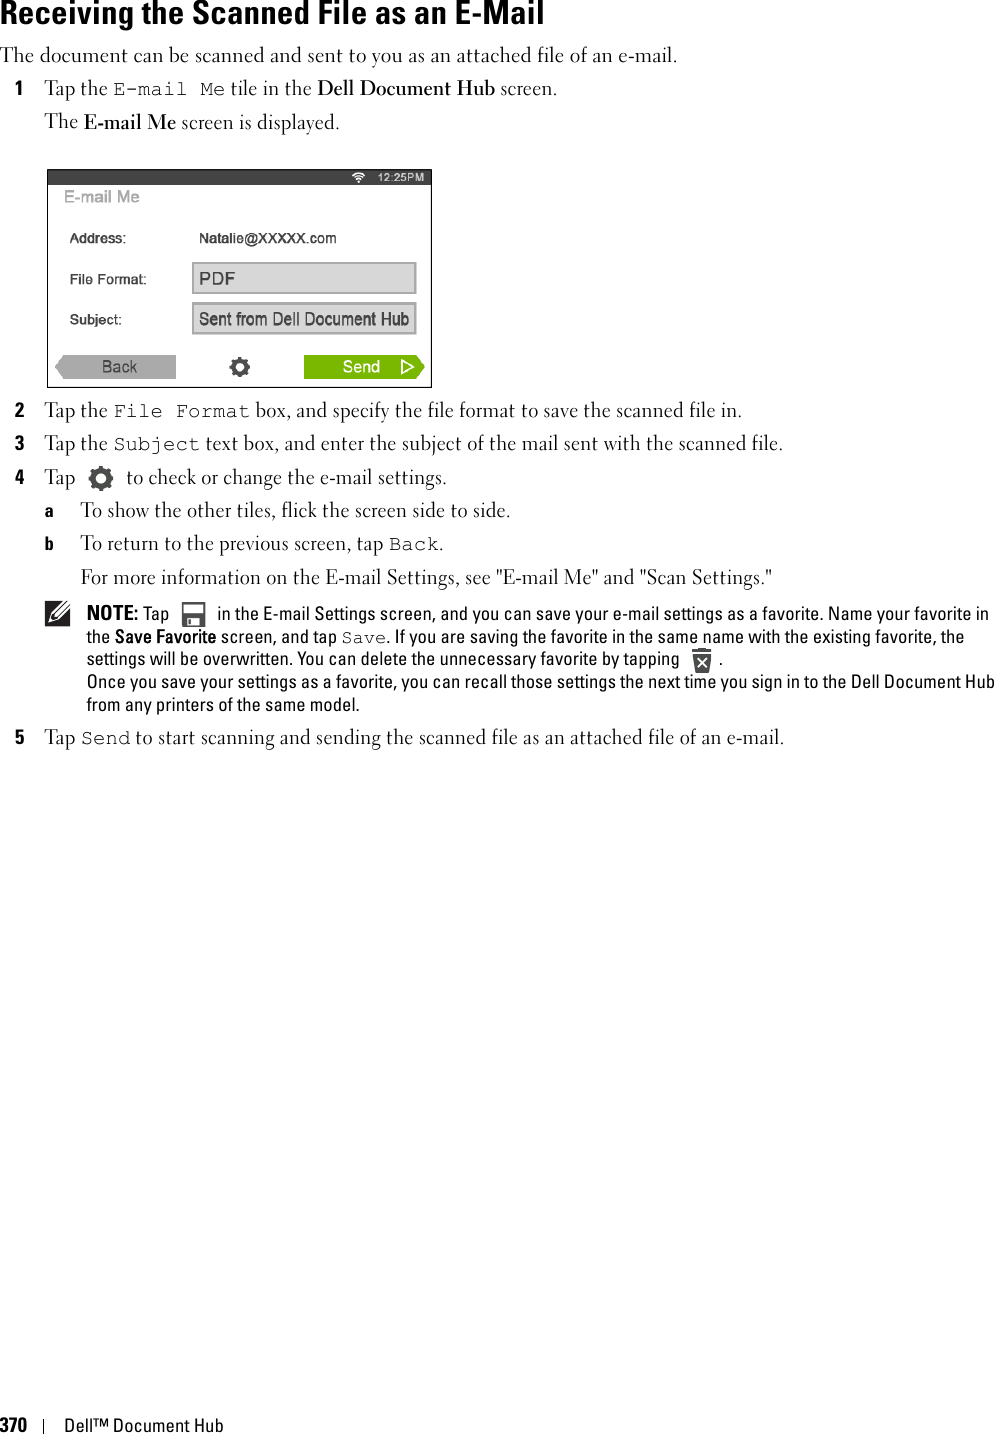
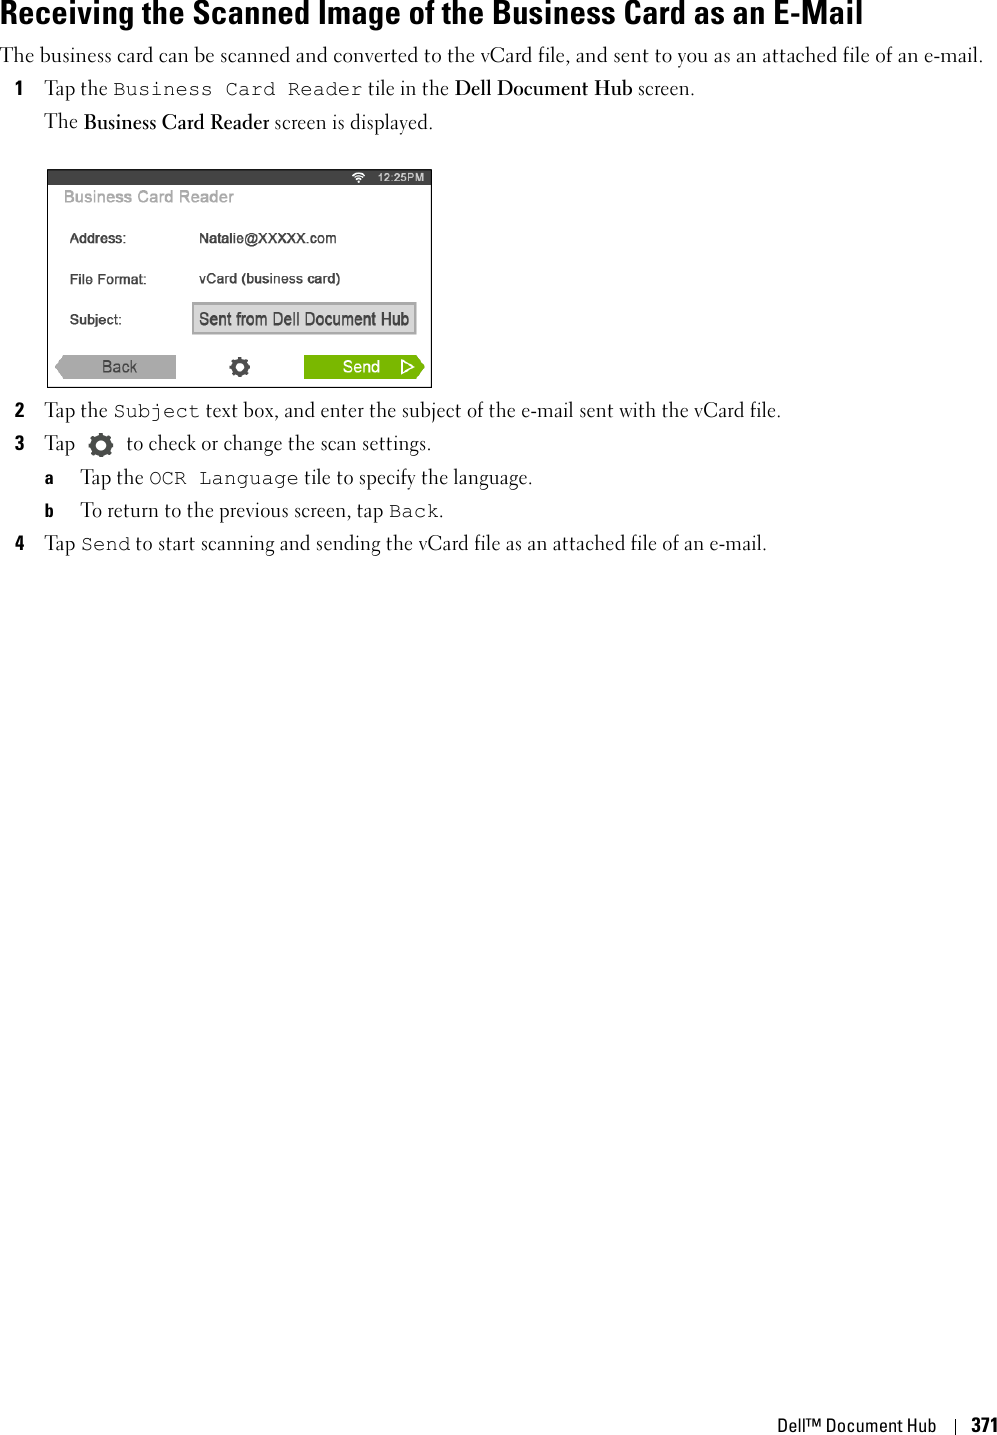
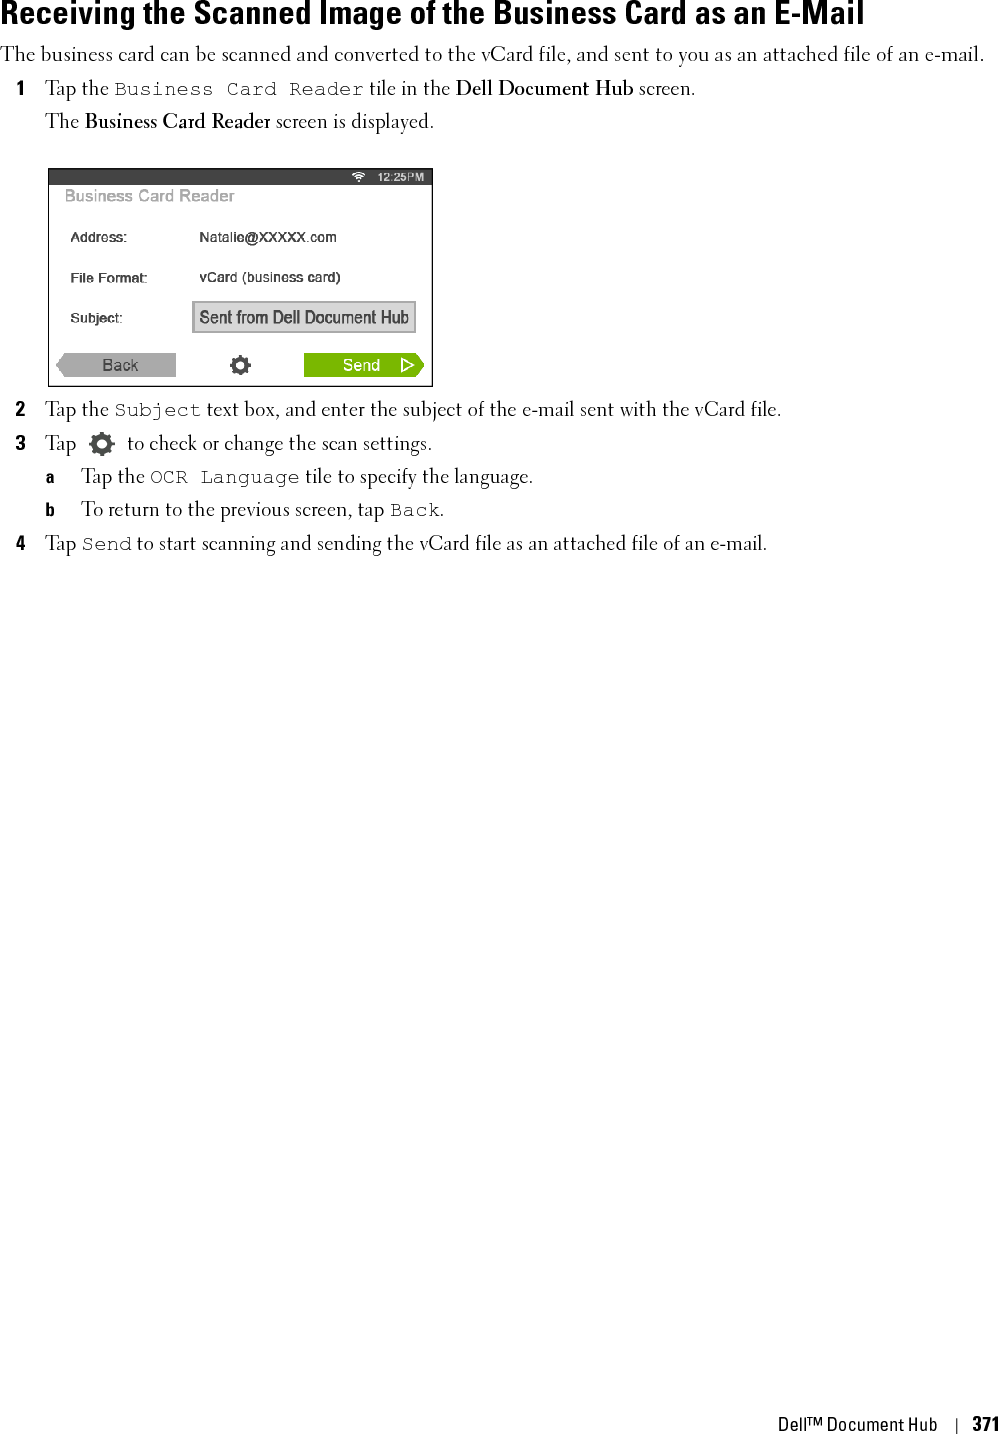
Fuji Xerox H815DW Multifunction Laser Printer User Manual Short Term Confidential 2
Fuji Xerox Co., Ltd. Multifunction Laser Printer Short Term Confidential 2
UserManual.wiki
>
Fuji Xerox
>
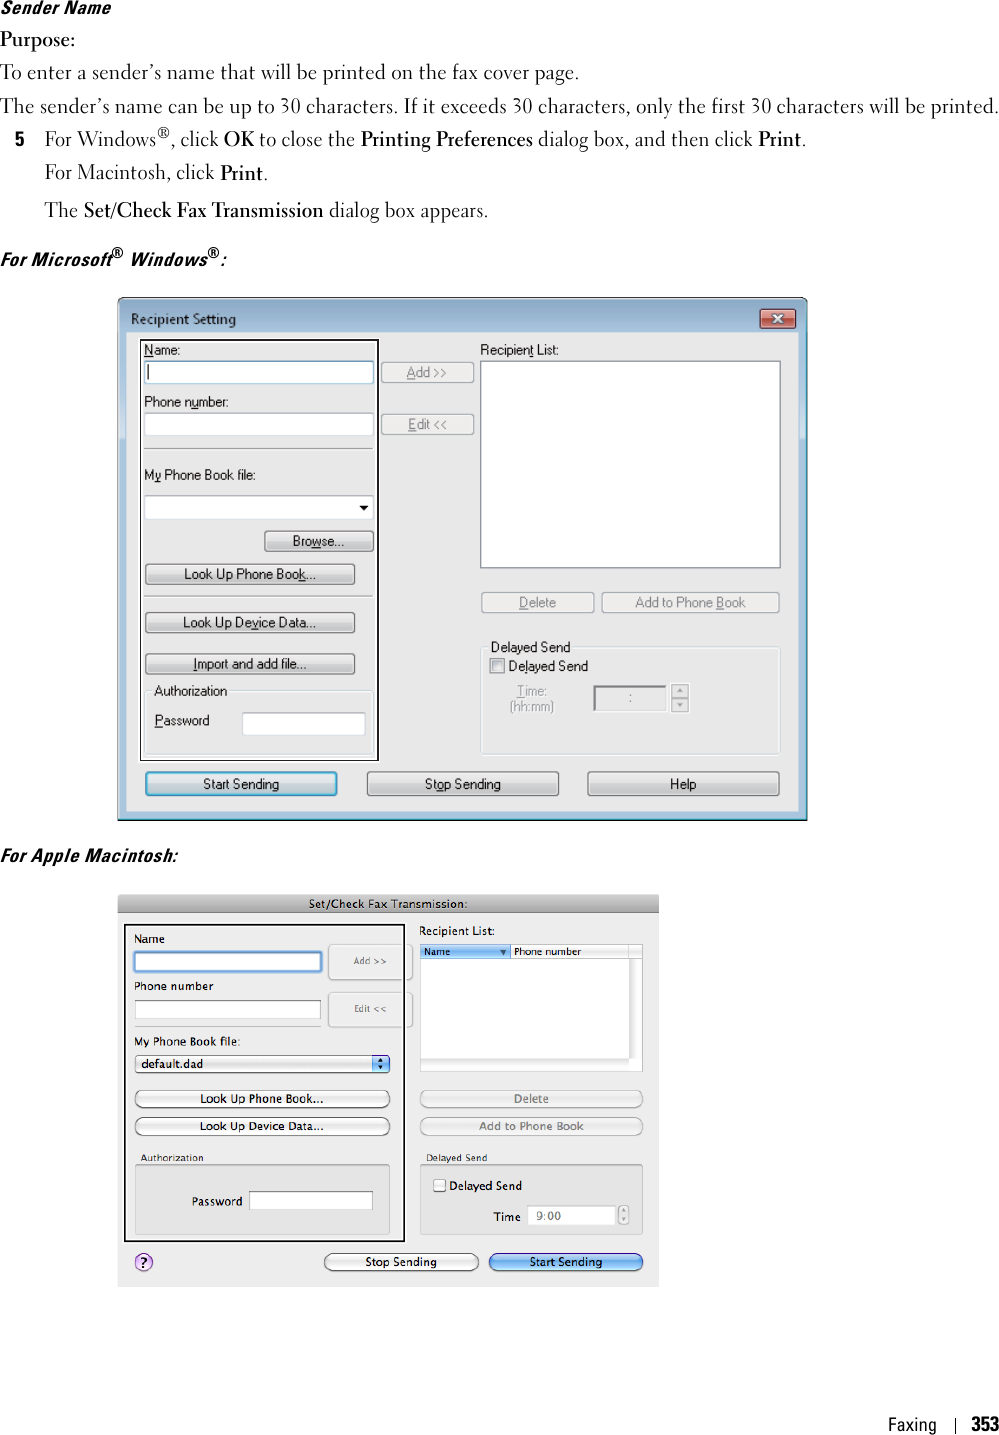
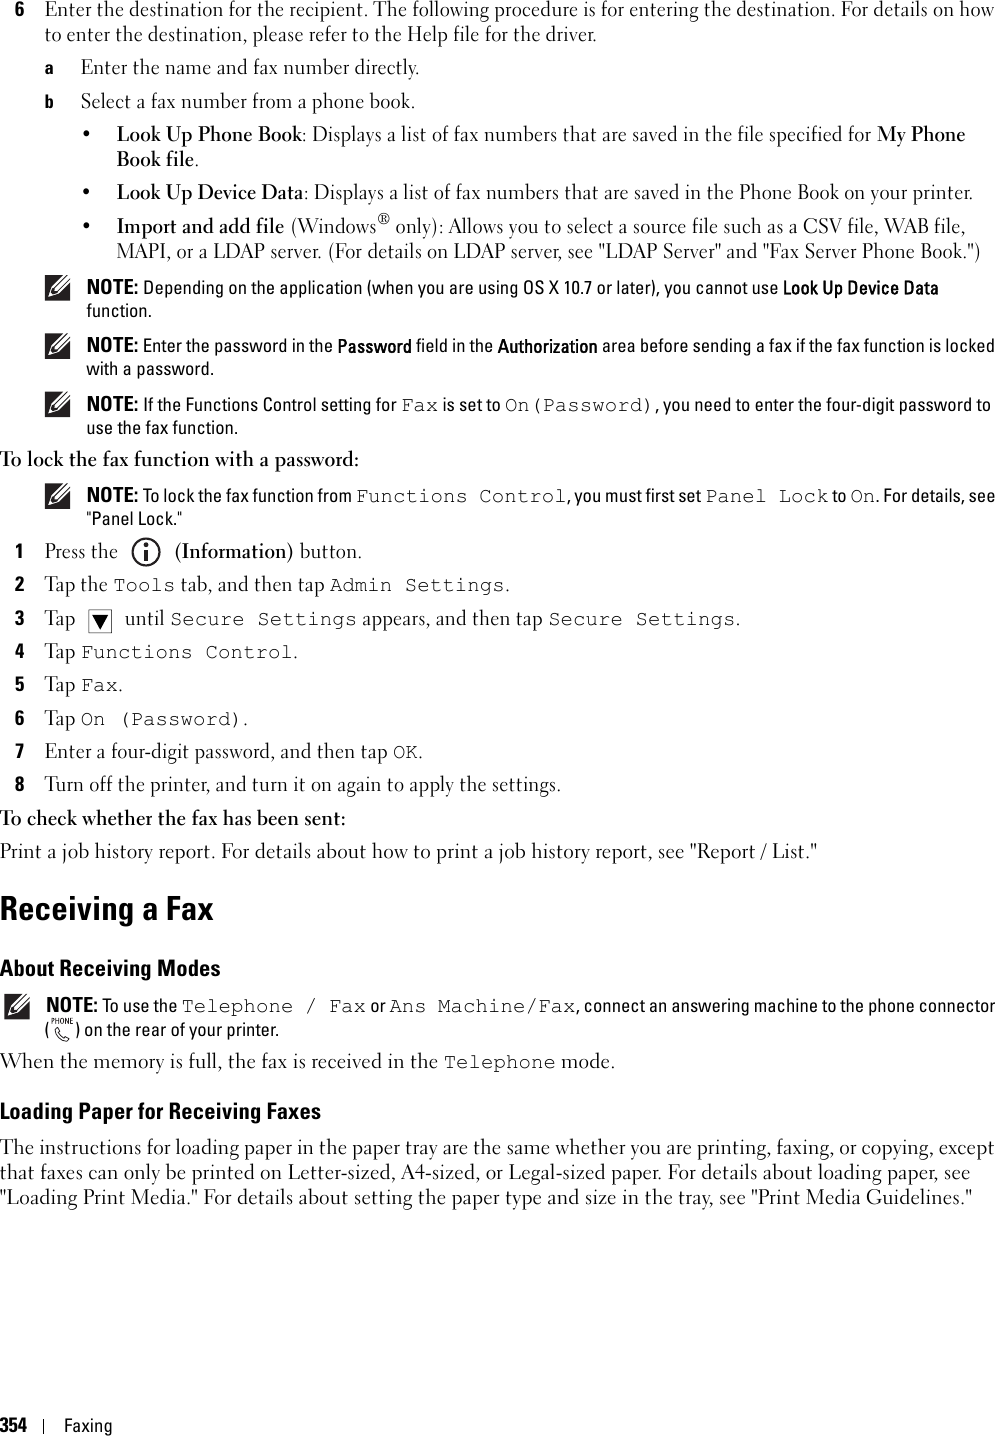
H815DW User Manual
>
(Short-Term Confidential) User Manual-2
Contents
1.
(Short-Term Confidential) User Manual-1
2.
(Short-Term Confidential) User Manual-2
3.
(Short-Term Confidential) User Manual-3
4.
(Short-Term Confidential) User Manual-4
5.
(Short-Term Confidential) User Manual-Important Info
6.
(Short-Term Confidential) User Manual-Regulatory Info for USA
(Short-Term Confidential) User Manual-2
Navigation menu
Upload a User Manual
Namespaces
Wiki Guide
HTML
PDF
Info
Views
User Manual
Discussion / Help
Navigation


![396User AuthenticationTo use the LDAP authentication, you can select one of the following methods to enter the Login Name text box.Method 1 [user name]Method 2 [domain name]\[user name]Method 3 [user name]@[domain1].[domain2]The [domain2] in the method 3 can be specified in the Dell Printer Configuration Web Tool, using the “Use Added Text String” feature. In the Login Name text box on the Sign In screen, enter only the [user name]@[domain1]. For details, see "LDAP Authentication."To use the Kerberos authentication, specify the domain name in the Dell Printer Configuration Web Tool. For details, see "Kerberos Server." NOTE: To enter the accented characters, tap to display the keyboard for those characters. NOTE: When you enter the login name, you can also tap to select a recently entered login name from a list. The list can contain up to eight recently entered login names. NOTE: When the remote authentication method is used, the same Home screen is displayed for each user.Logging In for Local AuthenticationWhen the printer is specified to use the local authentication method, you can log in to the account using the touch panel. 1Start the printer and wait until the portal screen is displayed. 2Tap the account tile you want to log in to. NOTE: When the account you want to log in to does not require a password, skip step 3. The Home screen is displayed. 3Enter the account password, and tap Login. When the password is correct, the Home screen is displayed.Logging OutWhen there is an account which is specified as Initial Login, turning on the printer will always display the Home screen of that account. To log in to another account, you need to log out first.1Press the (Login/Logout) button on the operator panel. The screen returns to the portal screen.](https://usermanual.wiki/Fuji-Xerox/H815DW.Short-Term-Confidential-User-Manual-2/User-Guide-2521568-Page-126.png)