GE Healthcare 6961-MON Novii Intrapartum Maternal/Fetal monitor User Manual 107 PT 006 USrev2 Novii Getting Started Guide

GE Healthcare Novii Intrapartum Maternal/Fetal monitor 107 PT 006 USrev2 Novii Getting Started Guide

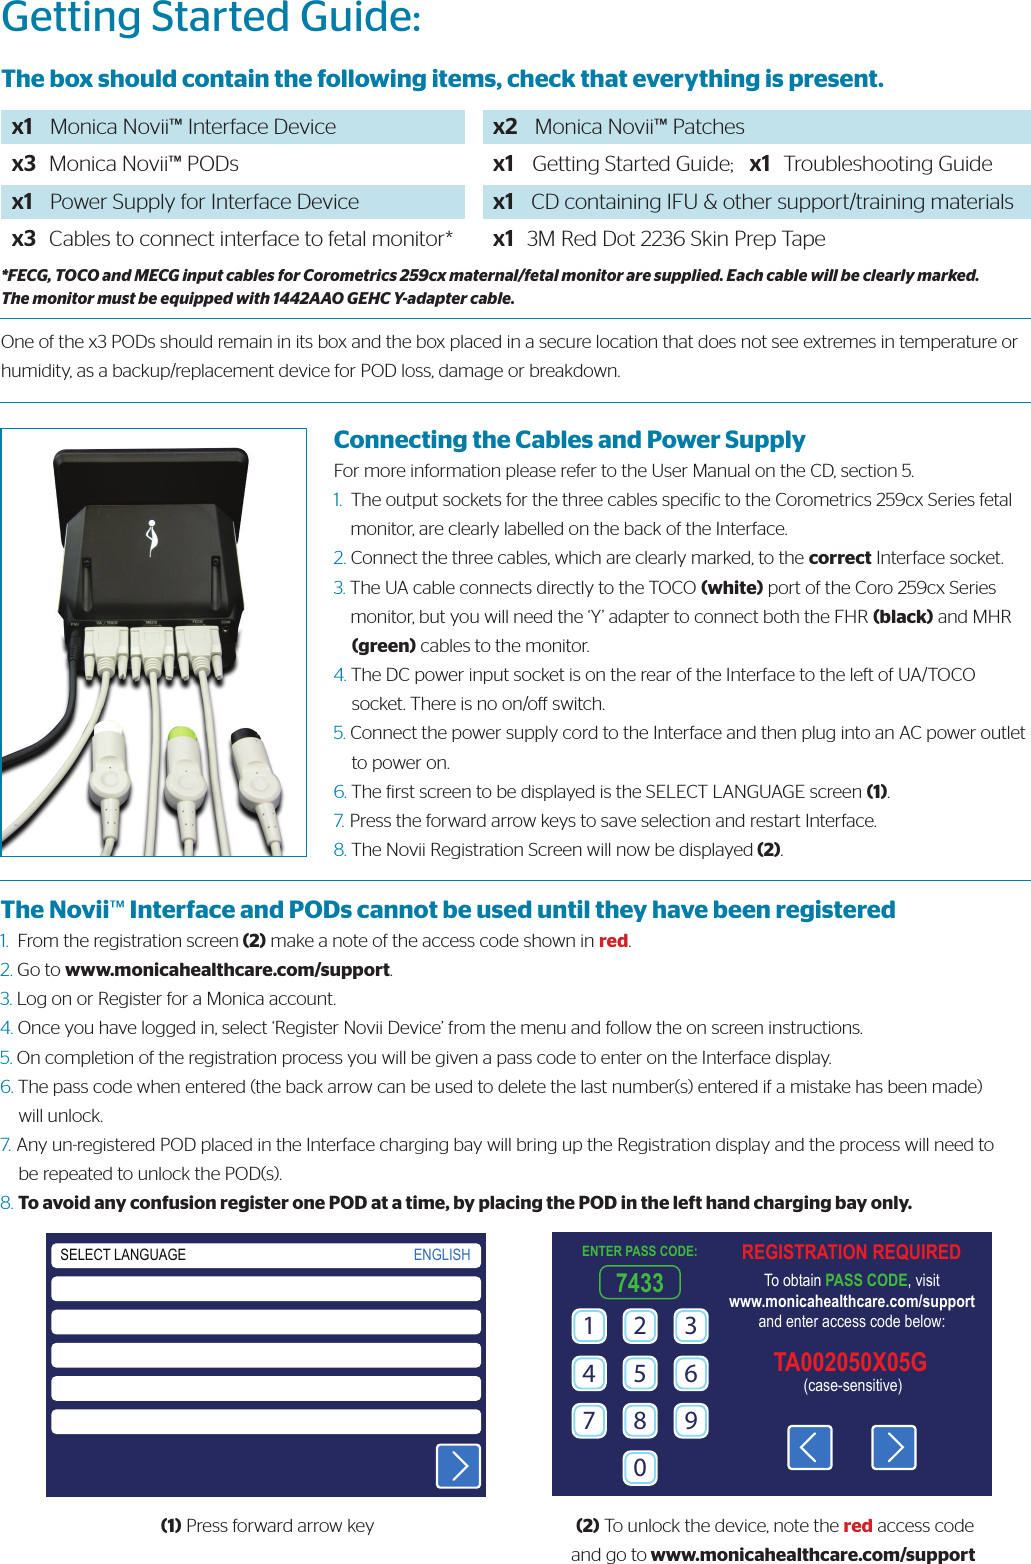
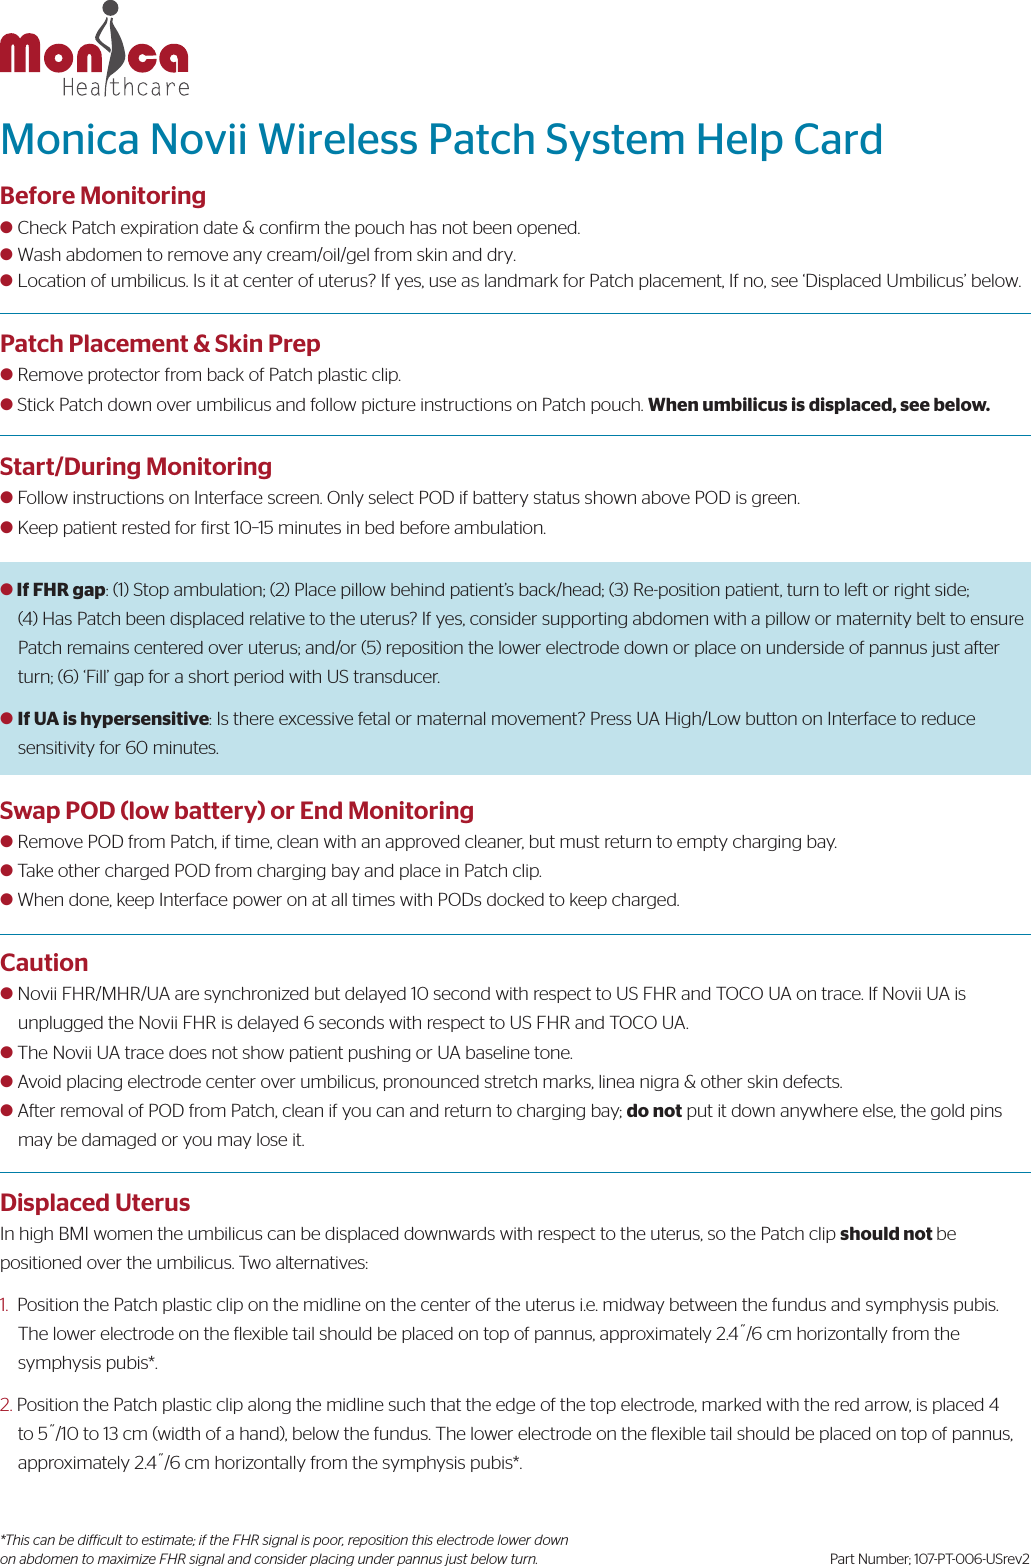
107-PT-006 USrev2_Novii - Getting Started Guide

Getting Started Guide:The box should contain the following items, check that everything is present.x1    Monica Novii™ Interface Devicex3   Monica Novii™ PODsx1    Power Supply for Interface Devicex3   Cables to connect interface to fetal monitor*x2    Monica Novii™ Patchesx1    Getting Started Guide;   x1   Troubleshooting Guide x1    CD containing IFU & other support/training materialsx1   3M Red Dot 2236 Skin Prep Tape*FECG, TOCO and MECG input cables for Corometrics 259cx maternal/fetal monitor are supplied. Each cable will be clearly marked. The monitor must be equipped with 1442AAO GEHC Y-adapter cable.One of the x3 PODs should remain in its box and the box placed in a secure location that does not see extremes in temperature or humidity, as a backup/replacement device for POD loss, damage or breakdown.Connecting the Cables and Power SupplyFor more information please refer to the User Manual on the CD, section 5.1.  The output sockets for the three cables speciic to the Corometrics 259cx Series fetal      monitor, are clearly labelled on the back of the Interface.2. Connect the three cables, which are clearly marked, to the correct Interface socket.3. The UA cable connects directly to the TOCO (white) port of the Coro 259cx Series     monitor, but you will need the ‘Y’ adapter to connect both the FHR (black) and MHR     (green) cables to the monitor.4. The DC power input socket is on the rear of the Interface to the left of UA/TOCO     socket. There is no on/o switch.5. Connect the power supply cord to the Interface and then plug into an AC power outlet     to power on.6. The irst screen to be displayed is the SELECT LANGUAGE screen (1).7.  Press the forward arrow keys to save selection and restart Interface.8. The Novii Registration Screen will now be displayed (2). The Novii™ Interface and PODs cannot be used until they have been registered1.  From the registration screen (2) make a note of the access code shown in red.2. Go to www.monicahealthcare.com/support.3. Log on or Register for a Monica account.4. Once you have logged in, select ‘Register Novii Device’ from the menu and follow the on screen instructions.5. On completion of the registration process you will be given a pass code to enter on the Interface display.6. The pass code when entered (the back arrow can be used to delete the last number(s) entered if a mistake has been made)     will unlock.7.  Any un-registered POD placed in the Interface charging bay will bring up the Registration display and the process will need to     be repeated to unlock the POD(s).8. To avoid any confusion register one POD at a time, by placing the POD in the left hand charging bay only. (1) Press forward arrow key  (2) To unlock the device, note the red access codeand go to www.monicahealthcare.com/support SELECT LANGUAGE ENGLISH REGISTRATION REQUIREDTo obtain PASS CODE, visitwww.monicahealthcare.com/supportand enter access code below:(case-sensitive)TA002050X05GENTER PASS CODE:74331 2 34 5 67 8 90
Patch Placement & Skin Prepl Remove protector from back of Patch plastic clip.l Stick Patch down over umbilicus and follow picture instructions on Patch pouch. When umbilicus is displaced, see below.Start/During Monitoringl Follow instructions on Interface screen. Only select POD if battery status shown above POD is green.l Keep patient rested for irst 1015 minutes in bed before ambulation.l If FHR gap: (1) Stop ambulation; (2) Place pillow behind patient’s back/head; (3) Re-position patient, turn to left or right side; (4) Has Patch been displaced relative to the uterus? If yes, consider supporting abdomen with a pillow or maternity belt to ensurePatch remains centered over uterus; and/or (5) reposition the lower electrode down or place on underside of pannus just afterturn; (6) ‘Fill’ gap for a short period with US transducer.l If UA is hypersensitive: Is there excessive fetal or maternal movement? Press UA High/Low button on Interface to reduce      sensitivity for 60 minutes.Swap POD (low battery) or End Monitoringl Remove POD from Patch, if time, clean with an approved cleaner, but must return to empty charging bay.l Take other charged POD from charging bay and place in Patch clip.l When done, keep Interface power on at all times with PODs docked to keep charged.Cautionl Novii FHR/MHR/UA are synchronized but delayed 10 second with respect to US FHR and TOCO UA on trace. If Novii UA is     unplugged the Novii FHR is delayed 6 seconds with respect to US FHR and TOCO UA.l The Novii UA trace does not show patient pushing or UA baseline tone.l Avoid placing electrode center over umbilicus, pronounced stretch marks, linea nigra & other skin defects.l After removal of POD from Patch, clean if you can and return to charging bay; do not put it down anywhere else, the gold pins     may be damaged or you may lose it.Displaced UterusIn high BMI women the umbilicus can be displaced downwards with respect to the uterus, so the Patch clip should not be positioned over the umbilicus. Two alternatives:1. Position the Patch plastic clip on the midline on the center of the uterus i.e. midway between the fundus and symphysis pubis.The lower electrode on the lexible tail should be placed on top of pannus, approximately 2.4/6 cm horizontally from thesymphysis pubis*.2. Position the Patch plastic clip along the midline such that the edge of the top electrode, marked with the red arrow, is placed 4to 5/10 to 13 cm (width of a hand), below the fundus. The lower electrode on the flexible tail should be placed on top of pannus,approximately 2.4/6 cm horizontally from the symphysis pubis*.Monica Novii Wireless Patch System Help CardBefore Monitoringl Check Patch expiration date & conirm the pouch has not been opened.l Wash abdomen to remove any cream/oil/gel from skin and dry.l Location of umbilicus. Is it at center of uterus? If yes, use as landmark for Patch placement, If no, see ‘Displaced Umbilicus’ below.*This can be difficult to estimate; if the FHR signal is poor, reposition this electrode lower down on abdomen to maximize FHR signal and consider placing under pannus just below turn. Part Number; 107-PT-006-USrev2

Navigation menu