Glue HUBV2 GLUE SMART LOCK User Manual instruction

Glue AB GLUE SMART LOCK Users Manual instruction

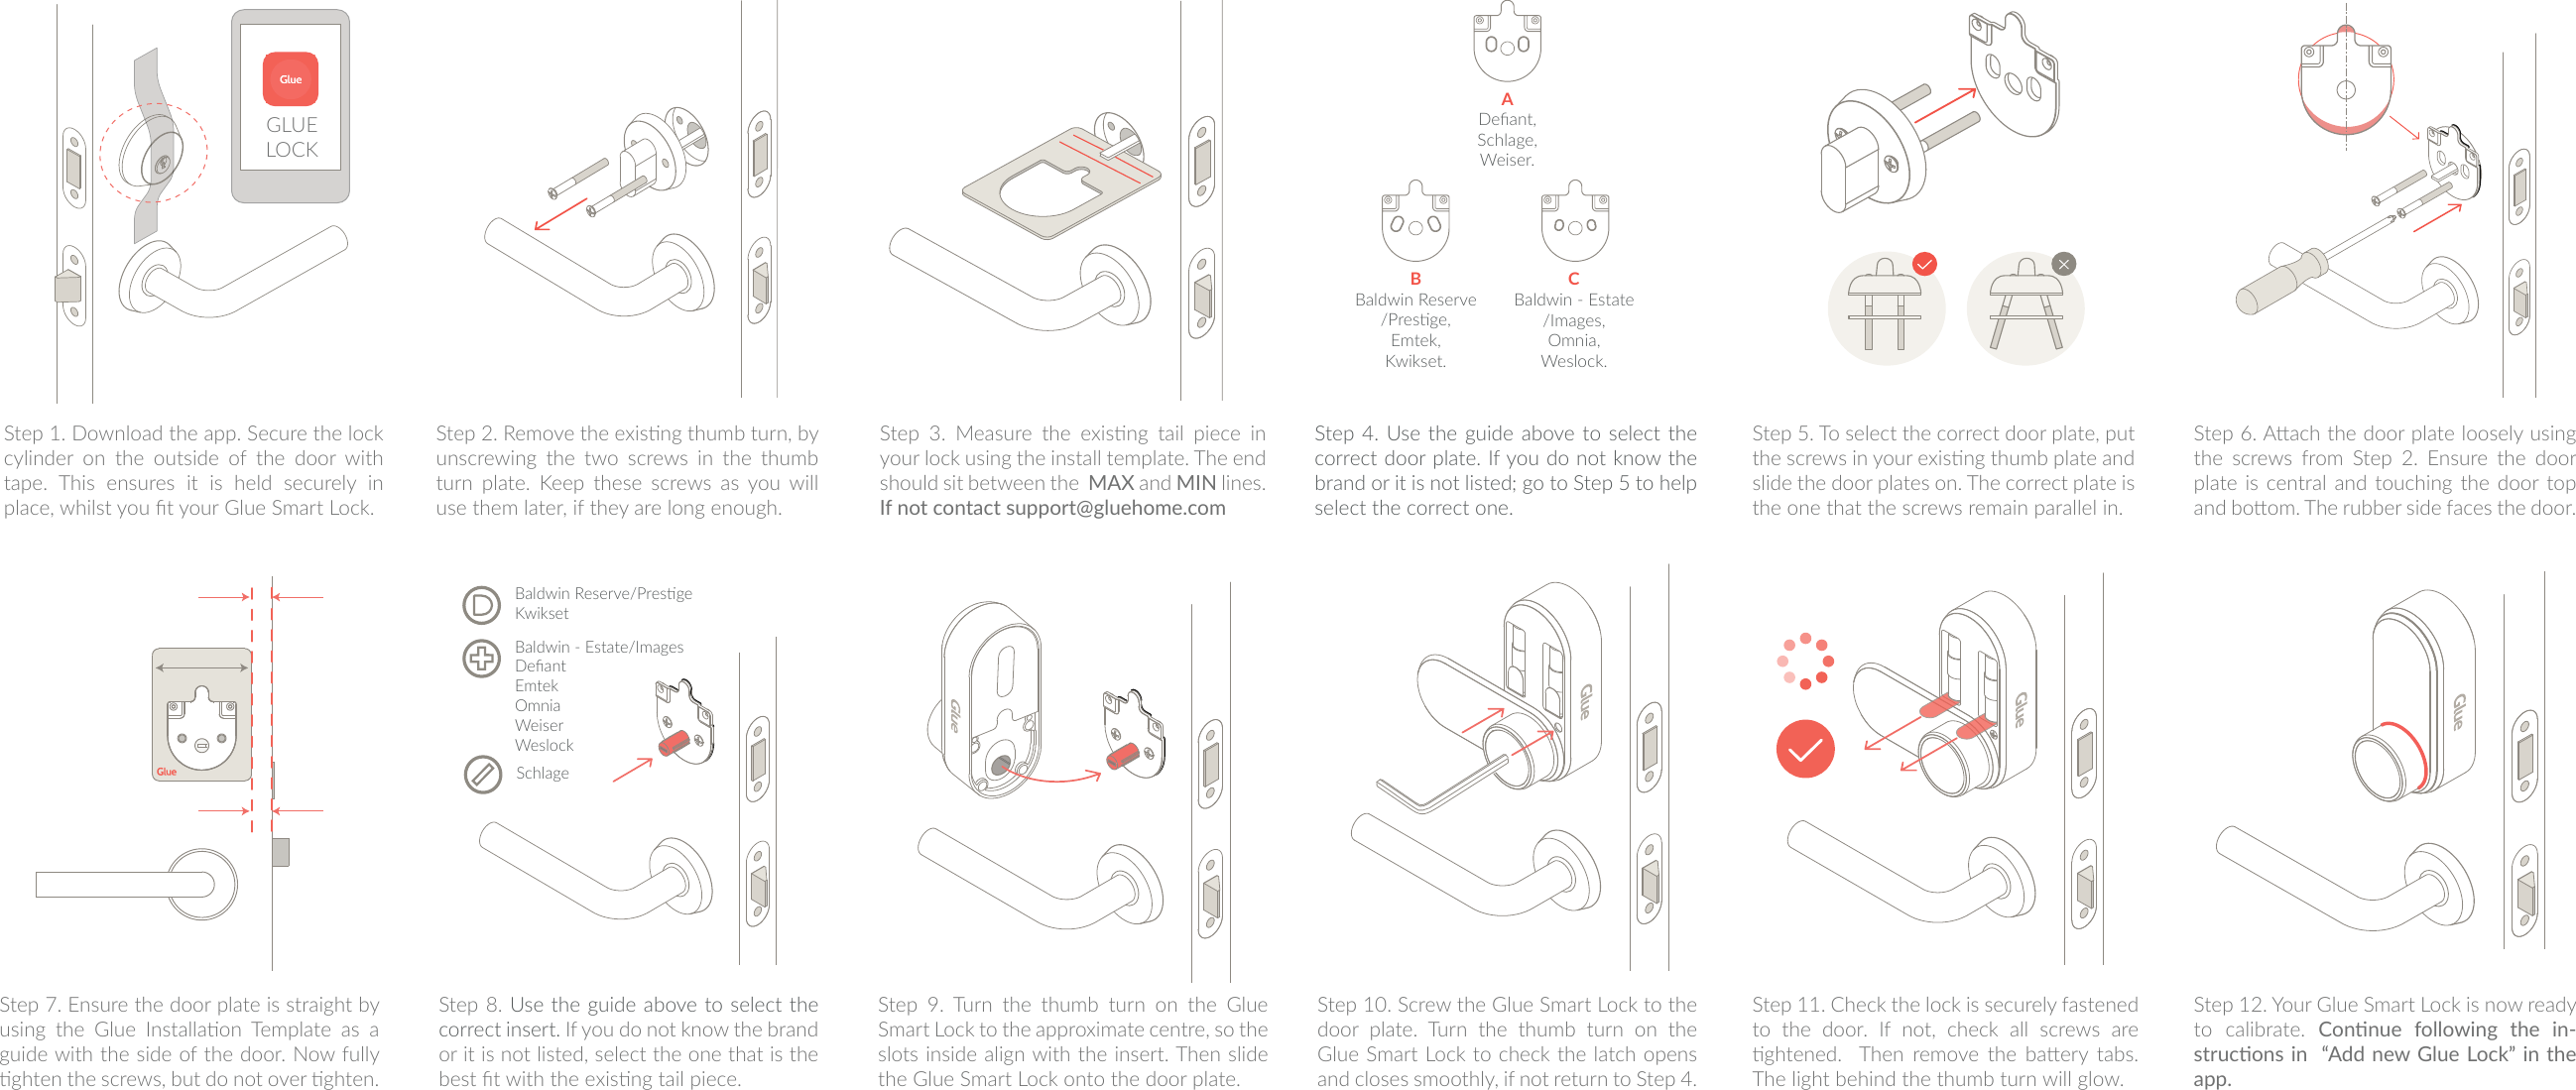
Users Manual - instruction

SchlageBaldwin Reserve/PresgeKwiksetBaldwin - Estate/ImagesDefiantEmtekOmniaWeiserWeslockADefiant,Schlage,Weiser.BBaldwin Reserve/Presge,Emtek,Kwikset.CBaldwin - Estate/Images,Omnia,Weslock.Step 1. Download the app. Secure the lock cylinder on the outside of the door with tape. This ensures it is held securely in place, whilst you t your Glue Smart Lock.Step 2. Remove the exisng thumb turn, by unscrewing  the  two  screws  in  the  thumb turn plate. Keep these screws as you will use them later, if they are long enough.Step  3.  Measure  the  exisng  tail  piece  in your lock using the install template. The end should sit between the  MAX and MIN  lines.  If not contact support@gluehome.com Step 4. Use the  guide above to select the correct door plate. If you do not know the brand or it is not listed; go to Step 5 to help select the correct one.  Step 5. To select the correct door plate, put the screws in your exisng thumb plate and slide the door plates on. The correct plate is the one that the screws remain parallel in.Step 6. Aach the door plate loosely using the  screws  from  Step  2.  Ensure  the  door plate is central and  touching the door top and boom. The rubber side faces the door.Step 7. Ensure the door plate is straight by using  the  Glue  Installaon  Template  as  a guide with the side of the door. Now fully ghten the screws, but do not over ghten.Step 8. Use the guide above to select the correct insert. If you do not know the brand or it is not listed, select the one that is the best t with the exisng tail piece.Step  9.  Turn  the  thumb  turn  on  the  Glue Smart Lock to the approximate centre, so the slots inside align with the insert. Then slide the Glue Smart Lock onto the door plate. Step 10. Screw the Glue Smart Lock to the door  plate.  Turn  the  thumb  turn  on  the Glue Smart Lock to check the latch opens and closes smoothly, if not return to Step 4.Step 12. Your Glue Smart Lock is now ready to  calibrate.  Connue  following  the  in-strucons in  “Add new Glue Lock” in the app.Step 11. Check the lock is securely fastened to the door. If not, check all screws are ghtened.    Then  remove  the  baery  tabs. The light behind the thumb turn will glow.GLUE LOCK

Navigation menu