goodbetterbest VX2PS3-31 VX2 RF Wireless Controller for PS3 User Manual
Goodbetterbest Limited VX2 RF Wireless Controller for PS3 Users Manual
Users Manual
LR
SELECT
TURBO
START
1
2
1
2
.
simulate the button being pressed
rapidly e.g. “boost firepower”.
The buttons supported by Turbo are
, , , , L1, L2, R1, R2
To enable turbo : Press & hold Turbo
then press the action button you wish
to turbo. The LED will flash when an
action is assigned.
To disable turbo : Repeat the steps
More than one button can be
assigned to turbo at one time.
return to default without Turbo.
FEATURES & DETAILS PS3 SET UP & PAIRING
WARNINGS
This symbol indicates
important installation,
operational or maintenance
instructions. Always follow
these instructions closely.
ENVIRONMENT
Please help to conserve the
environment by recycling
the cardboard packaging of
this product.
This product should NOT be
disposed of in normal household
waste. It should be disposed of
separately. Please take it to an
electrical waste collection point.
PRECAUTIONS
This product has been designed
with the highest concern for safety.
However, any electrical device, if used
improperly, has the potential to
cause harm. To help ensure risk-free
operation please pay attention
to the following guidelines.
• Use only as intended. This is a
precision product, handle with care.
• Contains small parts. Not suitable
for children under 3 years of age.
• Store in a dry & dust free area.
• Do not store in areas of extreme
heat or cold, and avoid direct
sunlight or heat sources eg. heaters.
• Do not allow the product to get wet
or dirty; doing so may cause damage.
• Do not clean with benzene, paint
thinner, acetone, alcohol, or other
such solvents.
• Do not take the product apart;
doing so will void your warranty
and may cause electrical shock.
TROUBLESHOOTING TIPS &
TO VIEW THIS MANUAL ONLINE:
www.gioteck.com
Gioteck hereby declares that this product is
in compliance with the essential requirements
and other provisions of Directive 2004/108/
EC and R&TTe 1999/5/EC. To view the full
version of the Declaration of Conformity
please go online to doc.gioteck.com
TouchSense Technology Licensed from
Immersion Corporation. TouchSense
Technology for Spinning Mass Tactile
Feedback Devices protected by one or
more of the following United States
Patents: 5831408, 5844392, 5857986, 5907487,
5959613, 6020875, 6088017, 6104158, 6246390,
6252583, 6271833, 6275213, 6278439, 6343349,
6400352, 6411276, 6424333, 6715045, 6801008,
7131073, 7199790, 7209117, 7299321, 7327348,
7345672, 7502011 and other patents pending.
radiate radio frequency energy and, if not
installed and used in accordance with the
instructions, may cause harmful interference
to radio communications. However, there
is no guarantee that interference will not
occur in a particular installation. If this
equipment does cause harmful interference
to radio or television reception, which can
be determined by turning the equipment
try to correct the interference by one
or more of the following measures:
• Reorient or relocate the receiving antenna.
• Increase the separation between the
equipment and receiver.
• Connect the equipment into an outlet
which the receiver is connected.
• Consult the dealer or an experienced
radio/TV technician for help.
This equipment complies with FCC
radiation exposure limits set forth
for an uncontrolled environment. End
user must follow the specific operating
instructions for satisfying RF exposure
compliance. This transmitter must not be
co-located or operating in conjunction
with any other antenna or transmitter.
This device complies with Industry Canada
licence-exempt RSS. Operation is subject
to the following two conditions: (1) this
device may not cause interference, and (2)
this device must accept any interference,
including interference that may cause
undesired operation of the device.
Caution: The user is cautioned that changes
or modifications not expressly approved by
the party responsible for compliance could
void the user’s authority to operate the
equipment. This device complies with Part
15 of the FCC Rules. Operation is subject to
the following two conditions: (1) this device
may not cause harmful interference, and (2)
this device must accept any interference
received, including interference that may
cause undesired operation. Note: This
equipment has been tested and found to
comply with the limits for a Class B digital
device, pursuant to part 15 of the FCC
Rules. These limits are designed to provide
reasonable protection against harmful
interference in a residential installation.
This equipment generates, uses and can
LEGALS
This product complies with the
following legal regulations. For further
information go to www.gioteck.com
Complies with
IDA Standards
DB100398
VX-2
LEDCHANNEL
1 1
2 2
3 3
4 4
1+4 5
2+4 6
3+4 7
FUNCTION KEYS
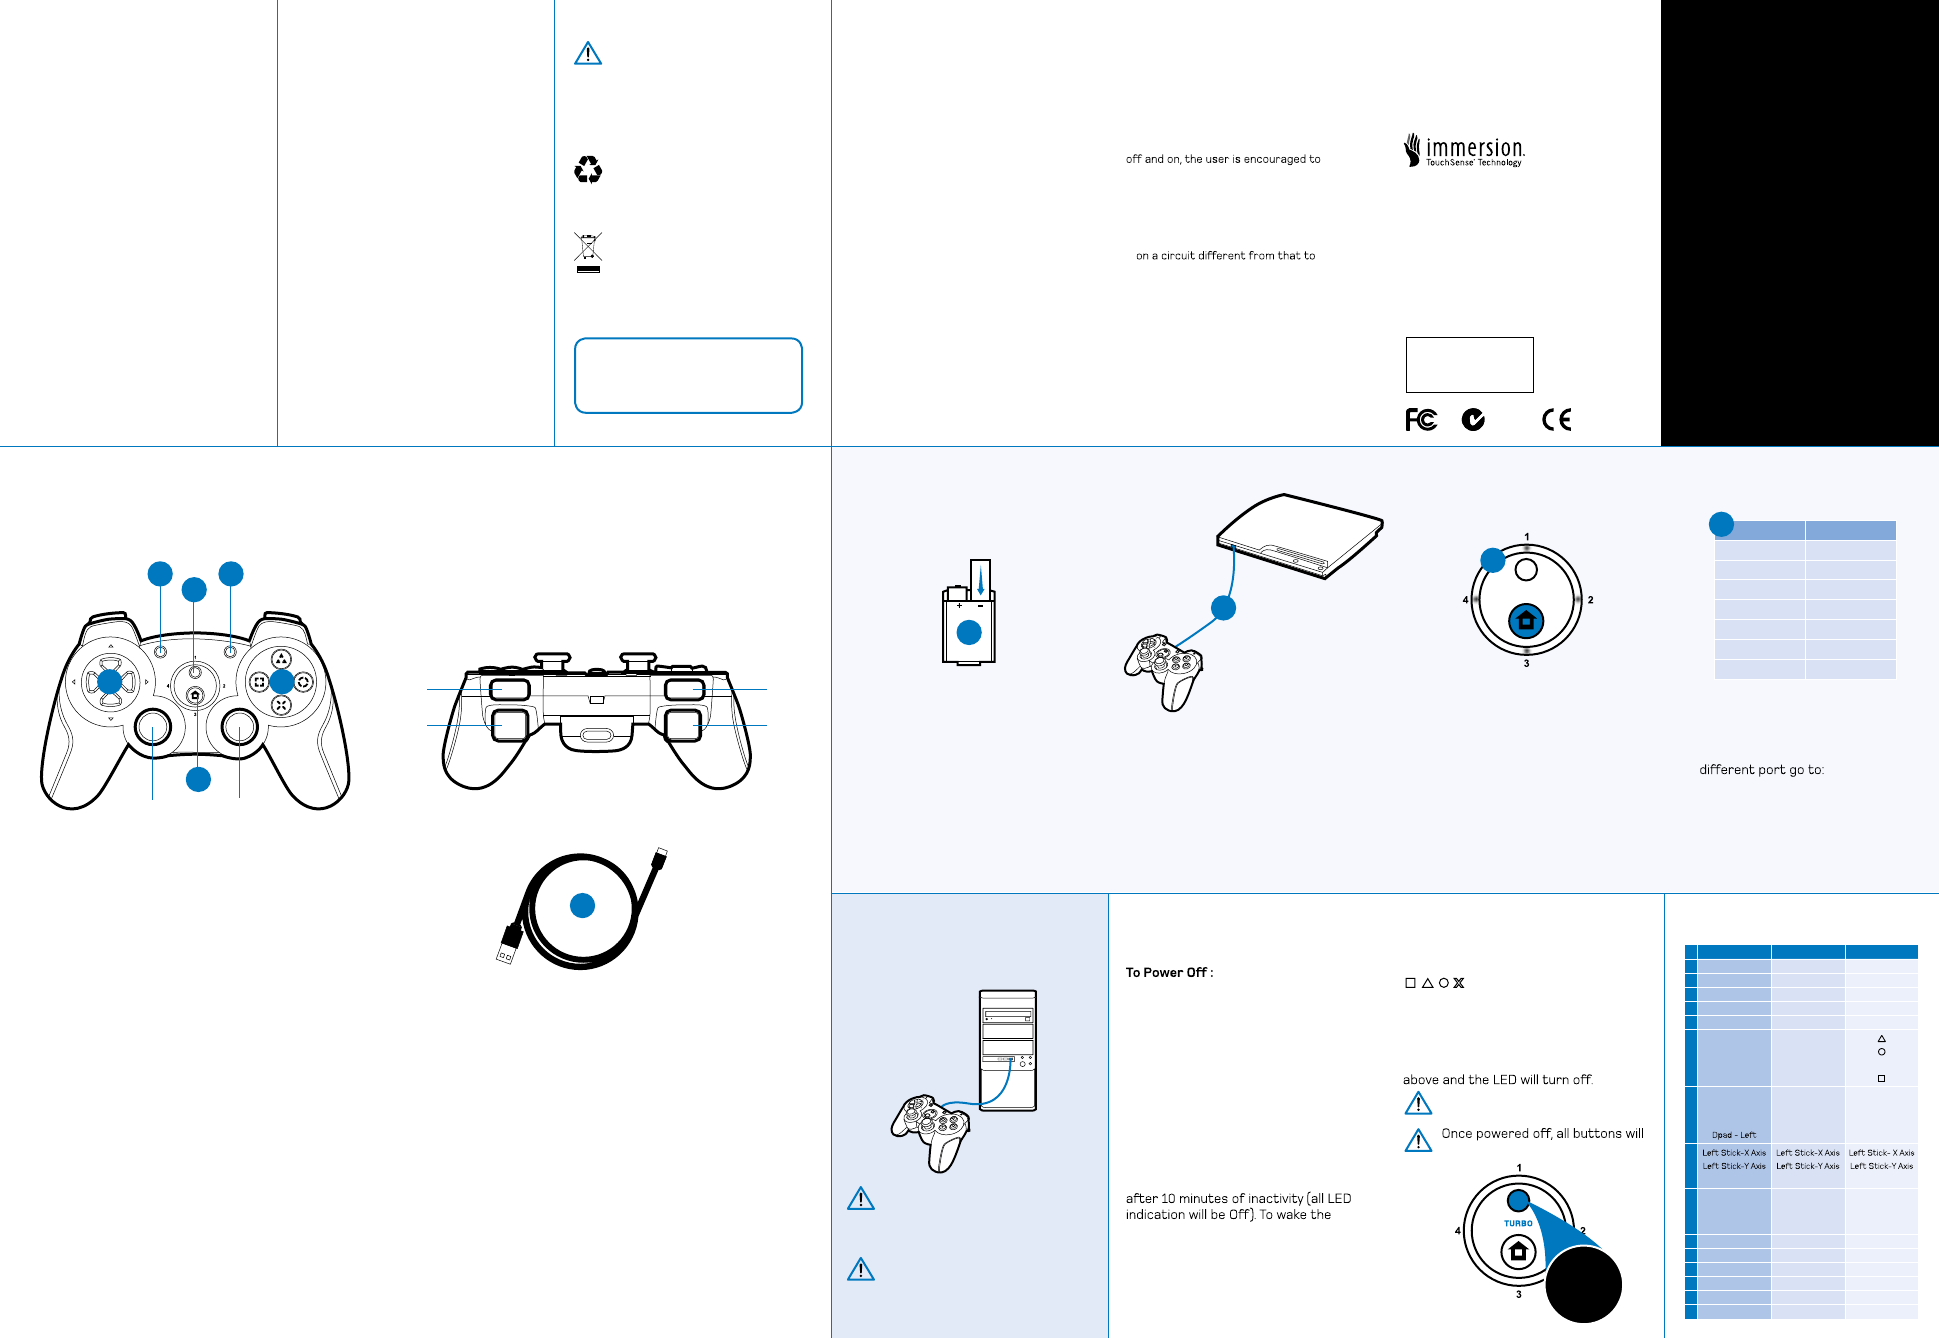
To Power On : Press the Home
button once until the LED illuminates.
Press & hold the
Home button for 10 secs.
START : To start/pause a game.
HOME : To enter the PS3 menu.
SELECT : To select weapons or tools.
D-PAD: For moving direction
UP/DOWN/LEFT/RIGHT.
Low Battery : The chosen channel
port LED will flash continuously and
motor vibration will stop functioning.
Sleep Mode : The controller will
automatically enter sleep mode
controller from sleep mode, press
the Home button.
Operation Time : 35 hours game play.
Turbo Function : Pressing an action
button assigned with turbo will
1. Ensure 2 x AA batteries are loaded
in your controller and that your
PS3 console is turned on.
2. Connect the USB cable between
the controller and the console.
3. Press the Home Button and pairing
will begin automatically. Once paired
the allocated channel port LED(s)
will illuminate. You can now use the
VX-2 in wired mode. To use wirelessly,
unplug the USB cable and the VX-2
will connect to the PS3 wirelessly.
The allocated channel port LED(s)
will then illuminate.
PRESS
& HOLD
KEY MAPPING
To check/change the default
key mapping and functions:
Control Panel > Game Controllers
> Properties > Test
The VX-2 cannot function as
a wireless device with a PC,
it has to maintain connection to
the PC via USB at all times.
PC SET UP
Connect the USB cable between
the controller and the computer.
The driver will install automatically.
#FunctionUSB (PC) Function PS3 Function
1LED 1 OFF Channel 1 LED
2LED 2 OFF Channel 2 LED
3LED 3 OFF Channel 3 LED
4LED 4 OFF Channel 4 LED
5HOME N/A PS Button
6
Fire Button 1
Fire Button 2
Fire Button 3
Fire Button 4
1
2
3
4
7
Dpad - UP
Dpad - Right
Dpad - Down
POV_UP
POV_RIGHT
POV_DOWN
POV_LEFT
UP
RIGHT
DOWN
LEFT
8
L3 11 L3
9
Right Stick-X Axis
Right Stick-Y Axis
R3
Z Axis
Z Rotation
12
Right Stick-X Axis
Right Stick-Y Axis
R3
10 START 10 START
11 SELECT 9 SELECT
12 R1 6 R1
13 R2 8 R2
14 L1 5 L1
15 L2 7 L2
GB
01 | Select Button
02 | Turbo Button
03 | Start Button
04 | Directional Pad
05 | Function Buttons
06 | Home Button
07 | USB Cable
FR
01 | Touche SELECT
02 | Bouton Turbo
03 | Touche START
04 | Touches directionnelles
05 | Touches de fonction
06 | Touche Home
07 | Câble USB
DE
01 | Select-Taste
02 | Turbo-Taste
03 | Start-Taste
04 | Steuerkreuz
05 | Funktionstasten
06 | Home-Taste
07 | USB-kabel
ES
01 | Botón SELECT
02 | Botón Turbo
03 | Botón START
04 | Botones de dirección
05 | Botones de función
06 | Botón Home
07 | Cable de USB
IT
01 | Tasto SELECT
02 | Tasto TURBO
03 | Tasto START
04 | Tasto direzionale
05 | Tasti funzione
06 | Tasto HOME
07 | Cavo USB
PT
01 | Botão SELECT
02 | Botão Turbo
03 | Botão START
04 | Botões Direccionais
05 | Botões de Função
06 | Botão Home
07 | Cabo de USB
CZ
01 | Tlačítko Vybrat
02 | Turbo tlačítko
03 | Tlačítko Start
04 | Směrová podložka
05 | Funkční tlačítka
06 | Tlačítko Domů
07 | Kabel USB
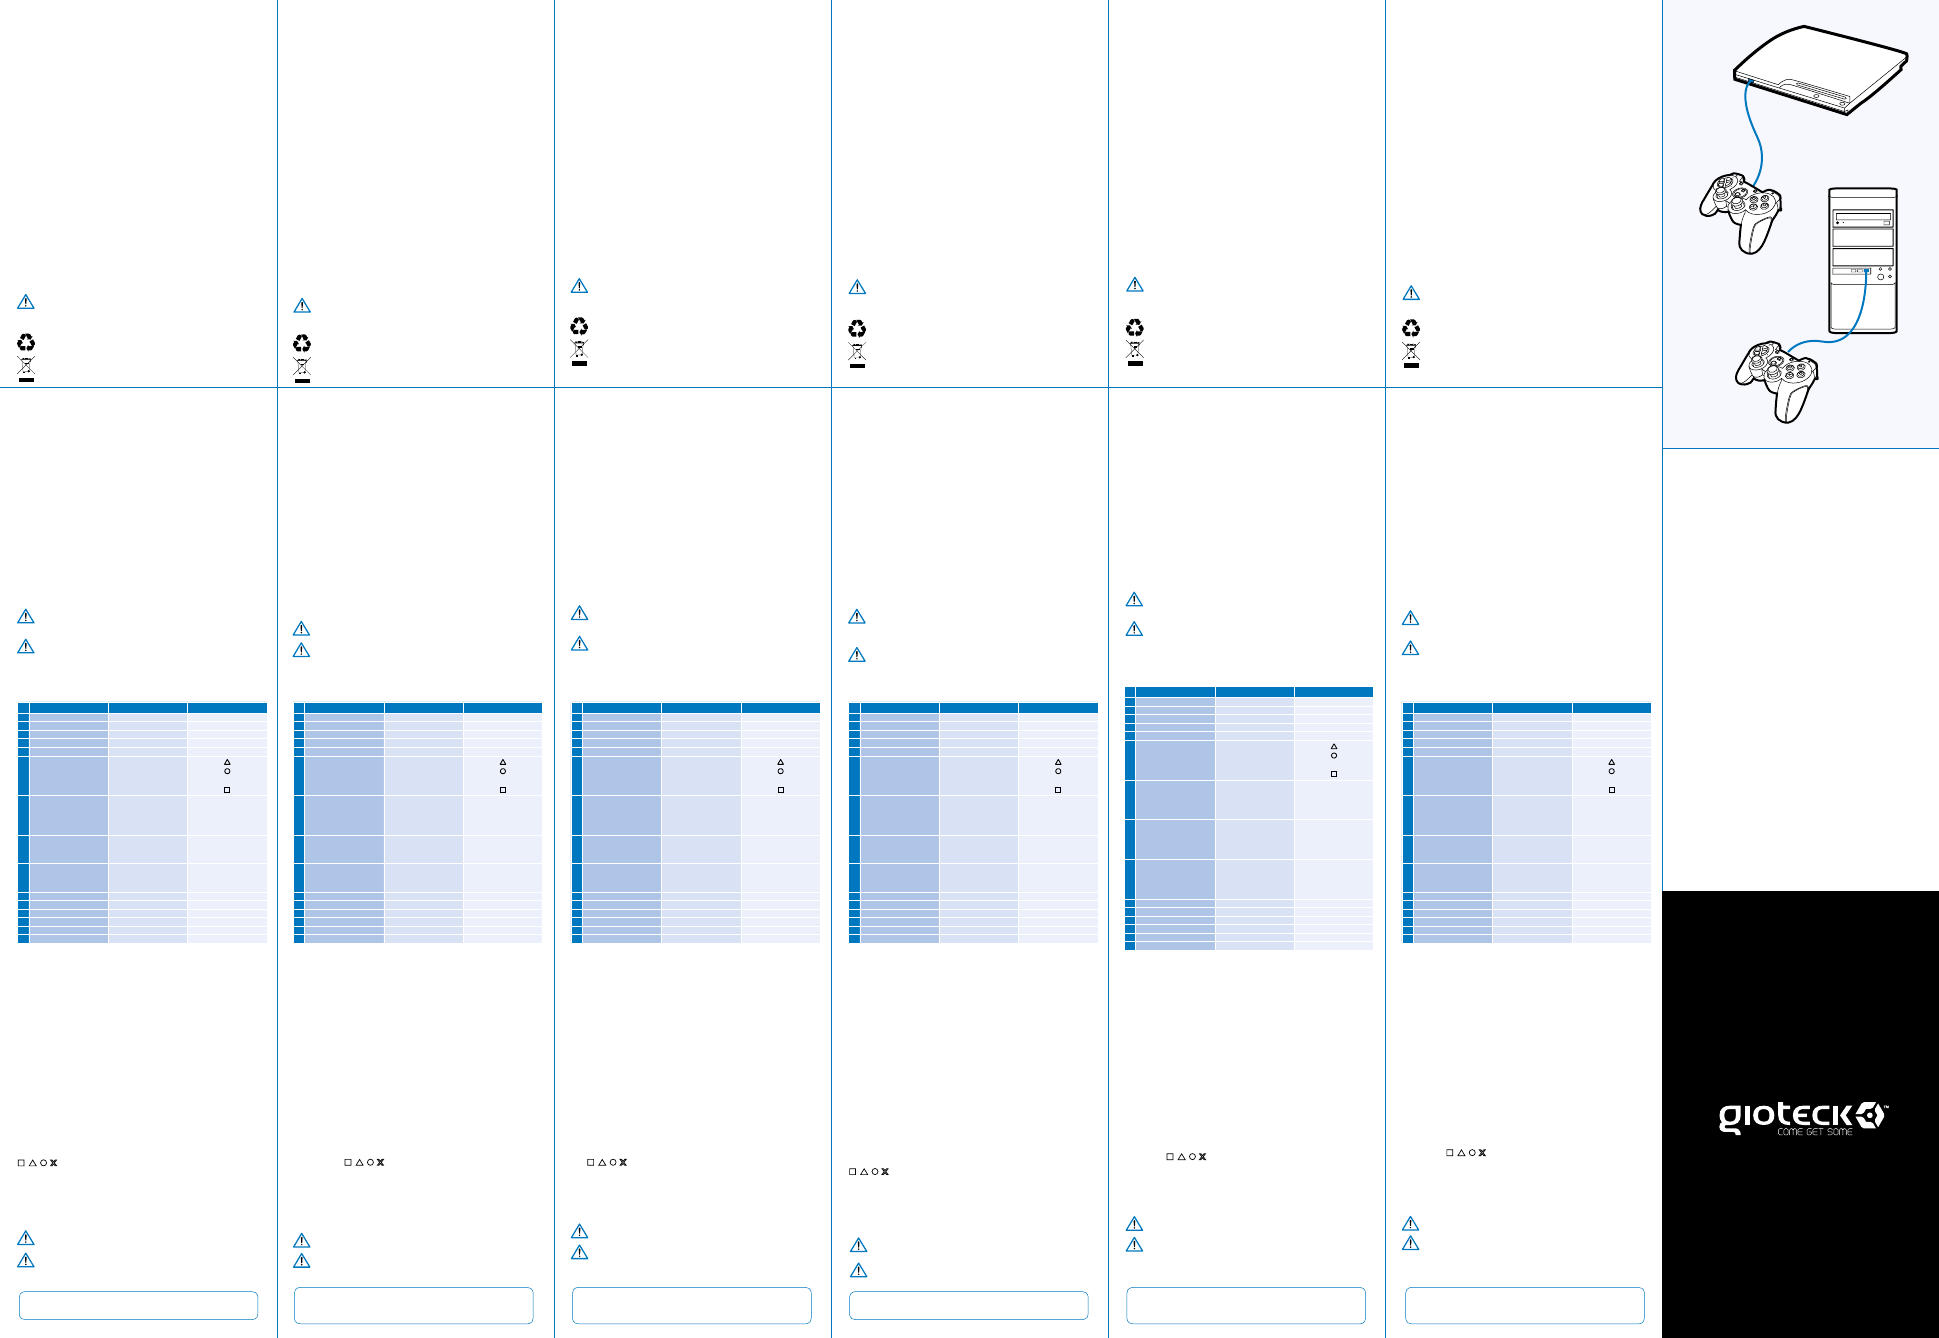
4. To add multiple controllers (up to 7)
or to assign your controller to a
Accessory
settings > Reassign controller.
Once connected 1 or 2 LEDs
around the Home button will light.
Motor vibration is not supported in PC mode.
N13179
Thank you for purchasing the
VX-2 Wireless Controller for PC
and Playstation®3 from Gioteck.
We hope that this product will
go beyond your expectations
for a quality made accessory.
Please read this booklet
thoroughly before using
the product and review the
Playstation®3 and PC manual
for additional details regarding
system operation.
Thank you & enjoy!
WIRELESS CONTROLLER
FOR PLAYSTATION®3 | PC
01
01
02
02
03
03
04 05
04
06
L3
R1L1
R3
R2L2
07
VX-2
WIRELESS
CONTROLLER
PLAYSTATION®3 | PC
FR
REMERCIEMENTS
Merci d’avoir acheté manette VX-2 pour Playstation®3 et PC de
Gioteck. Nous espérons que ce produit vous satisfera au-delà de
vos attentes en tant qu’accessoire de qualité. Veuillez lire ce manuel
minutieusement avant d’utiliser le produit et consulter le manuel
Playstation®3 et PC pour obtenir d’autres détails concernant le
fonctionnement sur Playstation®3 et PC . Merci et bon jeu !
PRÉCAUTIONS
Ce produit a été conçu dans un grand souci de sécurité.
Toutefois, tous les appareils électriques, s’ils ne sont pas utilisés
correctement, sont potentiellement dangereux. Afin de vous assurer
de l’utiliser sans aucun risque, merci de consulter attentivement les
mesures ci-dessous.
• Utilisez uniquement dans les conditions prévues.
Il s’agit d’un produit de précision, manipulez-le avec soin.
• Contient de petites pièces. Ne convient pas à un enfant
de moins de 3 ans.
• Stockez dans un endroit sec et à l’abri de la poussière.
Ne le stockez pas dans un endroit sujet à des températures
extrêmes et évitez de le mettre directement au soleil ou
près de sources de chaleur comme un radiateur.
• Le produit ne doit jamais être humide ou sale.
• Ne nettoyez pas avec du benzène, du diluant pour peinture,
de l’acétone, de l’alcool, ou autre dissolvant.
• Ne démontez pas le produit, au risque d’annuler la garantie
et de recevoir des décharges électriques.
AVERTISSEMENTS
Ce symbole indique d’importantes instructions d’installation,
de fonctionnement ou de maintenance. Suivez toujours
scrupuleusement ces instructions.
ENVIRONNEMENT
Merci d’aider à préserver l’environnement en recyclant le
carton d’emballage intérieur de ce produit.
Cette produit ne doit PAS être jetée avec les ordures
ménagères habituelles. Elle doit être jetée séparément.
Portez-la à un centre de récupération de déchets électriques.
DE
VIELEN DANK
Vielen Dank für Ihren Kauf des VX-2 Controller für Playstation®3
und PC von Gioteck. Wir hoen, dieses Produkt übertrit Ihre
Erwartungen an Qualitätszubehör. Bitte lesen Sie sich dieses
He genau durch, bevor Sie das Produkt verwenden. Weitere
Informationen zur Verwendung des Playstation®3 und PC Systems
finden Sie im Playstation®3 und PC Bedienungshandbuch.
Vielen Dank und viel Spaß!
VORSICHTSMASSNAHMEN
Dieses Produkt wurde unter höchsten Sicherheitsgesichtspunkten
entwickelt. Allerdings birgt jedes elektrische Gerät Gefahren in sich,
wenn es falsch benutzt wird. Bitte lesen Sie folgende Hinweise, um
sicheren Betrieb zu gewährleisten.
• Nicht für andere Zwecke missbrauchen. Dies ist ein
Präzisionsprodukt, das pfleglich behandelt werden sollte.
• Enthält Kleinteile. Nicht geeignet für Kinder unter 3 Jahren.
• Bitte an trockenen und staubfreien Orten aufbewahren. Bitte
nicht an Orten extremer Hitze oder Kälte lagern und direktes
Sonnenlicht oder Hitzequellen, wie z. B. Heizungen, vermeiden.
• Das Produkt darf nicht Feuchtigkeit oder Schmutz ausgesetzt
werden, da dies zu Beschädigungen führen kann.
• Bitte nicht mit Benzin, Farbverdünner, Azeton, Alkohol oder
ähnlichen Lösungsmitteln reinigen.
• Bitte das Produkt nicht auseinandernehmen, dies würde
die Garantie erlischen lassen und kann einen elektrischen
Schlag verursachen.
WARNUNGEN
Dieses Symbol weist auf wichtige Installations-,
Bedienungs- oder Wartungsanweisungen hin. Bitte folgen
Sie immer präzise den Anweisungen.
UMWELT
Bitte schützen Sie die Umwelt und geben Sie die innere
Papierverpackung des Produkts in die Wiederverwertung.
Dieses produkt sollte NICHT in den normalen Hausmüll
gegeben, sondern separat entsorgt werden. Bitte bringen Sie
es zu einer entsprechenden Sammelstelle.
INSTALLATION ET COUPLAGE DE LA PS3
1. Assurez-vous que 2 batteries AA sont installées dans
votre contrôleur et que votre console PS3 est allumée.
2. Branchez le câble USB entre le contrôleur et la console.
3. Appuyez sur le bouton Home pour démarrer
automatiquement le couplage. Une fois le couplage
eectué, la DEL du port attribué s’allumera.
Vous pouvez maintenant utiliser le VX-2 en mode de
connexion filaire. Pour une utilisation sans fil,
déconnectez le câble USB et le VX-2 se connectera sans
fil à la PS3. La DEL du port attribué s’allumera ensuite.
4. Pour ajouter plusieurs contrôleurs ( jusqu’à 7) ou
attribuer votre contrôleur à un port diérent, allez
dans : Paramètres accessoires > Réaecter un contrôleur.
Une fois le branchement eectué, un ou deux voyants
lumineux situés autour du bouton Home s’allument.
CONFIGURACIÓN Y EMPAREJAMIENTO DE LA PS3
1. Asegúrese de cargar dos pilas AA en su controladora
y de que su consola PS3 esté encendida.
2. Conecte el cable USB entre la controladora y la consola.
3. Pulse el botón Inicio y el emparejamiento comenzará
automáticamente. Una vez emparejado, se
iluminará(n) el (los) LED de puerto del canal asignado.
Ya puede utilizar el VX-2 en modo con cable. Para el
uso inalámbrico, desenchufe el cable USB y el VX-2 se
conectará con la PS3 inalámbricamente. A continuación,
se iluminará(n) el (los) LED de puerto del canal asignado.
4. Para añadir varias controladoras (hasta siete) o asignar
su controladora a otro puerto, vaya a: Configuración de
accesorios > Reasignar controladora. Una vez conectado,
se encenderán uno o dos LED alrededor del botón Inicio.
CONFIGURAZIONE E ACCOPPIAMENTO PS3
1. Assicurarsi di caricare 2 batterie AA nel
controller e che la console PS3 sia accesa.
2. Collegare il cavo USB tra il controller e la console.
3. Premere il pulsante Home per avviare automaticamente
l’accoppiamento. Una volta completato l’accoppiamento,
si accende/accendono il/i LED della porta scelta.
È ora possibile utilizzare il VX-2 in modalità di
connessione cablata. Per utilizzarlo in modalità wireless,
è suciente scollegare il cavo USB e il VX-2 si collegherà
in wireless alla PS3. Una volta completato l’accoppiamento,
si accende/accendono il/i LED della porta scelta.
4. Per aggiungere controller multipli (fino a 7) o
per assegnare il proprio controller ad una porta
diversa: Impostazioni accessori> Riassegnazione
del controller. Dopo avere eseguito il collegamento,
1 o 2 LED vicino al pulsante home lampeggeranno.
NASTAVENÍ KONZOLY PS3 A PÁROVÁNÍ
1. Ujistěte se, že jsou do ovladače vloženy 2
baterie typu AA a že je konzola PS3 zapnuta.
2. Zapojte kabel USB spojující ovladač a konzoli.
3. Stiskněte tlačítko Home a párování se zahájí automaticky.
Až bude párování dokončeno, LED dioda/diody přiřazeného
portu kanálu se rozsvítí. Můžete nyní používat
VX-2 v režimu propojení kabelem. Chcete-li
používat zařízení bezdrátově, odpojte kabel USB a
VX-2 se připojí ke konzoli PS3 bezdrážově. LED dioda/
diody přiřazeného portu kanálu se poté rozsvítí.
4. Chcete-li přidat více ovladačů (až 7) nebo přiřadit
ovladači jiný port, přejděte na: Accessory Settings
> Reassign Controller (Nastavení příslušenství >
Změna přiřazení ovladače). Po připojení se rozsvítí
1 nebo 2 LED diody kolem tlačítka Home.
CONFIGURAÇÃO E EMPARELHAMENTO DA PS3
1. Certifique-se de que estão colocadas 2 pilhas AA
no comando e de que a consola PS3 está ligada.
2. Ligue o cabo USB entre o comando e a consola.
3. Prima o botão Início para que o emparelhamento inicie
automaticamente. Após estar emparelhado, o(s) LED(s)
da porta do canal designado acende(m)-se. Pode agora
utilizar o VX-2 no modo com fios. Para utilizar sem fios,
desligue o cabo USB e o VX-2 conecta-se à PS3 sem fios.
O(s) LED(s) da porta do canal designado acende(m)-se.
4. Para adicionar vários comandos (até 7) ou designar o
seu comando a uma porta diferente, aceda a: Definições
dos acessórios > Reatribuir comando. Após estar ligado,
1 ou 2 LEDs em torno do botão de Início irão acender-se.
PS3 - EINRICHTUNG UND FUNKANBINDUNG
1. Stellen Sie sicher, dass Ihr Controller mit 2 x AA-Batterien
versehen und Ihre PS3-Konsole eingeschaltet ist.
2. Schließen Sie das USB-Kabel an den
Controller und die Konsole an.
3. Drücken Sie die Home-Taste. Die Verbindung startet
automatisch. Sobald die Verbindung erfolgt ist, leuchtet
(leuchten) die LED(s) am zugewiesenen Kanalanschluss auf.
Die VX-2 können Sie nun im drahtgebundenen
Modus benutzen. Zur kabellosen Nutzung entfernen
Sie das USB-Kabel, und die VX-2 verbindet sich mit
der PS3 über Funk. Am zugewiesenen Kanalanschluss
leuchtet (leuchten) nun die LED(s) auf.
4. Um mehrere Controller (bis zu 7) hinzuzufügen oder um
Ihrem Controller einen anderen Port zuzuweisen, gehen
Sie auf: Zubehöreinstellungen > Controller neu zuweisen.
Nach dem Anschluss leuchten 1 oder 2 LEDs auf.
INSTALLATION DEL LA PC
1. Branchez le câble USB entre le contrôleur et
l’ordinateur. Le pilote s’installera automatiquement.
Le VX-2 ne peut pas fonctionner comme appareil
sans fil avec un PC car il doit maintenir en
permanence la connexion au PC via le câble USB.
Pour vérifier/modifier la programmation des touches
et les fonctions par défaut : Panneau de configuration
> Contrôleurs de jeu > Propriétés > Tester
CONFIGURACIÓN DEL PC
1. Conecte el cable USB entre la controladora y el
ordenador. El controlador se instalará automáticamente.
El VX-2 no puede funcionar como un dispositivo
inalámbrico con un PC, sino que tiene que mantener la
conexión con el PC a través del USB en todo momento.
Para comprobar/cambiar las funciones y la asignación
de teclas predeterminadas: Panel de control >
Controladoras de juego > Propiedades > Prueba
CONFIGURAZIONE DEL PC
1. Collegare il cavo USB tra il controller e il computer.
Il driver si installerà automaticamente.
Il VX-2 non può funzionare come un dispositivo
wireless con un PC, deve necessariamente
mantenere la connessione al PC tramite USB.
Per controllare/modificare la mappatura dei
tasti di default e le funzioni: Pannello di controllo
> Periferiche di gioco> Proprietà> Test
NASTAVENÍ POČÍTAČE
1. Zapojte kabel USB spojující ovladač a počítač.
Ovladač se poté nainstaluje automaticky.
Zařízení VX-2 nemůže fungovat jako bezdrátové
zařízení s počítačem, musí být vždy zachováno
propojení počítače pomocí kabelu USB.
Chcete-li zkontrolovat/změnit předvolené namapování tlačítek
a funkce: Ovládací panely > Herní zařízení > Vlastnosti > Test
CONFIGURAÇÃO DO PC
1. Ligue o cabo USB entre o comando e o computador.
O controlador é instalado automaticamente.
O VX-2 não pode funcionar como um dispositivo
sem fios com um PC, necessitando manter uma
ligação permanente com o PC por USB.
Para verificar/alterar o mapeamento e funções
predefinidos dos botões: Painel de controlo >
Controladores de jogo > Propriedades > Testar
PC EINRICHTUNG
1. Schließen Sie das USB-Kabel an den Controller und den
Computer an. Der Treiber wird automatisch installiert.
Die VX-2 kann mit einem PC nicht über Funk verbunden werden,
so dass der Anschluss per USB-Kabel beizubehalten ist.
Zur Überprüfung/Änderung der Belegung und
der Funktionen der Standardtasten: Bedienfeld
> Game Controllers > Eigenschaen > Test
TOUCHES DE FONCTION
Pour mettre en marche : Appuyez sur le bouton Home jusqu’à
ce que la DEL s’allume.
Pour arrêter : Appuyez en maintenant enfoncé le bouton
Home pendant 10 secondes.
Start : Pour démarrer/mettre en pause un jeu.
Home : Pour entrer dans le menu de la PS3.
Select : Pour sélectionner les armes ou les outils.
D-Pad : Pour se diriger Haut/Bas/Gauche/Droite.
Batterie faible : La DEL du port choisi clignotera en continu et
la vibration du moteur arrêtera de fonctionner.
Mode Veille : Le contrôleur entre automatiquement en mode
veille après 10 minutes d’inactivité (toutes les DEL seront
éteintes). Pour sortir le contrôleur du mode veille, appuyez
sur le bouton Home.
Autonomie : 35 heures de jeu.
Fonction Turbo : Une pression sur un bouton d’action auquel
la fonction Turbo est aectée simule une succession rapide
de pressions sur le bouton, par exemple pour intensifier le tir.
Les boutons concernés par la fonction Turbo sont
, , , , L1, L2, R1, R2
Pour activer la fonction turbo : Maintenez le bouton Turbo
enfoncé pendant que vous appuyez sur le bouton d’action
que vous souhaitez intensifier. La DEL clignote lorsqu’une
action est activée.
Pour désactiver la fonction Turbo : Répétez les étapes
ci-dessus et la DEL Turbo s’éteindra.
La fonction Turbo peut être aectée à
plusieurs boutons en même temps.
Une fois la fonction désactivée, tous les boutons
reviennent au mode par défaut sans Turbo.
TECLAS DE FUNCIONES
Para encender: Pulse el botón Inicio una vez hasta que se
encienda el LED.
Para apagar: Mantenga pulsado el botón Inicio durante diez
segundos.
Iniciar: Para iniciar/pausar un juego.
Inicio: Para acceder al menú de la PS3.
Seleccionar: Para seleccionar armas o herramientas.
D-Pad: Para moverse Arriba/Abajo/a la izquierda/a la derecha.
Batería baja: El LED de puerto del canal elegido parpadeará
continuamente y la vibración dejará de funcionar.
Modo de suspensión: La controladora entrará
automáticamente en modo de suspensión tras diez
minutos de inactividad (todos los indicadores LED estarán
apagados). Para sacar la controladora del modo de
suspensión, pulse el botón Inicio.
Tiempo de funcionamiento: treinta y cinco horas de juego.
Función turbo: Al pulsar un botón de acción asignado con el
turbo, simulará una pulsación rápida del botón; p. ej. “mayor
capacidad de disparo”. Los botones compatibles con el turbo
son , , , , L1, L2, R1, R2
Para activar el turbo: Mantenga pulsado el turbo y,
a continuación, pulse el botón de acción que desee asignar
como turbo. Al asignar una acción parpadeará el LED.
Para desactivar el turbo: Repita los pasos anteriores y el
LED se apagará.
La función turbo se puede asignar a más
de un botón al mismo tiempo.
Una vez desactivada, todos los botones volverán
al modo predeterminado sin turbo.
TASTI DELLE FUNZIONI
Accensione: premere il tasto Home fino a quando non si
accendono i LED.
Spegnimento: tenere premuto il tasto Home per 10 secondi.
Avvio: Per avviare/mettere in pausa un gioco.
Home : Per accedere al menu della PS3.
Seleziona: Per selezionare armi o strumenti.
D-Pad: Per spostare la direzione in alto/in basso
/a sinistra/a destra.
Basso livello di carica: il LED della porta scelta lampeggerà
continuamente e la funzione vibrazioni del motore smetterà
di funzionare.
Modalità Sleep: Il controller entrerà automaticamente
in Modalità Sleep dopo 10 minuti di inutilizzo (tutti i LED
si spegneranno). Premere il pulsante Home per riattivare
il controller.
Autonomia di funzionamento: 35 ore di gioco.
Funzione Turbo: premendo uno dei pulsanti di controllo
assegnati alla funzione turbo, è possibile simulare la pressione
rapida ripetuta del pulsante selezionato, come quando si
desidera ottenere un “incremento della potenza di fuoco”, per
esempio. I pulsanti che supportano tale funzione sono:
, , , , L1, L2, R1, R2
Per abilitare la funzione turbo: tenere premuto il tasto Turbo
e quindi premere il pulsante di controllo al quale si desidera
assegnare la funzione turbo. Il LED lampeggia quando viene
assegnata un’azione.
Per disabilitare la funzione turbo: Ripetere i passi riportati in
sezione sopra e spegnere il relativo LED.
La funzione Turbo può essere assegnata a
più pulsanti contemporaneamente.
Una volta spento il controller, tutti i pulsanti
precedentemente configurati con la funzione Turbo
verranno reimpostati alla modalità di default.
FUNKČNÍ TLAČÍTKA
Zapnutí: Stiskněte jednou tlačítko Home, dokud se
nerozsvítí LED dioda.
Vypnutí: Stiskněte a podržte tlačítko Home po
dobu 10 sekund.
Start: Spuštění/pozastavení hry.
Home : Vstup do nabídky PS3.
Select: Výběr zbraní či nástrojů.
D-pad: Pro směr pohybu Nahoru/Dolů/Doleva/Doprava.
Slabá baterie: LED dioda vybraného portu kanálu se trvale
rozsvítí a funkce vibrace motoru přestane fungovat.
Režim spánku: Ovladač se automaticky přepne do
režimu spánku po 10 minutách neaktivity (všechny LED diody
zhasnou). Chcete-l probudit ovladač z režimu
spánku, stiskněte tlačítko Home.
Provozní čas: 35 hodin hry
Funkce turbo: Stisknutí akčního tlačítka přiřazeného k turbu
bude simulovat tlačítko stisknuté rychle za sebou, např. “boost
firepower” (zesílení palebné síly). Tlačítka podporovaná funkcí
turbo jsou , , , , L1, L2, R1, R2
Aktivace turba: Stiskněte a podržte Turbo a potom stiskněte
akční tlačítko, kterému chcete zvýšit výkon. LED dioda se
rozbliká po přiřazení akce.
Deaktivace turba: Opakujte kroky popsané nahoře a LED
dioda zhasne.
Současně může být funkce turbo přiřazena
více než jednomu tlačítku.
Jakmile je provedeno vypnutí, všechna tlačítka
se vrátí do výchozího režimu bez turba.
BOTÕES DE FUNÇÕES
Para ligar: Prima o botão de Início uma vez até o LED acender.
Para desligar: Prima e mantenha premido o botão de Início
durante 10 segundos.
Start: Para iniciar/colocar o jogo em pausa.
Início: Para aceder ao menu da PS3.
Select: Para selecionar armas ou ferramentas.
D-Pad: Para mover para Cima/Baixo/Esquerda/Direita.
Bateria fraca: O LED da porta do canal selecionado pisca
continuamente e a vibração do motor para de funcionar.
Modo de repouso: O comando entra automaticamente no
modo de repouso após 10 minutos de inatividade (todas as
indicações LED desligam-se). Para ativar o comando do
modo de repouso, prima o botão de Início.
Tempo de funcionamento: 35 horas de jogo.
Função de turbo: Ao premir um botão de ação atribuído ao
turbo irá simular o botão a ser premido rapidamente, por ex.
“aumentar a potência de fogo”. Os botões suportados pelo
Turbo são , , , , L1, L2, R1, R2
Para ativar o turbo: Prima e mantenha premido Turbo e de
seguida prima o botão de ação que deseja aplicar o turbo.
O LED pisca quando é atribuída uma ação.
Para desativar o turbo: Repita os passos anteriores e
o LED apagar-se-á.
Pode ser atribuído mais do que um botão
à função de turbo em simultâneo.
Depois de desligados, todos os botões
voltam à predefinição sem Turbo.
FUNKTIONSTASTEN
Einschalten: Drücken Sie die Home-Taste,
bis die LED aufleuchtet.
Ausschalten: Halten Sie die Home-Taste 10
Sekunden lang gedrückt.
Start : Um ein Spiel zu starten/anzuhalten.
Home : Um in das PS3-Menü zu gelangen
Auswählen: Um Waen oder Werkzeuge auszuwählen.
D-Pad : Zur Richtungsbewegung Auf/Ab/Links/Rechts.
Leerer Akku: Die LED des ausgewählten Kanalanschlusses
leuchtet dauerha, und die Motorvibration hört auf.
Schlafmodus: Wenn der Controller 10 Minuten lang
inaktiv ist, geht er automatisch in den Schlafmodus über
(alle LED-Anzeigen gehen aus). Um den Controller aus dem
Schlafmodus zu holen, drücken Sie die Home-Taste.
Betriebsdauer: 35 Stunden Spielzeit.
Turbofunktion: Wenn eine Aktionstaste gedrückt wird, die
mit der Turbofunktion belegt ist, wird eine beschleunigte
Tastenbetätigung simuliert, z. B. wie beim Verstärken der
Feuerkra. Die Tasten, die von der Turbofunktion unterstützt
werden, sind , , , , L1, L2, R1, R2
Turbo aktivieren: Halten Sie die Turbo-Taste und
anschließend die Aktionstaste gedrückt, die mit der
Turbofunktion versehen werden soll. Wenn eine Aktion
zugewiesen ist, leuchtet die LED auf.
Turbo deaktivieren: Wiederholen Sie die obigen Schritte.
Die LED geht dann aus.
Mit der Turbofunktion können auch mehrere
Tasten gleichzeitig versehen werden.
Nach dem Ausschalten werden alle Tasten wieder
auf die Standardfunktion ohne Turbo zurückgestellt.
PROGRAMMATION DES TOUCHES
La vibration du moteur n’est pas supportée en mode PC.
ASIGNACIÓN DE TECLAS
La vibración del motor no es compatible con el modo PC.
MAPPATURA DEI TASTI
La funzione vibrazione del motore non è supportata in
modalità PC.
NAMAPOVÁNÍ TLAČÍTEK
Vibrace motoru není v režimu PC podporována.
MAPEAMENTO DE BOTÕES
A vibração do motor não é suportada no modo PC.
TASTENBELEGUNG
Die Motorvibration wird im PC-Modus nicht unterstützt.
INFORMATIONS LÉGALES
Par ce document, Gioteck déclare que cette produit est conforme
aux critères fondamentaux et autres dispositions de la Directive
2004/108/EC et R&TTe 1999/5/EC. Pour consulter la version
complète de la Déclaration de Conformité, veuillez vous rendre en
ligne sur doc.gioteck.com
Le présent appareil est conforme aux CNR d’Industrie Canada
applicables aux appareils radio exempts de licence. L’exploitation est
autorisée aux deux conditions suivantes : (1) l’appareil ne doit pas
produire de brouillage, et (2) l’utilisateur de l’appareil doit accepter
tout brouillage radioélectrique subi, même si le brouillage est
susceptible d’en compromettre le fonctionnement.
PRÁVNÍ USTANOVENÍ
Společnost Gioteck tímto prohlašuje, že tento produkt splňuje
základní požadavky a další ustanovení Směrnice 2004/108/EC a
R&TTe 1999/5/EC. Plná verze Prohlášení o shodě je k dispozici
on-line, viz doc.gioteck.com
INFORMAÇÃO LEGAL
A Gioteck declara que este produto é compatíveis com os
requisitos essenciais e outras provisões da Directiva 2004/108/EC
e R&TTe 1999/5/EC. Para ver a versão completa da Declaração de
Conformidade, visite doc.gioteck.com online.
NOTE LEGALI
Gioteck dichiara che questo prodotto soddisfa i requisiti essenziali
e altre clausole della direttiva 2004/108/EC e R&TTe 1999/5/EC.
Per consultare la versione completa della dichiarazione di conformità,
si prega di contattare il supporto tecnico online su doc.gioteck.com
AVISOS LEGALES
Gioteck declara que este producto cumple los requisitos esenciales y
demás disposiciones de la Directiva 2004/108/EC y R&TTe 1999/5/EC.
Para ver la versión completa de la Declaración de conformidad, visita
en Internet la página doc.gioteck.com
RECHTLICHES
Gioteck erklärt hiermit, dass dieses produkt die Grundanforderungen
sowie weitere Vorschrien der Richtlinie 2004/108/EC
und R&TTe 1999/5/EC erfüllt. Die vollständige Version der
Konformitätserklärung finden Sie im Internet unter doc.gioteck.com
Tipps zur Fehlerbehebung und wie dieses
Handbuch online angezeigt wird:
www.gioteck.com
Conselhos para a resolução de problemas
e consultar este manual online:
www.gioteck.com
Astuces de dépannage et achage de ce manuel
en ligne : www.gioteck.com Risoluzione dei problemi e visualizzazione
del manuale online: www.gioteck.com
Sugerencias para solucionar problemas
y ver este manual en Internet:
www.gioteck.com
Tipy k odstraňování problémů a online
zobrazení této příručky: www.gioteck.com
PT
OBRIGADO
Obrigado por ter comprado o controlador VX-2 para a Playstation®3
e PC da Gioteck. Esperamos que este produto exceda as suas
expectativas em relação a acessórios de qualidade. Leia este
documento cuidadosamente antes de usar o produto e releia o
manual da Playstation®3 e PC para informações adicionais sobre o
funcionamento da Playstation®3 e PC. Obrigado e divirta-se!
PRECAUÇÕES
Este produto foi criado com a maior atenção para a segurança.
No entanto, qualquer dispositivo eléctrico, se usado incorrectamente,
tem potencial para ser prejudicial. Para ajudar a garantir uma
utilização segura, preste atenção às seguintes instruções.
• Use apenas para o efeito pretendido. Isto é um produto de
precisão, manuseie-o com cuidado.
• Contém peças pequenas. Não adequado a crianças com idade
inferior a 3 anos.
• Guarde num local seco e sem pó. Não guarde em locais com
temperaturas extremas, e evite a luz directa do sol ou fontes
de calor, como aquecedores.
• Não molhe ou suje o produto; caso contrário, poderá danificá-lo.
• Não limpe com benzeno, diluente, acetona, álcool ou outros
solventes semelhantes.
• Não desmonte o produto; se o fizer poderá anular a garantia
e causarchoques eléctricos.
AVISOS
Este símbolo indica instruções de instalação, operação
ou de manutenção importantes. Siga sempre estas
instruções cuidadosamente.
AMBIENTE
Ajuste a proteger o ambiente reciclando a embalagem
interior de cartão deste produto.
Este produto NÃO devem ser misturados com o lixo
doméstico. Devem ser deitados fora em separado. Leve-os a
um ponto de recolha de resíduos eléctricos.
IT
GRAZIE
Grazie per aver acquistato controller VX-2 per Playstation®3
e PC di Gioteck. Ci auguriamo che questo prodotto superi le tue
aspettative in termini di qualità. Prima di utilizzare il prodotto,
leggi attentamente questo libretto di istruzioni e consulta il
manuale di Playstation®3 e PC per ulteriori informazioni sul
funzionamento di Playstation®3 e PC. Grazie e buon divertimento!
PRECAUZIONI
Questo prodotto è stato concepito per garantire la massima
sicurezza. Tuttavia, tutti i dispositivi elettronici, se usati in modo
improprio, possonoarrecare danni. Per evitare di correre rischi,
si consiglia di seguire i consigli sotto riportati.
• Utilizzare soltanto nelle modalità previste. Si tratta di un prodotto
di precisione, da maneggiare con cura.
• Contiene parti di piccole dimensioni. Non adatto a bambini di
età inferiore a 3 anni.
• Conservare in un luogo secco e privo di polvere. Non riporre in
zone eccessivamente calde o fredde ed evitare l’esposizione alla
luce solare diretta o a fonti di calore (come il riscaldamento).
• Non bagnare o sporcare il prodotto, poiché potrebbe subire danni.
• Non pulire con benzene, acquaragia, acetone, alcool o altri
solventi simili.
• Non smontare il prodotto. Così facendo si renderà nulla la
garanzia e si corre il rischio di choc elettrico.
AVVERTENZE
Questo simbolo indica importanti istruzioni di installazione,
funzionamento o manutenzione. Seguire sempre alla lettera
queste istruzioni.
AMBIENTE
Rispettare l’ambiente riciclando la parte in cartone
della confezione del prodotto.
Questo prodotto NON DEVE essere smaltito come
un comune rifiuto domestico. Dovrebbe essere smaltito
separatamente. Si prega di portarlo presso un punto di
raccolta per dispositivi elettrici.
CZ
PODĚKOVÁNÍ
Děkujeme, že jste si nákup VX-2 Controller pro Playstation®3 a PC
od společnosti Gioteck. Doufáme, že díky kvalitnímu příslušenství
splní tento produkt vaše očekávání. Tento návod si před použitím
pozorně přečtěte, doplňující informace týkající se obsluhy
Playstation®3 a PC naleznete v návodu k Playstation®3 a PC.
Děkujeme vám a bavte se!
BEZPEČNOSTNÍ OPATŘENÍ
Tento výrobek byl navržen s těmi nejvyššími ohledy na bezpečnost.
:Nicméně, stejně jako ostatní elektronická zařízení, může v případě
nesprávného používání způsobit škodu. Abyste pomohli zajistit provoz
bez rizika, věnujte pozornost následujícím pokynům.
• Používejte pouze tak, jak bylo zamýšleno. Toto je precizní výrobek,
zacházejte s ním s péčí.
• Obsahuje malé části. Výrobek není vhodný pro děti mladší 3 let.
• Skladujte v suchých a bezprašných prostorách. Neskladujte v
místech, kde je extrémní teplo nebo chladno, neskladujte na
přímém slunečním světle nebo v blízkosti tepelných zdrojů, např.
radiátorů.
• Nedovolte, aby produkt zmoknul nebo se zašpinil; mohlo by tak
dojít k poškození.
• Nečistěte benzenem, ředidlem na barvy, acetonem, alkoholem nebo
jinými podobnými rozpouštědly.
• Výrobek nerozebírejte; předejdete tak úrazu elektrickým
proudem a zneplatnění vaší záruky.
VAROVÁNÍ
Tento symbol označuje důležité pokyny k instalaci, provozu nebo
údržbě. Vždy postupujte přesně podle těchto pokynů.
ŽIVOTNÍ PROSTŘEDÍ
Prosíme, abyste recyklací vnitřního obalu tohoto produktu
pomohlichránit životní prostředí.
Tento produkt NESMÍ být vyhozen do běžného domácího
odpadu. Musí být zlikvidován odděleně. Odneste ho prosím
na sběrné místo pro elektrický odpad.
ES
GRACIAS
Gracias por comprar el controladora VX-2 para Playstation®3 y PC
de Gioteck. Esperamos que este producto supere tus expectativas
como accesorio de calidad. Por favor, lee atentamente este libro de
instrucciones antes de utilizar el producto y revisa el manual de tu
Playstation®3 y PC para más detalles sobre el funcionamiento de
Playstation®3 y PC. ¡Gracias y que lo disfrutes!
PRECAUCIONES
Este producto ha sido diseñado con la máxima atención
a la seguridad.No obstante, cualquier dispositivo eléctrico,
si se utiliza de formainapropiada, puede causar daños.
Para asegurar un funcionamiento libre de riesgos,
presta atención a las pautas siguientes.
• Usar solo para los usos previstos. Este es un producto
de precisión; utilizar con cuidado.
• Contiene piezas pequeñas. No apto para niños menores de 3 años.
• Guardar en una zona seca y libre de polvo. No almacenar en
lugares de calor o frío extremos, y evitar la luz solar directa
o fuentes de calor como las estufas.
• No ensucies ni mojes el producto, podría resultar dañado.
• No limpiar con benceno, disolvente de pintura, acetona,
alcohol u otros disolventes.
• No desmontes el producto; podrías anular la garantía y provocar
descargas eléctricas.
ADVERTENCIAS
Este símbolo indica instrucciones importantes de instalación,
funcionamiento o mantenimiento. Sigue siempre con atención
estas instrucciones.
MEDIO AMBIENTE
Por favor, ayuda a conservar el medio ambiente reciclando el
envase de cartón interior de este producto.
Este producto NO se debe desechar junto a la basura doméstica
normal. Debe desecharse por separado. Llévalo a un punto de
recogida de desechos eléctricos.
#FONCTION FONCTION PC FONCTION PS3
1DEL 1 ARRÊT CANAL 1 DEL
2DEL 2 ARRÊT CANAL 2 DEL
3DEL 3 ARRÊT CANAL 3 DEL
4DEL 4 ARRÊT CANAL 4 DEL
5HOME NA BOUTON PS
6
BOUTON FEU 1
BOUTON FEU 2
BOUTON FEU 3
BOUTON FEU 4
1
2
3
4
✕
7
D-PAD - HAUT
D-PAD - DROITE
D-PAD - BAS
D-PAD - GAUCHE
POV_HAUT
POV_DROITE
POV_BAS
POV_GAUCHE
HAUT
DROITE
BAS
GAUCHE
8
STICK GAUCHE - AXE X
STICK GAUCHE - AXE Y
L3
STICK GAUCHE - AXE X
STICK GAUCHE - AXE Y
11
STICK GAUCHE - AXE X
STICK GAUCHE - AXE Y
L3
9
STICK DROIT - AXE X
STICK DROIT - AXE Y
R3
AXE Z
ROTATION Z
12
STICK DROIT - AXE X
STICK DROIT - AXE Y
R3
10 START 10 START
11 SELECT 9SELECT
12 R1 6R1
13 R2 8R2
14 L1 5L1
VL2 7L2
#FUNCIÓN FUNCIÓN DEL PC FUNCIÓN DE LA PS3
1LED 1 APAGADO LED DE CANAL 1
2LED 2 APAGADO LED DE CANAL 2
3LED 3 APAGADO LED DE CANAL 3
4LED 4 APAGADO LED DE CANAL 4
5INICIO N/A BOTÓN DE LA PS
6
BOTÓN DE FUEGO 1
BOTÓN DE FUEGO 2
BOTÓN DE FUEGO 3
BOTÓN DE FUEGO 4
1
2
3
4
✕
7
DPAD - ARRIBA
DPAD - DERECHA
DPAD - ABAJO
DPAD - IZQUIERDA
POV_ARRIBA
POV_DERECHA
POV_ABAJO
POV_IZQUIERDA
ARRIBA
DERECHA
ABAJO
IZQUIERDA
8
EJE X STICK IZQUIERDO
EJE Y STICK IZQUIERDO
L3
EJE X STICK IZQUIERDO
EJE Y STICK IZQUIERDO
11
EJE X STICK IZQUIERDO
EJE Y STICK IZQUIERDO
L3
9
EJE X STICK DERECHO
EJE Y STICK DERECHO
R3
EJE Z
ROTACIÓN Z
12
EJE X STICK DERECHO
EJE Y STICK DERECHO
R3
10 INICIAR 10 INICIAR
11 SELECCIONAR 9SELECCIONAR
12 R1 6R1
13 R2 8R2
14 L1 5L1
15 L2 7L2
#FUNZIONE FUNZIONE PC FUNZIONE PS3
1LED 1 OFF LED CANALE 1
2LED 2 OFF LED CANALE 2
3LED 3 OFF LED CANALE 3
4LED 4 OFF LED CANALE 4
5HOME N/A PULSANTE PS
6
PULSANTE FUOCO 1
PULSANTE FUOCO 2
PULSANTE FUOCO 3
PULSANTE FUOCO 4
1
2
3
4
✕
7
DPAD - ARRIBA
DPAD - DERECHA
DPAD - ABAJO
DPAD - IZQUIERDA
POV_UP
POV_RIGHT
POV_DOWN
POV_LEFT
IN ALTO
A DESTRA
IN BASSO
A SINISTRA
8
ASSE STICK-X SINISTRA
ASSE STICK-Y SINISTRA
L3
ASSE STICK-X SINISTRA
ASSE STICK-Y SINISTRA
11
ASSE STICK-X SINISTRA
ASSE STICK-Y SINISTRA
L3
9
ASSE STICK-X DESTRA
ASSE STICK-Y DESTRA
R3
ASSE Z
ROTAZIONE Z
12
ASSE STICK-X DESTRA
ASSE STICK-Y DESTRA
R3
10 AVVIO 10 AVVIO
11 SELEZIONA 9SELEZIONA
12 R1 6R1
13 R2 8R2
14 L1 5L1
15 L2 7L2
#FUNKCE FUNKCE PC FUNKCE PS3
1LED DIODA 1 VYPNUTO LED DIODA KANÁLU 1
2LED DIODA 2 VYPNUTO LED DIODA KANÁLU 2
3LED DIODA 3 VYPNUTO LED DIODA KANÁLU 3
4LED DIODA 4 VYPNUTO LED DIODA KANÁLU 4
5HOME NEPOUŽÍVÁ SE TLAČÍTKO PS
6
TLAČÍTKO SPOUŠŤ 1
TLAČÍTKO SPOUŠŤ 2
TLAČÍTKO SPOUŠŤ 3
TLAČÍTKO SPOUŠŤ 4
1
2
3
4
✕
7
DPAD - NAHORU
DPAD - DOPRAVA
DPAD - DOLŮ
DPAD - DOLEVA
POHLED_NAHORU
POHLED_DOPRAVA
POHLED_DOLŮ
POHLED_DOLEVA
NAHORU
DOPRAVA
DOLŮ
DOLEVA
8
LEVÁ PÁKA – OSA X
LEVÁ PÁKA – OSA Y
L3
LEVÁ PÁKA – OSA X
LEVÁ PÁKA – OSA Y
11
LEVÁ PÁKA – OSA X
LEVÁ PÁKA – OSA Y
L3
9
PRAVÁ PÁKA – OSA X
PRAVÁ PÁKA – OSA Y
R3
OSA Z
ROTACE Z
12
PRAVÁ PÁKA – OSA X
PRAVÁ PÁKA – OSA Y
R3
10 START 10 START
11 SELECT 9SELECT
12 R1 6R1
13 R2 8R2
14 L1 5L1
15 L2 7L2
#FUNÇÃO FUNÇÃO PC FUNÇÃO PS3
1LED 1 DESLIGADO LED DO CANAL 2
2LED 2 DESLIGADO LED DO CANAL 2
3LED 3 DESLIGADO LED DO CANAL 3
4LED 4 DESLIGADO LED DO CANAL 4
5INÍCIO N/A BOTÃO PS
6
BOTÃO DE DISPARO 1
BOTÃO DE DISPARO 2
BOTÃO DE DISPARO 3
BOTÃO DE DISPARO 4
1
2
3
4
✕
7
DPAD - CIMA
DPAD - DIREITA
DPAD - BAIXO
DPAD - ESQUERDA
POV_CIMA
POV_DIREITA
POV_BAIXO
POV_ESQUERDA
CIMA
DIREITA
BAIXO
ESQUERDA
8
MANÍPULO ESQUERDO-
EIXO X
MANÍPULO ESQUERDO-
EIXO Y
L3
MANÍPULO ESQUERDO-
EIXO X
MANÍPULO ESQUERDO-
EIXO Y
11
MANÍPULO ESQUERDO-
EIXO X
MANÍPULO ESQUERDO-
EIXO Y
L3
9
MANÍPULO DIREITO-EIXO X
MANÍPULO DIREITO-EIXO Y
R3
EIXO Z
ROTAÇÃO Z
12
MANÍPULO DIREITO-EIXO X
MANÍPULO DIREITO-EIXO Y
R3
10 START 10 START
11 SELECT 9SELECT
12 R1 6R1
13 R2 8R2
14 L1 5L1
15 L2 7L2
#FUNKTION PC-FUNKTION PS3-FUNKTION
1LED 1 AUS KANAL 1-LED
2LED 2 AUS KANAL 2-LED
3LED 3 AUS KANAL 3-LED
4LED 4 AUS KANAL 4-LED
5HOME NICHT BELEGT PS-TASTE
6
FEUERTASTE 1
FEUERTASTE 2
FEUERTASTE 3
FEUERTASTE 4
1
2
3
4
✕
7
D-PAD - NACH OBEN
D-PAD - NACH RECHTS
D-PAD - NACH UNTEN
D-PAD - NACH LINKS
POV_NACH OBEN
POV_NACH RECHTS
POV_NACH UNTEN
POV_NACH LINKS
NACH OBEN
NACH RECHTS
NACH UNTEN
NACH LINKS
8
LINKER STICK: X-ACHSE
LINKER STICK: Y-ACHSE
L3
LINKER STICK: X-ACHSE
LINKER STICK: Y-ACHSE
11
LINKER STICK: X-ACHSE
LINKER STICK: Y-ACHSE
L3
9
RECHTER STICK: X-ACHSE
RECHTER STICK: Y-ACHSE
R3
Z-ACHSE
Z-DREHUNG
12
RECHTER STICK: X-ACHSE
RECHTER STICK: Y-ACHSE
R3
10 START 10 START
11 AUSWÄHLEN 9AUSWÄHLEN
12 R1 6R1
13 R2 8R2
14 L1 5L1
15 L2 7L2
VERSION NUMBER 1.2
VX2-31