Hanwha Techwin SEP1003RWN Wireless Baby Camera User Manual Part 1
Samsung Techwin Co Ltd Wireless Baby Camera Users Manual Part 1
Contents
- 1. Users Manual Part 1
- 2. Users Manual Part 2
Users Manual Part 1

BrightVIEW
User Manual
English

IMPORTANT SAFETY INSTRUCTIONS
1. Read these instructions.
2. Keep these instructions.
3. Heed all warnings.
4. Follow all instructions.
5. Do not use this apparatus near water.
6. Clean only with dry cloth.
7. Do not block any ventilation openings, Install in accordance with the manufacturer’s
instructions.
8. Do not install near any heat sources such as radiators, heat registers, stoves, or other
apparatus (including amplifiers) that produce heat.
9. Do not defeat the safety purpose of the polarized or grounding-type plug. A polarized
plug has two blades with one wider than the other. A grounding type plug has two
blades and a third grounding prong. The wide blade or the third prong are provided for
your safety. If the provided plug does not fit into your outlet, consult an electrician for
replacement of the obsolete outlet.
10. Protect the power cord from being walked on or pinched particularly at plugs,
convenience receptacles, and the point where they exit from the apparatus.
11. Only use attachments/ accessories specified by the manufacturer.
12. Use only with the cart, stand, tripod, bracket, or table specified by
the manufacturer, or sold with the apparatus. When a cart is used,
use caution when moving the cart/apparatus combination to avoid
injury from tip-over.
13. Unplug this apparatus during lighting storms or when unused for
long periods of time.
14. Refer all servicing to qualified service personnel. Servicing is required when the apparatus
has been damaged in any way, such as power-supply cord or plug is damaged, liquid
has been spilled or objects have fallen into the apparatus, the apparatus has been
exposed to rain or moisture, does not operate normally, or has been dropped.
Copyright
©2015 Hanwha Techwin Co., Ltd. All rights reserved.
Trademark
Each of trademarks herein is registered. The name of this product and other trademarks
mentioned in this manual are the registered trademark of their respective company.
Restriction
Copyright of this document is reserved. Under no circumstances, this document shall be
reproduced, distributed or changed, partially or wholly, without formal authorization.
Disclaimer
Samsung makes the best to verify the integrity and correctness of the contents in this
document, but no formal guarantee shall be provided. Use of this document and the
subsequent results shall be entirely on the user’s own responsibility. Samsung reserves
the right to change the contents of this document without prior notice.
BrightVIEW
User Manual

SPECIFY SERVICE INSTRUCTIONS AND
W
ARRANTY
TERMS
FCC
Caution :
Any Changes
or
modifications not expressly approved
by
the party responsible for compliance
could void the user’s authority
to
operate the
equipment.
This device complies with part 15 of the FCC Rules. Operation is subject
to
the following
two
conditions
:
(1) This device may not cause harmful interference, and (2) this device must accept
any
interference received, including interference that may cause undesired
operation.
Note :
This equipment has been tested and found
to
comply with the limits for
a
Class
B digital
device, pursuant
to
part
15 of
the FCC Rules. These limits are designed
to
provide reasonable
protection against harmful interference in
a
residential installation. This equipment
generates,
uses and can radiate radio frequency energy and, if not installed and used in accordance
with
the instructions, may cause harmful interference
to
radio communications. However, there
is
no
guarantee that interference will not occur in
a
particular installation. If this equipment
does
cause harmful interference
to
radio
or
television reception, which can be determined
by
turning the equipment off and on, the user is encouraged
to
try
to
correct the interference
by
one
or
more
of
the following
measures:
•
Reorient
or
relocate the receiving
antenna.
•
Increase the separation between the equipment and
monitor.
•
Connect the equipment into an outlet
on a
circuit different from that
to
which the monitor
is
connected.
•
Consult the dealer
or
an experienced radio/TV technician for
help.
WARNING
•
STRANGULATION HAZARD
-
Keep
cord
out
of
child's reach. NEVER place camera
or cords
within
3
feet
of
crib
or
playpen. Never use extension cords with AC Adapters. Only use the
AC
Adapters
provided.
•
Some adult assembly
or
installation
required.
•
This product contains small parts that may cause choking. Keep small parts away from
children.
•
This product is NOT intended
to
replace proper supervision
of
children. You MUST check
your
child’s activity regularly, as this product will not alert parents
to
silent activities
of a child.
•
Before using this product, read and follow all instructions contained in this booklet, and read
and
follow all instructions and warnings
on
the
product.
•
NEVER use the transmitter
or
monitor near water, including near
a
bathtub, sink, laundry tub,
wet
basement,
etc.
•
This product is intended for indoor use
only.
•
This product is not intended for use as
a
medical monitor and its use should not replace
adult
supervision.
•
The transmitter detects normal sound levels within
a
range
of 2 to 3
meters (6
to 10
feet) from
a
child. If the child moves outside
of
this range,
if
may not
be
able
to
detect sounds from him
or her.
• It
is essential that you check the operating range and condition
of
the transmitter monitor
on
initial
installation, and
on a
regular basis after
that.
•
Check reception regularly. Test monitor before use and after changing camera
location.
The
wireless signal transfer
range
may be shortened if an obstacle such as a
concrete wall is in between the camera and monitor
.
•
To prevent overheating, keep the product and AC power adapters away from any direct
sunlight
and heat sources such as radiators, heat registers, cooking devices (e.g., stoves and ovens)
and
other appliances that produce heat (e.g., amplifiers, televisions and
stereos).
•
Ensure that the product is well ventilated during use. Avoid contact with pillows and furniture
that
may block
ventilation.
•
Use only the AC adapters provided with the product, as other adapters may damage the
product.
Plug the adapters only into standard household current (100~240 volts
AC).
Place the AC adapters avoiding pinch points otherwise you can damage the
adapters.
•
When an AC adapter is plugged into
a
power source, DO NOT touch the exposed end
of
the
AC
adapter’s
cord.
•
Do not use extension cords with the AC power adapters
to
avoid
entanglement.
•
This product should only
be
serviced
by
qualified and authorized Samsung service
centers.
•
Images and sounds are transmitted
by
the product over public airwaves and transmissions
may
be
picked
up by
other
units.
•
Caution
if
you use the system
to
watch
a
young child,
do
not place the camera where the
child
can
reach.
•
When using the system with only battery power and the charge is low, then the picture and
or
sound may
affected.
•
If this occurs then please connect the AC power
adapter.
•
This appliance and its antenna must not be co-located or operation in conjunction with any other
antenna or transmitter. A minimum separation distance of 20
㎝
must be maintained between the
antenna and the person for this appliance to satisfy the RF exposure requirements.
• When device is operating, please use the device at the flat place and do not carry in person pocket.
This device must be use at least 20
㎝
away and The MIC sensitivity is also fine at the distance longer
.than 20
㎝
.

Contents
WHAT’S INCLUDED
Package Contents ………………………………………………… 5
GETTING STARTED
Functional Description ……………………………………………… 6
Powering your monitor ……………………………………………………… 6
Operating the System ……………………………………………………… 6
VIEWING MODE DISPLAY
Indicator Description ……………………………………………… 8
How to use the indicator …………………………………………………… 8
Menu Operation …………………………………………………… 9
How to use the function tools ……………………………………………… 9
How to use the setup icon ………………………………………………… 9
OVERVIEW
Getting to know your Monitoring system ……………………… 11
Wireless Monitor …………………………………………………………… 11
Wireless Camera …………………………………………………………… 13
INSTALLATION
How to Install ……………………………………………………… 14
Wireless Monitor …………………………………………………………… 14
Wireless Camera …………………………………………………………… 14
APPENDIX
Specifications …………………………………………………… 15
Troubleshooting ………………………………………………… 16

English ·
5
01 What’s Included
What’s Included
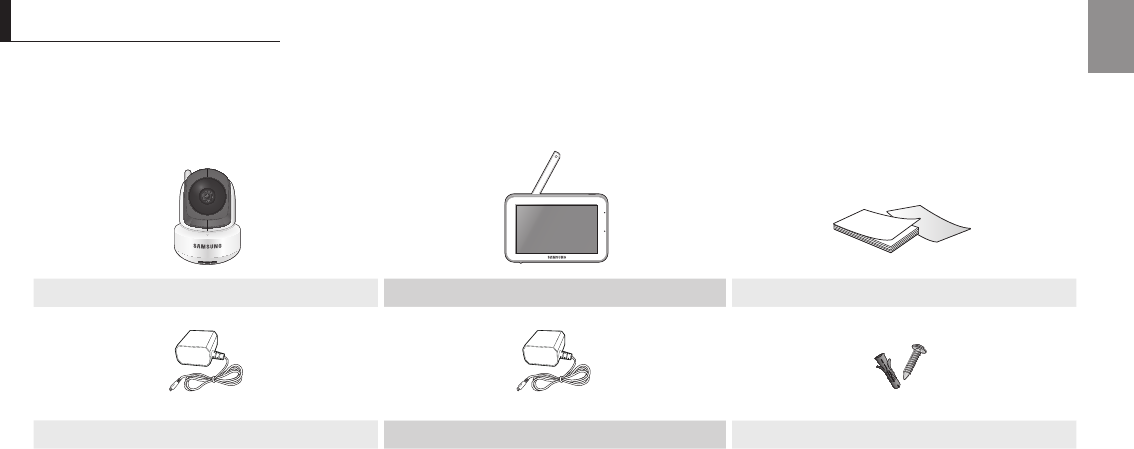
Package Contents
The system comes with the following components:
Wireless camera Wireless monitor User Manual & Warranty Card
Camera Adapter Monitor Adapter Plastic anchor (1EA) & Screw (1EA)
Check your package to confirm that you have received the complete system, including all components shown above.

6
· Getting Started
Functional Description
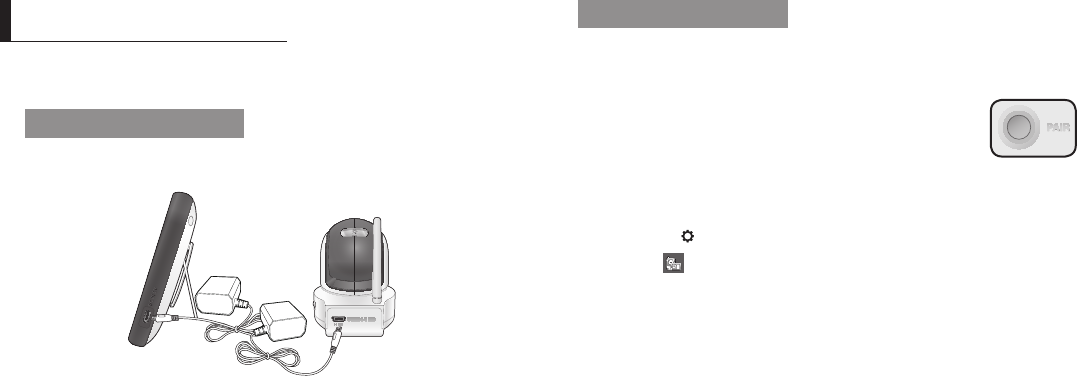
Powering your monitor
After opening the box, fully charge the monitor before use. After initial charge, recharge
as needed.
Wireless Monitor
You can use the device while charging with connected adapter, and the device is
portable if charged.
Wireless Camera
The Wireless Camera must be plugged in at all times in order to view.
n
`Check if the Power LEDs of wireless monitor is turned on.
GettInG started
Operating the System
The basic operation is as follows:
Pairing
The units already come paired for your convenience. This button is
used to add an additional camera. User can select camera number
to assign. Up to 4 Cameras may be paired.
1. Power on wireless monitor and wireless camera.
The power LED for the monitor should be ON.
2.
모니터의
라이브
뷰
화면을
터치하세요
.
설정
아이콘이
나타납니다
.
3. Press the [ ] button on the monitor.
4. Select [ ] icon.
5. Select camera number.
The monitor search a camera which sets to pairing mode.
A count down clock appears at the middle of screen which starts counting from
30 to 0.
6. Press the [PAIR] button on the camera.
7. Within 30 seconds, if the monitor successfully pairs with the camera, the monitor
will automatically switch to the camera's current view.

English ·
7
02 Getting Started
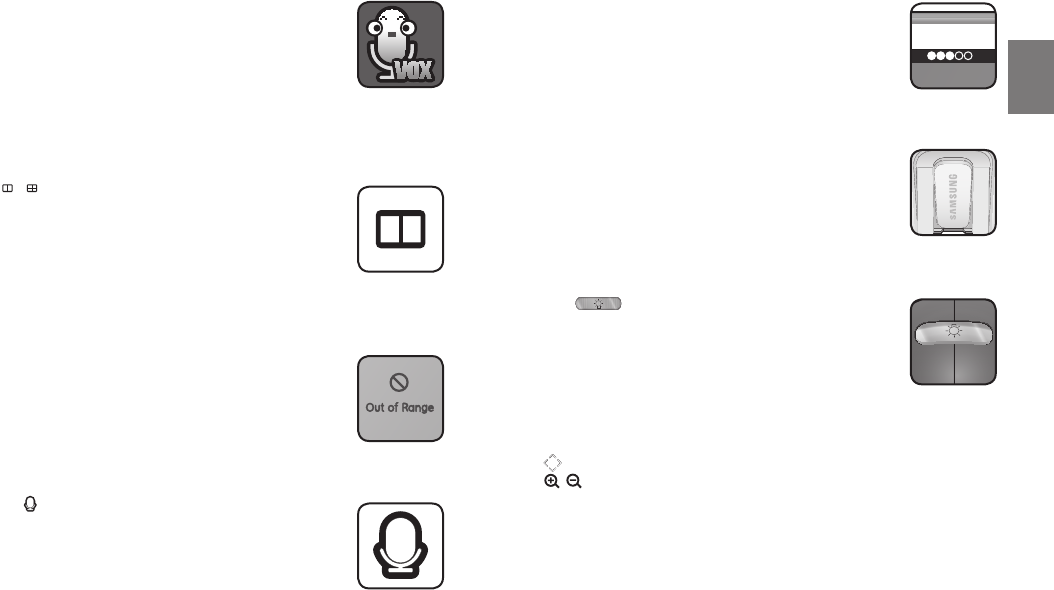
Voice activated (VOX)
Select to monitor significant sound with reduced ambient noise.
The screen goes off in “VOX” mode if there is no significant sound
louder than a certain level about 30 seconds. Meanwhile, the monitor
screen turns on as soon as detecting sound around the camera. In
“VOX” mode, you can set the sensitivity.
• Low Sound Level Detection : Sets to higher sensitivity.
• High Sound Level Detection : Sets to lower sensitivity.
Multi camera mode
Press [ / ] switch the split mode.
According to the paired camera, screen split mode is different. When
two cameras are paired, it displays as 2-split mode.
When there are more than 2 cameras are paired, it displays as 4 split
mode.
Up to 4 cameras can be paired.
Out of Range
If the camera and monitor are not paired or if the monitor is outside
of transmission range with the paired camera, the “Out of Range”
message appears with warning beeps at regular intervals.
Two-way talk
Press the [ ] button while talking.
Sound level
The louder the sound around the camera, the more LEDs turn on.
Portable monitoring
Slide the belt clip upwards to use the integrated belt clip on the
monitor. When not in use, please push the clip back to its original
position.
Night Light
Press the [ ] button on the camera to remotely activate or
deactivate the night light on the camera.
Remote PTZ and Zoom
You can remotely control the camera to pan, tilt and digital zoom.
Use [ ] icons on the wireless monitor to control the camera.
Use [ ]
icon
to zoom in and out.
SEW-3036W
- ON
- VOX
- OFF
DC IN 6V
[Camera]