HON HAI PRECISION IND HSTNH-F16C WLAN/BT HANDHELD PDA User Manual USERS MANUAL
Hon Hai Precision Ind. Co., Ltd. WLAN/BT HANDHELD PDA USERS MANUAL
UserManual.wiki
>
HON HAI PRECISION IND
>
HSTNH-F16C User Manual
>
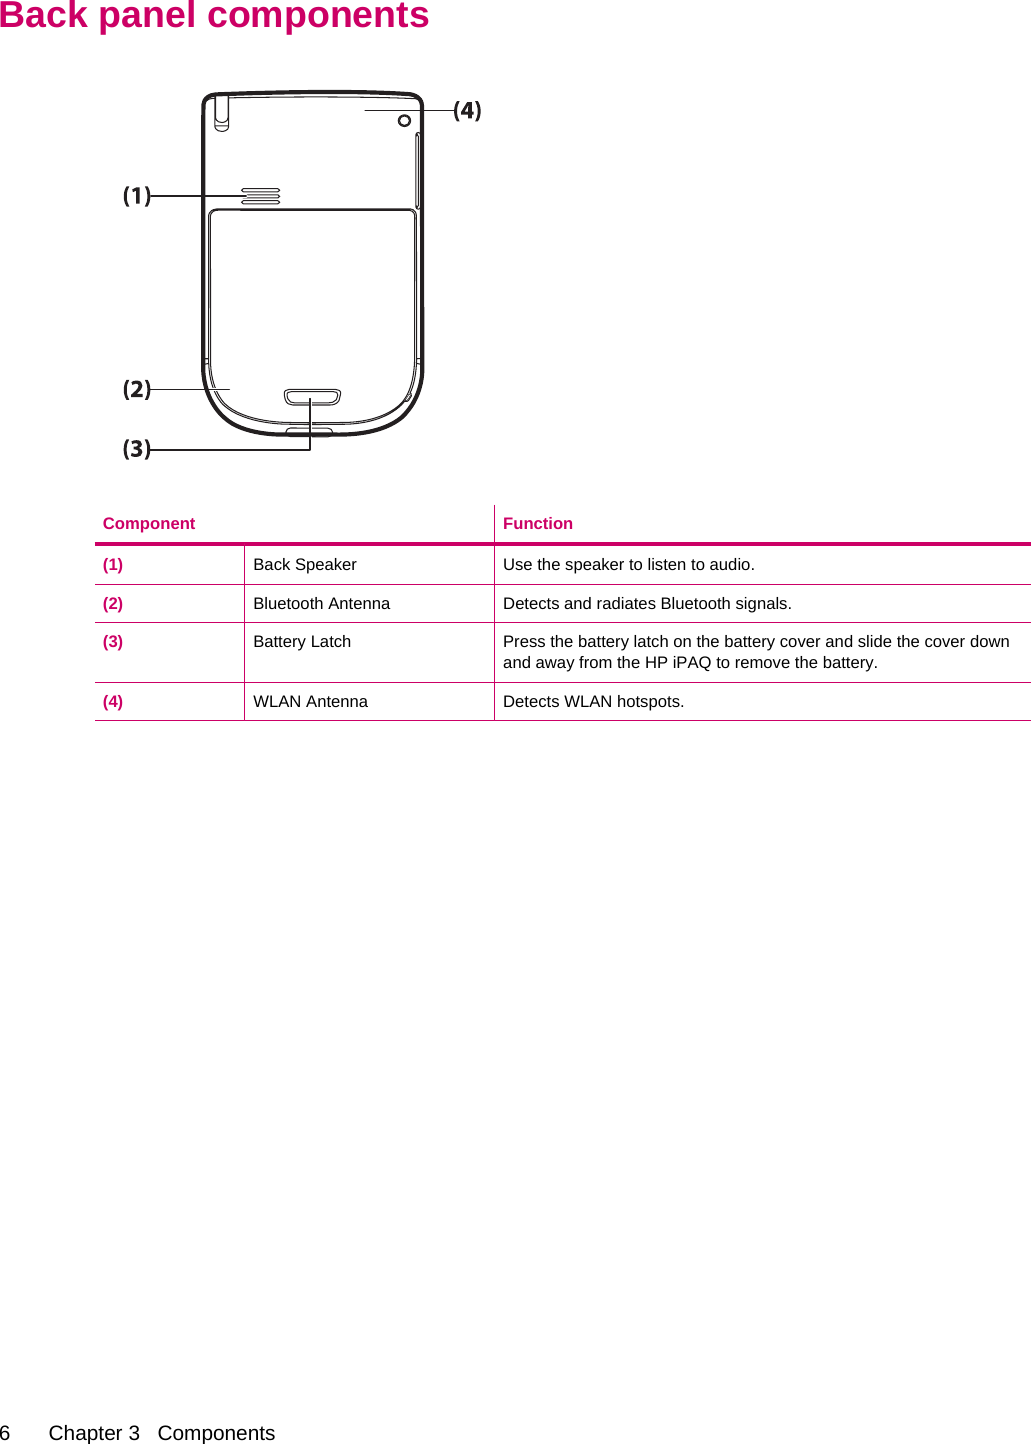
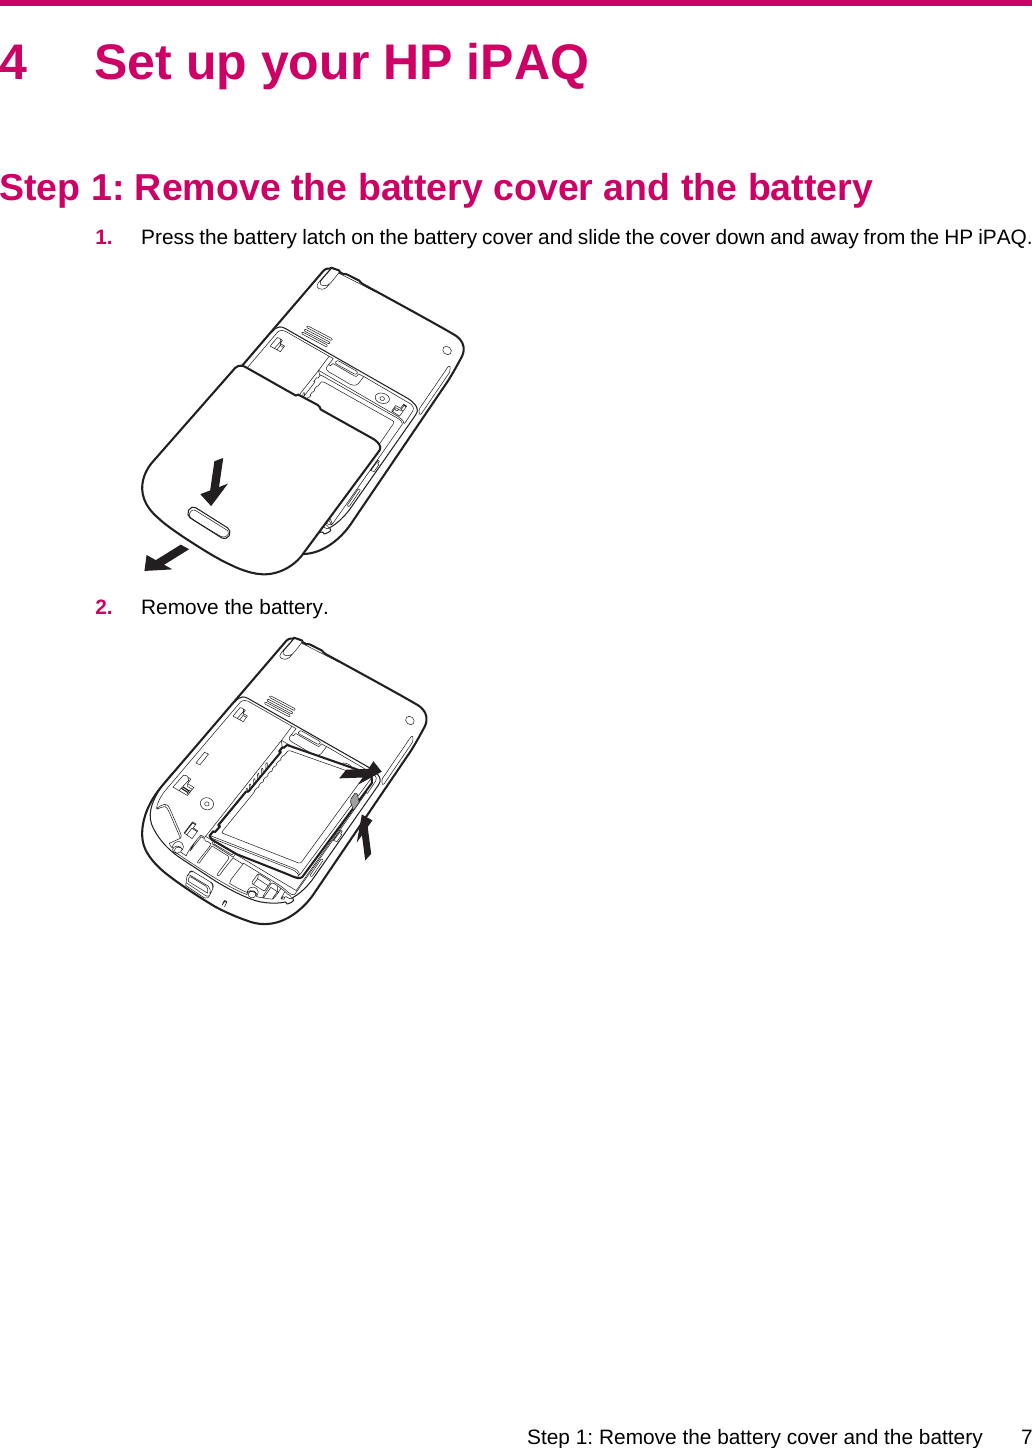
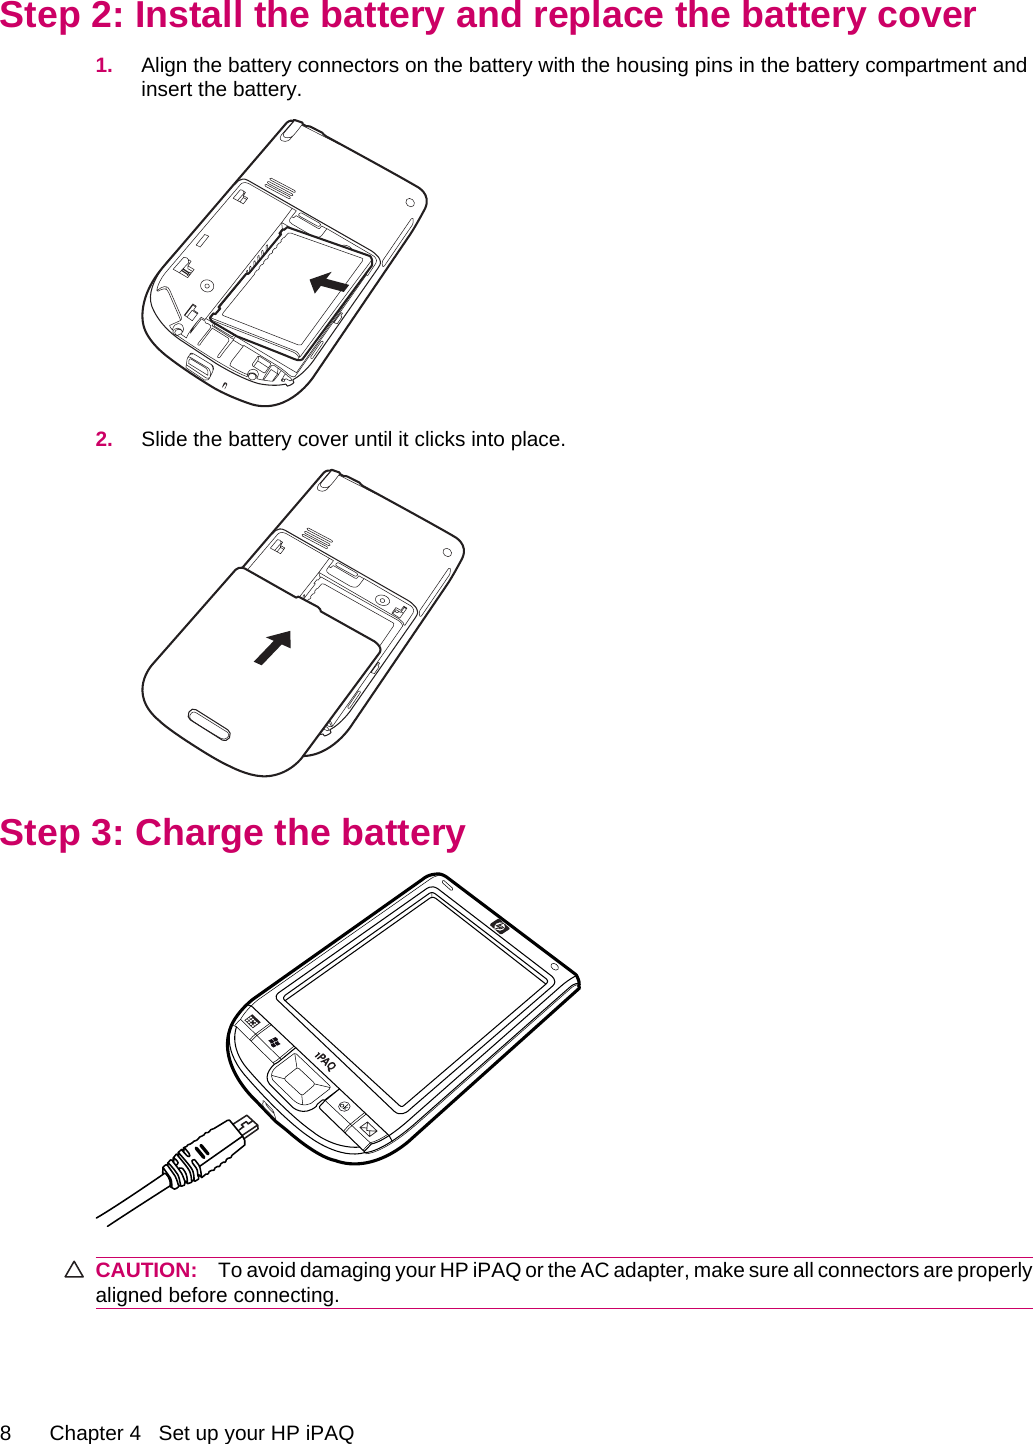
USERS MANUAL
Contents
1.
USERS MANUAL
2.
USER MANUAL
3.
revised statement in manual
USERS MANUAL
Navigation menu
Upload a User Manual
Namespaces
Wiki Guide
HTML
PDF
Info
Views
User Manual
Discussion / Help
Navigation