LG ELECTRONICS LSM3001306 Wireless Scanner Mouse User Manual LSM300 WIN ENG
LG Electronics Inc. Wireless Scanner Mouse LSM300 WIN ENG
UserManual.wiki
>
LG ELECTRONICS
>
LSM3001306 User Manual
User Manual
Navigation menu
Upload a User Manual
Namespaces
Wiki Guide
HTML
PDF
Info
Views
User Manual
Discussion / Help
Navigation

![Table of Contents 712345Table of Contents1 Getting Started3 Safety Information8 Main Features8 – About the mouse scanner8 In the Box9 Product Overview2 Mouse Operation10 Using an Wireless Mouse10 – Battery installation11 – Connecting the mouse scanner 12 Using an Wired Mouse12 – Connecting the mouse scanner 3 Scanner Operation13 Installing the LG Smart Scan Software13 – About LG Smart Scan Software13 – System requirements14 – How to install14 – How to quit15 Using the LG Smart Scan Software15 – Main menu display16 Scanning20 Editing20 – Edit menu display20 – Control panel20 – Editing the scanned image21 Pasting22 Exporting22 – Drag & Drop feature22 – Double Click feature23 Sharing23 – Using [Share] menu24 – Using [Apps] menu25 – Managing [Share] and [Apps] menu26 Settings26 – General26 – Save26 – Updates27 – Text Recognition27 – Proxy Settings27 – Advanced4 Troubleshooting28 Troubleshooting29 Customer Support5 Appendix30 Specifications](https://usermanual.wiki/LG-ELECTRONICS/LSM3001306/User-Guide-2040785-Page-7.png)
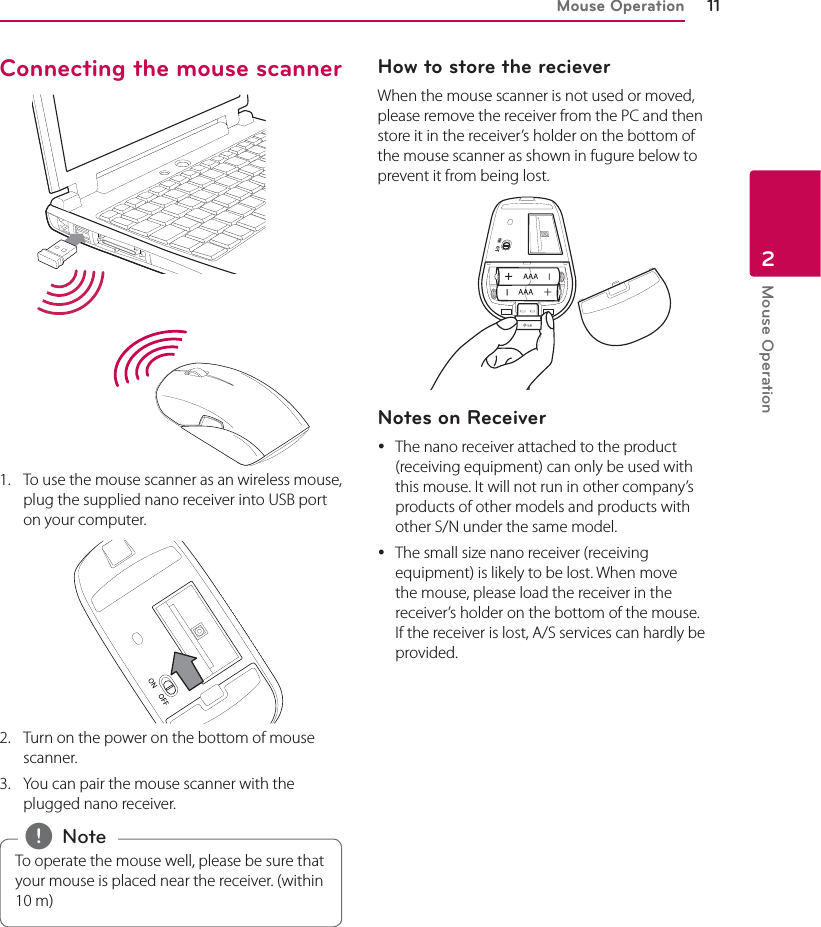
![Mouse Operation14Mouse Operation2How to installTo use mouse scanner’s scan function, you should install LG Scan Software CD first. Please read the user manual before installing the LG Smart Scan software. When you insert the CD you will see 3 icons which are installation of the LG Smart Scan software, User Manual and Movie Clip.1. Insert Scan Software CD.2. Find and double-click “Setup.exe” file and installation screen appears. -Install : Installs the LG Smart Scan software. -User Manual : Goes to the folder to see user manual. -Movie Clip : Shows the introduction movie.3. Select your language. 4. Click [Install] to display the initial installation screen. The end user license agreement screen will appear. Read the end user license agreement carefully.5. If you accept all conditions, click check box and click [Install]. Once the installation is complete, the wizard’ s finish screen appears.6. Click [Finish] to finish the installation.How to quitIf you want to quit the software please go to tray which is bottom and right side of Windows O/S.1. Move the cursor on the icon and click the right button of the mouse. You will find out the quit buton on it.2. Press quit button to quit the software.](https://usermanual.wiki/LG-ELECTRONICS/LSM3001306/User-Guide-2040785-Page-14.png)
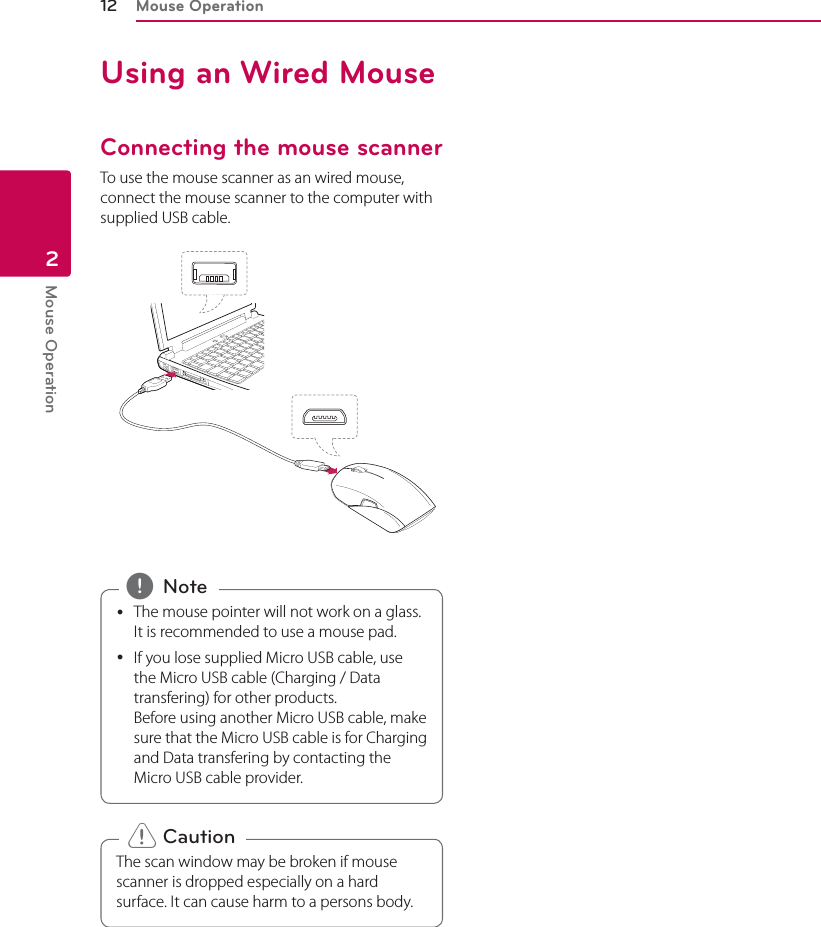
![Mouse Operation 15Mouse Operation2Main menu displayMenu bar Type of leScanned imageQuick Menu[Save] Saves the scanned image as an image le (png, jpg, tif, bmp) or a text le (pdf, xls, doc) to the desired location. Because of OCR process, saving as a text le may take time.[Copy] Copies the scanned image. (page 21)[Edit] Goes to the edit window. (page 19)[Share] Uploads the scanned image to Flickr, Twitter, Facebook, or attaches the image to an e-mail message. (page 23)[Apps] Seaches the relevant contents through search engine. (page 24)Makes the scanned image into an image le icon (jpg, png) and a text le icon (doc, pdf, txt, xls).Because of OCR process, saving as a text le may take time.Using the LG Smart Scan SoftwareThe [Share] service and [Apps] function may be updated or changed to improve performance without notice. , Note](https://usermanual.wiki/LG-ELECTRONICS/LSM3001306/User-Guide-2040785-Page-15.png)
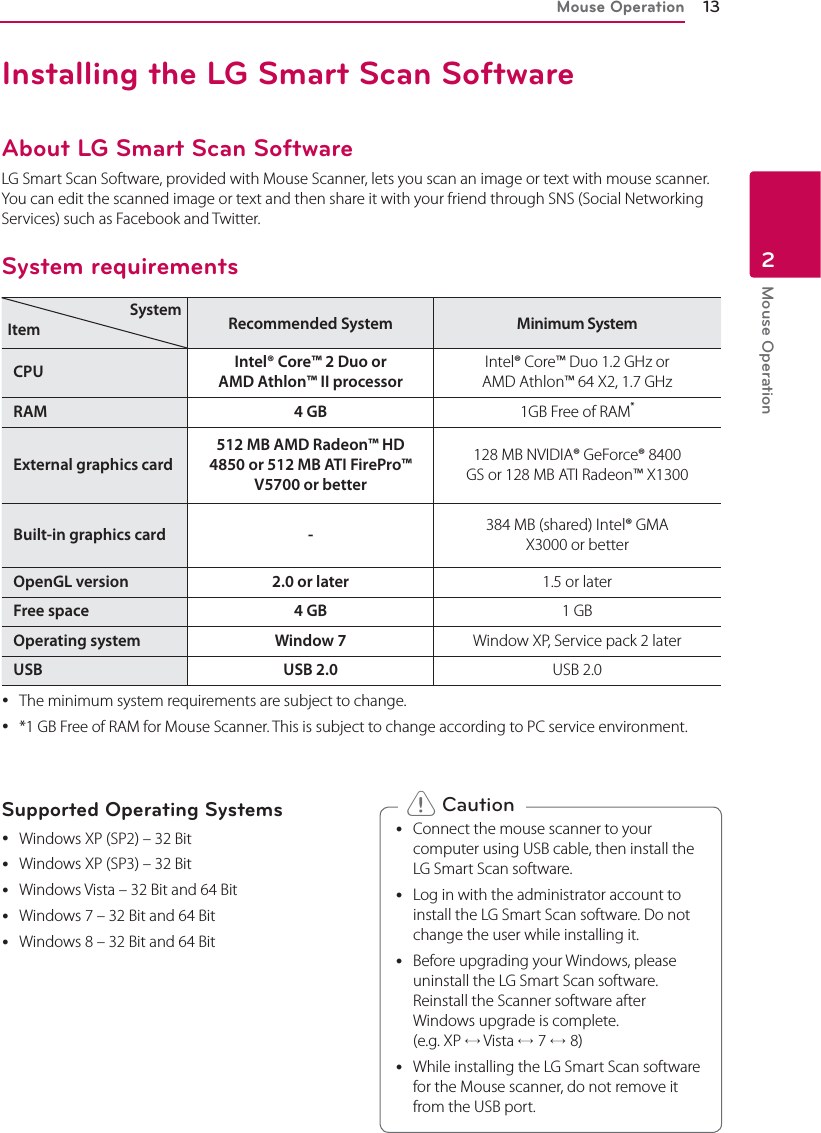
![Scanner Operation18Scanner Operation3Optical Character Recognition (OCR)You can convert the scanned image to the editable text using OCR function. Supported application : Microsoft Oce (e.g., Word, Excel and Outlook), Internet browser, e-mail applications such as Outlook. yTo use the OCR function, scan a document or photo in high-resolution. Go to [Settings] [ [General] to check the resolution. The OCR function supports minimum font size of 10 point. yIf it fails to recognize the text, check whether the language you selected is valid. Go to [Settings] [ [Text Recognition] and check the language set in the right panel. The OCR function restarts whenever the language is changed or the text recognition range is modied in edit mode. When using the OCR, make sure that the resolution is set to high in [Settings] [ [General]. , NoteNotes on Scanning yMake sure to x a document or photo so that it does not move while scanning. If the document or photo moves with the mouse scanner, the scanner may be unable to calibrate the image. yPlease do not click or typing of other Input device while scanning. yIf you move the mouse scanner too fast, some areas may not be scanned and result in empty spots. Go back to the empty spots and move the mouse scanner slowly to re-scan the areas. yIf the scanned image appears distorted or broken, stop moving the mouse scanner briey and then the image will be calibrated automatically. If the image still appears distorted or broken, re-scan the corresponding area to calibrate the image manually. yIf you scan a large image, the image will be automatically reduced. If you need to check whether it is scanned properly, roll the mouse scanner wheel up/down to zoom in/out the image. yIf the mouse scanner is placed away from a document or photo, the scanning will pause. To resume scanning, place the mouse scanner where the scanning is paused and move it left/right/up/down. yIf you pause scanning in a blank area with no text or image, the scanner is not able to resume the operation and stops scanning. The edit menu appears.](https://usermanual.wiki/LG-ELECTRONICS/LSM3001306/User-Guide-2040785-Page-18.png)
![Scanner Operation20Scanner Operation3EditingYou can adjust size, angle, color, brightness, etc. of the scanned image, using edit menu.Edit menu displayBackground Scanned imageRotate arrow Control PanelControl panelAdjusts the color, saturation, brightness and contrast of the image.Adjusts the Background color.Rotates the image.Erases the image.Editing the scanned image1. When scanning is complete, the scanned image is automatically cut into a rectangular shape and aligned perpendicular to the background.2. Using rectangular box and rotate arrow, adjust the size and angle of the image.3. Using the control panel, adjust the color, brightness, etc. of the scanned image.4. Click [OK] to complete editing scanned image and then the OCR function starts automatically. yIf the scanned image is not perpendicular to the background, rotate it manually with the rotate arrow. yWhen scanning a partial area, the image may not be perpendicular to the background. In this case, the OCR function may not work properly. Make sure to align the image vertically prior to proceeding. , Note](https://usermanual.wiki/LG-ELECTRONICS/LSM3001306/User-Guide-2040785-Page-20.png)
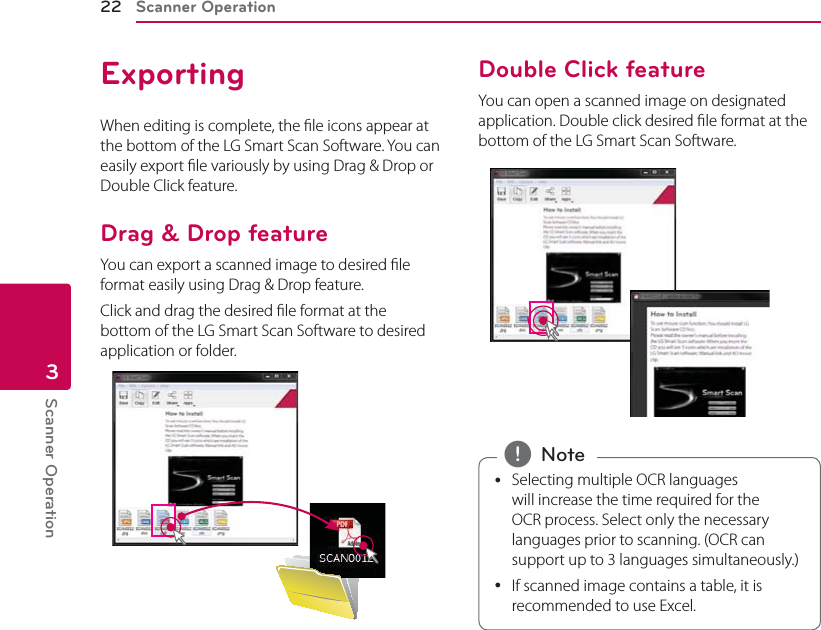
![Scanner Operation 21Scanner Operation3PastingWhen editing is complete, you can easily paste the scanned image on the compatible application. There are several ways to paste the scanned image or text.CopyCopy ImageChoose [Edit] [ [Copy Image] in the menu bar or choose [Copy] in the quick menu bar.Copy TextChoose [Edit] [ [Copy Text] in the menu bar.Paste1. Open the compatible application. 2. Paste the scanned image or text using the [Paste] feature on each compatible application. <Pasted image><Pasted text>3. Confirm the pasted image or text on the compatible application.](https://usermanual.wiki/LG-ELECTRONICS/LSM3001306/User-Guide-2040785-Page-21.png)
![Scanner Operation 23Scanner Operation3SharingUsing [Share] menuYou can share the scanned image with others through the various SNS and e-mail.Using SNS serviceYou can use various SNS via internet on the [Share] menu.1. Click [Share] and select an SNS option. (e.g. Facebook)2. Fill in [ID] and [Password], and then click [Login]. If you use this function for the first time, you need to sign in with your account. If you do not have an account, register. Once the sign in is complete, you can use these services with your account.If you are using a shared computer, do not select the [Keep me logged in] check box for blocking personal information leakage. , Note3. Check the image which will be posted, enter the words you want to wirte in the message box. Then click [Post] to upload them on the SNS service.4. The image was successfully posted on SNS service. If you want to check the image on SNS, Please click [Show post on Facebook]. yDepending on the version of software and SNS service, some of the steps written in this user manual may dier. yThe [Share] service and [Apps] function may be updated or changed to improve performance without notice. yIf you want to change the account of the SNS service, goes to [Option] [ [Manage Apps] and then click the [Sign Out] on SNS service [Setting]. , Note](https://usermanual.wiki/LG-ELECTRONICS/LSM3001306/User-Guide-2040785-Page-23.png)
![Scanner Operation24Scanner Operation3Using e-mail serviceYou can send the scanned image using an e-mail service via internet on [Share] menu.1. Click [Share] and select [Mail].2. E-mail application appears on the screen with attached file you’ve scanned.You can select one of the e-mail applications available in your system. Outlook is selected by default. , NoteUsing [Apps] menuUsing the scanned image, you can search for relevant information or translate to other language with [Apps] menu. If you click [Apps], four options are displayed.aEvernote - Posts scans directly on Evernote.The Evernote program must be installed on your PC to use the Evernote service. bGoogle Search By Image - Searches for relevant information directly by google search engine.Because of searching by image, the result may be inaccurate and differ.cGoogle Translate - Translates scanned text (OCRed) directly by google translator. If scanned text exceeds 1000 characters, paste scanned text to google translate webpage using copy text on [Edit] [ [Copy text].dQR Code Reader - Scans QR Code directly and goes to linked web page. Before using QR Code Reader, make sure that scanned QR code is aligned perpendicular.The [Share] service and [Apps] function may be updated or changed to improve performance without notice. , Note](https://usermanual.wiki/LG-ELECTRONICS/LSM3001306/User-Guide-2040785-Page-24.png)
![Scanner Operation 25Scanner Operation3Managing [Share] and [Apps] menuYou can change the account information of the SNS service and choose whether to activate apps or not. 1. Click [Options] and select [Manage Apps].2. Select the service you want to change. Click [Disable], [Enable] or [Settings].In [Settings] on each SNS service, you can deselect the [Keep me logged in] check box for blocking personal information leakage. , Note](https://usermanual.wiki/LG-ELECTRONICS/LSM3001306/User-Guide-2040785-Page-25.png)
![Scanner Operation26Scanner Operation3SettingsYou can adjust the settings of the software in the [Settings] menu. Choose [Options] [ [Settings] in the menu bar.GeneralGeneral optionsa[User interface language] Selects proper user interface language.b[Scan resolution] Low : 100 dpi Middle : 200 dpi High : 320 dpi Full : 400 dpi yIf you higher the resolution, the scanning area will be reduced in the same system. yThe resolution may be lower than the maximum available options due to your computer specications and/or user settings. yIf you higher the resolution, the OCR function will be improved. (At least [High]) , NoteWindow behaviorc[Always on top] Yes : Always shows the application in the foreground. No : Not always shows the application in the foreground.d[Window position] Right (default) Left Remember last positionSaveSave optionsa[Default le name prex] The default file name is inserted at the beginning of the file’s name (configurable).b[JPEG Quality] JPEG compression ratio in three levels: high, medium and low. The compression ratio depends on the resolution.UpdatesSoftware updates checka[Silent] Installs updates automatically.[Automatically] Checks for updates but you can choose whether to download updates or not.You can set the update check interval to Daily, Weekly or Monthly.b[Manually] Does not check the updates.Once the update is complete, remove the mouse scanner from the USB port, then reconnect it in 5 seconds. The mouse scanner may function properly. , Note](https://usermanual.wiki/LG-ELECTRONICS/LSM3001306/User-Guide-2040785-Page-26.png)
![Scanner Operation 27Scanner Operation3Text RecognitionLanguages for OCR can be selected in the options menu.Text recognition optionsa[Filter] Languages can be filtered by “selected” languages and “available” languages.b[Search] Languages can be found quickly using the search tab underneath the filter option.Proxy SettingsProxy Settingsa[No Proxy] b[Use system settings] c[Manual settings] d[Proxy-Server requires password] If your network is blocked or behind a rewall, use the proxy feature. For more detail, please contact with the network manager. , NoteAdvancedAdvanceda[Maximum scan memory] Adjusts the size of the maximum scan memory.b[Drag & Drop and paste image size] Adjusts the size of the image.Modifying the advanced options is generally not suggested as it may aect the system’s performance. , Note](https://usermanual.wiki/LG-ELECTRONICS/LSM3001306/User-Guide-2040785-Page-27.png)
![Troubleshooting 29Troubleshooting4ScannerSymptom Cause & SolutionScanning does not work. yConnect the mouse scanner to your PC with the USB cable. yWhile scanning, keep the scanning speed with green color on scan window. yIf you scan the small object, use the supplied business card holder.OCR function does not work. yCheck the language on [Options] [ [Settings] [ [Text Recognition]. OCRed character is low quality. or distorted. yCutting part of character images yMake sure to align the image vertically prior to scanning. (If tilt, rotate the picture.)How to make PDF, WORD and other le formats? yCheck the save option on [Options] [ [Settings] [ [Save] menu. Because of JPEG format with high quality picture and smaller storage capacity, please use JPEG format to scan before conversion. Click [Save] on quick menu, select conversion format and conversion page, click [Save] to complete the operation.Customer SupportTo obtain the user manual, etc. for this mouse scanner, please visit http://www.lg.com or contact LG Electronics customer care center.](https://usermanual.wiki/LG-ELECTRONICS/LSM3001306/User-Guide-2040785-Page-29.png)
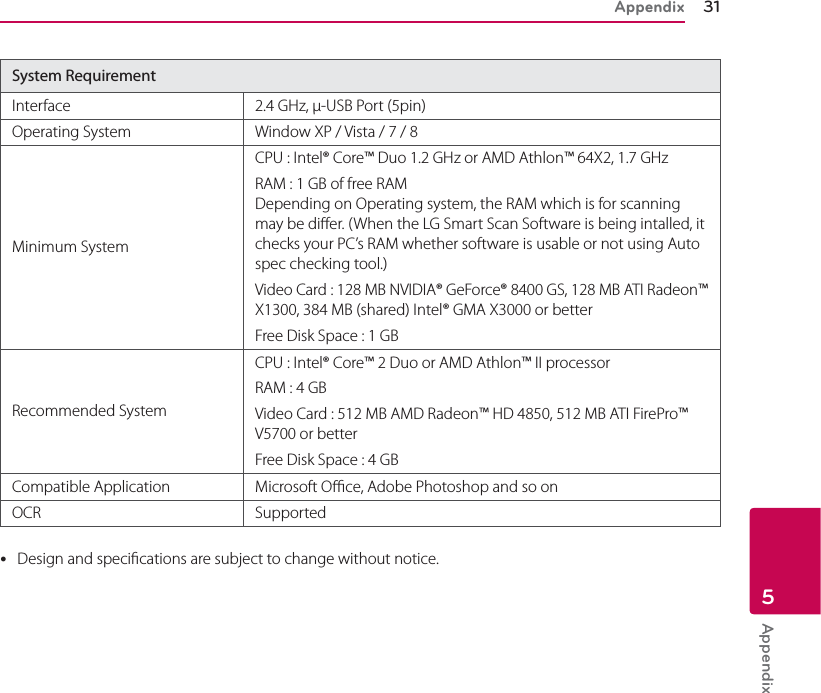
![Appendix30Appendix5SpecificationsMouse Sensor Laser Sensor / 1200 dpiButton 4 buttons with scan buttonDimension (L x W x H) 139 mm x 60 mm x 38 mm (5.5” x 2.4” x 1.5”)ScannerResolution (Maximum)Full : 400 dpi, High : 320 dpi, Middle : 200 dpi, Low : 100 dpi (Can be modied in the [Settings]) yThe resolution may be lower than the maximum available options due to your computer specications and/or user settings.Scan Size A3 Support on recommended computer system (It may be dierent regarding with user’s computer system.)Pixel Size 640 x 300 pixels @ 30 HzFunctionEdit Contrast Control / Brightness Control / Zoom in and out / Resizable / Auto rotationSave Format JPEG / TIFF/ PNG / PDF / BMP / Word / Excel availableShare Facebook / Flickr / Twitter / Connectable to E-mail service and so onCompatible Application Microsoft Oce, Adobe Photoshop and so onText recognition OCR Function Supported](https://usermanual.wiki/LG-ELECTRONICS/LSM3001306/User-Guide-2040785-Page-30.png)