LG ELECTRONICS SD500 Single-Mode 800MHz CDMA Phone User Manual FCC manual SD500
LG Electronics, Inc. Single-Mode 800MHz CDMA Phone FCC manual SD500
UserManual.wiki
>
LG ELECTRONICS
>
SD500 User Manual
Users Manual
Navigation menu
Upload a User Manual
Namespaces
Wiki Guide
HTML
PDF
Info
Views
User Manual
Discussion / Help
Navigation
![Terminal Development Center2LGICStand-by Status Menu Set-up and Its FunctionsPIM1. PHONE BOOK (Cion Secretary) [Menu + 1]* Telephone Directory / Scheduler / Alarm / Call Reserve / World Time1.1 Contact Secretary [Menu + 1 + 1 ]1.1.1 NEW ENTRY (Telephone Directory Register) [Menu + 1 + 1 + 1 ]1.1.2 FIND ENTRY (Telephone Directory Search) [Menu + 1 + 1 + 2 ]1.1.3 DELETE ENTRY (Telephone Directory Delete) [Menu + 1 + 1 + 3 ]- See the manual on the telephone directory function.1.2 Calendar (Schedule Management Secretary) [Menu + 1 + 2 ] - See the manual on the diary function1.2.1 Calendar : You can search the calendar by entering the month and year you want to find.* Menu +1 +2 + Menu +11.2.2 ADD NEW* Menu +1 +2 + Menu +21.2.3 SEARCH : Used to check if there is schedule,memo,anniversary on the date for your search* Menu +1 +2 +Menu +31.2.4 DELETE ALL : Used to delete the schedule saved in the phone.* Menu +1 +2 +Menu +41.2.5 DELETE OLD : Used to delete old records which are now unnecessary because their dates have expired* Menu +1 +2 +Menu +51.3 Alarm Secretary [Menu + 1 + 3 ]Alarm Time* User can set an alarm to the desired time.l Select one of ‘Release / Once / Daily’.l If you select ‘Release’, it becomes the state of stand-by. In case an alarm time was set previously,that setting time will be deleted.l When ‘Once / Daily’ is selected, you just enter the alarm time in the order of hour and minute.l In case the alarm time has been set already, the set alarm time and the soft keys of EDIT/OK aredisplayed.- If you select EDIT here, the soft key 1 of EDIT is displayed in ‘AM’ or ‘PM” mode for editing theinput.](https://usermanual.wiki/LG-ELECTRONICS/SD500/User-Guide-83541-Page-4.png)
![Terminal Development Center3LGICl ‘AM’ and ‘PM’ mode can be switched with Soft Key1[AM/PM]l You can edit the entered contents using DEL key.l Press OK key to store the entered alarm time.Note: The alarm bell is triggered at the set alarm time with the message of “Alarming Now”displayed on the display.Note: In case ‘Once’ is selected, if the END key is pressed or 1minute is passed, the alarm time is deleted.1.4 Call Reservation Secretary [Menu + 1 + 4 ]Call Reserve* Function to originate a call to the reserved number automatically at the reserved time.l Enter the reservation time in the order of “Hour : Minute”.l ‘AM’ and ’PM’ mode can be switched with Soft Key 1[AM/PM].l Press OK key to store the entered reserved call time.l Enter the reservation telephone number. [Up to 32 characters acceptable]l Store the entered telephone number using STORE key.Note: Telephone rings at the reserved time with the message of “Time for Reserved Call” on the display.Note: If the END key is pressed or one minute is passed, the reserved call time is automatically deleted and stored in the last call list.1.5 World Time Secretary [Menu + 1 + 5]World Time* Function to confirm the standard time of major cities in the world based on GPC time.This function is available in CDMA mode only.l Select the city you want to check using ‘Soft Key1’ or ‘V/#’ key and press OK key.Then, the international standard time of the selected city is appeared. Cities applicableGuam / New York / Dacca / Dallas / Denver / Delhi / Tokyo / Detroit / London / Rome / Los Angeles /Lisbon / Riode Janeiro / Manila / Madrid / Mexico / Moscow / Montreal / Bangkok / Berlin / Beijing /Beirut / Boston / Buenos Aires / Vienna / Sydney / Seattle / Chicago / Singapore / Athens / Abu Dhabi /Ajoles / Amsterdam / Anchorage / Oakland / Washington / Jakarta / Jedda / Kabul / Cairo / Caracas /Colombo / Kuwait / Taipei / Tehran / Paris / Hanoi / Helshinki / Honolulu / Hongkong](https://usermanual.wiki/LG-ELECTRONICS/SD500/User-Guide-83541-Page-5.png)
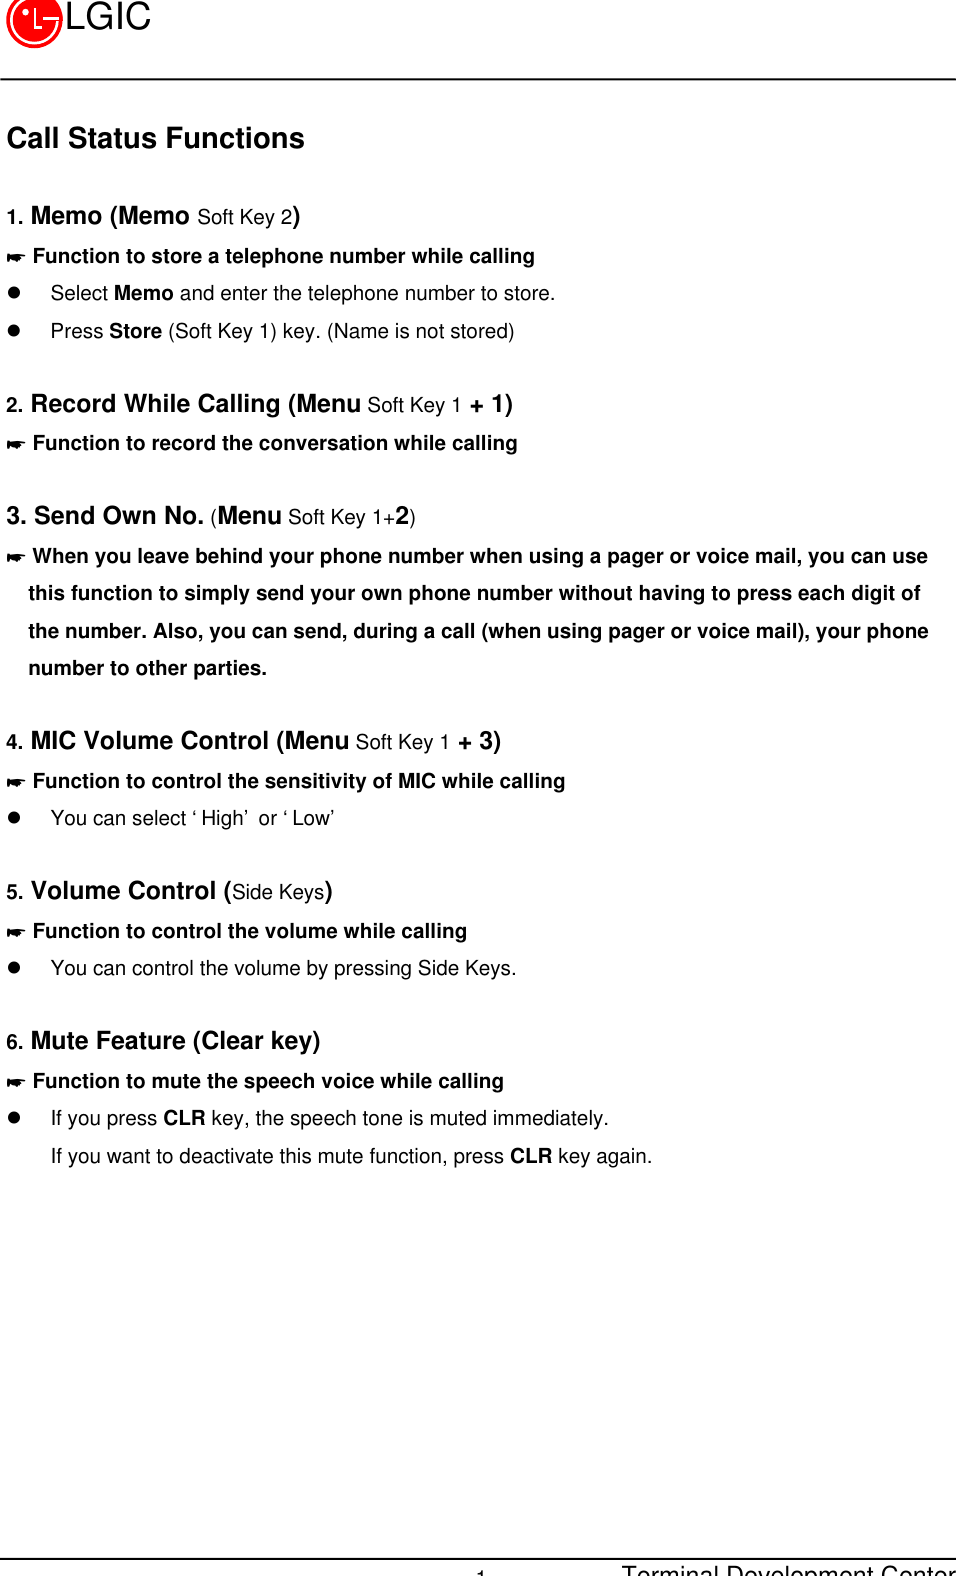
![Terminal Development Center4LGIC2. Volume Control [Menu + 2]* Function to control Ring / Key Tone / Call Volume2.1 Ringer Volume (Receiver Volume Control) [Menu +2 +1] l Select the volume using the next setup key (Soft Key 1).l Select the volume you want using V/# keys.l Store the selected volume using the selection key.2.2 Key Tone Volume Control [Menu +2 +2]l Select the volume using the next setup key (Soft Key 1).l Select the volume you want using V/# key.l Store the selected volume using the selection key.2.3 Earpiece Volume Control [Menu +2 +3]l Select the volume using the next setup key (Soft Key 1).l Select the volume you want using V/# key.l Store the selected volume using the selection key.3. Select Ring (Bell Selection) [Menu + 3 ]* Function to select the bell type for the incoming call.3.1 Types of Bell [Ring / Vibration / Vibration + Ring]l Select Menu + 3 + 1.l Select the bell type using the next setup key (Soft Key 1).l Select the type of bell you want using V/# key.l Store the selected status using the selection key.3.2 Bell Selection (17 types)[General / Sound of glass bead / Kung-tha-ri Shabara / Rise tone / Alarm tone / Chime bell / Codetone / Tune of Japanese apricot tree / Pathetic sonata / Bolero of love/ Tune of bird / Father’sface / Small fountain / Edelweiss / A happy home / Nostalgia / Mail carriage]l Select Menu + 3 + 2l Select the type of bell using the next setup key (Soft Key 1).l Select the bell you want using V/# key.l Store the selected status using the selection key.](https://usermanual.wiki/LG-ELECTRONICS/SD500/User-Guide-83541-Page-6.png)
![Terminal Development Center5LGIC4. Call Time [Menu + 4]* Function to verify the record on the call time4.1 Last Call Time* Function to show the last call timel Select Menu + 4 + 1.l Press OK key to return to the stand-by state.4.2 Total Call Time* Function to show the number of call and the call time for all calls of receiving and transmitting. User can verify the total number of calls made and the call time through this function.l Select Menu + 4 + 2.l If you select OK key (Soft Key2), it returns to the stand-by status and if you select DEL key (SoftKey1), you can delete the accumulated total call time.4.3 Home call + Roam calls* Used to display the call time for calls only within your business place.* Used to display the call time of calls with other business enterprise places.l Select Menu + 4 + 3.5. Secret Function [Menu + 5 + Password 4-digit]* Lock mode setup / Call list delete / Private information delete / Voice list delete / Emergency phone number store / Password change / International call restrict / Automatic PIN transmit / Software version confirm functions can be performed in this menu.5.1. Lock Mode* Function to restrict the originating and storing functions.* You can select ‘Release / Power-On / Always’l Press Menu + 5 + Password 4-digit + 1l Select one of ‘Release / Power-On / Always’ using ‘Soft Key1’ or ‘V/#’ key and press the storekey.l If you select ‘Always’, the phone falls in the lock mode always, and [Select] menu and the callingare locked.- If you try to call in this case, you are prompted for the password and if the entered password isidentified, the call is established. In the lock mode, if you press [Locking Release] button, the](https://usermanual.wiki/LG-ELECTRONICS/SD500/User-Guide-83541-Page-7.png)
![Terminal Development Center6LGIClocking on the [Select] key is released and the [Locking Release] button is changed to [Select]button.- Even in this case, whenever you try to call, the password is required.- If you want the locking release, you should release this setup from the [Menu].l If you select ‘Power-On’, the locking function is not immediately executed but when the phone isswitched on, it is automatically set to the lock mode and at the same time, the soft key is changedto [Menu], [Locking Release].Default password is ‘0000’.5.2. Call List Delete* Function to delete all the telephone numbers stored in the last call list.l Select Menu + 5 + Password 4-digit + 2l Select ‘Yes’ from Yes/No using the next setup key (Soft Key1) or ‘V/#’ key and press theSELECT key.5.3. Private Information Delete* Function to delete all the contents stored in the memory address 01 ~ 200.l Select Menu + 5 + Password 4-digit + 3.l Select ‘Yes’ from Yes/No using the next setup key (Soft Key1) or ‘V/#’ key and press theSELECT key. During the deletion, a message of ‘Please, wait’ appears and after the completion of the deletion it returns to the stand-by status.5.4 Voice List Delete* Function to delete all the voice items (20 entities) from the memory addresses where voice isstored of memory address 01 ~ 200.l Select Menu +5+ Password 4-digit + 4.l Select ‘Yes’ from Yes/No using the next setup key (Soft Key1) or ‘V/#’ key and press theSTORE key.5.5. Emergency Phone Number Store* Function used to enter the emergency telephone number [Up to 3 numbers ]l Select Menu + 5 + Password 4-digit + 5. If the telephone number stored in the telephone number 1is appeared empty, a message of](https://usermanual.wiki/LG-ELECTRONICS/SD500/User-Guide-83541-Page-8.png)
![Terminal Development Center7LGIC‘None’ appears.l Select the memory address where you want to make input using the next setup key (Soft Key1) or‘V/#’ key [ 1 ~ 3 ]l Select the edit mode by pressing EDIT key.l Enter the telephone to store and press OK key. If you want to terminate the process at this time, press the END key and if you want to enter thetelephone in other memory address, repeat the procedures that follow the step of memory addressselection.5.6. Password Change* Function to change the passwordl Select Menu + 5 + Password 4-digit + 6.l Enter a new password of 4-digit and press STORE key.l For the reconfirmation, enter the password you entered just before in 4-digit.l Press OK key. [It is then back to the previous status]5.7. International Call Restrict* Function to restrict the originating for the international calll Select Menu + 5 + Password 4-digit + 7l Select ‘Setup’ of ‘Setup/Release’ using the next setup key (Soft Key1) or ‘V/#’ key and pressSTORE key.Once the international call is restricted, the international call cannot be originated.5.8. Automatic PIN Transmit* Function to set up PIN CODE and store it.l Select ‘Setup’ of ‘Setup/Release’ using the next setup key (Soft Key1) or ‘V/#’ key and pressSTORE key.l Select Menu + 5 + Password 4-digit + 8 This function is not used currently. (It is subject to change later by the service provider)5.9. Software Version Confirm* Function to confirm the software version of the phone.l Select Menu + 5 + Password 4-digit + 9.¢Ñ MSM Version / Self Source Version / Qualcomm Source Version are appeared.](https://usermanual.wiki/LG-ELECTRONICS/SD500/User-Guide-83541-Page-9.png)
![Terminal Development Center8LGIC6. Convenient Functions [ Menu + 6 ]* Area code input/setup, automatic reception, calculator, voice recognition setup, automatic answer functions can be set.6.1 Automatic Area Code* The stored area code is added to the dial number automatically while a call is originated.l Select Menu + 6 + 1.l Select one of ‘Setup/Release’ using the next setup key (Soft Key1) or ‘V/#’ key and pressSTORE key.l If you select ‘Release’, it will be in the stand-by state. In case there is a pre-stored number, thatnumber will be deleted.l Press SETUP to enter the area code. [Max. up to 4 digits ]l Press OK key to store the entered contents.If the entered area code is not registered one, a message of ‘Wrong Number’ appears with abeep alarm and it returns to its initial stage.¢Ã World Area Code (Skip)6.2 Automatic Reception* If the user does not answer an incoming call, after the telephone rings as many times as the set number of the bell for the automatic reception, call is established automatically.l Select Menu + 6 + 3l Select one of ‘Release / After 1st Ring / After 3rd Ring’ using the next setup key (Soft Key1) or‘V/#’ key and press STORE key. In case of melody, the incoming call is received after the 1 st tune regardless of the setting value. 6.3 Calculator* [Add / Subtract / Multiply / Divide] can be executed.* You can enter the decimal point with [ V ] key.l Select Menu + 6 + 4.l Enter numbers. [9 digits can be entered including the decimal point]l Select operators using Soft Key1 key.l Enter numbers. [9 digits can be entered including the decimal point]](https://usermanual.wiki/LG-ELECTRONICS/SD500/User-Guide-83541-Page-10.png)
![Terminal Development Center9LGICl Select [ = ] operator using Soft key1 key and press [OK] key. [9 digits including the decimal pointcan be displayed]If you want to make other operation on the operation result onward, press other operator than [ = ]and press STORE key to make continuous operation. If the operation result exceeds 9 digits including the decimal point, error message appears and it returns to the initial status of the calculator.6.4 Voice Recognition Setup [Menu + 6 + 5]* You can determine whether to use the voice recognition function or not. l Select Menu + 6 + 5.l Select ‘Setup’ or ‘Release’ using 3/4 key or [SELECT] key.l Store it using [SELECT] key.Note: When the voice recognition is set, press DEL key from the main screen to use the voice recognition function.6.5 Automatic Answer [Menu + 6 + 6]* It is used for the setup of functions that are related with the automatic answering function.Note: If you are not in a position to answer a call, you can record the message of the counterpart by answering the call automatically. See the description of the automatic answering for more information.6.6 Record While Calling [Menu + 6 + 7]* Used to set up the sub menu that is related with the function of ‘Record While Calling’.Note: This is a function that allows you to record the conversation in the telephone while calling. See the description of the function of ‘Record While Calling’ for more information.6.7 Hold Function [Menu + 6 + 8]* Used to set up the sub menu that is related with the Hold function.Note: You can hold the call temporarily (max. 30 seconds) for a urgent matter and resume the call pressing SEND key or opening the flip when you are again ready for the call. See the description of hold function for more information.7. Supplementary Functions [Menu + 7]7.1 Background Illumination* Function to control the time of the background illumination for keypad and LCD.](https://usermanual.wiki/LG-ELECTRONICS/SD500/User-Guide-83541-Page-11.png)
![Terminal Development Center10LGICl Select Menu + 7 + 1l Select one of ‘Always Off / Flip Open / 10 Sec. / Auto’ using the next setup (Soft Key1) or ‘V/#’key.l Press OK to store the selected value.Following values can be set. Always Off: Background illumination is always off. 10 Sec.: Background illumination is on for 10 seconds. Automatic: It remains in off-state from 08:00 through 17:00, otherwise the background illuminationlights up every 9 seconds. Flip Open: Background illumination lights up only when the flip is open.7.2 Key Tone Length* Function to set the length of DTMF TONE.l Select Menu + 7 + 2l Select one of ‘Short/Long’ using the next setup key (Soft Key1) or ‘V/#’ key. Short: Once the key is pressed, DTMF TONE is transmitted for a specific period [200ms] Long: DTMF TONE is transmitted constantly, while the key is pressed on hold.7.3 Logo Setup* Function to store the characters to be displayed on the stand-by screen of the terminal.l Select Menu + 7 + 3l Enter the contents of logo. [Up to 16chaacters]l Press OK key.7.4 Modem Terminating Setup [Only available for a phone with data communication function]* When you use the data communication function , you can select modem communication or faxcommunication.l Select ‘Menu + 7 + 5’l Select one of ‘Terminating Release / Modem Terminating / Fax Terminating’ using V/# key andpress STORE key.](https://usermanual.wiki/LG-ELECTRONICS/SD500/User-Guide-83541-Page-12.png)
![Terminal Development Center11LGICModem Communication: You select this mode when you receive the counterpart’s call in the 1 : 1 data communication mode.Fax Communication: You select this mode when you receive a fax from your counterpart.8. Audible Alert Setup [Menu + 8]* Three types of audible alert are provided.8.1 Call Connect Alert* An alert to notify of the state of the call connection while a call is originated. l Select ‘Menu + 8 + 1’l Select ‘Setup’ of ‘Setup/Release’ using the next setup key (Soft Key1) or ‘V/#’ key and pressOK key.8.2 Service Change* An alert to notify that the service area has been changed.l Select ‘Menu + 8 + 2’l Select ‘Setup’ of ‘Setup/Release’ using the next setup key (Soft Key1) or ‘V/#’ key and pressSTORE key.8.3 1 Minute Alert* An alert that is triggered 10 seconds before every minute as one minute is passed during the call.l Select ‘Menu + 8 + 3’l Select ‘Setup’ of ‘Setup/Release’ using the next setup key (Soft Key1) or ‘V/#’ key and pressSTORE key.9. System Setup [Menu + 000000]* This is the function used for the dual mode at DCN. You can select the mode in use and the system.9.1 Select NAM in Use [Menu + 0 + 000000 + 1]* Select the NAM to use of 4 sets of NAM.](https://usermanual.wiki/LG-ELECTRONICS/SD500/User-Guide-83541-Page-13.png)
![Terminal Development Center12LGICl Select ‘Menu + 0 + 000000 + 1’l Select one of NAM#1 ~ NAM#4 using the next setup key (Soft Key1) or ‘V/#’ key and pressSTORE key. As NAM#1 ~ NAM#4 have different NAM parameters respectively, if you select the NAM that is not identified with the subscribed number, the service is not provided.9.2 AUTO NAM Setup [Menu + 0 + 000000 + 2]It is the function to automatically set the NAM that is identified with the subscribed number when morethan one NAM are used. l Select ‘Menu + 0 + 000000 + 2’.l Select ‘Setup’ of ‘Setup/Release’ using the next setup key (Soft Key1) or ‘V/#’ key and pressSTORE key.9.3 Field Service [Menu + 0 + 000000 + 3 ]* Used for the call test of the PHONE, check of the phone status, verification of the error list and thedeletion of the error list. 9.3.1 Test Screen [Menu + 0 + 000000 + 3 + 1]* As the function capable of checking the status of the phone, this performs to verify the status of thecurrent reception task, RX AGC VALUE, TX GAIN, PN OFFSET and PILOT ACTIVE.l Select ‘Menu + 0 + 000000 + 3 + 1’First LINE 1 ~ 3 : PN OFFSET / 5 : Status of Reception TASK / 7 ~ 8 : RX AGC VALUE Second LINE 1 : No meaning / 3 : Status of PILOT ACTIVE / 7 ~ 8 : TX GAIN VALUE9.3.2 Test Call [Menu + 0 + 000000 + 3 + 2 ]* It can make test of 8K / 13K Markov and loopback.l Select ‘Menu + 0 + 000000 + 3 + 2’l Select one of OLD8K Markov / NEW8K Markov / 8K loopback / NEW13K Markov / 13Kloopbacks using */# key and press STORE key. You can verify the call operation under theselected status.](https://usermanual.wiki/LG-ELECTRONICS/SD500/User-Guide-83541-Page-14.png)
![Terminal Development Center13LGIC9.3.3 Error Delete [Menu + 0 + 000000 + 3 + 3]* Function used to delete the entities stored in the error list.l Select ‘Menu + 0 + 000000 + 3 + 3’.l Select ‘Yes’ of ‘Yes/No’ using the next setup key (Soft Key1) or ‘V/#’ key and press STOREkey.At this moment, a message of “Please, wait” appears and once the deletion is completed, itreturns to the previous status.9.3.4 Error List [Menu + 0 + 000000 + 3 + 4]* Function used to verify the entities stored in the error list.l Select ‘Menu + 0 + 000000 + 3 + 4’l You can verify 20 lists of error using the next setup key (Soft Key1) or V/# key.End => It returns to the stand-by statusDel => It returns to the previous state9.4 Service Setup [Menu + 0 + 000000 + 4]* You can select NAM#1 ~ NAM#4 parameters.l Select ‘Menu + 0 + 000000 + 6’.NAM#1 parameters are appeared as follows and you can edit the editable items.PHONE MODEL / SLOT CYCLE INDEX [Editable] / PHONE NUMBER [Editable] / NAM NAME[Editable] OK => To store the contents and go to the next step. (Other keys lead to the end stage)l If you press Further Edit key from the message of ‘NAM1 Basic Program Edit End’, the currentlyused SERVICE CODE is appeared and you can edit the SERVICE CODE.Following parameters can be edited.Changeable Parameter Lists [NAM#1 ~ NAN#4]NAM1 MOBILE COUNTY CODE /NAM1 MOBILE NETWORK CODE / NAM1 CDMA SID1~4 / NAM1CDMA NID1 ~4/ NAM1 SYTEM A~B PRAMARY CHAN / NAM1 SYTEM A ~B SECONDARY CHAN .9.5 Mode Change [Menu + 0 + 000000 + 5]* Select the mode to use of DM Mode / Data Mode l Select ‘Menu + 0 + 000000 + 5’](https://usermanual.wiki/LG-ELECTRONICS/SD500/User-Guide-83541-Page-15.png)
![Terminal Development Center14LGICUsing Search Menu1. Latest Call List [Search + 1]* Used to verify the list of 10 telephone numbers that were connected lately.l Select ‘Search + 1’ [Latest call list appears] Call => Originating End => It returns to the stand-by status Del => It returns to Stand-by status/Previous status View => It returns to detailed information display status [Function of Keys of Detailed Information Display] Call => Originating. Num => Enter into PREPEND status [Originating only possible, storing disabled] Store => Same as the storing procedure of telephone number Del => Returns to the previous status End => Returns to the stand-by status2. Directory Search [Search + 2]* Function to search the memorized telephone numbers using the memory address. See the manual on PIM function.3. Stored Voice List [Search + 3]* Function to search the telephone lists only that store voice.l Select ‘Search + 3’Further procedures are the same as those for the above-mentioned search of the address list.4. Schedule Search [Search + 4]* Function to search user’s schedule and its details using the scheduler.l Select ‘Search + 4’.- See the description of the diary function.](https://usermanual.wiki/LG-ELECTRONICS/SD500/User-Guide-83541-Page-16.png)
![Terminal Development Center15LGIC5. Own Number Search [Search + 5]* Function to verify her/his phone number.l Select ‘Search + 5’Other Function Keys1. Message Key- If you press this key in the step of telephone number edit, you can enter ‘manual stand-by/time stand-by/hyphen’.2. # Key- If you press this key on hold for a specific time at any state, you can make a call with one-touch.](https://usermanual.wiki/LG-ELECTRONICS/SD500/User-Guide-83541-Page-17.png)
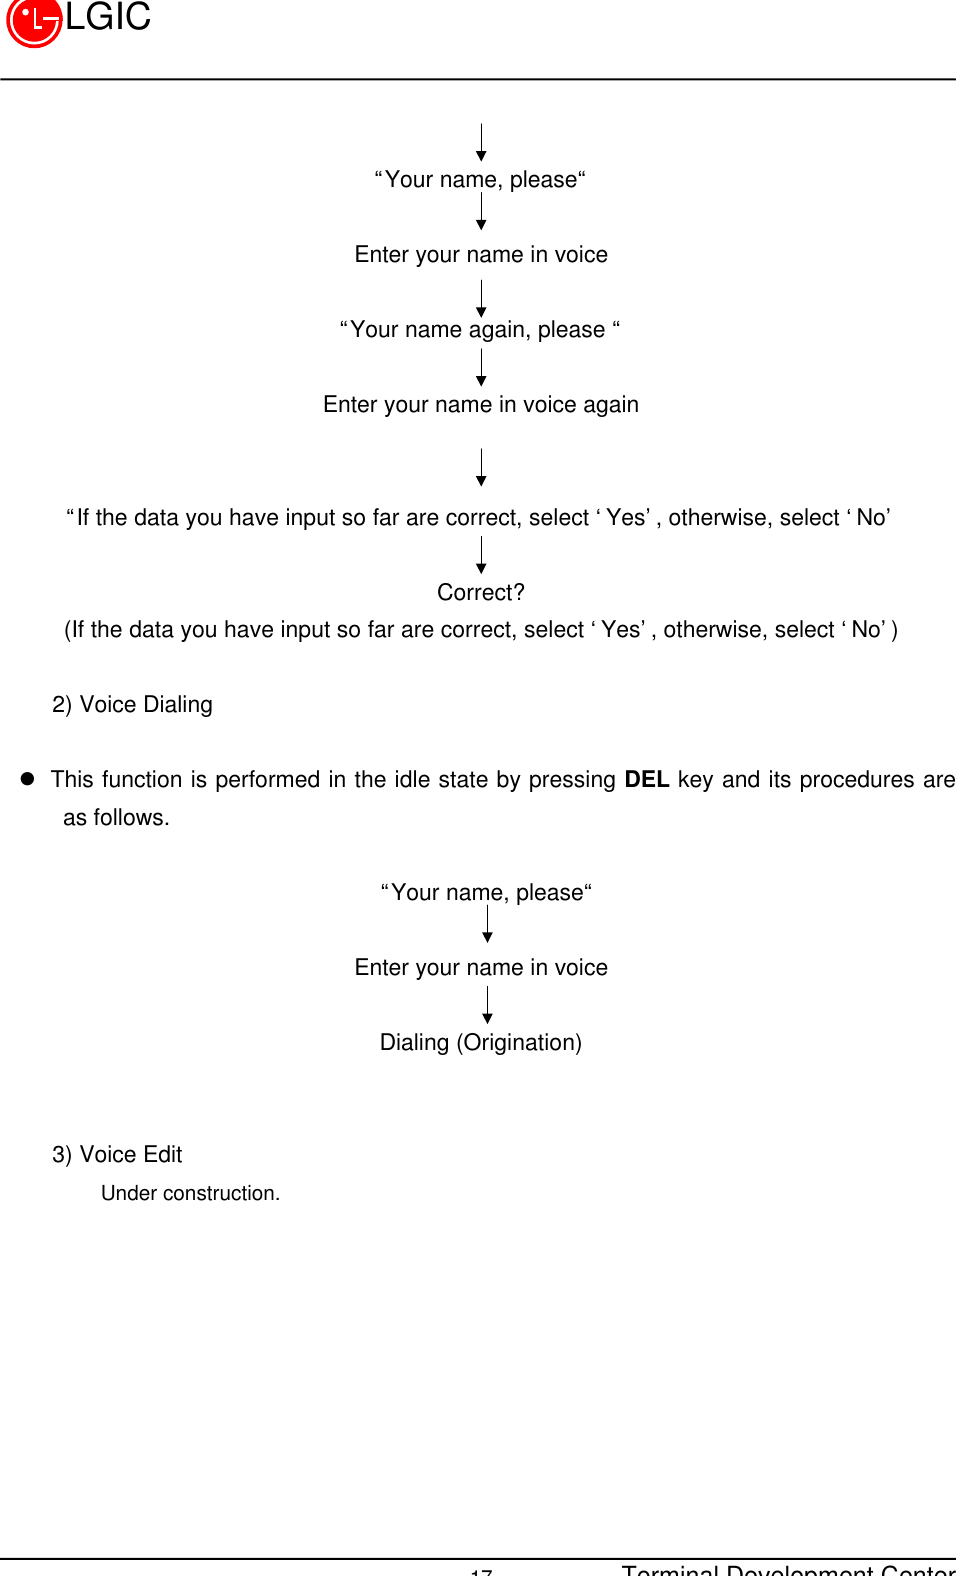
![Terminal Development Center16LGICAnnex 2 : Voice Recognition Function1. Using Voice Recognition Function * For using the voice recognition dialing function, there should be a voice availablethat was previously stored in the memory through the voice learning process. Andthe voice recognition function should be set through ‘Menu 6 + 5’ 1) Voice Learningl This function is performed following the procedures for the conventional telephonenumber storing.l Voice learning should be conducted in a silent place with no noise for high recognitionrate and 2 times of learning should be made respectively. l As the voice data learned in the phone mode and that learned in the hands-free modeare different in their characteristic, you should store the recognized data separately.For storing these 2 voice data in one address, you should store one of voice data firstlyaccording to the following procedure and add the other one through the process of thevoice editing. <Storing procedures are as follows> [Storing procedures related to PIM function] Set up the secret statusPress DEL keySet up the voice recognitionPress STORE key](https://usermanual.wiki/LG-ELECTRONICS/SD500/User-Guide-83541-Page-18.png)
![Terminal Development Center18LGICAnnex3: Automatic Answer Function1. What is Automatic Answer Function?It is a function to store the conversation message of the counterpart through the automaticanswering by the terminal when there is a call.2. Operation Concept(1) Once the automatic answering function has been set, a message of ‘Auto Answering…: (’ is displayed on the LCD display.(2) Upon a call, the bell rings once (But bell is muted), the automatic announcement is released and then the message of the counterpart is recorded. (3) There are two types of message as follows. - Basic Message: A message of [Sorry but I’m not in a position to answer the call, please leave a message] is released. - Recorded Message: You can store a message that you want for automatic answering and some 10-second long of message can be stored. (4) You can store the message of counterpart for around 30 seconds in the recording mode and up to 3 messages can be stored.(5) If you want to call by interrupting the recording while recording, you just press SEND key in the course of a call.(6) If there are 3 messages already in the memory, those existing messages are automatically deleted.(7) Once the received messages are stored in the memory, ‘Automatic Answer: (’ is displayed in the state of idle unless you verify or delete messages.3. Menu Configuration (Menu 6 – 6)(1) Automatic Answer Setup (Menu 6 + 6 + 1)](https://usermanual.wiki/LG-ELECTRONICS/SD500/User-Guide-83541-Page-20.png)
![Terminal Development Center19LGIC- As a function to set the automatic answering mode, it can be set to “Setup/Release” modeand its default is “Release”.(2) Message Retrieve (Menu 6 + 6 + 2)- You can retrieve the recorded message of your counterpart while calling.(3) Message Delete (Menu 6 + 6 + 3)- Function to delete the recorded message.(4) Message Select (Menu 6 + 6 + 4)- You can select ‘Basic message/Recorded message’ to release in the automatic answeringmode and its default is the basic message.(5) Message Record (Menu 6 + 6 + 5)- When the recorded message is selected, you can store the message to release.- Recording time is approximately 10 seconds.- Once the recording is completed (End button), the voice is recorded in the memory.(6) Message Play (Menu 6 + 6 + 6)- Function to play the recorded message.- Press [Cancel] key or END key for the abortion.(7) Record Message Delete (Menu 6 + 6 + 7)- Function to delete the recorded message from the memory.](https://usermanual.wiki/LG-ELECTRONICS/SD500/User-Guide-83541-Page-21.png)
![Terminal Development Center20LGICHold-on Function1. What is Hold-on function?It is also called “Reception Hold Message Transmission Function”. If there is a call while you areoccupied with some urgent matters, you can release the message of [Sorry but hold on, please and Iget back to you shortly…(up to 30 seconds)] and converse with your counterpart shortly.2. How to Use 1) Message Delivery upon a Call(1) Select “Setup” from Menu 6 + 8 + 2.(2) For delivering a message that requests the caller to wait a moment upon a call, you just pressMSG Key.(3) When you are ready for the call, press SEND key to resume the suspended call.(4) Initiate the call. 2) Recording Self Message (1) Select Menu 6 + 8 + 3.(2) Start recording upon the sound of “BEEP”](https://usermanual.wiki/LG-ELECTRONICS/SD500/User-Guide-83541-Page-22.png)