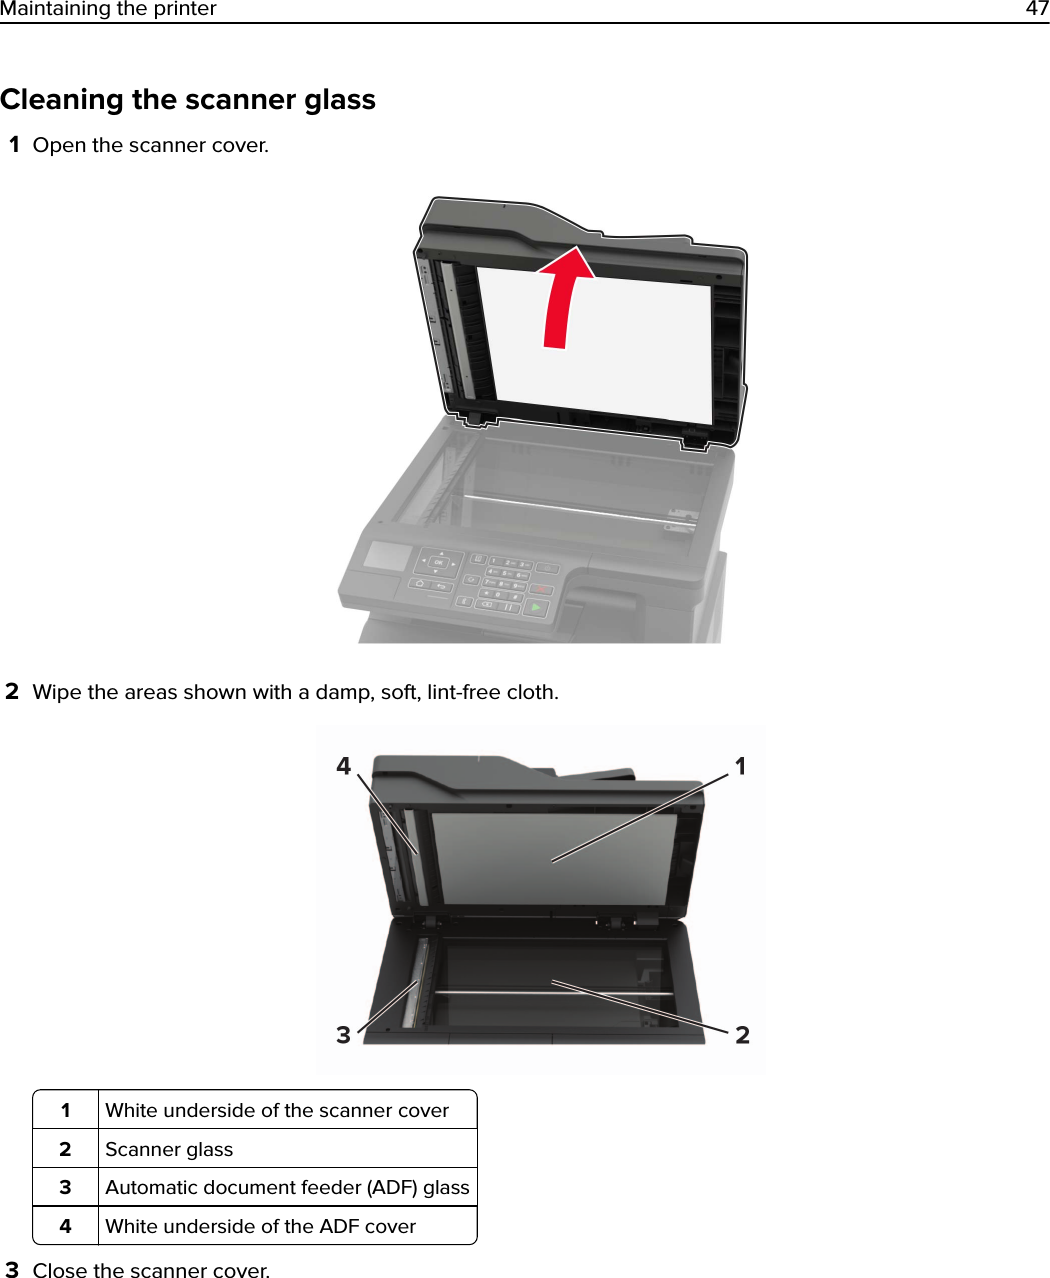
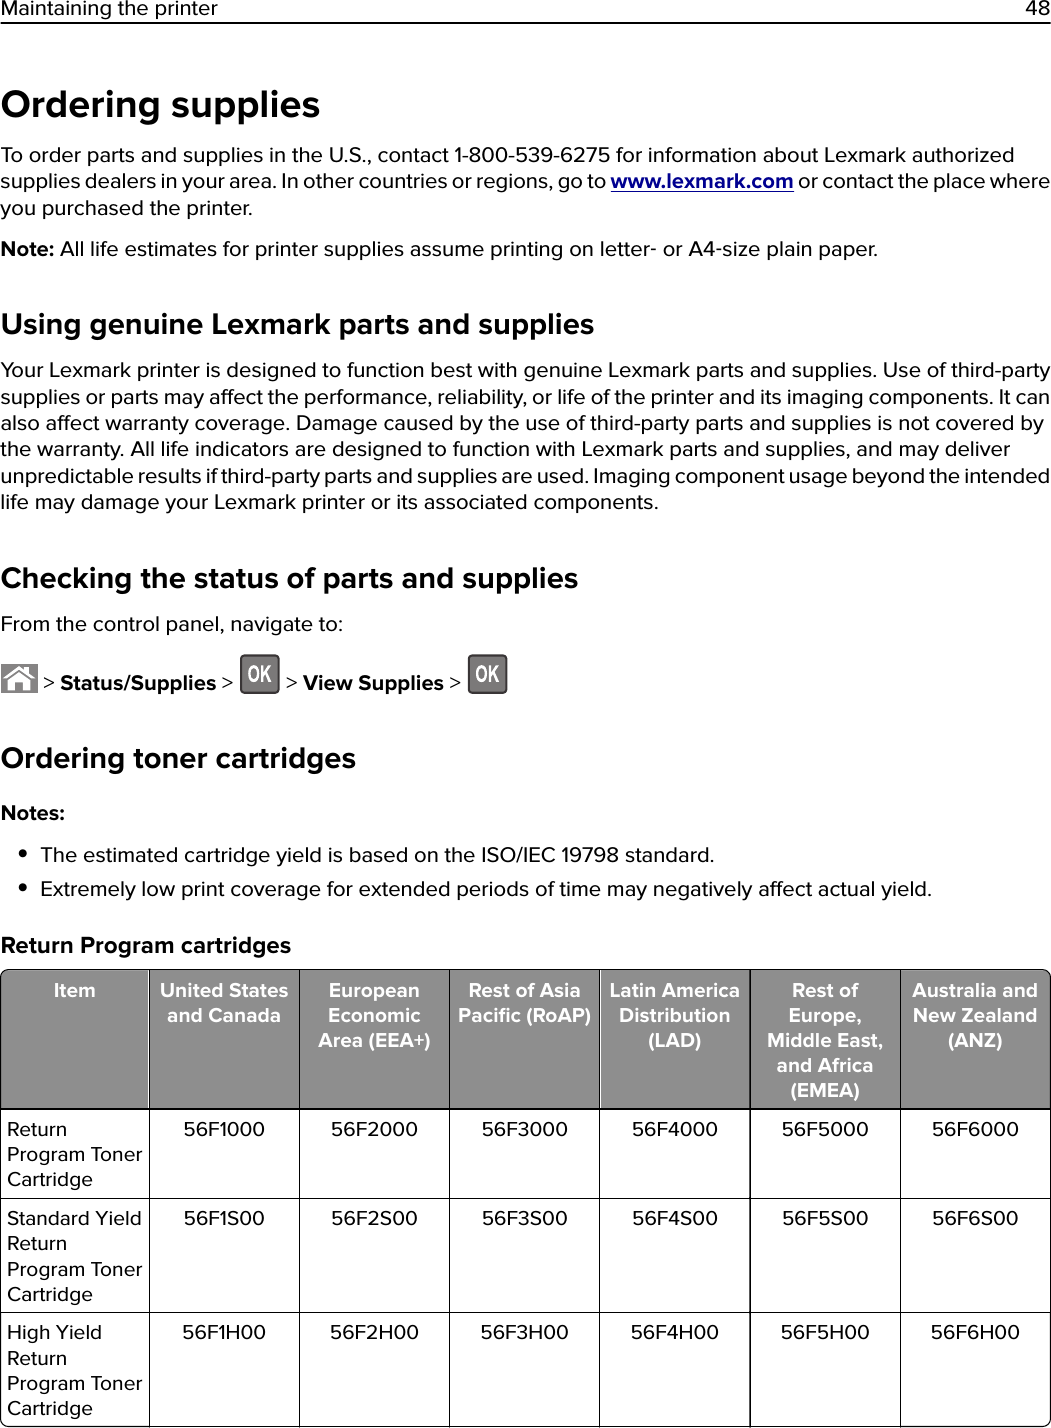
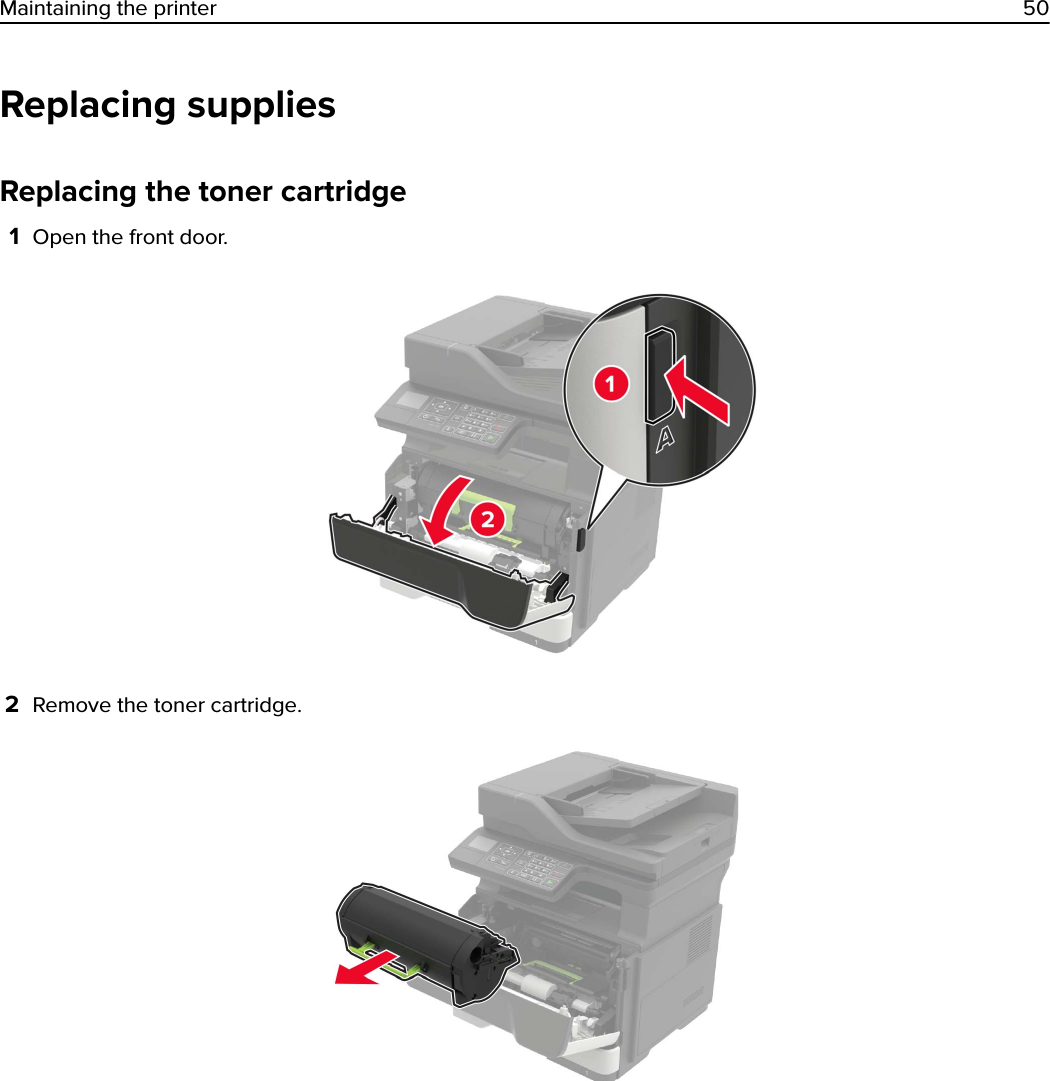
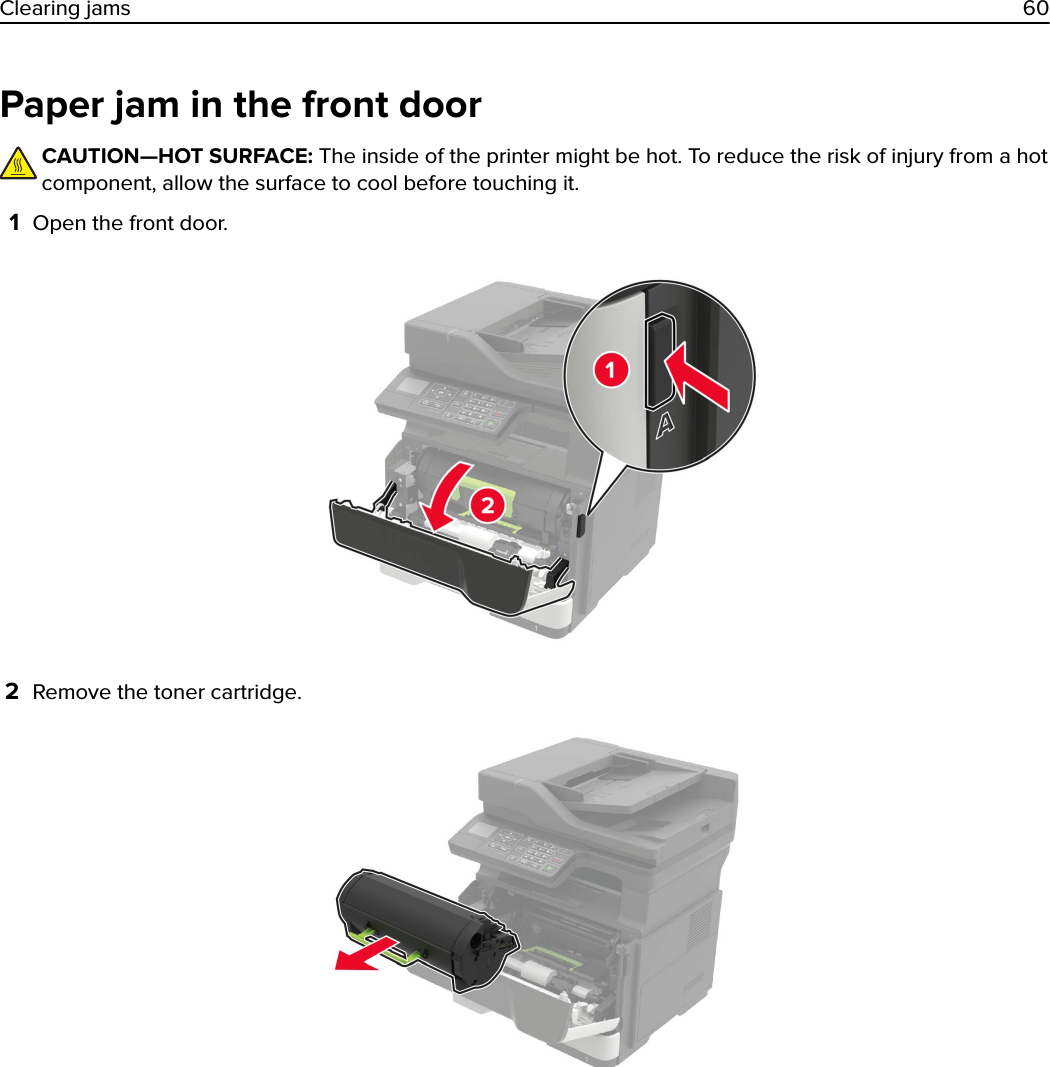
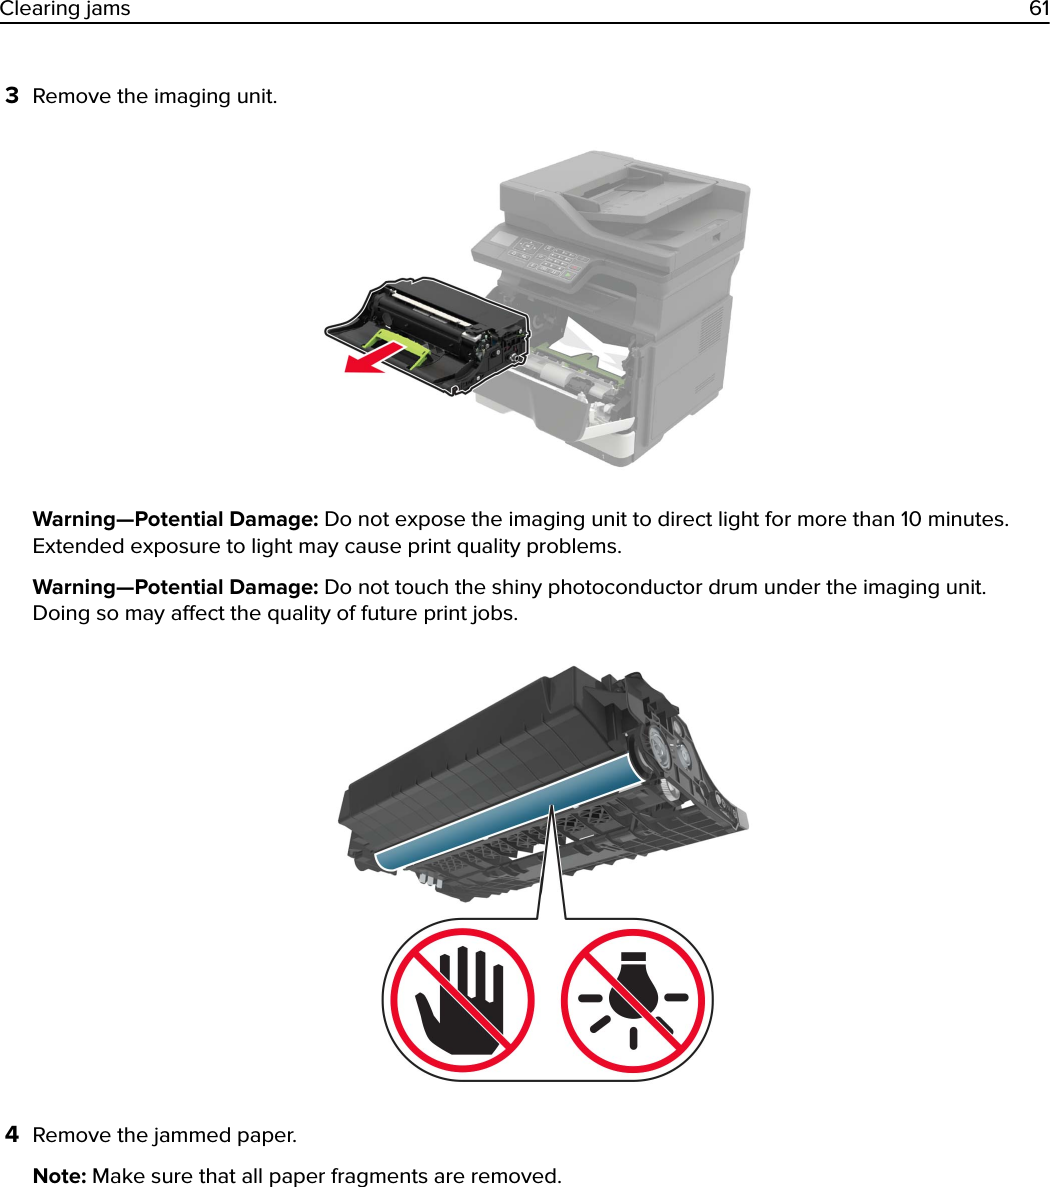
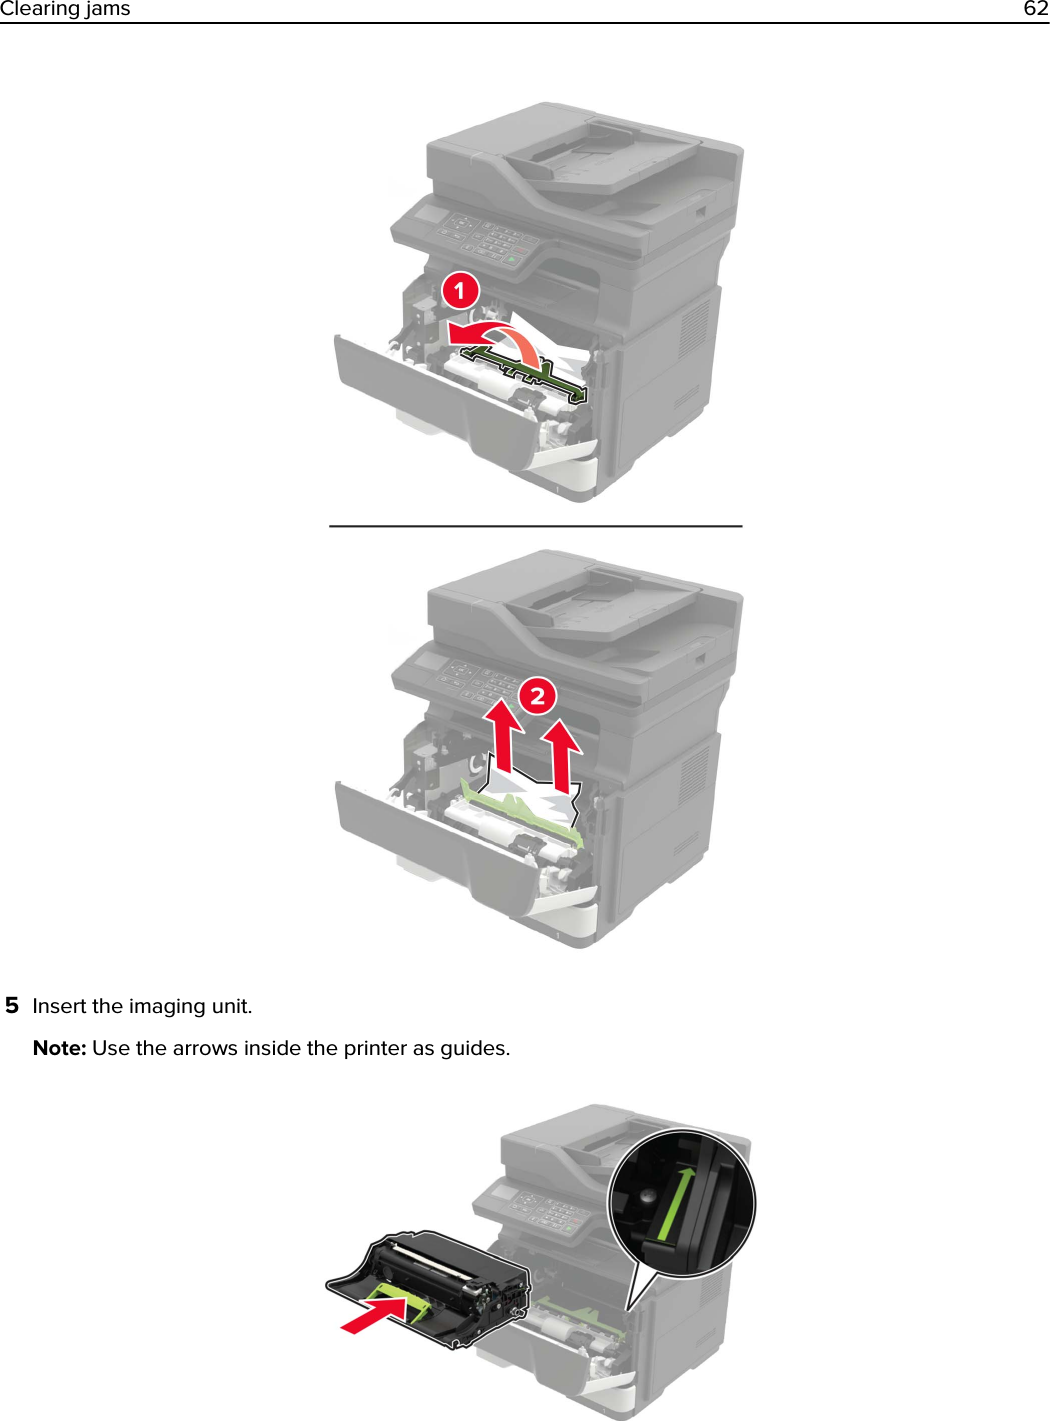
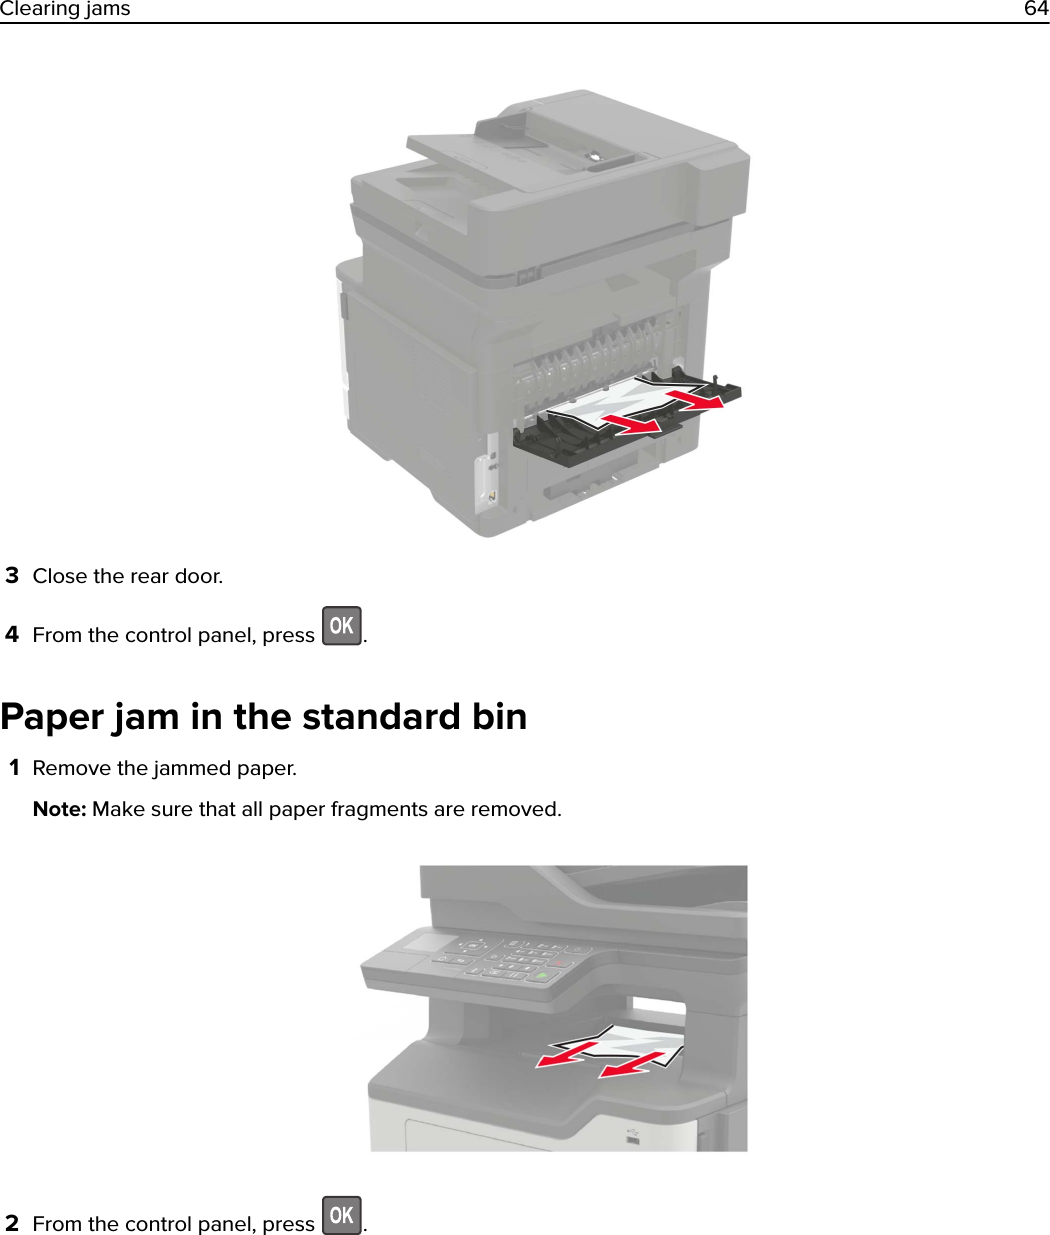
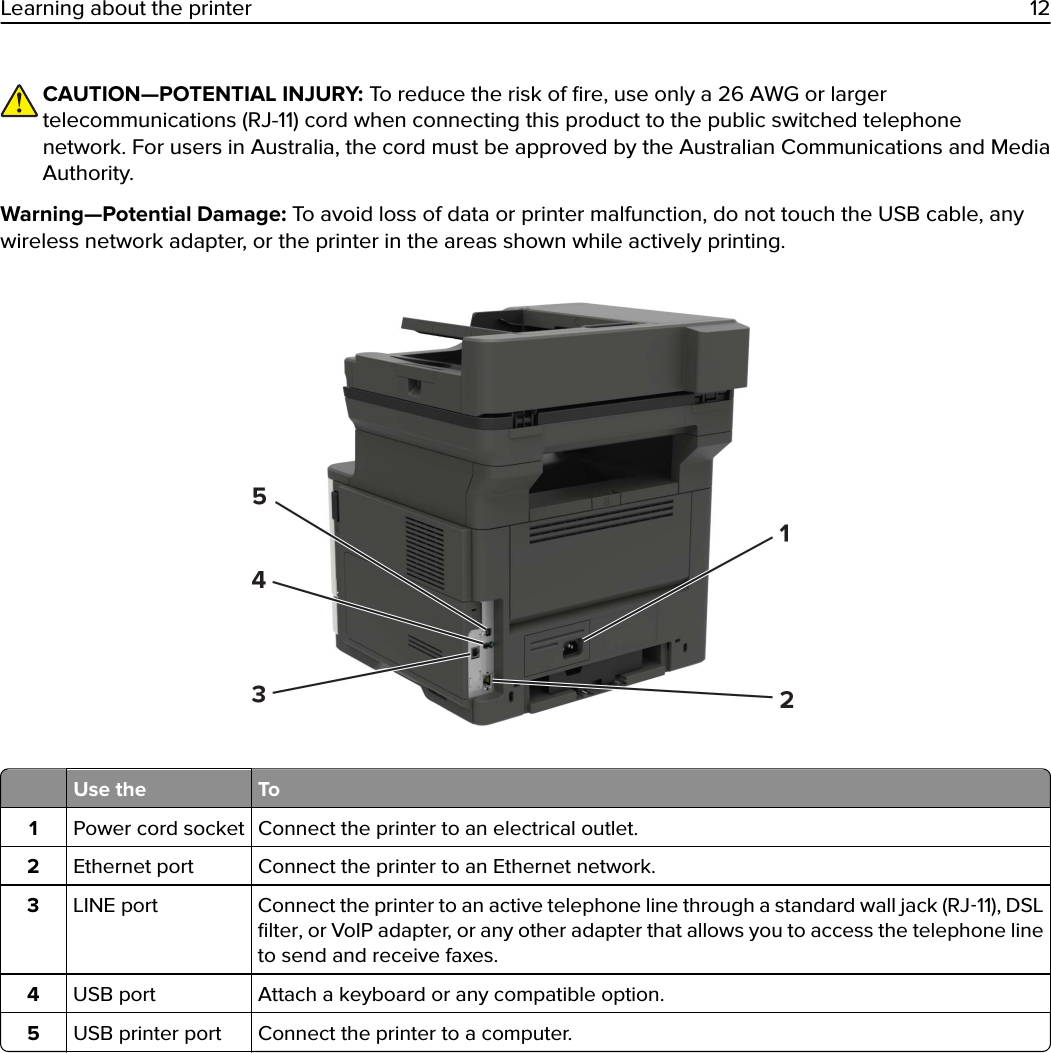
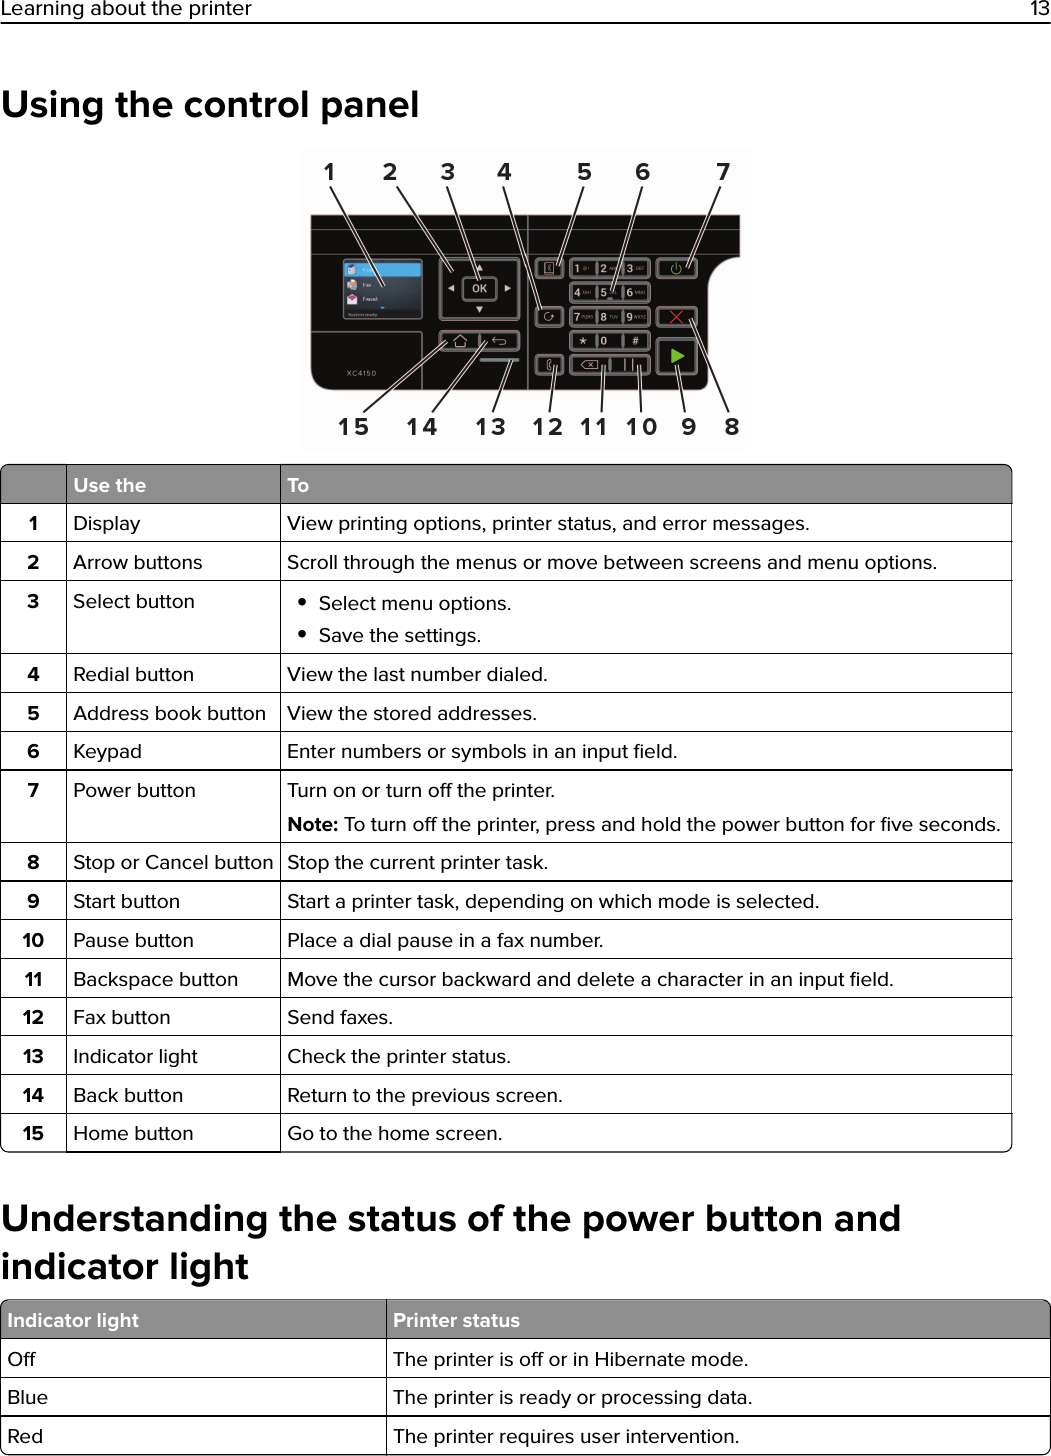
Lexmark LEXM07001 Internal Network Adapter User Manual User s Guide
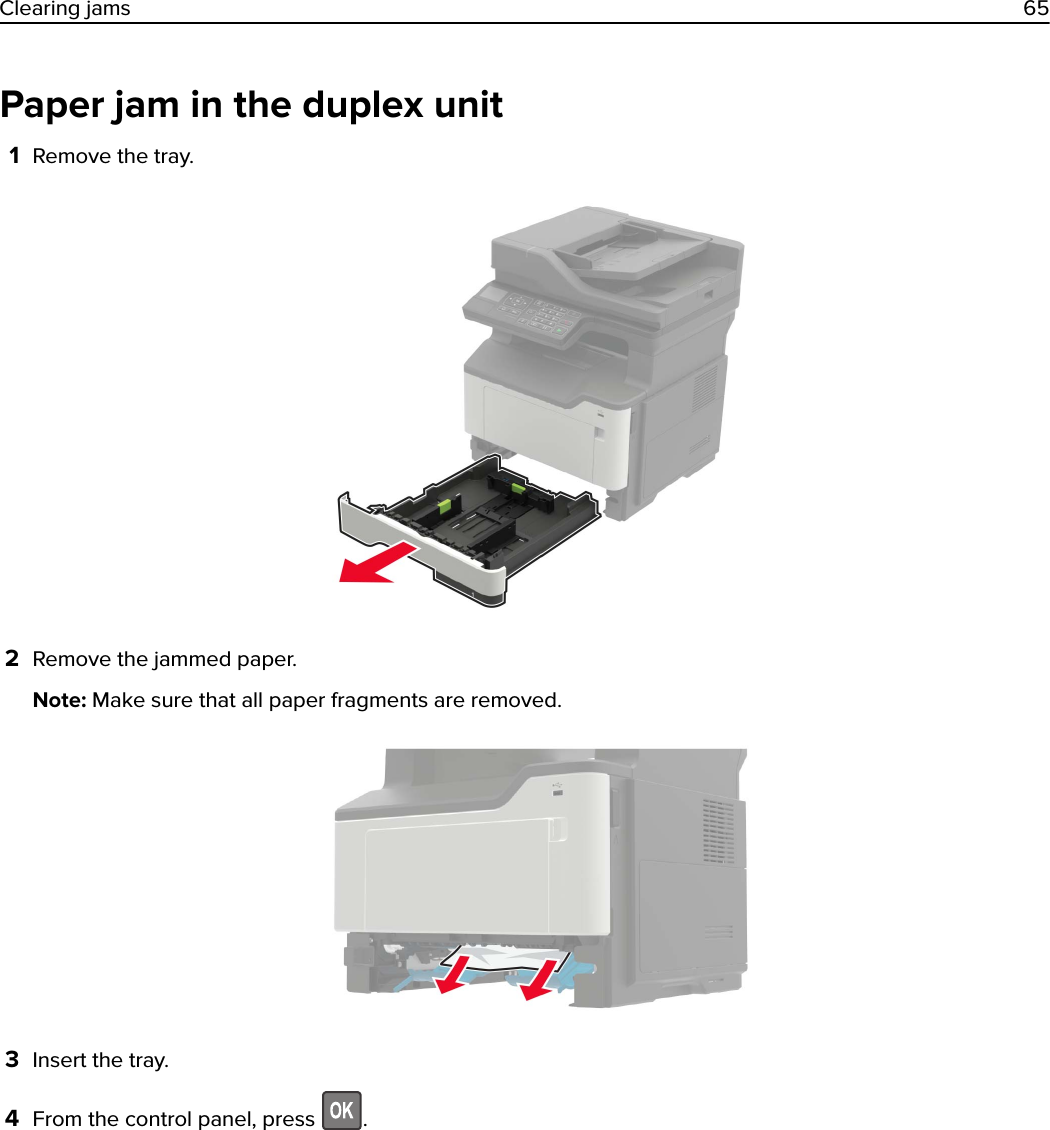
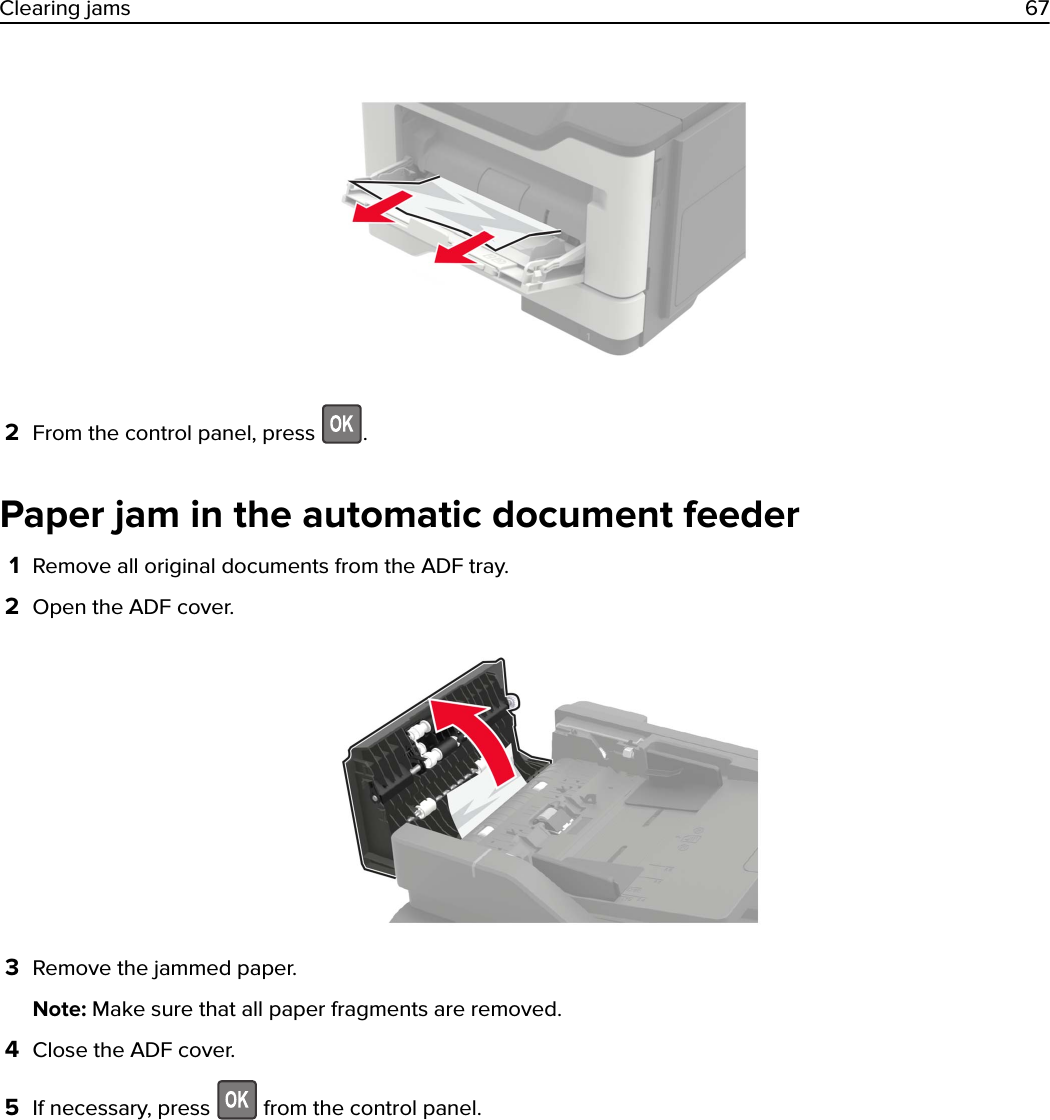
Lexmark International Inc Internal Network Adapter User s Guide
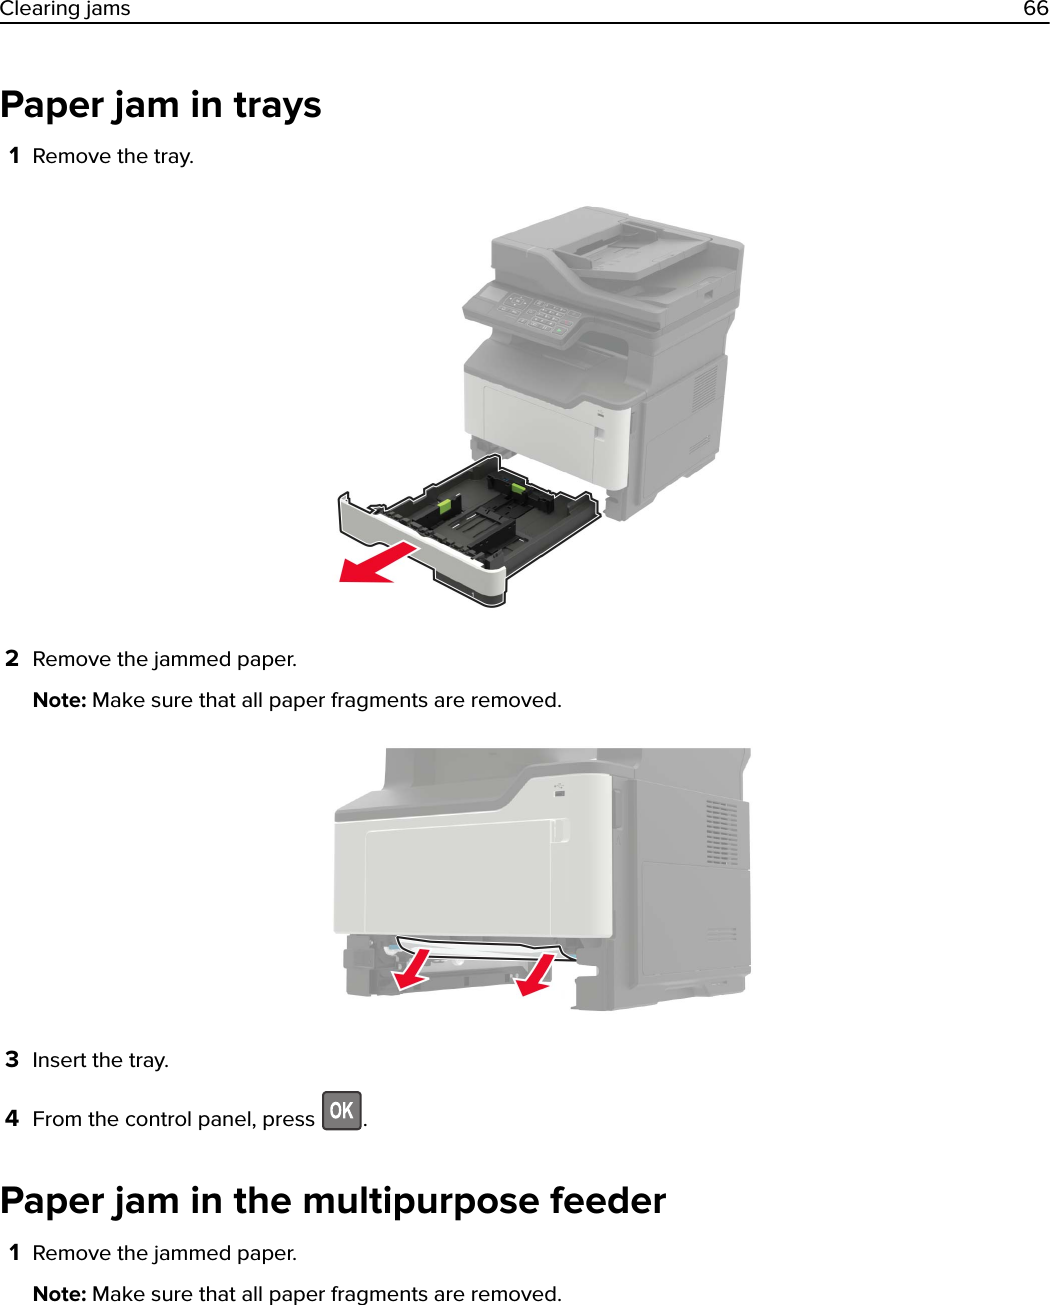
Lexmark >
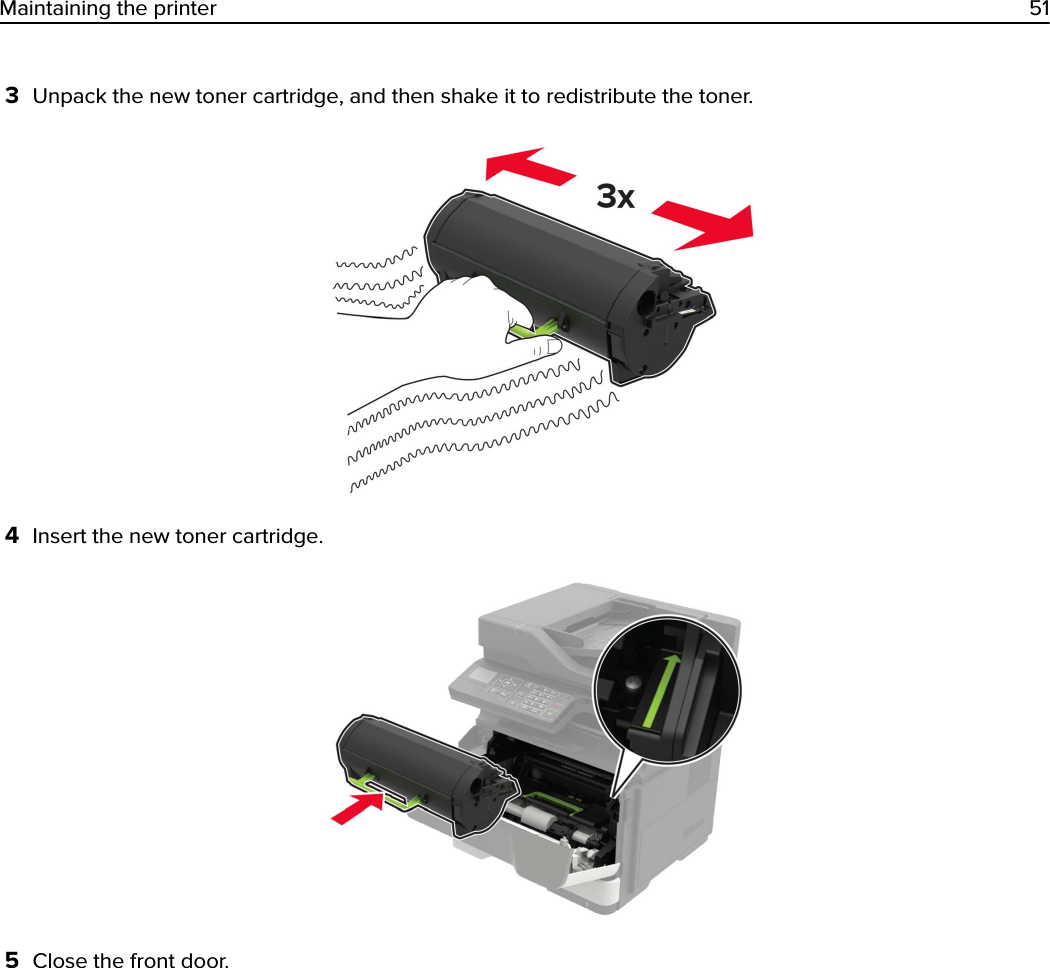
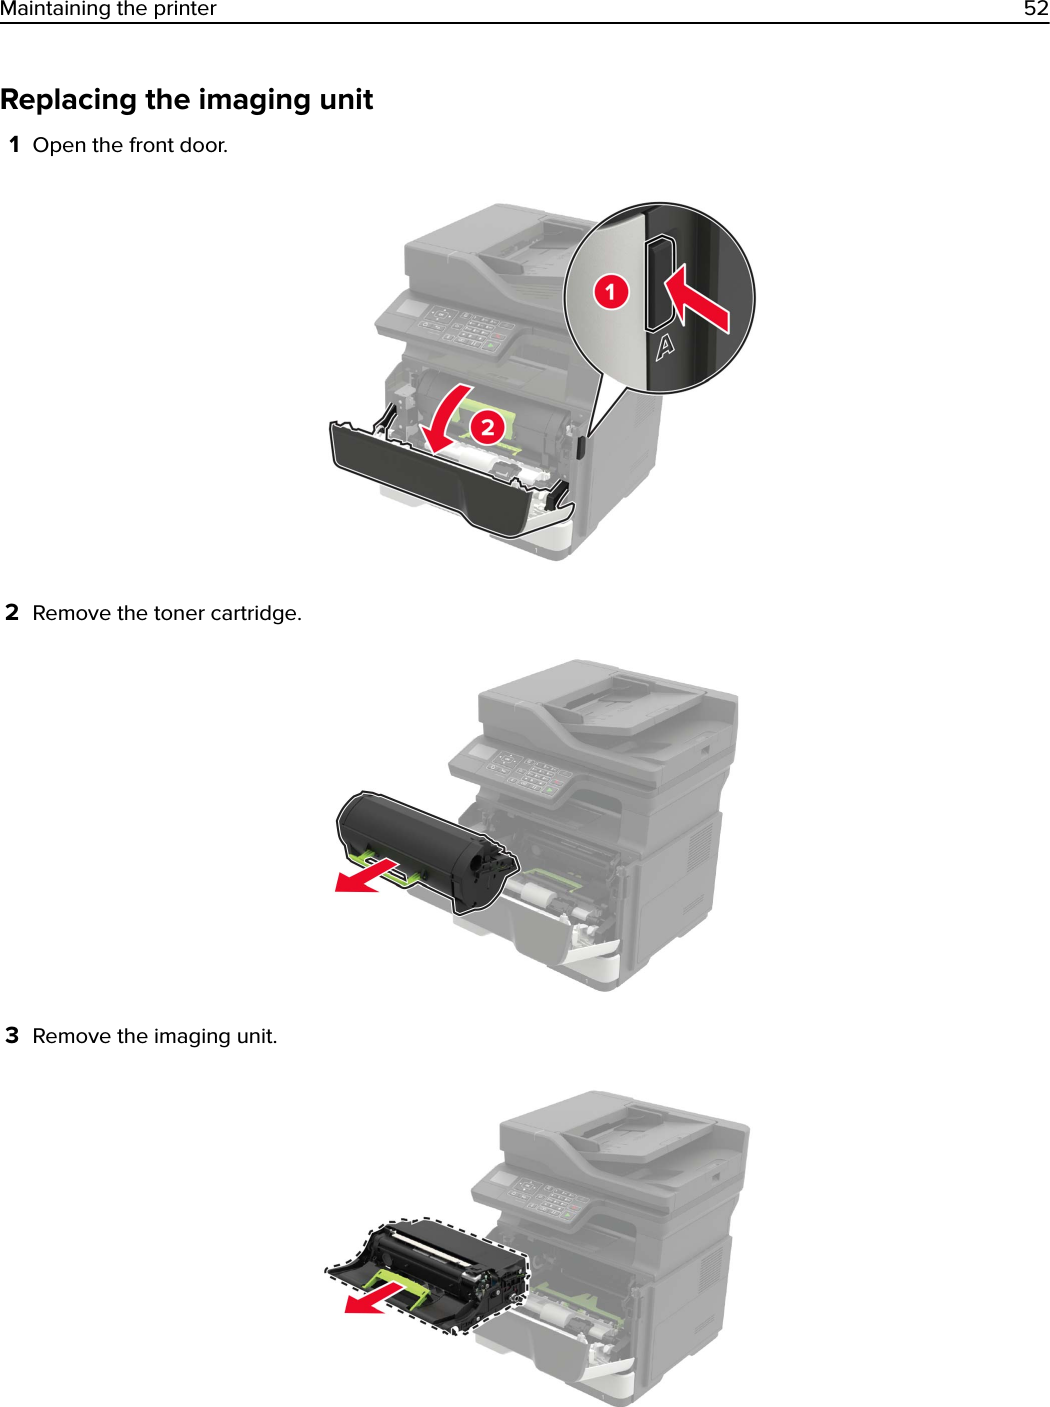
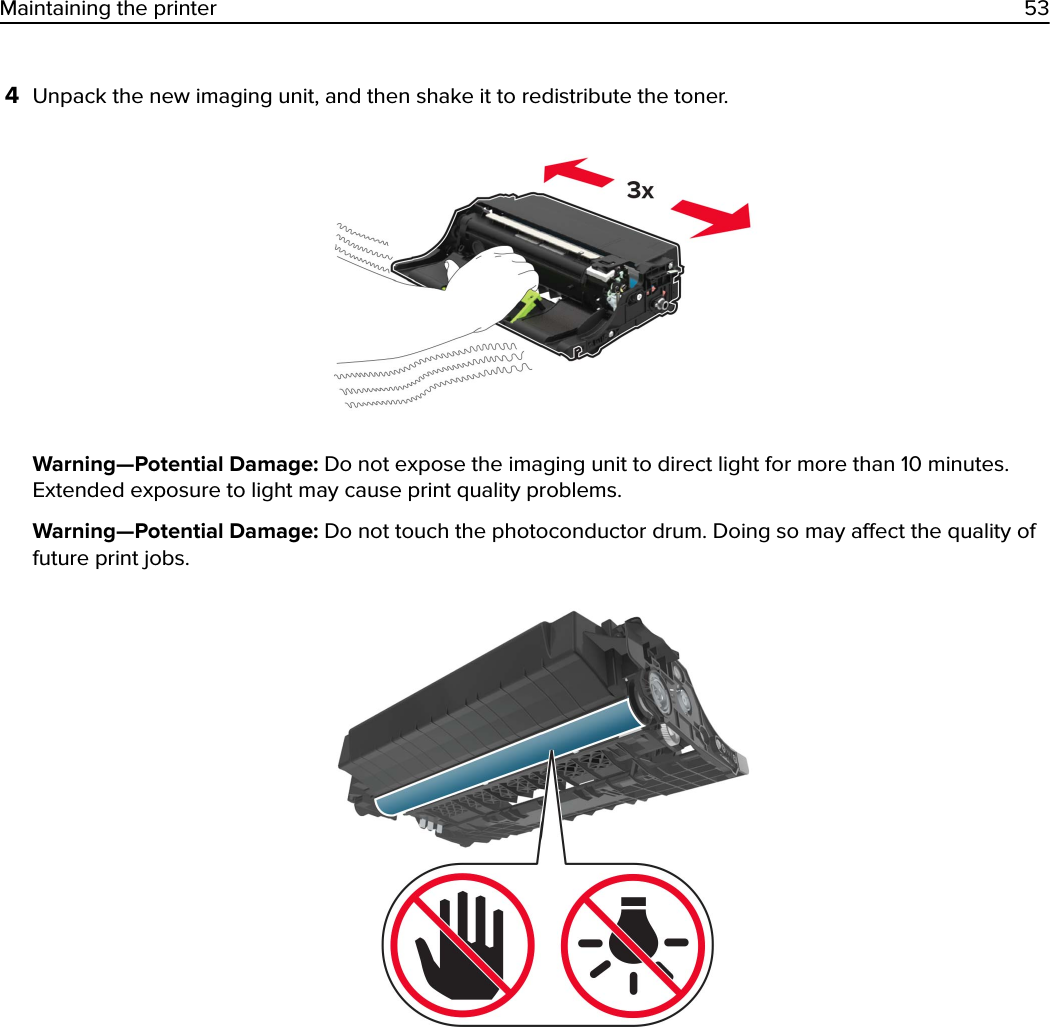
Contents
- 1. Manual - Module
- 2. Manual - Host Device Example Part 1
- 3. Manual - Host Device Example Part 2
Manual - Host Device Example Part 1

![FTP•FTP DefaultsUSB Drive•Flash Drive Scan •Flash Drive PrintNetwork/Ports•Network Overview•Wireless•AirPrint•Ethernet•TCP/IP•IPv6•SNMP•IPSec•LPD Configuration•HTTP/FTP Settings•ThinPrint•USB•Parallel [x]•Serial•Google Cloud Print•Wi‑Fi DirectSecurity•Security Audit Log•Confidential Print Setup•Erase Temporary Data Files•Solutions LDAP Settings•MiscellaneousReports•Device•Print•Shortcuts•NetworkHelp•Print All Guides•Mono Quality Guide•Connection Guide•Copy Guide•E‑mail Guide•Information Guide•Media Guide•Moving Guide•Print Quality Guide•Scan Guide•Supplies GuideTroubleshooting•Print Quality Test PagesLearning about the printer 15](https://usermanual.wiki/Lexmark/LEXM07001.Manual-Host-Device-Example-Part-1/User-Guide-3748166-Page-15.png)