MEILOON IDS3RX Powered Speaker with Wireless Subwoofer for iPhone/iPod User Manual manual part 1
Meiloon Industrial Co., Ltd. Powered Speaker with Wireless Subwoofer for iPhone/iPod manual part 1
MEILOON >
Contents
- 1. manual part 1
- 2. manual part 2
- 3. manual part 3
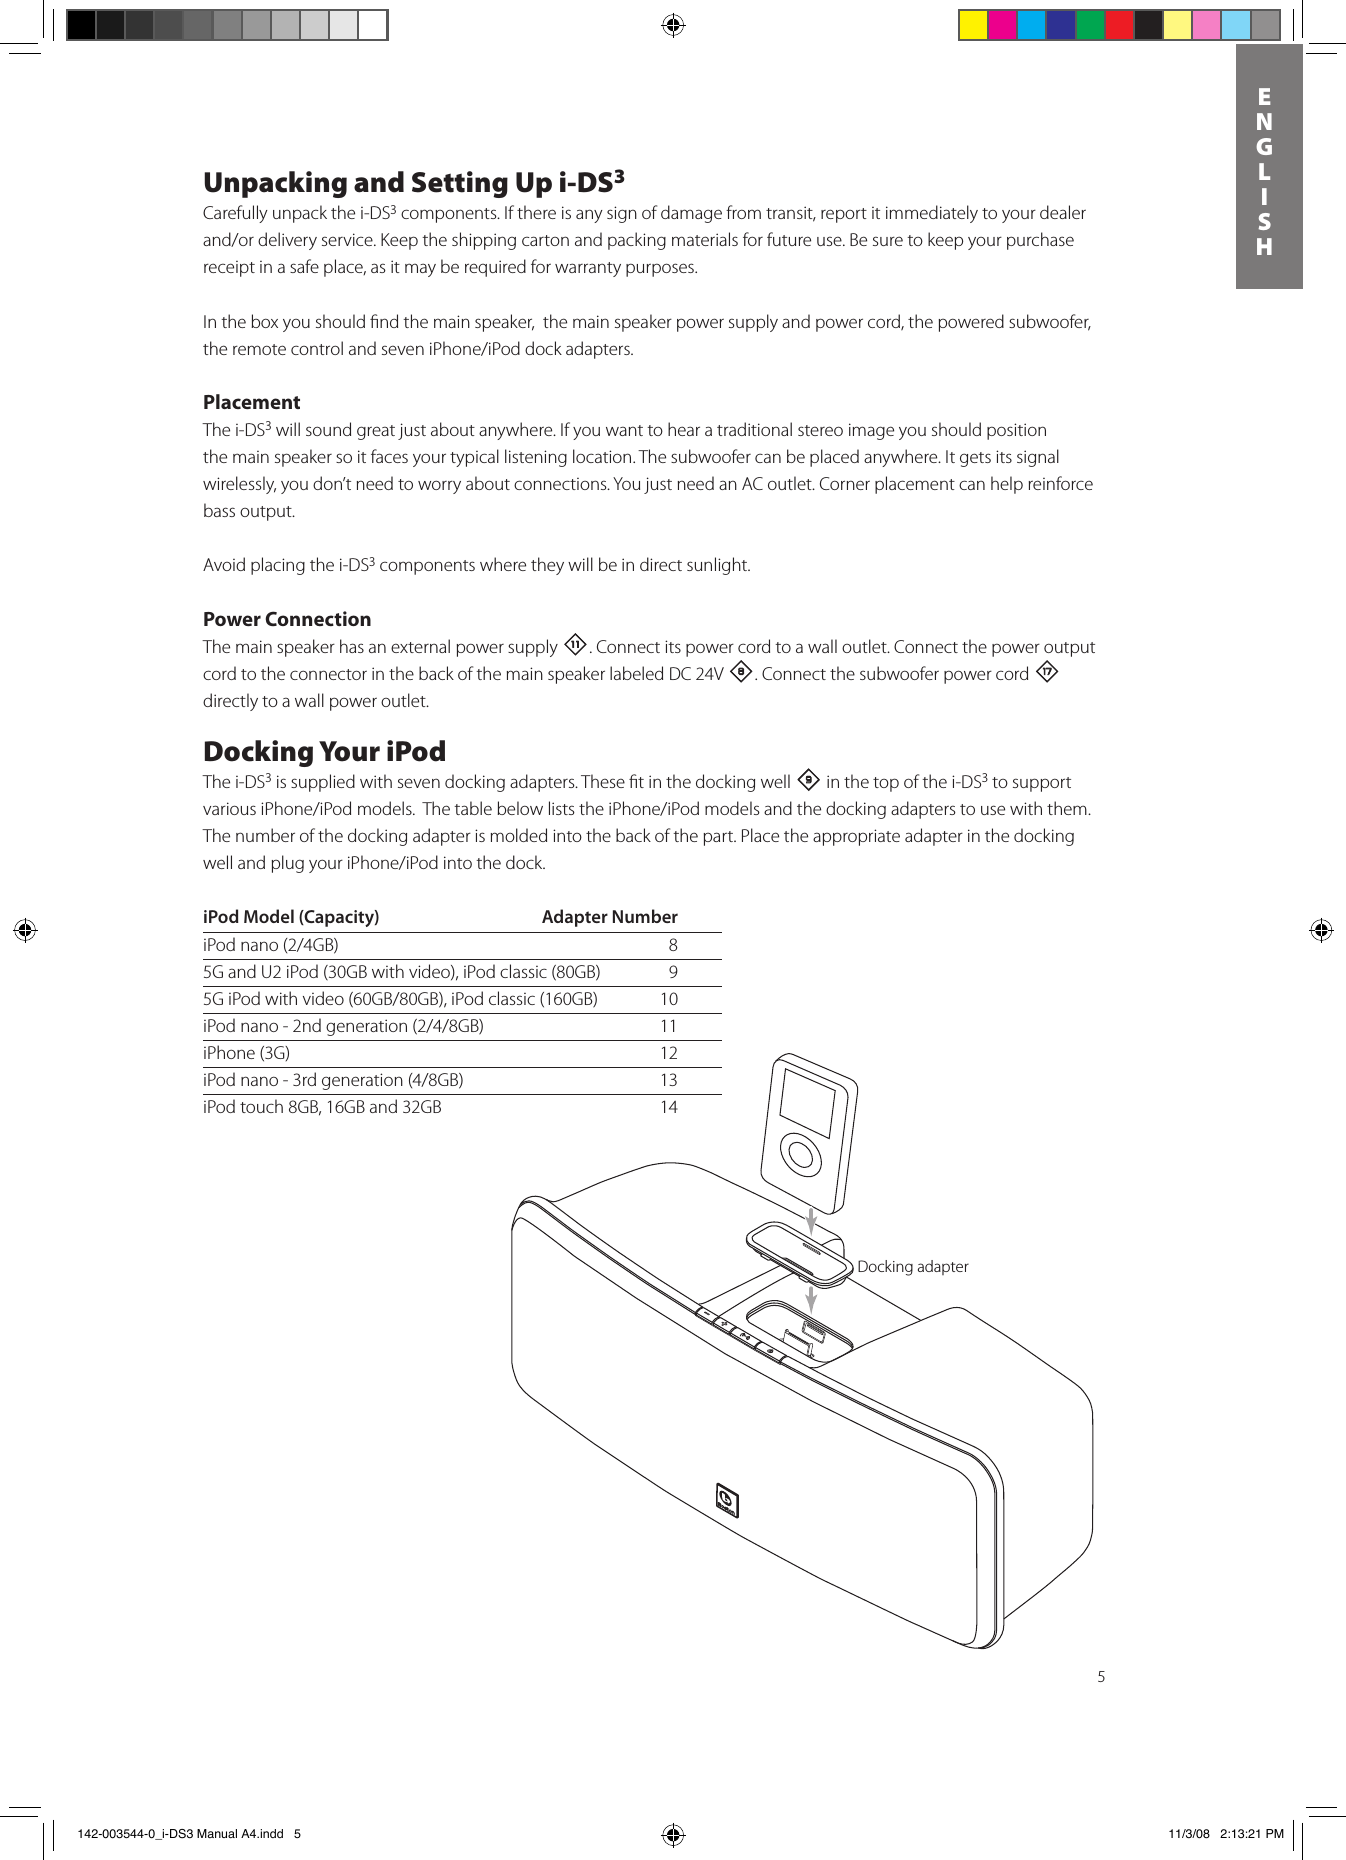
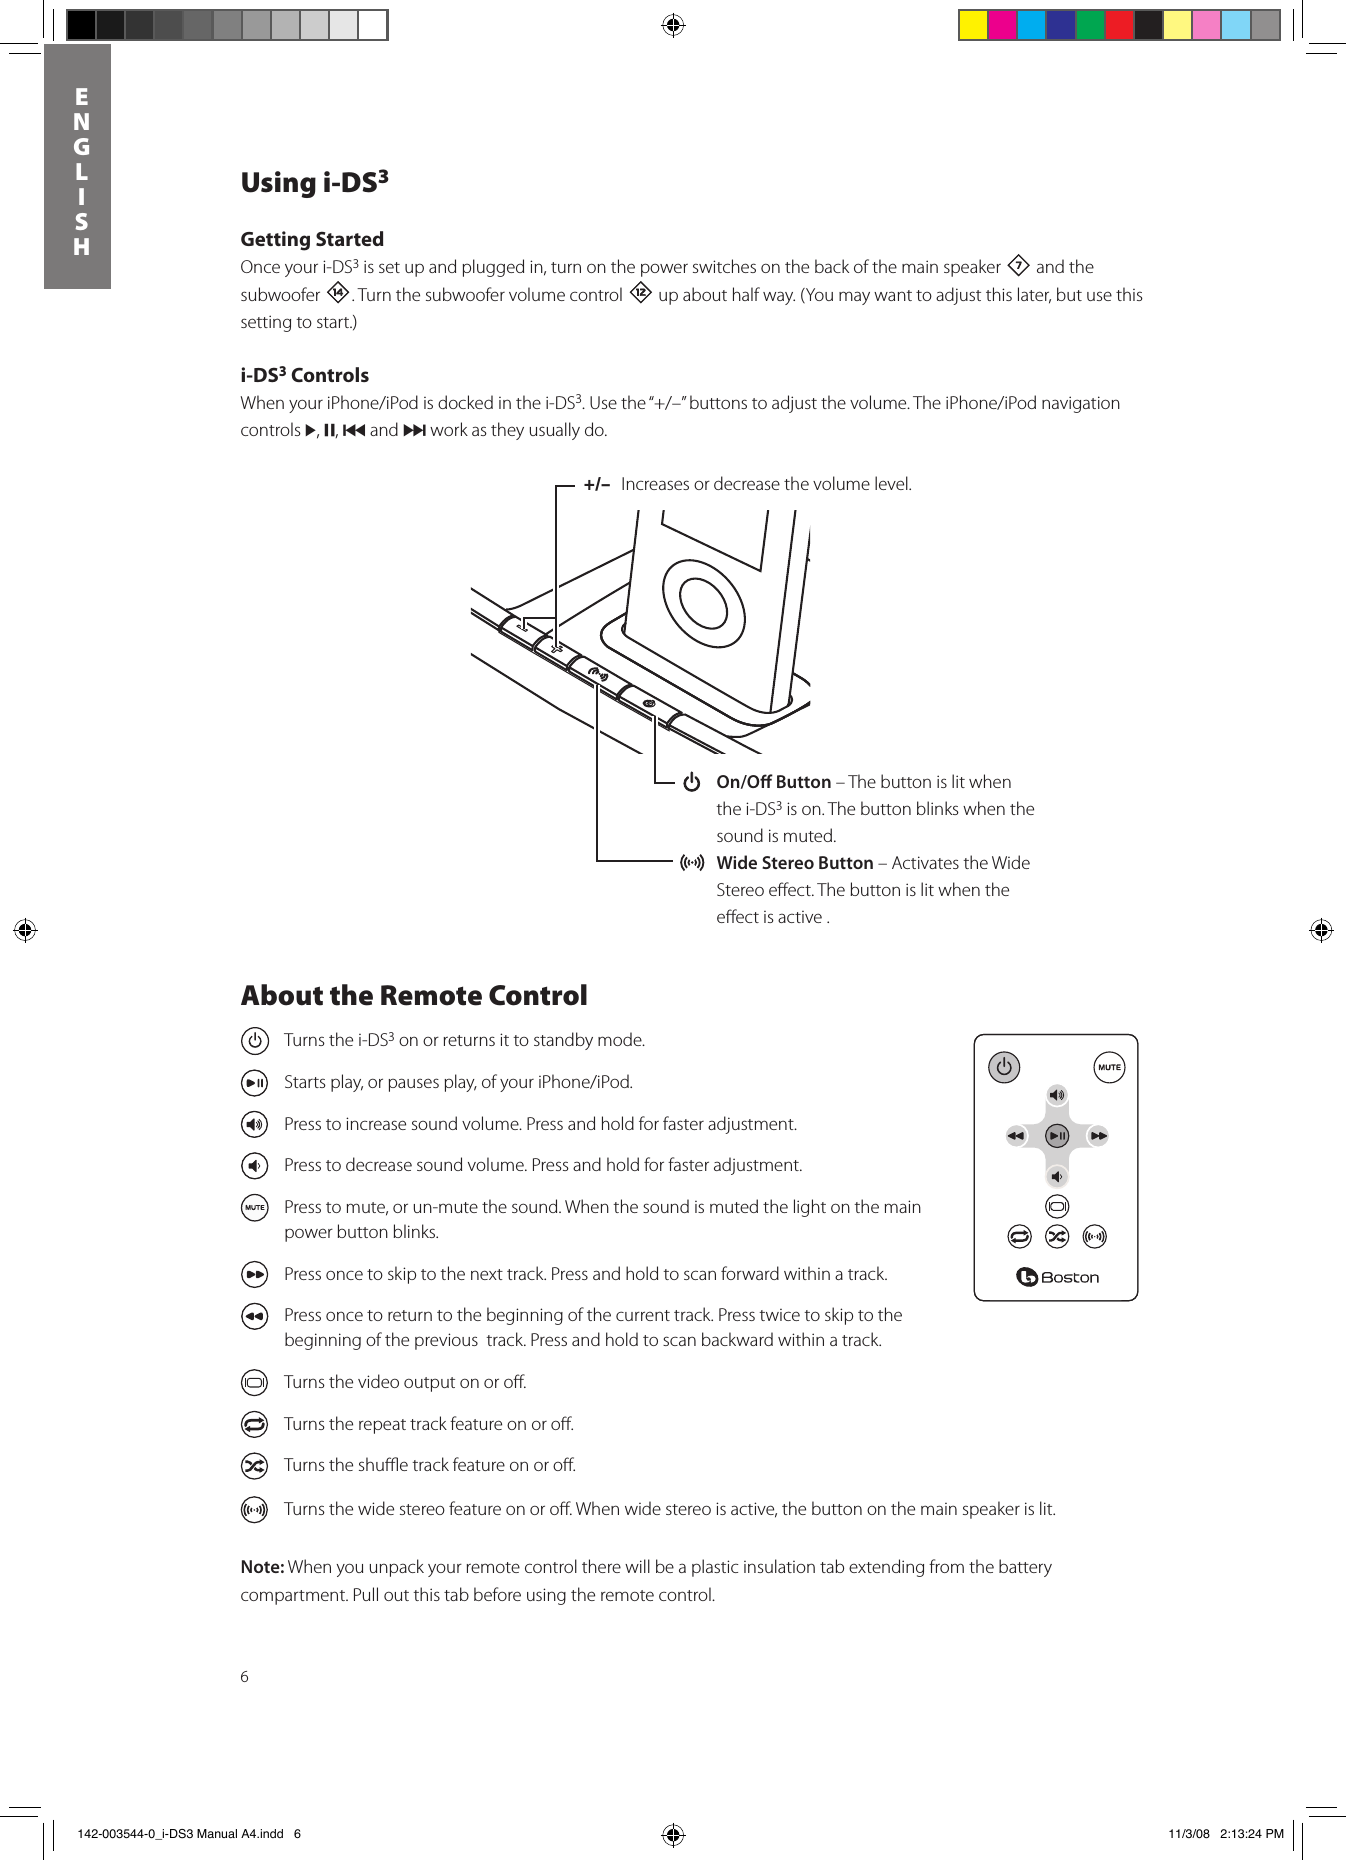
manual part 1