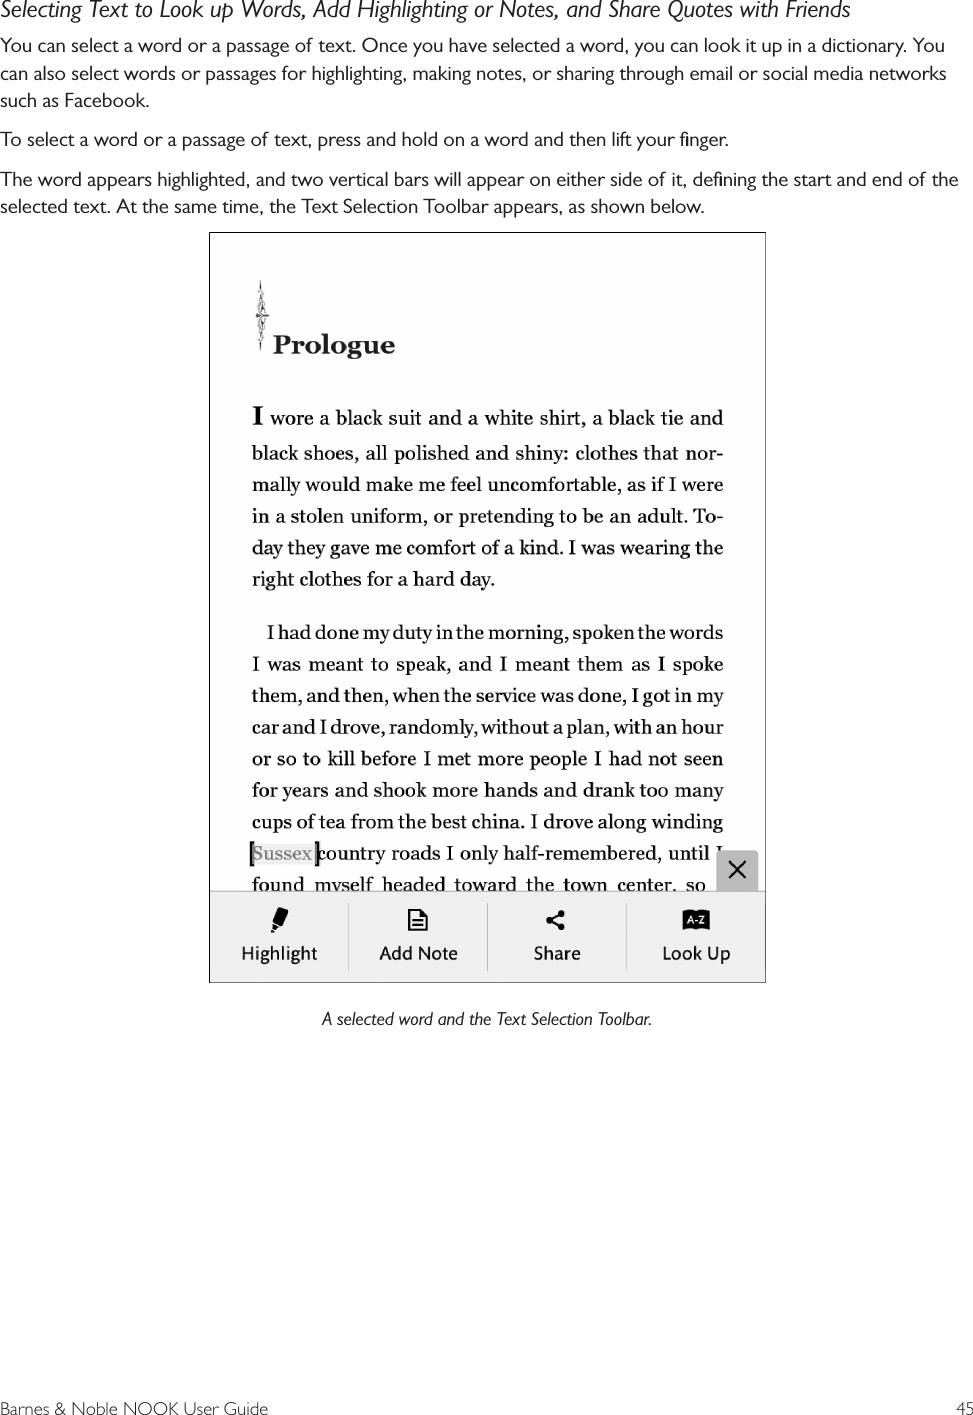
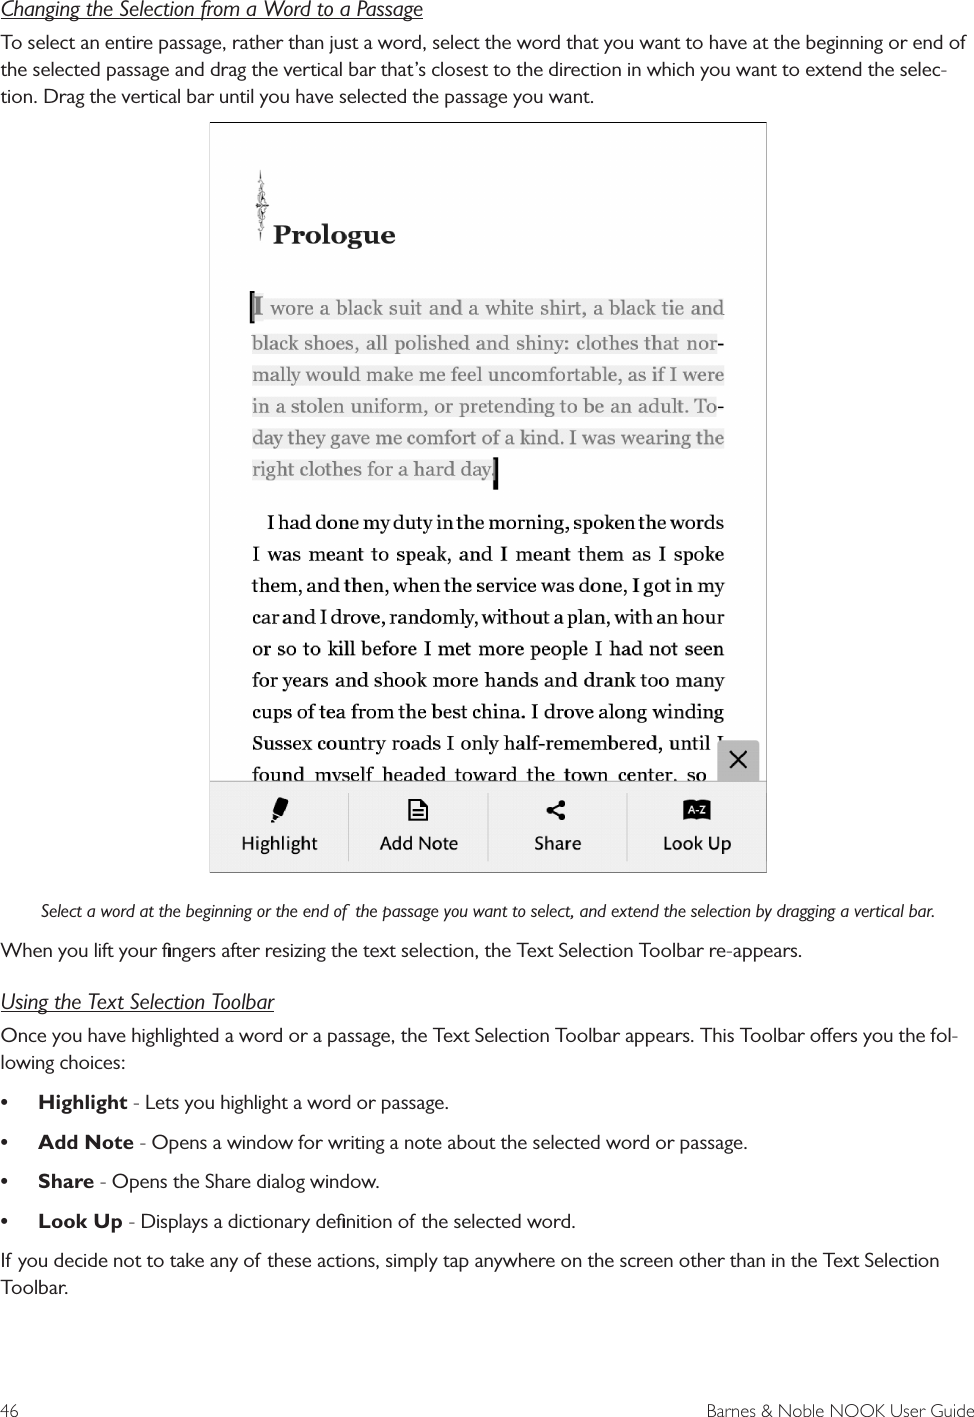
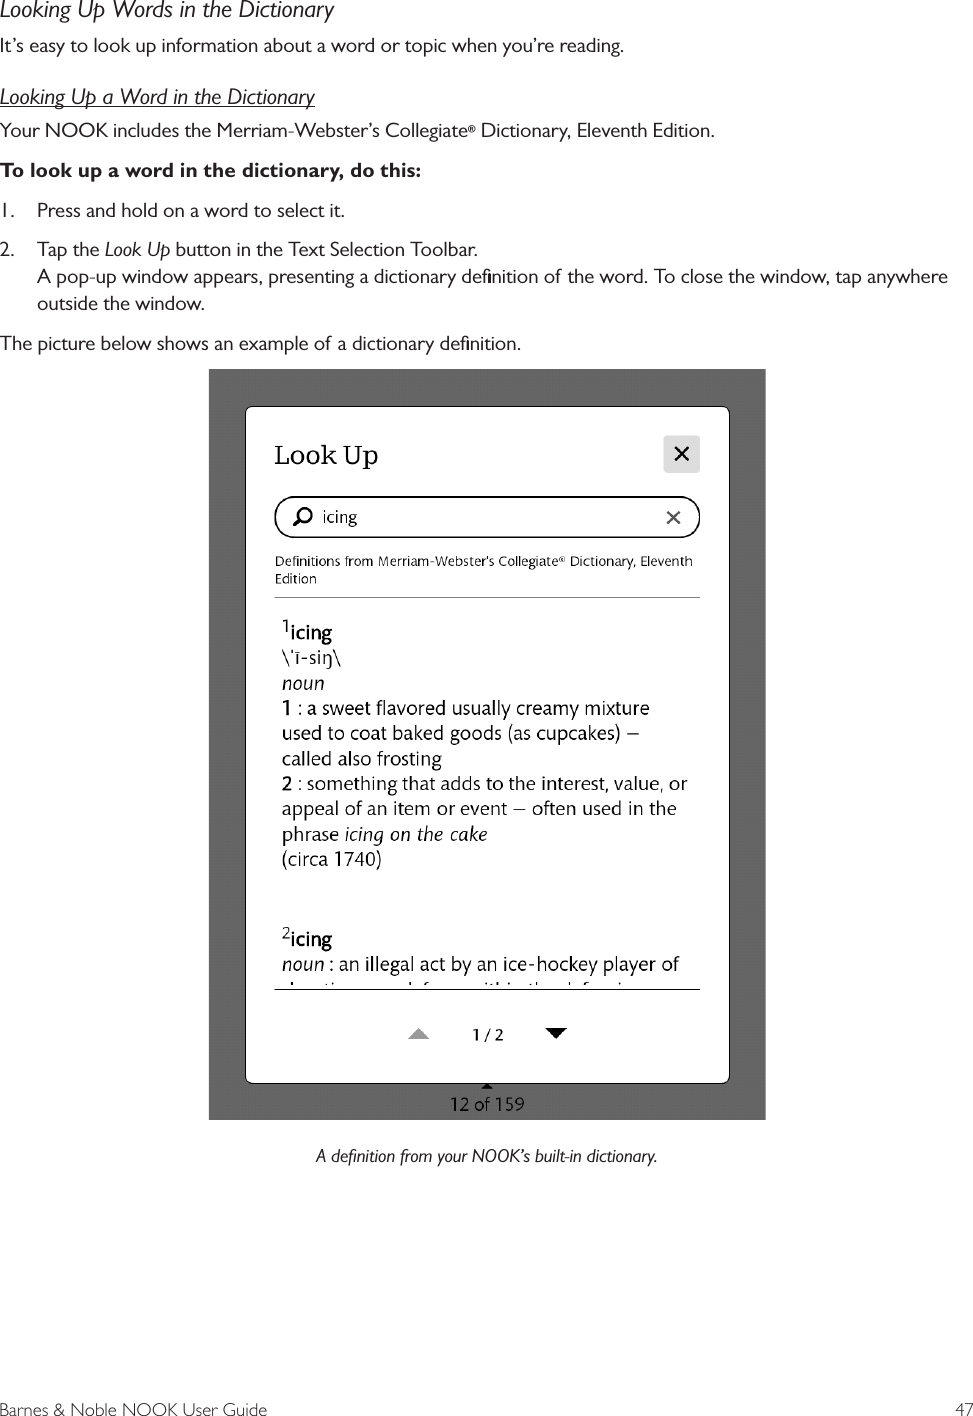
Nook Digital subsidiary of Barnes and Noble BNRV510-A EBOOK READER User Manual Barnes Noble NOOK User Guide
Barnes&Noble.com; EBOOK READER Barnes Noble NOOK User Guide
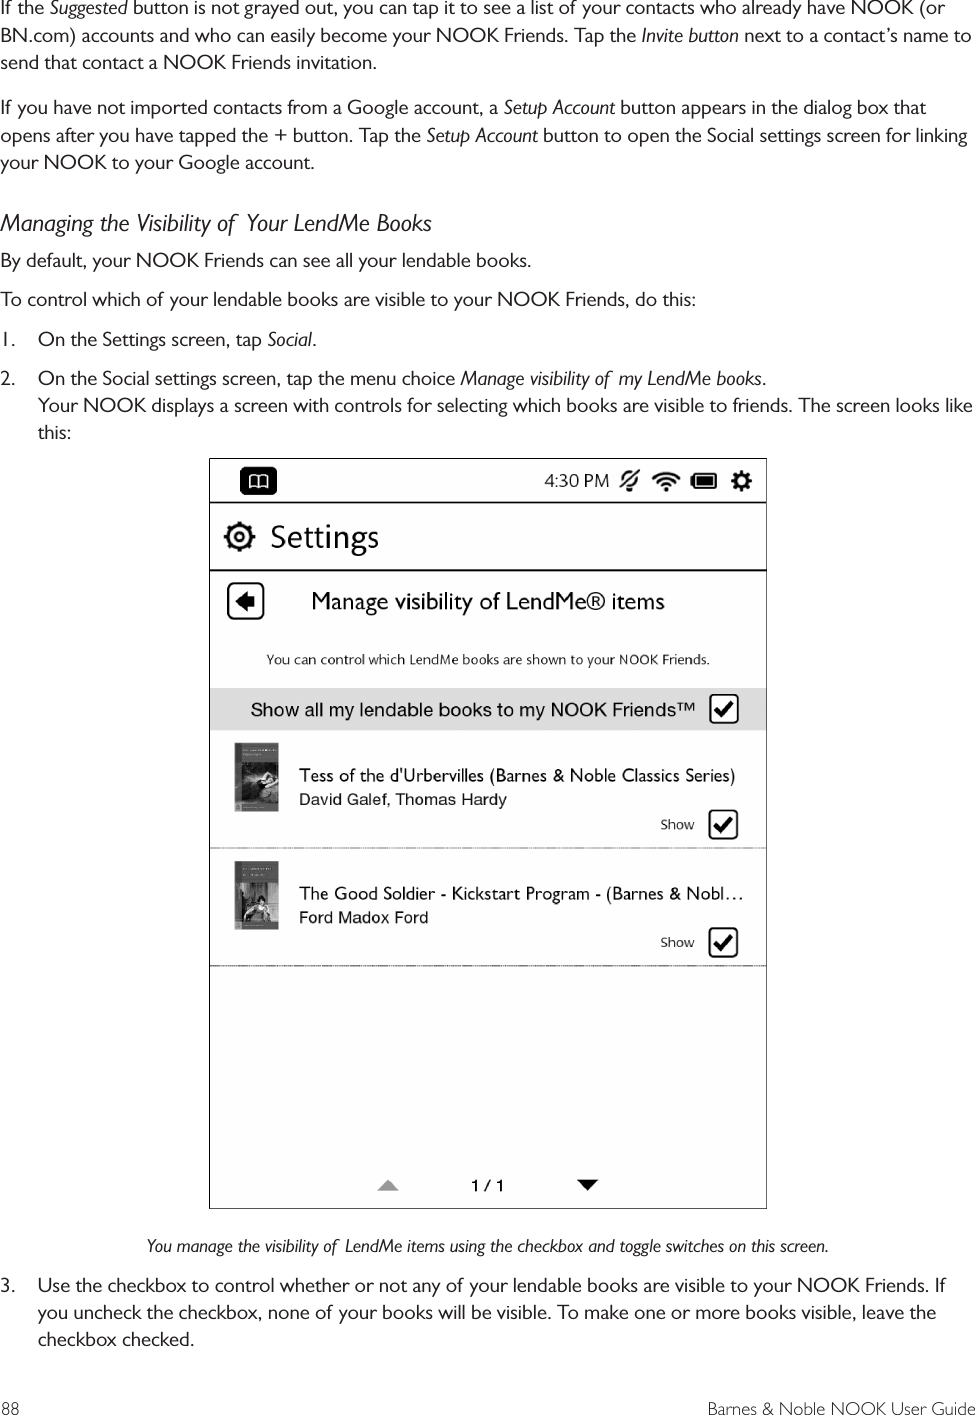
UserManual.wiki
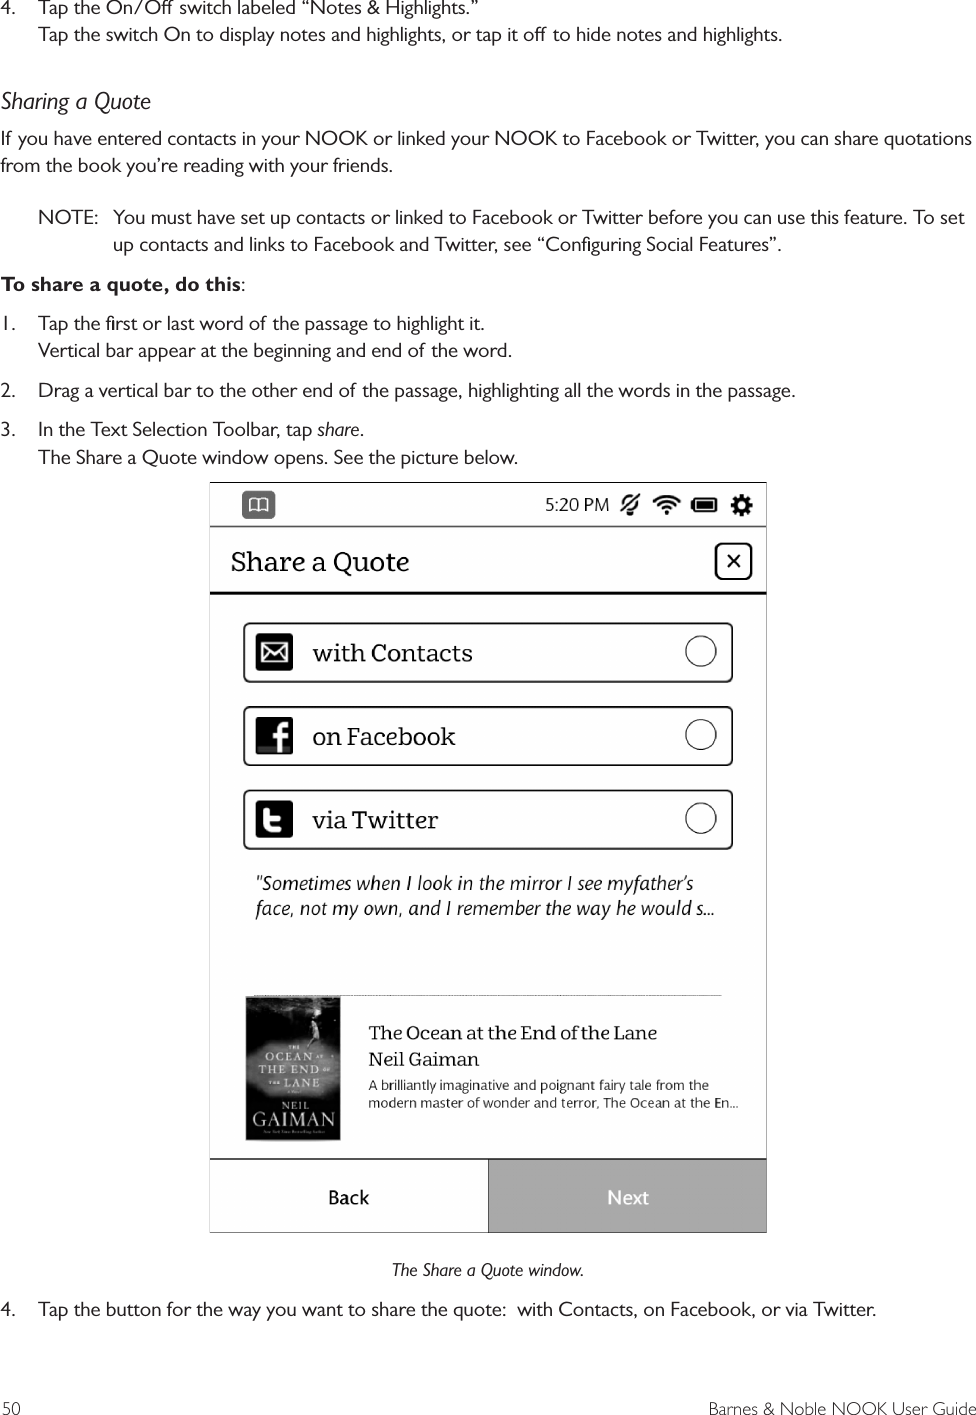
>
Nook Digital subsidiary of Barnes and Noble
>
BNRV510 A User Manual
User Manual rev.pdf
Navigation menu
Upload a User Manual
Namespaces
Wiki Guide
HTML
PDF
Info
Views
User Manual
Discussion / Help
Navigation