Ohsung Electronics URC-300 RF REMOTE CONTROLLER User Manual EMISSION TEST REPORT
Ohsung Electronics Co., Ltd. RF REMOTE CONTROLLER EMISSION TEST REPORT
UserManual.wiki
>
Ohsung Electronics
>
URC-300 User Manual
>
USERS MANUAL
Contents
1.
Users Manual
2.
USERS MANUAL
USERS MANUAL
Navigation menu
Upload a User Manual
Namespaces
Wiki Guide
HTML
PDF
Info
Views
User Manual
Discussion / Help
Navigation

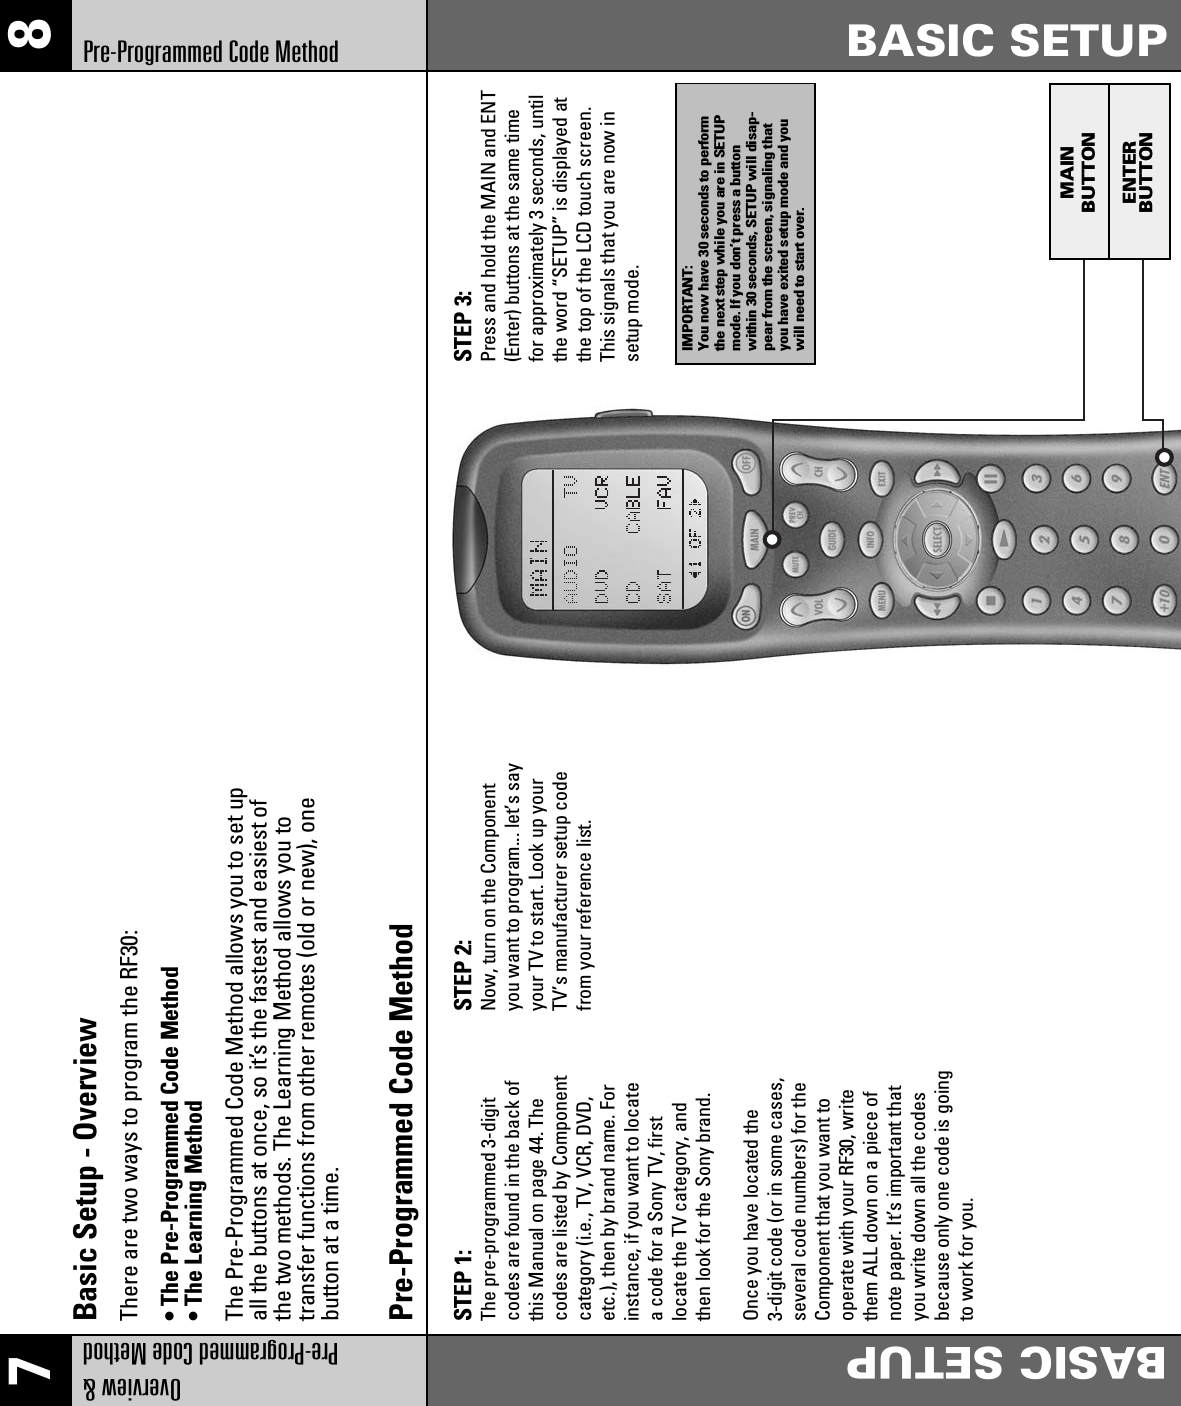
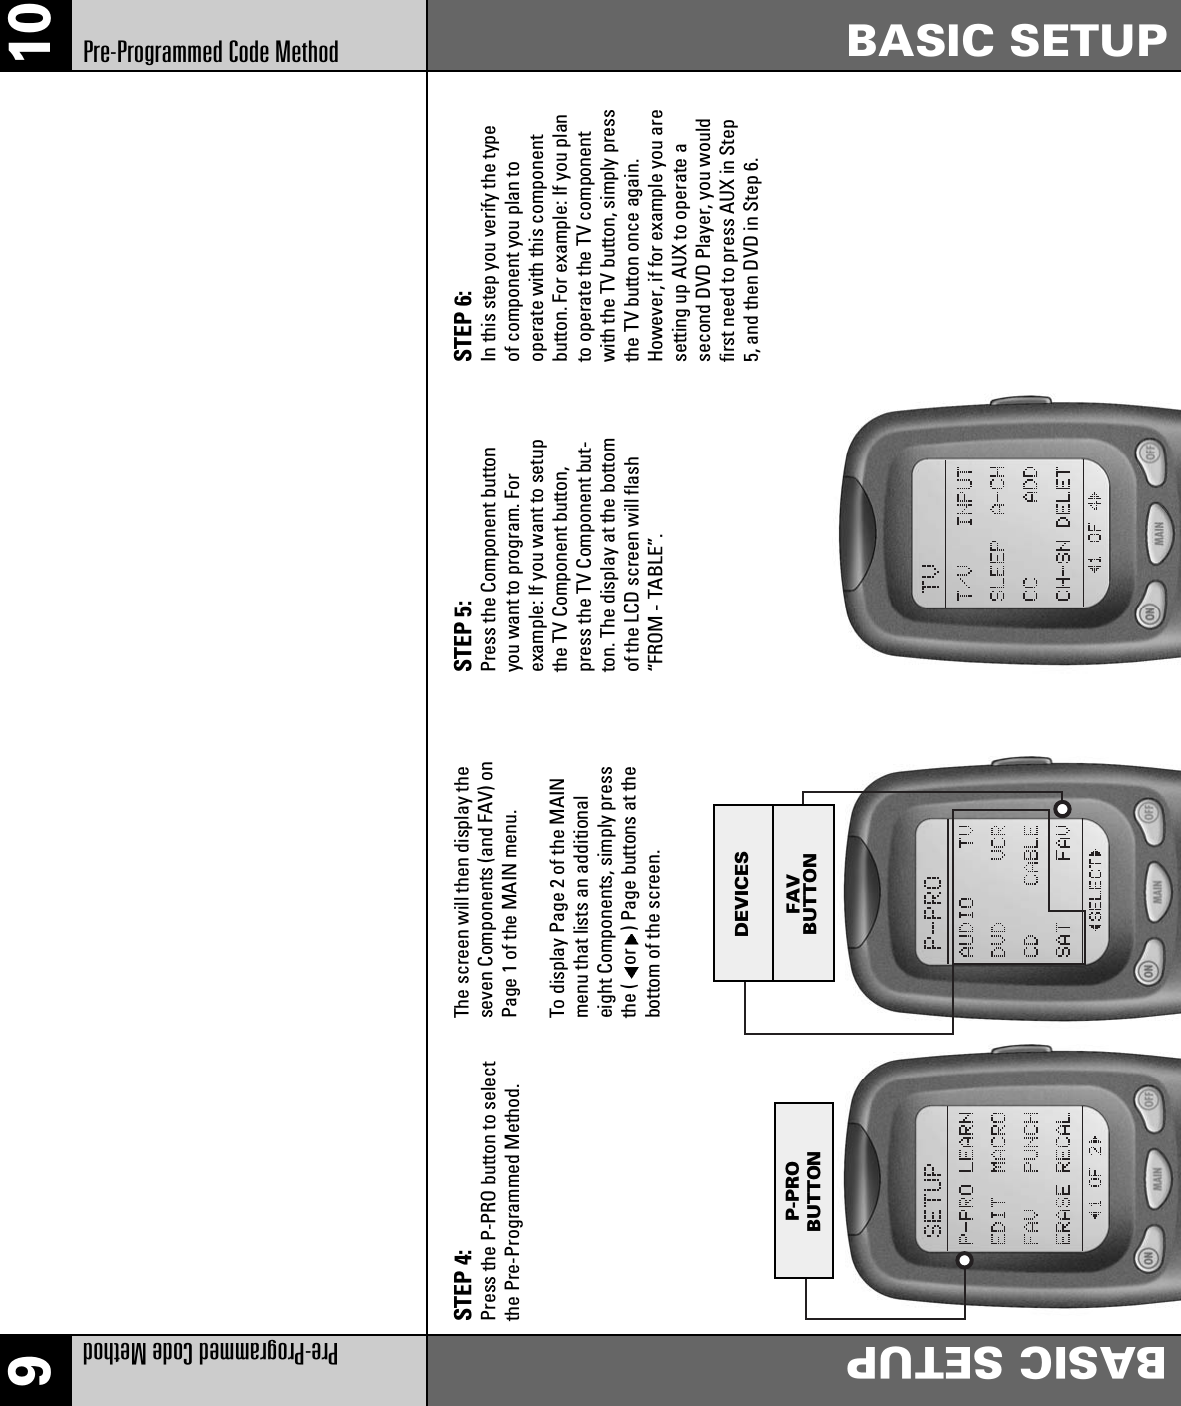
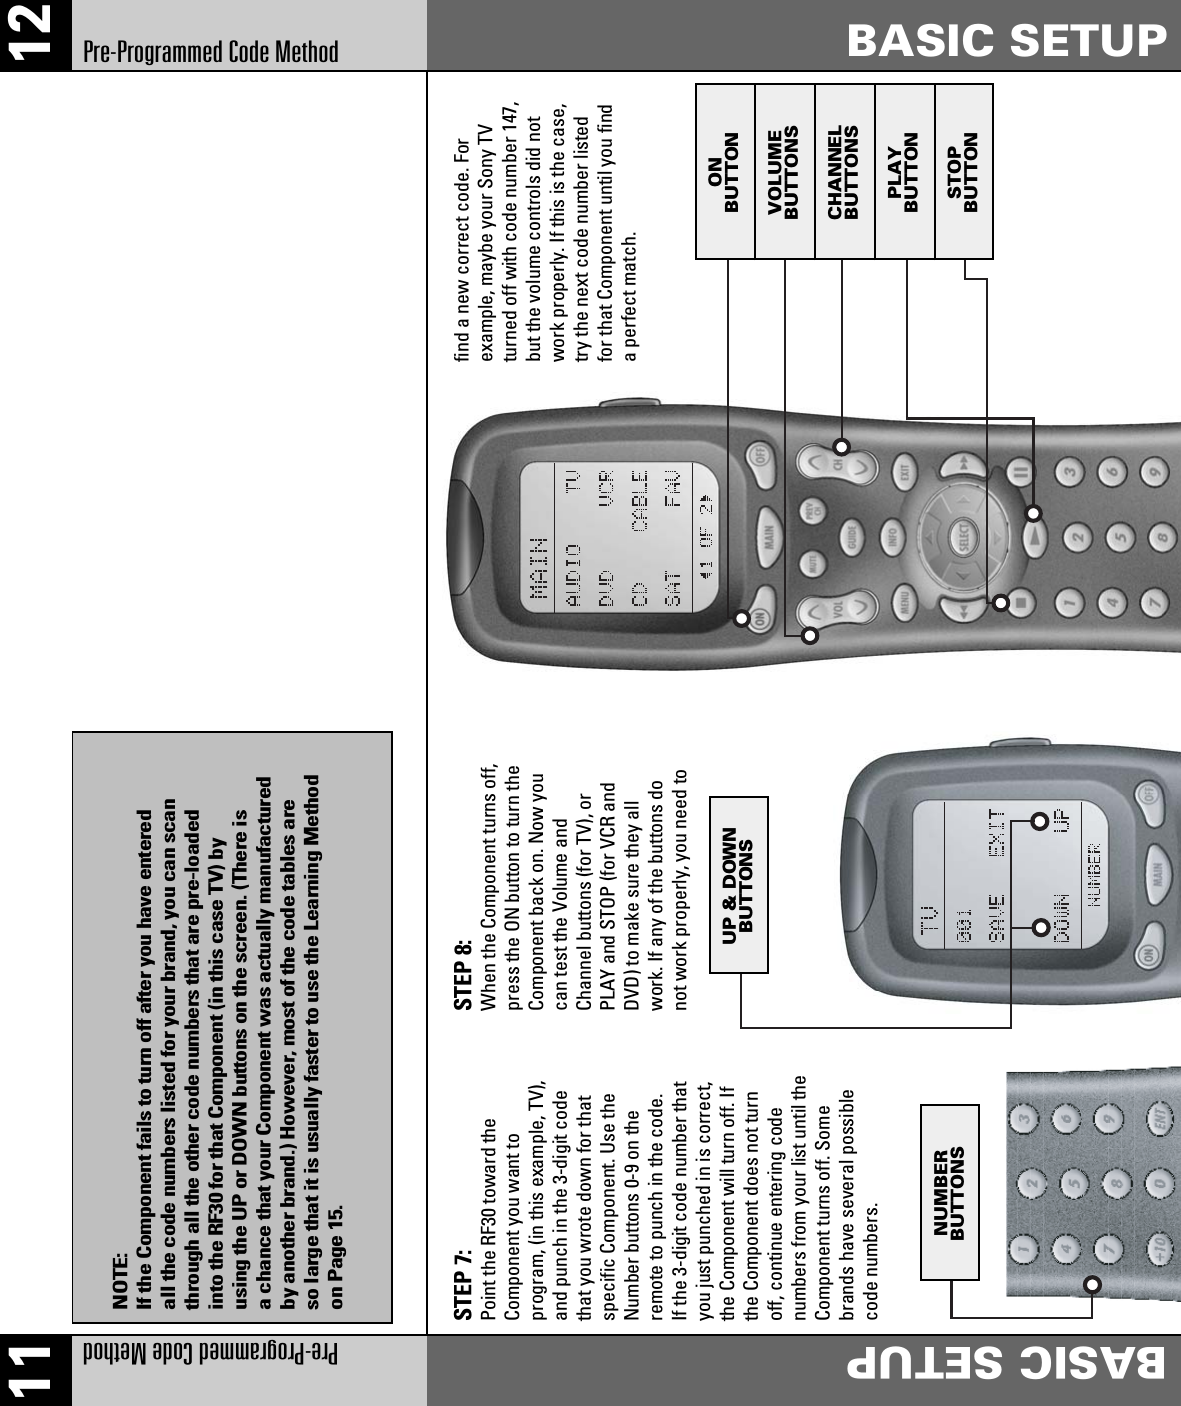
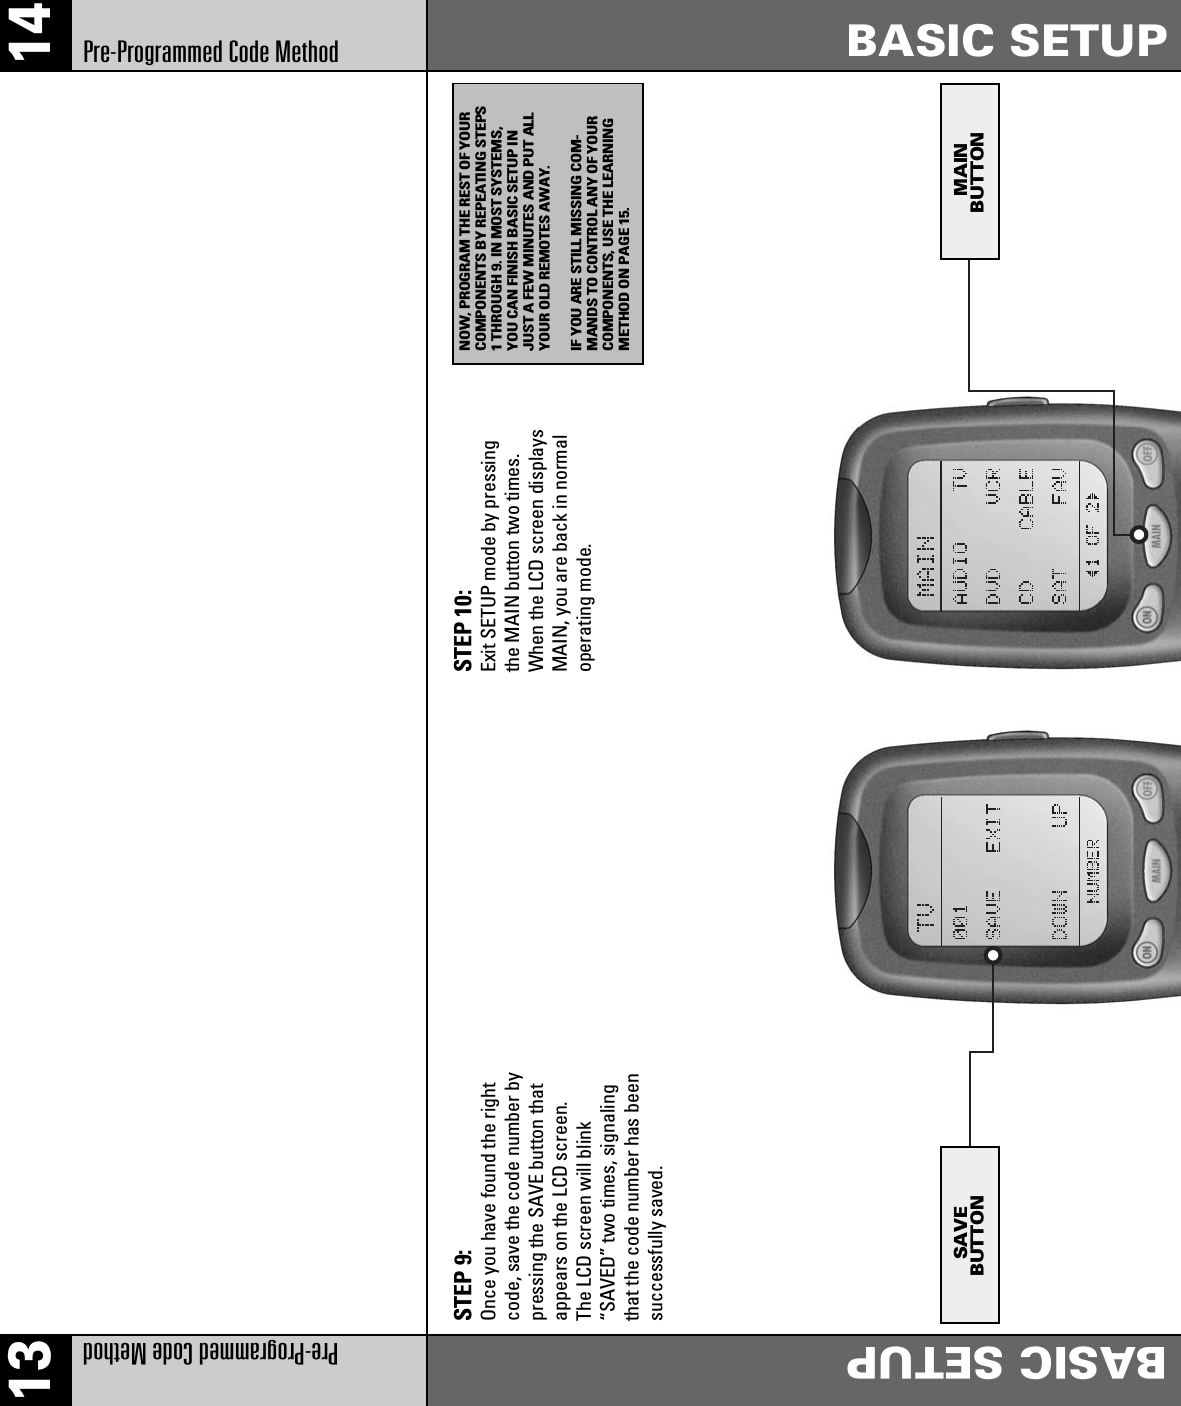
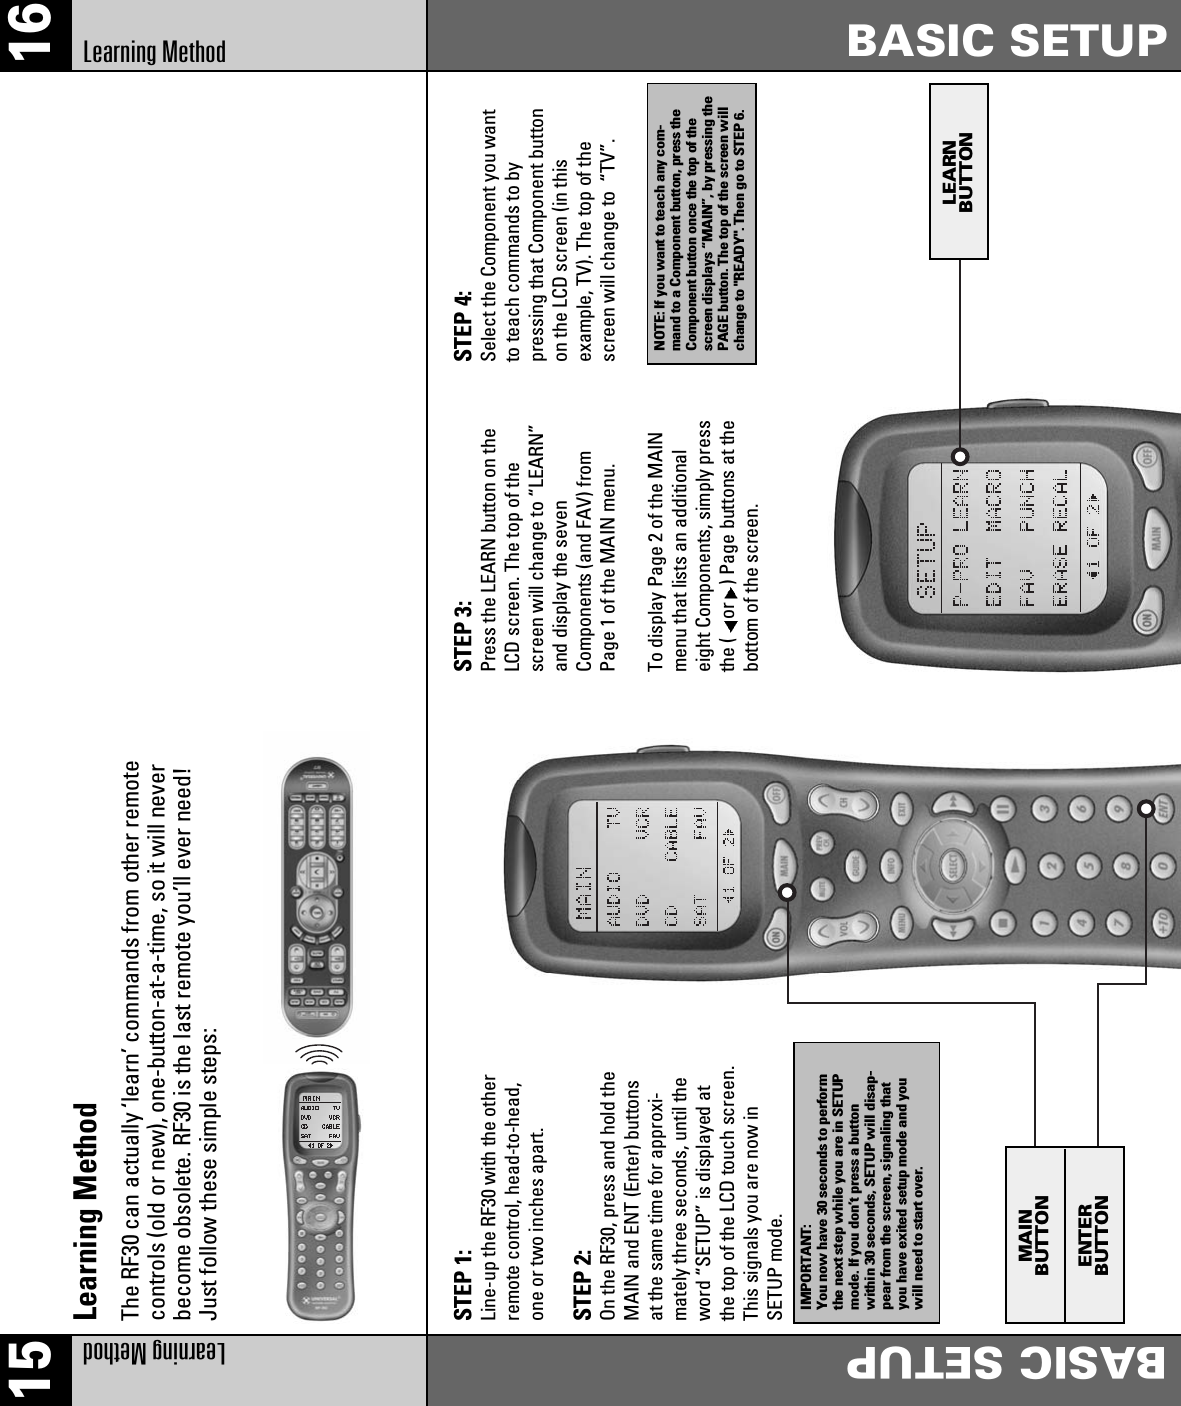
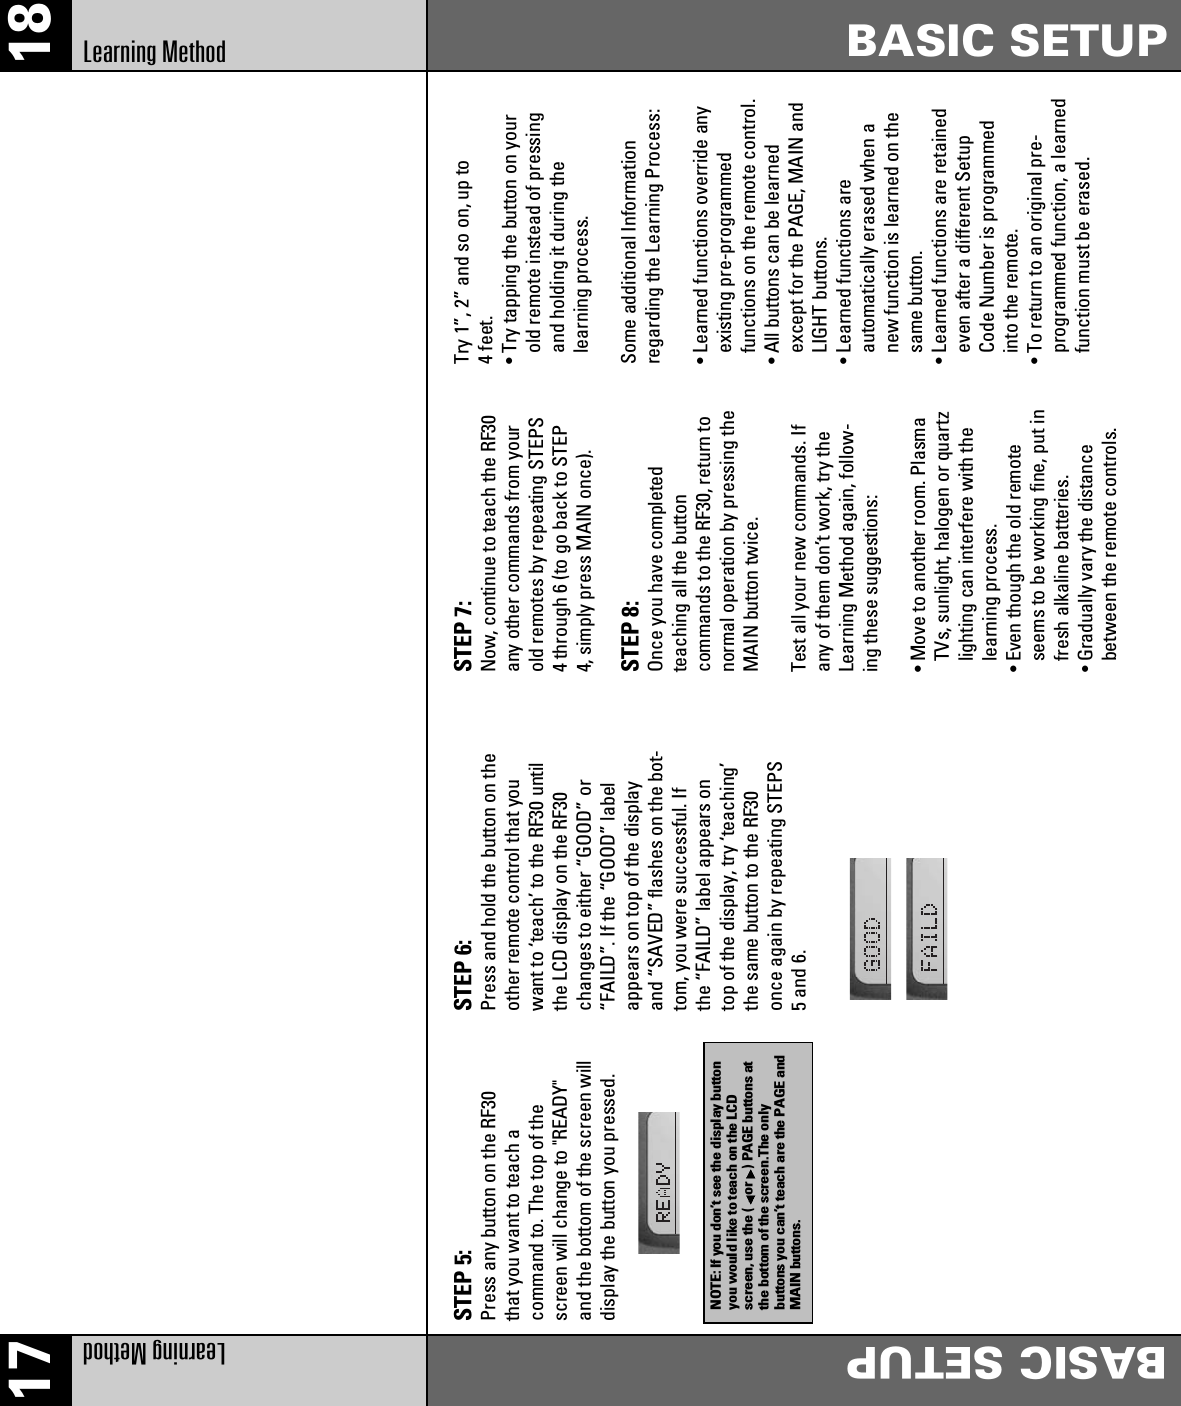
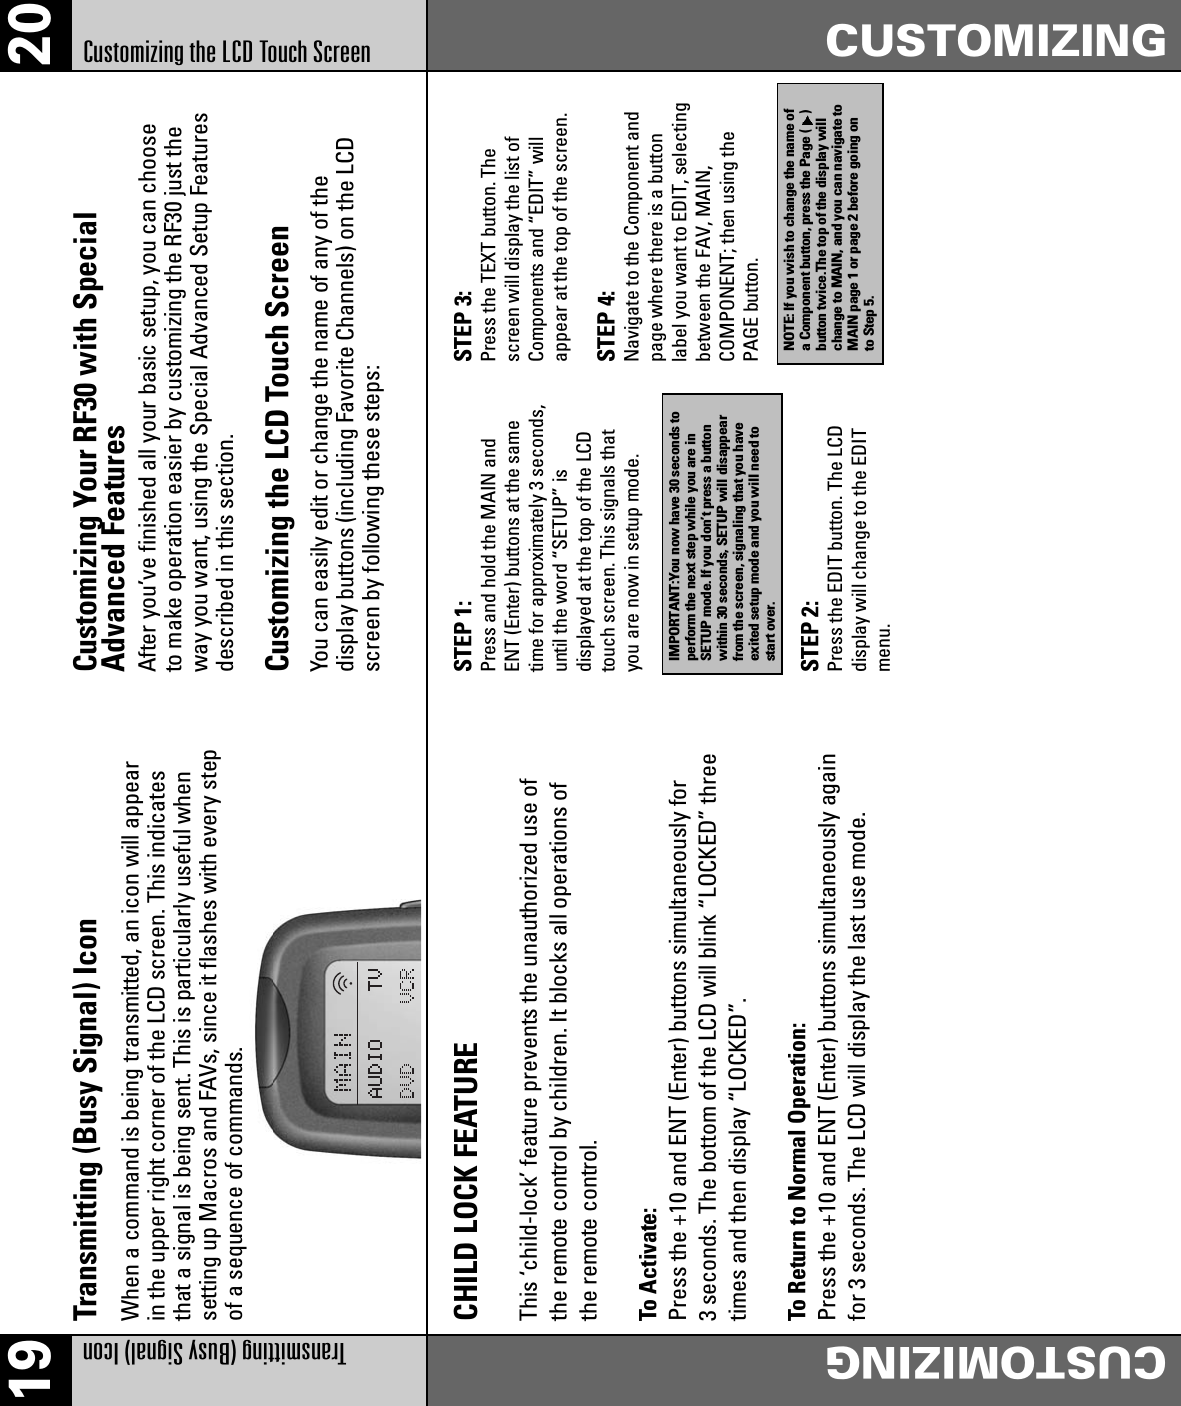
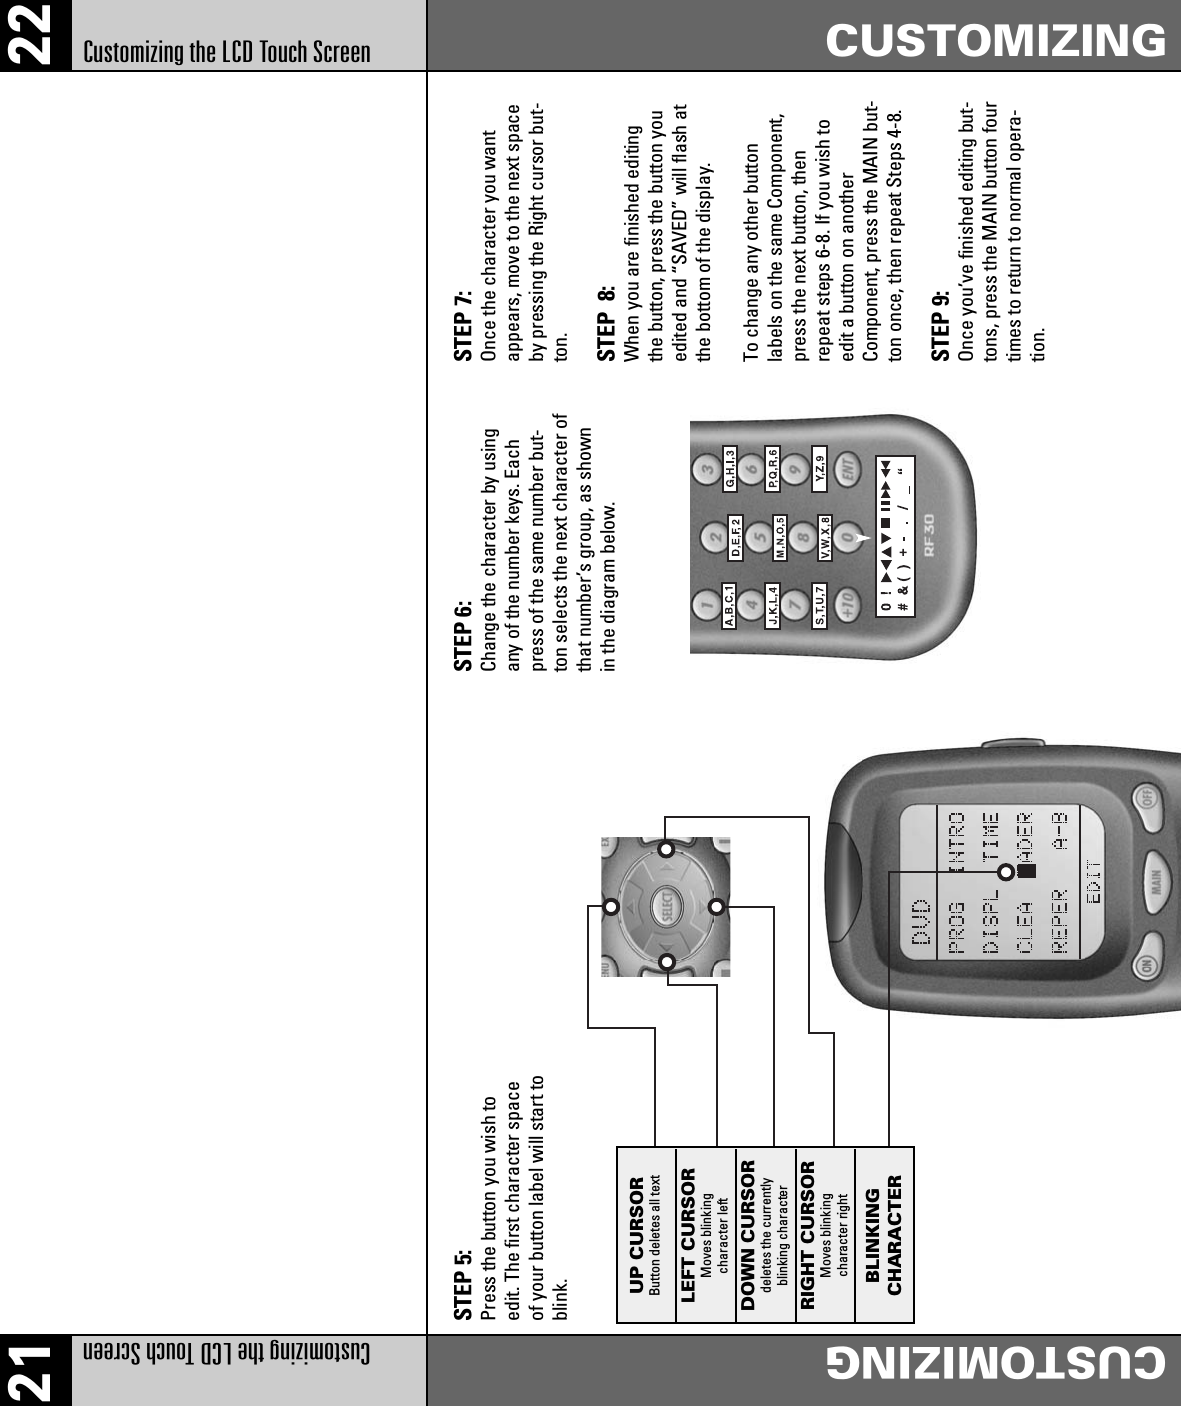
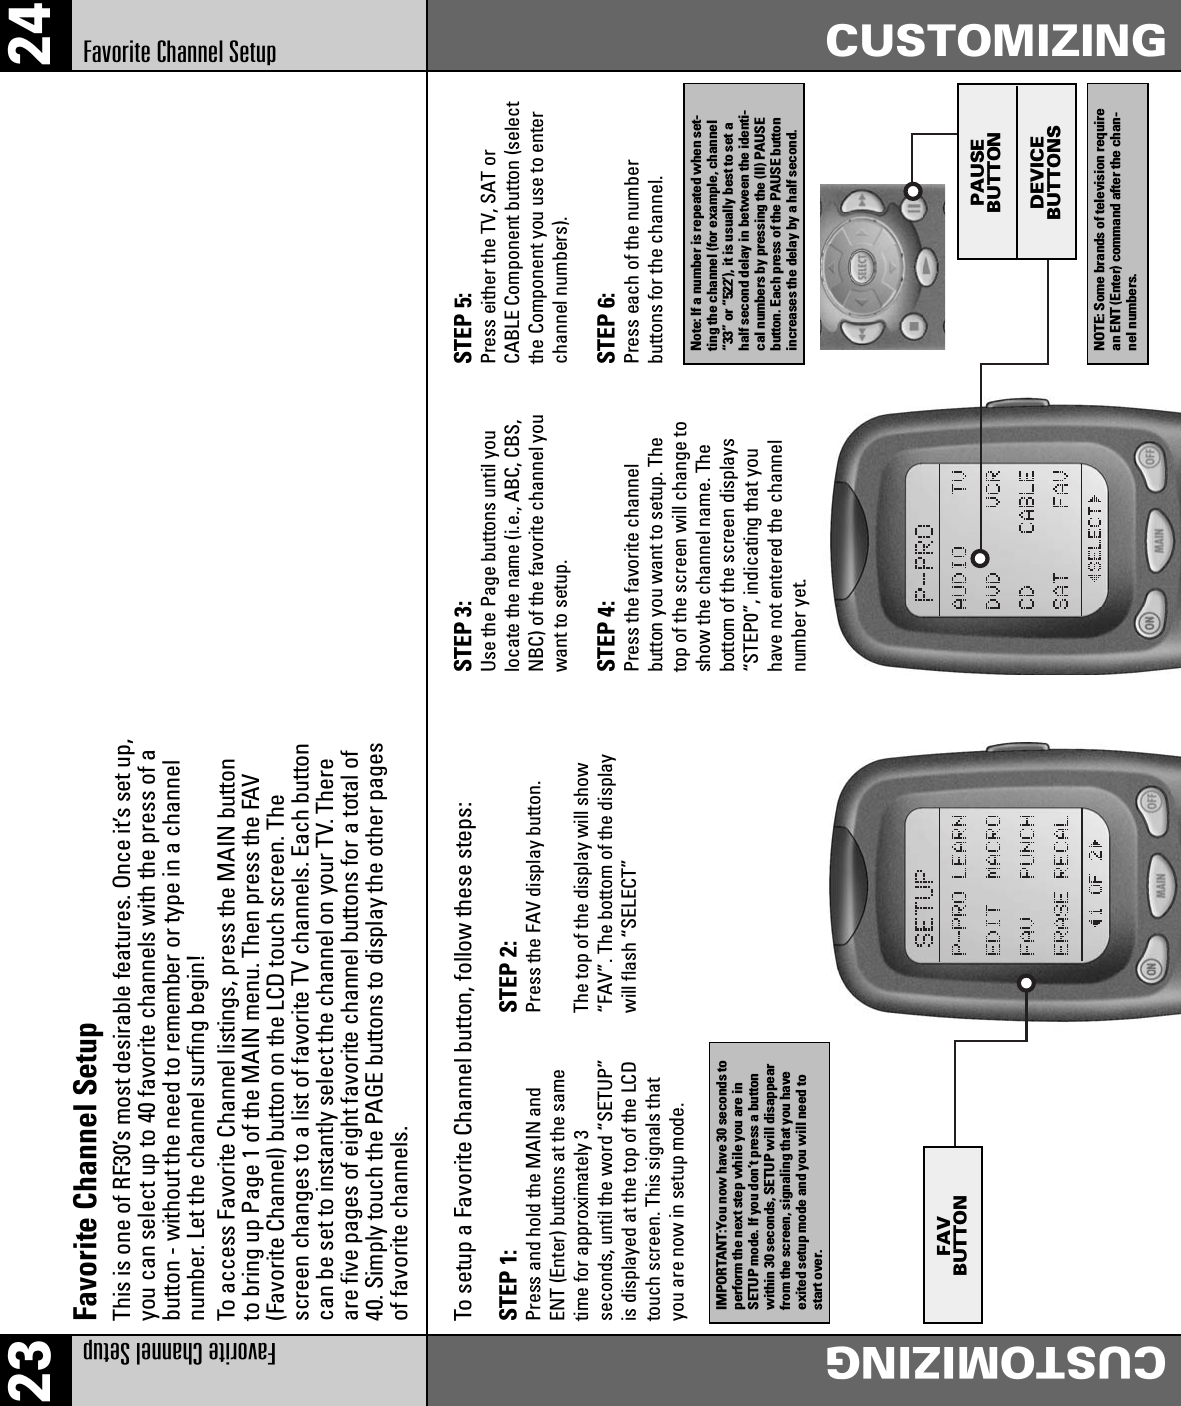
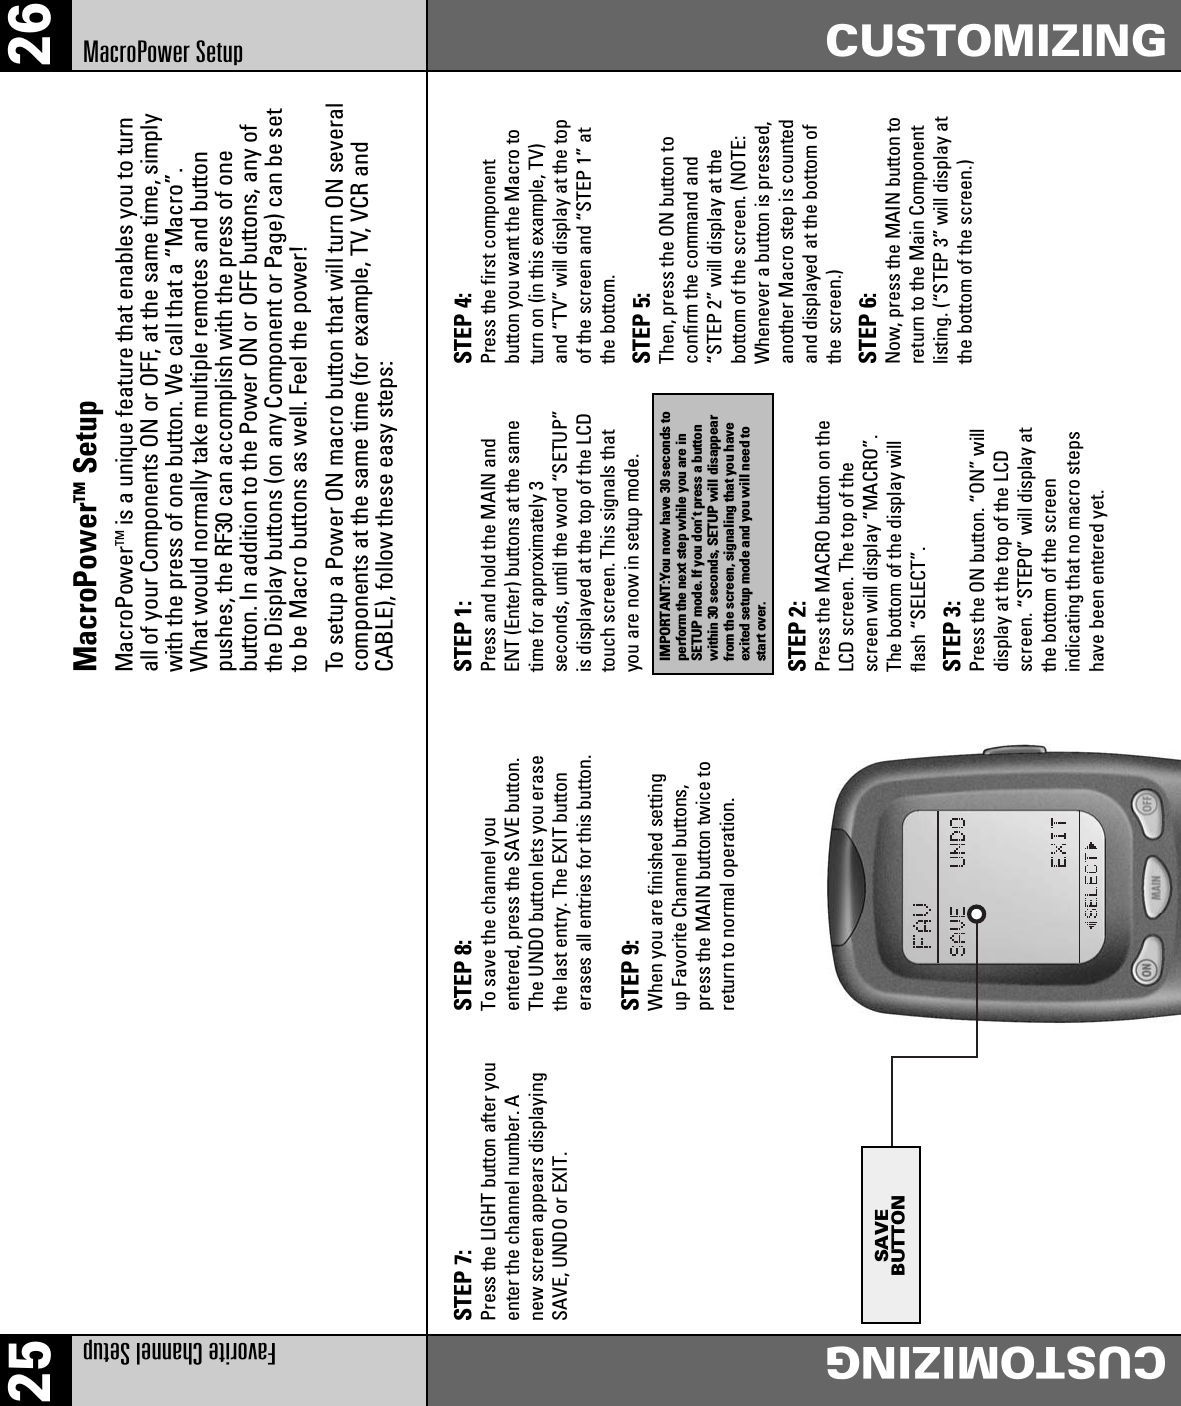
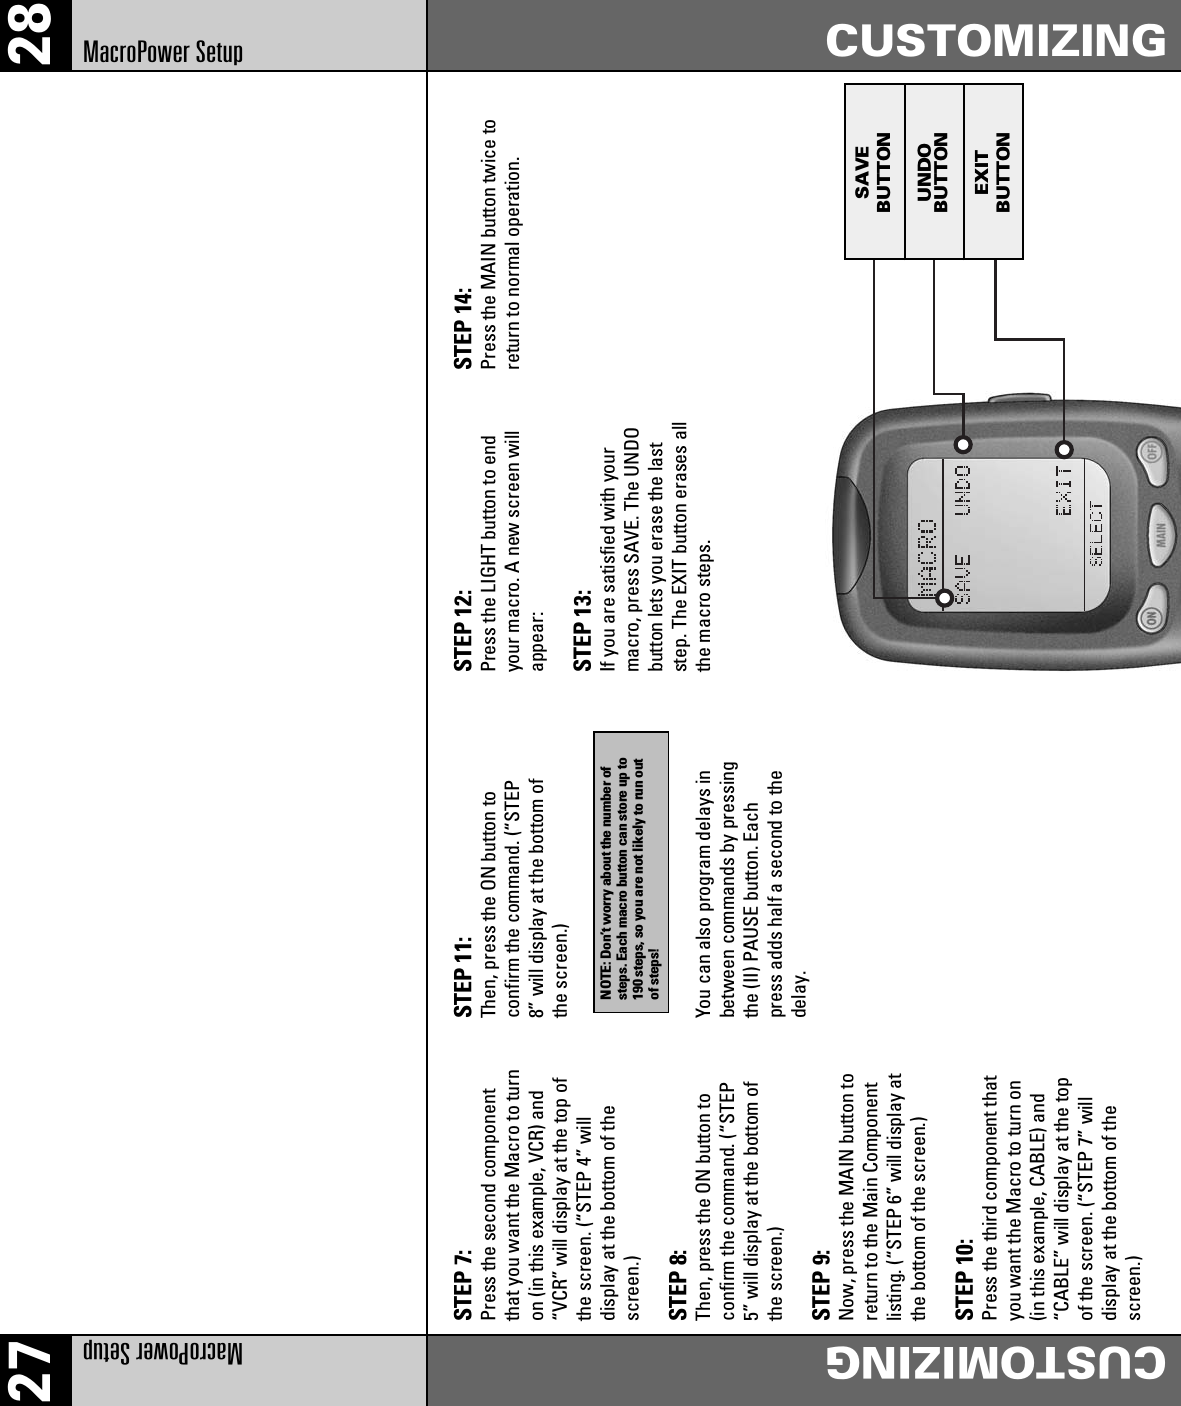
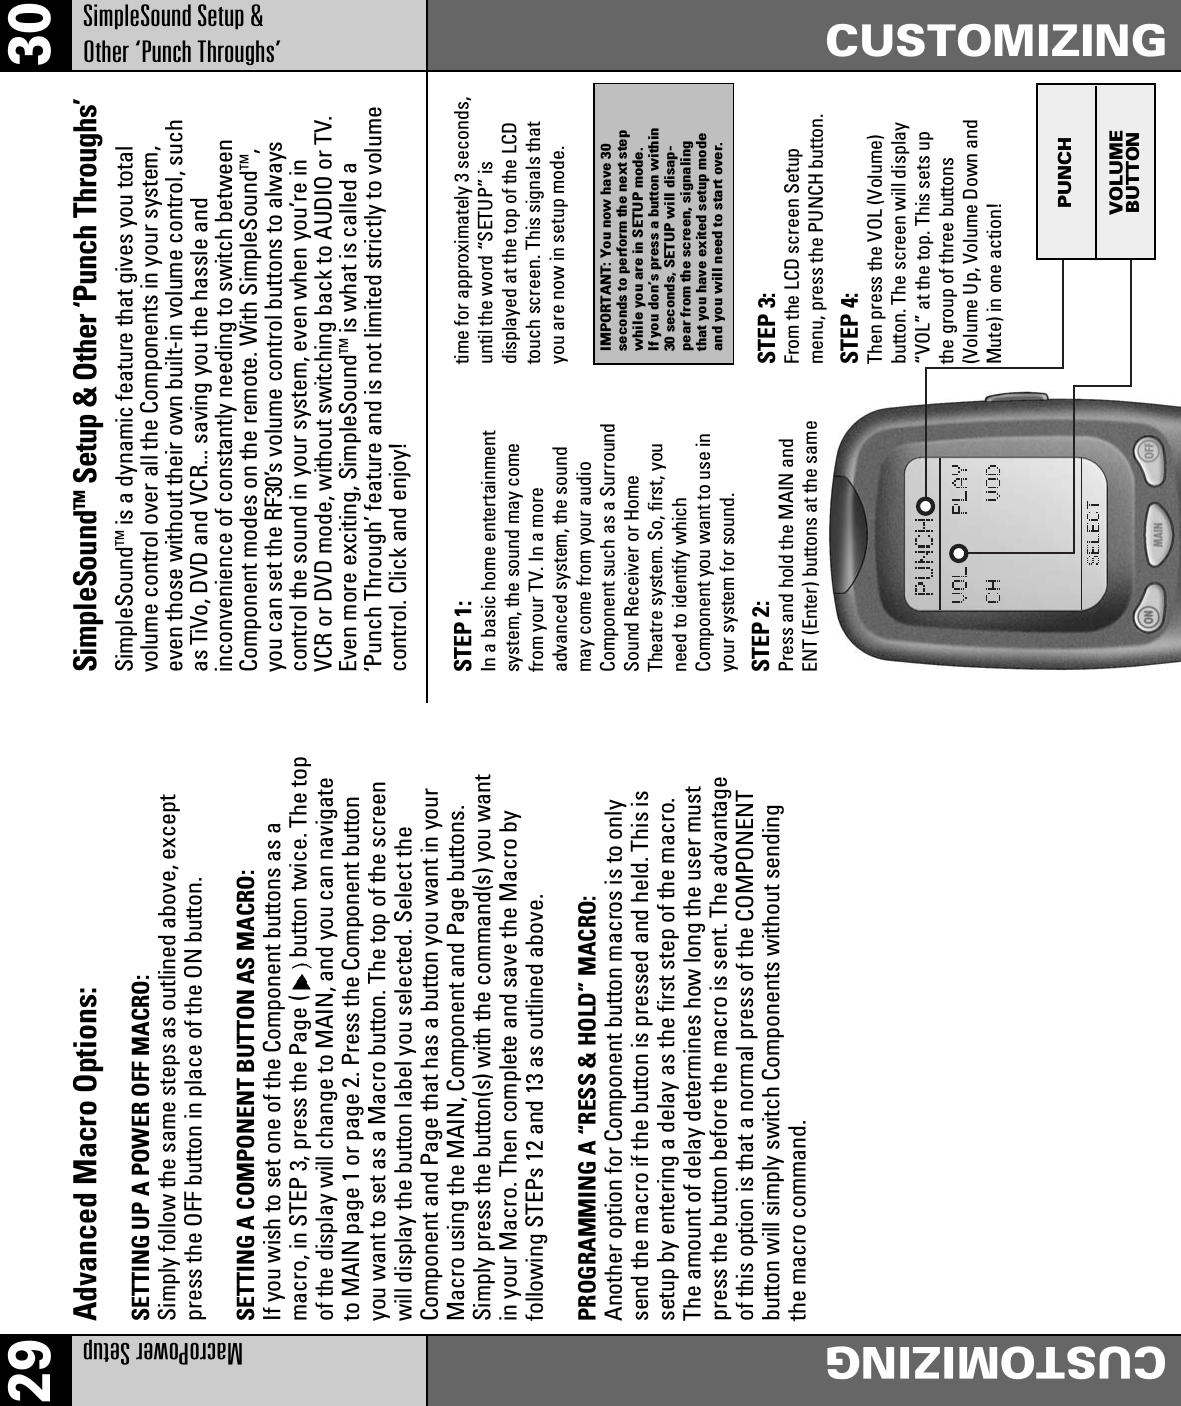
![41 42‘Barroer -Free’ RF controlTHE POWER BLASTER ‘Barroer -Free’ RF controlTHE POWER BLASTER The Optional PowerBlasterTM(for ‘barrier-free’ RF control)[Sold separately]Of all the fabulous RF30 features, this is probably the mostexciting. When used in combination with the optionalPowerBlasterTM, the RF30 becomes an amazing remotecontrol powerhouse that sends multi-directional RF (RadioFrequency) signals that pass through walls, doors andfloors - both indoors and outdoors.This changes everything! It enables you to controlComponents that are completely out-of-sight, up to 100’away. The PowerBlasterTM picks up RF30’s radio frequencysignals from any direction, regardless of distance, so RF30doesn’t need to be pointed directly at any Component.Just imagine - no more pointing! Now you can close yourentertainment center doors, hide your Components, andstill control them with ease. Control outdoor speakers onyour patio. Control your Components anywhere!One of the best things about this is - nothing has to bedone to the RF30 for this feature to work. Every time youpress a button on the RF30, it sends both a standard IR(Infrared Command) AND an RF (Radio Frequency) signal.If you install the PowerBlasterTM kit, it will automaticallyreceive RF30’s radio signals and translate them into theinfrared commands that control your Components.The RF30 sends radio signal to the PowerBlasterTM, whichis a radio receiver.The PowerBlasterTM converts radio signals to standardinfrared commands and sends them out via a built-in frontblaster to Components in the same cabinet space.Self-adhesive “flashers” (included in the PowerBlasterTM kit)affix to the front panels of your Components. The flashersrelay infrared commands to Components out-of-sight of thePowerBlaster’s front blaster. The flashers plug intoPowerBlaster’s rear flasher line output jacks. Each flasherhas a 10’ cable to easily reach Components on nearbyshelves.NOTE: The RF30's radio signals will not control Componentsdirectly. You must have a PowerBlasterTMto receive theRF30's radio signals. Components that came with “nopointing” radio remote controls cannot be operated by theRF30 unless the Component can be switched to standard IR(Infrared Control) via its internal menus. Some remotecontrol ceiling fans are radio only and cannot be operatedby the RF30.](https://usermanual.wiki/Ohsung-Electronics/URC-300.USERS-MANUAL/User-Guide-651710-Page-23.png)