Point Mobile PM3 Bluetooth Scanner User Manual
POINTMOBILE CO., LTD. Bluetooth Scanner
UserManual.wiki
>
Point Mobile
>
PM3 User Manual
User Manual
Navigation menu
Upload a User Manual
Namespaces
Wiki Guide
HTML
PDF
Info
Views
User Manual
Discussion / Help
Navigation


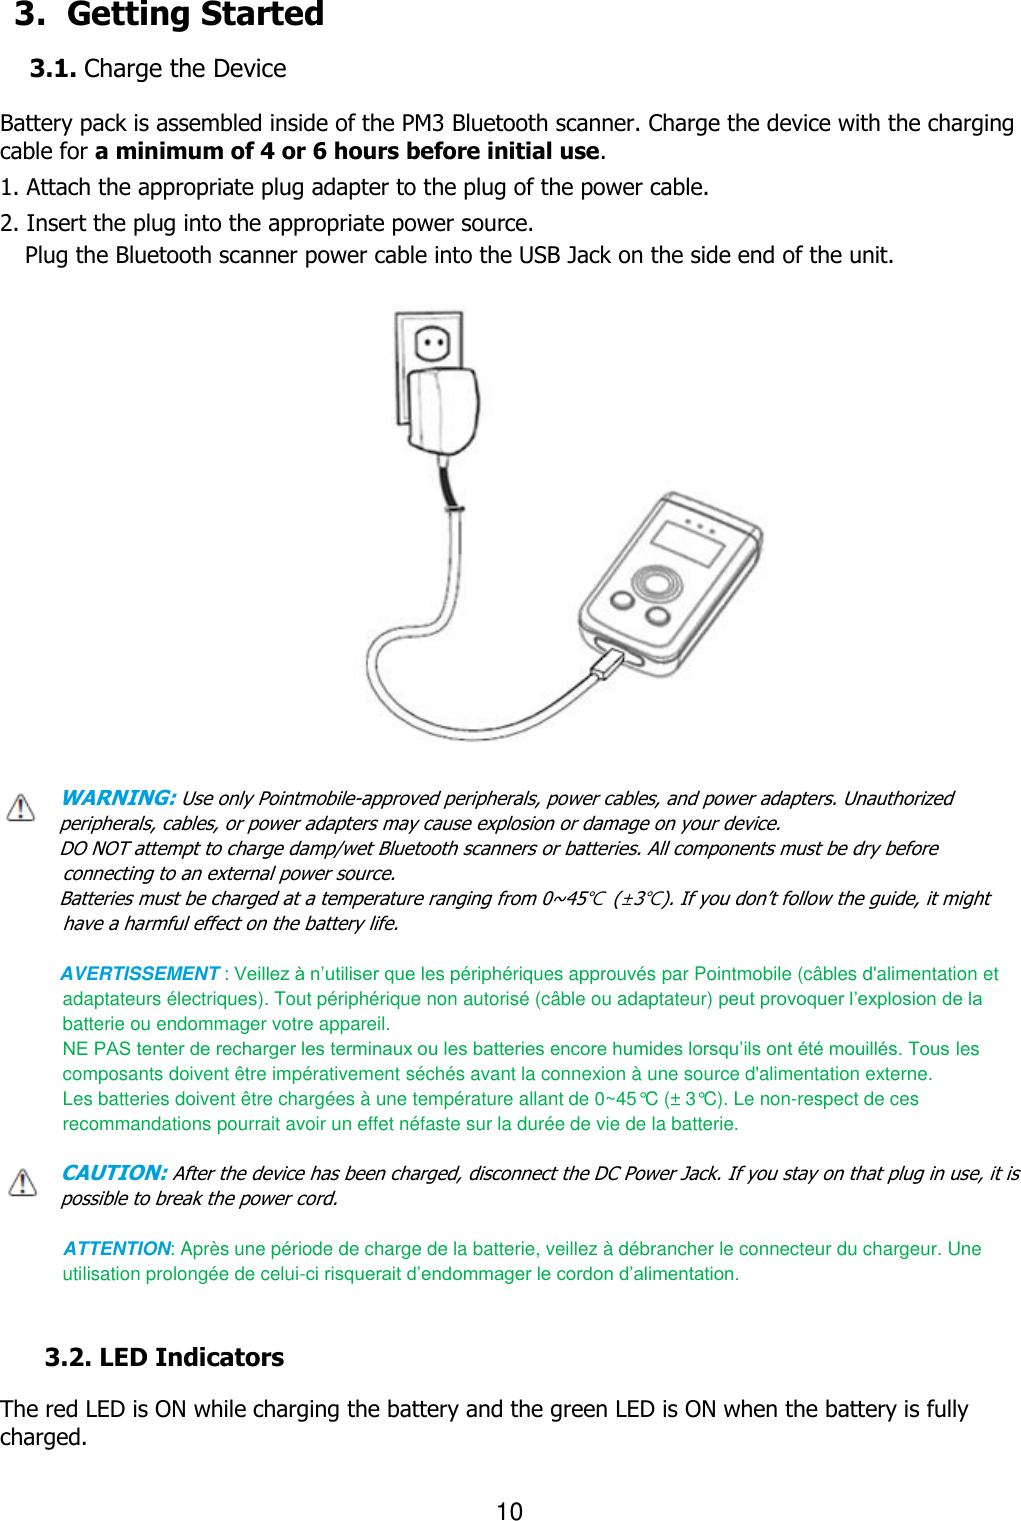

![15 USB Cable The Micro USB Cable is used when communicating between the terminal and a host computer to transfer data via the USB interface. Battery Power The battery works to prevent data loss when the terminal is used over long periods of time. The battery must be charged to full capacity before using the BLUETOOTH SCANNER AC Adaptor for the first time! Charge the main battery pack with the Bluetooth scanner AC Adaptor for a minimum of 4 or 6 hours depending on your battery before initial use. Resetting the Terminal The device is reset when pressing the SCAN, UP, and DOWN Key at the same time, and press The UP key for 1 second to turn it on. Sleep Mode Sleep Mode suspends terminal operation. The terminal appears to be “off” when in Sleep Mode. The terminal is programmed to go into Sleep Mode automatically when inactive for a specified period of time. You can set this time period in the “Sleep Timeout” menu. PM3 Technical Specifications Model PM3 Operating System Firmware Processor ATMEL SAM4S16C, 32-bit ARM® Cortex® -M4 RISC processor 120Mhz Memory 1MB(PGM), 4MB Storage Flash, 128KB RAM Storage Expansion N/A Display Bright OLED/ 0.96 inch(21.74mm x 11.18mm Active Area) Scan Engine 1D engine: SE-965HP, N4313 2D engine: SE4710 CCD: SE655 Keypad 3 keys [ 1 scan key, 2 menu Keys (Up & Down) ] Audio Built-in speaker I/O Full Speed USB v2.0(12Mbps) Client. support USB Disk Mode & USB to Serial mode](https://usermanual.wiki/Point-Mobile/PM3/User-Guide-3193734-Page-15.png)