Panasonic of North America 9TGWL15A Wireless Network Adapter User Manual
Panasonic Corporation of North America Wireless Network Adapter
Contents
- 1. User Manual of Wireless Communiation
- 2. User Manual
- 3. User manual
- 4. User Manual_20160427_v1 - User Manual_Host_FZ-G1.pdf
- 5. User Manual_20160427_v1 - User Manual_WL15A.pdf
- 6. User Manual_20170420_v1 - Host CF-33_User_manual of wireless communication
- 7. User Manual_20170420_v1 - Host CF-33_User_Manual
User Manual_20170420_v1 - Host CF-33_User_manual of wireless communication
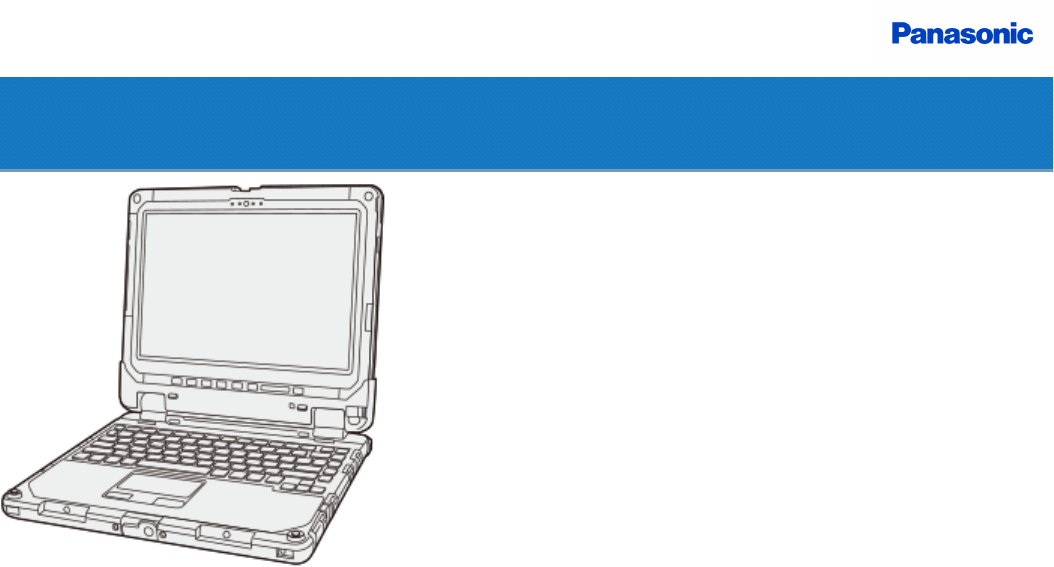
Personal Computer
Model No. CF-33 Series
Connect to a network
©Panasonic Corporation 2017
PB0117-0
20160495ZAP
Introduction
The following are instructions to connect to a network.
Disclaimer
Computer specifications and manuals are subject to change without notice. Panasonic Corporation assumes no liability for damage incurred dir-
ectly or indirectly from errors, omissions or discrepancies between the computer and the manuals.
Trademarks
Microsoft, Windows and the Windows logo are registered trademarks or trademarks of Microsoft Corporation of the United States
and/or other countries.
Intel, Core, and PROSet are either registered trademarks or trademarks of Intel Corporation.
Names of products, brands, etc., appearing in this manual are trademarks or registered trademarks of their respective own companies.
Illustrations and Terminology in this manual
This manual explains using the default setting.
In principle, this manual explains based on the following conditions:
When the tablet and keyboard base have been installed
When the keyboard and touchpad are used for operation
“Windows 10 Pro 64-bit” as “Windows” or “Windows 10”
For Windows 10:
Screen messages are explained in [English (United States)].
(Depending on the language preference, some screen messages in these instructions are different from the actual screen messages. For
example, [Flight mode] may be displayed instead of [Airplane mode] in some language preference)
Windows 10 offers the desktop mode in which operation is performed using the keyboard or touchpad, and also the tablet mode optimized for the touch
panel operation.
To switch the mode, click (Notification) - (Tablet mode) tile.
In this manual, the tablet mode may refer to the status when the tablet detached from the keyboard base is used.
Terms and illustrations in these instructions.
≪Enter≫: This means to press the Enter key.
≪Ctrl≫+≪F7≫: This means to press and hold ≪Ctrl≫key, and then press ≪F7≫key.
The display of the key may be different from this manual according to the keyboard used. (e.g. “Delete” instead of “Del”)
- :
Click (Start) and then click (Power).
Some illustrations and display examples may look different from the actual product. Some types of software are automatically updated, and dif-
ferences may occur from descriptions in this manual.
LAN
<Only for model with LAN>
Connecting LAN
C A U T I O N
nDo not connect the telephone cable to the LAN port.
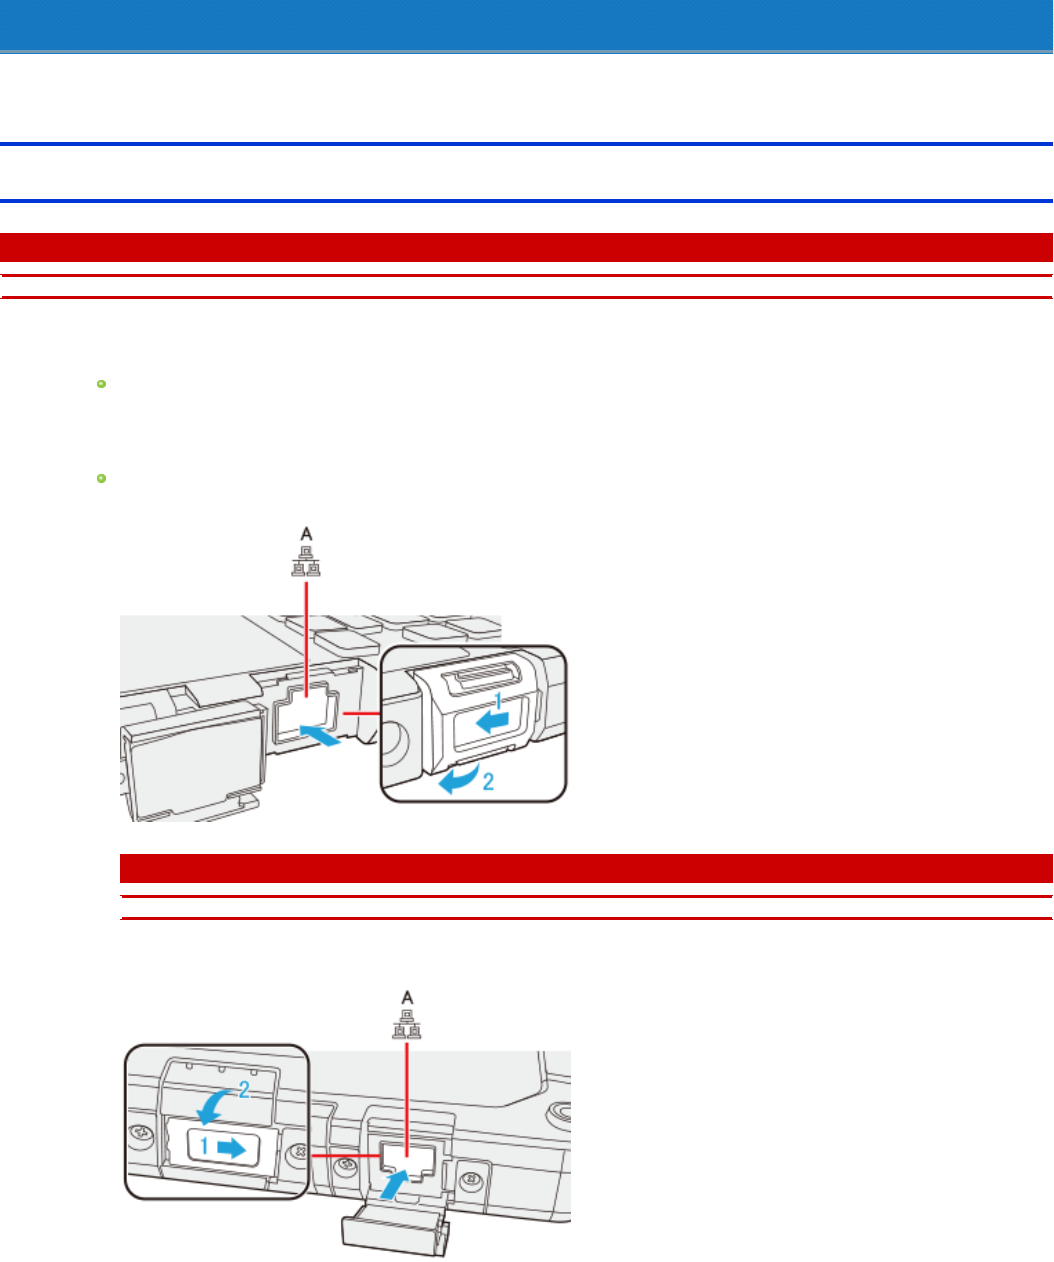
1. Turn off the computer.
Do not use sleep or hibernation.
2. Slide the cover and open it.
3. Connect the LAN cable.
Connect the LAN port (A) and the network system (server, HUB, etc.) using a LAN cable.
Keyboard base
C A U T I O N
nDo not remove the tablet from keyboard base while using the LAN function.
Tablet
4. Turn on the computer.
Disabling/Enabling Wireless Communication
<Only for model with wireless LAN>
There are several ways of disabling and enabling wireless communication.
Using airplane mode
Setting [Wireless Configuration] in the [Advanced] menu of the Setup Utility
Settings in the Network and Sharing Center ( Using the Wireless LAN Function)
N O T E
nFor further information about Wireless LAN.
Using airplane mode*1
(For wireless LAN)
1. Click (Start) - (Settings) - [Network & Internet] - [Airplane mode] *1.
Alternatively click (Settings) - [Network & Internet] - [Airplane mode]*1 in the tablet mode.
2. To disable wireless communications, set [Airplane mode]*1 to [On].
To enable wireless communications, set [Airplane mode]*1 to [Off], and then;
set [Wi-Fi]*1 to [On] (for wireless LAN).
*1 : Screen messages are explained in [English (United States)].
(Depending on the language preference, some screen messages in these instructions are different from the actual screen messages. For example,
[Flight mode]/[WiFi] may be displayed instead of [Airplane mode]/[Wi-Fi] in some language preference.)
Wireless LAN
<Only for model with wireless LAN>
C A U T I O N
nDo not use wireless LAN on airplanes, in hospitals, or in other locations where wireless LAN signals may affect devices.
Follow the instructions of airline companies and hospitals. If you use the computer in these locations, turn off the wireless LAN.
nTo avoid unauthorized access to the computer through wireless LAN
We recommend you to make security settings such as encryption before using wireless LAN.
Otherwise the hard disk data such as the shared files can be exposed to the risk of unauthorized access.
N O T E
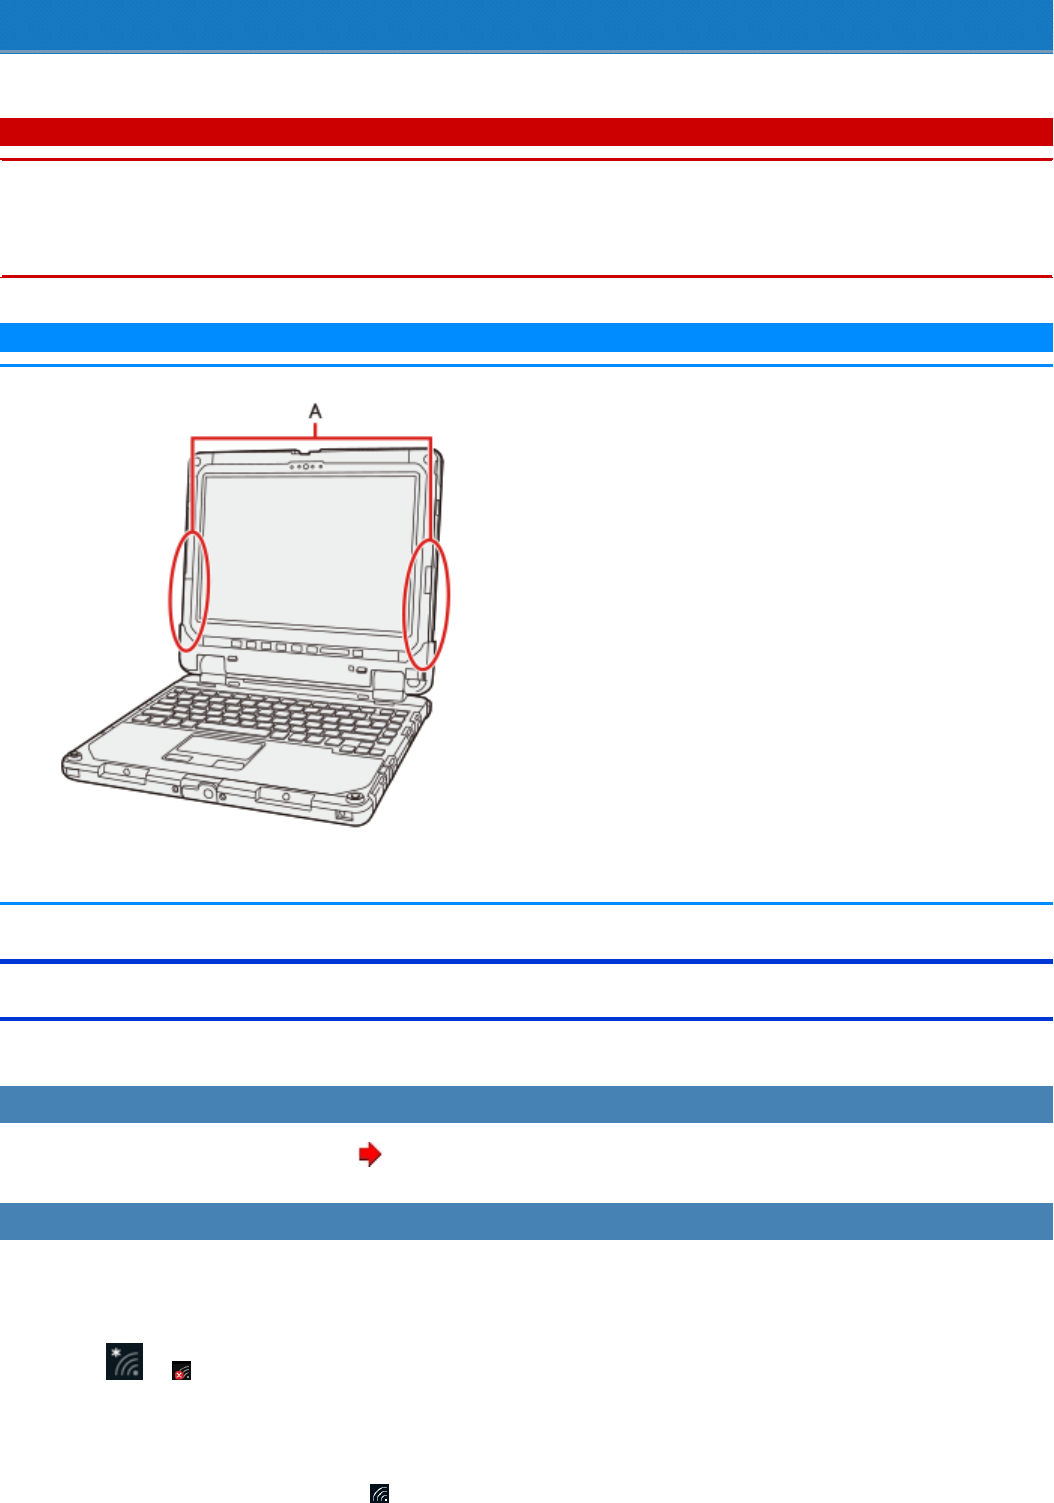
nCommunication is established through the wireless LAN antenna (A). Do not block the antenna area with your hand or body.
nThe transmission rate will be lower when a microwave oven is used near by.
nTo use wireless LAN, set [Wireless LAN] of [Wireless Configuration] to [Enabled] (default) in the [Advanced] menu of the Setup Utility.
Using the Wireless LAN Function
Before using a wireless LAN, turn the wireless LAN communication on.
Turning on/off the wireless LAN communication
1. To enable the wireless communication ( Disabling/Enabling Wireless Communication).
Setting the wireless LAN access point
Preparation
Follow the instruction manual of the wireless LAN access point to make settings for the access point to recognize the computer.
1. Turn the wireless LAN on.
2. Click or on the task tray.
3. Select an access point, and click [Connect].
4. Input the key you set for the access point to recognize the computer, and click [Next].
Wait for the computer to connect to the wireless LAN access point.
When the icon on the task tray is changed to , the wireless LAN setting is complete.
N O T E
nThe settings depend on the network environment. For further information, ask the system administrator or the person in charge of the
network.
nIf you use the stealth type wireless LAN access point which restricts automatic detection of the wireless LAN access point, take the fol-
lowing procedure.
If you do not perform the procedure below, you may not be able to access the wireless LAN access point automatically or the wireless
LAN access point may not be displayed.
1. Click on the task tray, and then click [Hidden network].
2. Click [Connect], enter the necessary information such as the network name (SSID), and click [Next].
For further information, ask the system administrator or the person in charge of the network.
Enabling/Disabling the Wireless LAN Standard IEEE802.11a (802.11a)
1. Click (Start) - [Panasonic] - [Panasonic PC Settings Utility], and click (Settings) - (Network).
Alternatively click (All apps) - [Panasonic] - [Panasonic PC Settings Utility], and click (Settings) - (Network) in the tablet mode.
2. Click [Enabled] or [Disabled] for the wireless LAN IEEE802.11a.
N O T E
nIn some countries, communication using IEEE802.11a (5 GHz wireless LAN) standard is restricted by law.
nIf IEEE802.11a is enabled or disabled while the computer is connected to an IEEE802.11b/g access point, the connection will be temporarily inter-
rupted.
Troubleshooting (Advanced)
Refer to the following instructions when a problem occurs. If the remedies indicated in the chart do not solve the problem, contact Panasonic Technical
Support.
For a software problem, refer to the instruction manual of the software.
Network
Cannot connect to a network. Set the device ([Tablet LAN] /[Wireless LAN]) to [Enabled] in the [Advanced] menu of the Setup
Utility.
Cannot check the computer's MAC
address.
Follow the steps below.
1. Right-click (Start) at the bottom left corner, and then click [Command Prompt].
2. Input "getmac /fo list /v", and press ≪Enter≫.
Insert a space between "fo" and "list", and between "list" and "/v".
3. Wireless LAN's MAC address:
Make a note of the 12-digit string of alphanumeric displayed on "Physical Address" line
of "Wi-Fi".
Wired LAN's MAC address:
Make a note of the 12-digit string of alphanumeric displayed on "Physical Address" line
of "Ethernet*1".
4. Input "exit", and press ≪Enter≫.
*1 : Numeric characters are displayed depending on the model.
Wireless Communication (only for model with wireless LAN)
Cannot connect to a network. Confirm the airplane mode is Off.
To turn off the airplane mode, follow the steps below.
1. Click (Start) - (Settings) - [Network & Internet] - [Airplane mode]*2.
Alternatively click (Settings) - [Network & Internet] - [Airplane mode]*2 in the tab-
let mode.
2. Click [Airplane mode]*2 to [Off], and then;
set [Wi-Fi]*2 to [On] (for wireless LAN).
Restart the computer.
Access point is not detected. Shorten the distance between the computer and the access point, and try the detection again.
Confirm the following settings:
[Wireless LAN] in the [Advanced] menu of the Setup Utility
Confirm that [Wireless LAN] of [Wireless Configuration] is set to [Enabled].
Airplane mode
Confirm that Wireless LAN (Wi-Fi) is ON.
This computer uses channels 1 through 11*3 when using IEEE802.11b/g/n. Check the channel
being used by the access point.
*2 : Screen messages are explained in [English (United States)].
(Depending on the language preference, some screen messages in these instructions are different from the actual screen messages. For example,
[Flight mode] / [WiFi] may be displayed instead of [Airplane mode] / [Wi-Fi] in some language preference.)
*3 : In the case of wireless communications, the frequency band being used can be divided into segments, so that different communications can be con-
ducted on each band segment. A "Channel" refers to the individual frequency bandwidth divisions.

Setup Utility
You can make the settings of the computer's operating environment (password settings, startup drive selection, etc.)
Starting the Setup Utility
1. Click (Start) - (Settings) - [Update & security] - [Recovery].
Alternatively, click (Settings) - [Update & security] - [Recovery] in the tablet mode.
2. Click [Restart now] under “Advanced startup”*1.
*1: Screen messages are explained in [English (United States)].
(Depending on the language preference, some screen messages in these instructions are different from the actual screen messages. For
example, [Advanced start-up] may be displayed instead of [Advanced startup] in some language preference.)
3. Click [Troubleshoot] - [Advanced options] - [UEFI Firmware Settings] - [Restart].
The computer restarts, and the Setup Utility screen appears.
N O T E
nWhen the fast startup is enabled, Setup Utility cannot be started by pressing ≪F2≫or ≪Del≫during the startup procedure.
When [Enter Password] is displayed, enter your password.
When you start the Setup Utility with Supervisor Password
You can make the settings of all items of the Setup Utility.
When you start the Setup Utility with User Password
Note the following:
In the [Advanced] and [Boot] menus, you cannot make the settings of all items.
In the [Security] menu, you can change only the User Password when [User Password Protection] is set to [No Protection]. You cannot
delete the User Password.
In the [Exit] menu, you cannot make the setting of [Load Default Values] and [Boot Override].
≪F9≫(Setup Defaults) does not function.
N O T E
nSetup Utility screen is displayed on the internal LCD even when an external display is connected to the computer as the factory default. However,
if the LID (display) is closed, it will come to be displayed on an external display.
nWindows 10 supports UEFI boot.
nThe [Panasonic] boot screen may not appear when only the external display is being used. In this case, as soon as the computer starts up, press
≪F2≫or ≪Del≫several times and start the Setup Utility.
Advanced Menu
Underlined items are the factory presets.
Peripheral Configuration
Tablet LAN
Only for Tablet
Disabled
Enabled
Power On by LAN
Can be changed only when [LAN] is set to [Enabled].
Deny
Allow

Wireless Configuration
The submenu appears when this item is selected.
Enters the sub-menu.
Sub-menu (Wireless Configuration)
Wireless LAN
Only for model with wireless LAN
Disabled
Enabled