Admin_Guide Summation Admin Guide
2016-04-25
: Pdf Summation Admin Guide Summation_Admin_Guide old 03 2016
Open the PDF directly: View PDF ![]() .
.
Page Count: 390 [warning: Documents this large are best viewed by clicking the View PDF Link!]
- AccessData Legal and Contact Information
- Contents
- Introducing the Summation Admin Guide
- Introducing Summation
- Introduction to Application Management
- Getting Started
- Administrating Summation
- Using the Management Page
- Configuring and Managing System Users, User Groups, and Roles
- About Users
- About User Roles and Permissions
- About Admin Roles and Permissions
- About the Users Tab
- About the Admin Roles Tab
- Managing Admin Roles
- Managing Users
- Managing the List of Users
- Adding Users
- Associating Admin Roles to a User
- Disassociating an Admin Role from a User
- Editing the Email Address of a User
- Resetting a User’s Password
- Managing Locked User Accounts
- Unlocking a User Account
- Deleting Users
- Deactivating a User
- Activating a User
- Associating a Group to a User
- Disassociating a Group from a User
- Configuring and Managing User Groups
- Configuring the System
- Using the Work Manager Console and Logs
- Using Language Identification
- Getting Started with KFF (Known File Filter)
- About KFF
- About the KFF Server and Geolocation
- Installing the KFF Server
- Configuring the Location of the KFF Server
- Migrating Legacy KFF Data
- Importing KFF Data
- About CSV and Binary Formats
- Uninstalling KFF
- Installing KFF Updates
- KFF Library Reference Information
- What has Changed in Version 5.6
- Using De-NIST (Known File Filter)
- Configuring Data Sources
- Managing Projects
- Introduction to Project Management
- Using the Project Management Home Page
- Creating a Project
- Managing People
- Managing Tags
- Setting Project Permissions
- Running Reports
- Configuring Review Tools
- Monitoring the Work List
- Managing Document Groups
- Managing Transcripts and Exhibits
- Managing Review Sets
- Project Folder Structure
- Loading Summation Data
- Introduction to Loading Data
- Using the Evidence Wizard
- Importing Evidence
- Data Loading Requirements
- Analyzing Document Content
- Editing Evidence
- Using Lit Holds
- Using Litigation Holds
- About Litigation Holds
- Process for Using Litigation Holds
- Configuring the System for Litigation Holds
- Configuring Litigation Hold Settings
- Creating a Litigation Hold
- Managing Litigation Holds
- Using the Lit Hold Page
- Editing a Litigation Hold
- Deactivating and Activating a Litigation Hold
- Deleting a Litigation Hold
- Resubmitting a Litigation Hold
- Viewing Information About Holds
- Viewing the Overall Status of a Litigation Hold
- About the Approvals Tab
- About the Hold Event Log for a Litigation Hold
- About the Email Distribution History of a Litigation Hold
- About Lit Hold Reports
- Searching Litigation Holds
- Using Lit Hold Dashboard Widgets
- Using the Dashboard
- Using Litigation Holds
- Configuring and Using the Multi-Tenant Environment
- Understanding the Multi-Tenant Environment
- Administrating a Multi-Tenant Environment
- Using the Multi-Tenant Environment
- Configuring and Using LawDrop
- Understanding LawDrop™
- Administrating LawDrop™
- Using LawDrop™
- Reference
- Installing the AccessData Elasticsearch Windows Service
- Integrating with AccessData Forensics Products

| 1
Draft
AccessData
Summation®
Administration Guide

AccessData Legal and Contact Information | 2
AccessData Legal and Contact Information
Document date: March 11, 2016
Legal Information
©2016 AccessData Group, Inc. All rights reserved. No part of this publication may be reproduced, photocopied,
stored on a retrieval system, or transmitted without the express written consent of the publisher.
AccessData Group, Inc. makes no representations or warranties with respect to the contents or use of this
documentation, and specifically disclaims any express or implied warranties of merchantability or fitness for any
particular purpose. Further, AccessData Group, Inc. reserves the right to revise this publication and to make
changes to its content, at any time, without obligation to notify any person or entity of such revisions or changes.
Further, AccessData Group, Inc. makes no representations or warranties with respect to any software, and
specifically disclaims any express or implied warranties of merchantability or fitness for any particular purpose.
Further, AccessData Group, Inc. reserves the right to make changes to any and all parts of AccessData
software, at any time, without any obligation to notify any person or entity of such changes.
You may not export or re-export this product in violation of any applicable laws or regulations including, without
limitation, U.S. export regulations or the laws of the country in which you reside.
AccessData Group, Inc.
588 West 400 South Suite 350
Lindon, UT 84042
USA
AccessData Trademarks and Copyright Information
The following are either registered trademarks or trademarks of AccessData Group, Inc. All other trademarks are
the property of their respective owners.
AccessData® DNA® PRTK®
AccessData Certified Examiner® (ACE®) Forensic Toolkit® (FTK®) Registry Viewer®
AD Summation® Mobile Phone Examiner Plus® Summation®
Discovery Cracker® MPE+ Velocitor™ SilentRunner®
Distributed Network Attack® Password Recovery Toolkit®

AccessData Legal and Contact Information | 3
A trademark symbol (®, ™, etc.) denotes an AccessData Group, Inc. trademark. With few exceptions, and
unless otherwise notated, all third-party product names are spelled and capitalized the same way the owner
spells and capitalizes its product name. Third-party trademarks and copyrights are the property of the trademark
and copyright holders. AccessData claims no responsibility for the function or performance of third-party
products.
Third party acknowledgements:
-FreeBSD ® Copyright 1992-2011. The FreeBSD Project.
-AFF® and AFFLIB® Copyright® 2005, 2006, 2007, 2008 Simson L. Garfinkel and Basis Technology
Corp. All rights reserved.
-Copyright © 2005 - 2009 Ayende Rahien
BSD License: Copyright (c) 2009-2011, Andriy Syrov. All rights reserved. Redistribution and use in source and
binary forms, with or without modification, are permitted provided that the following conditions are met:
Redistributions of source code must retain the above copyright notice, this list of conditions and the following
disclaimer; Redistributions in binary form must reproduce the above copyright notice, this list of conditions and
the following disclaimer in the documentation and/or other materials provided with the distribution; Neither the
name of Andriy Syrov nor the names of its contributors may be used to endorse or promote products derived
from this software without specific prior written permission. THIS SOFTWARE IS PROVIDED BY THE
COPYRIGHT HOLDERS AND CONTRIBUTORS "AS IS" AND ANY EXPRESS OR IMPLIED WARRANTIES,
INCLUDING, BUT NOT LIMITED TO, THE IMPLIED WARRANTIES OF MERCHANTABILITY AND FITNESS
FOR A PARTICULAR PURPOSE ARE DISCLAIMED. IN NO EVENT SHALL THE COPYRIGHT OWNER OR
CONTRIBUTORS BE LIABLE FOR ANY DIRECT, INDIRECT, INCIDENTAL, SPECIAL, EXEMPLARY, OR
CONSEQUENTIAL DAMAGES (INCLUDING, BUT NOT LIMITED TO, PROCUREMENT OF SUBSTITUTE
GOODS OR SERVICES; LOSS OF USE, DATA, OR PROFITS; OR BUSINESS INTERRUPTION) HOWEVER
CAUSED AND ON ANY THEORY OF LIABILITY, WHETHER IN CONTRACT, STRICT LIABILITY, OR TORT
(INCLUDING NEGLIGENCE OR OTHERWISE) ARISING IN ANY WAY OUT OF THE USE OF THIS
SOFTWARE, EVEN IF ADVISED OF THE POSSIBILITY OF SUCH DAMAGE.
WordNet License
This license is available as the file LICENSE in any downloaded version of WordNet.
WordNet 3.0 license: (Download)
WordNet Release 3.0 This software and database is being provided to you, the LICENSEE, by Princeton
University under the following license. By obtaining, using and/or copying this software and database, you agree
that you have read, understood, and will comply with these terms and conditions.: Permission to use, copy,
modify and distribute this software and database and its documentation for any purpose and without fee or
royalty is hereby granted, provided that you agree to comply with the following copyright notice and statements,
including the disclaimer, and that the same appear on ALL copies of the software, database and documentation,
including modifications that you make for internal use or for distribution. WordNet 3.0 Copyright 2006 by
Princeton University. All rights reserved. THIS SOFTWARE AND DATABASE IS PROVIDED "AS IS" AND
PRINCETON UNIVERSITY MAKES NO REPRESENTATIONS OR WARRANTIES, EXPRESS OR IMPLIED. BY
WAY OF EXAMPLE, BUT NOT LIMITATION, PRINCETON UNIVERSITY MAKES NO REPRESENTATIONS OR
WARRANTIES OF MERCHANT- ABILITY OR FITNESS FOR ANY PARTICULAR PURPOSE OR THAT THE
USE OF THE LICENSED SOFTWARE, DATABASE OR DOCUMENTATION WILL NOT INFRINGE ANY THIRD
PARTY PATENTS, COPYRIGHTS, TRADEMARKS OR OTHER RIGHTS. The name of Princeton University or

AccessData Legal and Contact Information | 4
Princeton may not be used in advertising or publicity pertaining to distribution of the software and/or database.
Title to copyright in this software, database and any associated documentation shall at all times remain with
Princeton University and LICENSEE agrees to preserve same.
Documentation Conventions
In AccessData documentation, a number of text variations are used to indicate meanings or actions. For
example, a greater-than symbol (>) is used to separate actions within a step. Where an entry must be typed in
using the keyboard, the variable data is set apart using [variable_data] format. Steps that require the user to
click on a button or icon are indicated by Bolded text. This Italic font indicates a label or non-interactive item in
the user interface.
A trademark symbol (®, ™, etc.) denotes an AccessData Group, Inc. trademark. Unless otherwise notated, all
third-party product names are spelled and capitalized the same way the owner spells and capitalizes its product
name. Third-party trademarks and copyrights are the property of the trademark and copyright holders.
AccessData claims no responsibility for the function or performance of third-party products.
Registration
The AccessData product registration is done at AccessData after a purchase is made, and before the product is
shipped. The licenses are bound to either a USB security device, or a Virtual CmStick, according to your
purchase.
Subscriptions
AccessData provides a one-year licensing subscription with all new product purchases. The subscription allows
you to access technical support, and to download and install the latest releases for your licensed products during
the active license period.
Following the initial licensing period, a subscription renewal is required annually for continued support and for
updating your products. You can renew your subscriptions through your AccessData Sales Representative.
Use License Manager to view your current registration information, to check for product updates and to
download the latest product versions, where they are available for download. You can also visit our web site,
www.accessdata.com anytime to find the latest releases of our products.
For more information, see Managing Licenses in your product manual or on the AccessData website.
AccessData Contact Information
Your AccessData Sales Representative is your main contact with AccessData. Also, listed below are the general
AccessData telephone number and mailing address, and telephone numbers for contacting individual
departments
AccessData Legal and Contact Information | 5
Mailing Address and General Phone Numbers
You can contact AccessData in the following ways:
Technical Support
Technical support is available on all currently licensed AccessData solutions.
You can contact AccessData Customer and Technical Support in the following ways:
AccessData Support Portal
You can access the Chat, Knowledge Base, Discussion Boards, White Papers and more through the
AccessData Support Portal:
https://support.accessdata.com
E-Mail Support:
support@accessdata.com
Telephone:
Americas/Asia-Pacific:
800-658-5199 (North America)
Support Hours: Mon-Fri, 7:00 AM – 6:00 PM (MST), except corporate holidays.
NOTE: Emergency support is available on weekends:
Saturday and Sunday 8:00am – 6:00pm MST via support@accessdata.com
AccessData Mailing Address, Hours, and Department Phone Numbers
Corporate Headquarters: AccessData Group, Inc.
588 West 400 South Suite 350
Lindon, UT 84042 USA
Voice: 801.377.5410; Fax: 801.377.5426
General Corporate Hours: Monday through Friday, 8:00 AM – 5:00 PM (MST)
AccessData is closed on US Federal Holidays
State and Local
Law Enforcement Sales:
Voice: 800.574.5199, option 1; Fax: 801.765.4370
Email: Sales@AccessData.com
Federal Sales: Voice: 800.574.5199, option 2; Fax: 801.765.4370
Email: Sales@AccessData.com
Corporate Sales: Voice: 801.377.5410, option 3; Fax: 801.765.4370
Email: Sales@AccessData.com
Training: Voice: 801.377.5410, option 6; Fax: 801.765.4370
Email: Training@AccessData.com
Accounting: Voice: 801.377.5410, option 4
AccessData Legal and Contact Information | 6
Documentation
Please email AccessData regarding any typos, inaccuracies, or other problems you find with the documentation:
documentation@accessdata.com
Professional Services
The AccessData Professional Services staff comes with a varied and extensive background in digital
investigations including law enforcement, counter-intelligence, and corporate security. Their collective
experience in working with both government and commercial entities, as well as in providing expert testimony,
enables them to provide a full range of computer forensic and eDiscovery services.
At this time, Professional Services provides support for sales, installation, training, and utilization of Summation,
FTK, FTK Pro, Enterprise, eDiscovery, Lab and the entire Resolution One platform. They can help you resolve
any questions or problems you may have regarding these solutions.
Contact Information for Professional Services
Contact AccessData Professional Services in the following ways:
AccessData Professional Services Contact Information
Contact Method Number or Address
Phone North America Toll Free: 800-489-5199, option 7
International: +1.801.377.5410, option 7
Email services@accessdata.com

| 7
Contents
AccessData Legal and Contact Information
. . . . . . . . . . . . . . . . . . . . . . . . . . . 2
Contents
. . . . . . . . . . . . . . . . . . . . . . . . . . . . . . . . . . . . . . . . . . . . . . . . . 7
Part 1: Introducing the Summation Admin Guide
. . . . . . . . . . . . . . . . . . . .20
Chapter 1: Introducing Summation
. . . . . . . . . . . . . . . . . . . . . . . . . . . . . . . . . . . . . . . . . . . . . . . . 21
About AccessData Summation . . . . . . . . . . . . . . . . . . . . . . . . . 21
About the Audience for this Guide . . . . . . . . . . . . . . . . . . . . . . . . 21
Summation Features. . . . . . . . . . . . . . . . . . . . . . . . . . . . . . . 22
Recommended Hardware Specifications . . . . . . . . . . . . . . . . . . . . 22
Chapter 2: Introduction to Application Management
. . . . . . . . . . . . . . . . . . . . . . . . . . . . . . . . 23
Workflows for Administrators . . . . . . . . . . . . . . . . . . . . . . . . . . 23
Chapter 3: Getting Started
. . . . . . . . . . . . . . . . . . . . . . . . . . . . . . . . . . . . . . . . . . . . . . . . . . . . . . . . 24
Terminology . . . . . . . . . . . . . . . . . . . . . . . . . . . . . . . . . . . 24
About the AccessData Web Console . . . . . . . . . . . . . . . . . . . . . . . . . . .25
Web Console Requirements . . . . . . . . . . . . . . . . . . . . . . . . . . . . . .25
About User Accounts . . . . . . . . . . . . . . . . . . . . . . . . . . . . . . 26
User Account Types . . . . . . . . . . . . . . . . . . . . . . . . . . . . . . . . . .26
Opening the AccessData Web Console . . . . . . . . . . . . . . . . . . . . . 26
Installing the Browser Components . . . . . . . . . . . . . . . . . . . . . . . . . . . .28
Installing Components through the Browser . . . . . . . . . . . . . . . . . . . . .28
Installing Browser Components Manually . . . . . . . . . . . . . . . . . . . . . .30
Introducing the Web Console . . . . . . . . . . . . . . . . . . . . . . . . . . . . . . . .31
The Project List Panel . . . . . . . . . . . . . . . . . . . . . . . . . . . . . . 33
User Actions . . . . . . . . . . . . . . . . . . . . . . . . . . . . . . . . . . . . . . . . . .36
Changing Your Password . . . . . . . . . . . . . . . . . . . . . . . . . . . . . . .37
Using Elements of the Web Console . . . . . . . . . . . . . . . . . . . . . . . . . . .38
Maximizing the Web Console Viewing Area . . . . . . . . . . . . . . . . . . . . .38
About Content in Lists and Grids . . . . . . . . . . . . . . . . . . . . . . . . . . .38

| 8
Part 2: Administrating Summation
. . . . . . . . . . . . . . . . . . . . . . . . . . . . . . . .44
Chapter 4: Using the Management Page
. . . . . . . . . . . . . . . . . . . . . . . . . . . . . . . . . . . . . . . . . . . 45
About the Management Page . . . . . . . . . . . . . . . . . . . . . . . . . . 45
Opening the Management Page. . . . . . . . . . . . . . . . . . . . . . . . . 45
Management Page . . . . . . . . . . . . . . . . . . . . . . . . . . . . . . . . . . . . . .46
Chapter 5: Configuring and Managing System Users,
User Groups, and Roles
. . . . . . . . . . . . . . . . . . . . . . . . . . . . . . . . . . . . . . . . . . . . . . . . . . . . . . . 47
About Users . . . . . . . . . . . . . . . . . . . . . . . . . . . . . . . . . . . 47
About User Roles and Permissions . . . . . . . . . . . . . . . . . . . . . . . 47
Planning User Roles . . . . . . . . . . . . . . . . . . . . . . . . . . . . . . . . . .48
About Admin Roles and Permissions . . . . . . . . . . . . . . . . . . . . . . . . . . .49
Creating Admin Roles . . . . . . . . . . . . . . . . . . . . . . . . . . . . . . . . .49
About the Users Tab. . . . . . . . . . . . . . . . . . . . . . . . . . . . . . . . . . . . . .52
About the Admin Roles Tab . . . . . . . . . . . . . . . . . . . . . . . . . . . . . . . . .54
Managing Admin Roles. . . . . . . . . . . . . . . . . . . . . . . . . . . . . . . . . . . .55
Creating an Admin Role . . . . . . . . . . . . . . . . . . . . . . . . . . . . . . . .55
Adding Permissions to an Admin Role . . . . . . . . . . . . . . . . . . . . . . . .55
Managing Users . . . . . . . . . . . . . . . . . . . . . . . . . . . . . . . . . . . . . . . .57
Managing the List of Users. . . . . . . . . . . . . . . . . . . . . . . . . . . . . . .57
Adding Users . . . . . . . . . . . . . . . . . . . . . . . . . . . . . . . . . . . . . .57
Associating Admin Roles to a User . . . . . . . . . . . . . . . . . . . . . . . . . .58
Disassociating an Admin Role from a User . . . . . . . . . . . . . . . . . . . . .59
Editing the Email Address of a User . . . . . . . . . . . . . . . . . . . . . . . . .59
Resetting a User’s Password . . . . . . . . . . . . . . . . . . . . . . . . . . . . .60
Managing Locked User Accounts . . . . . . . . . . . . . . . . . . . . . . . . . . .61
Unlocking a User Account . . . . . . . . . . . . . . . . . . . . . . . . . . . . . . .61
Deleting Users. . . . . . . . . . . . . . . . . . . . . . . . . . . . . . . . . . . . . .61
Deactivating a User . . . . . . . . . . . . . . . . . . . . . . . . . . . . . . . . . . .62
Activating a User . . . . . . . . . . . . . . . . . . . . . . . . . . . . . . . . . . . .62
Associating a Group to a User. . . . . . . . . . . . . . . . . . . . . . . . . . . . .63
Disassociating a Group from a User . . . . . . . . . . . . . . . . . . . . . . . . .63
Configuring and Managing User Groups . . . . . . . . . . . . . . . . . . . . . . . . .65
Opening the User Groups Tab . . . . . . . . . . . . . . . . . . . . . . . . . . . . .65
User Groups Tab . . . . . . . . . . . . . . . . . . . . . . . . . . . . . . . . . . . .66
Adding Groups . . . . . . . . . . . . . . . . . . . . . . . . . . . . . . . . . . . . .66
Deleting Groups . . . . . . . . . . . . . . . . . . . . . . . . . . . . . . . . . . . . .67
Editing Groups. . . . . . . . . . . . . . . . . . . . . . . . . . . . . . . . . . . . . .67
Associating Users/Admin Roles to a Group . . . . . . . . . . . . . . . . . . . . .67
Chapter 6: Configuring the System
. . . . . . . . . . . . . . . . . . . . . . . . . . . . . . . . . . . . . . . . . . . . . . . . 69
About System Configuration . . . . . . . . . . . . . . . . . . . . . . . . . . . 69
System Configuration Tab - Standard Settings . . . . . . . . . . . . . . . . . 69

| 9
Configuring Active Directory Synchronization . . . . . . . . . . . . . . . . . . . .70
Configuring the Email Notification Server . . . . . . . . . . . . . . . . . . . . . .74
Configuring Default Project Settings . . . . . . . . . . . . . . . . . . . . . . . . .76
Configuring Export Options . . . . . . . . . . . . . . . . . . . . . . . . . . . . . .78
Chapter 7: Using the Work Manager Console and Logs
. . . . . . . . . . . . . . . . . . . . . . . . . . . . . 79
Using the Work Manager Console. . . . . . . . . . . . . . . . . . . . . . . . 79
Opening the Work Manager Console . . . . . . . . . . . . . . . . . . . . . . . . .79
Work Manager Console Tab . . . . . . . . . . . . . . . . . . . . . . . . . . . 79
Validating Activate Work Orders . . . . . . . . . . . . . . . . . . . . . . . . . . . . . .81
Configuring a Work Manager . . . . . . . . . . . . . . . . . . . . . . . . . . . . . . . .82
Using the System Log and Activity Log . . . . . . . . . . . . . . . . . . . . . . . . . .83
About the System Log . . . . . . . . . . . . . . . . . . . . . . . . . . . . . . . . .83
System Log Tab . . . . . . . . . . . . . . . . . . . . . . . . . . . . . . . . . . . .83
About the Activity Log . . . . . . . . . . . . . . . . . . . . . . . . . . . . . . . . .84
Activity Log Tab . . . . . . . . . . . . . . . . . . . . . . . . . . . . . . . . . . . . .84
Viewing the System Log or Activity Log . . . . . . . . . . . . . . . . . . . . . . .85
Clearing the Log. . . . . . . . . . . . . . . . . . . . . . . . . . . . . . . . . . . . .85
Exporting the Log . . . . . . . . . . . . . . . . . . . . . . . . . . . . . . . . . . . .85
Chapter 8: Using Language Identification
. . . . . . . . . . . . . . . . . . . . . . . . . . . . . . . . . . . . . . . . . . 86
Language Identification . . . . . . . . . . . . . . . . . . . . . . . . . . . . . 86
Chapter 9: Getting Started with KFF (Known File Filter)
. . . . . . . . . . . . . . . . . . . . . . . . . . . . 88
About KFF . . . . . . . . . . . . . . . . . . . . . . . . . . . . . . . . . . . . 88
Introduction to the KFF Architecture . . . . . . . . . . . . . . . . . . . . . . . . .89
Components of KFF Data . . . . . . . . . . . . . . . . . . . . . . . . . . . . . . .89
How KFF Works. . . . . . . . . . . . . . . . . . . . . . . . . . . . . . . . . . . . .91
About the KFF Server and Geolocation . . . . . . . . . . . . . . . . . . . . . . . . . .93
Installing the KFF Server . . . . . . . . . . . . . . . . . . . . . . . . . . . . . . . . . . .94
About Installing the KFF Server . . . . . . . . . . . . . . . . . . . . . . . . . . . .94
About KFF Server Versions . . . . . . . . . . . . . . . . . . . . . . . . . . . . . .94
Process for Installing KFF . . . . . . . . . . . . . . . . . . . . . . . . . . . . . . .95
Downloading the Latest KFF Installation Files . . . . . . . . . . . . . . . . . . . .95
Installing the KFF Server Service . . . . . . . . . . . . . . . . . . . . . . . . . . .95
Configuring the Location of the KFF Server . . . . . . . . . . . . . . . . . . . . . . .96
Configuring the KFF Server Location on FTK-based Computers . . . . . . . . .96
Configuring the KFF Server Location on Summation and eDiscovery Applications
96
Migrating Legacy KFF Data . . . . . . . . . . . . . . . . . . . . . . . . . . . 97
Importing KFF Data . . . . . . . . . . . . . . . . . . . . . . . . . . . . . . . . . . . . . .98
About Importing KFF Data . . . . . . . . . . . . . . . . . . . . . . . . . . . . . . .98
Using the KFF Import Utility . . . . . . . . . . . . . . . . . . . . . . . . . . . . . .99

| 10
Importing Pre-defined KFF Data Libraries . . . . . . . . . . . . . . . . . . . . . 101
Installing the Geolocation (GeoIP) Data . . . . . . . . . . . . . . . . . . . . . . 104
About CSV and Binary Formats . . . . . . . . . . . . . . . . . . . . . . . . . . . . . 105
Uninstalling KFF . . . . . . . . . . . . . . . . . . . . . . . . . . . . . . . . . . . . . . . 108
Installing KFF Updates . . . . . . . . . . . . . . . . . . . . . . . . . . . . . . . . . . . 109
KFF Library Reference Information . . . . . . . . . . . . . . . . . . . . . . . . . . . 110
About KFF Pre-Defined Hash Libraries. . . . . . . . . . . . . . . . . . . . . . . 110
What has Changed in Version 5.6 . . . . . . . . . . . . . . . . . . . . . . . . . . . . 115
Chapter 10: Using De-NIST (Known File Filter)
. . . . . . . . . . . . . . . . . . . . . . . . . . . . . . . . . . . . 116
About KFF and De-NIST Terminology . . . . . . . . . . . . . . . . . . . . . .116
Process for Using De-NIST . . . . . . . . . . . . . . . . . . . . . . . . . . .117
Configuring De-NIST Permissions. . . . . . . . . . . . . . . . . . . . . . . .117
Adding Hashes to the KFF Server . . . . . . . . . . . . . . . . . . . . . . . . . . . . 118
About the Manage De-NIST Hash Sets Page . . . . . . . . . . . . . . . . . . . 118
Importing De-NIST Data . . . . . . . . . . . . . . . . . . . . . . . . . . . . . . . 119
Manually Creating and Managing De-NIST Hash Sets . . . . . . . . . . . . . . 121
Adding Hashes to Hash Sets Using Project Review. . . . . . . . . . . . . . . . 122
Using De-NIST Groups to Organize Hash Sets . . . . . . . . . . . . . . . . . . . . 124
About De-NIST Groups. . . . . . . . . . . . . . . . . . . . . . . . . . . . . . . . 124
Creating a De-NIST Group. . . . . . . . . . . . . . . . . . . . . . . . . . . . . . 125
Viewing the Contents of a De-NIST Group . . . . . . . . . . . . . . . . . . . . . 125
Managing De-NIST Groups . . . . . . . . . . . . . . . . . . . . . . . . . . . . . 125
About the Manage De-NIST Groups Page . . . . . . . . . . . . . . . . . . . . . 126
Enabling a Project to Use De-NIST . . . . . . . . . . . . . . . . . . . . . . . . . . . 128
About Enabling and Configuring De-NIST . . . . . . . . . . . . . . . . . . . . . 128
Enabling and Configuring De-NIST . . . . . . . . . . . . . . . . . . . . . . . . . 128
Reviewing De-NIST Results . . . . . . . . . . . . . . . . . . . . . . . . . . . . . . . . 130
Viewing De-NIST Data Shown on the Project Details Page . . . . . . . . . . . 130
About De-NIST Data Shown in the Review Item List . . . . . . . . . . . . . . . 130
Using the De-NIST Information Quick Columns . . . . . . . . . . . . . . . . . . 130
Using Quick Filters . . . . . . . . . . . . . . . . . . . . . . . . . . . . . . . . . . 131
Using the De-NIST Facets . . . . . . . . . . . . . . . . . . . . . . . . . . . . . . 132
Viewing Detailed De-NIST Data . . . . . . . . . . . . . . . . . . . . . . . . . . . 133
Re-Processing De-NIST . . . . . . . . . . . . . . . . . . . . . . . . . . . . . . . . . . 134
Exporting De-NIST Data . . . . . . . . . . . . . . . . . . . . . . . . . . . . . . . . . . 135
About Exporting KFF Data . . . . . . . . . . . . . . . . . . . . . . . . . . . . . . 135
Exporting KFF Groups and Hash Sets . . . . . . . . . . . . . . . . . . . . . . . 135
Part 3: Configuring Data Sources
. . . . . . . . . . . . . . . . . . . . . . . . . . . . . . . .137
Chapter 11: Managing People as Data Sources
. . . . . . . . . . . . . . . . . . . . . . . . . . . . . . . . . . . . 138
About People . . . . . . . . . . . . . . . . . . . . . . . . . . . . . . . . . 138

| 11
About Managing People . . . . . . . . . . . . . . . . . . . . . . . . . . . . . . . 138
About the Data Sources Person Page. . . . . . . . . . . . . . . . . . . . . . . . . . 140
Data Sources Person Tab Options . . . . . . . . . . . . . . . . . . . . . . . . . . . . 141
Adding People. . . . . . . . . . . . . . . . . . . . . . . . . . . . . . . . . . . . . 142
Adding People Using Active Directory . . . . . . . . . . . . . . . . . . . . . . . 144
Associating a Project to a Person . . . . . . . . . . . . . . . . . . . . . . . . . . 146
Part 4: Managing Projects
. . . . . . . . . . . . . . . . . . . . . . . . . . . . . . . . . . . . . .147
Chapter 12: Introduction to Project Management
. . . . . . . . . . . . . . . . . . . . . . . . . . . . . . . . . . 148
About Projects . . . . . . . . . . . . . . . . . . . . . . . . . . . . . . . . . 148
Workflow for Project/Case Managers . . . . . . . . . . . . . . . . . . . . . 148
Chapter 13: Using the Project Management Home Page
. . . . . . . . . . . . . . . . . . . . . . . . . . . 150
Viewing the Home Page . . . . . . . . . . . . . . . . . . . . . . . . . . . . 150
Introducing the Home Page . . . . . . . . . . . . . . . . . . . . . . . . . . . . . . . . 151
The Project List Panel . . . . . . . . . . . . . . . . . . . . . . . . . . . . . . . . 152
Evidence Tab . . . . . . . . . . . . . . . . . . . . . . . . . . . . . . . . . . . . . . . . . 155
Adding Custom Properties . . . . . . . . . . . . . . . . . . . . . . . . . . . . . . . . . 157
Custom Properties . . . . . . . . . . . . . . . . . . . . . . . . . . . . . . . . . . 157
Managing People for a Project . . . . . . . . . . . . . . . . . . . . . . . . . . . . . . 159
About People . . . . . . . . . . . . . . . . . . . . . . . . . . . . . . . . . . . . . 159
About Managing People . . . . . . . . . . . . . . . . . . . . . . . . . . . . . . . 159
About the Project’s Person Tab . . . . . . . . . . . . . . . . . . . . . . . . . . . 160
Project’s Person Tab Options . . . . . . . . . . . . . . . . . . . . . . . . . . . . 161
Adding People. . . . . . . . . . . . . . . . . . . . . . . . . . . . . . . . . . . . . 161
Associating a Project to a Person . . . . . . . . . . . . . . . . . . . . . . . . . . 163
Chapter 14: Creating a Project
. . . . . . . . . . . . . . . . . . . . . . . . . . . . . . . . . . . . . . . . . . . . . . . . . . . 164
Creating Projects . . . . . . . . . . . . . . . . . . . . . . . . . . . . . . . 164
General Project Properties. . . . . . . . . . . . . . . . . . . . . . . . . . . . . . 165
Normalized Time Zones . . . . . . . . . . . . . . . . . . . . . . . . . . . . . . . 166
Evidence Processing and Deduplication Options . . . . . . . . . . . . . . . . . 167
About Deduplication . . . . . . . . . . . . . . . . . . . . . . . . . . . . . . . . . 172
About Indexing for Text Searches of Content of Files . . . . . . . . . . . . . . . 174
About Optical Character Recognition (OCR). . . . . . . . . . . . . . . . . . . . 174
Interruption of Evidence Processing . . . . . . . . . . . . . . . . . . . . . . . . 176
Using Project Properties Cloning . . . . . . . . . . . . . . . . . . . . . . . . . . . . . 177
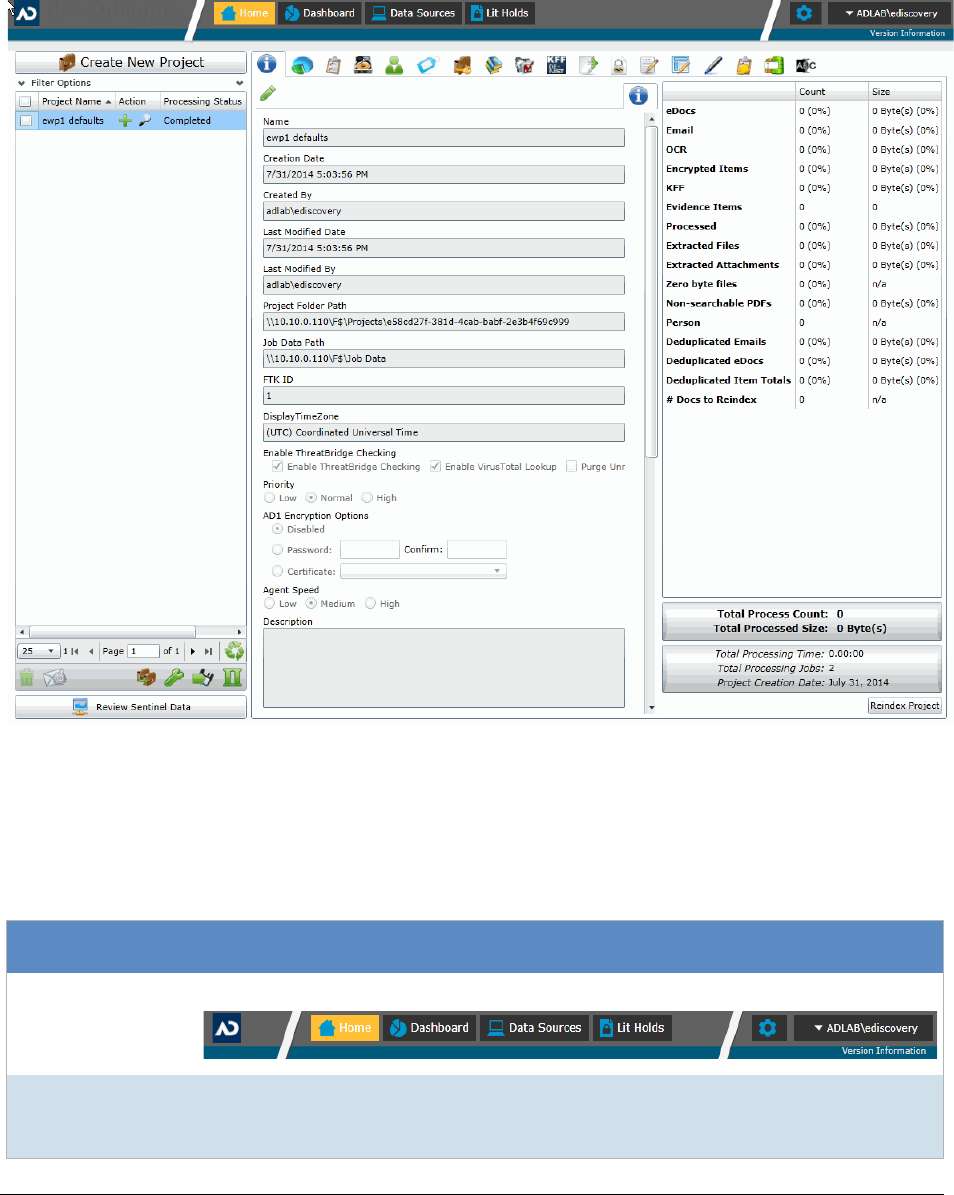
Viewing and Editing Project Details . . . . . . . . . . . . . . . . . . . . . . . . . . . 178
Project Details Tab . . . . . . . . . . . . . . . . . . . . . . . . . . . . . . . . . . 178

| 12
Chapter 15: Managing People
. . . . . . . . . . . . . . . . . . . . . . . . . . . . . . . . . . . . . . . . . . . . . . . . . . . . 180
Data Sources People Tab . . . . . . . . . . . . . . . . . . . . . . . . . . . 180
Opening the Data Sources, People Page . . . . . . . . . . . . . . . . . . . . . 181
Adding People. . . . . . . . . . . . . . . . . . . . . . . . . . . . . . . . . . . . . 182
Manually Creating People . . . . . . . . . . . . . . . . . . . . . . . . . . . . . . 183
Editing a Person. . . . . . . . . . . . . . . . . . . . . . . . . . . . . . . . . . . . 183
Removing a Person. . . . . . . . . . . . . . . . . . . . . . . . . . . . . . . . . . 183
Importing People From a File . . . . . . . . . . . . . . . . . . . . . . . . . . . . 183
Adding People using Active Directory. . . . . . . . . . . . . . . . . . . . . . . . 184
Home People Tab . . . . . . . . . . . . . . . . . . . . . . . . . . . . . . . . . . . 185
Adding a Person to a Project . . . . . . . . . . . . . . . . . . . . . . . . . . . . . . . 186
Manually Creating People for a Project. . . . . . . . . . . . . . . . . . . . . . . 186
Editing a Person. . . . . . . . . . . . . . . . . . . . . . . . . . . . . . . . . . . . 187
Removing a Person. . . . . . . . . . . . . . . . . . . . . . . . . . . . . . . . . . 187
Importing People From a File . . . . . . . . . . . . . . . . . . . . . . . . . . . . 187
About Associating a Person to an Evidence Item . . . . . . . . . . . . . . . . . 187
Chapter 16: Managing Tags
. . . . . . . . . . . . . . . . . . . . . . . . . . . . . . . . . . . . . . . . . . . . . . . . . . . . . . 189
Managing Labels. . . . . . . . . . . . . . . . . . . . . . . . . . . . . . . . . . . . . . . 191
Creating Labels . . . . . . . . . . . . . . . . . . . . . . . . . . . . . . . . . . . . 191
Deleting Labels . . . . . . . . . . . . . . . . . . . . . . . . . . . . . . . . . . . . 192
Renaming a Label. . . . . . . . . . . . . . . . . . . . . . . . . . . . . . . . . . . 192
Managing Label Permissions . . . . . . . . . . . . . . . . . . . . . . . . . . . . 192
Applying Labels to Documents . . . . . . . . . . . . . . . . . . . . . . . . . . . 193
Managing Issues. . . . . . . . . . . . . . . . . . . . . . . . . . . . . . . . . . . . . . . 194
Creating Issues . . . . . . . . . . . . . . . . . . . . . . . . . . . . . . . . . . . . 194
Deleting Issues . . . . . . . . . . . . . . . . . . . . . . . . . . . . . . . . . . . . 195
Renaming Issues . . . . . . . . . . . . . . . . . . . . . . . . . . . . . . . . . . . 195
Managing Issue Permissions . . . . . . . . . . . . . . . . . . . . . . . . . . . . 195
Applying Issues to Documents. . . . . . . . . . . . . . . . . . . . . . . . . . . . 196
Chapter 17: Setting Project Permissions
. . . . . . . . . . . . . . . . . . . . . . . . . . . . . . . . . . . . . . . . . 197
About Project Permissions. . . . . . . . . . . . . . . . . . . . . . . . . . . 197
About Project Roles. . . . . . . . . . . . . . . . . . . . . . . . . . . . . . . . . . 197
Project-level Permissions . . . . . . . . . . . . . . . . . . . . . . . . . . . . . . 198
Permissions Tab . . . . . . . . . . . . . . . . . . . . . . . . . . . . . . . . 200
Associating Users and Groups to a Project . . . . . . . . . . . . . . . . . . . . . . 203
Disassociate Users and Groups from a Project . . . . . . . . . . . . . . . . . . 203
Associating Project Roles to Users and Groups. . . . . . . . . . . . . . . . . . . . 204
Disassociating Project Roles from Users or Groups. . . . . . . . . . . . . . . . 204
Creating a Project Role. . . . . . . . . . . . . . . . . . . . . . . . . . . . . . . . . . . 205
Editing and Managing a Project Role . . . . . . . . . . . . . . . . . . . . . . . . 206

| 13
Chapter 18: Running Reports
. . . . . . . . . . . . . . . . . . . . . . . . . . . . . . . . . . . . . . . . . . . . . . . . . . . . 207
Accessing the Reports Tab . . . . . . . . . . . . . . . . . . . . . . . . . . 207
Basic Reports . . . . . . . . . . . . . . . . . . . . . . . . . . . . . . . . . . . . . 208
eDiscovery Reports . . . . . . . . . . . . . . . . . . . . . . . . . . . . . . . . . . 211
Chapter 19: Configuring Review Tools
. . . . . . . . . . . . . . . . . . . . . . . . . . . . . . . . . . . . . . . . . . . . 212
Configuring Markup Sets . . . . . . . . . . . . . . . . . . . . . . . . . . . 212
Markup Sets Tab . . . . . . . . . . . . . . . . . . . . . . . . . . . . . . . . . . . 213
Adding a Markup Set . . . . . . . . . . . . . . . . . . . . . . . . . . . . . . . . . 214
Deleting a Markup Set . . . . . . . . . . . . . . . . . . . . . . . . . . . . . . . . 214
Editing the Name of a Markup Set . . . . . . . . . . . . . . . . . . . . . . . . . 214
Associating a User or Group to a Markup Set . . . . . . . . . . . . . . . . . . . 215
Disassociating a User or Group from a Markup Set. . . . . . . . . . . . . . . . 215
Configuring Custom Fields. . . . . . . . . . . . . . . . . . . . . . . . . . . . . . . . . 216
Custom Fields Tab . . . . . . . . . . . . . . . . . . . . . . . . . . . . . . . . . . 216
Adding Custom Fields . . . . . . . . . . . . . . . . . . . . . . . . . . . . . . . . 217
Editing Custom Fields . . . . . . . . . . . . . . . . . . . . . . . . . . . . . . . . 217
Creating Category Values . . . . . . . . . . . . . . . . . . . . . . . . . . . . . . 218
About Deleting Custom Fields . . . . . . . . . . . . . . . . . . . . . . . . . . . . 218
Configuring Tagging Layouts . . . . . . . . . . . . . . . . . . . . . . . . . . . . . . . 219
Tagging Layout Tab . . . . . . . . . . . . . . . . . . . . . . . . . . . . . . . . . . 219
Adding a Tagging Layout . . . . . . . . . . . . . . . . . . . . . . . . . . . . . . . 220
Deleting a Tagging Layout . . . . . . . . . . . . . . . . . . . . . . . . . . . . . . 220
Editing a Tagging Layout . . . . . . . . . . . . . . . . . . . . . . . . . . . . . . . 221
Associating Fields to a Tagging Layout . . . . . . . . . . . . . . . . . . . . . . . 221
Disassociating Fields from a Tagging Layout . . . . . . . . . . . . . . . . . . . 222
Associate User or Group to Tagging Layout . . . . . . . . . . . . . . . . . . . . 223
Disassociate User or Group to Tagging Layout . . . . . . . . . . . . . . . . . . 223
Configuring Highlight Profiles . . . . . . . . . . . . . . . . . . . . . . . . . . . . . . . 224
Highlight Profiles Tab . . . . . . . . . . . . . . . . . . . . . . . . . . . . . . . . . 224
Adding Highlight Profiles . . . . . . . . . . . . . . . . . . . . . . . . . . . . . . . 225
Editing Highlight Profiles . . . . . . . . . . . . . . . . . . . . . . . . . . . . . . . 226
Deleting Highlight Profiles . . . . . . . . . . . . . . . . . . . . . . . . . . . . . . 226
Add Keywords to a Highlight Profile. . . . . . . . . . . . . . . . . . . . . . . . . 226
Associating a Highlight Profile . . . . . . . . . . . . . . . . . . . . . . . . . . . . 227
Disassociating a Highlight Profile . . . . . . . . . . . . . . . . . . . . . . . . . . 227
Configuring Redaction Text . . . . . . . . . . . . . . . . . . . . . . . . . . . . . . . . 228
Redaction Text Tab . . . . . . . . . . . . . . . . . . . . . . . . . . . . . . . . . . 228
Creating a Redaction Text Profile . . . . . . . . . . . . . . . . . . . . . . . . . . 228
Editing Redaction Text Profiles . . . . . . . . . . . . . . . . . . . . . . . . . . . 229
Deleting Redaction Text Profiles. . . . . . . . . . . . . . . . . . . . . . . . . . . 229
Chapter 20: Monitoring the Work List
. . . . . . . . . . . . . . . . . . . . . . . . . . . . . . . . . . . . . . . . . . . . . 230
Accessing the Work List . . . . . . . . . . . . . . . . . . . . . . . . . . . . 230

| 14
Work List Tab . . . . . . . . . . . . . . . . . . . . . . . . . . . . . . . . . . . . . 230
Chapter 21: Managing Document Groups
. . . . . . . . . . . . . . . . . . . . . . . . . . . . . . . . . . . . . . . . . 232
About Managing Document Groups . . . . . . . . . . . . . . . . . . . . . . 232
About DocIDs and Object IDs . . . . . . . . . . . . . . . . . . . . . . . . . . . . 232
How DocIDs are Created. . . . . . . . . . . . . . . . . . . . . . . . . . . . . . . 232
Creating a Document Group During Import . . . . . . . . . . . . . . . . . . . . . . 235
Creating a Document Group in Project Review . . . . . . . . . . . . . . . . 235
Renumbering a Document Group in Project Review . . . . . . . . . . . . . . . . . 236
Deleting a Document Group in Project Review . . . . . . . . . . . . . . . . 236
Managing Rights for Document Groups in Project Review . . . . . . . . . . . . . 237
Chapter 22: Managing Transcripts and Exhibits
. . . . . . . . . . . . . . . . . . . . . . . . . . . . . . . . . . . 238
Creating a Transcript Group . . . . . . . . . . . . . . . . . . . . . . . . . . 238
Uploading Transcripts . . . . . . . . . . . . . . . . . . . . . . . . . . . . . . . . 238
Updating Transcripts . . . . . . . . . . . . . . . . . . . . . . . . . . . . . . . . . 239
Creating a Transcript Report. . . . . . . . . . . . . . . . . . . . . . . . . . . . . 240
Capturing Realtime Transcripts . . . . . . . . . . . . . . . . . . . . . . . . . . . . . . 242
Marking Realtime Transcripts . . . . . . . . . . . . . . . . . . . . . . . . . . . . 243
Updating a Realtime Transcript . . . . . . . . . . . . . . . . . . . . . . . . . . . 245
Using Transcript Vocabulary. . . . . . . . . . . . . . . . . . . . . . . . . . . . . . . . 247
Viewing Details of Words in the Vocabulary Dialog . . . . . . . . . . . . . . . . 248
Uploading Exhibits. . . . . . . . . . . . . . . . . . . . . . . . . . . . . . . . . . . . . . 249
Chapter 23: Managing Review Sets
. . . . . . . . . . . . . . . . . . . . . . . . . . . . . . . . . . . . . . . . . . . . . . . 250
Creating a Review Set . . . . . . . . . . . . . . . . . . . . . . . . . . . . . 250
Deleting Review Sets . . . . . . . . . . . . . . . . . . . . . . . . . . . . . . . . . . . . 252
Renaming a Review Set . . . . . . . . . . . . . . . . . . . . . . . . . . . . . . . . . . 253
Manage Permissions for Review Sets. . . . . . . . . . . . . . . . . . . . . . . . . . 254
Chapter 24: Project Folder Structure
. . . . . . . . . . . . . . . . . . . . . . . . . . . . . . . . . . . . . . . . . . . . . 255
Project Folder Path . . . . . . . . . . . . . . . . . . . . . . . . . . . . . . 255
Finding the Project Folder Path . . . . . . . . . . . . . . . . . . . . . . . . . . . 255
Project Folder Subfolders . . . . . . . . . . . . . . . . . . . . . . . . . . . . . . . . . 256
Opening Project Files. . . . . . . . . . . . . . . . . . . . . . . . . . . . . . . . . 257
Files in the Project Folder . . . . . . . . . . . . . . . . . . . . . . . . . . . . . . 257
Part 5: Loading Summation Data
. . . . . . . . . . . . . . . . . . . . . . . . . . . . . . . .258
Chapter 25: Introduction to Loading Data
. . . . . . . . . . . . . . . . . . . . . . . . . . . . . . . . . . . . . . . . . 259
Importing Data . . . . . . . . . . . . . . . . . . . . . . . . . . . . . . . . . 259

| 15
Chapter 26: Using the Evidence Wizard
. . . . . . . . . . . . . . . . . . . . . . . . . . . . . . . . . . . . . . . . . . . 260
Using the Evidence Wizard . . . . . . . . . . . . . . . . . . . . . . . . . . 260
About Associating People with Evidence. . . . . . . . . . . . . . . . . . . . . . 262
Using the CSV Import Method for Importing Evidence . . . . . . . . . . . . . . 262
Using the Immediate Children Method for Importing . . . . . . . . . . . . . . . 264
Adding Evidence to a Project Using the Evidence Wizard . . . . . . . . . . . . . 266
Evidence Time Zone Setting. . . . . . . . . . . . . . . . . . . . . . . . . . . . . 268
Chapter 27: Importing Evidence
. . . . . . . . . . . . . . . . . . . . . . . . . . . . . . . . . . . . . . . . . . . . . . . . . . 269
About Importing Evidence Using Import . . . . . . . . . . . . . . . . . . . . 269
About Mapping Field Values . . . . . . . . . . . . . . . . . . . . . . . . . . . . . 269
Importing Evidence into a Project . . . . . . . . . . . . . . . . . . . . . . . 270
Chapter 28: Data Loading Requirements
. . . . . . . . . . . . . . . . . . . . . . . . . . . . . . . . . . . . . . . . . . 272
Document Groups . . . . . . . . . . . . . . . . . . . . . . . . . . . . . . . 272
Images . . . . . . . . . . . . . . . . . . . . . . . . . . . . . . . . . . . . . . . . . 272
Full-Text or OCR . . . . . . . . . . . . . . . . . . . . . . . . . . . . . . . . . . . 273
DII Load File Format for Image/OCR . . . . . . . . . . . . . . . . . . . . . . . . 273
Email & eDocs . . . . . . . . . . . . . . . . . . . . . . . . . . . . . . . . . . . . . . . . 275
Coding . . . . . . . . . . . . . . . . . . . . . . . . . . . . . . . . . . . . . . . . . . . . . 277
Related Documents . . . . . . . . . . . . . . . . . . . . . . . . . . . . . . . . . . . . . 280
Transcripts and Exhibits . . . . . . . . . . . . . . . . . . . . . . . . . . . . . . . . . . 281
Transcripts . . . . . . . . . . . . . . . . . . . . . . . . . . . . . . . . . . . . . . . 281
Exhibits. . . . . . . . . . . . . . . . . . . . . . . . . . . . . . . . . . . . . . . . . 282
Work Product . . . . . . . . . . . . . . . . . . . . . . . . . . . . . . . . . . . . . . . . . 283
Sample DII Files . . . . . . . . . . . . . . . . . . . . . . . . . . . . . . . . . . . . . . . 284
eDoc DII Load Files. . . . . . . . . . . . . . . . . . . . . . . . . . . . . . . . . . 284
eMail DII Load Files. . . . . . . . . . . . . . . . . . . . . . . . . . . . . . . . . . 285
DII Tokens . . . . . . . . . . . . . . . . . . . . . . . . . . . . . . . . . . . . . . . . . . . 288
Chapter 29: Analyzing Document Content
. . . . . . . . . . . . . . . . . . . . . . . . . . . . . . . . . . . . . . . . 292
Using Cluster Analysis. . . . . . . . . . . . . . . . . . . . . . . . . . . . . 292
About Cluster Analysis . . . . . . . . . . . . . . . . . . . . . . . . . . . . . . . . 292
Filtering Documents by Cluster Topic . . . . . . . . . . . . . . . . . . . . . . . . 293
Using Entity Extraction . . . . . . . . . . . . . . . . . . . . . . . . . . . . . . . . . . . 295
About Entity Extraction . . . . . . . . . . . . . . . . . . . . . . . . . . . . . . . . 295
Enabling Entity Extraction . . . . . . . . . . . . . . . . . . . . . . . . . . . . . . 297
Viewing Entity Extraction Data. . . . . . . . . . . . . . . . . . . . . . . . . . . . 297
Chapter 30: Editing Evidence
. . . . . . . . . . . . . . . . . . . . . . . . . . . . . . . . . . . . . . . . . . . . . . . . . . . . 298
Editing Evidence Items in the Evidence Tab. . . . . . . . . . . . . . . . . . 298

| 16
Evidence Tab . . . . . . . . . . . . . . . . . . . . . . . . . . . . . . . . . . . . . . . . . 299
Part 6: Using Lit Holds
. . . . . . . . . . . . . . . . . . . . . . . . . . . . . . . . . . . . . . . .301
Chapter 31: Using Litigation Holds
. . . . . . . . . . . . . . . . . . . . . . . . . . . . . . . . . . . . . . . . . . . . . . . 302
About Litigation Holds . . . . . . . . . . . . . . . . . . . . . . . . . . . . . 302
Process for Using Litigation Holds. . . . . . . . . . . . . . . . . . . . . . . 303
Configuring the System for Litigation Holds . . . . . . . . . . . . . . . . . . 303
Configuring IIS for Lit Holds . . . . . . . . . . . . . . . . . . . . . . . . . . . . . 303
Configuring Application Email Settings . . . . . . . . . . . . . . . . . . . . . . . 304
Configuring User Roles and Permissions for Lit Holds . . . . . . . . . . . . . . 304
Configuring Projects and People . . . . . . . . . . . . . . . . . . . . . . . . . . 306
Configuring Litigation Hold Settings . . . . . . . . . . . . . . . . . . . . . . . . . . . 307
Configuring Lit Hold General Settings . . . . . . . . . . . . . . . . . . . . . . . 307
Configuring IT Staff . . . . . . . . . . . . . . . . . . . . . . . . . . . . . . . . . . 308
Configuring LitHold Email Templates . . . . . . . . . . . . . . . . . . . . . . . . 310
Configuring Lit Hold Interview Templates. . . . . . . . . . . . . . . . . . . . . . 312
Configuring Lit Hold Custom Properties . . . . . . . . . . . . . . . . . . . . . . 316
Creating a Litigation Hold . . . . . . . . . . . . . . . . . . . . . . . . . . . . . . . . . 318
General Info Options . . . . . . . . . . . . . . . . . . . . . . . . . . . . . . . . . 318
Approval Options . . . . . . . . . . . . . . . . . . . . . . . . . . . . . . . . . . . 319
IT Staff Options . . . . . . . . . . . . . . . . . . . . . . . . . . . . . . . . . . . . 320
People Options . . . . . . . . . . . . . . . . . . . . . . . . . . . . . . . . . . . . 320
Email Notifications Options . . . . . . . . . . . . . . . . . . . . . . . . . . . . . 321
Documents Options. . . . . . . . . . . . . . . . . . . . . . . . . . . . . . . . . . 323
Interview Questions Options . . . . . . . . . . . . . . . . . . . . . . . . . . . . . 324
Summary. . . . . . . . . . . . . . . . . . . . . . . . . . . . . . . . . . . . . . . . 325
Managing Litigation Holds . . . . . . . . . . . . . . . . . . . . . . . . . . . . . . . . . 326
Using the Lit Hold Page . . . . . . . . . . . . . . . . . . . . . . . . . . . . . . . 326
Editing a Litigation Hold . . . . . . . . . . . . . . . . . . . . . . . . . . . . . . . 328
Deactivating and Activating a Litigation Hold. . . . . . . . . . . . . . . . . . . . 328
Deleting a Litigation Hold. . . . . . . . . . . . . . . . . . . . . . . . . . . . . . . 329
Resubmitting a Litigation Hold . . . . . . . . . . . . . . . . . . . . . . . . . . . . 329
Viewing Information About Holds . . . . . . . . . . . . . . . . . . . . . . . . . . 331
Viewing the Overall Status of a Litigation Hold. . . . . . . . . . . . . . . . . . . 331
About the Approvals Tab . . . . . . . . . . . . . . . . . . . . . . . . . . . . . . . 331
About the Hold Event Log for a Litigation Hold . . . . . . . . . . . . . . . . . . 332
About the Email Distribution History of a Litigation Hold . . . . . . . . . . . . . 332
About Lit Hold Reports . . . . . . . . . . . . . . . . . . . . . . . . . . . . . . . . 332
Searching Litigation Holds . . . . . . . . . . . . . . . . . . . . . . . . . . . . . . 333
Using Lit Hold Dashboard Widgets . . . . . . . . . . . . . . . . . . . . . . 334
Chapter 32: Using the Dashboard
. . . . . . . . . . . . . . . . . . . . . . . . . . . . . . . . . . . . . . . . . . . . . . . . 335
About the Dashboard . . . . . . . . . . . . . . . . . . . . . . . . . . . . . 335

| 17
Configuring Dashboard Widgets. . . . . . . . . . . . . . . . . . . . . . . . 337
The Filter Case Chart Results Pane . . . . . . . . . . . . . . . . . . . . . . . . 337
Part 7: Configuring and Using the Multi-Tenant Environment
. . . . . . . . .338
Chapter 33: Understanding the Multi-Tenant Environment
. . . . . . . . . . . . . . . . . . . . . . . . . 339
About the Summation Multi-Tenant Environment . . . . . . . . . . . . . . . 339
About SubAdmins. . . . . . . . . . . . . . . . . . . . . . . . . . . . . . . . . . . 339
About Permissions and Security Within a SubAdmin Environment . . . . . . . 340
About Application Features Not Available in SubAdmin Environments. . . . . . 341
About Creating Projects in SubAdmin Environments. . . . . . . . . . . . . . . . . 343
About Creating Projects in a SubAdmin Environment. . . . . . . . . . . . . . . 343
Chapter 34: Administrating a Multi-Tenant Environment
. . . . . . . . . . . . . . . . . . . . . . . . . . . 344
Enabling the Multi-tenant Login Page . . . . . . . . . . . . . . . . . . . . . 344
Creating and Managing SubAdmins . . . . . . . . . . . . . . . . . . . . . . 345
Creating SubAdmins . . . . . . . . . . . . . . . . . . . . . . . . . . . . . . . . . 345
Viewing and Managing SubAdmins, Users, and User Groups . . . . . . . . . . . 348
Viewing SubAdmins and SubAdmin Users . . . . . . . . . . . . . . . . . . . . . 348
Viewing SubAdmin User Groups . . . . . . . . . . . . . . . . . . . . . . . . . . 349
Creating and Managing Projects in SubAdmin Environments . . . . . . . . . . . 350
Creating Projects in SubAdmin Environments . . . . . . . . . . . . . . . . . . . 350
Managing Projects in SubAdmin Environments . . . . . . . . . . . . . . . . . . 350
Chapter 35: Using the Multi-Tenant Environment
. . . . . . . . . . . . . . . . . . . . . . . . . . . . . . . . . . 352
About Using the Multi-Tenant Environment . . . . . . . . . . . . . . . . . . 352
Performing SubAdmin Tasks. . . . . . . . . . . . . . . . . . . . . . . . . . 352
Accessing the Summation Web-Based Console. . . . . . . . . . . . . . . . . . 352
Creating Your Own SubAdmin Account. . . . . . . . . . . . . . . . . . . . . . . 353
Logging in as a SubAdmin . . . . . . . . . . . . . . . . . . . . . . . . . . . . . . 354
Introduction to the SubAdmin’s User Interface. . . . . . . . . . . . . . . . . . . 354
SubAdmins Creating Users . . . . . . . . . . . . . . . . . . . . . . . . . . . . . 355
SubAdmins Creating User Groups . . . . . . . . . . . . . . . . . . . . . . . . . 355
SubAdmins Creating and Managing Projects . . . . . . . . . . . . . . . . . . . 355
SubAdmin Using LawDrop . . . . . . . . . . . . . . . . . . . . . . . . . . . . . . 355
SubAdmin Performing Exports. . . . . . . . . . . . . . . . . . . . . . . . . . . . 355
Performing User Tasks . . . . . . . . . . . . . . . . . . . . . . . . . . . . . . . . . . . 356
Users Logging into a Summation SubAdmin Environment . . . . . . . . . . . . 356
Using the Home Page . . . . . . . . . . . . . . . . . . . . . . . . . . . . . . . . 356
Using Review . . . . . . . . . . . . . . . . . . . . . . . . . . . . . . . . . . . . . 356
Using LawDrop . . . . . . . . . . . . . . . . . . . . . . . . . . . . . . . . . . . . 357

| 18
Part 8: Configuring and Using LawDrop
. . . . . . . . . . . . . . . . . . . . . . . . . .358
Chapter 36: Understanding LawDrop™
. . . . . . . . . . . . . . . . . . . . . . . . . . . . . . . . . . . . . . . . . . . 359
About LawDrop . . . . . . . . . . . . . . . . . . . . . . . . . . . . . . . . 359
Chapter 37: Administrating LawDrop™
. . . . . . . . . . . . . . . . . . . . . . . . . . . . . . . . . . . . . . . . . . . 361
About Administrating LawDrop . . . . . . . . . . . . . . . . . . . . . . . . 361
About the LawDrop File Storage Folder Structure . . . . . . . . . . . . . . . . . 361
Configuring the System for Using LawDrop . . . . . . . . . . . . . . . . . . 362
Configuring the LawDrop DropSpace Folder. . . . . . . . . . . . . . . . . . . . 362
Configuring the System To Share LawDrop Files with External Users . . . . . 363
Chapter 38: Using LawDrop™
. . . . . . . . . . . . . . . . . . . . . . . . . . . . . . . . . . . . . . . . . . . . . . . . . . . . 366
Getting Started with LawDrop . . . . . . . . . . . . . . . . . . . . . . . . . 366
About the LawDrop Page . . . . . . . . . . . . . . . . . . . . . . . . . . . . . . 367
Creating and Deleting Sub-Folders in LawDrop. . . . . . . . . . . . . . . . . . . . 369
Dropping and Uploading Files to LawDrop . . . . . . . . . . . . . . . . . . . . . . . 370
About Dropping and Uploading Files . . . . . . . . . . . . . . . . . . . . . . . . 370
About Dropping and Uploading Folders . . . . . . . . . . . . . . . . . . . . . . 370
Dropping Files into the File Upload Queue. . . . . . . . . . . . . . . . . . . . . 370
Uploading and Managing Files in the File Upload Queue . . . . . . . . . . . . 371
Viewing and Managing Uploaded Files . . . . . . . . . . . . . . . . . . . . . . . . . 372
Using the Item List Grid . . . . . . . . . . . . . . . . . . . . . . . . . . . . . . . 372
Moving and Copying Uploaded Items. . . . . . . . . . . . . . . . . . . . . . . . 373
Performing Actions on LawDrop Items . . . . . . . . . . . . . . . . . . . . . . . 374
Sharing Files and Folders . . . . . . . . . . . . . . . . . . . . . . . . . . . . . . . . . 376
About Sharing Files and Folders . . . . . . . . . . . . . . . . . . . . . . . . . . 376
Sharing Files and Folders with other Application Users. . . . . . . . . . . . . . 376
Sharing Files and Folders with External People . . . . . . . . . . . . . . . . . . 377
Unsharing Files and Folders . . . . . . . . . . . . . . . . . . . . . . . . . . . . . 378
Adding Evidence to Projects Using LawDrop . . . . . . . . . . . . . . . . . . . . . 379
About Adding Evidence to Projects Using LawDrop. . . . . . . . . . . . . . . . 379
Exporting Files to LawDrop . . . . . . . . . . . . . . . . . . . . . . . . . . . . . . . . 381
Viewing Exported Files in LawDrop . . . . . . . . . . . . . . . . . . . . . . . . . 381
Part 9: Reference
. . . . . . . . . . . . . . . . . . . . . . . . . . . . . . . . . . . . . . . . . . . . .382
Chapter 39: Installing the AccessData Elasticsearch Windows Service
. . . . . . . . . . . . . 383
About the Elasticsearch Service . . . . . . . . . . . . . . . . . . . . . . . . 383
Prerequisites. . . . . . . . . . . . . . . . . . . . . . . . . . . . . . . . . . . . . . 383
Installing the Elasticsearch Service . . . . . . . . . . . . . . . . . . . . . . 384
Installing the Service . . . . . . . . . . . . . . . . . . . . . . . . . . . . . . . . . 384
Troubleshooting the AccessData Elasticsearch Windows Service. . . . . . . . 385

| 19
Chapter 40: Integrating with AccessData Forensics Products
. . . . . . . . . . . . . . . . . . . . . . 386
Installation . . . . . . . . . . . . . . . . . . . . . . . . . . . . . . . . . . . 387
Managing User Accounts and Permissions Between
FTK and Summation/eDiscovery. . . . . . . . . . . . . . . . . . . . . . 387
Creating and Viewing Projects. . . . . . . . . . . . . . . . . . . . . . . . . 387
Managing Evidence in FTK . . . . . . . . . . . . . . . . . . . . . . . . . . . . . 387
Reviewing Evidence in FTK . . . . . . . . . . . . . . . . . . . . . . . . . . . . . 388
Reviewing FTK Data in Summation . . . . . . . . . . . . . . . . . . . . . . . . . 389
Known Issues with FTK Compatibility . . . . . . . . . . . . . . . . . . . . . 390

Introducing the Summation Admin Guide | 20
Part 1
Introducing the Summation
Admin Guide
This Summation Admin Guide includes information about administrating AccessData Summation and includes
the following parts and chapters:
-Introducing Summation (page 21)
-Introduction to Application Management (page 23)
-Getting Started (page 24)
-Administrating Summation (page 44)
-Configuring Data Sources (page 137)
-Managing Projects (page 147)
-Loading Summation Data (page 258)
-Using Lit Holds (page 301)
-Configuring and Using the Multi-Tenant Environment (page 338)
-Configuring and Using LawDrop (page 358)
-Reference (page 382)
For information on using Project Review, see the Summation Reviewer Guide that can be downloaded from
http://summation.accessdata.com.

Introducing Summation About AccessData Summation | 21
Chapter 1
Introducing Summation
About AccessData Summation
AD Summation helps you review, documents, electronic data, and transcripts in a web-based console. You can
cull and filter the data in a particular project and search for specific terms. The collected evidence can then be
processed, reviewed, and exported.
The resulting production set can then be exported into an AD1 format, or into a variety of load file formats such
as Concordance, Summation, EDRM, Introspect, and iConect. You can also export native files.
About the Audience for this Guide
This product is intended for use in gathering and processing electronically stored evidence for criminal, civil, and
internal corporate projects.
The audience for this forensic investigation software tool includes legal personnel, as well as corporate security
and IT professionals who need to access and evaluate the evidentiary value of files, folders, computers, and
other electronic data sources. They should be well-versed in the eDiscovery process. They should also have a
good understanding of Chain of Custody and the implications of running the AD Summation process within an
organization. They should also have the following competencies when using this software:
-Basic knowledge of and training in forensic policies and procedures
-Familiarity with the fundamentals of collecting digital evidence and ensuring the legal validity of the
evidence
-Understanding of forensic images and how to acquire forensically sound images
-Experience with project studies and reports
For information about administrating Summation, see the Summation Admin Guide.
For information about new features, fixed issues, and known issues, see the Summation Release Notes.
You can download the Admin Guide and Release Notes from the Help/Documentation link. See User Actions on
page 36.

Introducing Summation Summation Features | 22
Summation Features
PROCESSING
-Process 700+ data types and associated meta-data while maintaining chain of custody
-Distributed processing that harnesses current hardware technology for unmatched speeds
-Automatically identifies and categorizes data, even encrypted files
-De-duplicate email and ESI across the matter or for a specific custodian, de-NiST and OCR
EARLY PROJECT ASSESSMENT/FIRST PASS REVIEW
-Cull data by custodian, data source, document metadata and type
-Advanced email threading and analytics.
-Advanced search with hundreds of unique data filters
-Custom tagging and bookmarking
-Export to all industry standard load files and EDRM XML
FINAL REVIEW AND PRODUCTION
-Next Generation E-Discovery Review Features
Integrated Technology Assisted Review (“TAR” or “Predictive Coding”)
Integrated visualization module with graphic representation of project data relationships and
custodian communication patterns
Advanced search, including concept and ‘4D’
Web based with multi-user, multi-site support
Email threading, related documents, document family views, and linking
New issue coding & tagging panel with customized radio buttons and pick lists
Redact in near native view with word boundary support
-Classic Summation Functionality
Native Concordance database migration for direct loading into Summation
Transcript review with Real Time, notes, color highlighting and reporting
Production tools including bates stamping, burned-in redactions and production history
Offline, mobile capability – take project offline, work on it, then sync up later
Recommended Hardware Specifications
For the recommended hardware specifications, see the Specifications tab on the following Web page:
http://www.accessdata.com/products/ediscovery-litigation-support/summation
Introduction to Application Management Workflows for Administrators | 23
Chapter 2
Introduction to Application Management
This chapter is designed to help application administrators perform management tasks. Application
administration tasks are performed on the Management page. Administrators can perform their tasks as long as
they have been granted the correct permissions.
See About User Roles and Permissions on page 47.
Workflows for Administrators
Administrators and managers configure and manage the global application environment.
Before creating and reviewing projects, you should review and perform the following tasks for configuring the
application.
At regular intervals, administrators should perform the following tasks to manage the overall system health and
performance of the application.
Most of these administrative tasks are performed in the web console in the Management page.
Workflow for Configuring the Application
Step Task Link to the Tasks
1 Decide which authentication
mode to use See Opening the AccessData Web Console on page 26.
2Manage users, groups, and roles See Planning User Roles on page 48.
See Managing Users on page 57.
See Configuring and Managing User Groups on page 65.
3 Configure default project settings See Configuring Default Project Settings on page 76.
Workflow for Managing the Application
Step Task Link to the tasks
1 Monitor system activity using logs See Viewing the System Log or Activity Log on page 85.
2Monitor the performance of the
Distribution Server and the Work
Managers
See on page 79.
Getting Started Terminology | 24
Chapter 3
Getting Started
Terminology
Features and technology are shared across the multiple applications. To provide greater compatibility between
products, some terminology in the user interface and documentation has been consolidated. The following table
lists the common terminology:
Terminology Changes
Previous Term New Term
Case Project
Custodian Person
Custodians People
System Console Work Manager Console
Security Log Activity Log
Audit Log User Review Activity

Getting Started About the AccessData Web Console | 25
About the AccessData Web Console
The application displays the AccessData web-based console that you can open from any computer connected to
the network.
All users are required to enter a username and password to open the console.
What you can see and do in the application depends on your product license and the rights and permissions
granted to you by the administrator. You may have limited privileges based on the work you do.
See About User Accounts on page 26.
Note: Like many applications that you run in a browser, do not click the browser’s Back button. Use the menus
and buttons to navigate in the console.
Web Console Requirements
Software Requirements
The following are required for using the features in the web console:
-Windows-based PC running the Internet Explorer web browser:
Internet Explorer 9 or higher is required for full functionality of most features.
Internet Explorer 10 or higher is required for full functionality of all features. (Some new features use
HTML5 which requires version 10 or higher.
Note: If you have issues with the interface displaying correctly, view the application in compatibility
view for Internet Explorer.
The console may be opened using other browsers but will not be fully functional.
-Internet Explorer Browser Add-on Components
Microsoft Silverlight--Required for the console.
Adobe Flash Player--Required for imaging documents in Project Review.
-AccessData console components
AD NativeViewer--Required for viewing documents in the Alternate File Viewer in Project Review.
Includes Oracle OutsideX32.
AD Bulk Print Local--Required for printing multiple records using Bulk Printing in Project Review.
To use these features, install the associated applications on each users’ computer.
See Installing the Browser Components on page 28.
Hardware Recommendations
-Use a display resolution of 1280 x 1024 or higher.
Press F11 to display the console in full-screen mode and maximize the viewing area.
Getting Started About User Accounts | 26
About User Accounts
Each user that uses the web console must log in with a user account. Each account has a username and
password. Administrators configure the user accounts.
User accounts are granted permissions based on the tasks those users perform. For example, one account may
have permissions to create and manage projects while another account has permissions only to review files in a
project.
Your permissions determine which items you see and the actions you can perform in the web console.
There is a default Administrator account.
User Account Types
Depending on how the application is configured, your account may be either an Integrated Windows
Authentication account or a local application account.
The type of account that you have will affect a few elements in the web interface. For example, if you use an
Integrated Windows Authentication account, you cannot change your password within the console. However,
you can change your password within the console if you are using an application user account.
Opening the AccessData Web Console
You use the AccessData web console to perform application tasks.
See About the AccessData Web Console on page 25.
You can launch the console from an approved web browser on any computer that is connected to the application
server on the network.
See Web Console Requirements on page 25.
To start the console, you need to know the IP address or the host name of the computer on which the application
server is installed.
When you first access the console, you are prompted to log in. Your administrator will provide you with your
username and password.
To open the web console
1. Open Internet Explorer.
Note: Internet Explorer 7 or higher is required to use the web console for full functionality. Internet
Explorer 10 or 11 is recommended.
2. Enter the following URL in the browser’s address field:
https://<host_name>/ADG.map.Web/
where <host_name> is the host name or the IP address of the application server.
This opens the login page.
You can save this web page as a favorite.
Getting Started Opening the AccessData Web Console | 27
3. One of two login pages displays:
If you are using Integrated Windows Authentication, the following login page displays.
Integrated Windows Authentication Page
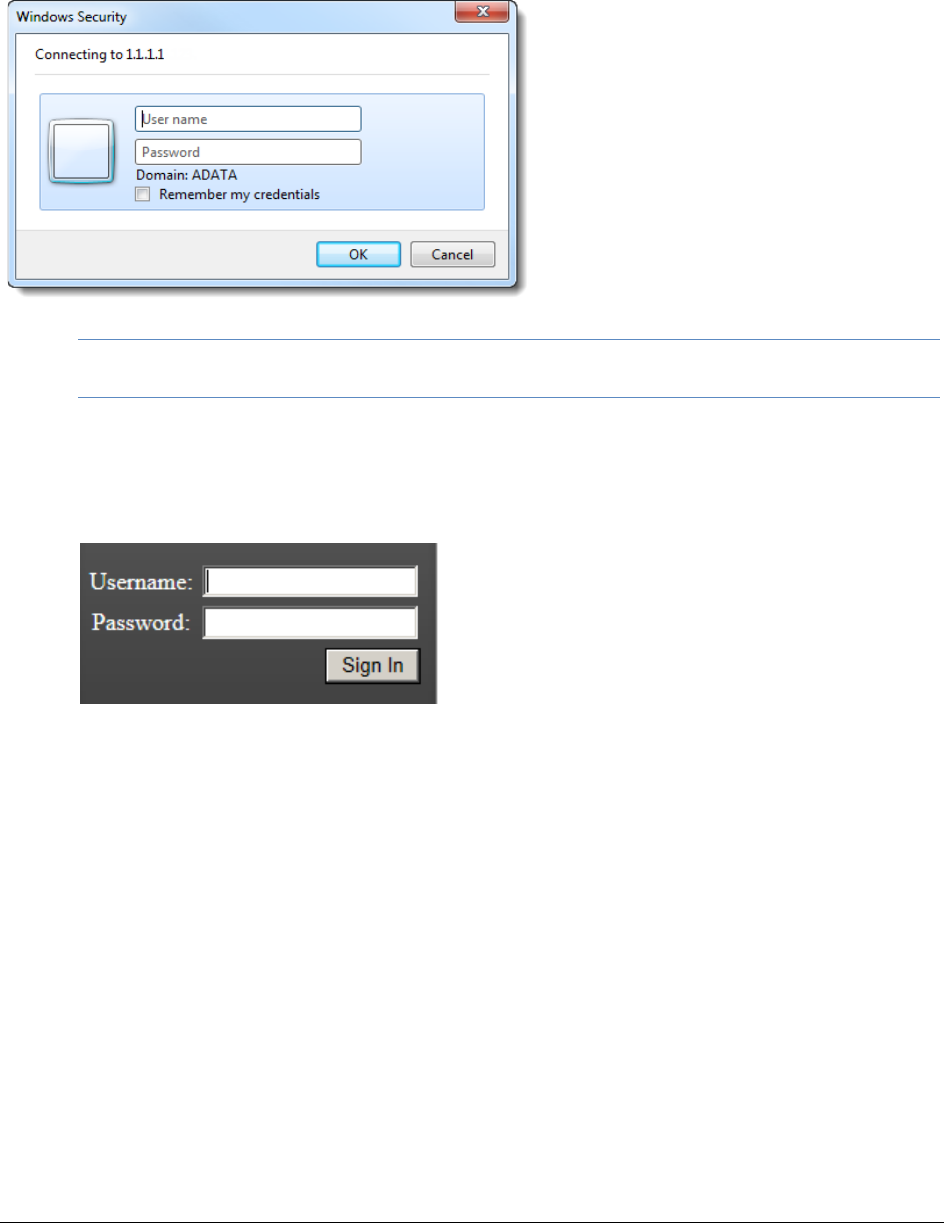
Note: If you are using Integrated Windows Authentication and are not on the domain, you will see a
Windows login prompt.
If you are not using Integrated Windows Authentication, the login page displays the product name and
version for the product license that your organization is using and provides fields for your username and
password.
Non-Integrated Windows Authentication Login
4. On the login page, enter the username and password for your account.
If you are logging in as the administrator for the very first time and have not enabled Integrated Window
Authentication, enter the pre-set default user name and password. Contact your technical support or
sales representative for login information.
5. Click Sign In.
If you are authenticated, the application console displays.
If you cannot log in, contact your administrator.
6. The first time the web console is opened on a computer, you may be prompted to install the following
plug-ins:
-Microsoft Silverlight
-Adobe Flash Player
-AD Alternate File Viewer (Native Viewer)
-AD Bulk Print Local
Download the plug-ins. When a pop-up from Internet Explorer displays asking to run or download the
executable, click Run. Complete the install wizard to finish installing the plug-in.
See Web Console Requirements on page 25.
See Installing Browser Components Manually on page 30.

Getting Started Installing the Browser Components | 28
Installing the Browser Components
To use all of the features of the web console, each computer that runs the web console must have Internet
Explorer and the following add-ons:
-Microsoft Silverlight--Required for the console.
-Adobe Flash Player--Required for imaging documents in Project Review.
-AccessData Alternate File Viewer (Native Viewer)--Required for imaging documents in Project Review.
This includes the Oracle OutsideX32 plug-in.
-AccessData Local Bulk Print--Required for printing multiple records using Bulk Printing in Project Review
Important:
Each computer that runs the console must install the required browser components. The installations
require Windows administrator rights on the computer.
Upon first login, the web console will detect if the workstation's browser does not have the required versions of
the add-ons and will prompt you to download and install the add-ons.
See Installing Components through the Browser on page 28.
See Installing Browser Components Manually on page 30.
Installing Components through the Browser
Microsoft Silverlight
To install Silverlight
1. If you need to install Silverlight, click Click now to install in the Silverlight plug-in window.
2. Click Run in the accompanying security prompts.
3. On the Install Silverlight dialog, Install Now.
When the Silverlight installer completes, on the Installation successful dialog, click Close.

Getting Started Installing the Browser Components | 29
If the web browser does not display the AD logo and then the console, refresh the browser window.
The application Main Window displays and you can install Flash Player from the plug-in installation bar.
Adobe Flash Player
To install Flash Player
1. If you need to install Flash Player, click the Flash Player icon.
2. Click Download now.
3. Click Run in the accompanying security prompts.
4. Complete the installation.
5. Refresh the browser.
Once the application is installed, you need to install the Alternate File Viewer and Local Bulk Print software. You
can find the links to download the add-ons in the dropdown in the upper right corner of the application.
AccessData Alternate File Viewer (Native Viewer)
To install the AD Alternate File Viewer (Native Viewer)
1. From the User Actions dropdown, select AD Alternate File Viewer.
2. Click RUN on the NearNativeSetup.exe prompt.
3. Click Next on the InstallShield Wizard dialog.
4. Click Next on the Custom Setup dialog.
5. Click Install on the Ready to Install the Program dialog.
6. Allow the installation to proceed and then click Finish.
7. Close the browser and re-log in.
8. Click Allow on the ADG.UI.Common.Document.Views.NearNativeControl prompt.
9. Refresh the browser.

Getting Started Installing the Browser Components | 30
AccessData Local Bulk Print
To install the Local Bulk Print add-on
1. From the User Actions dropdown, select AD Local Bulk Print.
2. Click Run at the AccessData Local Bulk Print.exe prompt in Internet Explorer.
3. In the InstallShield Wizard dialog, click Next.
4. Accept the license terms and click Next.
5. Accept the default location in the Choose Destination Location dialog and click Next.
6. Click Install on the Ready to Install the Program dialog.
7. Click Finish.
Installing Browser Components Manually
You can use EXE files to install the components outside of the browser. You can run these locally or use
software management tools to install them remotely.
Installing AD Alternate File Viewer
To install the Alternate File Viewer add-on, navigate to the following path on the server:
C:\Program Files (x86)\AccessData\MAP\NearNativeSetup.exe
To install the AD Alternate File Viewer add-on
1. Run the NearNativeSetup.MSI file.
2. Click Next on the InstallShield Wizard dialog.
3. Click Next on the Custom Setup dialog.
4. Click Install on the Ready to Install the Program dialog.
5. Allow the installation to proceed and then click Finish.
Installing the Local Bulk Print Tool
To install the Local Bulk Print tool, navigate to the following path on the server:
C:\Program Files (x86) \AccessData\MAP\AccessDataBulkPrintLocal.exe
To install the Local Bulk Print add-on
1. Run the AccessDataBulkPrintLocal.exe. The wizard should appear.
2. Click Next to begin.
3. Click Next on the Select Installation Folder dialog.
4. Click Next. After the installation is complete, click Close.
Installing Adobe Flash Player
Visit http://get.adobe.com/flashplayer/ and follow the prompts to install the flash player.
Getting Started Introducing the Web Console | 31
Introducing the Web Console
The user interface for the application is the AccessData web console. The console includes different tabs and
elements.
The items that display in the console are determined by the following:
-Your application’s license
-Your user permissions
The main elements of the application are listed in the following table. Depending on the license that you own and
the permissions that you have, you will see some or all of the following:
Component Description
Navigation bar This lets you open multiple pages in the console.
Home page The Home page lets you create, view, manage, and review projects based on the
permissions that you have. This is the default page when you open the console.
See Using the Project Management Home Page on page 150.
Getting Started Introducing the Web Console | 32
Dashboard (Available in eDiscovery or with a special Litigation Hold license.)
The Dashboard allows you to view important event information in an easy-to-read
visual interface.
See Using the Dashboard on page 335.
Data Sources The Data Sources tab lets you manage people, computers, network shares, evidence,
as well as several different connectors. This tab allows you to manage these data
sources throughout the system, not just by project.
See About Data Sources on page 102.
Lit Hold (Available in eDiscovery or with a special Litigation Hold license.)
The Lit Hold tab lets you create and manage litigation holds.
See Using Litigation Holds on page 302.
Management
(gear icon) The Management page lets administrators perform global management tasks.
See Opening the Management Page on page 45.
User Actions Actions specific to the logged-in user that affects the user’s account.
See User Actions on page 36.
Project
Review
The Project Review page lets you analyze, filter, code and label documents for a
selected project.
You access Project Review from the Home page.
See the Reviewer Guide for more information on Project Review. You can download the
Reviewer Guide from the Help/Documentation link. See User Actions on page 36.
Component Description
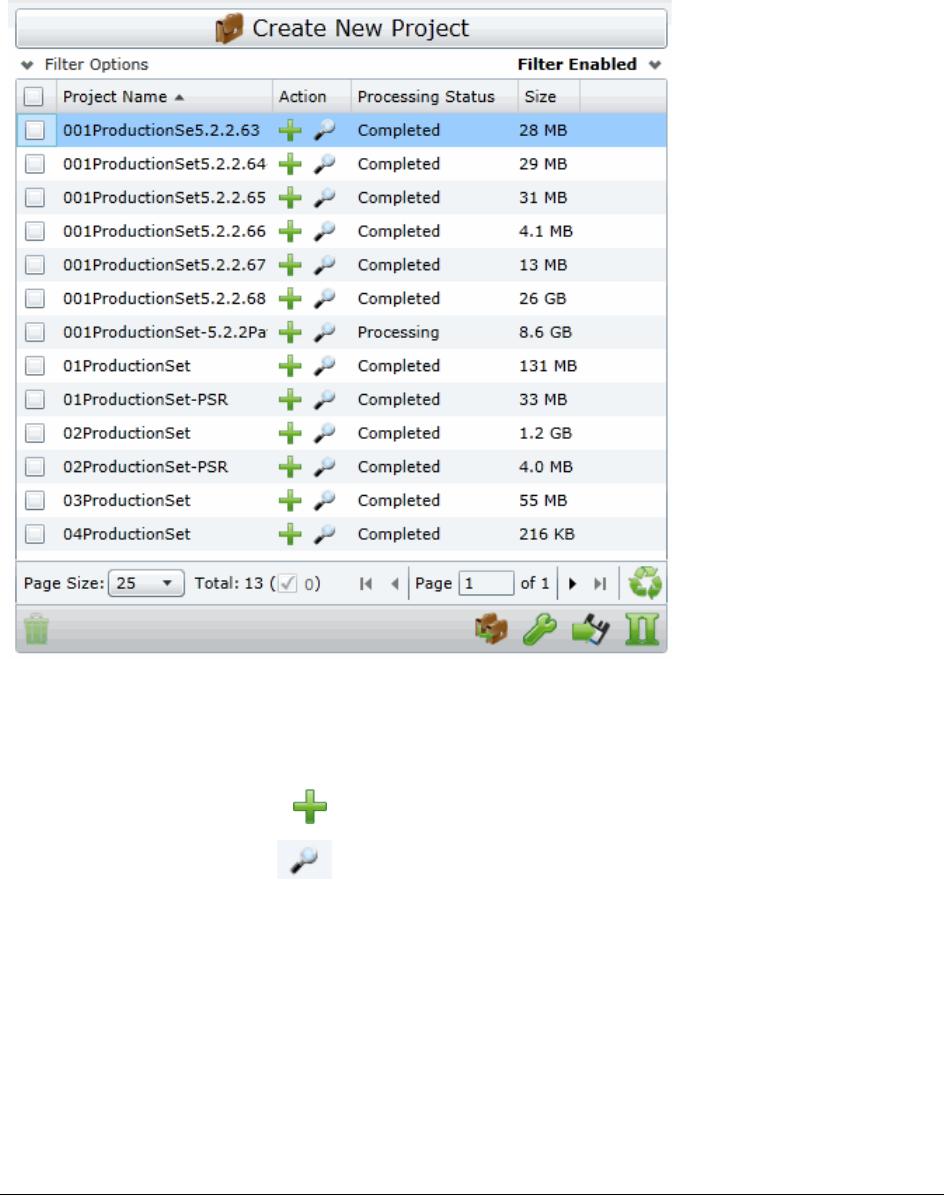
Getting Started The Project List Panel | 33
The Project List Panel
The Home page includes the Project List panel. The Project List panel is the default view after logging in. Users
can only view the projects for which they have created or been given permissions.
Administrators and users, given the correct permissions, can use the project list to do the following:
-Create projects.
-View a list of existing projects.
-Add evidence to a project.
-Launch Project Review.
If you are not an administrator, you will only see either the projects that you created or projects to which you
were granted permissions.
The following table lists the elements of the project list. Some items may not be visible depending on your
permissions.
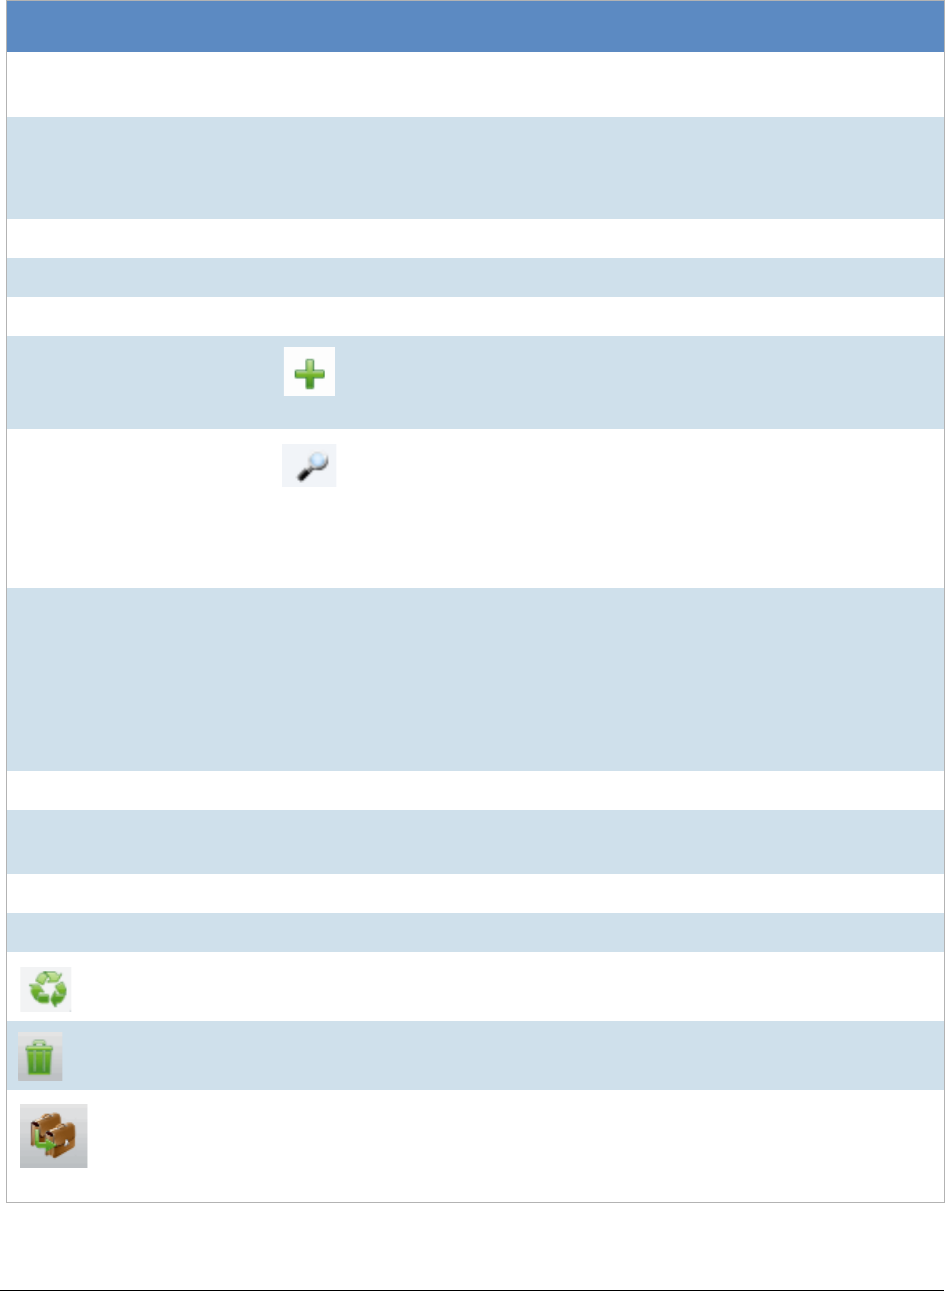
Getting Started The Project List Panel | 34
Elements of the Project List
Element Description
Create New Project Click to create a new project.
See Creating a Project on page 164.
Filter Options Allows you to search and filter all of the projects in the project list. You can
filter the list based on any number of fields associated with the project,
including, but not limited to the project name.
See Filtering Content in Lists and Grids on page 41.
Filter Enabled Displayed if you have enabled a filter.
Project Name Column Lists the names of all the projects to which the logged-in user has permissions.
Action Column Allows you to add evidence to a project or enter Project Review.
Add Data
Allows you to add data to the selected project.
Project Review
Allows you to review the project using Project Review.
See the Reviewer Guide for more information on using Product Review. You
can download the Reviewer Guide from the Help/Documentation link. See
Changing Your Password on page 37.
Processing Status Column Lists the status of the projects:
Not Started - The project has been created but no evidence has been added.
Processing - Evidence has been added and is still being processed.
Completed - Evidence has been added and processed.
Note: When processing a small set of evidence, the Processing Status may
show a delay of two minutes behind the actual processing of the evidence.
You may need to refresh the list to see the current status. See Refresh below.
Size Column Lists the size of the data within the project.
Page Size drop-down Allows you to select how many projects to display in the list.
The total number of projects that you have permissions to see is displayed.
Total Lists the total number of projects displayed in the Project List.
Page Allows you to view another page of projects.
Refresh If you create a new project, or make changes to the list, you may need to
refresh the project list
Delete Select one or more projects and click Delete Project to delete them from the
Project List.
Project Property
Cloning
Clone the properties of an existing project to another project. You can apply a
single project’s properties to another project, or you can pick and choose
properties from multiple individual projects to apply to a single project.
See Using Project Properties Cloning on page 177.
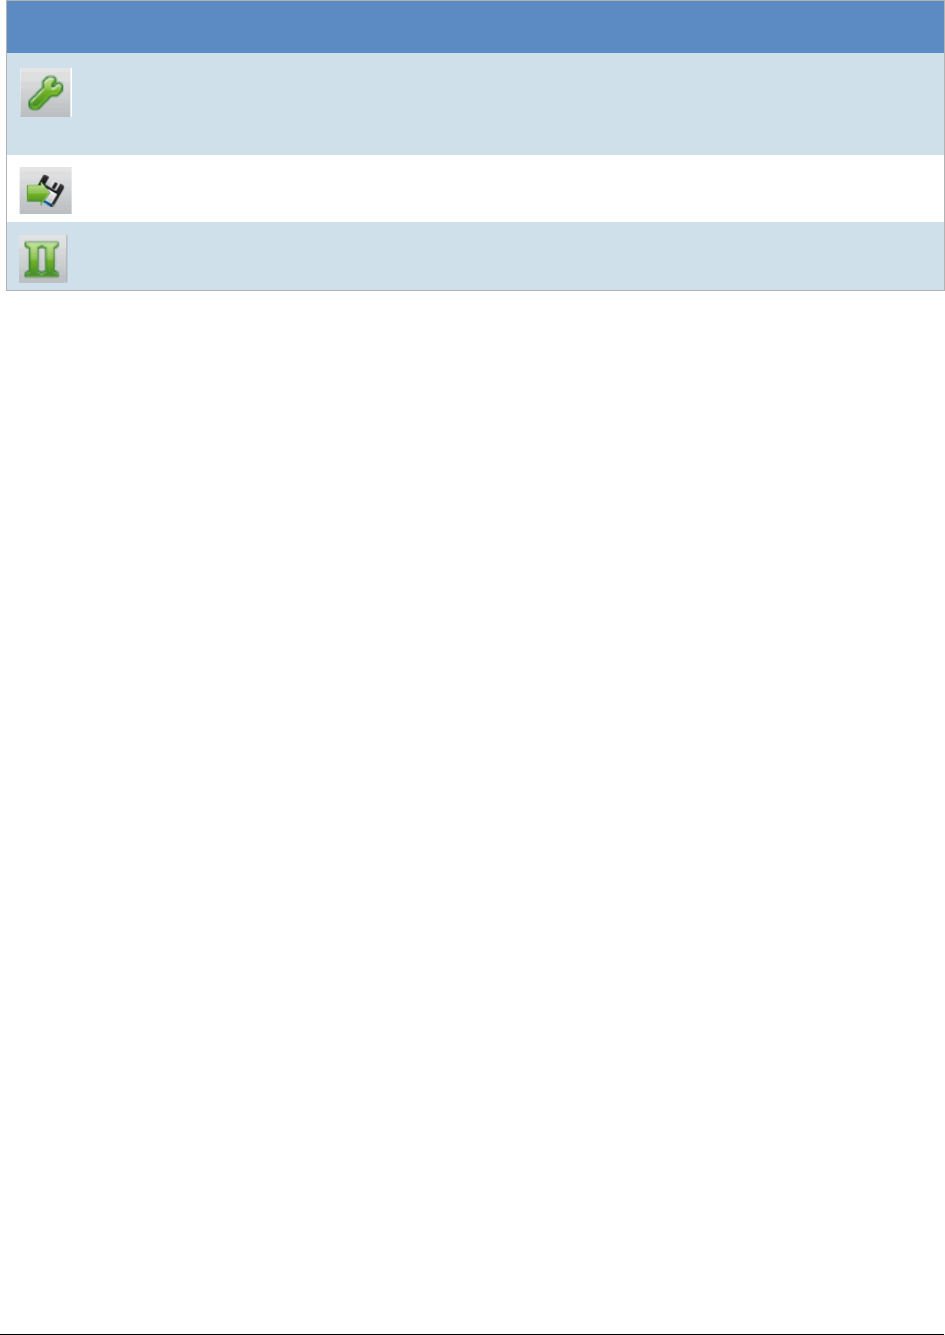
Getting Started The Project List Panel | 35
Custom Properties
Add, edit, and delete custom columns that will be listed in the Project list
panel. When you create a project, this additional column will be listed in the
project creation dialog.
See Adding Custom Properties on page 157.
Export to CSV Export the Project list to a .CSV file. You can save the file and open it in a
spreadsheet program.
Columns Add or remove viewable columns in the Project List.
Element Description
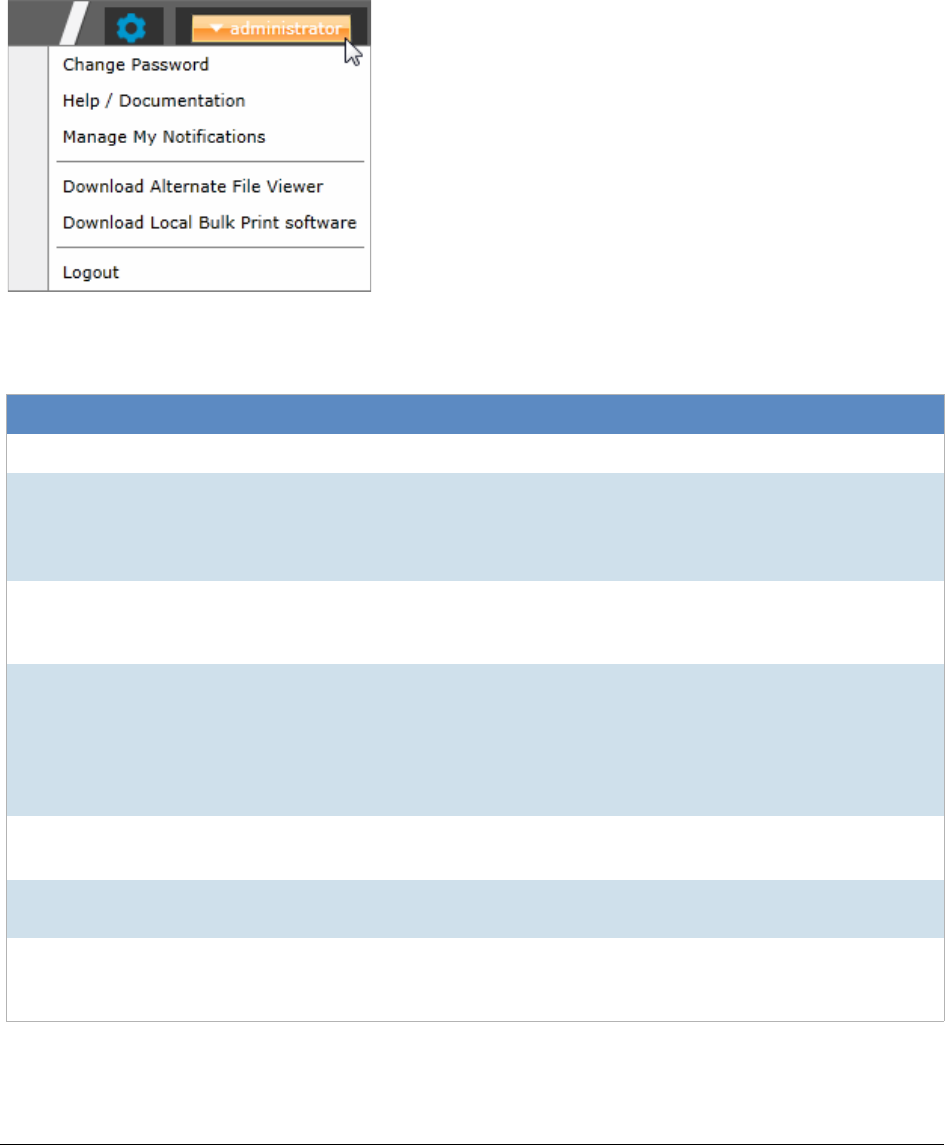
Getting Started User Actions | 36
User Actions
Once in the web console, you can preform user actions that are specific to you as the logged-in user. You access
the options by clicking on the logged-in user name in the top right corner of the console.
User Actions
User Actions
Link Description
Logged-on user The username of the logged-on user is displayed; for example, administrator.
Change password Lets the logged-on user change their password.
See Changing Your Password on page 37.
Note: This function is hidden if you are using Integrated Windows
Authentication.
Help/ Documentation Lets you to access the latest version of the Release Notes and User Guide.
The files are in PDF format and are contained in a ZIP file that you can
download.
Manage My Notifications Lets you to manage the notifications that you have created and that you belong
to.
See About Managing Notifications for a Job on page 462.
You can delete notifications, export the notifications list to a CSV file, and filter
the notifications with the Filter Options.
See Filtering Content in Lists and Grids on page 41.
Download Alternate File
Viewer Lets you to download the Alternate FIle Viewer application.
See AccessData Alternate File Viewer (Native Viewer) on page 29.
Download Local Bulk
Print software Lets you to access the latest version of the Local Bulk Print software. See
AccessData Local Bulk Print on page 30.
Logout Logs you off and returns you to the login page.
Note: This function is hidden if you are using Integrated Windows
Authentication.
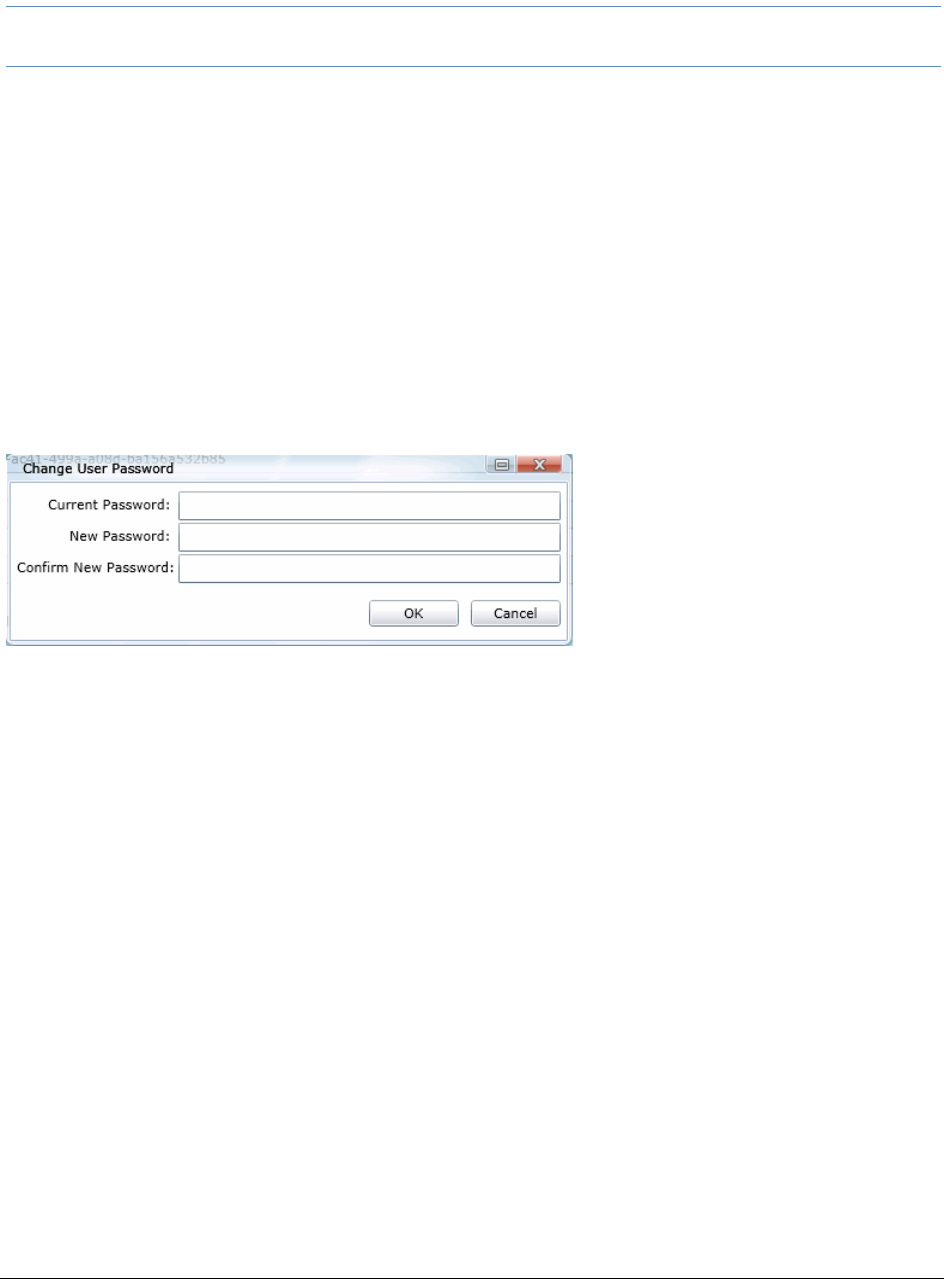
Getting Started User Actions | 37
Changing Your Password
Note: This function is hidden if you are using Integrated Windows Authentication. You must change your
password using Windows.
Any logged-in user can change their password. You may want to change your password for one of the following
reasons:
-You are changing a default password after you log in for the first time.
-You are changing your password on a schedule, such as quarterly.
-You are changing your password after having a password reset.
To change your own password
1. Log in using your username and current password.
See To open the web console on page 26.
2. In the upper right corner of the console, click your logged-in username.
3. Click Change Password.
Change User Password
4. In the Change User Password dialog, enter the current password and then enter and confirm the new
password in the respective fields. The following are password requirements:
-The password must be between 7 - 50 characters.
-At least one Alpha character.
-At least one non-alphanumeric character.
5. Click OK.
Getting Started Using Elements of the Web Console | 38
Using Elements of the Web Console
Maximizing the Web Console Viewing Area
You can press F11 to enable or disable the console in full-screen mode.
About Content in Lists and Grids
Many objects within the console are made up of lists and grids. Many elements in the lists and grids recur in the
panels, tabs, and panes within the interface. The following sections describe these recurring elements.
You can manage how the content is displayed in the grids.
-See Refreshing the Contents in List and Grids on page 38.
-See Managing Columns in Lists and Grids on page 39.
-See Sorting by Columns on page 38.
-See Filtering Content in Lists and Grids on page 41.
-See Changing Your Password on page 37.
Refreshing the Contents in List and Grids
There may be times when the list you are looking at is not dynamically updated. You can refresh the contents by
clicking .
Sorting by Columns
You can sort grids by most columns.
Note: You can set a default column to sort by when you create a project or in the Project Details pane. The
default is ObjectID.
To sort a grid by columns
1. Click the column head to sort by that column in an ascending order.
A sort indicator (an up or down arrow) is displayed.
2. Click it a second time to sort by descending order.
3. Click Search Options > Clear Search to return to the default column.
Sorting By Multiple Columns
In the Item List in Project Review, you can also sort by multiple columns. For example, you can do a primary sort
by file type, and then do a second sort by file size, then a third sort by accessed date.
Getting Started Using Elements of the Web Console | 39
To sort a grid by columns
1. Click the column head to sort by that column in an ascending order.
A sort indicator (an up or down arrow) is displayed.
2. Click it a second time to sort by descending order.
3. In the Item List in Project Review, to perform a secondary search on another column, hold Shift+Alt keys
and click another column.
A sort indicator is displayed for that column as well.
4. You can repeat this for multiple columns.
Moving Columns in a Grid View
You can rearrange columns in a Grid view in any order you want. Some columns have pre-set default positions.
Column widths are also sizable.
To move columns
In the Grid view, click and drag columns to the position you want them.
Managing Columns in Lists and Grids
You can select the columns that you want visible in the Grid view. Project managers can create custom columns
in the Custom Fields tab on the Home page.
See Configuring Custom Fields on page 216.
For additional information on using columns, see Using Columns in the Item List Panel in the Reviewer Guide.
To manage columns
1. In the grid, click Columns.
2. In the Manage Columns dialog, there are two lists:
-Available Columns
Lists all of the Columns that are available to display. They are listed in alphabetical order.
If the column is configured to be in the Visible Columns, it has a .
If the column is not configured to be in the Visible Columns, it has a .
If the column is a non-changeable column (for example, the Action column in the Project List), it has
a .
-Visible Columns
Lists all of the Columns that are displayed. They are listed in the order in which they appear.
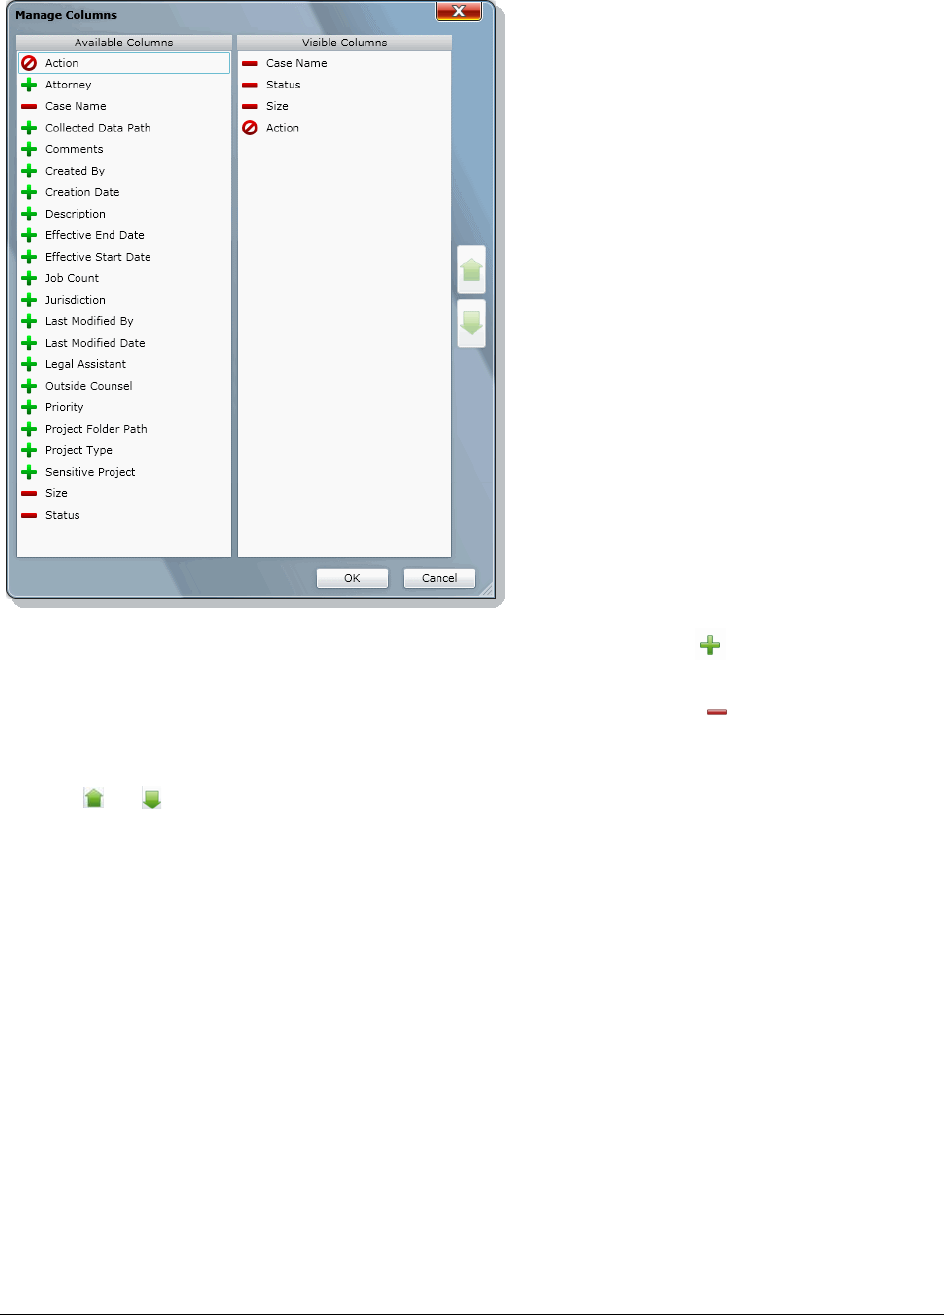
Getting Started Using Elements of the Web Console | 40
Manage Columns Dialog
3. To configure columns to be visible, in the Available Columns list, click the for the column you want
visible.
4. To configure columns to not be visible, in the Visible Columns list, click the for the column you want
not visible.
5. To change the display order of the columns, in the Visible Columns list, select a column name and click
or to change the position.
6. Click OK.
Managing the Grid’s Pages
When a list or grid has many items, you can configure how many items are displayed at one time on a page. This
is helpful for customizing your view based on your display size and resolution and whether or not you want to
scroll in a list.
To configure page size
1. Below a list, click the Page Size drop-down menu.
2. Select the number of items to display in one page.
3. Use the arrows by Page n of n to view the different pages.
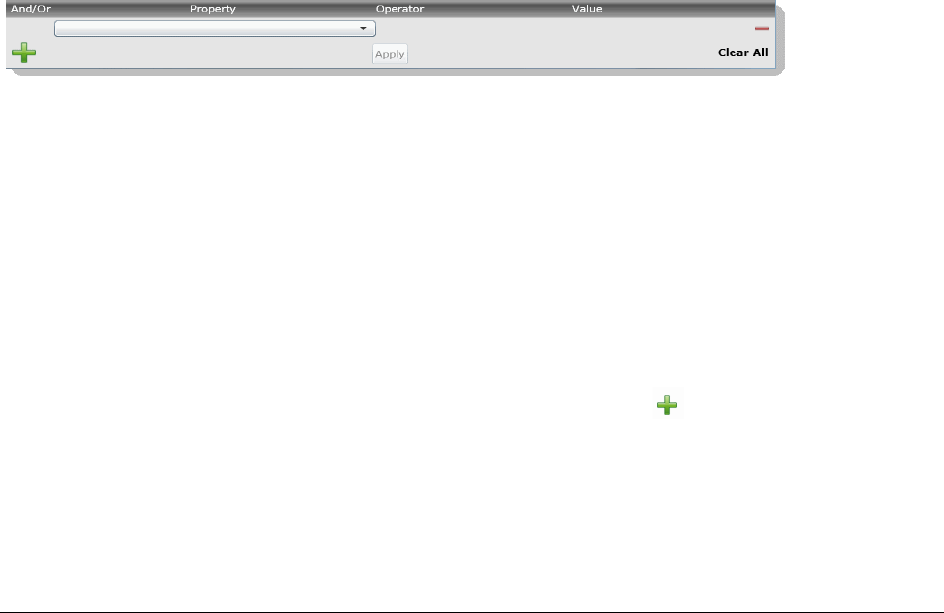
Getting Started Using Elements of the Web Console | 41
Filtering Content in Lists and Grids
When a list or grid has many items, you can use a filter to display a portion of the list. Depending on the data you
are viewing, you have different properties that you can filter for.
For example, when looking at the Activity Log, there could be hundreds of items. You may want to view only the
items that pertain to a certain user. You can create a filter that will only display items that include references to
the user.
For example, you could create the following filter:
Activity contains BSmith
This would include activities that pertain to the BSmith user account, such as when the account was created and
permissions for that user were configured.
You could add a second filter:
Activity contains BSmith
OR Username = BSmith
This would include the activities performed by BSmith, such as each time she logged in or created a project.
In this example, because an OR was used instead of an AND, both sets of results are displayed.
You can add as many filters as needed to see the results that you need.
To use filters
1. Above the list, click Filter Options.
This opens the filter tool.
Filter Options
2. Use the Property drop-down to select a property on which to filter.
This list will depend on the page that you are on and the data that you are viewing.
3. Use the Operator drop-down to select an operator to use.
See Filter Operators on page 42.
4. Use the Value field to enter the value on which you want to filter.
See Filter Value Options on page 43.
5. Click Apply.
The results of the filter are displayed.
Once a filter had been applied, the text Filter Enabled is displayed in the upper-right corner of the panel.
This is to remind you that a filter is applied and is affecting the list of items.
6. To further refine the results, you can add additional filters by clicking Add.
7. When adding additional filters, be careful to properly select And/Or.
If you select And, all filters must be true to display a result. If you select OR, all of the results for each
filter will be displayed.
Getting Started Using Elements of the Web Console | 42
8. After configuring your filters, click Apply.
9. To remove a single filter, click Delete.
10. To remove all filters, click Disable or Clear All.
11. To hide the filter tool, click Filter Options.
Filter Operators
The following table lists the possible operators that can be found in the filter options. The operators available
depend upon what property is selected.
Filter Operators
Operator Description
= Searches for a value that equals the property selected. This operator is available
for almost all value filtering and is the default value.
!= Searches for a value that does not equal the property selected. his operator is
available for almost all value filtering.
> Searches for a value that is greater than the property selected. This operator is
available for numerical value filtering.
<Searches for a value that is less than the property selected. This operator is
available for numerical value filtering.
>= Searches for a value that is greater than and/or equal to the property selected.
This operator is available for numerical value filtering.
<= Searches for a value that is less than and/or equal to the property selected. This
operator is available for numerical value filtering.
Contains Searches for a text string that contains the value that you have entered in the
value field. This operator is available for text string filtering.
StartsWith Searches for a text string that starts with the value that you have entered in the
value field. This operator is available for text string filtering.
EndsWith Searches for a text string that ends with a value that you have entered in the
value field. This operator is available for text string filtering.
Getting Started Using Elements of the Web Console | 43
Filter Value Options
The following table lists the possible value options that can be found in the filter options. The value options
available depend upon what property is selected.
Filter Value Options
Value Option Description
Blank field This value allows you to enter a specific item that you can search for. The
Description property is an example of a property where the value is a blank field.
Date value This value allows you to enter a specific date that you can search for. You can
enter the date in a m/d/yy format or you can pick a date from a calendar. The
Creation Date property is an example of a property where the value is entered as
a date value.
Pulldown This value allows you to select from a pulldown list of specific values. The
pulldown choices are dependent upon the property selected. The Priority
property with the choices High, Low, Normal, Urgent is an example of a property
where the value is chosen from a pulldown.

Administrating Summation | 44
Part 2
Administrating Summation
This part describes how to administrate Summation and includes the following sections:
-Workflows for Administrators (page 23)
-Using the Management Page (page 45)
-Configuring and Managing System Users, User Groups, and Roles (page 47)
-Configuring the System (page 69)
-Using the Work Manager Console and Logs (page 79)
-Using Language Identification (page 86)

Using the Management Page About the Management Page | 45
Chapter 4
Using the Management Page
About the Management Page
Administrators manage the application through the Management page. You can manage users and users
permissions, configure aspects of the application on a global basis, and monitor activity on the system.
See Management Page on page 46.
Opening the Management Page
Administrators, and users with management permissions, use the Management page to configure and manage
the application.
To access the Management page
1. Log in to the web console as administrator or as a user with management permissions.
See Opening the AccessData Web Console on page 26.
See Managing Users on page 57.
2. In the web console, click Management.
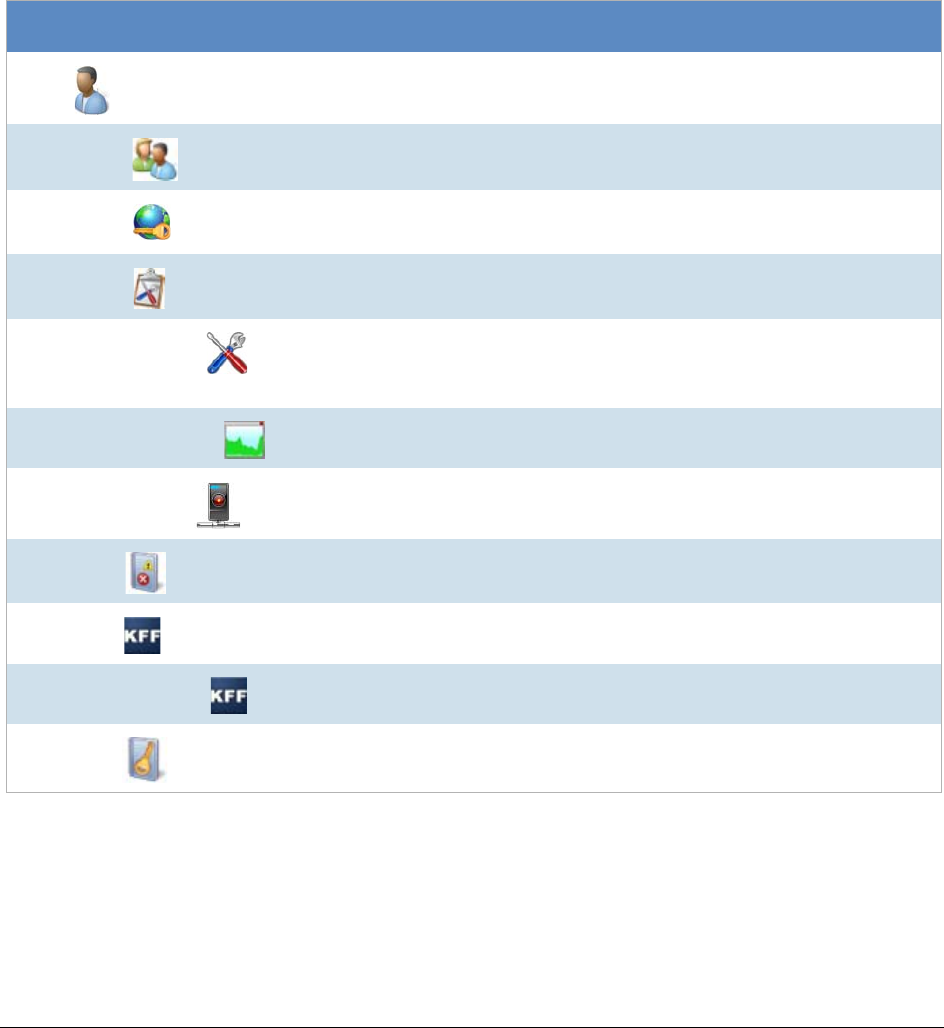
Using the Management Page Management Page | 46
Management Page
You can use the Management page to maintain the list of people who use the application, including their specific
usage rights and roles. From Management, you can view system and security logs.
You can also configure Active Directory, agent credentials, a notification email server. The system administration
console area of the Management page lets you view Work Manager status.
Depending on the license that you own and the permissions that you have, you will see some or all of the
following:
Management Page Features and Options
Management Feature Available Options
Users
See About the Users Tab on page 52.
See Managing Users on page 57.
User Groups See Configuring and Managing User Groups on page 65.
See User Groups Tab on page 66.
Admin Roles See About Admin Roles and Permissions on page 49.
See Managing Admin Roles on page 55.
System Jobs See Adding a System Job on page 70.
See System Job Options on page 71.
System Configuration See Configuring Active Directory Synchronization on page 70.
See Configuring Export Options on page 78.
See Configuring Default Project Settings on page 76.
Work Manager Console See Using the Work Manager Console and Logs on page 79.
Site Server Console
See Using the Site Server Console on page 94.
System Log See Using the System Log and Activity Log on page 83.
See System Log Tab on page 83.
KFF Library See Using KFF (Known File Filter) on page 340.
KFF Group Templates See Using KFF (Known File Filter) on page 340.
Activity Log
See Using the System Log and Activity Log on page 83.
See Activity Log Tab on page 84.

Configuring and Managing System Users, User Groups, and Roles About Users | 47
Chapter 5
Configuring and Managing System Users,
User Groups, and Roles
This chapter will help administrators to configure users, user groups, and roles.
About Users
A user is any person who logs in and performs tasks in the web console. Each person should have their own
user account. You can configure accounts to have specific permissions to perform specific tasks. When users
open the console, what they see and do is based on their assigned permissions.
There are two users in the database that do not appear in the user interface. The passwords for these accounts
are unique per system/strong passwords:
-Administrator - This is a different user than the Application Administrator role
-eDiscoveryProcessingUser
Permissions are managed by user roles.
See Adding Users on page 57.
About User Roles and Permissions
You can assign users different permissions based on the tasks that you want them to perform. The permissions
that a user has affects the items that they see and the tasks that they can perform in the web console.
For example, you can have one group of users that can manage the whole application and another group can
create projects and another group can only reviews files in a project.
Changes to permissions for a currently logged-in user take effect when they log out and log back in.
You assign permissions to a user by configuring roles and then associating users, or groups of users, to those
roles.

Configuring and Managing System Users, User Groups, and Roles About User Roles and Permissions | 48
You can configure roles at the following levels:
-Admin roles
-Project roles
Admin roles provide global permissions to a user for the whole application. The following are examples of admin
permissions that you can use:
-Application Administrator
-Mange Users
-Create/Edit Projects
-Manage Admin Roles
-View the System Console
See About Admin Roles and Permissions on page 49.
Project roles only apply to a specific project. The following are examples of global permissions that you can use:
-Project Administrator (for that project only)
-Project Reviewer
-Manage Evidence
-View Project Reports
-Manage Project People
For more information, see Introduction to Project Management on page 148.
Planning User Roles
Before creating users, plan the types of roles your users will be performing. This facilitates the process of
assigning roles and permissions to users.
See Workflows for Administrators on page 23.
Possible things to consider when planning user roles:
-How many and which users should have Administrator permissions for the entire application?
-How many and which users should have application management permissions to perform tasks such as
creating and managing other users, roles, and projects?
-How do you want to distinguish between users who can create and manage projects versus those who
can only review them?
-How many and which users should have project-level permissions to perform tasks such as adding and
managing evidence and creating production sets?
Configuring and Managing System Users, User Groups, and Roles About Admin Roles and Permissions | 49
About Admin Roles and Permissions
An admin role is a set of permissions that you assign to users or groups. Each admin role has specific
permissions that allows users to manage the application, such as managing users, managing roles and
permissions, and creating and managing projects.
See Admin Permissions on page 49.
You can create admin roles or assign one of the default admin roles already created in the system. There are
three default admin roles:
Creating Admin Roles
When you create an admin role, you can grant users Administrator permissions (all permissions) or grant a
combination of individual permissions.
If you want to grant permissions to a user that only allows them to review a project, then use project roles instead
of admin roles.
Note: The admin permissions available depend upon the license that you have.
Admin Permissions
You can configure admin roles with the following admin permissions
Admin Roles Default Roles
Role Description
Application Administrator This role grants all permissions to manage the application.
Power User This role grants the user permissions for create/edit project, manager user
groups, and manage users.
Users This role grants the user permissions for create/edit project.
Admin Permissions
Permissions Description
Administrator:Grants all rights to the user/group for all projects.
SubAdmin Grants rights as a SubAdmin in a multi-tenant environment. (Summation only)
See Understanding the Multi-Tenant Environment on page 339.
Custom
Selection You can select the following individual administrator roles:
Configuring and Managing System Users, User Groups, and Roles About Admin Roles and Permissions | 50
Create/Edit Projects Grants the right to create and edit projects on the Home page.
Users with this permission are automatic administrators of any
projects that they create.
See Creating a Project on page 164.
Create/Edit Projects -
Restricted Grants the rights to:
-Create projects
-Manage Admin Roles for the projects they create
-Assign permissions for the projects they create
-Link people and data sources to the projects
However, users with this permission do not have administrator
status over projects that they create. They cannot create jobs in
the project, nor view and search data in Review.
Delete Project Grants the right to delete projects on the Home page
See Creating a Project on page 164.
.
Manage User Groups Grants the right to add, edit, delete, and assign roles to groups.
See Planning User Roles on page 48.
Manage Users Grants the rights to add, edit, delete, activate, deactivate, reset
passwords, and assign admin roles to users.
See About Users on page 47.
See Adding Users on page 57.
See Editing the Email Address of a User on page 59.
See Deleting Users on page 61.
See Deactivating a User on page 62.
See Activating a User on page 62.
See Resetting a User’s Password on page 60.
See Associating Admin Roles to a User on page 58.
Create People Grants the right to create users.
See Adding Users on page 57.
Delete People Grants the right to delete users.
See Deleting Users on page 61.
Create Nodes Grants the right to create job targets.
See Managing People, Groups, Computers and Network
Shares on page 104.
Delete Nodes Grants the right to delete job targets.
See Managing People, Groups, Computers and Network
Shares on page 104.
Global ID Admin Grants the right to access and change the permissions of any
user in any project.
See Associating Admin Roles to a User on page 58.
Manage Project
Permissions Grants the right to manage project permissions.
See Setting Project Permissions on page 197.
Admin Permissions
Permissions Description
Configuring and Managing System Users, User Groups, and Roles About Admin Roles and Permissions | 51
System Console Grants the right to view and use the Work Manager Console
and Site Server Console on the Management page.
See on page 79 and Using the Site Server Console on
page 94.
LitHold Manager Grants the right to manage Litholds.
Evidence Admin Grants the right to add, delete, and associate the evidence.
See Using the Evidence Wizard on page 260.
Manage Admin Roles Grants the right to add, edit, delete and assign admin roles.
See About Admin Roles and Permissions on page 49.
See Creating an Admin Role on page 55.
See Managing Admin Roles on page 55.
See Adding Permissions to an Admin Role on page 55.
Manage KFF Grants the right to create and manage KFF libraries, sets,
templates, and groups.
See Using KFF (Known File Filter) on page 340.
System Jobs Grants the right to view and use the System Jobs tab on the
Management page.
See Using System Jobs on page 68.
View Activity Log Grants the right to view the Activity Log on the Management
page.
See Viewing the System Log or Activity Log on page 85.
Purge Activity Log Grants the right to purge the Activity Log.
See Activity Log Tab on page 84.
Manage Job
Templates Grants the right to manage the following:
-Job Templates
-Filter Templates
-System Job Templates
See Managing Templates on page 200.
Admin Permissions
Permissions Description
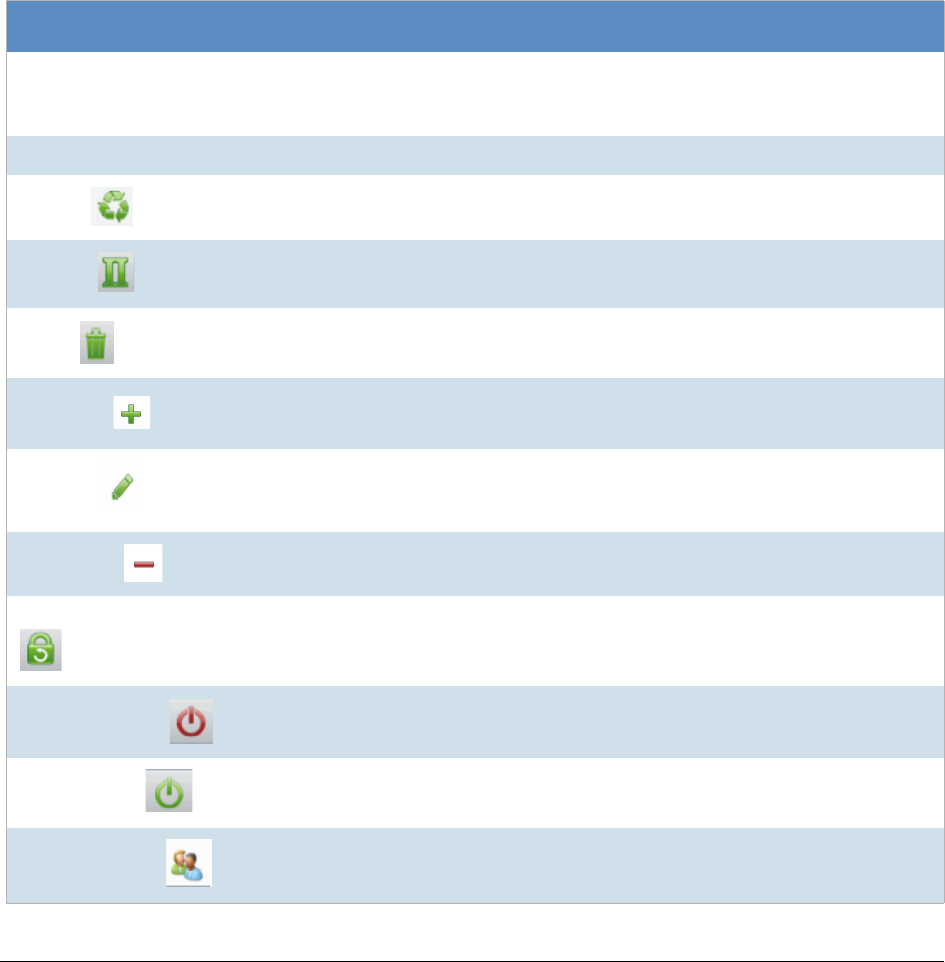
Configuring and Managing System Users, User Groups, and Roles About the Users Tab | 52
About the Users Tab
The Users tab on the Management page can be used by administrators to add, edit, delete, and associate users
on a global scale. Users are people who are logging in and working in the application.
From the Users list, you can also add, edit, or delete the application’s users. You can set users as active or
inactive, reset user passwords, and set global and group permissions.
The Users tab is the default page when you click Management on the menu bar. The User Groups tab below the
Users list pane allows you to associate and remove associations to users. The Admin Roles tab below the Users
list pane identifies the admin roles that are associated with a highlighted user.
Changes to permissions for a currently logged-in user take effect after they log out of the system and log back in.
Elements of the Users Tab
Element Description
Filter Options Allows you search and filter all of the items in the list. You can filter the list based
on any number of fields.
See Filtering Content in Lists and Grids on page 41.
Users List Displays all users. Click the column headers to sort by the column.
Refresh
Refreshes the Users list.
See Refreshing the Contents in List and Grids on page 38.
Columns
Adjusts what columns display in the Users list.
See Sorting by Columns on page 38.
Delete
Deletes the selected user. Only active when a user is selected.
See Deleting Users on page 61.
Add Users
Adds a user.
See About Users on page 47.
Edit User
Edits the selected user. You can add or change a selected user’s email address
that is used for notifications of the application’s events.
See Editing the Email Address of a User on page 59.
Delete User
Deletes the selected user(s).
See Deleting Users on page 61.
Reset a User’s Password Assigns a new password for the selected user.
See Resetting a User’s Password on page 60.
Deactivate Users
Makes selected user(s) inactive in the application.
See Deactivating a User on page 62.
Activate Users
Reactivates selected user.
See Activating a User on page 62.
User Groups Tab
Allows you to associate or disassociate groups to users.
See Associating a Group to a User on page 63.
Configuring and Managing System Users, User Groups, and Roles About the Users Tab | 53
Admin Roles Tab
Allows you to associate or disassociate admin roles to users.
See Associating Admin Roles to a User on page 58.
Add Association
Associates a user to a group or admin role.
Remove Association Disassociates a user from a group or admin role.
Elements of the Users Tab (Continued)
Element Description

Configuring and Managing System Users, User Groups, and Roles About the Admin Roles Tab | 54
About the Admin Roles Tab
The Admin Roles tab on the Management page can be used to add, edit, delete, and associate admin roles.
Admin roles are a set of global permissions that you can associate with a user or a group.
Elements of the Admin Roles Tab
Element Description
Filter Options Allows you search and filter all of the items in the list. You can filter the list
based on any number of fields.
See Filtering Content in Lists and Grids on page 41.
Admin Roles List Displays all admin roles. Click the column headers to sort by the column.
Refresh
Refreshes the Admin Roles List.
See Refreshing the Contents in List and Grids on page 38.
Columns
Adjusts what columns display in the Admin Roles List.
See Sorting by Columns on page 38.
Delete
Deletes the selected admin roles. Only active when an admin roles is
selected.
See About Admin Roles and Permissions on page 49.
Add Admin Roles
Adds an admin role.
See Creating an Admin Role on page 55.
Edit Admin Roles
Edits the selected admin roles.
Delete Admin Roles
Deletes the selected admin roles.
Users Tab
Allows you to associate or disassociate users to an admin role.
Groups Tab
Allows you to associate or disassociate groups to an admin role.
Features Tab
Allows you to add administrator permissions to an admin role.
See Adding Permissions to an Admin Role on page 55.
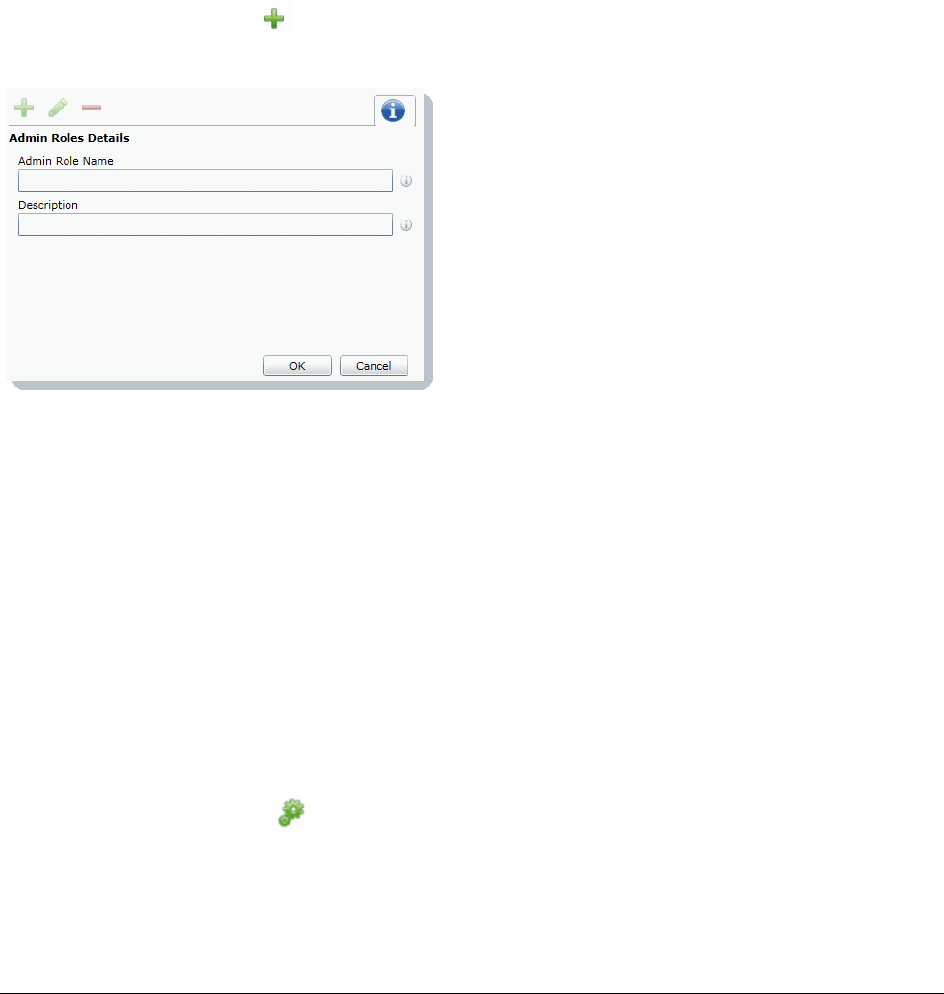
Configuring and Managing System Users, User Groups, and Roles Managing Admin Roles | 55
Managing Admin Roles
Creating an Admin Role
Before you can assign permissions to an admin role, you have to create the role.
To create an admin role
1. Log in to the web console using administrator rights.
2. Click the Management tab.
3. Click the Admin Roles tab.
See About Admin Roles and Permissions on page 49.
4. Click the Add button .
Admin Roles Details
5. Enter a name for the admin role and a description.
6. Click OK.
The role is added to the Admin Role list.
Adding Permissions to an Admin Role
After you have created an admin role, you need to add permissions to it before you assign it to a user or a group.
To add permissions to an admin role
1. Log in to the web console using administrator rights.
2. Click the Management tab.
3. Click the Admin Roles tab.
4. Select the role from the Admin Roles List.
5. Click the Features tab .
6. Select the permissions.
See About Admin Roles and Permissions on page 49.

Configuring and Managing System Users, User Groups, and Roles Managing Admin Roles | 56
Note: Users with the Manage Admin Roles, Manage Users, or Manage User Groups permission have
the ability to upgrade themselves or other users to system administrators.
7. Click Save.

Configuring and Managing System Users, User Groups, and Roles Managing Users | 57
Managing Users
Administrators, and users assigned the Manage Users permission, manage users by doing the following:
-Managing the List of Users on page 57
-Adding Users on page 57
-Editing the Email Address of a User on page 59
-Resetting a User’s Password on page 60
-Deleting Users on page 61
-Deactivating a User on page 62
-Activating a User on page 62
-Associating Admin Roles to a User on page 58
Managing the List of Users
You create and manage users from the Users tab on the Management page.
To open the Users tab
1. Log in as an administrator or a user that has the Manage Users permission.
See Opening the AccessData Web Console on page 26.
2. Click Management.
3. Click Users .
The users list lets you view all the users, including the following columns of information about them:
-Username
-Email Address of the user
-Date that the user was created
-Date of last login for the user
-Active status of a user
-First and Last name of the user
-Description
From the users list, you can also add, edit, or delete users. You can set users as active or inactive, reset user
passwords, and associate groups to users and admin roles.
When you create and view the list of users, they are displayed in a grid. You can do the following to modify the
contents of the grid:
-Control which columns of data are displayed in the grid.
-If you have a large list, you can apply a filter to display the items that you want.
Adding Users
Each person that uses the console must log in with a username and password. Each person should have their
own user account.
Administrators, and users assigned the Manage Users permission, can add new user accounts.

Configuring and Managing System Users, User Groups, and Roles Managing Users | 58
When a user is created, an entry for that user is created in the system databases.
How you add users differs depending on whether you use Integrated Windows Authentication.
If you are not using Integrated Windows Authentication, you need to configure both the username and
password. In this mode, a password is required, and the Password field is bolded.
If you are using Integrated Windows Authentication, enter the domain username but do not enter a password. In
this mode, a password is not required, and the Password field is hidden.
To add a user
1. Open the Users tab.
See Managing the List of Users on page 57.
2. In the User Details pane, click Add.
3. In the Username field, enter a unique username.
The name must be between 7 - 32 characters and must contain only alphanumeric characters.
If you are using Integrated Windows Authentication, enter the user’s domain and username. For
example, <domain>\<username>.
4. Enter the First and Last name of the user.
5. (Optional) In the Email Address field, enter the email address of the user.
6. If you are not using Integrated Windows Authentication, enter a password in the Password and the
Reenter Password fields.
The password must be between 7 - 20 characters.
7. Click OK.
Associating Admin Roles to a User
Administrators, and users assigned the Manage Users permission, can associate admin roles to users.
See About User Roles and Permissions on page 47.
To associate admin roles to user
1. Open the Users tab.
See Managing the List of Users on page 57.
2. In the user list pane, select a user to associate to an admin role.
3. In the bottom pane, select the Admin Roles tab.
4. Click the Add Association button .
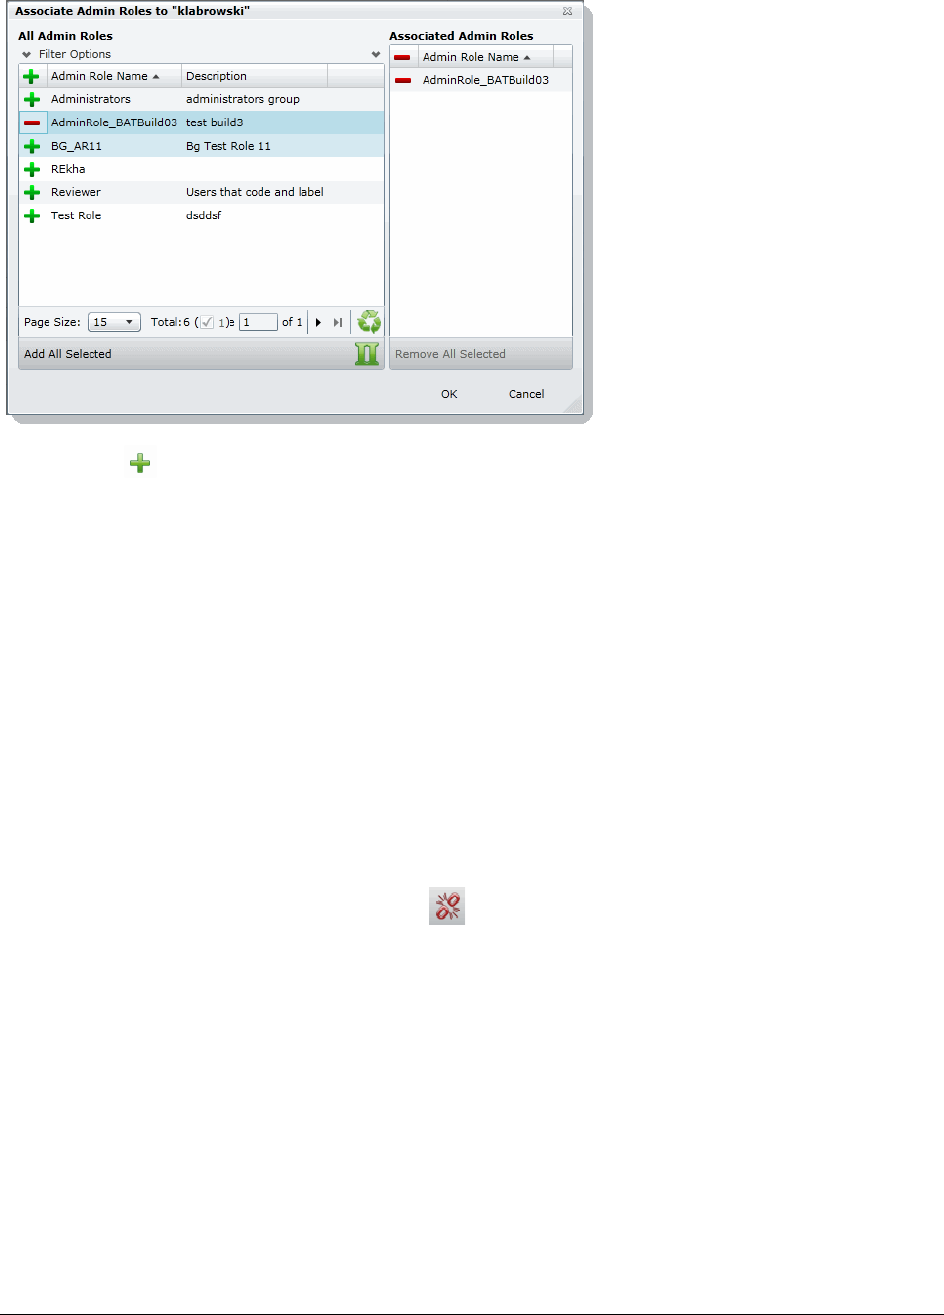
Configuring and Managing System Users, User Groups, and Roles Managing Users | 59
Associate Admin Roles Dialog
5. Click to add the role to the user.
6. Click OK.
Disassociating an Admin Role from a User
Administrators, and users assigned the Manage Users permission, can disassociate admin roles from users.
See About User Roles and Permissions on page 47.
To disassociate admin roles from a user
1. Open the Users tab.
See Managing the List of Users on page 57.
2. In the user list pane, select a user who you want to disassociate from an admin role.
3. In the bottom pane, click the Admin Roles tab.
4. Check the role that you want to remove.
5. Click the Remove Association button .
Editing the Email Address of a User
Administrators, and users assigned the Manage Users permission, can change the email address of an existing
user. If you need to make more than an email change (such as changing the username), you must delete the
user and then recreate the user with the correct information.
To edit the email address of a user
1. Open the Users tab.
See Managing the List of Users on page 57.
2. In the user list pane, select the user whose email address you want to edit.

Configuring and Managing System Users, User Groups, and Roles Managing Users | 60
3. In the User Details pane, click Edit.
4. In the Email Address field, enter the email address of the user.
5. Click OK.
Resetting a User’s Password
If a user has forgotten their password, administrators and users assigned the Manage Users permission can
reset passwords for users.
Note: This function is hidden if you are using Integrated Windows Authentication. Reset a password using
Windows methods.
You cannot reset the password of the Service Account.
See Changing the Password of the Service Account on page 60.
When you reset a user’s password, a new password is automatically created. You can then give the new
password to the user. After they log in with the new password, they can change the password themselves.
You cannot reset your own password. To change your own login password, use the Change Password dialog,
not the User page.
See Changing Your Password on page 37.
To reset the password of an administrator or user
1. Open the Users tab.
See Managing the List of Users on page 57.
2. In the user list pane, select a user.
3. Click .
A new password for the user is generated and displayed.
4. Copy the password and email it to the user, informing them that they can change the password after
logging in.
Changing the Password of the Service Account
This only applies if you are not using Integrated Windows Authentication. The service account password can
only be changed by the user who is logged in as the master administrator. This person is typically the one who
initially performed the installation. The username cannot be changed.
See Changing Your Password on page 37.
You can use the same process as you do for a user.
See Resetting a User’s Password on page 60.
Configuring and Managing System Users, User Groups, and Roles Managing Users | 61
Managing Locked User Accounts
In Forms authentication, if a user logs into the application with an invalid password, after six incorrect attempts,
the user will be locked out of the account.
Note: If you are using Integrated Windows Authentication, domain user accounts are not locked out.
On the Users tab, you can add the Is Locked column to see which user accounts are locked. The value will
display either True or False.
A locked user account be unlocked in the following ways:
-An administrator can unlock the account
-The account will be unlocked after a configured period of time (see below).
Changing the Lockout setting
When a user’s account is locked, there is a time period where the user is locked out. After the time period, the
user can attempt to log into the account again. You can change the Lockout timeout setting and specify how long
the timeout session is. You change the Lockout timeout setting by editing a value in the C:\Program
Files\AccessData\Common\FTK Business Services\AdgWindowsServiceHost.exe.config file.
To change the lockout setting
1. Navigate to C:\Program Files\AccessData\Common\FTK Business
Services\AdgWindowsServiceHost.exe.config file.
2. Locate the key <add key="FailedAuthenticationLockoutPeriodInMinutes" value=" "/> .
3. The value is the number of minutes that you want the timeout period to be.
4. Save the file and close.
Unlocking a User Account
When a user’s account is locked, an administrator can unlock the account.
To unlock a locked account
1. As a User administrator, click Management > Users.
2. Select the user account that is locked.
3. Click the (unlock) icon.
Deleting Users
Users can be deleted by an administrator or a user with the right to delete users.
If you try to recreate a deleted user, you receive a warning that the user already exists in the application and was
marked as deleted. You can continue to create the user and assign user rights as a new user.
Configuring and Managing System Users, User Groups, and Roles Managing Users | 62
To delete users
1. Open the Users tab.
See Managing the List of Users on page 57.
2. Do one of the following:
-In the users list, select the user that you want to delete. In the User Details pane, click Delete.
-In the users list, select one or more users that you want to delete. Click Delete.
3. In the Confirm Deletion dialog box, click OK.
Deactivating a User
You can deactivate users as needed to make the console unavailable to them. When you deactivate a user, that
user remains in the users list of the Users tab, and has the status of False in the Active column. The user’s data
remains in the database; however, the user cannot log in, and they are not available for any other assignments
or work. The user remains inactive until an administrator reactivates them. You can activate or deactivate users
individually or collectively.
See Activating a User on page 62.
To deactivate a user
1. Open the Users tab.
See Managing the List of Users on page 57.
2. In the user list pane, check one or more users whose Active status is True.
3. Click Deactivate.
4. In the Deactivate user message box, click Yes.
Activating a User
You can activate users as needed. When a user is activated, they can log in and be available for work. An
activated user remains active until an administrator deactivates them. You can activate or deactivate users
individually or collectively.
See Deactivating a User on page 62.
To activate a user
1. Open the Users tab.
See Managing the List of Users on page 57.
2. In the user list pane, check one or more users whose Active status is False.
3. In the bottom of the middle pane, click .
4. In the Activate user frame, click Yes.
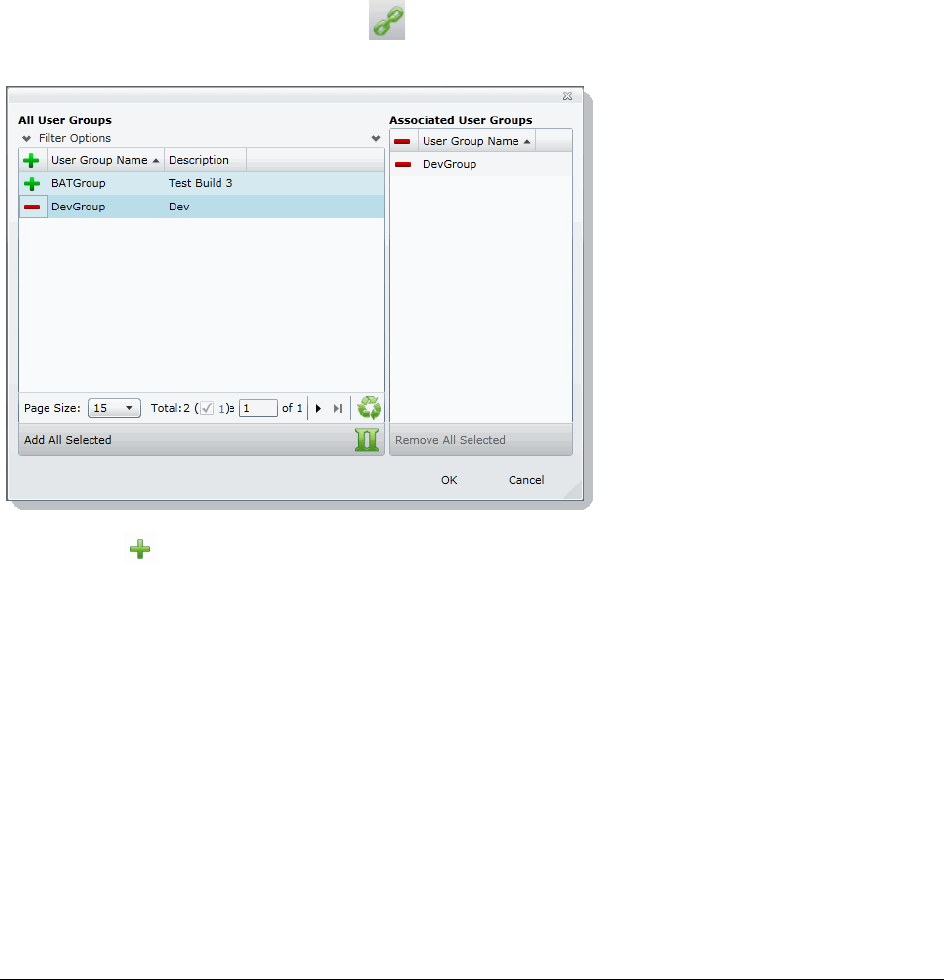
Configuring and Managing System Users, User Groups, and Roles Managing Users | 63
Associating a Group to a User
Groups are a set of users grouped together that perform the same tasks. Putting users into groups makes it
easier to assign and manage project permissions for users. Administrators, and users assigned the Manage
Users permission, can associate groups to users.
See About User Roles and Permissions on page 47.
To associate groups to user
1. Open the Users tab.
See Managing the List of Users on page 57.
2. In the user list pane, select a user who you want to associate to a group.
3. In the bottom pane, click the User Groups tab.
4. Click the Add Association button .
All User Groups Dialog
5. Click to associate the user to the group.
6. Click OK.
Disassociating a Group from a User
Administrators, and users assigned the Manage Users permission, can disassociate groups from users.
See About User Roles and Permissions on page 47.
To disassociate groups from user
1. Open the Users tab.
See Managing the List of Users on page 57.
2. In the user list pane, select a user who you want to disassociate from a group.
3. In the bottom pane, click the User Groups tab.

Configuring and Managing System Users, User Groups, and Roles Managing Users | 64
4. Check the group you want to remove.
5. Click the Remove Association button .
Configuring and Managing System Users, User Groups, and Roles Configuring and Managing User Groups | 65
Configuring and Managing User Groups
Groups are a set of users grouped together. Groups allow you to put sets of users together who perform the
same tasks. Putting users into groups makes it easier to assign and manage project permissions for users.
The project permissions that you assign to users define the tasks that they can perform. Therefore, if you have a
group of users who all are going to review documents, you can put them in a group and grant them permissions
to review, code, and label documents.
Administrators, and users assigned the Manage Groups permission, can manage groups.
Opening the User Groups Tab
To open the User Groups tab
1. Log in as an administrator or a user with the Manage Groups admin role.
See Opening the AccessData Web Console on page 26.
2. Click Management.
3. Click User Groups .
The users list lets you view all the groups, including the following columns of information about them:
-User Group Name
-Description
From the group list, you can also add, edit, or delete groups. You can associate groups to users and admin roles.
When you create and view the list of groups, they are displayed in a grid. You can do the following to modify the
contents of the grid:
-Control which columns of data are displayed in the grid.
-If you have a large list, you can apply a filter to display the items that you want.
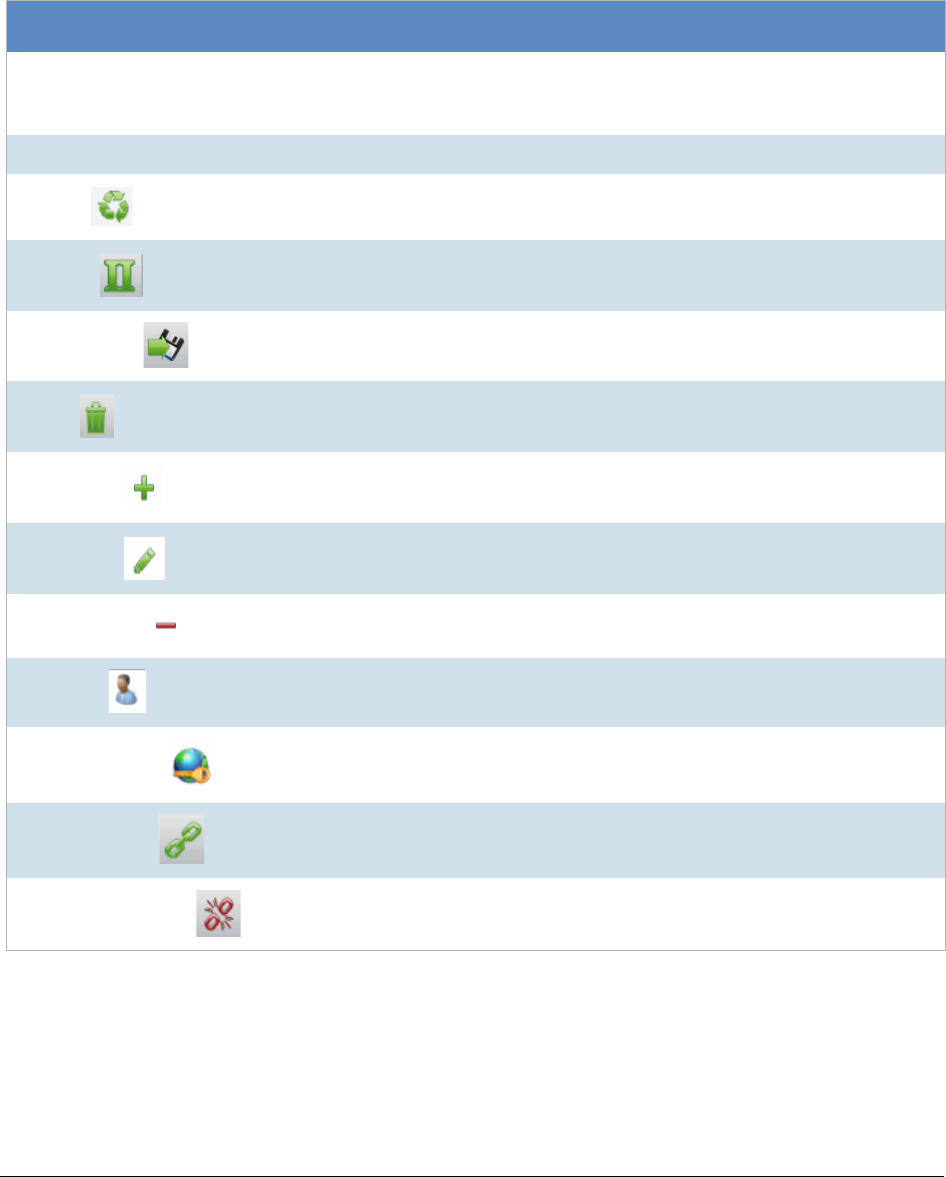
Configuring and Managing System Users, User Groups, and Roles Configuring and Managing User Groups | 66
User Groups Tab
The User Groups tab on the Management page can be used to add, edit, delete, and associate user groups on a
global scale. Groups are collections of users who perform the same tasks in the application.
Adding Groups
To add a group
1. Open the User Groups tab.
See Opening the User Groups Tab on page 65.
Elements of the User Groups Tab
Element Description
Filter Options Allows you search and filter all of the items in the list. You can filter the list
based on any number of fields.
See Filtering Content in Lists and Grids on page 41.
Groups List Displays all groups. Click the column headers to sort by the column.
Refresh
Refreshes the Groups List.
See Refreshing the Contents in List and Grids on page 38.
Columns
Adjusts what columns display in the Groups List.
See Sorting by Columns on page 38.
Export to CSV
Exports the user group list to a CSV file.
Delete
Deletes the selected group. Only active when a group is selected.
See Deleting Groups on page 67.
Add Groups
Adds a group.
See Adding Groups on page 66.
Edit Groups
Edits the selected group.
See Editing Groups on page 67.
Delete Groups
Deletes the selected group.
See Deleting Groups on page 67.
Users Tab
Allows you to associate or disassociate users to groups.
See Associating Users/Admin Roles to a Group on page 67.
Admin Roles Tab
Allows you to associate or disassociate admin roles to groups.
See Associating Users/Admin Roles to a Group on page 67.
Add Association
Associates a group to a user or admin role.
Remove Association
Disassociates a group from a user or admin role.
Configuring and Managing System Users, User Groups, and Roles Configuring and Managing User Groups | 67
2. In the Groups Details pane, click Add.
3. In the User Group Name field, enter a unique username.
The name must be between 7 - 32 characters and must contain only alphanumeric characters.
4. Enter a Description.
5. Click OK.
Deleting Groups
To delete a group
1. Open the User Groups tab.
See Opening the User Groups Tab on page 65.
2. Do one of the following:
-In the groups list, highlight the group that you want to delete. In the Groups Details pane, click
(delete).
-In the users list, check one or more users that you want to delete. Click Delete.
3. In the Confirm Deletion dialog box, click OK.
Editing Groups
To edit a group
1. Open the User Groups tab.
See Opening the User Groups Tab on page 65.
2. In the Groups Details pane, click (edit).
3. In the User Group Name field, enter a unique username.
The name must be between 7 - 32 characters and must contain only alphanumeric characters.
4. Enter a Description.
5. Click OK.
Associating Users/Admin Roles to a Group
From the User Groups tab, you can associate users and admin roles to the selected group.
To associate users/admin roles to a group
1. Open the User Groups tab.
See Opening the User Groups Tab on page 65.
2. In the user list pane, select a group to which you want to add an association.
3. In the bottom pane, do one of the following:
-Select the Users tab to associate users to the group.
-Select the Admin Roles tab to associate roles to the group.
4. Click Add Association .
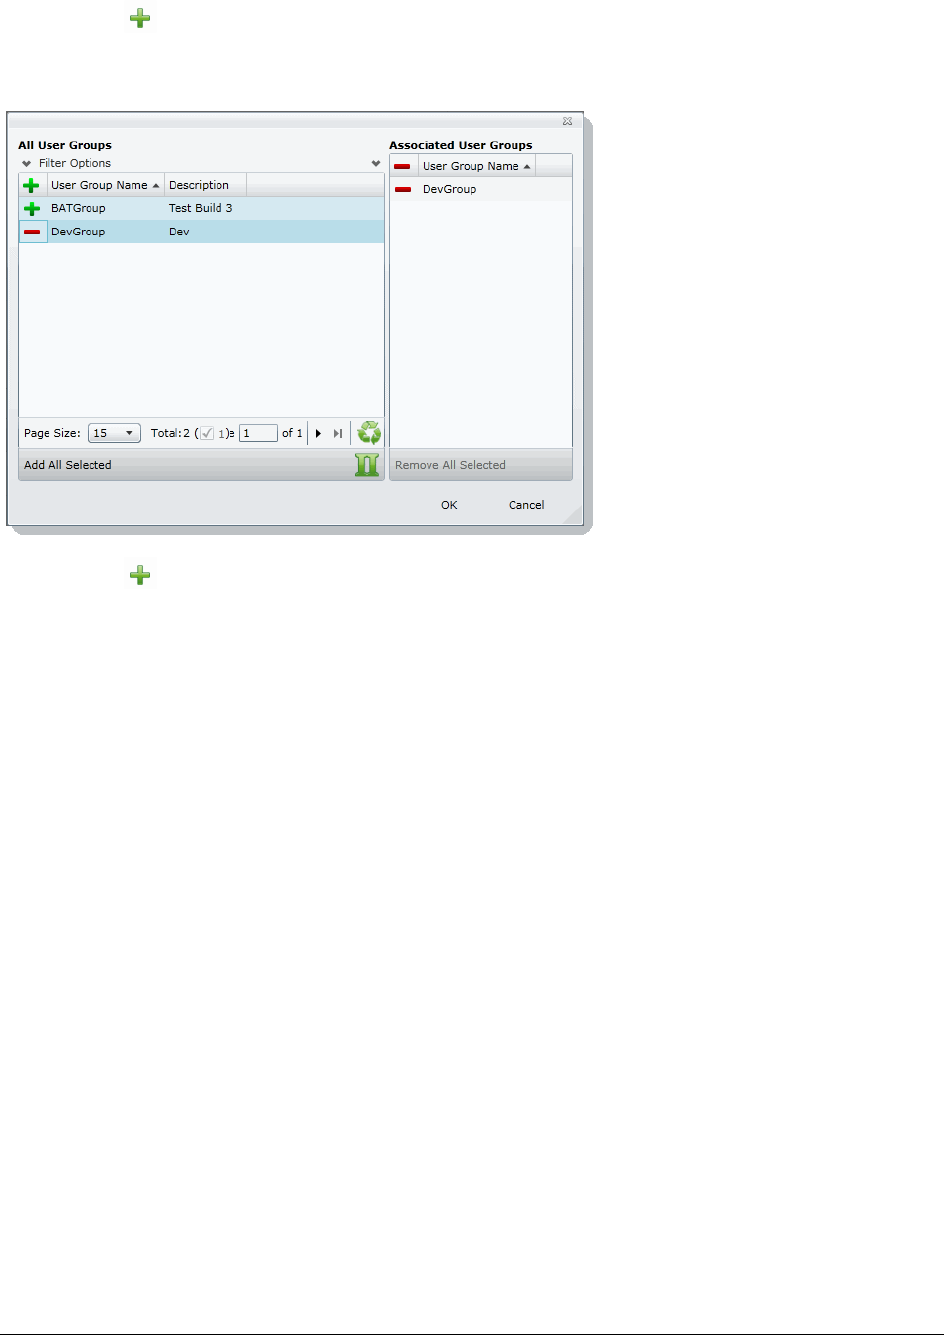
Configuring and Managing System Users, User Groups, and Roles Configuring and Managing User Groups | 68
5. Click to add users/roles.
6. Click OK.
All User Groups Dialog
7. Click to associate the user to the group.
8. Click OK.
Configuring the System About System Configuration | 69
Chapter 6
Configuring the System
This chapter will help administrators configure the system to their preferences.
About System Configuration
You can configure many settings for the application system. These are global settings that affect the entire
system.
System Configuration Tab - Standard Settings
The System Configuration tab on the Management page allows you to configure multiple items. This section
describes each item.
Depending on the license that you own and the permissions that you have, you will see some or all of the
following:
Elements of the System Configuration Tab
Element Description
Active Directory Allows you to configure Active Directory to synchronize and import Active Directory
users. Synchronization is from Active Directory to the application only.
See Configuring Active Directory Synchronization on page 70.
Email Server Allows you to configure the Email Notification Server so that you can send notification
emails to specified users for certain events. This configuration is also necessary for
sending Litigation Hold emails to appropriate recipients.
See Configuring the Email Notification Server on page 74.
Create
Notifications Allows you to configure email notifications for the project and user related events.
See Creating Notifications on page 74.
Manage
Certificates Allows you to manage certificates used for encrypting AD1 files.
Configuring the System System Configuration Tab - Standard Settings | 70
Configuring Active Directory Synchronization
You can sync with Active Directory to import the following objects:
-Domain users as People
-Computers
-Groups
-Shares
You can select to import one or more types of objects. For example, this can be helpful to easily add new users
only.
When you sync with Active Directory, all objects of that type are imported. Synchronization only occurs from
Active Directory to the application. Changes made to the application do not sync back to Active Directory.
Domain Users can be imported but they cannot be application users. They are only used as people.
You can also configure the system to send an email notification when a value in Active Directory is changed and
synced with Summation or eDiscovery. This can be helpful when you have a custodian in a Litigation Hold and
the status of that user changes. For example, they may move locations or may no longer be employed. You
configure the email notifications as part of the Active Directory sync setting. You can select which Active
Project Defaults Allows you to configure the following settings that will be used every time you create a
project:
-Default paths for project data
-Default options for processing evidence in projects
See Default Evidence Processing Options on page 77.
Export Options Allows you to set the application to include Australian numbering.
Processing
Priority Options Allows you to configure how much of the available CPU will be used for processing. If
not configured, the evidence processing engine will use all available CPUs.
Notes
Certificates Allows you to manage certificates used for encrypting Lotus Notes files.
KFF
Allows you to configure KFF.
See Using KFF (Known File Filter) on page 340.
Other Advanced
Options Depending on the license that you own and the permissions that you have, you may
see other advanced options.
See Configuring Advanced System Settings on page 195.
Elements of the System Configuration Tab
Element Description
Configuring the System System Configuration Tab - Standard Settings | 71
Directory fields you want to be notified about when changes occur and which application users to send an email
to. The notification email contains a time stamp, the name of the user that the change occurred for, the
properties that changed, and the old and new values of the changed properties.
Note: After migrating from an earlier version of the application, you must re-enter the Active Directory
password. If not, the Active Directory data does not appear in the application. See Active Directory
Configuration Options on page 73.
To configure Active Directory synchronization
1. Log in as an administrator.
See Opening the AccessData Web Console (page 26).
2. Click Management.
3. Click System Configuration.
4. If you want to use email notifications, configure the email server.
See Configuring the Email Notification Server on page 74.
5. Click Active Directory.
6. In the Active Directory Configuration dialog, set all options and click Next.
See Active Directory Configuration Options on page 73.
7. Click Next.
8. Select which Active Directory fields to import into User information.
In the Active Directory Fields dialog box, in the Active Directory Fields list box, select an alias attribute
and click the green arrow next to the user field that you want associated with the attribute.
Bold user field names are required fields.
The following are examples of fields that you can use:
9. Click Next.
10. To configure Active Directory object change notification, do the following:
10a. In the Active Directory Fields list, select a field that you want to be notified about if they change
and click the right arrows.
10b. Repeat for all desired fields.
10c. Select the application users that you want to be notified. (Each will receive an email.)
You can filter on the list of application users.
11. Click Next.
Active Directory Fields
Active Directory
Field Person Field
givenname First Name (Required)
sn Last Name (Required)
samaccountname Username (Required)
displayname Notes Username
mail Email

Configuring the System System Configuration Tab - Standard Settings | 72
12. Do one of the following:
-To save the settings, but not perform a sync, click Save.
-If you have completed all the settings and are ready to sync, click Save and Sync.
13. View the imported user in the Users tab.
Configuring the System System Configuration Tab - Standard Settings | 73
Active Directory Configuration Options
Elements of the Active Directory Configuration Dialog
Element Description
Server Enter the server name of a domain controller in the enterprise.
Use Global
Catalog Select to use the global catalog.
Port Enter the connection port number used by Active Directory.
The default port number is 389.
If you want to support synch with an entire Active Directory forest, set the port as 3268.
Otherwise, the synch only collects information from one domain instead of the entire
forest.
The default ports for communicating with Active Directory are:
LDAP: 389
Secure LDAP(SSL): 636
Global Catalog: 3268
Secure Global Catalog(SSL): 3269
Base DN Enter the starting point in the Active Directory hierarchy at which the search for users
and groups begins.
The Base DN (Distinguished Name) describes where to load users and groups.
For example, in the following base DN
dc=domain,dc=com
you would replace domain and com with the appropriate domain name to search for
objects such as users, computers, contacts, groups, and file volumes.
User DN Enter the distinguished name of the user that connects to the directory server.
For example
tjones or <domain>\tjones
Password Enter the password that corresponds to the User DN account. This is the same
password used when connecting to the directory server.
Active Directory
Authentication Select to enable authentication against Active Directory on login.
AD Sync Objects You can select which types of objects to include or not include: Users, Groups,
Computers, or Shares. All objects are selected by default. If you want to exclude
objects from being synced, de-select those objects.
This can be helpful to easily add new users only.
AD Sync
Recurrence Configure a daily recurrence by selecting or entering the time of day to start the sync. If
a sync is in progress when the interval occurs, the interval is skipped to allow the
current sync to complete.
Test Configuration Click to test the current configuration to ensure proper communication exists with the
Active Directory server.
AD
Synchronization Set to inactive by default.
Configuring the System System Configuration Tab - Standard Settings | 74
Configuring the Email Notification Server
You can configure the Email Notification Server so that when you create a litigation hold, your notification emails
are sent successfully.
To configure an email notification server
1. Click Management.
2. Click System Configuration.
3. Click Email Server.
4. In the Email Server Configuration dialog box, set the email options that you want. See Email Server
Configuration Options on page 74.
5. Click Save.
Email Server Configuration Options
Creating Notifications
About Event Notifications
You can configure event notifications for when certain system events occur. You select which type of event for
which you want a notification and the users to whom the notification is sent.
You can create notifications for the following events:
-Project Created
-Project Deleted
Email Server Configuration Options
Option Description
SMTP Server Address Specifies the address of the SMTP mail server (for example,
smtpserver.domain.com or server1) on which you have a valid account. You
must have an SMTP-compliant email system, such as a POP3 mail server, to
receive notification messages from the application.
SMTP Port Specifies the SMTP port to use. Port 25 is the standard non-SSL SMTP port.
However, if a connection is not established with default port 25, contact the email
server administrator to get the correct port number.
SMTP SSL? Allows you configure the use of SSL by the SMTP server. The default SSL port is
465.
Default from Address Specifies the name of the default email account from which alerts and
notifications are sent.
Domain Specifies the sender’s domain.
Username Specifies the sender’s name. The default credentials (Username, Password,
Domain) are optional.
Password Specifies the sender’s password.
Confirm Password Confirms the sender’s password that had been entered in the Password field.

Configuring the System System Configuration Tab - Standard Settings | 75
-User Created
-User Deleted
Note: For eDiscovery, you can also create notifications for job events.
Creating Event Notifications
To create an email event notification
1. Click Management.
2. Click System Configuration.
3. Click Create Notifications.
4. Click Select Event Type and select the event type for which you want a notification.
5. Select the user or users that you want to receive the notification.
6. Click Create Event Notification.
7. Click Close.
Viewing and Deleting Job Notifications
You can view and delete either the job notifications that you created or the job notifications to which you are
subscribed.
To view and delete event notifications
1. In the console, click your logged-in name (top-right corner) to open the user actions menu.
2. Click Manage My Notifications.
For information on managing list columns or filtering items in the list, see Managing Columns in Lists
and Grids (page 39).
3. Do one or more of the following:
-In the Notifications I Created group box, under the Notification Type column header, select the job
notifications that you want to delete.
-In the Notification I Belong To group box, under the Notification Type column header, select the job
notifications that you want to delete.
4. Click Delete.
5. In the Confirm Deletion dialog box, click OK.
Configuring the System System Configuration Tab - Standard Settings | 76
Configuring Default Project Settings
About Default Project Settings
You can configure the following settings to use every time you create a project:
-Default paths for project data
-Default options for processing evidence in projects
In most cases, you are not required to configure defaults.
Note: The exception is if you use LawDrop™, then you must set a default LawDrop folder path.
See Configuring the System for Using LawDrop on page 362.
For processing options, there are defaults that are pre-configured.
If no default project paths are configured, the person creating the project provides this information.
If you configure default settings, you can have the application display those settings when a project is created. If
you allow the values to display, the user creating the project can view and/or change the values.
You can also hide the default values. If hidden, the person creating the project cannot view the options and/or
change them.
See Setting Default Project Settings on page 76.
See Default Evidence Folder Options on page 77.
See Default Evidence Processing Options on page 77.
Setting Default Project Settings
You can configure default project evidence settings.
See About Default Project Settings on page 76.
To set default project options
1. Log in as an administrator.
See Opening the AccessData Web Console (page 26).
2. Click Management.
3. Click System Configuration.
4. Click Project Defaults.
5. On the Info tab, set the default path settings.
See Default Evidence Folder Options on page 77.
6. On the Processing Options tab, set the default evidence processing options.
See Default Evidence Processing Options on page 77.
7. Click Save.
Configuring the System System Configuration Tab - Standard Settings | 77
Default Evidence Folder Options
You can define default locations where the project data is stored.
If you set the following project and data locations, they are used whenever you create a project:
-Project Folder Path
-Job Data Path
You can also set the location for the LawDrop DropSpace path.
Local paths only work on single box installations.
If a network UNC path is specified, you can validate the path to ensure that the application can access the
location. If the path is not validated, you may need to re-enter the path correctly or specify a new path.
To verify the path, click .
Default Evidence Processing Options
The processing options configured here are the default options used by a project when it is created.
See About Default Project Settings on page 76.
See Evidence Processing and Deduplication Options on page 167.
If you configure default settings, you can have the application display those settings when a project is created. If
you allow the values to display, the user creating the project can view and/or change the values.
Note: After upgrading the application, Enable Standard Viewer Processing Option is turned off by default
because it is a slower performing processing option. If you want this functionality, you need to enable it
manually in System Configuration > Project Defaults > Processing Options.
You can also hide the default values. If hidden, the person creating the project cannot view the options and/or
change them.
Hover the mouse over the information icon to get information about each item.
Paths
Project Folder Path Allows you to specify a local path or a UNC network path to the project folder.
This path is the location where all project data is stored.
Job Data Path Allows you to specify a job data path. The responsive folder path is the location of
reports data.
LawDrop DropSpace
Path If you use LawDrop, you must set a default folder path for the DropSpace. This is an
application- level setting separate from project settings.
See Configuring the System for Using LawDrop on page 362.
Default Evidence Processing Options
Option Description
Hide Processing Options Allows you to hide the processing options dialog when a user creates a
project. This forces the project to use the default values set here.
The default is off.
Configuring the System System Configuration Tab - Standard Settings | 78
Configuring Export Options
You can configure Export Options to specify the document ID numbering when exporting an export set to a load
file.
For more information on production sets, see the Exporting documentation.
To configure export settings
1. Log in as an administrator.
See Opening the AccessData Web Console (page 26).
2. Click Management.
3. Click System Configuration.
4. Click Export Options. The option available is described in the following table.
5. If you want to change from the default U.S. numbering scheme, select a different option.
6. Click Save.
Individual Processing Options. See Evidence Processing and Deduplication Options on page 167.
Show All Time zones When selected, allows you to select any time zone recognized by the
operating system when adding evidence.
Alternative Numbering
Option Description
Use Australian
Numbering Scheme This option is specific to what options are available when exporting to a load file
format.
The same underlying technology performs both U.S. and Australian numbering.
For example, the Box level in the Australian scheme corresponds to the Volume
level in the U.S. scheme, and the Folder level is the same in both schemes.
Changes the Volume/Document Options page in Export to include the
numbering elements that are needed for Australian document IDs.
For example, the U.S. numbering scheme uses volumes and folders in the load
file.
The Australian numbering scheme uses a party code, boxes, and folders for their
volume structure in the load file.
See the Exporting documentation for more information on Australian numbering.
Default Evidence Processing Options (Continued)
Option Description
Using the Work Manager Console and Logs Using the Work Manager Console | 79
Chapter 7
Using the Work Manager Console and Logs
Using the Work Manager Console
From Work Manager Console, the Administrator can monitor the performance of the Distribution Server and
the Work Managers. Click any work manager node by name to view specific server details.
As an administrator, you can use the Work Manager Console to view pending, active, or completed work orders.
You can also view the performance of the entire system or specific Work Managers.
Opening the Work Manager Console
To open the Work Manager Console page
1. Log in as an administrator.
See Opening the AccessData Web Console (page 26).
2. Click Management.
3. Click Work Manager Console.
Work Manager Console Tab
The Work Manager Console tab, on the Management page, allows administrators to monitor the performance of
the Distribution Server and the Work Managers. Click on any work manager node by name to view specific
server details.
As an administrator, you can use the System Administration Console to view pending, active, or completed work
orders. You can also view the performance of the entire system or specific Work Managers.
Elements of the Work Manager Console Tab
Element Description
Overall System
Status Pane Allows you to view the performance of the entire system or specific Work Managers.
Queued Work
Orders Displays work orders waiting to execute.

Using the Work Manager Console and Logs Work Manager Console Tab | 80
See Validating Activate Work Orders on page 81.
See Viewing the System Log or Activity Log on page 85.
See Configuring a Work Manager on page 82.
Active Work
Orders Displays active work orders.
Completed Work
Orders Displays completed work orders.
Overall System
Performance Displays overall system performance. You can access the Overall System Performance
panel by expanding the Performance pane on the right side of the page. On the Overall
System Performance panel, the displayed time range indicates the time frame in which
the status information was collected.
Elements of the Work Manager Console Tab
Element Description

Using the Work Manager Console and Logs Validating Activate Work Orders | 81
Validating Activate Work Orders
Validate Active Work Orders allows you to remove orphaned work orders from the Active Work Orders table.
Work orders can become orphaned when the work manager handling the work order shuts down his/her
computer or in some other way loses contact with the Distribution server. When this happens, however, it does
not change the status of the associated job in the Jobs list.
To validate active work orders
1. In the Work Manager Console, click a work manager name to view active work orders.
2. At the bottom of the left pane, click Validate Active Work Orders to confirm and update current work
orders and their status.

Using the Work Manager Console and Logs Configuring a Work Manager | 82
Configuring a Work Manager
You can configure a selected Work Manager by setting various property values.
To configure a Work Manager
1. Open the Work Manager Console.
See Opening the Work Manager Console (page 79).
2. In the left pane of the Work Manager Console, under Overall System Status, click a work manager
name.
3. In the right pane, click the Configuration tab.
4. In the Configuration pane, click Edit.
5. When completed, click OK.
Using the Work Manager Console and Logs Using the System Log and Activity Log | 83
Using the System Log and Activity Log
About the System Log
When certain internal events occur in the system, it is recorded in the System Log. This can be used in
conjunction with the activity log to monitor the work and status of your system.
The following are examples of the types of events that are recorded:
-Completion of evidence processing for an individual project
-Exports started and finished
-Starting of internal services
-Job failures
-System errors
-Errors accessing computers and shares
You can filter the log information that is displayed based on the following different types of criteria:
-Date and time of the log message
-Log type such as an error, information, or warning
-Log message contents
-Which component caused the log entry
-Which method caused the log entry
-Username
-Computer name
System Log Tab
The System Log tab on the Management page is only accessible to the administrator. This log maintains an
historical record of the events that take place in the application. The administrator can view, clear, and export the
log file.
Elements of the System Log Tab
Element Description
Filter Options Allows you to filter the items in the System Log.
See Filtering Content in Lists and Grids on page 41.
System Log Displays all the events. Click the column headers to sort by the column.
Clear Log
Deletes all the events in the log.
See Clearing the Log on page 85.
Export Log
Exports the log. It is recommended that you export and save logs before you clear
them.
See Exporting the Log on page 85.
Using the Work Manager Console and Logs Using the System Log and Activity Log | 84
About the Activity Log
When certain internal activities occur in the system, it is recorded in the Activity log. This can be used in
conjunction with the System Log to monitor the work and status of your system.
See About the System Log on page 83.
The following are examples of the types of activities that are recorded:
-A user logged out
-A user is forced to log out due to inactivity
-Processing started on the project
-A project is opened
You can filter the log information that is displayed based on the following different types of criteria:
-Category
-Activity Date
-Activity
-Username
Activity Log Tab
The Activity Log tab on the Management page can only be accessed by the administrator. The Activity Log can
help you detect and investigate attempted and successful unauthorized activity in the application and to
troubleshoot problems.
The Activity Log event columns include the activity date, username, activity, and category.
Only an administrator can view, clear, and export the Activity Log file.
Elements of the Activity Log Tab
Element Description
Filter Options Allows you to filter the items in the activity log.
See Filtering Content in Lists and Grids on page 41.
Activity Log Displays all the events. Click the column headers to sort by the column.
Clear Log
Deletes all the events in the log.
Export Log
Exports the log. It is recommended that you export and save logs before you clear
them.
Refresh
Refreshes activity log.
See Refreshing the Contents in List and Grids on page 38.
Columns
Adjusts what columns display in the activity log.
See Sorting by Columns on page 38.

Using the Work Manager Console and Logs Using the System Log and Activity Log | 85
Viewing the System Log or Activity Log
An administrator can view, clear, and export the log file.
Event lists are displayed in a grid. You can modify the contents of the grid as follows:
-You can control which columns of data are displayed in the grid.
-If you have a large list, you can apply a filter to display only the items you want.
To open the Log page
1. Log in as an administrator.
2. Click Management.
3. Click System Log or Activity Log.
4. To refresh the log view, click (refresh).
Clearing the Log
As an Administrator, you can clear the log. When you clear the log, you delete all log entries across all pages. A
new entry is created stating that the log was cleared and who cleared it. Before clearing the log, consider
exporting the log file to keep a historical record.
To clear the log
1. Open the Logs page.
2. In the bottom left corner, click Clear Log.
3. Click Yes to confirm the deletion.
Exporting the Log
Exporting the log lets you maintain a historical record of events in the software and saves a copy of the log for
future use, even after the log is cleared. Only an administrator can view, clear, and export the log file. You can
export the log to a CSV file to allow others, who may not have view log access, the ability to query and access
the saved events.
To export the log
1. Open the Logs page.
See Activity Log Tab (page 84).
2. In the bottom left corner of the View Log pane, click Export Log.
3. In the Save As dialog box, specify a file name and file location.
4. Click Save.

Using Language Identification Language Identification | 86
Chapter 8
Using Language Identification
Language Identification
When selecting Evidence Processing, you can identify documents based on the language they were created in.
See Default Evidence Processing Options on page 77.
With Language Identification, you can identify and isolate documents that have been created in a specific
language. Because Language Identification extends the processing time, only select the Language Identification
needed for your documents. There are three levels of language identification to choose from:
None
The system will perform no language identification. All documents are assumed to be written in English. This is
the faster processing option.
Basic
The system will perform language identification for the following languages:
-Arabic
-Chinese
-English
-French
-German
-Japanese
-Korean
-Portuguese
-Russian
-Spanish
If the language to identify is one of the ten basic languages (except for English), select Basic when choosing
Language Identification. The Extended option also identifies the basic ten languages, but the processing time is
significantly greater.

Using Language Identification Language Identification | 87
Extended
The system will perform language identification for 67 different languages. This is the slowest processing option.
The following languages can be identified:
-Afrikaans
-Albanian
-Amharic
-Arabic
-Armenian
-Basque
-Belarusian
-Bosnian
-Breton
-Bulgarian
-Catalan
-Chinese
-Croatian
-Czech
-Danish
-Dutch
-English
-Esperanto
-Estonian
-Finnish
-French
-Georgian
-German
-Greek
-Hawaiian
-Hebrew
-Hindi
-Hungarian
-Icelandic
-Indonesian
-Irish
-Italian
-Japanese
-Korean
-Latin
-Latvian
-Lithuanian
-Malay
-Manx
-Marathi
-Nepali
-Norwegian
-Persian
-Polish
-Portuguese
-Quechua
-Romanian
-Rumantsch
-Russian
-Sanskrit
-Scots
-Scottish Gaelic
-Serbian
-Slovak
-Slovenian
-Spanish
-Swahili
-Swedish
-Tagalong
-Tamil
-Thai
-Turkish
-Ukrainian
-Vietnamese
-Welsh
-Yiddish
-West Frisian

Getting Started with KFF (Known File Filter) About KFF | 88
Chapter 9
Getting Started with KFF (Known File Filter)
This document contains the following information about understanding and getting started using KFF (Known
File Filter).
-About KFF (page 88)
-About the KFF Server and Geolocation (page 93)
-Installing the KFF Server (page 94)
-Configuring the Location of the KFF Server (page 96)
-Migrating Legacy KFF Data (page 97)
-Importing KFF Data (page 98)
-About CSV and Binary Formats (page 105)
-Installing KFF Updates (page 109)
-Uninstalling KFF (page 108)
-KFF Library Reference Information (page 110)
-What has Changed in Version 5.6 (page 115)
Important:
AccessData applications versions 5.6, 6.0, and later use a new KFF architecture. If you are using one
of the following applications version 5.6 or later, you must install and implement the new KFF
architecture:
FTK-based products (FTK, FTK Pro, AD Lab, AD Enterprise)
Summation
eDiscovery
See What has Changed in Version 5.6 on page 115.
About KFF
KFF (Known File Filter) is a utility that compares the file hash values of known files against the files in your
project. The known files that you compare against may be the following:
-Files that you want to ignore, such as operating system files
-Files that you want to be alerted about, such as malware or other contraband files
The hash values of files, such as MD5, SHA-1, etc., are based on the file’s content, not on the file name or
extension. The helps you identify files even if they are renamed.
Getting Started with KFF (Known File Filter) About KFF | 89
Using KFF during your analysis can provide the following benefits:
-Immediately identify and ignore 40-70% of files irrelevant to the project.
-Immediately identify known contraband files.
Introduction to the KFF Architecture
There are two distinct components of the KFF architecture:
-KFF Data - The KFF data are the hashes of the known files that are compared against the files in your
project. The KFF data is organized in KFF Hash Sets and KFF Groups. The KFF data can be comprised
of hashes obtained from pre-configured libraries (such as NSRL) or custom hashes that you configure
yourself.
See Components of KFF Data on page 89.
-KFF Server - The KFF Server is the component that is used to store and process the KFF data against
your evidence. The KFF Server uses the AccessData Elasticsearch Windows Service. After you install
the KFF Server, you import your KFF data into it.
Note: The KFF database is no longer stored in the shared evidence database or on the file system in EDB
format.
Components of KFF Data
Item Description
Hash The unique MD5 or SHA-1 hash value of a file. This is the value that is compared
between known files and the files in your project.
Hash Set A collection of hashes that are related somehow. The hash set has an ID, status,
name, vendor, package, and version. In most cases, a set corresponds to a
collection of hashes from a single source that have the same status.
Group KFF Groups are containers that are used for managing the Hash Sets that are
used in a project.
KFF Groups can contains Hash Sets as well as other groups.
Projects can only use a single KFF Group. However, when configuring your
project you can select a single KFF Group which can contains nested groups.
Status The specified status of a hash set of the known files which can be either Ignore
or Alert. When a file in a project matches a known file, this is the reported status
of the file in the project.
Library A pre-defined collection of hashes that you can import into the KFF Serve.
There are three pre-defined libraries:
-NSRL
-NDIC HashKeeper
-DHS
See About Pre-defined KFF Hash Libraries on page 91.

Getting Started with KFF (Known File Filter) About KFF | 90
About the Organization of Hashes, Hash Sets, and KFF Groups
Hashes, such as MD5, SHA-1, etc., are based on the file’s content, not on the file name or extension.
You can also import hashes into the KFF Server in .CSV format.
For FTK-based products, you can also import hashes into the KFF Server that are contained in .TSV, .HKE,
.HKE.TXT, .HDI, .HDB, .hash, .NSRL, or .KFF file formats.
You can also manually add hashes.
Hashes are organized into Hash Sets. Hash Sets usually include hashes that have a common status, such as
Alert or Ignore.
Hash Sets must be organized into to KFF Groups before they can be utilized in a project.
Index/Indices When data is stored internally in the KFF Library, it is stored in multiple indexes
or indices.
The following indices can exist:
-NSRL index
A dedicated index for the hashes imported from the NSRL library.
-NDIC index
A dedicated index for the hashes imported from the NDIC library.
-DHC index
A dedicated index for the hashes imported from the DHC library.
-KFF index
A dedicated index for the hashes that you manually create or import from
other sources, such as CSV.
These indices are internal and you do not see them in the main application. The
only place that you see some of them are in the KFF Import Tool.
See Using the KFF Import Utility on page 99.
The only time you need to be mindful of the indices is when you use the KFF
binary format when you either export or import data.
See About CSV and Binary Formats on page 105.
Item Description
Getting Started with KFF (Known File Filter) About KFF | 91
About Pre-defined KFF Hash Libraries
All of the pre-configured hash sets currently available for KFF come from three federal government agencies
and are available in KFF libraries.
See About KFF Pre-Defined Hash Libraries on page 110.
You can use the following KFF libraries:
-NIST NSRL
See About Importing the NIST NSRL Library on page 102.
-NDIC HashKeeper (Sept 2008)
See Importing the NDIC Hashkeeper Library on page 103.
-DHS (Jan 2008)
See Importing the DHS Library on page 104.
It is not required to use a pre-configured KFF library in order to use KFF. You can configure or import custom
hash sets. See your application’s Admin Guide for more information.
How KFF Works
The Known File Filter (KFF) is a body of MD5 and SHA1 hash values computed from electronic files. Some pre-
defined data is gathered and cataloged by several US federal government agencies or you can configure you
own. KFF is used to locate files residing within project evidence that have been previously encountered by other
investigators or archivists. Identifying previously cataloged (known) files within a project can expedite its
investigation.
When evidence is processed with the MD5 Hash (and/or SHA-1 Hash) and KFF options, a hash value for each
file item within the evidence is computed, and that newly computed hash value is searched for within the KFF
data. Every file item whose hash value is found in the KFF is considered to be a known file.
Note: If two hash sets in the same group have the same MD5 hash value, they must have the same metadata.
If you change the metadata of one hash set, all hash sets in the group with the same MD5 hash file will be
updated to the same metadata.
The KFF data is organized into Groups and stored in the KFF Server. The KFF Server service performs lookup
functions.
Status Values
In order to accelerate an investigation, each known file can labeled as either Alert or Ignore, meaning that the file
is likely to be forensically interesting (Alert) or uninteresting (Ignore). Other files have a status of Unknown.
The Alert/Ignore designation can assist the investigator to hone in on files that are relevant, and avoid spending
inordinate time on files that are not relevant. Known files are presented in the Overview Tab’s File Status
Container, under “KFF Alert files” and “KFF Ignorable.”

Getting Started with KFF (Known File Filter) About KFF | 92
Hash Sets
The hash values comprising the KFF are organized into hash sets. Each hash set has a name, a status, and a
listing of hash values. Consider two examples. The hash set “ZZ00001 Suspected child porn” has a status of
Alert and contains 12 hash values. The hash set “BitDefender Total Security 2008 9843” has a status of Ignore
and contains 69 hash values. If, during the course of evidence processing, a file item’s hash value were found to
belong to the “ZZ00001 Suspected child porn” set, then that file item would be presented in the KFF Alert files
list. Likewise, if another file item’s hash value were found to belong to the “BitDefender Total Security 2008 9843”
set, then that file would be presented in the KFF Ignorable list.
In order to determine whether any Alert file is truly relevant to a given project, and whether any Ignore file is truly
irrelevant to a project, the investigator must understand the origins of the KFF’s hash sets, and the methods
used to determine their Alert and Ignore status assignments.
You can install libraries of pre-defined hash sets or you can import custom hash sets. The pre-defined hash sets
contain a body of MD5 and SHA1 hash values computed from electronic files that are gathered and cataloged by
several US federal government agencies.
See About KFF Pre-Defined Hash Libraries on page 110.
Higher Level Structure and Usage
Because hash set groups have the properties just described, and because custom hash sets and groups can be
defined by the investigator, the KFF mechanism can be leveraged in creative ways. For example, the
investigator may define a group of hash sets created from encryption software and another group of hash sets
created from child pornography files and then apply only those groups while processing.

Getting Started with KFF (Known File Filter) About the KFF Server and Geolocation | 93
About the KFF Server and Geolocation
In order to use the Geolocation Visualization feature in various AccessData products, you must use the KFF
architecture and do the following:
-Install the KFF Server.
See Installing the KFF Server on page 94.
-Install the Geolocation (GeoIP) Data (this data provide location data for evidence)
See Installing the Geolocation (GeoIP) Data on page 104.
From time to time, there will be updates available for the GeoIP data.
See Installing KFF Updates on page 109.
If you are upgrading to 5.6 or later from an application 5.5 or earlier, you must install the new KFF Server and the
updated Geolocation data.
Getting Started with KFF (Known File Filter) Installing the KFF Server | 94
Installing the KFF Server
About Installing the KFF Server
In order to use KFF, you must first install and configure a KFF Server.
For product versions 5.6.x and 6.0.x and later, you install a KFF Server by installing the AccessData
Elasticsearch Windows Service.
Where you install the KFF Server depends on the product you are using with KFF:
-For FTK and FTK Pro applications, the KFF Server must be installed on the same computer that runs the
FTK Examiner application.
-For all other applications, such as AD Lab, Summation, or eDiscovery, the KFF Server can be installed on
either the same computer as the application or on a remote computer. For large environments, it is
recommended that the KFF Server be installed on a dedicated computer.
Once the KFF components are installed, they will be accessible via the Windows Start Menu, as well as through
FTK in the Manage menu.
Note: KFF components will only be available in the Windows Start Menu on the computer where they are
physically installed.
After installing the KFF Server, you configure the application with the location of the KFF Server.
See Configuring the Location of the KFF Server on page 96.
About KFF Server Versions
The KFF Server (AccessData Elasticsearch Windows Service) may be updated from time to time. It is best to
use the latest version.
For applications 5.5 and earlier, the KFF Server component was version 1.2.7 and earlier.
AccessData
Elasticsearch
Windows Service
Released Installation Instructions
Version 1.3.2.x -November 2014 with
5.6 versions of
FTK-based products
Summation
eDiscovery
-November 2015 with
6.0 versions of
FTK-based products
Summation
eDiscovery
See Installing the KFF Server Service on page 95.

Getting Started with KFF (Known File Filter) Installing the KFF Server | 95
About Upgrading from Earlier Versions
If you have used KFF with applications versions 5.5 and earlier, you can migrate your legacy KFF data to the
new architecture.
See Migrating Legacy KFF Data on page 97.
Process for Installing KFF
The process for installing KFF is as follows:
1. Downloading the Latest KFF Installation Files (page 95)
2. Installing the KFF Server Service (page 95)
3. Configuring the KFF Server location:
-Configuring the KFF Server Location on FTK-based Computers (page 96)
-Configuring the KFF Server Location on Summation and eDiscovery Applications (page 96)
4. (Optional) Upgrading or importing KFF data.
-See Migrating Legacy KFF Data on page 97.
-About Importing KFF Data (page 98)
-Importing Pre-defined KFF Data Libraries (page 101)
-Installing the Geolocation (GeoIP) Data (page 104)
Downloading the Latest KFF Installation Files
You can download ISO files which has the latest KFF files. Files may be updated from time to time.
To download the latest KFF Installation Files
1. Go to the AccessData Current Releases - Digital Forensics product download page.
You can also download the file from the FTK or AD Lab product download pages.
2. Click Known File Filter (KFF) Compatible with 5.6 and above.
3. Do one of the following:
-To download the KFF Server files, utilities, and NSRL data, click KFF for all 6.0 products.
-To download the DHS library, click KFF DHS.
-To download the NDIC library, click KFF NDIC.
4. Click Download Now.
Installing the KFF Server Service
The KFF Server Service is install by installing the AccessData Elasticsearch Windows Service
For instructions on installing the AccessData Elasticsearch Windows Service, see Installing the Elasticsearch
Service (page 384).

Getting Started with KFF (Known File Filter) Configuring the Location of the KFF Server | 96
Configuring the Location of the KFF Server
After installing the KFF Server, on the computer running the application, such as FTK, AD Lab, Summation, or
eDiscovery, you configure the location of the KFF Server.
Do one of the following:
-Configuring the KFF Server Location on FTK-based Computers (page 96)
-Configuring the KFF Server Location on Summation and eDiscovery Applications (page 96)
Configuring the KFF Server Location on FTK-based Computers
Before using KFF with FTK, FTK Pro, Lab, or Enterprise, with KFF, you must configure the location of the KFF
Server.
Important:
To configure KFF, you must be logged in with Admin privileges.
To view or edit KFF configuration settings
1. In the Case Manager, click Tools > Preferences > Configure KFF.
2. You can set or view the address of the KFF Server.
-If you installed the KFF Server on the same computer as the application, this value will be localhost.
-If you installed the KFF Server on a different computer, identify the KFF server.
3. Click Test to validate communication with the KFF Server.
4. Click Save.
5. Click OK.
Configuring the KFF Server Location on Summation and eDiscovery
Applications
When using the KFF Server with Summation or eDiscovery applications, two configuration files must point to the
KFF Server location.
These setting are configured automatically during the KFF Server installation. If needed, you can verify the
settings.
However, if you change the location of the KFF Server, do the following to specify the location of the KFF Server.
1. Configure AdgWindowsServiceHost.exe.config:
1a. On the computer running the application (for example, the server running Summation), go to
C:\Program Files\AccessData\Common\FTK Business Services.
1b. Open AdgWindowsServiceHost.exe.config.
1c. Modify the line <add key="KffElasticSearchUrl" value="http://localhost:9200" />.
1d. Change localhost to be the location of your KFF server (you can use hostname or IP).
1e. Save and close file.
1f. Restart the business services common service.
2. Configure AsyncProcessingServices web.config:

Getting Started with KFF (Known File Filter) Migrating Legacy KFF Data | 97
2a. On the computer running the application (for example, the server running Summation), go to
C:\Program Files\AccessData\AsyncProcessingServices.
2b. Open web.config.
2c. Modify the line <add key="KffElasticSearchUrl" value="http://localhost:9200" />.
2d. Change localhost to be the location of your KFF server (you can use hostname or IP).
2e. Save and close file.
2f. Restart the AsyncProcessing service.
Migrating Legacy KFF Data
If you have used KFF with applications versions 5.5 and earlier, you can migrate that data from the legacy KFF
Server to the new KFF Server architecture.
Important:
Applications version 5.6 and later can only use the new KFF architecture that was introduced in 5.6.
If you want to use KFF data from previous versions, you must migrate the data.
Important:
If you have NSRL, NDIC, or DHS data in your legacy data, those sets will not be migrated. You must
re-import them using the 5.6 versions or later of those libraries. Only legacy custom KFF data will be
migrated.
Legacy KFF data is migrated to KFF Groups and Hash Sets on the new KFF Server.
Because KFF Templates are no longer used, they will be migrated as KFF Groups, and the groups that were
under the template will be added as sub-groups.
You migrate data using the KFF Migration Tool. To use the KFF Migration Tool, you identify the following:
-The Storage Directory folder where the legacy KFF data is located.
This was folder was configured using the KFF Server Configuration utility when you installed the legacy
KFF Server. If needed, you can use this utility to view the KFF Storage Directory. The default location of
the KFF_Config.exe file is Program Files\AccessData\KFF.
-The URL of the new KFF Server (the computer running the AccessData Elastic Search Windows Service)
This is populated automatically if the new KFF Server has been installed.
To install the KFF Migration Tool
1. On the computer where you have installed the KFF Server, access the KFF Installation disc, and run the
autorun.exe.
2. Click the 64 bit or 32 bit Install KFF Migration Utility.
3. Complete the installation wizard.
To migrate legacy KFF data
1. On the legacy KFF Server, you must stop the KFF Service.
You can stop the service manually or use the legacy KFF Config.exe utility.
2. On the new KFF Server, launch the KFF Migration Tool.
3. Enter the directory of the legacy KFF data.
4. The URL of Elasticsearch should be listed.
5. Click Start.
6. When completed, review the summary data.
Getting Started with KFF (Known File Filter) Importing KFF Data | 98
Importing KFF Data
About Importing KFF Data
You can import hashes and KFF Groups that have been previous configured.
You can import KFF data in one of the following formats:
KFF Data sources that you can import
Source Description
Pre-configured KFF libraries You can import KFF data from the following pre-configured libraries
-NIST NSRL
-NDIC HashKeeper
-DHS
To import KFF libraries, it is recommended that you use the KFF Import
Utility.
See Using the KFF Import Utility on page 99.
See Importing Pre-defined KFF Data Libraries on page 101.
See KFF Library Reference Information on page 110.
Custom Hash Sets and KFF
Groups
You can import custom hashes from CSV files.
See About the CSV Format on page 105.
For FTK-based products, you can also import custom hashes from the
following file types:
-Delimited files (CSV or TSV)
-Hash Database files (HDB)
-Hashkeeper files (HKE)
-FTK Exported KFF files (KFF)
-FTK Supported XML files (XML)
-FTK Exported Hash files (HASH)
To import these kinds of files, use the KFF Import feature in your
application.
See Using the Known File Feature chapter.
KFF binary files You can import KFF data that was exported in a KFF binary format, such as
an archive of a KFF Server.
See About CSV and Binary Formats on page 105.
When you import a KFF binary snapshot, you must be running the same
version of the KFF Server as was used to create the binary export.
To import KFF binary files, it is recommend that you use the KFF Import
Utility.
See Using the KFF Import Utility on page 99.

Getting Started with KFF (Known File Filter) Importing KFF Data | 99
About KFF Data Import Tools
When you import KFF data, you can use one of two tools:
About Default Status Values
When you import KFF data, you configure a default status value of Alert or Ignore. When adding Hash Sets to
KFF Groups, you can configure the KFF Groups to use the default status values of the Hash Set or you can
configure the KFF Group with a status that will override the default Hash Set values.
See Components of KFF Data on page 89.
About Duplicate Hashes
If multiple Hash Set files containing the same Hash identifier are imported into a single KFF Group, the group
keeps the last Hash Set’s metadata information, overwriting the previous Hash Sets’ metadata. This only
happens within an individual group and not across multiple groups.
Using the KFF Import Utility
About the KFF Import Utility
Due to the large size of some KFF data, a stand-alone KFF Import utility is available to use to import the data.
This KFF Import utility can import large amounts of data faster then using the import feature in the application.
It is recommend that you install and use the KFF Import utility to import the following:
-NSRL, DHC, and NIST libraries
-An archive of a KFF Server that was exported in the binary format
After importing NSRL, NDIC, or DHS libraries, these indexes are displayed in the Currently Installed Sets list.
See Components of KFF Data on page 89.
You can also use the KFF Import Utility to remove the NSRL, NDIC, or DHS indexes that you have imported.
An archive of a KFF Server, which is the exported KFF Index, is not shown in the list.
KFF Data Import Tools
The application’s Import
feature
The KFF management feature in the application lets you import both .CSV and
KFF Binary formats. Use the application to import .CSV files.
See Using the Known File Feature chapter.
Even though you can import KFF binary files using the application, it is
recommend that you use the KFF Import Utility.
KFF Import Utility It is recommended that you use the KFF Import Utility to import KFF binary files.
See Using the KFF Import Utility on page 99.

Getting Started with KFF (Known File Filter) Importing KFF Data | 100
Installing the KFF Import Utility
You should use the KFF Import Utility to import some kinds of KFF data.
To install the KFF Import Utility
1. On the computer where you have installed the KFF Server, access the KFF Installation disc, and run the
autorun.exe.
2. Click the 64 bit or 32 bit Install KFF Import Utility.
3. Complete the installation wizard.
Importing a KFF Server Archive Using the KFF Import Utility
You can import an archive of a KFF Server that you have exported using the binary format.
If you are importing a pre-defined KFF Library, see Importing Pre-defined KFF Data Libraries (page 101).
To import using the KFF Import Utility
1. On the KFF Server, open the KFF Import Utility.
2. To test the connection to the KFF Server’s Elasticsearch service at the displayed URL, click Connect.
If it connects correctly, no error is shown.
If it is not able to connect, you will get the following error: Failed after retrying 10 times: ‘HEAD
accessdata_threat_indicies’.
3. To import, click Import.
4. Click Browse.
5. Browse to the folder that contains the KFF binary files.
Specifically, select the folder that contains the Export.xml file.
6. Click Start.
7. Close the dialog.
Removing Pre-defined KFF Libraries Using the KFF Import Utility
You can remove a pre-defined KFF Library that you have previously imported.
You cannot see or remove existing custom KFF data (the KFF Index).
To remove pre-defined KFF Libraries
1. On the KFF Server, open the KFF Import Utility.
2. Select the library that you want to remove.
3. Click Remove.

Getting Started with KFF (Known File Filter) Importing KFF Data | 101
Importing Pre-defined KFF Data Libraries
About Importing Pre-defined KFF Data Libraries
After you install the KFF Server, you can import pre-defined NIST NSRL, NDIC HashKeeper, and DHS data
libraries.
See About Pre-defined KFF Hash Libraries on page 91.
In versions 5.5 and earlier, you installed these using an executable file. In versions 5.6 and later, you must import
them. It is recommend that you use the KFF Import Utility.
After importing pre-defined KFF Libraries, you can remove them from the KFF Server.
See Removing Pre-defined KFF Libraries Using the KFF Import Utility on page 100.
See the following sections:
-About Importing the NIST NSRL Library (page 102)
-Importing the NDIC Hashkeeper Library (page 103)
-Importing the DHS Library (page 104)
Getting Started with KFF (Known File Filter) Importing KFF Data | 102
About Importing the NIST NSRL Library
You can import the NSRL library into your KFF Server. During the import, two KFF Groups are created:
NSRL_Alert and NSRL_Ignore. In FTK-based products, these two groups are automatically added to the Default
KFF Group.
The NSRL libraries are updated from time to time. To import and maintain the NSRL data, you do the following:
Process for Importing and Maintaining the NIST NSRL Library
1. Import the complete
NSRL library.
You must first install the most current complete NSRL library. You can later add
updates to it.
To access and import the complete NSRL library, see
Importing the Complete NSRL Library (page 103)
2. Import updates to the
library
When updates are made available, import the updates to bring the data up-to
date.
See Installing KFF Updates on page 109.
Important: In order to use the NSRL updates, you must first import the complete
library. When you install an NSRL update, you must keep the previous NSRL
versions installed in order to maintain the complete set of NSRL data.
Available NRSL library files (new format)
NSRL Library
Release Released Information
Complete library
version 2.45
(source .ZIP file)
Nov 2014 For use only with applications version 5.6 and later.
Contains the full NSRL library up through update 2.45.
See Importing the Complete NSRL Library on page 103.
Available Legacy NRSL library files
Legacy NSRL
Library Release Released Information
version 2.44
(.EXE file)
Nov 2013 For use with the legacy KFF Server that was used with
applications versions 5.5 and earlier.
Contains the full NSRL library up through update 2.44.
Install this library first.
Note: NSRL updates for the legacy KFF format will end in the
2nd quarter of 2015. From that time, NSRL updates will only
be provided in the new format.

Getting Started with KFF (Known File Filter) Importing KFF Data | 103
Importing the Complete NSRL Library
To add the NSRL library to your KFF Library, you import the data. You start by importing the full NSRL library.
You can then import any updates as they are available.
See About Importing the NIST NSRL Library on page 102.
See Installing KFF Updates on page 109.
Important:
The complete NSRL library data is contained in a large (3.4 GB) .ZIP file. When expanded, the data
is about 18 GB. Make sure that your file system can support files of this size.
Important:
Due to the large amount of NSRL data, it will take 3-4 hours to import the NSRL data using the KFF
Import Utility. If you import from within an application, it will take even longer.
To install the NSRL complete library
1. Extract the NSRLSOURCE_2.45.ZIP file from the KFF Installation disc.
See Downloading the Latest KFF Installation Files on page 95.
2. On the KFF Server, launch the KFF Import Utility.
See Installing the KFF Import Utility on page 100.
3. Click Import.
4. Click Browse.
5. Browse to and select the NSRLSource_2.45 folder that contains the NSRLFile.txt file.
(Make sure you are selecting the folder and not drilling into the folder to select an individual file. The
import process will drill into the folder to get the proper files for you.)
6. Click Select Folder.
7. Click Start.
8. When the import is complete, click OK.
9. Close the Import Utility dialog and the NSRL library will be listed in the Currently Installed Sets.
Importing the NDIC Hashkeeper Library
You can import the Hashkeeper 9.08 library.
For application versions 5.6 and later, these files are stored in the KFF binary format.
To import the Hashkeeper library
1. Have access the NDIC source files by download the ZIP file from the web:
See Downloading the Latest KFF Installation Files on page 95.
2. Extract the ZIP file.
3. On the KFF Server, launch the KFF Import Utility.
See Installing the KFF Import Utility on page 100.
4. Click Import.
5. Click Browse.
6. Browse to and select the NDIC source folder that contains the Export.xml file.
(Make sure you are selecting the folder and not drilling into the folder to select an individual file. The
import process will drill into the folder to get the proper files for you.)
7. Click Select Folder.

Getting Started with KFF (Known File Filter) Importing KFF Data | 104
8. Click Start.
9. When the import is complete, click OK.
10. Close the Import Utility dialog and the NDIC library will be listed in the Currently Installed Sets.
Importing the DHS Library
You can import the DHS 1.08 library.
For application versions 5.6 and later, these files are stored in the KFF binary format.
To import the DHS library
1. Have access the NDIC source files by download the ZIP file from the web:
See Downloading the Latest KFF Installation Files on page 95.
2. Extract the ZIP file.
3. On the KFF Server, launch the KFF Import Utility.
See Installing the KFF Import Utility on page 100.
4. Click Import.
5. Click Browse.
6. Browse to and select the DHS source folder that contains the Export.xml file.
(Make sure you are selecting the folder and not drilling into the folder to select an individual file. The
import process will drill into the folder to get the proper files for you.)
7. Click Select Folder.
8. Click Start.
9. When the import is complete, click OK.
10. Close the Import Utility dialog and the DHS library will be listed in the Currently Installed Sets.
Installing the Geolocation (GeoIP) Data
Geolocation (GeoIP) data is used for the Geolocation Visualization feature of several AccessData products.
See About the KFF Server and Geolocation on page 93.
You can also check for and install GeoIP data updates.
If you are upgrading to 5.6 or later from an application 5.5 or earlier, you must install the new KFF Server and the
updated Geolocation data.
The Geolocation data that was used with versions 5.5 and earlier is version 1.0.1 or earlier.
The Geolocation data that is used with versions 5.6 and later is version 2014.10 or later.
To install the Geolocation IP Data
1. On the computer where you have installed the KFF Server, access the KFF Installation disc, and run the
autorun.exe.
See Downloading the Latest KFF Installation Files on page 95.
2. Click the 64 bit or 32 bit Install Geolocation Data.
3. Complete the installation wizard.

Getting Started with KFF (Known File Filter) About CSV and Binary Formats | 105
About CSV and Binary Formats
When you export and import KFF data, you can use one of two formats:
-CSV
-KFF Binary
About the CSV Format
When you use the .CSV format, you use a single .CSV file. The .CSVfile contains the hashes that you import or
export.
When you export to a CSV file, it contains the hashes as well as all of the information about any associated Hash
Sets and KFF Groups. You can only use the CSV format when exporting individual Hash Sets and KFF Groups.
When you import using a CSV file, it can be a simple file containing only the hashes of files, or it can contain
additional information about Hash Sets and KFF Groups.
However, CSV files will usually take a little longer to export and import.
To view the sample of a .CSV file that contains binaries and Hash Sets and KFF Groups, perform a CSV export
and view the file in Excel.
You can also use the format of CSV files that were exported in previous versions.
To import .CSV files, use the application’s KFF Import feature.
About the KFF Binary Format
When you use the KFF binary format, you use a set of files that are in an internal KFF Server (Elasticsearch)
format that is referred to as a Snapshot. The binary format is essentially a snapshot of one of the indices
contained in the KFF Server. You can only have one binary format snapshot for each index.
See Components of KFF Data on page 89.
The benefit of the binary format is that it is able to support larger amounts of data than the CSV format. For large
data sets, the binary format will export and import faster than the CSV format.
For example, when you import the DHC or NDIC Hashkeeper libraries, they are imported from a KFF binary
format.
If you export your custom Hash Sets or KFF Groups using the KFF binary format, everything in the KFF Index is
included.
See About Choosing to Export in CSV or KFF Binary Format on page 106.
When exporting in a Binary format, you specify an existing parent folder and then the name of a new sub-folder
for the binary data. The new sub-folder must not previously exist and will be created by the export process.
After export, the binary export folder contains the following:
-Indices sub-folder - The folder contains the exported KFF data
-Export.xml - This file is the only file that is not an Elasticsearch file and is created by the export feature
and contains the KFF Group and Hash Set definitions for the index.
Getting Started with KFF (Known File Filter) About CSV and Binary Formats | 106
-Index - an index file generated by Elasticsearch
-metadata-snaphot file with the data and time it was created
-snapshot-snaphot file with the data and time it was created
Note: The binary format is dependent on the version of the KFF Server. When exporting and importing the
binary format, the systems must be using the same version of the KFF Server.
When new versions of the KFF Server are released in the future, an upgrade process will also be
provided.
About Choosing to Export in CSV or KFF Binary Format
When you export your own KFF data, you have the option of using either the CSV or the binary format. The
results are different based on the format that you use:
CSV format
Exporting in
CSV format
When you export KFF data using the CSV format, you can export specific pieces
of KFF data, such as one or more Hash Sets or one or more KFF Groups.
The exported data is contained in one .CSV file.
The benefits of the CSV format are that CSV files can be easily viewed and can
be manually edited. They are also less dependent on the version of the KFF
Server.
Importing
from CSV
format
When you import a CSV file, the data in the file is data is added to your existing
KFF data that is in the KFF Index.
See Components of KFF Data on page 89.
For example, suppose you started by manually created four Hash Sets and one
KFF Group. That would be the only contents in your KFF Index. Suppose you
import a .CSV file that contains five hash sets and two KFF Groups. They will be
added together for a total of nine Hash Sets and three KFF Groups.
To import .CSV files, use the KFF Import feature in your application.
See Using the Known File Feature chapter.
KFF binary format
Exporting in
KFF binary
format
If you export your KFF data using the KFF binary format, all of the data that you
have in the KFF Index will be exported together. You cannot use this format to
export individual Hash Sets or KFF Groups.
See Components of KFF Data on page 89.
You will only want to use this format if you intend to export all of the data in the
KFF Index and import it as a whole. This can be useful in making an archive of
your KFF data or copying KFF data from one KFF Server to another.
Because NSRL, NIST, and DHC data is contained in their own indexes, when you
do an export using this format, those sets are not included. Only the data in the
KFF Index is exported.

Getting Started with KFF (Known File Filter) About CSV and Binary Formats | 107
Importing KFF
binary format
IMPORTANT: When you import a KFF binary format, it will import the complete
index and will replace any data that is currently in that index on the KFF Server.
For example, if you import the DHC library, and then later you import the DHC
library again, the DHC index will be replaced with the new import.
If you have a KFF binary format snapshot of custom KFF data (which would have
come from a binary format export) it will replace all KFF data that already exists in
your KFF Index.
For example, suppose you manually created four Hash Sets and one KFF Group.
Suppose you then import a binary format that has five hash sets and two KFF
Groups. The binary format will be imported as a complete index and will replace
the existing data. The result will be only be the imported five Hash Sets and two
KFF libraries.
When importing KFF binary files, it is recommend that you use the KFF Import
Utility.
See Installing the KFF Import Utility on page 100.
Getting Started with KFF (Known File Filter) Uninstalling KFF | 108
Uninstalling KFF
You can uninstall KFF application components independently of the KFF Data.
Main version Description
Applications 5.6
and later
For applications version 5.6 and later, you uninstall the following components:
-AccessData Elasticsearch Windows Service (KFF Server) v1.2.7 and later
Note: Elasticsearch is used by multiple features in various applications, use caution
when uninstalling this service or the related data.
-AccessData KFF Import Utility (v5.6 and later)
-AccessData KFF Migration Tool (v1.0 and later)
-AccessData Geo Location Data (v2014.10 and later)
Note: This component is not used by the KFF feature, but with the KFF Server for the
geolocation visualization feature.
The location of the KFF data is configured when the AccessData Elasticsearch Windows
Service was installed. By default, it is lactated at
C:\Program Files\AccessData\Elacticsearch\Data.
Applications 5.5
and earlier
For applications version 5.5 and earlier, you can uninstall the following components:
-KFF Server (v1.2.7 and earlier)
Note: The KFF Server is also used by the geolocation visualization feature.
-AccessData Geo Location Data (1.0.1 and earlier)
This component is not used by the KFF feature, but with the KFF Server for the geolo-
cation visualization feature.
The location of the KFF data was configured when the KFF Server was installed. You can
view the location of the data by running the KFF.Config.exe on the KFF Server.
If you are upgrading from 5.5 to 5.6, you can migrate your KFF data before uninstalling the
KFF Server.

Getting Started with KFF (Known File Filter) Installing KFF Updates | 109
Installing KFF Updates
From time to time, AccessData will release updates to the KFF Server and the KFF data libraries.
Some of the KFF data updates may require you to update the version of the KFF Server.
To check for updates, do the following:
1. Go to the KFF product download page.
See Downloading the Latest KFF Installation Files on page 95.
2. Check for updates.
-See About KFF Server Versions on page 94.
-See About Importing the NIST NSRL Library on page 102.
3. If there are updates, download them.
4. Install or import the updates.

Getting Started with KFF (Known File Filter) KFF Library Reference Information | 110
KFF Library Reference Information
About KFF Pre-Defined Hash Libraries
This section includes a description of pre-defined hash collections that can be added as AccessData KFF data.
The following pre-defined libraries are currently available for KFF and come from one of three federal
government agencies:
-NIST NSRL (The default library installed with KFF)
-NDIC HashKeeper (An optional library that can be downloaded from the AccessData Downloads page)
-DHS (An optional library that can be downloaded from the AccessData Downloads page)
Note: Because KFF is now multi-sourced, it is no longer maintained in HashKeeper format. Therefore, you
cannot modify KFF data in the HashKeeper program. However, the HashKeeper format continues to be
compatible with the AccessData KFF data.
Use the following information to help identify the origin of any hash set within the KFF
-The NSRL hash sets do not begin with “ZZN” or “ZN”. In addition, in the AD Lab KFF, all the NSRL hash
set names are appended (post-fixed) with multi-digit numeric identifier. For example: “Password Manager
& Form Filler 9722.”
-All HashKeeper Alert sets begin with “ZZ”, and all HashKeeper Ignore sets begin with “Z”. (There are a
few exceptions. See below.) These prefixes are often followed by numeric characters (“ZZN” or “ZN”
where N is any single digit, or group of digits, 0-9), and then the rest of the hash set name. Two examples
of HashKeeper Alert sets are:
“ZZ00001 Suspected child porn”
“ZZ14W”
An example of a HashKeeper Ignore set is:
“Z00048 Corel Draw 6”
-The DHS collection is broken down as follows:
In 1.81.4 and later there are two sets named “DHS-ICE Child Exploitation JAN-1-08 CSV” and
“DHS-ICE Child Exploitation JAN-1-08 HASH”.
In AD Lab there is just one such set, and it is named “DHS-ICE Child Exploitation JAN-1-08”.
Once an investigator has identified the vendor from which a hash set has come, he/she may need to consider
the vendor’s philosophy on collecting and categorizing hash sets, and the methods used by the vendor to gather
hash values into sets, in order to determine the relevance of Alert (and Ignore) hits to his/her project. The
following descriptions may be useful in assessing hits.
Getting Started with KFF (Known File Filter) KFF Library Reference Information | 111
NIST NSRL
The NIST NSRL collection is described at: http://www.nsrl.nist.gov/index.html. This collection is much larger than
HashKeeper in terms of the number of sets and the total number of hashes. It is composed entirely of hash sets
being generated from application software. So, all of its hash sets are given Ignore status by AccessData staff
except for those whose names make them sound as though they could be used for illicit purposes.
The NSRL collection divides itself into many sub-collections of hash sets with similar names. In addition, many of
these hash sets are “empty”, that is, they are not accompanied by any hash values. The size of the NSRL
collection, combined with the similarity in set naming and the problem of empty sets, allows AccessData to
modify (or selectively alter) NSRL’s own set names to remove ambiguity and redundancy.
Find contact info at http://www.nsrl.nist.gov/Contacts.htm.
NDIC HashKeeper
NDIC’s HashKeeper collection uses the Alert/Ignore designation. The Alert sets are hash values contributed by
law enforcement agents working in various jurisdictions within the US - and a few that apparently come from
Luxemburg. All of the Alert sets were contributed because they were believed by the contributor to be connected
to child pornography. The Ignore sets within HashKeeper are computed from files belonging to application
software.
During the creation of KFF, AccessData staff retains the Alert and Ignore designations given by the NDIC, with
the following exceptions. AccessData labels the following sets Alert even though HashKeeper had assigned
them as Ignore: “Z00045 PGP files”, “Z00046 Steganos”, “Z00065 Cyber Lock”, “Z00136 PGP Shareware”,
“Z00186 Misc Steganography Programs”, “Z00188 Wiping Programs”. The names of these sets may
suggest the intent to conceal data on the part of the suspect, and AccessData marks them Alert with the
assumption that investigators would want to be “alerted” to the presence of data obfuscation or elimination
software that had been installed by the suspect.
The following table lists actual HashKeeper Alert Set origins:
A Sample of HashKeeper KFF Contributions
Hash Contributor Location Contact Information Case/Source
ZZ00001
Suspected child
porn
Det. Mike McNown
& Randy Stone
Wichita PD
ZZ00002
Identified Child
Porn
Det. Banks Union County
(NJ) Prosecutor's
Office
(908) 527-4508 case 2000S-0102
ZZ00003
Suspected child
porn
Illinois State Police
ZZ00004
Identified Child
Porn
SA Brad Kropp,
AFOSI, Det 307
(609) 754-3354 Case # 00307D7-
S934831
Getting Started with KFF (Known File Filter) KFF Library Reference Information | 112
ZZ00000,
suspected child
porn
NDIC
ZZ00005
Suspected Child
Porn
Rene Moes,
Luxembourg Police
rene.moes@police.eta
t.lu
ZZ00006
Suspected Child
Porn
Illinois State Police
ZZ00007b
Suspected KP
(US Federal)
ZZ00007a
Suspected KP
Movies
ZZ00007c
Suspected KP
(Alabama 13A-12-
192)
ZZ00008
Suspected Child
Pornography or
Erotica
Sergeant Purcell Seminole County
Sheriff's Office
(Orlando, FL,
USA)
(407) 665-6948,
dpurcell@seminoleshe
riff.org
suspected child
pornogrpahy from
20010000850
ZZ00009 Known
Child
Pornography
Sergeant Purcell Seminole County
Sheriff's Office
(Orlando, FL,
USA)
(407) 665-6948,
dpurcell@seminoleshe
riff.org
200100004750
ZZ10 Known Child
Porn
Detective Richard
Voce CFCE
Tacoma Police
Department
(253)594-7906,
rvoce@ci.tacoma.wa.u
s
ZZ00011
Identified CP
images
Detective Michael
Forsyth
Baltimore County
Police
Department
(410)887-1866,
mick410@hotmail.com
ZZ00012
Suspected CP
images
Sergeant Purcell Seminole County
Sheriff's Office
(Orlando, FL,
USA)
(407) 665-6948,
dpurcell@seminoleshe
riff.org
ZZ0013 Identified
CP images
Det. J. Hohl Yuma Police
Department
928-373-4694 YPD02-70707
A Sample of HashKeeper KFF Contributions (Continued)
Hash Contributor Location Contact Information Case/Source
Getting Started with KFF (Known File Filter) KFF Library Reference Information | 113
The basic rule is to always consider the source when using KFF in your investigations. You should consider the
origin of the hash set to which the hit belongs. In addition, you should consider the underlying nature of hash
values in order to evaluate a hit’s authenticity.
ZZ14W Sgt Stephen May
Tamara.Chandler@oa
g.state.tx.us,
(512)936-2898
TXOAG
41929134
ZZ14U Sgt Chris Walling
Tamara.Chandler@oa
g.state.tx.us,
(512)936-2898
TXOAG
41919887
ZZ14X Sgt Jeff Eckert
Tamara.Chandler@oa
g.state.tx.us,
(512)936-2898
TXOAG Internal
ZZ14I Sgt Stephen May
Tamara.Chandler@oa
g.state.tx.us,
(512)936-2898
TXOAG
041908476
ZZ14B Robert Britt, SA,
FBI
Tamara.Chandler@oa
g.state.tx.us,
(512)936-2898
TXOAG
031870678
ZZ14S Sgt Stephen May
Tamara.Chandler@oa
g.state.tx.us,
(512)936-2898
TXOAG
041962689
ZZ14Q Sgt Cody Smirl
Tamara.Chandler@oa
g.state.tx.us,
(512)936-2898
TXOAG
041952839
ZZ14V Sgt Karen McKay
Tamara.Chandler@oa
g.state.tx.us,
(512)936-2898
TXOAG
41924143
ZZ00015 Known
CP Images
Det. J. Hohl Yuma Police
Department
928-373-4694 YPD04-38144
ZZ00016 Marion County
Sheriff's
Department
(317) 231-8506 MP04-0216808
A Sample of HashKeeper KFF Contributions (Continued)
Hash Contributor Location Contact Information Case/Source
Getting Started with KFF (Known File Filter) KFF Library Reference Information | 114
Higher Level KFF Structure and Usage
Since hash set groups have the properties just described (and because custom hash sets and groups can be
defined by the investigator) the KFF mechanism can be leveraged in creative ways. For example:
-You could define a group of hash sets created from encryption software and another group of hash sets
created from child pornography files. Then, you would apply only those groups while processing.
-You could also use the Ignore status. You are about to process a hard drive image, but your search
warrant does not allow inspection of certain files within the image that have been previously identified.
You could do the following and still observe the warrant:
4a. Open the image in Imager, navigate to each of the prohibited files, and cause an MD5 hash value
to be computed for each.
4b. Import these hash values into custom hash sets (one or more), add those sets to a custom group,
and give the group Ignore status.
4c. Process the image with the MD5 and KFF options, and with AD_Alert, AD_Ignore, and the new,
custom group selected.
4d. During post-processing analysis, filter file lists to eliminate rows representing files with Ignore
status.
Hash Set Categories
The highest level of the KFF’s logical structure is the categorizing of hash sets by owner and scope. The
categories are AccessData, Project Specific, and Shared.
Important:
Coordination among other investigators is essential when altering Shared groups in a lab
deployment. Each investigator must consider how other investigators will be affected when Shared
groups are modified.
Hash Set Categories
Category Description
AccessData The sets shipped with as the Library. Custom groups can be created from these sets, but
the sets and their status values are read only.
Project
Specific
Sets and groups created by the investigator to be applied only within an individual project.
Shared Sets and groups created by the investigator for use within multiple projects all stored in the
same database, and within the same application schema.
Getting Started with KFF (Known File Filter) What has Changed in Version 5.6 | 115
What has Changed in Version 5.6
WIth the 5.6 release of eDiscovery, Summation, and FTK-based products, the KFF feature has been updated.
If you used KFF with applications version 5.5 or earlier, you will want to be aware of the following changes in the
KFF functionality.
Changes from version 5.5 to 5.6
Item Description
KFF Server KFF Server now runs a different service.
-In 5.5 and earlier, the KFF Server ran as the KFF Server service.
-In 5.6 and later, the KFF Server uses the AccessData Elasticsearch Windows
Service.
For applications version 5.6 and later, all KFF data must be created in or
imported into the new KFF Server.
KFF Migration Tool This is a new tool that lets you migrate custom KFF data from 5.5 and earlier to
the new KFF Server.
NIST NSRL, NDIC HashKeeper, or DHS library data from 5.5 will not be
migrated. You must re-import it.
See Migrating Legacy KFF Data on page 97.
KFF Import Utility This is a new utility that lets you import large amounts of KFF data quicker than
using the import feature in the application.
See Using the KFF Import Utility on page 99.
KFF Libraries, Templates,
and Groups
In 5.5, all Hash Sets were configured within KFF Libraries. KFF Libraries could
then contain KFF Groups and KFF Templates.
KFF Libraries and Templates have been eliminated. You now simply create or
import KFF Groups and add Hash Sets to the groups.
You can now nest KFF Groups.
NIST NSRL, NDIC
HashKeeper, or DHS
libraries
In 5.5 and earlier, to use these libraries, you ran an installation wizard for each
library. You now import these libraries using the KFF Import Utility.
See About Importing Pre-defined KFF Data Libraries on page 101.
Import Log FTK-based products no longer include the Import Log.
eDiscovery and Summation products did not have it previously.
Export When you export KFF data you can now choose two formats:
-CSV format which replaced XML format
-A new binary format
See About CSV and Binary Formats on page 105.
Using De-NIST (Known File Filter) About KFF and De-NIST Terminology | 116
Chapter 10
Using De-NIST (Known File Filter)
This chapter explains how to configure and use De-NIST and has the following sections:
-See About KFF and De-NIST Terminology on page 116.
-See Process for Using De-NIST on page 117.
-See Configuring De-NIST Permissions on page 117.
-See Adding Hashes to the KFF Server on page 118.
-See Using De-NIST Groups to Organize Hash Sets on page 124.
-See Exporting De-NIST Data on page 135.
-See Enabling a Project to Use De-NIST on page 128.
-See Reviewing De-NIST Results on page 130.
-See Re-Processing De-NIST on page 134.
About KFF and De-NIST Terminology
You can configure the interface to display either the term “KFF” (Known File Filter) or “De-NIST”. For example,
this can change references of a “KFF Group” to a “De-NIST Group.”
This does not affect the functionality of De-NIST, but only the term that is displayed. This allows users in forensic
environments to see the term “KFF” while users in legal environments can see the term “De-NIST.”
By default, the KFF term is used in the interface.
This setting only affects text in the interface. The following new icon is used with either setting:
In this manual, the De-NIST term is used.
To change the KFF and De-NIST terminology
1. In the web.config file, in the <ReviewOptions> section, add or modify the following entry:
<add key="KFFAlternateName" value="KFF" />
2. To change the setting to use De-NIST terminology, change the value= from “KFF” to “De-NIST”.
Using De-NIST (Known File Filter) Process for Using De-NIST | 117
Process for Using De-NIST
To use the De-NIST feature, you perform the following steps:
Configuring De-NIST Permissions
In order to create and manage De-NIST libraries, sets, templates, and groups, you must have one of the
following permissions:
-Administrator
-Manage KFF
You assign the Manage KFF permission to an Admin Role and then associate that role with users.
See Configuring and Managing System Users, User Groups, and Roles on page 47.
A user with project management permissions does not require the Manage KFF permission in order to enable
De-NIST for a new project.
Process for using De-NIST
Step 1. Install and configure the KFF Server.
See Installing the KFF Server on page 94.
Step 2. Configure De-NIST permissions.
Configuring De-NIST Permissions (page 117)
Step 3. Add and manage De-NIST hashes on the KFF Server.
See Adding Hashes to the KFF Server on page 118.
Step 4. Add and manage De-NIST Groups to organize De-NIST Hash Sets.
Using De-NIST Groups to Organize Hash Sets (page 124)
Step 5. Configure a project to use De-NIST.
See Enabling a Project to Use De-NIST on page 128.
Step 6. Review De-NIST results in Project Review.
See Reviewing De-NIST Results on page 130.
Step 7. (Optional) Re-process the De-NIST data using different hashes.
See Re-Processing De-NIST on page 134.
Step 8. (Optional) Archive or export KFF data to share with other KFF Servers.
See Exporting De-NIST Data on page 135.

Using De-NIST (Known File Filter) Adding Hashes to the KFF Server | 118
Adding Hashes to the KFF Server
You must add the hashes of the files that you want to compare against your evidence data. When adding hashes
to the De-NIST Serer, you add them in KFF Hash Sets.
See Components of KFF Data on page 89.
You can use the following methods to add hashes to the KFF Library:
About the Manage De-NIST Hash Sets Page
To configure De-NIST data, you use the De-NIST Hash Sets and De-NIST Groups pages.
To open the De-NIST Hash Sets page
1. Log in as an Administrator or user with Manage KFF permissions.
2. Click Management > Hash Sets
If the feature does not function properly, check the following:
-The KFF Server is installed.
See Installing the KFF Server on page 94.
-The application has been configured for the KFF Server.
See Configuring the Location of the KFF Server on page 96.
-The KFF Service is running.
In the Windows Services manager, make sure that the AccessData Elasticsearch service is started.
Migrate legacy De-NIST Server
data You can migrate legacy De-NIST data that is in a KFF Server in
applications versions 5.5 and earlier.
See Migrating Legacy KFF Data on page 97.
Import hashes You can import previously configured De-NIST hashes from .CSV files.
See Importing De-NIST Data on page 119.
Manually create and manage
Hash Sets You can manually add hashes to a Hash Set.
See Manually Creating and Managing De-NIST Hash Sets on page 121.
Create hashes from evidence
files in Review You can add hashes from the files in your evidence using Review.
See Adding Hashes to Hash Sets Using Project Review on page 122.
Elements of the De-NIST Hash Sets page
Element Description
Hash Sets Displays all of the Hash Sets that have been imported or created in the KFF Server.
Lets you create a Hash Set.
See Manually Creating and Managing De-NIST Hash Sets on page 121.
Using De-NIST (Known File Filter) Adding Hashes to the KFF Server | 119
Importing De-NIST Data
About Importing De-NIST Data
To understand the methods and formats for importing KFF data, first see About Importing KFF Data (page 98).
This chapter explains how to import KFF data using the application’s management console.
Importing De-NIST Hashes
You can import KFF data from the following:
-KFF export CSV files
-KFF binary files
Warning: Importing KFF binary files will replace your existing KFF data.
See About CSV and Binary Formats on page 105.
It is recommended that you use the external KFF Import Utility to import KFF binary files.
See Using the KFF Import Utility on page 99.
When importing KFF data, you can enter default values for the following fields:
-Default Status
-Default Vendor
-Default Version
Lets you edit the active Hash Set.
See Manually Creating and Managing De-NIST Hash Sets on page 121.
Lets you delete the active Hash Set.
Warning: You are not prompted to confirm the deletion.
See Manually Creating and Managing De-NIST Hash Sets on page 121.
Delete Lets you delete one or more checked Hash Sets.
View Hashes
Lets you view and manage the hashes in the Hash Set.
See Searching For, Viewing, and Managing Hashes in a Hash Set on page 122.
Import File Lets you import De-NIST data.
See Importing De-NIST Data on page 119.
Export Lets you export De-NIST data.
See Exporting De-NIST Data on page 135.
Refreshes the Hash Sets list.
Elements of the De-NIST Hash Sets page
Element Description
Using De-NIST (Known File Filter) Adding Hashes to the KFF Server | 120
-Default Package
These are default values that will be used if they import file does not contain the information.
When importing hash lists using the CSV import, each hash within the CSV can have the same, different or no
status. During the import process you must choose a default status of Alert or Ignore. This default status will
have no affect on any hash in your CSV that already contains a status, however, any hash that does not have a
pre-assigned status will have this default status assigned to them.
The override status for the hash sets that you import will be automatically set to No Override. This is to ensure
that if your hash set contains both Alert and Ignore hashes, the program will not override the original status. You
can, however, choose to override the individual hash status within a set by choosing to set the whole set to Alert
or Ignore.
You can use these value to organize your hashes. For example, you can filter or sort data based on these
values.
To import De-NIST hashes from files
1. Log in as an Administrator or user with Manage KFF permissions.
2. Click Management > Hash Sets.
3. Click Import File.
4. On the KFF Import File dialog, click Add File.
5. Browse to and select the file.
6. Click Select.
7. Specify a Default Status.
This sets a default status only for the hashes that do not have a status specified in the file.
8. (Optional) Specify a default Vendor, Version, and Package.
This sets values only for the hashes that do not have a value specified in the file.
9. (Optional) Add other files.
10. Click Import.
11. View the Import Summary to see the results of the Import.
12. Click Close.
To import De-NIST data from a binary format
Warning: This process may replace your existing KFF data.
See About the KFF Binary Format on page 105.
1. Log in as an Administrator or user with Manage KFF permissions.
2. Click Management > Hash Sets.
3. Click Import File.
4. On the KFF Import File dialog, click Binary Import.
5. Browse to the folder that contains the binary files (specifically the Export.xml file) and click Select.
6. Click Import.
Using De-NIST (Known File Filter) Adding Hashes to the KFF Server | 121
Manually Creating and Managing De-NIST Hash Sets
You can manually create Hash Sets and then add hashes to them. You can also edit and delete Hash Sets.
You can also add, edit, or delete the hashes in Hash Sets.
Note: You cannot manually add, edit, and delete hash values that were imported from NSRL, NDIC
HashKeeper, and DHS libraries.
To manually create a Hash Set
1. Log in as an Administrator or user with Manage KFF permissions.
2. Click Management > Hash Sets.
3. On the De-NIST Hash Sets page, in the right pane, click Add .
4. Enter a name for the Hash Set.
5. Select the status for the Hash Set: Alert, Ignore, or No Override.
6. (Optional) Enter a package, vendor, or version.
These are not required, but you can use these values for sorting and filtering results.
7. Click Save.
To manually manage Hash Sets
1. Click Management > Hash Sets.
2. Do one of the following:
-To edit a Hash Set, select a set a set, and click Edit .
-To delete a single Hash Set, select a set, and click Delete .
-To delete a multiple Hash Sets, select the sets, and click Delete .
To manage hashes in a hash set
1. On the De-NIST Hash Sets page, select a Hash Set.
2. Click View Hashes.
To add hashes to a hash set
1. On the De-NIST Hash Sets page, select a Hash Set.
2. Click View Hashes.
3. In the KFF Hash Finder dialog, click Add .
4. Enter the De-NIST hash value.
5. Enter the filename for the hash.
6. (Optional) Enter other reference information about the hash.
7. Click Save.
The new hash is displayed.

Using De-NIST (Known File Filter) Adding Hashes to the KFF Server | 122
Searching For, Viewing, and Managing Hashes in a Hash Set
Due to the large number of hashes that may be in a Hash Set, a list of hashes is not displayed. (However, you
can export a De-NIST Group that contains the Hash Set and view the hashes in the export file.)
You can use the KFF Hash Finder dialog to search for hash values within a hash set. You search by entering a
complete hash value. You can only search within one hash set at a time.
While the KFF Hash Finder does not display a list of hashes, it does display the number of hashes in the set.
To search for hashes in a hash set
1. On the De-NIST Hash Sets page, select a Hash Set.
2. Click View Hashes.
3. In the KFF Hash Finder dialog, enter the complete hash value that you want to search for.
4. Click Search.
If the has is found, it is displayed in the hash list.
If the hash is not found a message is displayed.
To edit hashes in a hash set
1. In the KFF Hash Finder dialog, search for the hash that you want to edit.
2. Click Edit .
3. Enter the hash information.
4. Click Save.
The edited hash is displayed.
To delete hashes from a hash set
1. In the KFF Hash Finder dialog, search for the hash that you want to delete.
2. Click Delete .
Adding Hashes to Hash Sets Using Project Review
You may identify files that in exist in a project as files that you want to add to your De-NIST hashes. For example,
you may find a graphics file that you want to either alert for or ignore in this or other projects. Using Project
Review, you can select files and then add them to existing or new De-NIST Hash Sets.
When you add hashes using Project Review, it starts a job that adds the hashes to the De-NIST Library.
To use Project Review to add hashes to Hash Sets
1. Log in as an Administrator or user with Manage KFF permissions.
2. Select a project and enter Project Review.
3. Select the files that you want to add to a hash set.
4. In the Actions drop-down, select Add to De-NIST.
5. Click Go.
6. In the Add Hash to Set dialog, select a status for the hash.
Using De-NIST (Known File Filter) Adding Hashes to the KFF Server | 123
7. Specify a Hash Set.
You can select an existing set or create a new set.
To create a new set, do the following:
7a. Select [Add New].
7b. Enter the name of the new set.
7c. Enter a name for the hash set.
7d. (Optional) Add other information.
7e. Click Save.
To use an existing set, do the following:
7a. Select the existing set.
By default, you will only see the sets that match the status that you select.
To see Hash Sets that have a No Override status as well, enable the Display hash sets with no
override status option.
7b. Click Save.
To verify that hashes were added to the De-NIST Server
1. Click to exit Review.
2. On the Home page, select the project that you are using.
3. Click Work List .
See Monitoring the Work List on page 230.
Click Refresh to see the current status.
4. View the Add Hash to De-NIST job types.
5. Click Refresh to see the current status.
6. When the jobs are completed, at the bottom of the page, you can view the results.
It will show the number of files that were added or any errors generated.
7. From the De-NIST Hash Sets tab on the Management page, you can view the Hash Sets.
See Searching For, Viewing, and Managing Hashes in a Hash Set on page 122.

Using De-NIST (Known File Filter) Using De-NIST Groups to Organize Hash Sets | 124
Using De-NIST Groups to Organize Hash Sets
About De-NIST Groups
De-NIST groups are containers for one or more Hash Sets. When you create a group, you then add Hash Sets
to the group. KFF Groups can also contain other KFF Groups.
When you enable De-NIST for a project, you select which De-NIST Group to use during processing.
Within a De-NIST group, you can manually edit custom Hash Sets.
About De-NIST Groups Status Override Settings
When you create a De-NIST Group, you can choose to use the default status of the Hash Set (Alert or Ignore) or
override it. You do this by setting one of the following Status Override settings:
-Alert - All Hash Sets within the De-NIST Group will be set to Alert regardless of the status of the individual
Hash Sets.
-Ignore - All Hash Sets within the De-NIST Group will be set to Ignore regardless of the status of the
individual Hash Sets.
-No Override - All Hash Sets will maintain their default status.
For example, if you have a Hash Set with a status of Alert, if you set the De-NIST Group to No Override, then the
default status of Alert is used. If you set the De-NIST Group with a status of Ignore, the Hash Set Alert status is
overridden and Ignore is used.
As a result, use caution when setting the Status Override for a De-NIST Group.
About Nesting De-NIST Groups
De-NIST Groups can contain Hash Sets or they can contain other De-NIST Groups. When one De-NIST Group
includes another De-NIST Group, it is called nesting.
The reason that you may want to nest De-NIST Groups is that you can use multiple De-NIST Groups when
processing your data. When you enable De-NIST for a case, you can only select one De-NIST Group. By
nesting, you can use multiple De-NIST Groups.
For example, you may have one De-NIST Group that contains Hash Sets with an Alert status. You may have a
second De-NIST Group that contains Hash Sets with an Ignore status. When processing a case, you may want
to use both of those De-NIST Groups. To accomplish this, you can create another De-NIST Group as a parent
and then add the other two De-NIST Groups to it. When processing, you would select the parent De-NIST
Group.
When nesting De-NIST Groups you must be mindful of the Status Override of the parent De-NIST Group. The
Status Override for the highest De-NIST Group in the hierarchy is used when nesting KFF Groups. In most
cases, you will want to set the parent De-NIST Group with a status of None. That way, the status of each child
De-NIST Group (or their Hash Sets) is used. If you select an Alert or Ignore status for the parent De-NIST Group,
then all child De-NIST Groups and their Hash Sets will use that status.
Using De-NIST (Known File Filter) Using De-NIST Groups to Organize Hash Sets | 125
Creating a De-NIST Group
You create De-NIST groups to organize your Hash Sets. When you create a KFF Group, you add one ore more
Hash Sets to it. You can later edit the KFF Group to add or remove Hash Sets.
To create a KFF Group
1. Log in as an Administrator or user with Manage KFF permissions.
2. Click Management > Groups.
3. Click Add .
4. Enter a Name.
5. Set the Status Override.
6. See About De-NIST Groups Status Override Settings on page 124.
7. (Optional) Enter a Package, Vendor, and Version.
8. Click Save.
To add a Hash Sets to a De-NIST Group
1. Click Management > Groups.
2. In the Groups list, select the group that you want to add Hash Sets to.
3. In the Groups and Hash Sets pane, click Add.
4. Select the Hash Sets that you want to add to the group.
5. You can filter the list of Hash Sets to help you find the hash sets that you want.
6. After selecting the sets, click OK.
Viewing the Contents of a De-NIST Group
On the KFF Groups page, you can select a De-NIST Group and in the Groups and Hash Sets pane, view the
Hash Sets and child De-NIST Groups that are contained in that De-NIST Group.
Managing De-NIST Groups
You can edit De-NIST Groups and do the following:
-Rename the group
-Change the Override Status
-Add or remove Hash Sets and De-NIST Groups
You can also do the following:
-Delete the group
-Export the group
See Exporting De-NIST Data on page 135.
Using De-NIST (Known File Filter) Using De-NIST Groups to Organize Hash Sets | 126
To manage a De-NIST Group
1. Click Management > Groups.
2. In the Groups list, select a KFF Group that you want to manage.
3. Do one of the following:
-Click Edit.
-Click Delete.
-Click Export.
See Exporting De-NIST Data on page 135.
About the Manage De-NIST Groups Page
To configure De-NIST Groups, you use the De-NIST Groups page.
To open the De-NIST Groups page
1. Log in as an Administrator or user with Manage KFF permissions.
2. Click Management > Groups
If the feature does not function properly, check the following:
-The KFF Server is installed.
See Installing the KFF Server on page 94.
-The application has been configured for the KFF Server.
See Configuring the Location of the KFF Server on page 96.
-The KFF Service is running.
In the Windows Services manager, make sure that the AccessData Elasticsearch service is started.
Elements of the De-NIST Groups page
Tab Element Description
De-NIST Groups
pane De-NIST Groups Displays all of the De-NIST Groups that have been
imported or created in the KFF Server.
Lets you create a De-NIST Group.
See Creating a De-NIST Group on page 125.
Lets you edit the active De-NIST Group.
See Managing De-NIST Groups on page 125.
Lets you delete the active De-NIST Group.
See Managing De-NIST Groups on page 125.
Delete Lets you delete one or more checked De-NIST
Groups.
Using De-NIST (Known File Filter) Using De-NIST Groups to Organize Hash Sets | 127
Export Lets you export De-NIST data.
See Exporting De-NIST Data on page 135.
Refreshes the De-NIST Groups list.
Groups and Hash
Sets Pane Lets you add and remote Hash Sets from De-NIST Groups.
See Managing De-NIST Groups on page 125.
Add Displays the list of Hash Sets that you can add to a
De-NIST Group.
See Managing De-NIST Groups on page 125.
Remove Lets you remove Hash Sets from a KFF Group.
See Managing De-NIST Groups on page 125.
View Hashes Lets you view and manage the hashes in the Hash
Set.
See Searching For, Viewing, and Managing Hashes
in a Hash Set on page 122.
Elements of the De-NIST Groups page
Tab Element Description
Using De-NIST (Known File Filter) Enabling a Project to Use De-NIST | 128
Enabling a Project to Use De-NIST
When you create a project, you can enable De-NIST and configure the De-NIST settings for the project.
About Enabling and Configuring De-NIST
To use De-NIST in a project you do the following:
Enabling and Configuring De-NIST
To enable and configure De-NIST for a project
1. Log in as an Administrator or user with Create/Edit Projects permissions.
2. Create a new project.
3. In Processing Options, select Enable De-NIST.
A Options tab option displays.
4. In Processing Options, select how to handle ignorable files.
5. Click Options.
The De-NIST Options window displays.
Process for enabling and configuring De-NIST
1. Create a new Project If you want to use De-NIST you must enable it when you create the project. You
cannot enable De-NIST for a project after it has been created.
2. Enable De-NIST Enable the KFF processing option.
See Enabling and Configuring De-NIST on page 128.
2. Configure how to
process ignorable files You can choose how to process ignorable files:
-Skip Ignorable Files - This option will not process any files determined to be
Ignorable. Any files that are ignorable will not be included or visible in the
project.
This is the default option.
-Process and Flag Ignorable Files - This option will process ignorable files, but
flag them as Ignorable. Any files that are Ignorable will be included and visi-
ble in the project, but can be filtered.
See Using Quick Filters on page 131.
4. Select a De-NIST
Group When enabling De-NIST for a project, you select one De-NIST Group that you
want to use. You do not create De-NIST Group at that time. You can only select
an existing group. Because of this, you must have at least one De-NIST Group
created before creating a project.
See Using De-NIST Groups to Organize Hash Sets on page 124.
However, after processing, you can re-process the data using a different De-
NIST template. This lets you create and use different templates after you initially
process the project.
See Re-Processing De-NIST on page 134.

Using De-NIST (Known File Filter) Enabling a Project to Use De-NIST | 129
6. In the drop-down menu, select the De-NIST Group that you want to use.
See Using De-NIST Groups to Organize Hash Sets on page 124.
7. In the Hash Sets pane, verify that this template has the hash sets that you want. Otherwise select a
different template.
8. Click Create Project and Import Evidence or click Create Project and add evidence later.

Using De-NIST (Known File Filter) Reviewing De-NIST Results | 130
Reviewing De-NIST Results
De-NIST results are displayed in Project Review.
You can use the following tools to see De-NIST results:
-Project Details page
-Project Review
De-NIST Information Quick Columns
De-NIST Quick Filters
De-NIST facets
De-NIST Details
You can also create and modify De-NIST libraries and hash sets using files in Review.
See Adding Hashes to Hash Sets Using Project Review on page 122.
Viewing De-NIST Data Shown on the Project Details Page
To View De-NIST Data on the Project Details page
1. Click the Home tab.
2. Click the Project Details tab.
3. In the right column, you can view the number of De-NIST known files.
About De-NIST Data Shown in the Review Item List
You can identify and view files that are either Known or Unknown based on De-NIST results.
Depending on the De-NIST configuration options, there are two or three possible De-NIST statuses in Project
Review:
-Alert (2) - Files that matched hashes in the template with an Alert status
-Ignore (1) - Files that matched hashes in the template with an Ignore status (not shown in the Item List by
default)
-Unknown (0) - Files that did not match hashes in the template
If you configured the project to skip ignorable files, files configured to be ignored (Ignore status) are not included
in the data and are not viewable in the Project Review.
See Enabling and Configuring De-NIST on page 128.
Using the De-NIST Information Quick Columns
You can use the De-NIST Information Quick Columns to view and sort and filter on De-NIST values. For
example, you can sort on the De-NIST Status column to quickly see all the files with the Alert status.
See Using Document Viewing Panels on page 76.
To see the De-NIST columns, activate the De-NIST Information Quick Columns.
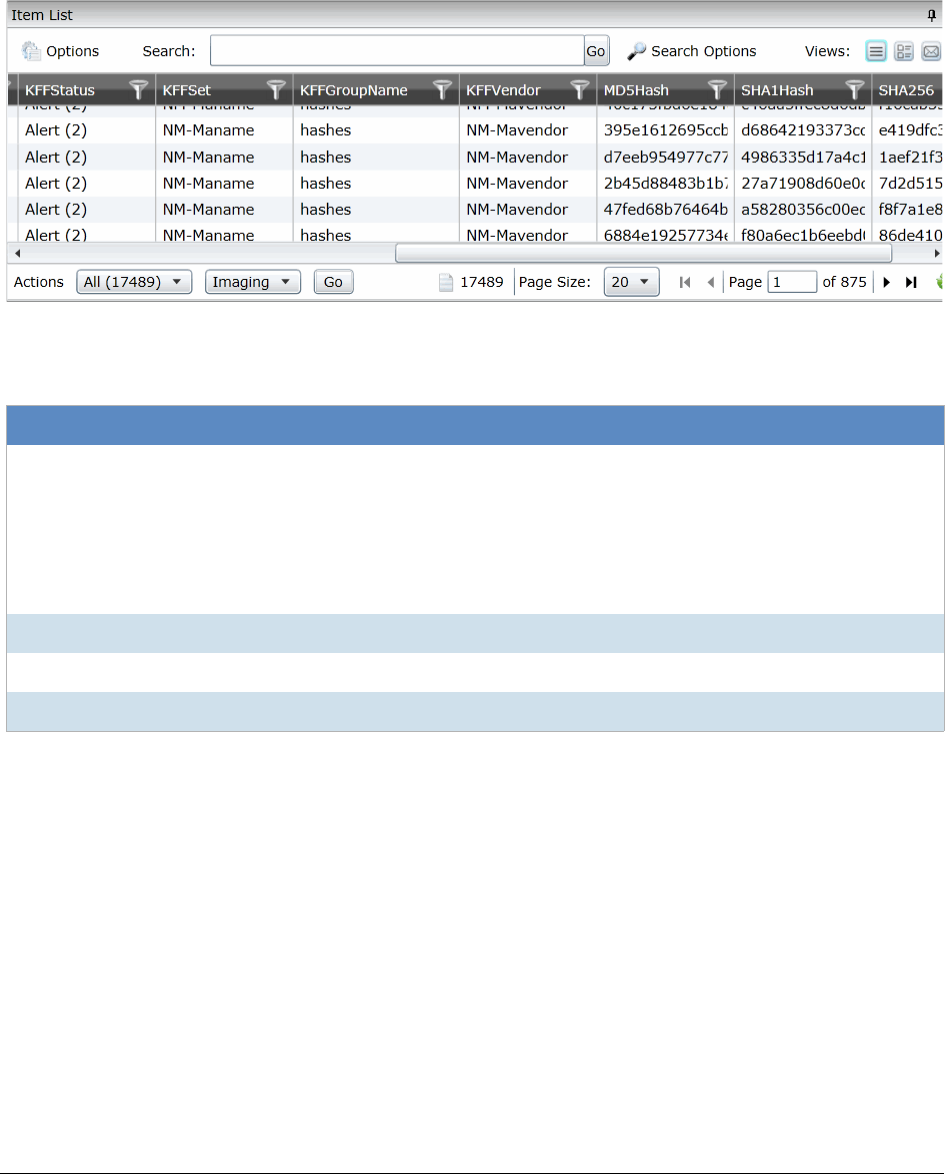
Using De-NIST (Known File Filter) Reviewing De-NIST Results | 131
To activate the De-NIST Information Quick Columns
1. From the Item List in the Review window, click Options.
2. Click Quick Columns > De-NIST > De-NIST Information.
The De-NIST Columns display.
Item List with De-NIST Tabs displayed
See Filtering by Column in the Item List Panel on page 224.
Using Quick Filters
You can use Quick Filters to quickly show or hide KFF Ignorable files.
You can toggle the quick filter to do the following:
-Hide Ignorables - enabled by default
-Show Ignorables
The Hide Ignorables Quick Filter is set by default. As a result, even if you selected to process and flag Ignorable
files for the project, they are not included in the Item List by default.
To show ignorable files in the Item list, change the Quick Filter to Show Ignorables.
De-NIST Columns
Column Description
De-NIST Status Displays the status of the file as it pertains to De-NIST. The three options are
Unknown (0), Ignore (1), and Alert (2).
-If you configured the project to skip Ignorable files, these files are not
included in the data.
-If you configured the project to flag Ignorable files, and the Hide Ignorables
Quick Filter is set, these files are in the data, but are not displayed.
See Using Quick Filters on page 131.
De-NIST Set Displays the De-NIST Hash Set to which the file belongs.
De-NIST Group Name Displays the name created for the De-NIST Group in the project.
De-NIST Vendor Displays the De-NIST vendor.
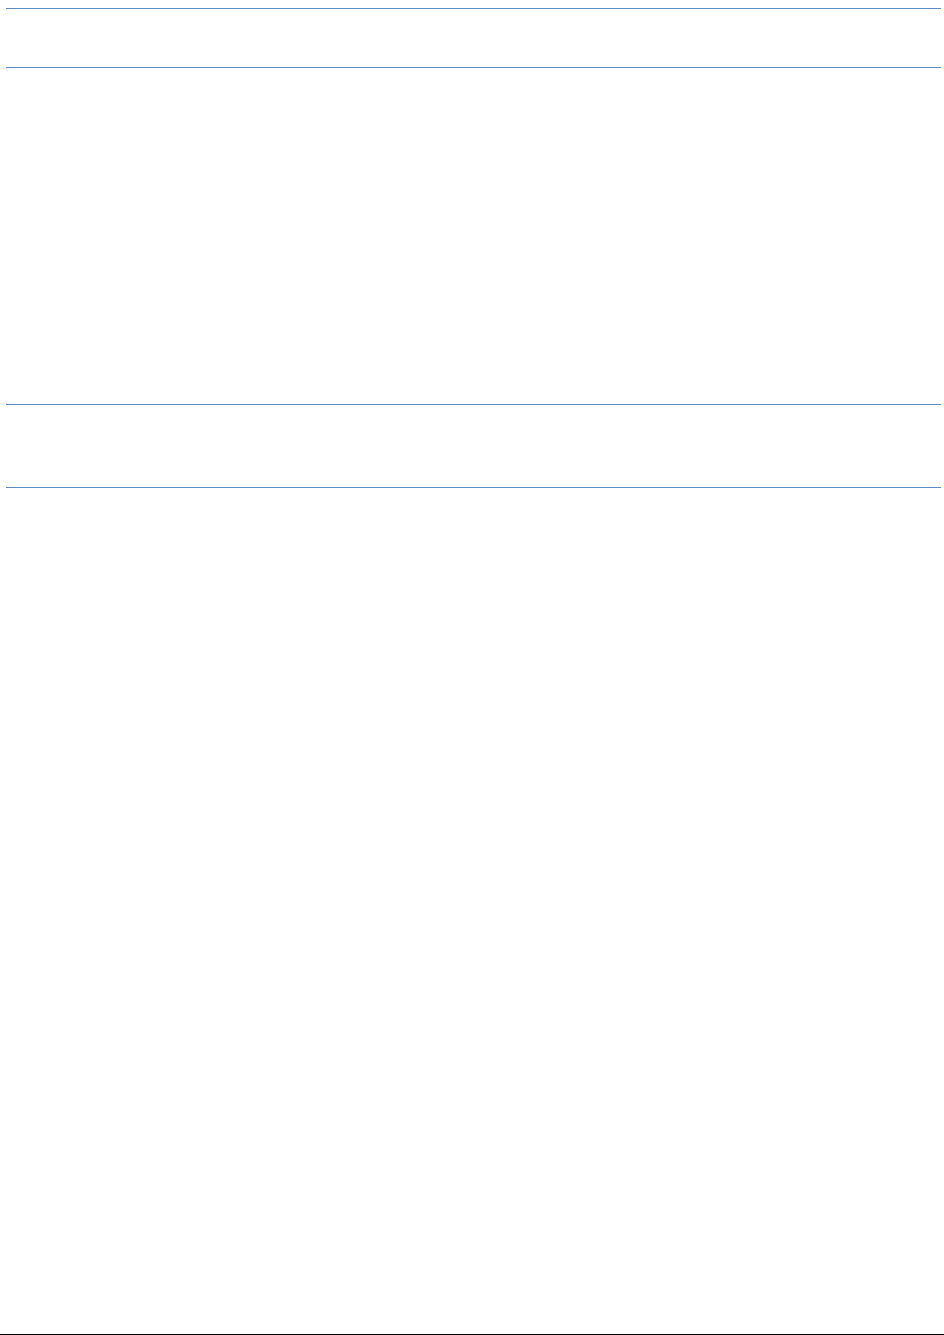
Using De-NIST (Known File Filter) Reviewing De-NIST Results | 132
Note: If you configured the project to skip ignorable files, files configured to be ignored (Ignore status) will not
be shown, even if you select to Show Ignorables.
To change the De-NIST Quick Filters
1. From the Item List in the Review window, click Options.
2. Click Quick Filters > Show Ignorables.
Using the De-NIST Facets
You can use the De-NIST facets to filter data based on De-NIST values. For example, you can apply a facet to
only display items with an Alert status or with a certain De-NIST set.
See About Filtering Data with Facets on page 209.
Note: If you configured the project to skip Ignorable files, these files are not included in the data and the Ignore
facet is not available. If you configured the project to flag Ignorable files, and the Hide Ignorables Quick
Filter is set, the Ignore facet is available, but the files will not be displayed.
See Using Quick Filters on page 131.
You can use the following De-NIST facets:
-De-NIST Vendors
-De-NISTGroups
-De-NIST Statuses
-De-NIST Sets
Within a facet, only the filters that are available in the project are available. For example, if no files with the Alert
status are in the project, the Alter filter will not be available in the De-NIST Statuses facet.
To apply De-NIST facets
1. From the Item List in the Review window, open the facets pane.
2. Expand De-NIST.
3. Select the facets that you want to apply.
Using De-NIST (Known File Filter) Reviewing De-NIST Results | 133
Viewing Detailed De-NIST Data
You can view De-NIST results details for an individual file.
To view the De-NIST Details
1. For a project that you have run De-NIST, open Project Review.
2. Under Layouts, select the CIRT Layout.
See Managing Saved Custom Layouts on page 54.
3. In Project Review, select a file in the Item List panel.
4. In the view panel, click the Detail Information view tab.
5. Click the De-NIST Details tab.
Using De-NIST (Known File Filter) Re-Processing De-NIST | 134
Re-Processing De-NIST
After you have processed a project with De-NIST enabled, you can re-process your data using an updated or
different De-NIST Group. This is useful in re-examining a project after adding or editing hash sets.
See Adding Hashes to Hash Sets Using Project Review on page 122.
If you want to re-process De-NIST with updated hash sets, be sure that the selected KFF Group has the desired
sets.
You can only select from existing KFF Groups.
To re-process De-NIST
1. From the Home page, select a project that you want to re-process.
2. Click the tab.
The currently selected group is displayed along with its corresponding hash sets.
3. (Optional) If you want to change the KFF Group, in the drop-down menu, select a different KFF Group
and click Save.
4. In the Hash Sets pane, verify that the desired sets are included.
5. Click Process De-NIST.
6. (Optional) On the Home page, for the project, click Work Lists , and verify that the De-NIST job
starts and completes.
See Monitoring the Work List on page 230.
7. Click Refresh to see the current status.
8. Review the De-NIST results.
See Reviewing De-NIST Results on page 130.
Using De-NIST (Known File Filter) Exporting De-NIST Data | 135
Exporting De-NIST Data
About Exporting KFF Data
You can share De-NIST Hash Sets and KFF Groups with other KFF Servers by exporting De-NIST data on one
KFF Server and importing it on another. You can also use export as a way of archiving your KFF data.
You can export data in one of the following ways:
-Exporting Hash Sets - This exports the selected Hash Sets with any included hashes. (CSV format only)
-Exporting KFF Groups - This exports the selected KFF Groups with any included sub-groups and any
included hashes. (CSV format only)
-Exporting an archive of all custom KFF data - This exports all the KFF data except NSRL, NIST, and DHC
data (in a binary format).
When exporting KFF Groups or Hash Sets, you can export in the following formats:
-CSV file
-Binary format
Important: Even though it appears that you can select and export one Hash Set or one KFF Group, if
you export using the KFF binary format, all of the data that you have in the KFF Index will be exported
together. You cannot use this format to export individual Hash Sets or KFF Groups. Use the CSV format
instead.
See About CSV and Binary Formats on page 105.
Exporting KFF Groups and Hash Sets
You can share De-NIST hashes by exporting De-NIST Hash Sets or KFF Groups. Exports are saved in a CSV
file that can be imported.
To export a one or more De-NIST Groups or Hash Sets
1. Do one of the following:
-Click Management > Hash Sets.
-Click Management > Groups.
2. Select one or more KFF Groups or Hash Sets that you want to export.
3. Click Export.
4. Select CSV (do not select Export Binary).
5. Browse to and select the location to which you want to save the exported file.
6. Click Select.
7. Enter a name for the exported file.
8. Click OK.
9. In the Export Summaries dialog, view the status of the export.
10. Click Close.
Using De-NIST (Known File Filter) Exporting De-NIST Data | 136
To create an archive of all your custom Hash Sets and Groups
1. Do one of the following:
-Click Management > Hash Sets.
-Click Management > Groups.
2. Select a KFF Group or Hash Set.
3. Click Export.
4. Select Export Binary.
5. Browse to and select the location to which you want to save the exported files.
6. Click Select.
7. Enter a name for the folder to contain the binary files (This is a new folder created by the export).
8. Click OK.
9. In the Export Summaries dialog, view the status of the export.
10. Click Close.
To view the Export History
1. Do one of the following:
-Click Management > Hash Sets.
-Click Management > Groups.
2. Click Export.
3. Select View Export History.
4. In the Export Summaries dialog, view the status of the export.
5. Click Close.


Managing People as Data Sources About People | 138
Chapter 11
Managing People as Data Sources
About People
The term “person” references any identified person or custodian who may have data relevant to evidence in a
project. You can associate people to a specific project and to specific evidence items within that project.
In Review, you can use the Person column to see the person that is associated with each item. You can sort,
filter, and search using the Person column.
Note: A person references people that are associated with evidence, they are not the users of the Summation
product.
About Managing People
When you manage people, you do the following:
-Create a person
-Edit the properties of a person
-Delete a person
-Associate a person with or dis-associate a person from a project
-Associate a person to a specific evidence item.
You can create a person in the following ways:
-Using the People tab on the Data Sources page. This creates people at a global level which can be
associated with any project.
See the Data Sources chapter.
-Using the People tab on the Home page. This creates people for a specific project.
See Adding People on page 142.
-Using the Add Evidence Wizard.
See About Associating People with Evidence on page 262.
For the most functionality of managing people, there are more options on the Data Sources page than on the
Home page. For example, on the Data Sources page, you can delete People and add them using
You associate people to projects in the following ways:
-Associate a person to a whole project when you create a project.
See Creating Projects on page 164.


Managing People as Data Sources About the Data Sources Person Page | 140
About the Data Sources Person Page
You manage people from the People tab on the Data Sources page. The people are listed in the Person List.
The main view of the Person List includes the following sortable columns:
When you create and view the list of people, this list is displayed in a grid. You can do the following to modify the
contents of the grid:
-Control which columns of data are displayed in the grid.
-Sort the columns
-Define a column on which you can sort.
-If you have a large list, you can apply a filter to display only the items you want.
See Managing Columns in Lists and Grids on page 39.
Highlighting a person in the list populates the Person Details info pane on the right side. The Person Details
info pane has information relative to the currently selected person, beginning with the first name.
At the bottom of the page, you can use the following tabs to view and manage the items that the highlighted
person is associated with:
-Evidence
-Job results
-Projects
People Information Options
Option Description
First Name The first name of the person.
Last Name The last name of the person.
Username The computer username of the person.
Email Address The email address of the person.
Creation Date The date that the person resource was created.
Domain The network domain to which the person belongs.
Managing People as Data Sources Data Sources Person Tab Options | 141
Data Sources Person Tab Options
The following table lists the various options that are available under the Person tab.
Person Tab Options
Element Description
Filter Options Allows you to filter the person list. See Filtering Content in Lists and Grids on
page 41.
Add
Click to add a person. See Adding People on page 142.
Edit
Click to edit a person. See Editing a Person on page 143.
Delete
Click to remove a person. See Removing a Person on page 143.
Refresh
Click to refresh the person list.
Delete
Click to remove multiple people. See Removing a Person on page 143.
Import People
Click to import people from a CSV file. See Importing People From a CSV File
on page 144.
Custom Properties
Click to add custom properties. Custom properties must be defined before
importing CSV files with custom fields in the headers. See Adding Custom
Properties on page 157.
Export to CSV
Export the current set of data to a CSV file.
Columns
Click to adjust what columns display in the Person List. See Managing Columns
in Lists and Grids on page 39.
Evidence Allows you to view evidence that has been associated to a person. In the
Evidence pane, you can do the following:
-Filter the Evidence list.
-Add Custom Properties. See Adding Custom Properties on page 157.
-Export the Evidence list to a CSV file.
-Adjust the columns’ display in the Evidence list.
-See Managing Evidence for Collecting Data in the Resolution1 User Guide.
Job Results
Allows you to view job results from a job that has been assigned to a person. In
the Job Results pane, you can do the following:
-Filter the Job Results list.
-Export the Job Results list to a CSV file.
-Adjust the columns’ display in the Job Results list.
Managing People as Data Sources Data Sources Person Tab Options | 142
Adding People
Administrators, and users with permissions, can add people.
You can add people in the following ways:
-Manually adding people
-Importing people from a file
See Importing People From a CSV File on page 144.
-Creating or importing people while importing evidence
See Managing Evidence for Collecting Data in the Resolution1 User Guide.
-Importing people from Active Directory.
See Adding People Using Active Directory on page 144.
Projects
Allows you to view a project that a person belongs to. In the Projects pane, you
can do the following:
-Filter the Projects list.
-Associate and disassociate a project to a person. See Associating a Project
to a Person on page 146.
-Export the Groups list to a CSV file.
-Adjust the columns’ display in the Groups list.
Person Tab Options
Element Description
Managing People as Data Sources Data Sources Person Tab Options | 143
Manually Creating People
To manually create a person
1. On the Home > Data Sources > People tab, click Add.
2. In Person Details, enter the person details.
3. Click OK.
Editing a Person
You can edit any person that you have added to the project.
To edit a project-level person
1. On the Home > Data Sources > People tab, select a person that you want to edit.
2. Click Edit
3. In Person Details, edit person details.
4. Click OK.
Removing a Person
You can remove one or more people from a project.
To remove one or more people from a project
1. On the Home > Data Sources > People tab, select the check box for the people that you want to
remove.
People Information Options
Option Description
First Name The first name of the person. This field is required.
Middle Initial The middle initial of the person.
Last Name The last name of the person. This field is required.
Username The computer username of the person. This field is required.
Domain The network domain to which the person belongs.
Notes
Username The username of the person as it appears in their Lotus Notes Directory.
A Lotus Notes username is typically formatted as Firstname Lastname/Organization as in
the following example:
Pat Ng/ICM
Email Address The email address of the person.
Managing People as Data Sources Data Sources Person Tab Options | 144
2. If you want to remove one person, check the person that you want to remove, and select Delete.
3. If you want to remove more than one person, check the people that you want to remove, and select
Delete.
4. To confirm the deletion, click OK.
Importing People From a CSV File
From the People tab, you can import a list of people into the system from a CSV file. Before importing people
from a CSV file, you need to be aware of the following items:
-You must define any custom columns before importing the CSV file. See Adding Custom Properties on
page 157.
-Make sure that your columns have headers.
-Multiple items in columns must be separated by semicolons.
To import people from a CSV file
1. On the Home > People tab, click Import People.
2. From the Import People from CSV dialog, choose from the following options:
-Import custom columns. This option is not available if custom columns have not been previously
defined.
-Merge into existing people. This option will overwrite fields, such as first name, last name, and
email address. It also adds new computers, network shares, etc. to existing associations.
Note:For an entry to be considered a duplicate in the External Evidence column, the network path,
assigned person, and type (such as image or native file) must be the same. If there are any dif-
ferences between these three fields, the entry is brought in as a new External Evidence item.
-Download Sample CSV. This allows you to download a sample CSV file illustrating how your CSV
file should be created. This example is dynamic; if you have created custom columns for people,
those custom columns appear in the sample CSV file.
Note: If your license does not support certain features (such as network shares or computers), the
columns for those items appear in the CSV without any data populated in the columns.
3. Once options have been selected, click OK.
4. Browse to the CSV file that you want to upload.
5. After file has been uploaded, a People Import Summary dialog appears. This displays the number of
people added, merged, and/or failed, with details if an import failed. Click OK.
Adding People Using Active Directory
You can add people by importing from Active Directory.
If you have not already done so, be sure that you have configured Active Directory in the application. When
Active Directory is properly configured, the Active Directory filter list opens in the wizard.
See Configuring Active Directory Synchronization on page 70.
Managing People as Data Sources Data Sources Person Tab Options | 145
The person information automatically populates the Person List when you create people using Active Directory.
You can edit person information.
In order to add users with the correct domain name, the system parses the user’s domain name from the user
principal name provided by Active Directory (For example: accessdata.com\hhadley). This allows the system
to use the full domain name instead of truncating the name (For example, development.accessdata.com will
be used instead of development).
If you find that there are errors in the system’s automatic retrieval of the domain name, you can override the
domain name and enter a value manually. See To add people using Active Directory on page 145. for more
information.
Note: If you want to have the system truncate the domain name, update your Infrastructure service
configuration file. Edit The AppSetting key ReturnDomainAsFullyQualifiedDomainName and change
the value from UserPrincipalName to CanonicalName.
To add people using Active Directory
1. In the Data Sources > People page, click Import from AD.
2. Set the search/Browse depth to All Children or Immediate Children.
3. (optional) Check Domain Name Override if you want to specify the domain or domain portion for the
users created. If you leave this unchecked, the application ignores any text in the Domain Name
Override field.
Note: The domain for the users created is drawn and parsed from the userPrincipalName in Active
Directory. Because all Active Directories are configured according to the needs of the directories’
organization, what populates automatically based on the userPrincipalName may not suit your
organization’s needs. In this case, use Domain Name Override to specify the domain.
4. (optional) In the Domain Name Override field, add the domain for users created. For example, if you
type accessdata.com, the user name will appear as accessdata.com\<user name>
Note: The domain name is applied once you advance to the second screen of the wizard. Navigating
back to the first page and changing the domain name will not affect any users added to the import
list and queued for creation. To change the domain name, remove all users from the To Be
Added list and add them again from the search results.
5. Select where you want to perform the search.
6. Set the search options to one of the following:
Match Exact
Starts With
Ends With
Contains
7. Enter your search text.
8. Check the usernames that you want to add as people.
9. Click Add to Import List.
10. Click Continue.
Managing People as Data Sources Data Sources Person Tab Options | 146
11. Review the members selected, members to add as people, and conflicted members. If you need to
make changes, click Back.
12. Click Import.
Associating a Project to a Person
From the Projects pane under the Person tab, you can associate and disassociate projects to a selected person.
To associate a project to a person
1. In the Project list pane, click to add projects.
2. In the Associate Projects to <Person> dialog, do one of the following:
-In the All Projects pane, click to add projects to the Associated Projects pane.
-In the All Projects pane, click to projects from the Associated Projects pane.
3. Click OK.
4. (optional) Click to remove projects from an associated person.

Managing Projects | 147
Part 4
Managing Projects
This part describes how to manage Summation projects and includes the following sections:
-About Projects (page 148)
-Viewing the Home Page (page 150)
-Creating a Project (page 164)
-Managing People (page 180)
-Managing Tags (page 189)
-Setting Project Permissions (page 197)
-Running Reports (page 207)
-Configuring Review Tools (page 212)
-Monitoring the Work List (page 230)
-Managing Document Groups (page 232)
-Managing Transcripts and Exhibits (page 238)
-Managing Review Sets (page 250)
-Project Folder Structure (page 255)
-Getting Started with KFF (Known File Filter) (page 88)
-Using De-NIST (Known File Filter) (page 116)
Introduction to Project Management About Projects | 148
Chapter 12
Introduction to Project Management
This guide is designed to help project/case managers perform common tasks. Project/case manager tasks are
performed on the Home page and in Project Review. Project/case managers can perform their tasks as long as
the administrator has granted the project manager the correct permission. See the Administrators guide for more
information on how administrators can grant global permissions.
About Projects
When you want to assess a set of evidence, you create a project and then add evidence to the project. When
evidence is added to the project, the data is processed so that it can be later reviewed, coded, and labeled by a
team of reviewers using the Project Review interface.
Workflow for Project/Case Managers
Administrators, or users that have been given rights to manage projects, use the Home page of the console to
create and manage projects by doing the following tasks.
Basic Workflow for Project Managers
Task Link to the tasks
Create a project See Creating a Project on page 164.
Configure the user/group permissions for a
project See Setting Project Permissions on page 197.
Loading Data You can load data using import or by processing the
evidence into the system. See the Loading Data
documentation for more information.
Manage evidence and people See the Loading Data documentation.
Configure the review tools to be used in project
review See Configuring Markup Sets on page 212.
See Creating Category Values on page 218.
See Configuring Custom Fields on page 216.
See Configuring Highlight Profiles on page 224.
View details about the project See Viewing and Editing Project Details on page 178.

Introduction to Project Management Workflow for Project/Case Managers | 149
Monitor the Work List See Work List Tab on page 230.
See Monitoring the Work List on page 230.
Manage Document Groups See Managing Document Groups on page 232.
Upload Transcripts/Exhibits See Updating Transcripts on page 239.
Create Production Sets See the Exporting documentation.
Export the selected evidence See the Exporting documentation.
Run reports See Running Reports on page 207.
Basic Workflow for Project Managers (Continued)
Task Link to the tasks

Using the Project Management Home Page Viewing the Home Page | 150
Chapter 13
Using the Project Management Home Page
Viewing the Home Page
Administrators, and users given permissions, use the Home page to do the following:
-Create projects
-View a list of existing projects
-Add evidence to a project
-Launch Project Review
If you are not an administrator, you will only see either the projects that you created or projects to which you
were granted permissions.
To view the home page
1. Log in to the console.
2. In the application console, click Home.
The Project List Panel is on the left-side of the page.
See The Project List Panel on page 152.
Administrators, and users with the Create/Edit Projects permission, create projects to add and process
evidence.
See About Projects on page 148.
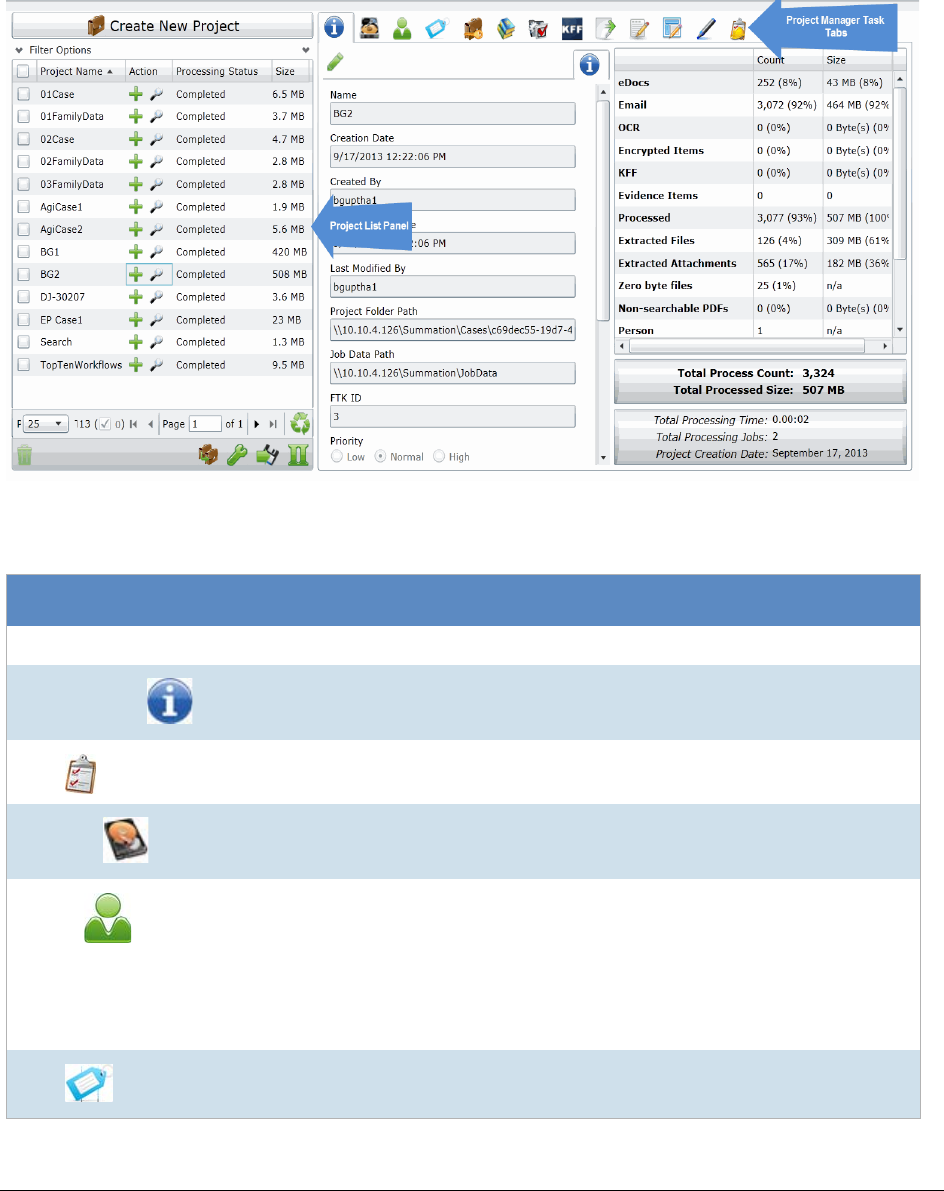
Using the Project Management Home Page Introducing the Home Page | 151
Introducing the Home Page
The project management Home page is where you see the Project list and details about the project.
Home Page
Elements of the Home Page
Elements Description
Project List Panel See The Project List Panel on page 152.
Project Details
See Viewing and Editing Project Details on page 178.
Jobs See Introduction to Jobs on page 427.
Evidence
The evidence in the project.
See Evidence Tab on page 155.
People
People that are associated to the project.
You can add people and associate and disassociate people to
the project.
See Managing People for a Project on page 159.
In the Evidence tab at the bottom, you can also see any people
that have been associated to specific evidence within the
project.
Tags
See Managing Tags on page 189.
Using the Project Management Home Page Introducing the Home Page | 152
The Project List Panel
The Home page includes the Project List panel. The Project List panel is the default view after logging in. Users
can only view the projects for which they have been given permissions.
Administrators and users, given the correct permissions, can use the project list to do the following:
-Create projects.
-View a list of existing projects.
Permissions
See Setting Project Permissions on page 197.
Reports
See Running Reports on page 207.
Processing Options
The processing options used for the project.
See Evidence Processing and Deduplication Options on
page 167.
KFF See Using KFF (Known File Filter) on page 340..
Printing/Export
See Introduction to Exporting Data on page 257.
Lit Hold
You can use Lit Hold if you have an AccessData eDiscovery
license or if you have purchased a special licence for
Summation.
See Using Litigation Holds on page 302.
Markup Sets
See Configuring Markup Sets on page 212.
Tagging Layout
See Configuring Tagging Layouts on page 219.
Highlight Profiles
See Configuring Highlight Profiles on page 224.
Work List
See Monitoring the Work List on page 230.
Custom Fields
See Configuring Custom Fields on page 216.
Redaction Text
See Configuring Redaction Text on page 228.
Elements of the Home Page (Continued)
Elements Description
Using the Project Management Home Page Introducing the Home Page | 153
-Add evidence to a project. See Importing Data on page 259.
-Launch Project Review.
If you are not an administrator, you will only see either the projects that you created or projects to which you
were granted permissions.
The following table lists the elements of the project list. Some items may not be visible depending on your
permissions.
Elements of the Project List
Element Description
Create New Project Click to create a new project.
Filter Options Allows you to search and filter all of the projects in the project list. You can
filter the list based on any number of fields associated with the project,
including, but not limited to the project name.
See Filtering Content in Lists and Grids on page 41.
Project Name Column Lists the names of all the projects to which the logged-in user has permissions.
Status Column Lists the status of the projects:
Not Started - The project has been created but no evidence has been
imported.
Processing - Evidence has been imported and is still being processed.
Completed - Evidence has been imported and processed.
Note: The Processing Status may show a delay of two minutes behind the
actual processing of the evidence. This is only noticeable when processing
a small set of evidence.
See Refresh below.
Size Column Lists the size of the data within the project.
Action Column Allows you to add evidence to a project or enter Project Review.
Add Data
Allows you to add data to the selected project.
Project Review
Allows you to review the project using Project Review.
See the Reviewers Guide for more information.
Page Size Drop-down Allows you to select how many projects to display in the list.
The total number of projects that you have permissions to see is displayed.
Total Lists the total number of projects displayed in the Project List.
Page Allows you to view another page of projects.
Refresh
If you create a new project, or make changes to the list, you may need to
refresh the project list
Custom Properties
Add, edit, and delete custom columns with the default value that will be listed
in the Project list panel. When you create a project, this additional column will
be listed in the project creation dialog. See Adding Custom Properties on
page 157.

Using the Project Management Home Page Introducing the Home Page | 154
Project Property
Cloning
Clone the properties of an existing project to another project. You can apply a
single project’s properties to another project, or you can pick and choose
properties from multiple individual projects to apply to a single project. See
Using Project Properties Cloning on page 177.
Export to CSV
Export the Project list to a .CSV file. You can save the file and open it in a
spreadsheet program.
Columns
Add or remove viewable columns in the Project List.
Delete
Highlight project and click Delete Project to delete it from the Project List.
Elements of the Project List (Continued)
Element Description

Using the Project Management Home Page Evidence Tab | 155
Evidence Tab
Users with permissions can view information about the evidence that has been added to a project. To view the
Evidence tab, users need one of the following permissions: administrator, create/edit project, or manage
evidence.
Evidence Tab
Elements of the Evidence Tab
Element Description
Filter Options Allows the user to filter the list.
Evidence Path List Displays the paths of evidence in the project. Click the column headers to sort by the
column.
Refresh
Refreshes the Groups List.
See Refreshing the Contents in List and Grids on page 38.

Using the Project Management Home Page Evidence Tab | 156
Columns
Adjusts what columns display in the Groups List.
See Sorting by Columns on page 38.
External Evidence
Details Includes editable information about imported evidence. Information includes:
-That path from which the evidence was imported
-A description of the project, if you entered one
-The evidence file type
-What people were associated with the evidence
-Who added the evidence
-When the evidence was added
Processing Status Lists any messages that occurred during processing.
Elements of the Evidence Tab (Continued)
Element Description

Using the Project Management Home Page Adding Custom Properties | 157
Adding Custom Properties
With Custom Properties, you can add, edit, and delete custom columns with the default value that will be listed in
the Project list panel. When you create a project, these additional columns will be listed in the project creation
dialog and will be available to populate when editing projects that have already been created.
When you create a new project, any custom properties marked as required will be available at the top of the
Create New Project dialog, while non-required custom properties will be at the bottom of the dialog. When you
edit an existing project, all custom properties will be at the bottom of the pane, whether they are required or not.
However, the required custom properties will be bolded to differentiate from non-required custom property fields.
To add a custom Properties
1. In the console, in the Project List, click Custom Properties.
2. Click Add.
3. Configure the custom property details and click OK.
Custom Properties
The following table lists the options available to you in the Custom Properties dialog:
Custom Properties Dialog
Element Description
Allows you to add a custom property.
Allows you to edit a custom property.
Allows you to delete a custom property.
Name This is a required field for a new custom property.
Description This field is optional.
Required Field Mark to make the custom property a required column. If the custom property
column is a required field, any previously created project must have this field
populated when you edit the project.
Type Choose whether the column is a text field or a choice field
Text Choose to make the custom property field a text field.
Default Value When this field is populated for text custom properties, the Default Value will
display on all existing projects.
Choice Choose to make the custom property field a choice field. Enter one choice per
line, separated by the Enter key. The first choice listed in the choice field will be
the default for all projects. If you do not want the first choice to be the default
choice, leave the first line blank.
Using the Project Management Home Page Adding Custom Properties | 158
Allows you to refresh the Custom Properties list.
Allows you to delete a custom property.
Custom Properties Dialog (Continued)
Element Description

Using the Project Management Home Page Managing People for a Project | 159
Managing People for a Project
About People
The term “person” references any identified person or custodian who may have data relevant to evidence in a
project. You can associate people to a specific project and to specific evidence items within that project.
In Review, you can use the Person column to see the person that is associated with each item. You can sort,
filter, and search using the Person column.
Note: A person references people that are associated with evidence, they are not the users of the Summation
product.
About Managing People
When you manage people, you do the following:
-Create a person
-Edit the properties of a person
-Delete a person
-Associate a person with or dis-associate a person from a project
-Associate a person to a specific evidence item.
You can create a person in the following ways:
-Using the People tab on the Data Sources page. This creates people at a global level which can be
associated with any project.
See the Data Sources chapter.
-Using the People tab on the Home page. This creates people for a specific project.
See Adding People on page 161.
-Using the Add Evidence Wizard.
See About Associating People with Evidence on page 262.
For the most functionality of managing people, there are more options on the Data Sources page than on the
Home page. For example, on the Data Sources page, you can delete People and add them using
You associate people to projects in the following ways:
-Associate a person to a whole project when you create a project.
See Creating Projects on page 164.
-Associate a person to a whole project after you create a project.
See Associating a Project to a Person on page 163.
-Associate a person to specific evidence that you add to a project.
See About Associating People with Evidence on page 262.
Using the Project Management Home Page Managing People for a Project | 160
About the Project’s Person Tab
You can manage people for a project from the People tab on the Home page. The people are listed in the
Person List. The main view of the Person List includes the following sortable columns:
When you create and view the list of people, this list is displayed in a grid. You can do the following to modify the
contents of the grid:
-Control which columns of data are displayed in the grid.
-Sort the columns
-Define a column on which you can sort.
-If you have a large list, you can apply a filter to display only the items you want.
See Managing Columns in Lists and Grids on page 39.
Highlighting a person in the list populates the Person Details info pane on the right side. The Person Details
info pane has information relative to the currently selected person, beginning with the first name.
At the bottom of the page, you can use the Evidence tab to view the evidence that person is associated with.
People Information Options
Option Description
First Name The first name of the person.
Last Name The last name of the person.
Username The computer username of the person.
Email Address The email address of the person.
Creation Date The date that the person resource was created.
Domain The network domain to which the person belongs.
Using the Project Management Home Page Managing People for a Project | 161
Project’s Person Tab Options
The following table lists the various options that are available under the Person tab.
Note: To import people from Active Directory or to delete a person, use the Data Sources page.
Adding People
Administrators, and users with permissions, can add people.
You can add people in the following ways:
-Manually adding people
-Importing people from a file
See Importing People From a CSV File on page 163.
-Creating or importing people while importing evidence
See Managing Evidence for Collecting Data on page 135.
Person Tab Options
Element Description
Filter Options Allows you to filter the person list. See Filtering Content in Lists and Grids on
page 41.
Add
Click to add a person. See Adding People on page 161.
Edit
Click to edit a person. See Editing a Person on page 162.
Refresh
Click to refresh the person list.
Import People
Click to import people from a CSV file. See Importing People From a CSV File
on page 163.
Export to CSV
Export the current set of data to a CSV file.
Columns
Click to adjust what columns display in the Person List. See Managing Columns
in Lists and Grids on page 39.
Evidence Allows you to view evidence that has been associated to a person. In the
Evidence pane, you can do the following:
-Filter the Evidence list.
-Add Custom Properties. See Adding Custom Properties on page 157.
-Export the Evidence list to a CSV file.
-Adjust the columns’ display in the Evidence list.
-See Managing Evidence for Collecting Data on page 135.
Using the Project Management Home Page Managing People for a Project | 162
-Importing people from Active Directory.
See Adding People Using Active Directory on page 144.
Manually Creating People for a Specific Project
To manually create a person
4. On the Home > Data Sources > People tab, click Add.
5. In Person Details, enter the person details.
6. Click OK.
Editing a Person
You can edit any person that you have added to the project.
To edit a project-level person
1. On the Home > Data Sources > People tab, select a person that you want to edit.
2. Click Edit
3. In Person Details, edit person details.
4. Click OK.
People Information Options
Option Description
First Name The first name of the person. This field is required.
Middle Initial The middle initial of the person.
Last Name The last name of the person. This field is required.
Username The computer username of the person. This field is required.
Domain The network domain to which the person belongs.
Notes
Username The username of the person as it appears in their Lotus Notes Directory.
A Lotus Notes username is typically formatted as Firstname Lastname/Organization as in
the following example:
Pat Ng/ICM
Email Address The email address of the person.

Using the Project Management Home Page Managing People for a Project | 163
Importing People From a CSV File
From the People tab, you can import a list of people into the system from a CSV file. Before importing people
from a CSV file, you need to be aware of the following items:
-You must define any custom columns before importing the CSV file. See Adding Custom Properties on
page 157.
-Make sure that your columns have headers.
-Multiple items in columns must be separated by semicolons.
To import people from a CSV file
1. On the Home > People tab, click Import People.
2. From the Import People from CSV dialog, choose from the following options:
-Import custom columns. This option is not available if custom columns have not been previously
defined.
-Merge into existing people. This option will overwrite fields, such as first name, last name, and
email address. It also adds new computers, network shares, etc. to existing associations.
Note:For an entry to be considered a duplicate in the External Evidence column, the network path,
assigned person, and type (such as image or native file) must be the same. If there are any dif-
ferences between these three fields, the entry is brought in as a new External Evidence item.
-Download Sample CSV. This allows you to download a sample CSV file illustrating how your CSV
file should be created. This example is dynamic; if you have created custom columns for people,
those custom columns appear in the sample CSV file.
Note: If your license does not support certain features (such as network shares or computers), the
columns for those items appear in the CSV without any data populated in the columns.
3. Once options have been selected, click OK.
4. Browse to the CSV file that you want to upload.
5. After file has been uploaded, a People Import Summary dialog appears. This displays the number of
people added, merged, and/or failed, with details if an import failed. Click OK.
Associating a Project to a Person
From the Projects pane under the Person tab, you can associate and disassociate projects to a selected person.
To associate a project to a person
1. In the Person list pane, click to add people.
2. In the Associate People to <Project> dialog, do one of the following:
-In the All People pane, click to add projects to the Associated People pane.
-In the All People pane, click to projects from the Associated People pane.
3. Click OK.
4. (optional) Click to remove people from an associated project.

Creating a Project Creating Projects | 164
Chapter 14
Creating a Project
Creating Projects
Administrators and project managers with the Create Project admin role can create projects from the Project List
panel.
To create a new project
1. Log in as an administrator or as a user that has permissions to create projects.
2. Click Create New Project.
3. In the Create New Project page, on the Info tab, configure the general project properties.
See General Project Properties on page 165.
4. (Optional) Click the People tab to add people to the project.
This is where you configure the people who are the custodians of the evidence in this project.
You can associate existing people or, if you have proper permissions, create new people.
People for the project can be configured later, but should be done before processing evidence.
See Managing People as Data Sources on page 138.
5. Click the Processing Options tab to set the processing options for the project.
This is where you set the options for how the evidence is processed when it is added to the project.
This setting may have a default value that you can use or change, or this setting may be configured and
hidden by the administrator.
See Evidence Processing and Deduplication Options on page 167.
Note: You cannot change the processing options after you have created the project.
6. Select one of the following options:
-Create Project: Click to create the project without importing evidence. This option will create the
project and return you to the Project Management page. You can then configure the project by
adding evidence, assigning permissions, and so on.
-Create Project and Import Evidence: Click to create the project and begin importing evidence. See
the Loading Data documentation for information on how to import evidence.
Creating a Project Creating Projects | 165
General Project Properties
You can set the properties of the specific project.
Many of the fields may be populated by values set in the Project Defaults configuration block under the
Management tab. See Configuring Default Project Settings on page 76. The following table describes the
general Project Properties.
General Project Info Properties Options
Option Description
Project Name Project Names must be only alphanumeric characters. Special characters will
cause the project creation to fail.
Description (Optional) This option allows you to enter the description of the project.
Project Folder Path Allows you to specify a local path or a UNC network path to the project folder.
This path is the location where all project data is stored.
Note: This setting may have a default value that you can use or change, or this
setting may be configured and hidden by the administrator. For example, a
folder with the Project name can be created in the actual directory to be
identified and managed easily. You then change the path to reflect and include
the new directory. See the Admin Guide for information on configuring Default
Evidence Folder Options.
Job Data Path The responsive folder path is the location of reports data.
Display Time Zone This option allows you to display the dates and times of files and emails based
on this specified time zone. For example, if data was collected in the Eastern
Time zone, you can select to display times in the Pacific Time zone and all dates
will be offset by four hours to display in PST. The default is set for (UTC)
Coordinated Universal Time.
See Normalized Time Zones on page 166.
Sort Evidence Items By You can set the default column that you wan to sort by when opening Project
Review.
You select the default column and then select the default sorting order:
ascending or descending.
The setting is project-specific and not user specific.
In Review, you can still click any column to sort on.
See Sorting by Columns on page 38.
Sub Administrator (Summation only) If you are using the multi-tenant environment, you can assign
this project to a Sub Admin environment.
See Understanding the Multi-Tenant Environment on page 339.
Copy Properties from
Existing Project (Optional) This allows you to apply properties of an existing project to the newly
created project.
You can also apply properties to an existing project once it has been created.
See Using Project Properties Cloning on page 177.

Creating a Project Creating Projects | 166
Normalized Time Zones
All data brought into a project using evidence processing or a collection job is stored in UTC time zone. You can
configure a Display Time Zone for the project that will offset the times and display them in the specified time
zone.
See Display Time Zone on page 165.
However, all data brought into a project using import load files is stored in the time setting that the data was
created which causes an issue when trying to set the correct display time zone. The following features help you
normalize time zone data.
-When adding data to the case through evidence processing or collection from a FAT storage device, you
need to select the proper time zone for the device so that the data can be normalized to UTC.
-No adjustment is needed for data added to the case from NTFS storage devices.
-The columns in the Item List grid will display the UTC time zone.
-During load file import, you must choose the time zone that the load file was created with so the date and
time values can be converted to a normalized UTC value in the database.
See Importing Evidence into a Project on page 270.
When you set a time zone display value for each project, you will be able to see the date and times when certain
events occurred. The following types of dates are displayed in the configured time zone rather than in UTC:
-Natural View for email - Email To and From dates
-Images for email
-File creation, modified and accessed dates
-Items in the Item List grid including filtered columns
-Items in Panels
-Search
When creating a project, and specifying a Display Time Zone, that time zone is used when performing
searches on metadata. For example, when searching for an email receive date, it will offset all of the
UTC dates to the specified time zone for the search.
-Facets
-Conversation Panel and Conversation View x
-Time Zone adjustments for emails that have been converted to SWF or TIFF
When the case is set with a specific time zone setting, documents that are converted to SWF or TIFF
display the selected time zone n the display-able date fields.
This will primarily affect email sent and received dates as most other document types do not have
dynamic date values displayed in the body of the document.
-Regional Formatting for DocDate and NoteDate Fields
You can now see the DocDate and NoteDate field values in a dd/mm/yyyy format.
-Date and Time offset in Search
When creating a project, and specifying a Display Time Zone, that time zone is used when performing
searches on metadata. For example, when searching for an email receive date, it will offset all of the
UTC dates to the specified time zone for the search.
-Load files with date and time fields
Creating a Project Creating Projects | 167
Evidence Processing and Deduplication Options
The options you select determine the data that is contained in projects, reports, and consequently, production
sets. When you create a project, you can specify unique options or use the default options. Options that increase
processing time when selected are marked by a turtle icon.
See the Configuring the System chapter in the User Guide.
Note: You cannot edit any settings on the Processing Options section after you have added evidence to a
project
The following table describes the Processing Options. Depending on the license that you own, you may some
or all of the following options.
See About Deduplication on page 172.
Processing Options
Option Description
Processing Mode
Standard
Mode Enabled by default.
Enables the default processing options.
Note: These defaults are not editable.
Will include:
-Hashing
-Deduplication - Project level for both Documents and Email
-File Signature Analysis
-Expand Compound Files (archive expansion) of the following file types:
7-ZIP, IPD, BZIP2, DBX, PDF, GZIP, NSF, MBOX, MS Exchange and
Office documents, MSG, PST, RAR, RFC822 Internet email, TAR, ZIP
Note: You cannot expand system image files, such as AD1 and E01, if
they are located inside of another archive. You must first export the
files and add the files as evidence to be properly processed.
Will index:
-Text data
Will not index:
-Graphic files and executable files
Will refine out:
-Microsoft OLE Streams
-Office 2010 package contents
-File slack
-Free space
-Deleted items
-Zero length files
-OS/File System Files
Creating a Project Creating Projects | 168
Standard No
Search Uses the default processing options but does not include the indexing of text
data.
See About Indexing for Text Searches of Content of Files on page 174.
Forensic Will include:
-Hashing (MD-5, SHA-1, SHA-256)
-Flag bad extensions
-Thumbnails for graphics
-Deleted files
-Microsoft OLE Streams
-Microsoft OPC documents
-Refinement options:
File slack
Free space
Will index:
-all file types
Will not include:
-KFF (for faster processing)
-Expand Compound Files (archive expansion)
-HTML file listing
-eDiscovery Deduplication
Quick Increases the speed of the processing of evidence by using minimal options to
expedite the processing.
Indexing, hashing, archive file drill down, and file identification are disabled.
(Files are identified by header analysis instead of file extension.)
If you select this option, the KFF Lookup option is disabled. Disabling KFF
Lookup occurs because Field Mode is a processing option that is intended to
speed up the process. It turns off indexing, hashing, and other options that tend
to slow down data processing. The KFF Lookup option takes time to process
and slows down data processing. Therefore, if both Field Mode and KFF
Lookup were both enabled, it would defeat the purpose of the Quick option.
Processing Options (Continued)
Option Description

Creating a Project Creating Projects | 169
Security Enables the default security processing options.
Will include:
-Hashing
-Indexing
-eDiscovery Deduplication - Project level for both Documents and Email
-File signature analysis
-Expand Compound Files (archive expansion) of the following file types:
7-ZIP, IPD, BZIP2, DBX, PDF, GZIP, NSF, MBOX, Microsoft Exchange,
MS Office documents, MSG, PST, RAR, RFC822 Internet email, TAR,
ZIP, EMFSPOOL, EXIF, ThumbsDB, TMBLIST, ThumbCacheDB,
NTDS, SQLITE, and PKCs7
Will refine out:
-File slack
-Free space
-Deleted items
-Microsoft OLE Streams
-Office 2010 package contents
-Zero length files
-OS/File System Files
Will not index:
-Graphic files
Note: In the Job Wizard, collection jobs executed in projects with
standard processing selected have Auto Processing selected by default.
See Job Options Tab on page 437.
Optical Character Recognition
Enable OCR Generates text from graphics files and indexes the resulting content. You can
then use Project Review to search and label the content and treat that content
the same as any other text in the project.
AccessData uses the GlyphReader engine for optical character recognition.
Selecting this option can increase processing time up to 50%. It also may give
you results that differ between processing jobs on the same computer, with the
same piece of evidence.
Pre-set default is off.
See About Optical Character Recognition (OCR) on page 174.
Enabling this option may increase processing times.
General Email Options
Expand
Embedded
Graphics
Pre-set default is off. Enabling this option may increase processing times.
KFF (Known File Filter)
Enable KFF Enables the Known File Filter (KFF).
See Using KFF (Known File Filter) on page 340.
Pre-set default is on.
Processing Options (Continued)
Option Description
Creating a Project Creating Projects | 170
Email Body Caching
Enable Email
Body Caching This option will speed up load file generation.
Pre-set default is off. Enabling this option may increase processing times.
Advanced Options Enabled by default.
Keep the database indexes while processing. Database indexes improve
performance, but slow processing when inserting data. If this option is
checked, all of the data reindexes every time more data is loaded. Only select
this option if you want to load a large amount of data quickly before data is
reviewed.
Standard Viewer
Enable
Standard
Viewer
The option does the following:
-Generates files that can be annotated and redacted (SWF format). SWF
files are generated for most all user-created processed documents such as
.DOC, .PPT, .MSG, and so forth (not .XLS).
This enables you to work on a file in Review without waiting for a SWF file
to be created.
SWF files are generated for documents with a size of 1 MB and larger.
-Makes the Standard Viewer the default viewer in Review.
For more information, see Using the Standard Viewer and the Alternate File
Viewer in the Viewing Data chapter.
This option is checked as the default for the Summation license, but can be
enabled in other products.
Note: This option slows processing speeds.
Video Files
Enable Video
Conversion Enabled by default.
When you process the evidence in your case, you can choose to create a
common video type for videos in your case. These common video types are not
the actual video files from the evidence, but a copied conversion of the media
that is generated and saved as an MP4 file that can be viewed in the Natural
Panel.
All converted videos are stored in the case folder.
You can define the following:
-Bit rate
-Video resolution
Generate
Thumbnails Enabled by default.
Creates thumbnail images for each video file in a project. These thumbnails
can be seen in the Thumbnails View in Review. The thumbnails let you quickly
examine a portion of the contents within video files without having to watch the
full content of each media file.
You can define the thumbnail generation interval based on one of the following:
-Percent (1 thumbnail every “n” % of the video)
-Interval (1 thumbnail every “n” minutes of the video)
This feature can be used when you choose the Standard, Standard No Search,
or Forensic processing modes. This is not available when using the Security or
Quick processing mode. This is also not available for import loaded files.
Miscellaneous Options
Processing Options (Continued)
Option Description
Creating a Project Creating Projects | 171
Geolocation Allows you to view processed evidence in the Geolocation Visualization filter.
Note: Geolocation IP address data may take up to eight minutes to generate,
depending upon other jobs currently running in the application.
Generate
Image
Thumbnails
Generates thumbnails for all image files in the project. These thumbnails can
be viewed in the Thumbnail View in Review. This option is enabled by default
with the Standard, Standard No Search, and Forensic Processing Modes.
Timeline Options
Expand
Additional
Timeline
Events
Lets you expand Log2Timeline, Event Logs, Registry, and Browser History.
For example, this will recognize CSV files that are in the Log2Timeline format
and parses the data within the single CSV into individual records within the
case. The individual records from the CSV will be interspersed with other data,
giving you the ability to perform more advanced timeline analysis across a very
broad set of data.
In addition you can leverage the visualization engine to perform more
advanced timeline based visual analysis. When you expand CSV files into
separate records, you can use several new columns in the Item List to view
each CSV Log2Timeline field.
Indexing Options
Disable Tag
Indexing Summation license only. This option is enabled by default.
This option disables the reindexing of labels, categories, and issues for
projects. This allows the project to process more quickly. This option only
applies to new projects. If enabled, after processing, the following text is
displayed in Review:
Tag indexing is disabled.
Document Deduplication See About Deduplication on page 172.
Email Deduplication See About Deduplication on page 172.
Document Analysis
Options You can perform an automatic cluster analysis of documents and emails which
provides grouping of email and documents by similar content.
See Using Cluster Analysis on page 292.
You can configure the number of paired keywords that are stored for the
comparison of documents during cluster analysis and predictive coding. For
performance reasons, the default number of keyword storage is 30 keywords.
This can limit the effectiveness of cluster analysis or predictive coding. You can
increase the number of pairs, but this will impact the time needed for
processing.
Max Keyword
Pairs You can change the number of allowable pairs by a set number or select
Unlimited.
Cluster
Analysis Enabled by default.
Perform Cluster Analysis: Enables the extended analysis of documents to
determine related, near duplicates, and email threads.
See Using Cluster Analysis on page 292.
You can view the similarity results in the Similar Panel in Review.
Processing Options (Continued)
Option Description
Creating a Project Creating Projects | 172
About Deduplication
Deduplication helps a project investigation by flagging duplicate electronic document (e-document) files and
emails within the data of a project or person. The duplicates filter, when applied during project analysis, removes
all files flagged “True” (duplicate) from the display, significantly reducing the number of documents an
investigator needs to review and analyze to complete the project investigation.
If you set document deduplication at the project level, and two people have the same file, one file is flagged as
primary and the other file or files are flagged as duplicates. The file resides in the project and the file paths are
tracked to both people. To limit the production set, the file is only created one time during the load file/native file
production. You can also deduplicate email, marking the email, email contents, or email attachments as
duplicates of others.
Note: In Project Review, if the duplicate filter is on, and if you perform a search for a file using a word that is part
of the file path, and that path and file name is a duplicate, the search will not find that file. For example,
there is a spreadsheet that is located in one folder called Sales and a duplicate of the file exists in a folder
called Marketing. The file in Sales is flagged as the primary and the file in Marketing is flagged as a
duplicate. If you do a search for spreadsheets in the folder named Sales, it is found. However, if you do a
search for spreadsheets in the folder named Marketing, it is not found. To locate the file in the Marketing
folder, turn off the duplication filter and then perform the search.
See Evidence Processing and Deduplication Options on page 167.
Deduplication options are integrated on the Processing Options page.
Entity
Extraction Enabled by default.
Identifies and extracts specific types of data in your evidence. You can process
and view each of the following types of entity data:
-Credit Card Numbers
-Email addresses
-People
-Phone Numbers
-Social Security Numbers
See Using Entity Extraction on page 295.
In Review, under the Document Content facet category, there is a facet for
each data type that you extracted.
Language Identification See Using Language Identification on page 86.
None Enabled by default.
Performs no language identification, all documents are assumed to be written
in English. This is the faster processing option.
Basic Performs language identification for English, Chinese, Spanish, Japanese,
Portuguese, German, Arabic, French, Russian, and Korean.
Extended Performs language identification for 67 different languages. This is the slowest
processing option.
Processing Options (Continued)
Option Description

Creating a Project Creating Projects | 173
The following tables describe the deduplication options that are available in the Processing Options.
You can also deduplicate email, marking the email, email contents, or email attachments as a duplicate of
others.
Document Deduplication Options
Option Description
No
Deduplication Processes the project without document deduplication. This feature allows the case to
process more quickly. This option is the default for Security processing.
Project Level Deduplication compares each of the e-documents processed within a project against the
others as they receive their hash during processing.
If the hash remains singular throughout processing, it receives no duplicate flag.
In the project of duplicate files, the first hash instance receives a “primary” flag and each
reoccurrence of the hash thereafter receives a “secondary” flag.
Person Level Deduplication compares the e-documents found in each custodial storage location against
the other files from that same custodial location (people, or in the project of no person, the
storage location).
If the hash remains singular throughout processing, it receives no duplicate flag.
In the project of duplicate files the first hash instance receives a “primary” or “master” flag
and each reoccurrence of the hash thereafter receives a “duplicate” flag.
Actual Files
Only Deduplicates actual files instead of all files. Checking this option excludes OLE files and
Alternate Data Stream files.
Email Deduplication Options
Option Description
No Deduplication Processes the project without email deduplication. This feature allows the case to
process more quickly. This option is the default for Security processing.
Project Level The scope of the email deduplication.
Deduplication compares each of the emails processed within a project against the
others as they are processed.
If the deduplication value remains singular throughout processing, it receives no
duplicate flag.
In the project of duplicate email, the first value instance receives a “primary” flag
and each reoccurrence of the value thereafter receives a “duplicate” flag.
If two people have the same email, it is marked as a duplicate.
Person Level The scope of the email deduplication.
Deduplication compares the email found in each custodial storage location against
the other emails from that same custodial location (people, or in the project of no
person, the storage location).
If the value remains singular throughout processing it receives no duplicate flag.
In the project of duplicate emails, the first email instance receives a “primary” or
“master” flag and each reoccurrence of the email thereafter receives a “duplicate”
flag.
In the project of duplicate files, the first value instance receives a “primary” flag and
each reoccurrence of the value thereafter receives a “duplicate” flag.
Email To Deduplicates email based on the recipients in the “To” field.
Email From Deduplicates email based on the senders in the “From” field.
Creating a Project Creating Projects | 174
About Indexing for Text Searches of Content of Files
By default, when you add evidence to a project, the files are indexed so that the content of the files can be
searched. You can select a No Search processing mode, which is faster, but does not index the evidence.
About Optical Character Recognition (OCR)
Optical Character Recognition (OCR) is a feature that generates text from graphic files and then indexes the
content so the text can be searched, labeled, and so forth.
OCR is currently supported in English only.
Some limitations and variables of the OCR process include:
-OCR can have inconsistent results. OCR engines have error rates which means that it is possible to have
results that differ between processing jobs on the same machine with the same piece of evidence.
-OCR may incur longer processing times with some large images and, under some circumstances, not
generate any output for a given file.
-Graphical images that have no text or pictures with unaligned text can generate illegible output.
-OCR functions best on typewritten text that is cleanly scanned or similarly generated. All other picture
files can generate unreliable output.
-OCR is only a helpful tool for you to locate images with index searches, and you should not consider
OCR results as evidence without further review.
Email CC Deduplicates email based on the recipients in the “Carbon Copy” field.
Email Bcc Deduplicates email based on the recipients in the “Blind Carbon Copy” field.
Email Subject Deduplicates email based on the contents in the “Subject” field.
Email Submit Time Deduplicates email based on the date and time the email was initially sent.
Email Delivery Time Deduplicates email based on the date and time the email was delivered to the
recipients.
Email Attachment
Count Deduplicates email based on the number of attached files.
Email Hash Deduplicates email based on the hash value.
Body and Attachments Includes email body, recipients (the “To” field), sender (the “From” field), CC, BCC,
Subject field contents, body, the number of attachments, and the attachments for
deduplication.
Body Only Includes only the email body and the list of attachment names for deduplication.
Email Deduplication Options (Continued)
Option Description
Creating a Project Creating Projects | 175
The following table describes the OCR options that are available in Processing Options:
Supported File Types for OCR
The following file types are supported for OCR:
OCR Options
Option Description
Enable OCR Enables OCR and expands the OCR pane to select options for OCR processing.
File Types Specifies any or all of the following file types to process for OCR:
-PDF. This file type is checked by default when enabling OCR.
-JPEG
-PNG
-TIFF. This file type is checked by default when enabling OCR.
-BMP
-GIF
-Uncommon (PCX, TGA, PSD, PCD. . .)
See Supported File Types for OCR on page 175.
Do Not OCR. . . -Defines the minimum and maximum file size in bytes of documents to be pro-
cessed by OCR. You can either enter a value in the spin box, or use arrows to
select the value. If you clear the box without entering a value, the values
return to the default setting.
Note: The maximum size that can be specified in the Do not OCR
documents over _____ bytes field is 9,223,372,036,854,775,807 bytes
-Excludes full color documents to be processed by OCR.
PDF Existing Filtered
Text Size Excludes documents that have text exceeding the limit specified. Documents
over the specified limit will not be OCRed. This option is only available when
PDF is selected as a file type.
ABC ABIC AFP ANI ANZt ARW AWD BMP CAL
CGM CIN CLP CMP CMW CMX CR2 CRW CUR
CUT DGN DOC DOCX DCR DCS DCM DCX DNG
DOC DOCX DRW DWF DWG DXF ECW EMF EPS
EXIF FAX FIT FLC FPX GBR GIF HDP HTML
ICO IFF IOCA IMG ITG JBG JB2 JPG JPEG-XR
JPEG-LS J2K JP2 JPM JPX KDC MAC MIF MNG
MO:DCA MSP MRC MRC NAP NEF NITF NRW ORF
PBM PCD PCL PCL6 PCT PCX PDF PGM PLT
PNG PNM PPM PPT PPTX PS PSD PSPo PTK
RAS RAF RAW RTF RW2 SCT SFF SGI SHP
SMP SNP SR2 SRF SVG TDB TFX TGA TIFF
Creating a Project Creating Projects | 176
Viewing OCR Confidence Scores
When you OCR a document, a confidence score is now calculated that indicates how successful the OCR was.
There is a new OcrScore column that displays the OCR confidence % score for each file that has been
processed with OCR. This column is sortable and searchable which helps you determine which files may need
to be manually reviewed for keywords.
The OcrScore value may be one of the following:
-1-100 — The OCR confidence % score for a document that had a successful OCR process--the higher
the score, the higher the confidence
-0 (None) — The OCR process did not identify any text to extract
--1 (Skipped) — The OCR process was skipped due to some condition
--2 (Failed) — The OCR process failed for that file
-blank — The file does not need the OCR process, for example, a .DOC file or email
Note: For data that is upgraded from a previous version, if a file has been previously processed with OCR, it will
show a value of 2. You can use the OCR Documents action in Review to re-OCR the document and you
will get the new OCR confidence score.
Interruption of Evidence Processing
On occasion, processing might be interrupted by a catastrophic failure. Examples of catastrophic events include
the network going down or power outages. In these situations, the application performs a roll back of the
processing job. A roll back is when records added during the interrupted job are not available in the database
and does not appear in Review. This action of rolling back of a job insures that you do not receive incomplete
records in Review. Processing Status tab of the Work List alerts you to the error and shows that the system is
attempting a roll back.
When a catastrophic event occurs, the Processing Status tab of the Work List alerts you to the error and shows
that the system is attempting a roll back. See Monitoring the Work List on page 230.
You need to be aware of the following considerations with the roll back option:
-For multiple adding evidence jobs, only the job that fails will roll back. Jobs that complete successfully
have data appear in the system.
-If records are locked by another process, the roll back may fail to delete physical files from the case
folder. You can view what files did not get removed by viewing the log found in \\<server or IP
address>\Users\Public\Documents\AccessData\Resolution1Logs\Summation.
-For Evidence Processing jobs where some records are added, only newly added records roll back.
-Roll back only occurs with failure during Evidence Processing jobs, not Import jobs.
-Incidences, such as if an Evidence Processing job fails to advance (for example, the interface displays
that the job is processing for a long time), do not trigger the roll back action.
TIFX TXT VFF WBMP WFX WMF WMZ WPG XBM
XLS XLSX XPM XPS XWD

Creating a Project Using Project Properties Cloning | 177
Using Project Properties Cloning
As an administrator or a project manager with the Create/Edit Project administrator role, you can clone the
properties of an existing project to another project. You can also apply a single project’s properties to another
project. You can also pick and choose properties from multiple individual projects to apply to a single project.
Note: The project data is not copied from one project to another. Only the project properties are copied.
You can apply Project Properties Cloning to a project as it is being created or it can be applied to projects that
have already been created.
You can clone properties from a project only if you have permission that allows you to view or create that type of
object. This is a security measure that prevents users from cloning properties from projects to which they should
not be accessing.
-If you do not have any View permissions for a project, that project is not displayed as a Source project
-If you do not have any Create permissions for a project, that project is not displayed as a Target project
-Within the project wizard, the ability to clone from an existing project is hidden from users with Create/Edit
Case Restricted, since those users do not have administration rights in the project that they are creating
You can apply the following properties:
-Custom Fields
-Category and Issue Values
-Tagging Layouts
-Labels
-Users and Groups
-Markup Sets
-People
-Highlight Profiles
To use Project Properties Cloning
1. From the Source Project menu, select the source project from which you want to copy.
2. If you are applying the properties to a previously created project, select the target project to which you
want to copy from the pull-down menu.
3. Under Elements to Copy, select the properties that you want to apply to the project. You can select All
or choose specific properties to apply.
Note: If you select only Category Values, Project Properties Cloning will copy over all of the custom
fields. If you select only Tagging Layouts, Project Properties Cloning will only copy over the
tagging layouts. You must also select Custom Fields and Category Values if you want those
values copied over.
4. If you are applying Project Properties Cloning to a project as it is being created, finish the Project
Wizard.
If you are applying Project Properties Cloning to a project that has already been created, click Merge.
Creating a Project Viewing and Editing Project Details | 178
Viewing and Editing Project Details
You can view the configured properties of the project on the Project Details tab.
You can also edit some of the project properties, for example:
-Name
-Job Data Path
-Sort Evidence Items By
You can set the column that you wan to sort by default when opening Project Review.
You select the default column and then select the default sorting oder: ascending or descending.
The setting is project-specific and not user specific.
In Review, you can still click any column to sort on.
See Sorting by Columns on page 38.
To access the Project Details tab
1. From the Home page, select a project, and click the Project Details tab.
See Project Details Tab on page 178.
2. To edit properties, click Edit.
Project Details Tab
The Project Details tab displays data for the selected project. You can also edit some of the project data from this
tab.
Elements of the Project Information Tab
Element Description
Edit Button
Allows you to edit information about the selected project. Only the Name, Job Data
Path, and the Description can be edited.
General Project
Properties See General Project Properties on page 165.
Creation Date Displays the date that the project was created.
Created By Displays the user who created the project.
Last Modified Date Displays the date when the project was last modified.
Last Modified By Displays the user who last modified the project.
FTK Case ID Displays the case ID for the associated FTK case if applicable.
Associated FTK
Case Pane Displays any associated FTK cases.

Creating a Project Viewing and Editing Project Details | 179
Display Time Zone This option allows you to display the dates and times of files and emails based on this
specified time zone. For example, if data was collected in the Eastern Time zone, you
can select to display times in the Pacific Time zone and all dates will be offset by four
hours to display in PST. The default is set for (UTC) Coordinated Universal Time.
See Normalized Time Zones on page 166.
Sort Evidence
Items By You can set the default column that you wan to sort by when opening Project Review.
You select the default column and then select the default sorting oder: ascending or
descending.
The setting is project-specific and not user specific.
In Review, you can still click any column to sort on.
See Sorting by Columns on page 38.
Elements of the Project Information Tab (Continued)
Element Description
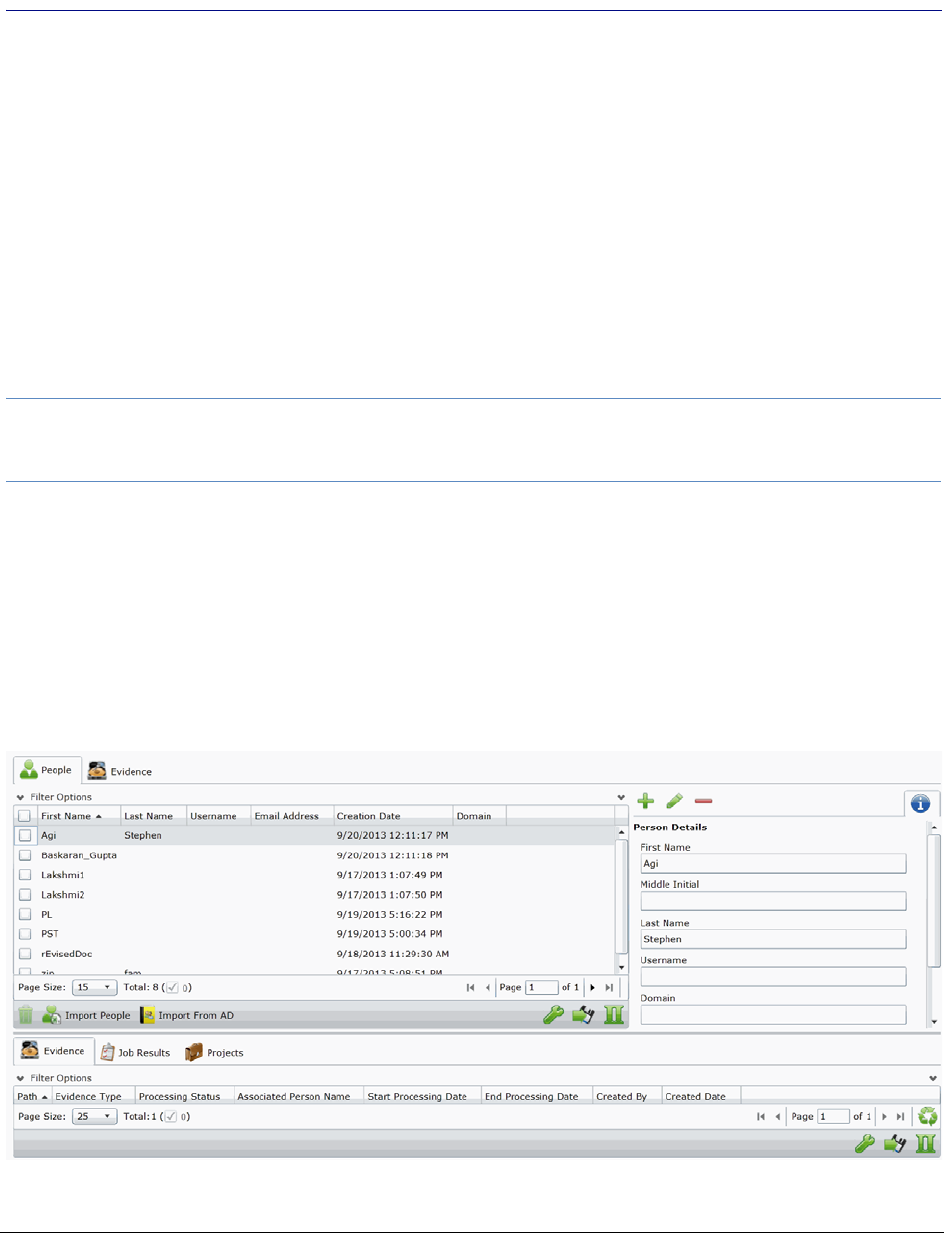
Managing People Data Sources People Tab | 180
Chapter 15
Managing People
Administrators, and users with the Create/Edit Project permission, can manage people in two ways:
-Globally across the system using the Data Sources tab.
See Data Sources People Tab on page 180.
-Individually for a project using the People tab on the Home page.
See Home People Tab on page 185.
For information on user permissions, see Setting Project Permissions (page 197).
Note: In order for people to be used in Project Review, people must be created and selected before you
process the evidence.
See About Associating a Person to an Evidence Item on page 187.
Data Sources People Tab
You use the Data Sources > People tab to maintain the list of people available in the application. You can add,
edit and delete global people, as well as import lists of people. From Data Sources, you can view evidence and
projects associated with a person.
Data Sources People Tab
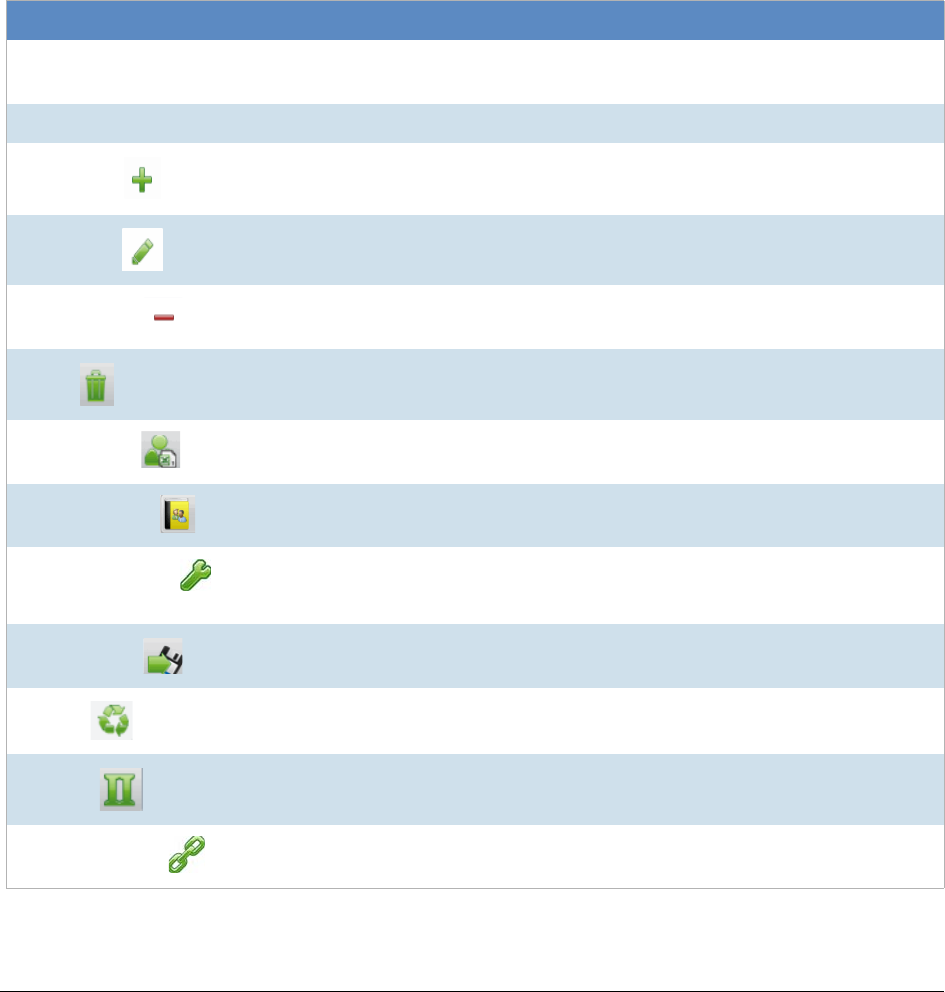
Managing People Data Sources People Tab | 181
Opening the Data Sources, People Page
Administrators, and users with management permissions, use the Data Sources page to manage global people.
To access the Data Sources, People page
1. Log in to the application console as administrator or as a user with management permissions.
See The Administrator Guide for more information.
2. In the console, click Data Sources.
3. On the Data Sources page, click People.
Data Sources Person Tab Features
Element Description
Filter Options Allows you to filter admin roles in the list.
For more information, see The Administrator Guide.
People List Displays all people. Click the column headers to sort by the column.
Add Person
Adds a person. See Adding People on page 182.
Edit Person
Edits a selected person. See Editing a Person on page 183.
Delete Person
Deletes the selected person. See Removing a Person on page 183.
Delete
Deletes the selected admin roles. Only active when an admin roles is selected.
See Removing a Person on page 183.
Import People
Imports people from a CSV or TXT file. See Importing People From a File on
page 183.
Import From AD
Import people from Active Directory. See Adding People using Active Directory
on page 184.
Custom Properties
Add, edit, and delete custom columns with the default value that will be listed in
the Project List panel. When you create a project, this additional column will be
listed in the project creation dialog.
Export to CSV
Exports the current set of data to a CSV file.
Refresh
Refreshes the Groups List.
See Refreshing the Contents in List and Grids on page 38.
Columns
Click to adjust what columns display in the Groups List.
See Sorting by Columns on page 38.
Add Associations
Associates a computer to the selected person.
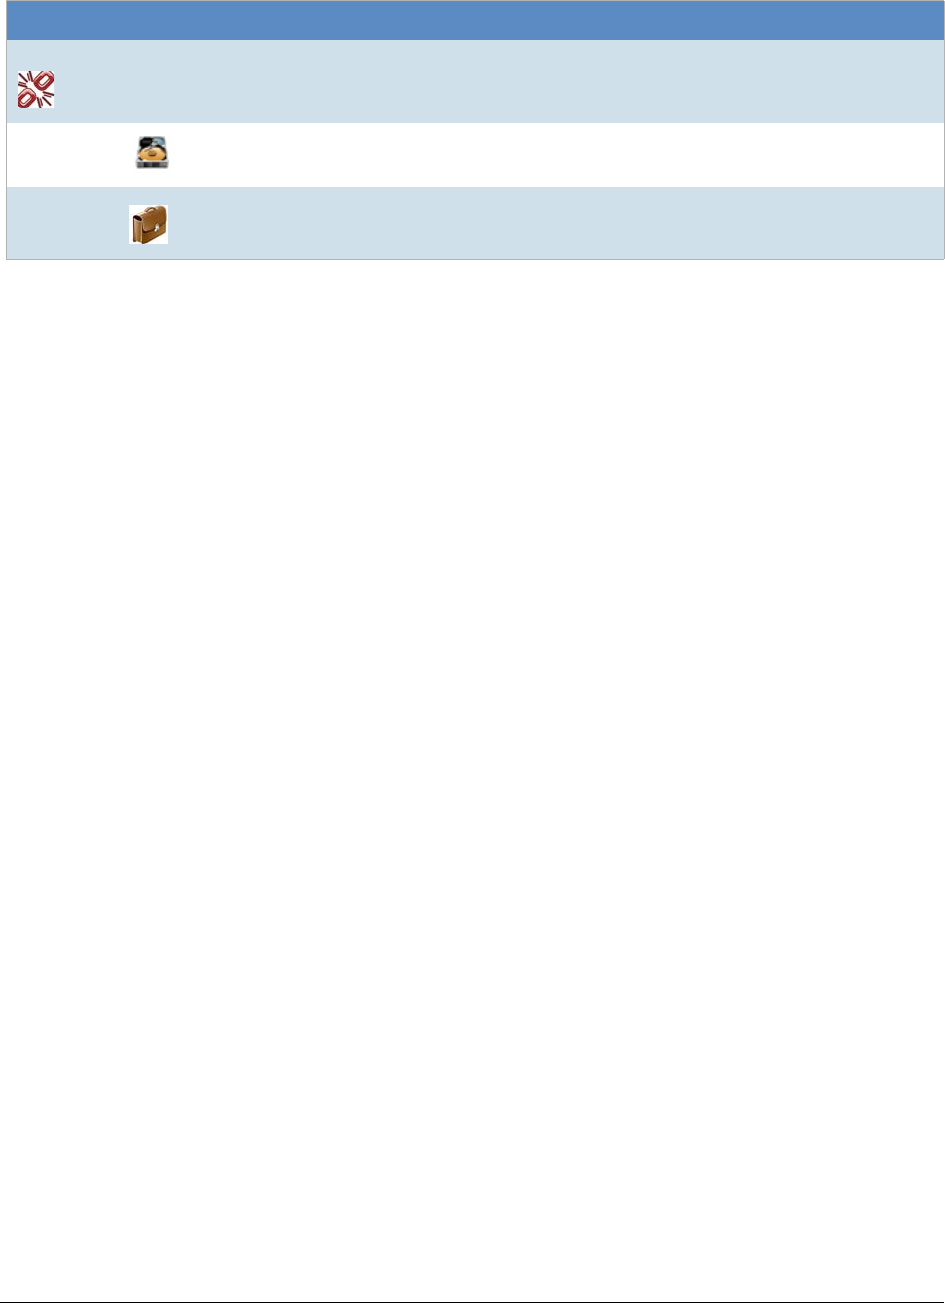
Managing People Data Sources People Tab | 182
The main view is the Person List and includes the following sortable columns:
-First Name
- Last Name
-Username
-Email Address
-Creation Date
-Domain
When you create and view the list of people, this list is displayed in a grid. You can do the following to modify the
contents of the grid:
-Control which columns of data are displayed in the grid.
-Sort the columns
-Define a column on which you can sort.
-If you have a large list, you can apply a filter to display only the items you want.
Highlighting a person in the list populates the Person Details info pane on the right side. The Person Details
info pane has information relative to the currently selected person, beginning with the first name.
At the bottom of the page, you can use the following tabs to view and manage the items that the highlighted
person is associated with:
-Evidence
-Projects
Adding People
Administrators, and users with permissions, can add people.
You can add people from the Data Sources tab in the following ways:
-Manually adding people. See Manually Creating People on page 183.
-Importing people from a file. See Importing People From a File on page 183.
-Importing people from Active Directory. See Adding People using Active Directory on page 184.
Remove Associations Removes the association to a selected person to a computer.
Evidence tab
Lists the evidence that is associated with a person.
Projects tab
Lists the projects that are associated with a person.
Data Sources Person Tab Features
Element Description
Managing People Data Sources People Tab | 183
Manually Creating People
To manually create a person
1. On the Data Sources > People tab, click Add.
2. In Person Details, enter the person details.
3. Click OK.
Editing a Person
You can edit any person that you have added to the project.
To edit a project-level person
1. On the Data Sources > People tab, select a person that you want to edit.
2. Click Edit
3. In Person Details, edit person details.
-Click OK.
Removing a Person
You can remove one or more people from the global People List.
To remove one or more people from the People List
1. On the Data Sources > People tab, select the check box for the people that you want to remove.
2. If you want to remove one person, select Delete. This icon displays above the Information pane
on the right side.
3. If you want to remove more than one person, select Delete. This icon displays on the bottom
menu bar of the People pane.
-To confirm the deletion, click OK.
Importing People From a File
You can import one or more people into a project from a file.
The source file can be either in TXT or CSV format. Custom properties must be defined before importing CSV
files with the custom fields in the headers.
The person name can in the following format:
-First and last name separated by a space
For example, John Smith or Bill Jones
For example, you can create a TXT or CSV file with the following text:
-Chris Clark
Managing People Data Sources People Tab | 184
-Sarah Ashland
To import people from a file
1. On the Home > People tab, click Import People.
2. The Import People Options dialog appears.
-Mark First row contains headers if you want to import custom columns from the file.
-Mark 1 or More Custom Columns if you want to import custom columns from the file.
3. Browse to the TXT or CSV file.
4. Click Open.
5. When the import is complete, view the summary and click OK.
Any people that have invalid data will not be imported. These people will appear on the summary, along with the
field that was flagged for invalid data. You can correct the field, and reattempt to import. Only those people who
were corrected will import. People that had been imported successfully earlier will not import a second time.
Adding People using Active Directory
You can add people by importing from Active Directory.
If Active Directory is not configured, configure it in the System Configuration tab. When Active Directory is
properly configured, the Active Directory filter list opens in the wizard. For more information on configuring Active
Directory, see the Administrator guide.
The person information automatically populates the Person List when you create people using Active Directory.
You can also edit person information.
To add people using Active Directory
1. In the Data Sources > People page, click Import from AD.
2. Set the search/Browse depth to All Children or Immediate Children.
3. Select where you want to perform the search.
4. Set the search options to one of the following:
Match Exact
Starts With
Ends With
Contains
5. Enter your search text.
6. Select the usernames that you want to add as people.
7. Click Add to Import List.
8. Click Continue.
9. Review the members selected, members to add as people, and conflicted members. If you need to
make changes, click Back.
10. Click Import.
Managing People Data Sources People Tab | 185
Home People Tab
Administrators, and users with the Create/Edit Project permission, manage people for a project using the People
tab on the Home page. The People tab is project specific, not global.
To manage people for a project
From the Home page, select a project, and click the People tab.
When you create and view the list of people, they are displayed in a grid. You can do the following to modify the
contents of the grid:
-Control which columns of data are displayed in the grid.
-If you have a large list, you can apply a filter to display only the items you want.
See About Content in Lists and Grids on page 38.
Elements of the People Tab
Element Description
Filter Options Allows you to search and filter all of the items in the list. You can filter the list
based on any number of fields.
See Filtering Content in Lists and Grids on page 41.
People List Displays the people for the project. Click the column headers to sort by the
column.
Refresh
Refreshes the Evidence Path list.
Export to CSV
Export the list to a .csv file.
Refresh
Refreshes the Groups List.
See Refreshing the Contents in List and Grids on page 38.
Columns
Adjusts what columns display in the Groups List.
See Sorting by Columns on page 38.
Add Association
Associates existing people to the project.
Remove Association
Disassociates an existing person from the project.
Import People Imports people from a file.
Add Person
Adds a person.
Edit Person
Edits the selected person.
Evidence Tab Lists the evidence associated with the selected person.
Managing People Adding a Person to a Project | 186
Adding a Person to a Project
Administrators and users with the Create/Edit Project permission can add people to a project.
You can add project-level people in the following ways:
-Adding project-level people from the Shared People list
-Manually adding people
-Importing people from a file
See Importing People From a File on page 187.
-Creating or importing people while importing evidence
See the Loading Data documentation for more information on creating people during import.
If you manually add or import people, they are added to the shared list of people.
To add a person from shared people
1. On the Home > People tab, click Add.
The Associate People to project page displays.
2. Select the shared people that you want associated with the project.
You can click a singe person or use Shift-click or Ctrl-click to select multiple people.
3. Click or Add all Selected.
This moves the people to the Associated People list.
You can also check the selection box next to First Name to add all of the people.
4. You can remove people from the Associated People list by selecting people and clicking or Remove
All Selected.
You can also clear the selection box next to First Name to remove all of the people.
5. Click OK.
You can also add project-level people from shared people using the People tab when creating a project.
Manually Creating People for a Project
To manually create a project-level person
1. On the Home > People tab, click Add.
2. In Person Details, enter the person details.
3. Click OK.
You can also manually create people from the People tab when creating a project.
Managing People Adding a Person to a Project | 187
Editing a Person
You can edit any person that you have added to the project.
To edit a project-level person
1. On the Home > project > People tab, select a person that you want to edit.
2. Click Edit.
3. In Person Details, edit person details.
4. Click OK.
Removing a Person
You can remove one or more people from a project. This does not delete the person from the shared people, it
just disassociates it from the project.
To remove one or more people from a project
1. On the Home > People tab, select the check box for the people that you want to remove.
2. Below the person list, click Remove.
To confirm the deletion, click OK.
Importing People From a File
You can import one or more people into a project from a file. Even though you perform this task at the project
level, it will also add the people to the global people list.
The source file can be either in TXT or CSV format. The file must not contain any headers.
The person name can in the following format:
-First and last name separated by a space
For example, John Smith or Bill Jones
For example, you can create a TXT or CSV file with the following text:
Chris Clark
Sarah Ashland
To import people from a file
1. On the Home > People tab, click Import People from File.
2. Browse to the TXT or CSV file.
3. Click Open.
4. When the import is complete, view the summary and click OK.
About Associating a Person to an Evidence Item
You can use people to associate data to its owner.

Managing People Adding a Person to a Project | 188
You can associate a person to an evidence item in one of two ways; however, the results are different.
-Specify a person when importing an evidence item.
This associates the person when the evidence is processed. You can then use person data when in
Project Review and in exports.
See the Loading Data documentation for more information on creating people on import.
When you associate a person to an evidence item, the person will be associated to all evidence in that
item, whether the evidence item contains a single file or a folder of many files, messages, and so on.
-Edit an evidence item that has already been imported and associate a person.
Using this method, the person association will not be visible or usable in Project Review nor in exports.
You can only view this association in the Evidence and People tabs of the Home page.
Managing Tags | 189
Chapter 16
Managing Tags
The Tags tab on the Home page and in the Project Explorer can be used to do the following:
-Create and manage Labels
-Create and manage Issues
-View categories
-Create category values
-Create Production Sets
-View Case Organizer objects.
Project managers can create labels and issues for the reviewer to use.
You can also view documents assigned to tags using the Tags tab in the Project Explorer.
Tags Tab in Project Explorer
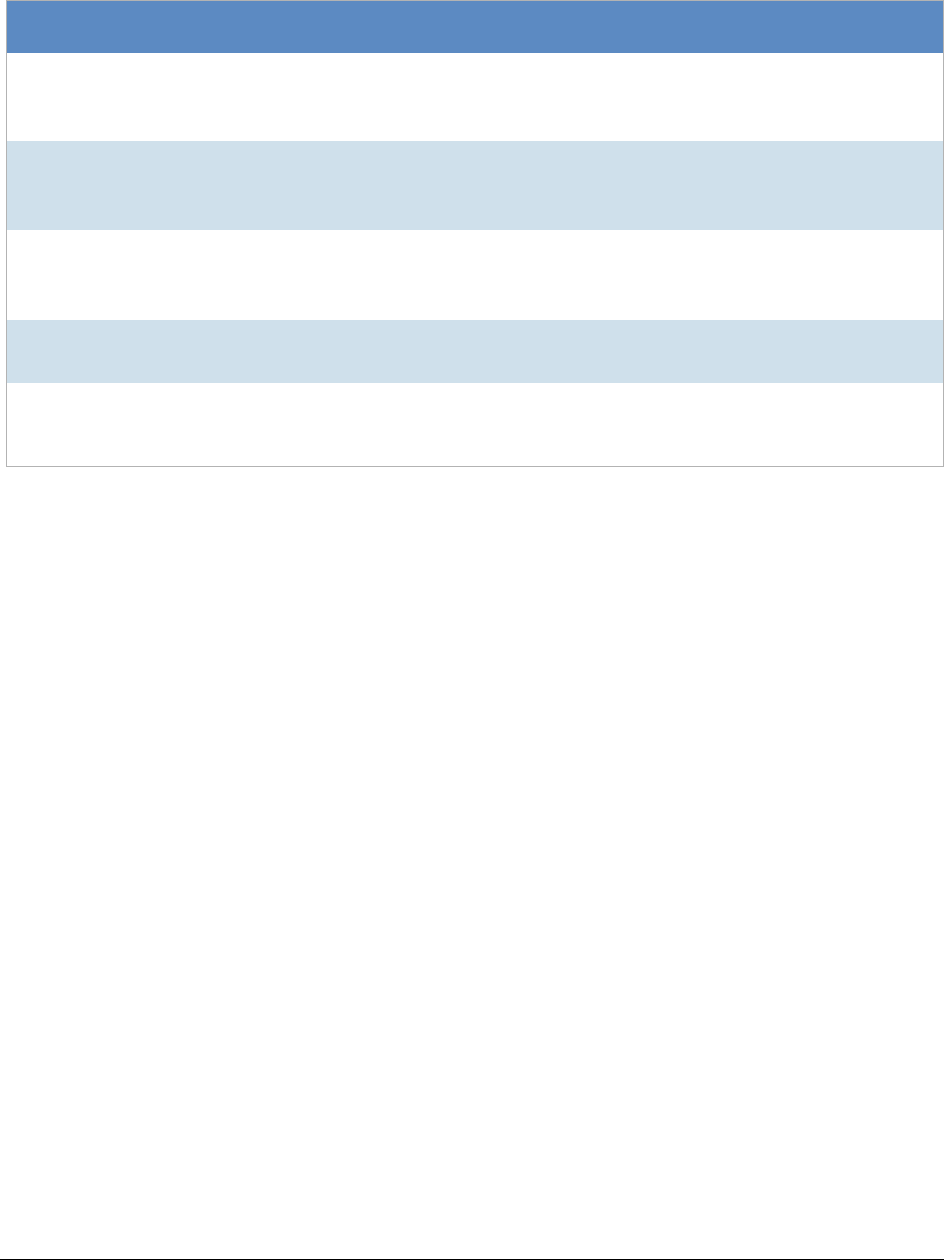
Managing Tags | 190
Elements of the Tags Tab
Elements Description
Categories Displays all the existing categories for the project. Right-click to create category values.
See Creating Category Values on page 218.
See Viewing Documents with a Category Coded on page 121.
Issues Displays all the existing issues. Right-click to create a new issue for the project.
See Managing Issues on page 194.
See Viewing Documents with an Issue Coded on page 121.
Labels Contains all the existing labels. Right-click to create a new label for the project.
See Managing Labels on page 191.
See Viewing Documents with a Label Applied on page 121.
Production Sets Check to include Production Sets in your search. Right-click to create Production Sets.
See Creating Production Sets on page 269.
Case Organizer Displays all the existing case organizer objects for the project. Right-click to create new
objects.
See Using the Case Organizer on page 123.

Managing Tags Managing Labels | 191
Managing Labels
Labels are a tool that reviewers can use to group documents together. Reviewers apply labels to documents,
then project/case managers can use the Labels filter to view all the documents under the selected label. Before
reviewers can use a label, the project/case manager must create it.
Project Managers can do the following:
-Create labels
-Rename labels
-Edit labels
-Delete labels
-Manage labels permissions
Creating Labels
Project/case managers can create labels for reviewers to use when reviewing documents.
To create a label
1. Log in as a user with Project Administrator rights.
2. Open the Tags page by doing one of the following:
-On the Home page:
2a. On the Home page, click Tags.
-In Review:
2a. Click the Project Review next to the project in the Project List.
2b. Click the Tags in the Project Explorer.
3. Right-click the Labels folder and click Create Label.
Create Label Dialog
4. Enter a Label Name.
5. (Optional) Select Is Label Group to create a Label Group to contain other labels and then skip to the
last step.

Managing Tags Managing Labels | 192
6. Do one of the following:
-No Color: Select this to have no color associated with the label.
-Color: Select this and then select a color to associate a color with the label.
Note: The default color is black if you select the Color option. The color selected appears next to the
label in the labels folder.
7. Click Save.
Deleting Labels
Project/case managers can delete existing labels.
To delete a label
1. Log in as a user with Project Administrator rights.
2. Expand the Labels folder.
3. Right-click the label that you want to delete and click Delete.
4. Click OK.
Renaming a Label
Project/case managers can rename labels in the Project Review.
To rename a label
1. Log in as a user with Project Administrator rights.
2. Expand the Labels folder.
3. Right-click the label that you want to rename and click Rename.
4. Enter the new name for the label.
Managing Label Permissions
Project/case managers can grant permissions of labels to groups for use. Groups of users can only use the
labels for which they have permissions.
In order for groups to be assigned, they must first be associated to the project.
To manage permissions for labels
1. Log in as a user with Project Administrator rights.
2. Expand the Labels folder.
3. Right-click the label for which you want to grant permissions and click Manage Permissions.
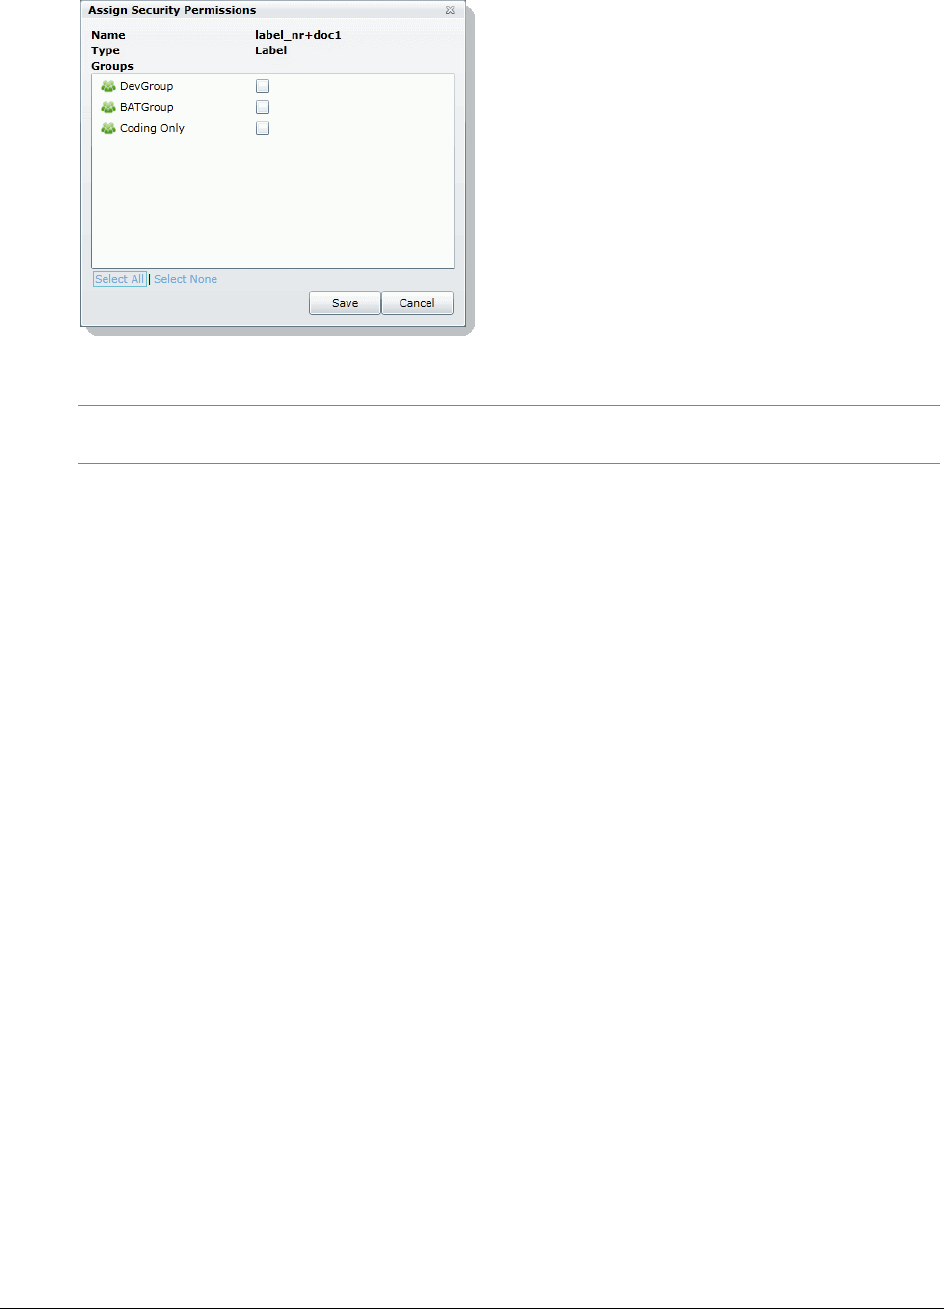
Managing Tags Managing Labels | 193
Assign Security Permissions
4. Select the groups that you want to grant permissions for the selected label.
Note: By default, all groups that the logged-in user belongs to will be selected. To make it a personal
label, all groups should be un-selected.
5. Click Save.
Applying Labels to Documents
After an label has been created and associated with a user group, you can apply labels to documents.
To apply a label to a document
1. Create an label.
See Creating Labels on page 191.
2. Grant permissions for the label.
See Managing Label Permissions on page 192.
3. Apply labels to documents.
For instructions, see Using Labels in the Reviewer Guide or go to Using Labels (page 117).
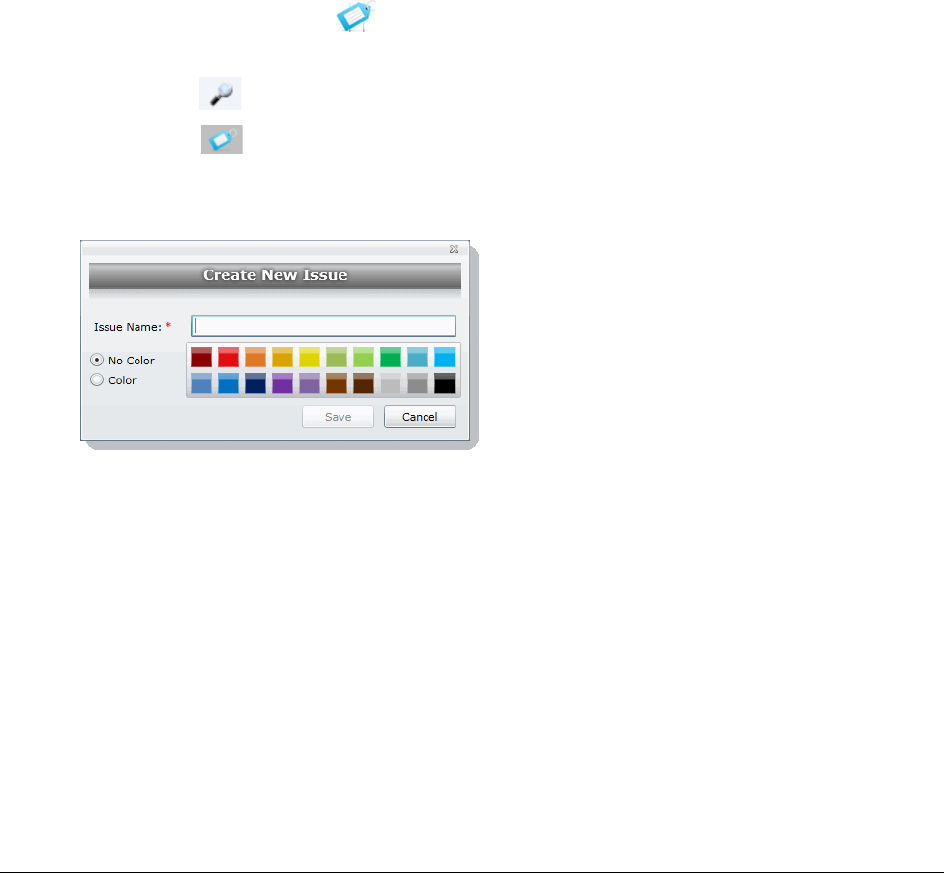
Managing Tags Managing Issues | 194
Managing Issues
Project/case managers with View Issues and Assign Issues permissions can create, delete, rename, and assign
permissions for issues. Issues work like labels. Reviewers can apply issues to documents to group similar
documents.
Creating Issues
Project/case managers with View Issues and Assign Issues permissions can create issues for other users to
code.
To create an issue
1. Log in as a user with View Issues and Assign Issues rights.
2. Open the Tags page by doing one of the following:
-On the Home page:
2a. On the Home page, click Tags.
-In Review:
2a. Click the Project Review next to the project in the Project List.
2b. Click the Tags in the Project Explorer.
3. Right-click the Issues folder and click Create Issue.
Create New Issue Dialog
4. Enter an Issue Name.
5. Do one of the following:
-No Color: Select this to have no color associated with the issue.
-Color: Select this and then select a color to associate a color with the issue.
6. Click Save.
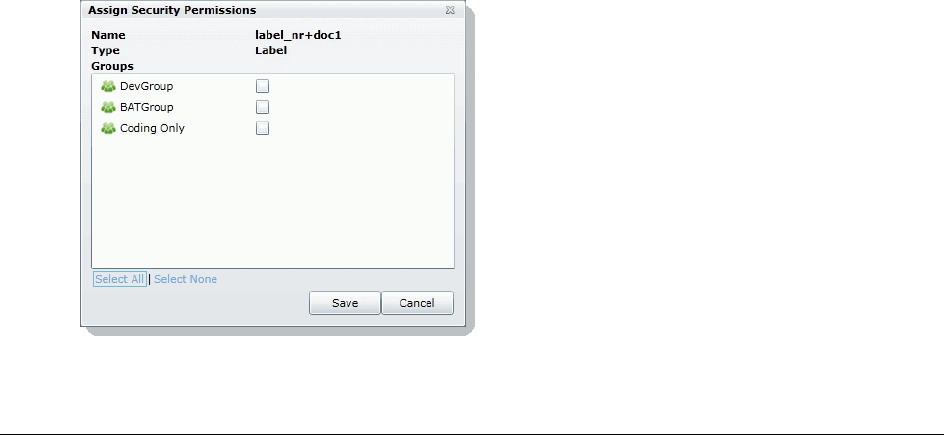
Managing Tags Managing Issues | 195
Deleting Issues
Project/case managers with View Issues and Assign Issues permissions can delete issues.
To delete an issue
1. Log in as a user with View Issues and Assign Issues rights.
2. Expand the Issues folder.
3. Right-click the issue that you want to delete and click Delete.
4. Click OK.
Renaming Issues
Project/case managers with View Issues and Assign Issues permissions can rename issues.
To rename an issue
1. Log in as a user with View Issues and Assign Issues rights.
2. Expand the Issues folder.
3. Right-click the issue that you want to rename and click Rename.
4. Enter the new name for the issue.
Managing Issue Permissions
Project/case managers can grant permissions of issues to groups for use. Groups of users can only use the
labels for which they have permissions.
To manage permissions for labels
1. Log in as a user with View Issues and Assign Issues rights.
2. Expand the Issues folder.
3. Right-click the issue for which you want to grant permissions and click Manage Permissions.
Assign Security Permissions
4. Check the groups that you want to grant permissions for the selected issue.

Managing Tags Managing Issues | 196
5. Click Save.
Applying Issues to Documents
After an issue has been created and associated with a user group, it can then be added to a tagging layout for
coding.
To apply an issue to a document
1. Create an issue.
See Creating Issues on page 194.
2. Grant permissions for the issue.
See Managing Issue Permissions on page 195.
3. Add Issues to the Tagging Layout.
See Associating Fields to a Tagging Layout on page 221.
4. Check out a review set of documents. (optional)
See the Reviewer Guide for more information on checking out review sets.
5. Code the documents in the review set with the issues you created.
See the Reviewer Guide for more information on coding.

Setting Project Permissions About Project Permissions | 197
Chapter 17
Setting Project Permissions
About Project Permissions
The user who creates a project automatically has administrator permissions for that project. User with the
Application Administrator role also have administrator permissions for all projects.
For all other users, you must assign permissions to a specific project. You can assign project permissions to
individual users or user groups.
In the project list of the Home page, users will only see projects to which they have permissions. You can give a
user permissions to review a project but not see any project properties on the Home page.
Project permissions are project specific, not global. For information on how to manage global permissions, see
the Admin Guide.
In order to configure project permissions, you must have either Administrator or Create/Edit Projects
permissions.
You assign project permissions to users or user groups by using Project Roles.
About Project Roles
Before you can apply permissions to a user or group, you must set up project roles. A project role is a set of
permissions that you can associate to multiple users or groups. Creating a project role simplifies the process of
assigning permissions to users who perform the same tasks. To use project roles, you do the following:
1. Associate users or user groups to a project.
2. Create a project role.
3. Assign permissions to the project role.
4. Associate users or user groups to the project role.
You can do the following:
-Select an existing project role
-Create or edit a role and assign permissions to that role
You can create and use multiple project roles.
Setting Project Permissions About Project Permissions | 198
Project-level Permissions
By default, when you associate a user (without global permissions) to a project, they can see the project in the
Project List, and they can enter Project Review, but they do not have permissions to see any of the data in the
project. In order to see data and perform any review tasks, they must be given explicit permissions to the project.
You can only assign permissions to a project role, which you then associate with users or user groups.
The following table describes the available project permissions that you can assign to a project role.
Project-level Permissions in the Project Role Details pane
Permission Description
Project Administrator This grants all permissions to the project, for example:
-Can Manage Project Roles.
-Can assign access permissions to users & groups.
-Has all project level functional permissions listed below.
-Can import/export.
-Can see job list for jobs created for his project.
Individual Permissions: These are individual permissions that you can assign to one or more
roles.
Admin Reviewer Can view all objects in the Item List that are in the project. However, they
must have other permissions to view contents in the viewers (Native and
Text), run searches, view and use labels, view document groups, and so on.
You can also use Document Groups to let users see items in the Item List.
Manage Project Roles Can manage Project Roles.
Manage Project People Provides access to the People tab where you can create and edit People
(custodians) associated with the project.
Run Search Can run searches in the Project Review.
Note: User must have this permission to perform other search functions as
well.
Save Search Can save searches that the user performs themselves.
Manage Saved Search
Permissions Can share your saved searches with other groups.
View Labels Can view the labels everywhere that labels appear.
Assign to Labels Can assign labels to objects.
Manage Labels Permissions Can grant permissions to labels.
Create Labels Can create and edit labels in the Project Explorer in Project Review.
Note: Must have View Labels permission as well to create and delete
labels.
Delete Labels Can delete labels in Project Review.
Create Review Sets Can create review sets.
Delete Review Sets Can delete review sets in Project Review.
View Review Sets Can view the review sets in the Project Explorer and Review Batches panel
in the Project Review.
Setting Project Permissions About Project Permissions | 199
Manage Review Set
Permissions Can assign review sets to users/groups.
View Native Can view the Native panel in Project Review.
View Text Can view the Text panel in Project Review.
View Coding Layout Can view the Coding panel in Project Review.
Edit Document Can change data for document fields using tagging layouts.
Create Categories Can create or edit categories in Project Review.
Delete Categories Can delete categories in Project Review.
View Categories Can view categories in Project Review.
Assign Categories Can assign a document to a category.
Manage Category
Permissions Can assign permissions for categories and category values.
View Issues Can view issues in Project Review.
Assign Issues Can assign issues to a document.
Create Issues Can create and edit issues in Project Review.
Delete Issues Can delete issues in Project Review.
Manage Issue Permissions Can assign permissions for issue values.
View Notes Can view notes everywhere that they appear in Project Review.
Add Notes Can add notes in Project Review.
Delete Notes Can delete notes in Project Review.
View Annotations Can view annotations in Image, Natural, and Transcript panels in Project
Review.
Add Annotations Can add annotations in Project Review (but no view them unless the View
Annotation permission is granted).
Delete Annotations Can delete annotations in Project Review.
View Activity History Can view Activity panel in Project Review.
Create Production Set Can create production sets in Project Review.
Delete Production Set Can delete production sets in Project Review.
Manage Production Set
Permissions Can edit and assign permissions for production sets.
Delete Evidence Can delete evidence items from the Item List grid.
Imaging Can perform the imaging mass action in the Item List panel and can create
an image using the Annotate option in the Natural panel.
Upload Transcripts Can upload transcripts in Project Review.
Project-level Permissions in the Project Role Details pane (Continued)
Permission Description
Setting Project Permissions Permissions Tab | 200
Permissions Tab
The Permissions tab on the Home page is used to assign users or groups permissions within the project.
Upload Transcript Exhibits Can upload exhibits in Project Review.
Manage Transcript
Permissions Can assign permissions to Transcript Groups.
Create Transcript Group Can create a transcript group in Project Review.
Predictive Coding Can apply predictive coding to documents in Project Review.
Global Replace Can search and replace words throughout a project in Project Review.
View Data Reports Can view the Data Volume Reports on the Reports tab for projects which
they have the rights to access.
The following are available if you have an eDiscovery or Litigation Hold license:
For more information, see the following in the Using Lit Holds chapter:
Project-level Lit Hold Permissions (page 305)
Approve Litholds Can approve configured Litigation Holds.
Create Litholds Can create Litigation Holds.
Delete Litholds Can delete Litigation Holds.
View Litholds Can view Litigation Holds.
Hold Manager Can manage Lit Holds, including creating, viewing, and deleting Lit Holds.
The following are available if you have an eDiscovery license:
View Project Jobs Can view all jobs. See Introduction to Jobs on page 427.
Approve Jobs Can approve jobs.
Create Collection Can create Collection jobs.
Create Report Only Can create Report Only jobs.
Delete Jobs Can delete jobs.
Execute Jobs Can execute jobs.
Express Export
Initiate Processing
View Status Reports
View Audit Reports
Project-level Permissions in the Project Role Details pane (Continued)
Permission Description
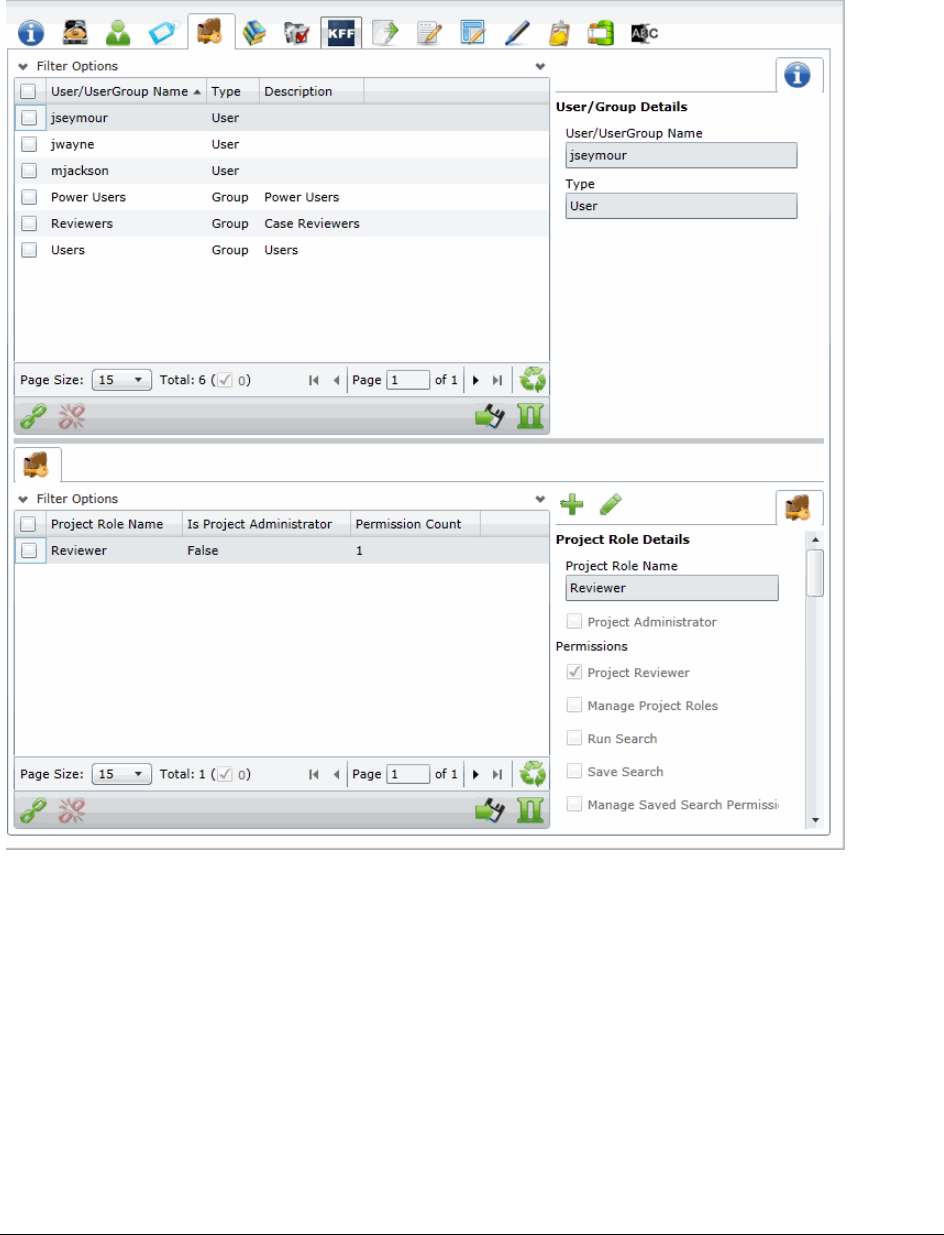
Setting Project Permissions Permissions Tab | 201
The Permissions tab is project specific, not global. For information on how to manage global permissions, see
the Admin Guide.
Permissions Tab

Setting Project Permissions Permissions Tab | 202
To access the Permissions tab
1. On the Home page, select a project.
2. Click the Permissions tab.
To apply permissions to a user or group, you must create a project role. You can then associate that project role
to a user or group on the Permissions tab.
See Creating a Project Role on page 205.
See Associating Users and Groups to a Project on page 203.
See Project-level Permissions on page 198.
Elements of the Permissions Tab
Element Permission
Filter Options Allows you search and filter all of the items in the list. You can filter the
list based on any number of fields.
See Filtering Content in Lists and Grids on page 41.
Users/User Group List Displays the users and groups associated with the project. Click the
column headers to sort by the column.
Refresh
Refreshes the User/Group List.
Export to CSV
Exports the Permissions List to a CSV file.
Columns
Adjusts what columns display in the User/Group List.
Add Association
Adds either a group/user to a role or a role to a group/user.
Remove Association
Disassociates a group/user from a role or disassociate a role from a
group/user.
User/Group Details pane Displays the details for the selected user or group.
Project Roles Tab Displays the available roles for the project.
Add Role Adds a role. Specify the permissions of the role in this data form.
Edit Role
Edits the selected role.
Project Role Details pane Displays the details for the selected project role name.
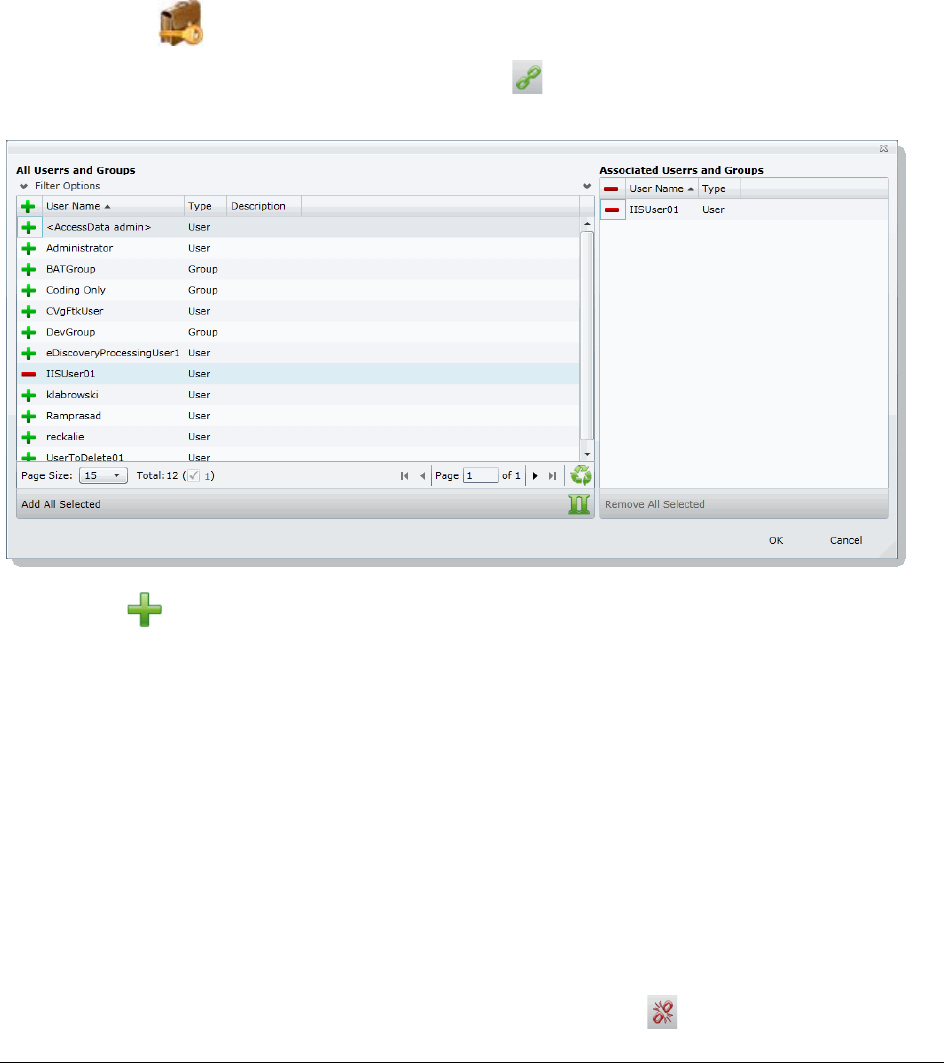
Setting Project Permissions Associating Users and Groups to a Project | 203
Associating Users and Groups to a Project
Before you can apply a project role to a user or group, you must first associate the user or group to the project.
Administrators and project managers with the correct permissions can associate users and groups to a project in
the Permissions tab. Once a user or group is added to a project, the user can see the project in the Project List
panel.
To associate a user or group to a project
1. On the Home page, select a project.
2. Click the Permissions tab.
3. In the User/Group list pane, click Add Association .
All Users and Groups Dialog
4. Click to add the user or group to the project.
5. Click OK.
6. To grant specific permissions to a user or group, associate them to a project role.
See Associating Project Roles to Users and Groups on page 204.
Disassociate Users and Groups from a Project
Administrators and project/case managers with the correct permissions can remove users from a project by
disassociating them from the project in the Permissions tab.
To disassociate a user or group to a project
1. On the Home page, select a project, and click the Permissions tab.
2. Check the user or group you want to remove from the project in the User/Group list pane.
3. In the User/Group list pane, click the Remove Association button .
Setting Project Permissions Associating Project Roles to Users and Groups | 204
Associating Project Roles to Users and Groups
After you have associated a user or user group to a project, you can associate them to a project role.
See Associating Users and Groups to a Project on page 203.
You can select an existing project role or create a new one.
For information on creating new project roles, see Creating a Project Role (page 205).
To associate a project role to a user or group
1. On the Home page, select a project.
2. Click the Permissions tab.
3. In the User/UserGoup pane, select a user or group that has been associated to the project.
4. Do one of the following:
Associate the user or group to an existing project role.
4a. In the Project Role pane (bottom of the page), click the Add Association button.
4b. In the All Project Role dialog, click the Add button for the desired project roles to associate
with the user or group.
4c. Click OK.
Create a new project role.
See Creating a Project Role on page 205.
Disassociating Project Roles from Users or Groups
Administrators and users with the Manage Project permissions can disassociate project roles from users and
groups for a specific project.
To disassociate a project role to a user or group
1. On the Home page, select a project.
2. Click the Permissions tab.
3. In the User/UserGoup pane, select a user or group that has been associated to the project.
4. In the Project Roles pane, click the Remove Association button .

Setting Project Permissions Creating a Project Role | 205
Creating a Project Role
After you have associated a user or user group to a project, you can associate them to a project role. You can
use an existing role or create a new role.
See About Project Roles on page 197.
To create a project role
1. On the Home page, select a project.
2. Click the Permissions tab.
3. If no user is associated with the project, associate a user by doing the following:
3a. In the Users/UserGroup pane, click the Add Associations button.
3b. Add a user or group by clicking the Add button for a user or group.
3c. Click OK.
4. In the Project Roles pane at the bottom of the screen, click the Add button.
Add Project Roles Data Form
5. Enter a Project Role Name.
6. Check the permissions that you want to include in the role.
See Project-level Permissions on page 198.
7. Click OK.

Setting Project Permissions Creating a Project Role | 206
Editing and Managing a Project Role
You can edit project roles if you want to alter the permissions in the role.
Because project roles can be used across multiple projects, you cannot delete a project role as it may affect
other projects.
To edit a project role
1. On the Home page, select a project.
2. Click the Permissions tab.
3. Select a user that has the project role associated with it.
4. In the Project Roles pane at the bottom of the screen, select a role and click the edit button .
5. Edit the role and click OK.

Running Reports Accessing the Reports Tab | 207
Chapter 18
Running Reports
This chapter is designed to help you execute and understand reports. Reports allow you to view data about your
project.
Users with the necessary project-level permissions can run reports for a project using the Reports tab and the
Exports tab on the Home page. Permissions for the Reports and Exports tabs are project specific, not global.
See Setting Project Permissions on page 197.
The following reports are available:
-Basic Reports (page 208)
Audit Log Report (page 208)
Deduplication Report (page 209)
Data Volume Report (page 209)
Search Reports (page 209)
Export Set Reports (page 210) (Only appears after generated)
Export Set Reports (page 210) (Only appears after generated)
Case Organizer Reports (page 211)
Case Organizer Reports (page 211)
-Search Reports (page 209)
Project Result Report (page 211)
Completion Status Report (page 211)
Custodian Datamap Report (page 211)
Accessing the Reports Tab
To access the Reports tab
From the Home page, select a project, and click the Reports tab.
To run a report
1. Select a project in the Project List Panel.
2. Click the Reports tab on the Home page.
3. Click Generate Report for the report that you want to run.
4. Wait for the report to generate.

Running Reports Accessing the Reports Tab | 208
5. After the report is generated, click Download.
Basic Reports
The following reports are available with all product licenses.
Audit Log Report
This log records the user activities at the Project Review and evidence object level. The log records the following
actions in the report:
-Project Review Activities:
Entered Review
Exited Review
Perform Search
Save Search
Apply Filter
Create Label
Create Document Group
Create Issue
Create Category
Create Review Set
Check Out Review Set
Check In Review Set
Create Production Set
Export Data
-Evidence Object Activities
Label Document
Annotate Document
Create Redaction
Delete Redaction
Remove Redaction
Create Highlight
Edit Document (via Editable Grid)
Image Document
Code Document (via Tagging)
Delete Document
View Document (Includes Duration)
Link Document
Compare Document
Print Document
Running Reports Accessing the Reports Tab | 209
Deduplication Report
You can open the Deduplication Summary report to view duplicate files and emails that were filtered in the
project. Also included in the report are the deduplication options that were set for documents and email.
You can generate the report, print it, and save it in a variety of formats, and download it to a spreadsheet.
Data Volume Report
You can generate the Data Volume Report to view the size of processed data, evidence file counts by file
category, and a breakout of files by extension.
You can view the report, print it, and save it in a variety of formats.
Search Reports
You can generate and download a report that shows you the overall results of your search.
Note: When generating a search report that includes a large number of items, such as over 100,000, the report
generation can take a long time, possibly two hours or more. You should not perform other tasks using the
console during this time. Even if the console closes due to inactivity, the report will still generate.
The following details are included in the Search report:
-Total Unique Files: This count is the total items that had at least one keyword hit. If a document has
several keywords that were found within its contents, a count of 1 is added to this total for that document.
Note: If a search term contains a keyword hit, due to a variation search (stemming, phonic, or fuzzy), the
character “&” is added to the end of each search term in the File details to indicate the variation
search. However, a search term found with the synonym or related search will not show the “&.” at
the end of the term.
-Total Unique Family Items: This count is the number of files where any single family member had a
keyword hit. If any one file within a document family had a keyword hit, the individual files that make up
this family are counted and added to this total. For example, one email had 3 attachments and the email
hit on a keyword, a count of 4 files would be added to this count as a result.
-Total Family Emails: This count is the number of emails that have attachments where either the email
itself or any of the attachments had a search hit. This count is for top level emails only. Emails as
attachments are counted as attachments.
-Total Family Attachments: This count is the number of the attachments where either the top level email or
any of the attachments had a search hit. For example, if you have an email with an email attached and
the attached email has 4 documents attached to it, this count would include the 5 attachments.
-Total Unique Emails with no Attachments: This count is the number of the emails that have no
attachments where a search hit was found.
-Total Unique Loose eDocs: This count is the number of loose eDocuments where a search hit was found.
This does not include attachments to emails, but does count the individual documents where a hit was
found from within a zip file.
-Total Hit Count: This count is the total number of hits that were found within all of the documents.

Running Reports Accessing the Reports Tab | 210
Note: For some queries, the total hit count may be incorrect.
To generate and download a search report
1. Perform a search.
In Project Review, click Search Options > Generate Report.
Export Set Reports
The Export Set report supplies information about exported production sets. You can also generate and download
a report either before or after you export the set to a load file. Each time you generate the report, it overwrites
any previously generated report for that export set.
After an export set report has been generated, you can download it in Microsoft Office Excel Worksheet format
(XLSX) and save it to a new location. You can also view a list of the Export Set Reports under the Reports tab.
To run an export set report
1. Select a project in the Project List panel.
2. Click the Printing/Export tab on the Home page.
3. Under the Export Set History tab, select an export and click Show Reports.
4. Under Summary, click Generate. Once an export report has been generated, click Download.
Export Set Info
-Name: The name of the Export Set as defined by the user when the set was created.
-Labels: Lists which labels are included in the document set.
-Comments: Lists any comments that added when the export set was created.
-File Count: Displays a total of the number of documents contained within the exported set of data.
-File Size: Displays the total size of the documents being exported.
File Breakout
-Type: Lists the document type by file extension of the files contained within the exported set of
documents.
-Count: Displays a count of how many documents are contained within each group.
-Size: Displays the total size of the files within each of the groupings.
File List
-Object Name: Displays the name of the file being exported.
-Person: Displays the name of the associated person.
-Extension: Displays the file extension of the exported item.
-Path: Displays the original filepath of the exported item.
-Create Date: Displays the metadata property for the created date of the exported item.
-Last Access Date: Displays the metadata property for the last access date of the exported item.

Running Reports Accessing the Reports Tab | 211
-Modify Date: Displays the metadata property for the modification date of the exported item.
-Logical Size: Displays the metadata property fore the logical size of the exported item.
-File Type (Generic): Displays the file type of the exported item.
Case Organizer Reports
The Case Organizer report supplies information about case organizer objects in your project.
You can must generate the report from the Tags tab in Review.
After an report has been generated, you can download it in Microsoft Word format (DOCX) and save it to a new
location. You can also view exported files.
For details, see the Using Case Organizer information in the Review Guide.
Image Conversion Exception Report
The Image Conversion Exception (ICE) report displays documents that were not imaged due to limitations of the
image conversion tools or system failures.
To run an image conversion exception report
1. Select a project in the Project List panel.
2. Click the Export tab on the Home page.
3. Expand the Download Reports button of a production set.
4. Select Download ICE Report.
eDiscovery Reports
If you have an eDiscovery license, you can also use the following reports.
Project Result Report
You can generate the Project Result Report to shows a summary and detailed information about collected and
external evidence.
Completion Status Report
The Completion Status report shows the status of a job. You can generate the report after the job starts running
and at least one job target status is collecting.
Custodian Datamap Report
You can generate the Custodian Datamap Report to show all the custodians and their associated data sources
for a given legal matter. For example, the report can display the custodian name, the data source type and
name, whether or not the data source was collected, and the date of the last collection that was made.

Configuring Review Tools Configuring Markup Sets | 212
Chapter 19
Configuring Review Tools
Project/case managers with the correct permissions can configure many of the review tools that admin reviewers
use in Project Review. See Setting Project Permissions (page 197) for information on the permissions needed to
set up review tools. The following review tools can be set up from the Home page:
-Markup Sets: Configuring Markup Sets (page 212)
-Custom Fields: Configuring Custom Fields (page 216)
-Tagging Layouts: Configuring Tagging Layouts (page 219)
-Highlight Profiles: Configuring Highlight Profiles (page 224)
-Redaction Text: Configuring Redaction Text (page 228)
Configuring Markup Sets
Markup sets are a set of redactions and annotations performed by a specified group of users. For example, you
can create a markup set for paralegals, then when paralegal reviewers perform annotations on documents in the
Project Review, all of their markups will only appear when the Paralegal option is selected as the markup for the
document in the Natural or Image panel of Project Review.
Note: Only redactions and annotations are included in markup sets.
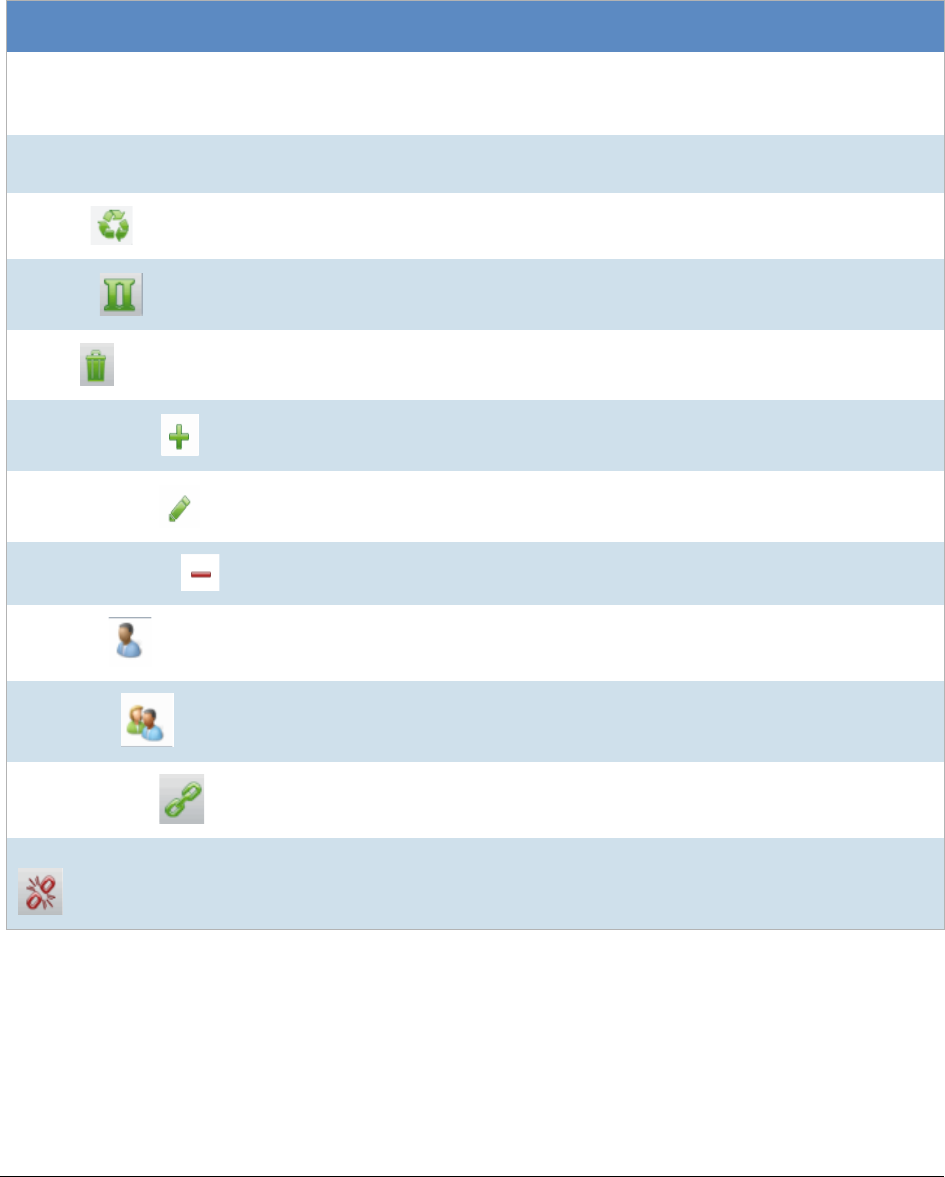
Configuring Review Tools Configuring Markup Sets | 213
Markup Sets Tab
The Markup Sets tab on the Home page can be used to create markup sets for reviewers to use. Markup sets
are a set of redactions and highlights performed by a specified group of users.
Markup Sets Elements
Element Description
Filter Options Allows you search and filter all of the items in the list. You can filter the list based
on any number of fields.
See Filtering Content in Lists and Grids on page 41.
Markup Sets List Displays the markup sets already created for the project. Click the column
headers to sort by the column.
Refresh
Refreshes the Markup Sets List.
Columns
Adjusts what columns display in the Markup Sets List.
Delete
Deletes selected markup set. Only active when a markup set is selected.
Add Markup Set
Adds a markup set.
Edit Markup Set
Edits the selected markup set.
Delete Markup Set
Deletes the selected markup set.
Users Tab
Allows you to associate users to a markup set.
Groups Tab
Allows you to associate groups to a markup set.
Add Association
Associates a group/user to a markup set.
Remove Association Disassociates a markup set from a user/group.

Configuring Review Tools Configuring Markup Sets | 214
Adding a Markup Set
Before you can assign a markup set to a user or group, you must first create the markup set on the Home page.
Project/case managers with the Project Administrator permission can create, edit, and delete markup sets.
To add a markup set
1. Log in as a user with Project Administrator rights.
2. Click the Markup Sets tab.
See Markup Sets Tab on page 213.
3. Click the Add button .
4. In the Markup Set Detail form, enter the name of the Annotation Set.
5. Click OK.
Deleting a Markup Set
To delete a markup set
1. Log in as a user with Project Administrator rights.
2. Click the Markup Sets tab.
See Markup Sets Tab on page 213.
3. Select the markup set that you want to delete.
4. Click the Delete button .
5. In the confirm deletion dialog, click OK.
Editing the Name of a Markup Set
You can edit the name of an existing markup set if you have Project Administrator rights.
To edit a markup set
1. Log in as a user with Project Administrator rights.
2. Click the Markup Sets tab.
See Markup Sets Tab on page 213.
3. Select the markup set that you want to edit.
4. Click the Edit button .
5. Change the name of the Annotation Set.
6. Click OK.
Configuring Review Tools Configuring Markup Sets | 215
Associating a User or Group to a Markup Set
If you are a user with Project Administrator rights, you can associate users or groups to markup sets. Once
associated, annotations that the user performs in the Project Review will appear on the document in Native or
Image view when the markup set is selected.
To associate a user or group to a markup set
1. Log in as a user with Project Administrator rights.
2. Click the Markup Sets tab.
See Markup Sets Tab on page 213.
3. Select the markup set that you want to associate to a user or group.
4. Click the User or Group tab at the bottom of the page.
5. Click the Add Association button .
6. In the All Users or All User Groups dialog, click the plus sign to add the user or group to the markup set.
7. Click OK.
Disassociating a User or Group from a Markup Set
If you are a user with Project Administrator rights, you can disassociate users or groups to markup sets.
To disassociate a user or group from a markup set
1. Log in as a user with Project Administrator rights.
2. Click the Markup Sets tab.
See Markup Sets Tab on page 213.
3. Check the markup set that you want to disassociate to a user or group.
4. Click the User or Group tab at the bottom of the page.
5. Click the Remove Association button .
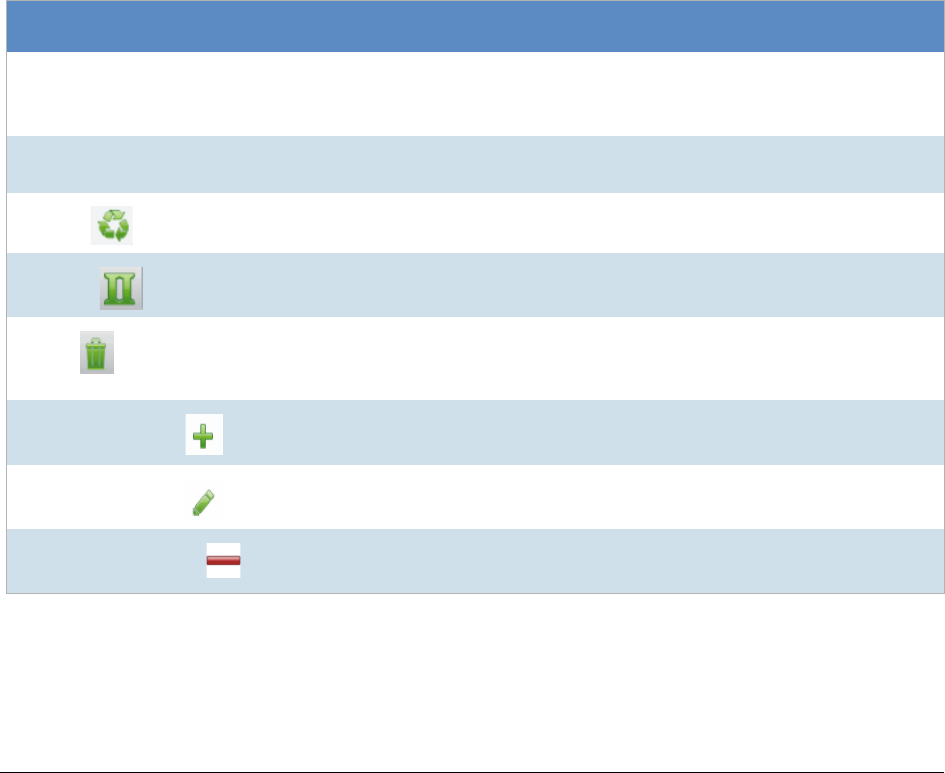
Configuring Review Tools Configuring Custom Fields | 216
Configuring Custom Fields
Custom fields include the columns that appear in the Project Review and categories that can be coded in Project
Review. You can create custom fields that will allow you to display the data that you want for each document in
Project Review, in production sets, and in exports. Custom fields allow you to:
-Map fields from documents upon import to the custom fields you create. See the Loading Data
documentation for more information on mapping fields.
-Code documents for the custom fields in Project Review, using tagging layouts. See the Reviewer Guide
for more information on coding data.
See Adding Custom Fields on page 217.
See Creating Category Values on page 218.
See Adding a Tagging Layout on page 220.
Custom Fields Tab
The Custom Fields tab on the Home page can be used to add and edit custom fields for Project Review and
coding.
Elements of the Custom Fields Tab
Element Description
Filter Options Allows you search and filter all of the items in the list. You can filter the list
based on any number of fields.
See Filtering Content in Lists and Grids on page 41.
Highlight Custom Fields Displays the custom fields already created for the project. Click the column
headers to sort by the column.
Refresh Refreshes the Custom Fields List.
Columns Adjusts what columns display in the Custom Fields List.
Delete Deletes selected custom fields. Only active when one or more custom fields
are selected.
IMPORTANT: See About Deleting Custom Fields on page 218.
Add Custom Fields Adds a custom field.
Edit Custom Fields Edits the selected custom field.
Delete Custom Fields Deletes the selected custom field.
IMPORTANT: See About Deleting Custom Fields on page 218.

Configuring Review Tools Configuring Custom Fields | 217
Adding Custom Fields
Project/case managers with the Project Administrator permission can create and edit custom fields. You can use
the custom fields to add categories, text, number, and date fields.
When creating a custom field, the application will prevent you from using the name of an existing field.
To add a custom field
1. Log in as a user with Project Administrator rights.
2. Click the Custom Fields tab.
See Custom Fields Tab on page 216.
3. Click the Add button .
4. In the Custom Field Detail form, enter the name of the custom field.
5. Select a Display Type:
-Check box: Create a column that contains a check box. This is for coding categories only.
-Date: Create a column that contains a date.
-Number: Create a column that contains a number.
-Radio: Create a column that contains a radio button. This is for coding categories only.
-Text: Create a column that contains text.
6. Enter a Description for the custom field.
7. Select ReadOnly to make the column un-editable.
8. Click OK.
Editing Custom Fields
Project/case managers with the Project Administrator permission can create and edit custom fields. You cannot
edit the Display Type of the custom field.
To edit a custom field
1. Log in as a user with Project Administrator rights.
2. Click the Custom Fields tab.
See Custom Fields Tab on page 216.
3. Select the custom field you want to edit.
4. Click the Edit button.
5. Make your edits.
6. Click OK.
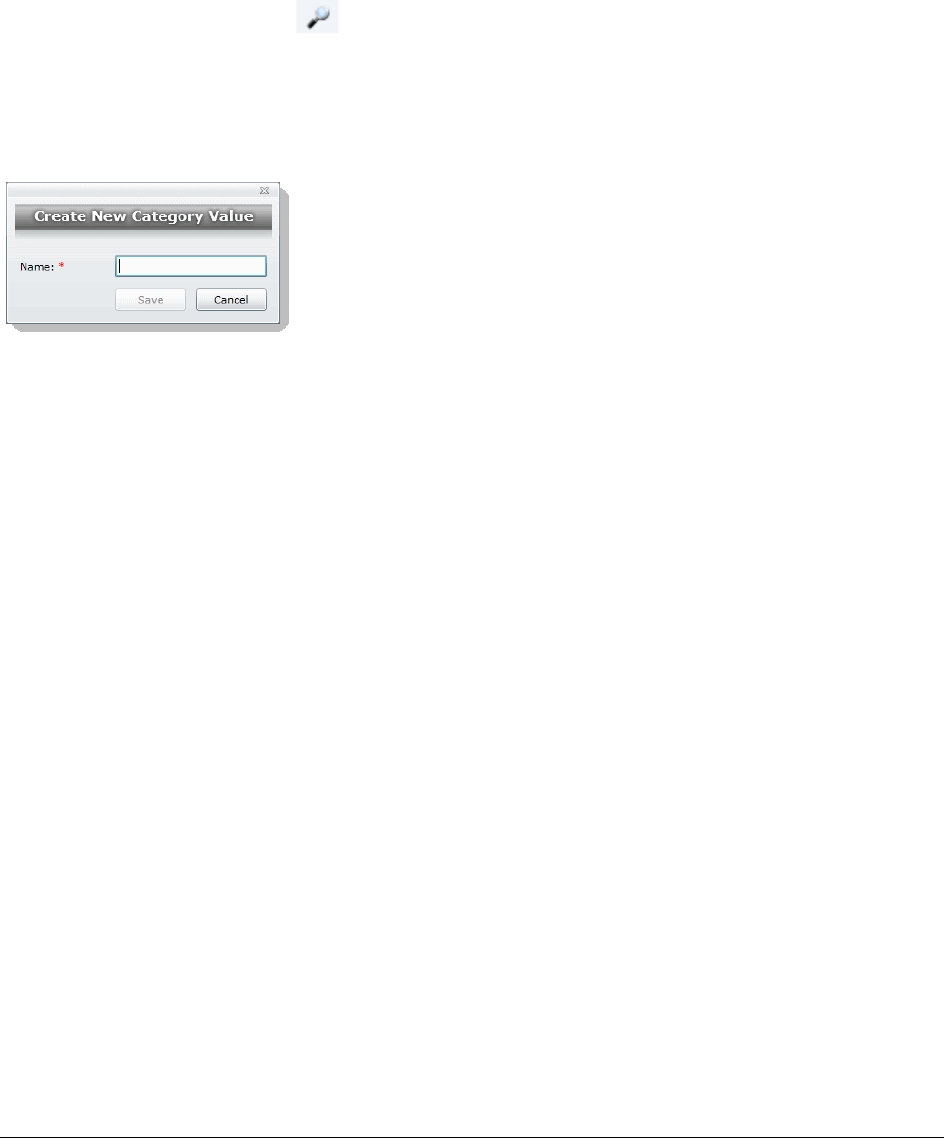
Configuring Review Tools Configuring Custom Fields | 218
Creating Category Values
After you have created a Custom Field for check boxes or radio buttons, you can add values to the check boxes
and radio buttons in Project Review. You can create multiple values for each category.
To add values to categories
1. Log in as a user with Assign Categories permissions.
2. Click the Project Review button next to the project in the Project List.
3. In the Project Explorer, click the Tags tab.
4. Expand the Categories.
5. Right-click on the category and select Create Category Value.
Create New Category Value Dialog
6. Enter a Name for the value.
7. Click Save.
About Deleting Custom Fields
The intent of this feature is that you can quickly delete a custom field that you created with properties that you
did not intend. For example, you may realize after saving a custom field that you selected the wrong display
type.
If you have been using a custom field, and there is associated data with it, in most cases you will not want to
delete it.
IMPORTANT: Be aware of the following:
-If you delete a custom field that has been previously used, it will also delete the data contained within the
field.
-If you delete a custom field that is used in a Tagging Layout, it will be removed from the layout, but the
layout will remain.
-If you delete a custom field that is in use as a column in the Item List by another user, the column will stay
in their grid until they manually remove it as a selected column. In Review, in the Select Columns dialog,
the deleted column will no longer be displayed in the Available columns list, but users will still have to
manually remove it from their Selected column list.
-It may cause similar problems for any other panel where this field is used.
-It may also cause problems if the field is used in a global replace job that involves the field that hasn’t run
yet.
-Any user with the appropriate permissions can delete a custom field. For example one user with Admin
rights can delete a custom field that was created by a different user.
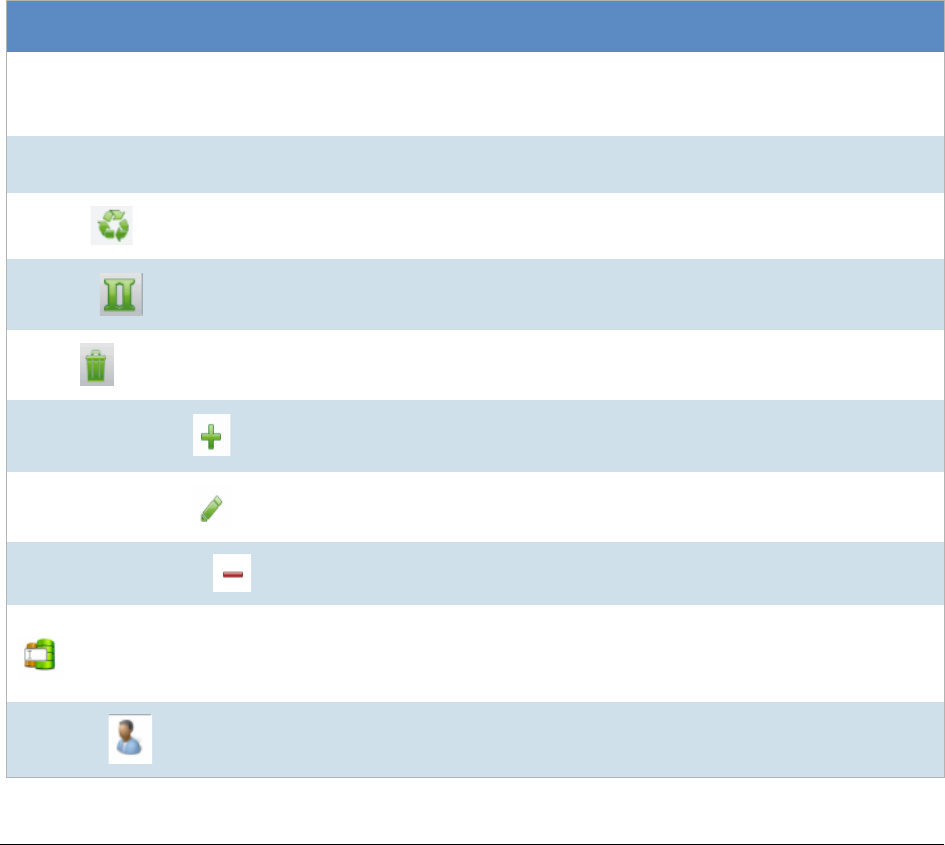
Configuring Review Tools Configuring Tagging Layouts | 219
Configuring Tagging Layouts
Tagging Layouts are layouts used for coding in the Project Review that the project manager creates. Users must
have Project Administration permissions to create, edit, delete, and associate tagging layouts. First, you must
create the layout, then associate fields to the layout for the reviewer to code, and finally, associate users or
groups to the layout so that they can code with it in Project Review.
Custom fields must be created by the project manager before they can be added to a tagging layout. See
Configuring Custom Fields (page 216) for information on how to create custom fields.
Tagging Layouts can be used to code fields in the Project Review for documents in the project. Coding is editing
the data that appears in the fields for each document.
Tagging Layout Tab
The Tagging Layout tab on the Home page can be used to create layouts for coding in the Project Review.
Elements of the Tagging Layout Tab
Element Description
Filter Options Allows you search and filter all of the items in the list. You can filter the list
based on any number of fields.
See Filtering Content in Lists and Grids on page 41.
Tagging Layout List Displays the tagging layouts already created for the project. Click the
column headers to sort by the column.
Refresh
Refreshes the Tagging Layout List.
Columns
Adjusts what columns display in the Tagging Layout List.
Delete
Deletes selected tagging layout. Only active when a tagging layout is
selected.
Add Tagging Layout
Adds a tagging layout.
Edit Tagging Layout
Edits the selected tagging layout.
Delete Tagging Layout
Deletes the selected tagging layout.
Tagging Layout Fields Tab Allows you to associate/disassociate fields to a tagging layout.
Users Tab
Allows you to associate users to a tagging layout.
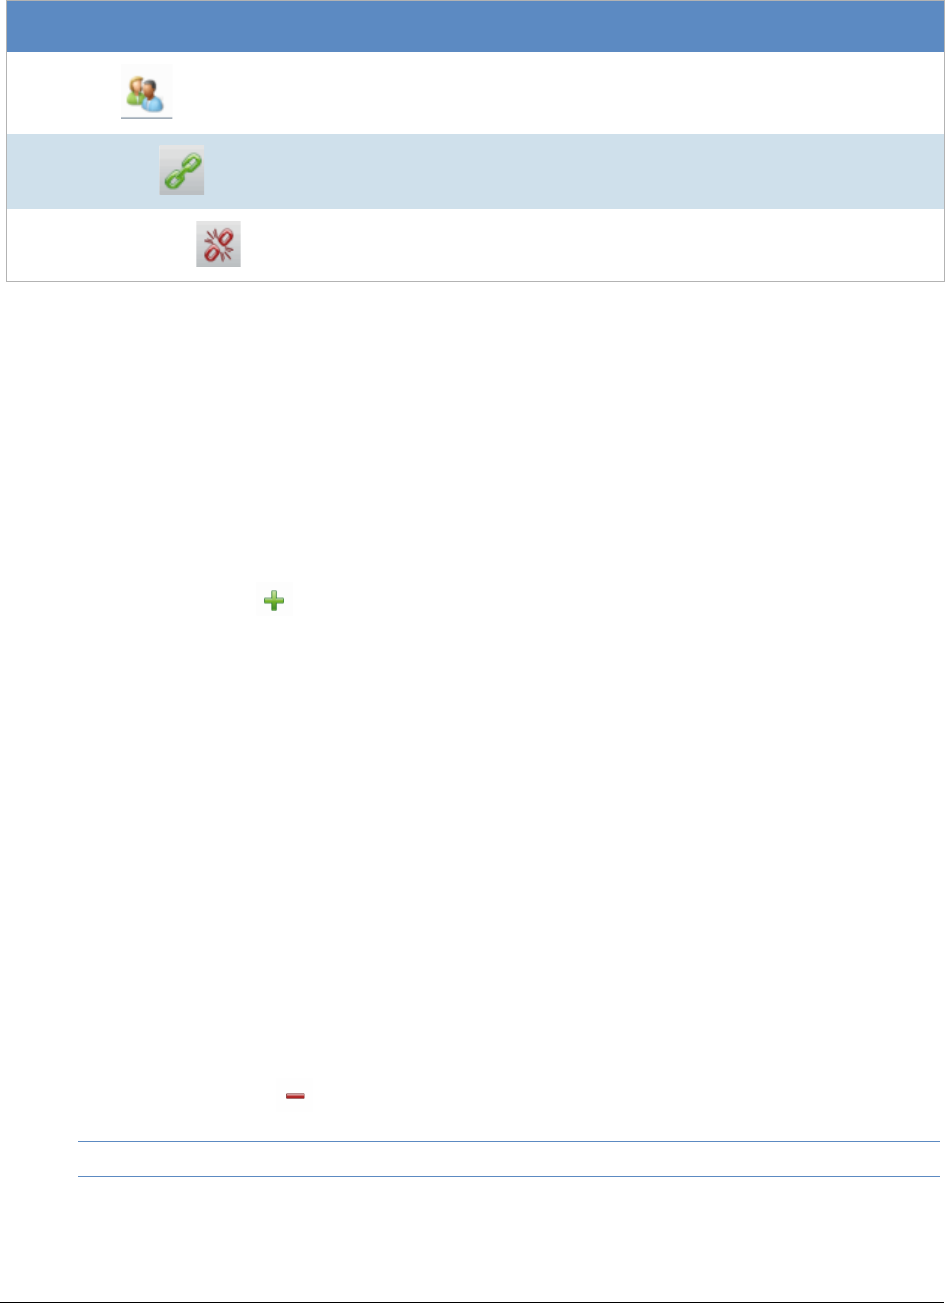
Configuring Review Tools Configuring Tagging Layouts | 220
Adding a Tagging Layout
Project/case managers with the Project Administrator permission can create, edit, delete, and associate tagging
layouts.
To add a tagging layout
1. Log in as a user with Project Administrator rights.
2. Click the Tagging Layout tab.
See Tagging Layout Tab on page 219.
3. Click the Add button .
4. In the Tagging Layout Detail form, enter the name of the Tagging Layout.
5. Enter the number of the order that you want the layout to appear to the user in the Project Review.
Repeated numbers appear in alphabetical order.
6. Click OK.
Deleting a Tagging Layout
Project/case managers with the Project Administrator permission can create, edit, delete, and associate tagging
layouts.
To delete a tagging layout
1. Log in as a user with Project Administrator rights.
2. Click the Tagging Layout tab.
See Tagging Layout Tab on page 219.
3. Check the layout that you want to delete.
4. Click the Delete button .
Note: You can also delete multiple layouts by clicking the trash can delete button.
5. In the confirmation dialog, click OK.
Groups Tab
Allows you to associate groups to a tagging layout.
Add Association
Associates a group, user, or field to a tagging layout.
Remove Association
Disassociates a tagging layout from a user, group, or field.
Elements of the Tagging Layout Tab (Continued)
Element Description

Configuring Review Tools Configuring Tagging Layouts | 221
Editing a Tagging Layout
Project/case managers with the Project Administrator permission can create, edit, delete, and associate tagging
layouts.
To edit a tagging layout
1. Log in as a user with Project Administrator rights.
2. Click the Tagging Layout tab.
See Tagging Layout Tab on page 219.
3. Click the Edit button .
4. In the Tagging Layout Detail form, enter the name of the Tagging Layout.
5. Enter the number of the order that you want the layout to appear to the user in the Project Review.
Repeated numbers appear in alphabetical order.
6. Click OK.
Associating Fields to a Tagging Layout
Project/case managers with the Project Administrator permission can create, edit, delete, and associate tagging
layouts. Custom fields must be created before you can associate them with a tagging layout.
See Configuring Custom Fields on page 216.
To associate fields to a tagging layout
1. Log in as a user with Project Administrator rights.
2. Click the Tagging Layout tab.
See Tagging Layout Tab on page 219.
3. Select the layout that you want from the Tagging Layout list pane.
4. Select the fields tab in the lower pane .
5. Click the Add Association button .
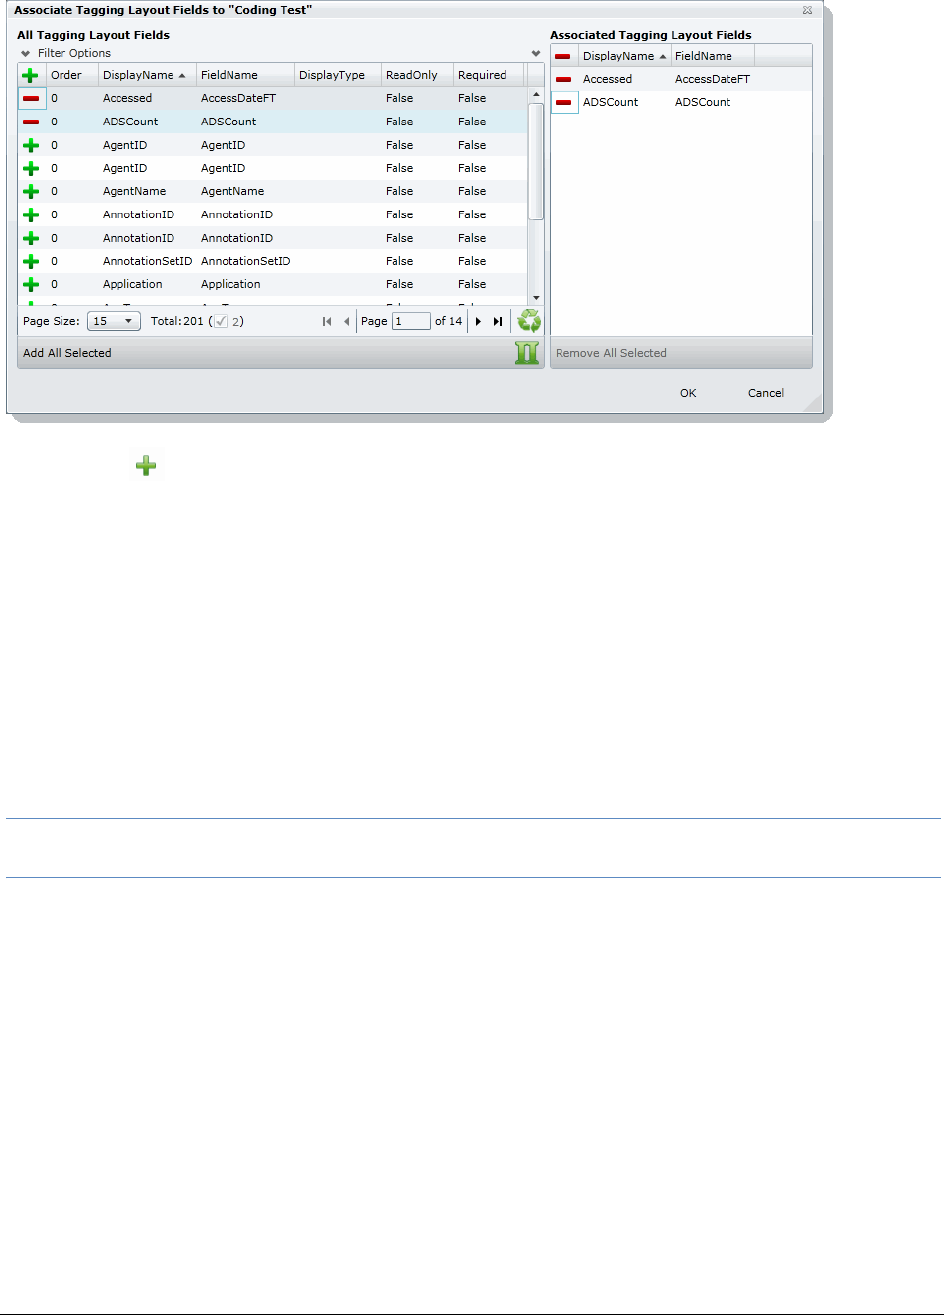
Configuring Review Tools Configuring Tagging Layouts | 222
Associate Tagging Layouts Dialog
6. Click to add the field to the layout.
7. Click OK.
8. Enter a number for the Order that you would like the fields to appear in the coding layout.
9. Select the fields that you just added (individually) and click the Edit button in the Tagging Layout Field
Details. Select one of the following:
-Read Only: Select to make the field read only and disallow edits. Any standard or custom field that is
defined to be 'Read Only' cannot be redefined as a "Required" or "None."
-Required: Select to make the field required to code before the reviewer can save the coding.
-None: Select to have no definition on the field.
-Is Carryable: Check to allow the field data to carry over to the next record when the user selects the
Apply Previous button during coding.
10. Click OK.
Note: Some fields are populated by processing evidence or are system fields and cannot be changed. These
fields, when added to the layout, will have a ReadOnly value of True.
Disassociating Fields from a Tagging Layout
Project/case managers with the Project Administrator permission can disassociate tagging layouts.
To disassociate fields from a tagging layout
1. Log in as a user with Project Administrator rights.
2. Click the Tagging Layout tab.
See Tagging Layout Tab on page 219.
Configuring Review Tools Configuring Tagging Layouts | 223
3. Select the layout that you want from the Tagging Layout list pane.
4. Click the fields tab in the lower pane .
5. Click the Remove Association button .
Associate User or Group to Tagging Layout
Project/case managers with the Project Administrator permission can create, edit, delete, and associate tagging
layouts.
To associate users or groups to a tagging layout
1. Log in as a user with Project Administrator rights.
2. Click the Tagging Layout tab.
See Tagging Layout Tab on page 219.
3. Select the layout that you want from the Tagging Layout list pane.
4. Open either the User or Groups tab.
5. Click the Add Association button .
6. In the All Users or All User Groups dialog, click to add the user or group to the tagging layout.
7. Click OK.
Disassociate User or Group to Tagging Layout
Project/case managers with the Project Administrator permission can disassociate tagging layouts.
To disassociate users or groups from a tagging layout
1. Log in as a user with Project Administrator rights.
2. Click the Tagging Layout tab.
See Tagging Layout Tab on page 219.
3. Check the layout that you want from the Tagging Layout list pane.
4. Open either the User or Groups tab.
5. Check the user or group that you want to disassociate.
6. Click the Remove Association button .
Configuring Review Tools Configuring Highlight Profiles | 224
Configuring Highlight Profiles
You can set up persistent highlighting profiles that will highlight predetermined keywords in the Natural panel of
Project Review. Persistent highlighting profiles are defined by the administrator or project/case manager and can
be toggled on and off using the Select Profile drop-down in the Project Review.
See Highlight Profiles Tab on page 224.
Highlight Profiles Tab
The Highlight Profiles tab on the Home page can be used to set up persistent highlighting profiles that will
highlight predetermined keywords in the Natural panel in Project Review. Persistent highlighting profiles are
defined by the administrator or project manager and can be toggled on and off using the Select Profile drop-
down in the Project Review.
Elements of the Highlight Profiles Tab
Element Description
Filter Options Allows you search and filter all of the items in the list. You can filter the list
based on any number of fields.
See Filtering Content in Lists and Grids on page 41.
Highlight Profiles List Displays the highlight profiles already created for the project. Click the
column headers to sort by the column.
Refresh
Refreshes the Highlight Profiles List.
Columns
Adjusts what columns display in the Highlight Profiles List.
Delete
Click to delete selected highlight profiles. Only active when a highlight profile
is selected.
Add Highlight Profiles
Adds a highlight profile.
Edit Highlight Profiles
Edits the selected highlight profile.
Delete Highlight Profiles
Deletes the selected highlight profile.
Highlight Profile Keywords Allows you to add keywords and highlights to the highlight profile.
Users Tab
Allows you to associate users to a highlight profile.
Configuring Review Tools Configuring Highlight Profiles | 225
Adding Highlight Profiles
Project/case managers with the Project Administrator permission can create, edit, delete, and associate
highlight profiles.
To add a highlight profile
1. Log in as a user with Project Administrator rights.
2. Click the Highlight Profiles tab.
See Highlight Profiles Tab on page 224.
3. Click the Add button .
4. In the Highlight Profile Detail form, enter a Profile Name.
5. Enter a Description for the profile.
6. Click OK.
Groups Tab
Allows you to associate groups to a highlight profile.
Add Association
Associates a user or group to a highlight profile.
Remove Association
Disassociates a highlight profile from a user or group.
Elements of the Highlight Profiles Tab (Continued)
Element Description

Configuring Review Tools Configuring Highlight Profiles | 226
Editing Highlight Profiles
Project/case managers with the Project Administrator permission can create, edit, delete, and associate
highlight profiles.
To edit a highlight profile
1. Log in as a user with Project Administrator rights.
2. Click the Highlight Profiles tab.
See Highlight Profiles Tab on page 224.
3. Select the profile that you want to edit.
4. Click the Edit button .
5. In the Highlight Profile Detail form, enter a Profile Name.
6. Enter a Description for the profile.
7. Click OK.
Deleting Highlight Profiles
Project/case managers with the Project Administrator permission can create, edit, delete, and associate
highlight profiles.
To delete a highlight profile
1. Log in as a user with Project Administrator rights.
2. Click the Highlight Profiles tab.
See Highlight Profiles Tab on page 224.
3. Select the profile that you want to delete.
4. Click the Delete button .
Note: You can also delete multiple profiles by clicking the trash can delete button.
Add Keywords to a Highlight Profile
After you have created a highlight profile, you can add keywords to the profile that will appear highlighted in the
Natural panel of the Project Review when the profile is selected.
To add keywords to a highlight profile
1. Log in as a user with Project Administrator rights.
2. Click the Highlight Profiles tab.
See Highlight Profiles Tab on page 224.
3. Select a profile.
4. Select the Keywords tab .
Configuring Review Tools Configuring Highlight Profiles | 227
5. Click the Add Keywords button.
6. In the Keyword Details form, enter the keywords (separated by a comma) that you want highlighted.
7. Expand the color drop-down and select a color you want to use as a highlight.
8. Click OK.
9. You can add multiple keyword highlights, in different colors, to one profile.
Note: You can edit and delete keyword details by clicking the pencil or minus buttons in the Keywords tab.
Associating a Highlight Profile
Project/case managers with the Project Administrator permission can create, edit, delete, and associate
highlight profiles. You can associate highlight profiles to users and groups.
To associate a highlight profile to a user or group
1. Log in as a user with Project Administrator rights.
2. Click the Highlight Profiles tab.
See Highlight Profiles Tab on page 224.
3. Select the profile that you want to associate to a user or group.
4. Open either the User or Groups tab.
5. Click the Add Association button .
6. In the All Users or All User Groups dialog, click the plus sign to associate the user or group with the
profile.
7. Click OK.
Disassociating a Highlight Profile
Project/case managers with the Project Administrator permission can disassociate highlight profiles from users
or groups.
To disassociate a highlight profile from a user or group
1. Log in as a user with Project Administrator rights.
2. Click the Highlight Profiles tab.
See Highlight Profiles Tab on page 224.
3. Select the profile that you want to disassociate from a user or group.
4. Open either the User or Groups tab.
5. Select the user or group that you want to disassociate.
6. Click the Remove Association button .
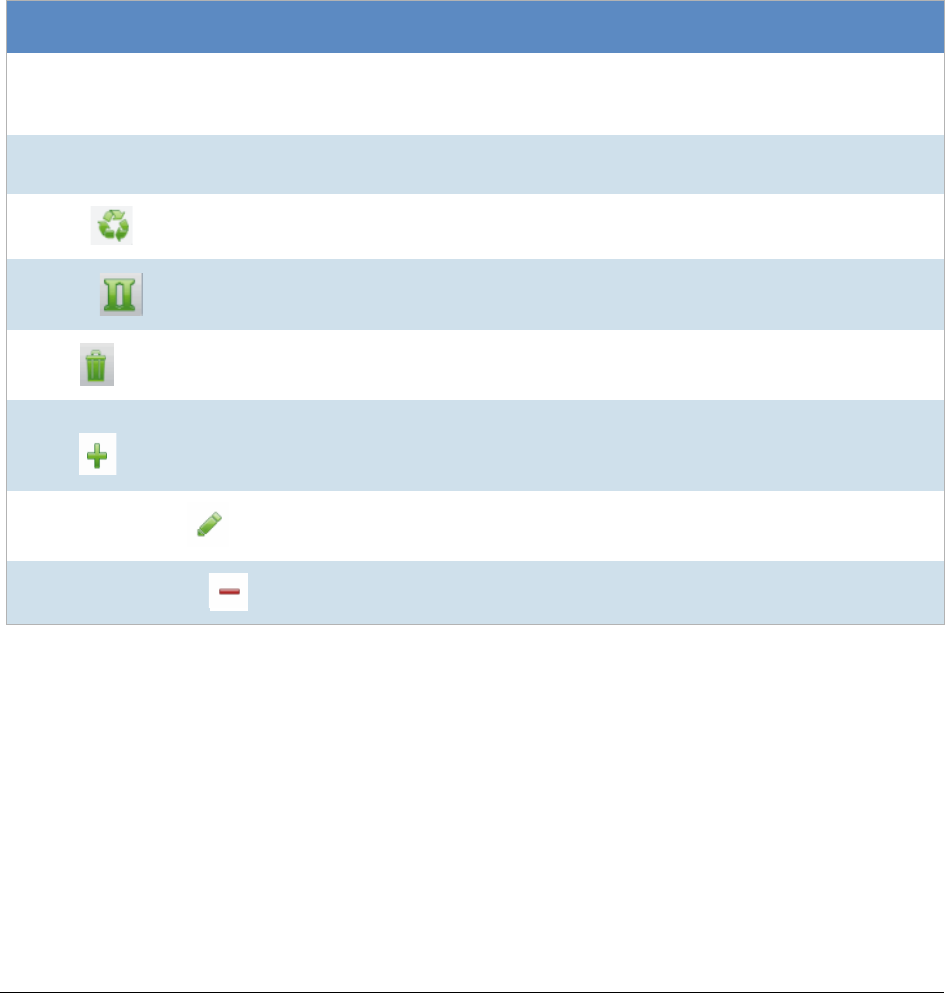
Configuring Review Tools Configuring Redaction Text | 228
Configuring Redaction Text
Project/case managers with the Project Administration permission can create redaction text profiles with text that
appears on redactions on documents. Redactions can be made in the Image or Natural panel of the Project
Review.
Redaction Text Tab
The Redaction Text tab on the Home page can be used to add, edit, and delete redaction text profiles.
Redactions can be made in the Image view of the Project Review.
Creating a Redaction Text Profile
Project/case managers with the Project Administration permission can create the text that appears on redactions
by adding redaction text profiles.
To create redaction text profiles
1. Log in as a user with Project Administrator rights.
2. Click the Redaction Text tab.
See Redaction Text Tab on page 228.
Elements of the Redaction Text Tab
Element Description
Filter Options Allows you search and filter all of the items in the list. You can filter the list
based on any number of fields.
See Filtering Content in Lists and Grids on page 41.
Redaction Text Profile List Displays the available redaction text profiles. Click the column headers to sort
by the column.
Refresh
Refreshes the Redaction Text Profile list.
Columns
Adjusts what columns display in the Redaction Text Profile list.
Delete
Deletes selected redaction text profile. Only active when a redaction text is
selected.
Create Redaction Text
Profile
Creates a redaction text profile.
See Creating a Redaction Text Profile on page 228.
Edit Redaction Text
Edits the selected redaction text profile.
Delete Redaction Text
Deletes the selected redaction text profile.

Configuring Review Tools Configuring Redaction Text | 229
3. Click the Add button .
4. In the Redaction Text Detail form, enter the text that you want to appear on the redaction.
5. Click OK.
Editing Redaction Text Profiles
Project/case managers with the Project Administration permission can edit the text that appears on redactions
by editing the redaction text profiles.
To edit redaction text profiles
1. Log in as a user with Project Administrator rights.
2. Click the Redaction Text tab.
See Redaction Text Tab on page 228.
3. Click the Edit button .
4. In the Redaction Text Detail form, enter the text that you want to appear on the redaction.
5. Click OK.
Deleting Redaction Text Profiles
Project/case managers with the Project Administration permission can delete redaction text profiles.
To delete redaction text profiles
1. Log in as a user with Project Administrator rights.
2. Click the Redaction Text tab.
See Redaction Text Tab on page 228.
3. Select the redaction text that you want to delete.
4. Click the Delete button .
Monitoring the Work List Accessing the Work List | 230
Chapter 20
Monitoring the Work List
The project/case manager can use the Work List tab on the Home page to monitor certain activities in the
project. The following items are recorded in the Work List: searches, review sets, imaging, label assignments,
imports, bulk coding, cluster analysis, bulk labeling, transcript/exhibit uploading, and delete summaries.
The Job IDs are unique to every job. Jobs cannot be deleted or edited, only monitored. Project managers can be
informed as to the actions performed in the project and errors that users have encountered in the project from
the Work List tab.
Accessing the Work List
To access the Work List
From the Home page, select a project, and click the Work List tab.
Work List Tab
The Work List tab on the Home page can be used to view data for the selected project. The bottom panel
displays the number of documents processed and number of errors. This will be updated periodically to reflect
current status.
Elements of the Work List Tab
Element Description
Filter Options Allows you search and filter all of the items in the list. You can filter the list
based on any number of fields.
See Filtering Content in Lists and Grids on page 41.
Work List Displays the jobs associated with the project. Click the column headers to sort
by the column.
Refresh
Refreshes the Work List.
Note: The Work List will automatically refresh every three minutes.
Columns
Adjusts what columns display in the Work List.
Monitoring the Work List Accessing the Work List | 231
Cancelling Review Jobs
You can cancel certain jobs that you may have started while in Review. This allows you to resubmit work or
cancel a process that you may not want to complete. Cancelling these jobs will cancel any work that has not yet
been completed. Any work that has already completed will be retained.
You can cancel the following jobs from the work list:
-Imaging
-Bulk Coding
-Network Bulk Printing
-OCR Documents
To cancel a review job from the Work List
1. From the Work List, select the review job that you want to cancel.
2. Click to cancel the review job.
Overview Tab
Displays the statistics on the data found in the Work List.
Elements of the Work List Tab (Continued)
Element Description

Managing Document Groups About Managing Document Groups | 232
Chapter 21
Managing Document Groups
About Managing Document Groups
Project/case managers with Folders and Project Administration permissions can manage document groups.
Document groups are folders where imported evidence is stored. You use document groups to organize your
evidence by culling the data via permissions.
Document groups can contain numerous documents. However, any given document can be in only one
document group. You cannot assign permissions for documents unless the documents are in a document group.
All documents in a group will be assigned DocIDs. Documents not within a document group, will NOT have
DocIDs.
You can name your document group to reflect where the files were located. The name can be a job number, a
business name, or anything that will allow you to recognize what files are contained in the group.
Document groups can be created in two ways: by importing evidence, or by selecting Document Groups in
Project Review.
See Creating a Document Group During Import on page 235.
See Creating a Document Group in Project Review on page 235.
Note: To make sure that the DocID, ParentDocID, and AttachDocIDs fields populate in the Family records,
include at least one parent document and one child document when creating the document group.
About DocIDs and Object IDs
DocIDs are assigned to document groups by sorting into the object ID order and then putting the objects into the
family order. The family order takes top priority.
Suppose you ignore all objects that are in a family except for the heads of family. The remaining objects (all
objects that are not in a family and all heads of family) appear in object ID order. Objects that are in a family
appear immediately after the head of family.
How DocIDs are Created
Doc IDs can either be imported or generated. When an import occurs, in the load file there is generally a doc ID
associated with each object. The doc ID for each imported object can be seen in the DocID column in Review.
This doc ID is also known as the original doc ID.

Managing Document Groups About Managing Document Groups | 233
Doc IDs are also generated during the creation of a production set or export set. These doc IDs do not appear in
the DocID column in review – they are only associated with the object in the context of the production set or
export set.
Note that there is also a Page ID generated for each page of a document. The Page ID can be branded on each
page. In most cases, the Page ID is related to the Doc ID.
Production Sets and Load File and Native Export Sets
There are two numbering styles for production/export sets: Australian, and US and all others. This topic only
describes US-style numbering.
When creating a production set, on the Volume Document Options tab, there are four Naming Options:
-New Production Doc ID
-Original Doc ID
-Original File Name
-Original File Name with Original Path
New Production Doc ID
This is the default. The doc ID is generated based on the selections in the Document section on the right-hand
size of the Volume Document Options tab. There are three different options, but with any option, the doc ID
consists of an optional prefix, a number that is padded with zeroes on the left, and an optional suffix. The
numeric portion begins with the starting number, which defaults to 1. The Padding is the minimum width of the
numeric portion. For example, if Prefix is ABC, Suffix is empty, Starting Number is 1, and Padding is 4, then the
first doc ID will be ABC0001.
How the doc IDs are incremented and how the page IDs are generated differ based on the option:
-Independent Document and Page Numbering. There are separate sections for documents and pages for
the prefix, suffix, starting number, and padding. The document settings control the doc ID, the name of
the exported native file, and the name of the exported text file. The documents are numbered
sequentially. The page settings control the page ID and the names of the images files. Each page is
numbered sequentially. For images files with one file for the entire document, e.g., PDF, the name of the
image file is the same as the page ID of the first page. The doc IDs and the page IDs are not correlated –
the doc ID is incremented once for each document, while the page ID is incremented once for each page
of each document. For example, the doc IDs might be D000001, D000002, D000003, etc. The page IDs
might be:
For D000001, page IDs P000001, P000002, P000003, P000004.
For D000002, page IDs P000005
For D000003, page IDs P000006, P000007, P000008.
Etc.
-Number by Document with Page Counter Suffix. Documents are numbered sequentially. The page ID of
each page is the doc ID followed by a period (.) and the page number padded with zeroes to a width of
four digits. For example, the documents might be ABC000001, ABC000002, etc. The pages of
ABC000002 would be numbered ABC000002.0001, ABC000002.0002, ABC000002.0003, etc.
-Number by Page. The page IDs of each page of each document are numbered sequentially, continuing
across documents. For example, if the page ID of the first page of the first document is D000001, and the
document contains two pages, then the page ID of page 2 of the first document is D000002, and the page

Managing Document Groups About Managing Document Groups | 234
ID of the first page of the second document is D000003. The doc ID of each document is the page ID of
the first page of the document.
Original Doc ID
The doc ID of each document is the doc ID imported with the document or assigned to it when it is added to a
document group. The prefix, suffix, starting number, and padding that are selected in the document naming
parameters are only used for documents that do not have an original doc ID.
-Independent Document and Page Numbering. There are separate sections for documents and pages for
the prefix, suffix, starting number, and padding. The doc ID is taken from the original doc ID, if the
document has one; otherwise, the doc ID is generated from the document settings. The doc ID is used as
the file name for the exported native file and the exported text file. The page settings control the page ID
and the names of the images files. Each page is numbered sequentially. For images files with one file for
the entire document, e.g., PDF, the name of the image file is the same as the page ID of the first page.
-Number by Document with Page Counter Suffix. The doc ID is the original doc ID. The page ID of each
page is the doc ID followed by a period (.) and the page number padded with zeroes to a width of four
digits.
-Number by Page. The doc ID is the original doc ID. The page ID of the first page is the doc ID. The page
ID of each subsequent page is one higher than that of the previous page. This option assumes that there
is a sufficient gap between successive doc IDs to provide a unique number for each page. If this is not
the case, then the same page ID may be assigned to pages in different documents. This is especially the
case when the original doc IDs are sequential. For example, let’s say that ten documents of ten pages
each are imported, and that the doc IDs of these documents are ABC000001, ABC000011, ABC000021,
…, ABC000091. The page IDs of ABC000001 will be ABC000001, ABC000002, ABC000003, …,
ABC000010. The page IDs of ABC000011 will be ABC000011, ABC000012, ABC000013, …,
ABC000020. The page IDs of ABC000091 will be ABC000091, ABC000092, ABC000093, …,
ABC000100. On the other hand, if these same documents were imported with doc IDs of ABC000001,
ABC000002, ABC000003, …, ABC000010, then the page IDs of ABC000001 will be ABC000001,
ABC000002, ABC000003, …, ABC000010, while the page IDs of ABC000002 will be ABC000002,
ABC000003, ABC000004, …, ABC000011. Thus most of the page IDs of the imported files overlap. The
second example demonstrates that with imported files with sequential doc IDs, if using original doc ID
naming, the documents should generally be numbered with the Number by Document with Page Counter
Suffix option and not the Number by Page option.
Original File Name and Original File Name with Original Path
The doc ID is the original file name (not including the rest of the file path) without the file extension.

Managing Document Groups Creating a Document Group During Import | 235
Creating a Document Group During Import
While importing evidence, you can create a document group. You can also place the documents into an existing
document group.
See the Loading Data documentation for information on how to create new document groups while importing
evidence and putting evidence into existing document groups.
Creating a Document Group in Project Review
Project/case managers with Folders permissions can create Document Groups in the Project Review.
To create document groups in Project Review
1. Prepare documents to be added to a Document Group by applying labels.
See Managing Labels on page 191.
2. Log in as a user with Project Administrator rights.
3. Click the Project Review button next to the project in the Project List.
4. In the Project Explorer, click the Explore tab.
5. Right-click Document Groups and select Create Document Group.
6. Enter a Name for the document group.
7. Enter a Description for the document group.
8. Click Next.
9. Check the labels that you want to include in the document group.
10. Click Next.
11. Select one of the following:
-Continue from Last: Select to continue the numbering from the last document.
-Assign DocIDs: Select to assign DocID numbers to the records.
12. Enter a Prefix for the new numbering.
13. Enter a Suffix for the new numbering.
14. Select a Starting Number for the documents.
15. Select the Padding for the documents.
16. Click Next.
17. Review the Summary and click Create.
18. Click OK.
19. When the job is successfully created, click Close.

Managing Document Groups Renumbering a Document Group in Project Review | 236
Renumbering a Document Group in Project Review
Project/case managers with Folders permissions can renumber Document Groups in the Project Review. This
lets you eliminate gaps and correct incorrect numbering. Upon the case of a deleted and recreated sub set of
documents within a document group, you can provide different numbering.
To renumber document groups in Project Review
1. Log in as a user with Project Administrator rights.
2. Click the Project Review button next to the project in the Project List.
3. In the Project Explorer, expand the Document Groups folder.
4. Right-click an existing Document Group folder and select Renumber Document Group.
5. Enter a Prefix for the new numbering.
6. Enter a Suffix for the new numbering.
7. Select a Starting Number for the documents.
8. Select the Padding for the documents.
9. Click Next.
10. Review the Summary and click Renumber.
11. Click OK.
Deleting a Document Group in Project Review
Project/case managers with Folders permissions can delete Document Groups in the Project Review. Deleting a
document group allows you to move a document from one document group to another group, create sub
document groups and create master document groups. When deleting a document group, the application
deletes any associations to the deleted group that a particular document has.
The application also deletes any DocIDs of documents that were in the deleted group. This allows you to assign
a document to a new document group, or alter an existing document group. You will need to assign new DocIDs
to documents that were in a deleted document group.
To delete document groups in Project Review
1. Log in as a user with Project Administrator rights.
2. Click the Project Review button next to the project in the Project List.
3. In the Project Explorer, expand the Document Groups folder.
4. Right-click a Document Group and select Delete Document Group.
5. Click OK.

Managing Document Groups Managing Rights for Document Groups in Project Review | 237
Managing Rights for Document Groups in Project Review
You can designate an existing User Group to have security permissions to manage Document Groups.
For information on creating User Groups, see and Admin Guide.
To assign security permissions to a User Group for a Document Group
1. Log in as a user with Project Administrator rights.
2. Click the Project Review button next to the project in the Project List.
3. In the Project Explorer, expand the Document Groups folder.
4. Right-click a Document Group and select Manage Permissions.
5. Check the User Groups that you want to assign.
6. Click Save.

Managing Transcripts and Exhibits Creating a Transcript Group | 238
Chapter 22
Managing Transcripts and Exhibits
Project/case managers with Upload Exhibits, Upload Transcripts, and Manage Transcripts permissions can
upload transcripts, create transcript groups, grant transcript permissions to users, and upload exhibits.
Transcripts are uploaded from Project Review and can be viewed and annotated in the Transcripts panel.
Creating a Transcript Group
Project/case managers with the Create Transcript Group permission can create transcript groups to hold multiple
transcripts.
To create a transcript group
1. Log in as a user with Create Transcript Group permissions.
2. Click the Project Review button next to the project in the Project List.
3. In the Project Explorer, right-click the Transcripts folder and click Create Transcript Group.
4. Enter a Transcript Group Name.
5. Click Save.
6. After creating the group, refresh the panel by clicking (Refresh) at the top of the Project Explorer
panel.
Uploading Transcripts
Project/case managers with the Upload Transcripts permission can upload either .PTX or . TXT transcript files
and put them in transcript groups. You can only add transcripts one at a time. When you upload a transcript, they
are automatically indexed.
To upload transcripts
1. Log in as a user with Upload Transcripts permissions.
2. Click the Project Review button next to the project in the Project List.
3. In the Project Explorer, right-click the Transcripts folder and click Upload Transcript.
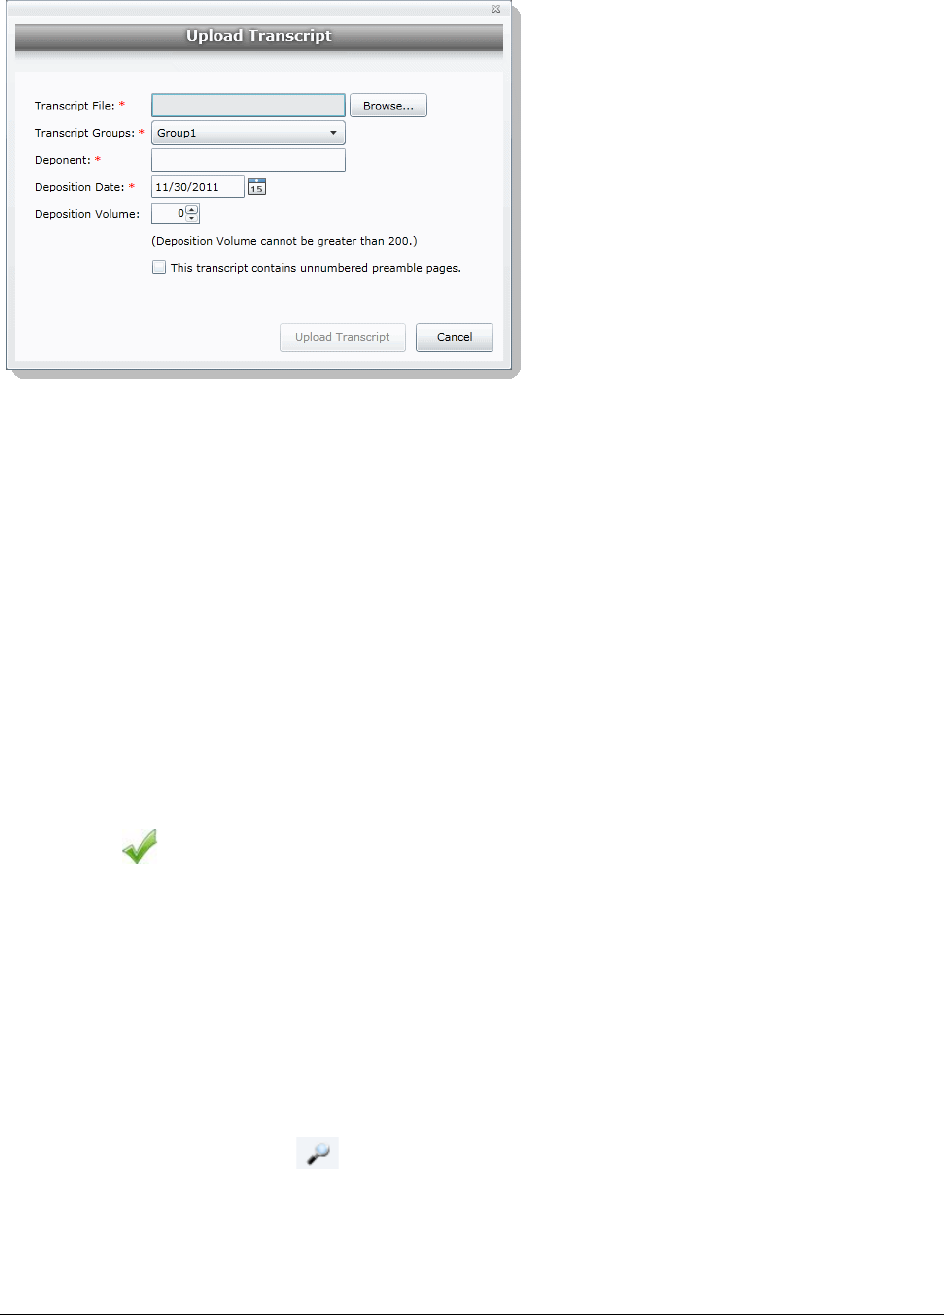
Managing Transcripts and Exhibits Creating a Transcript Group | 239
Upload Transcript Dialog
4. Click Browse to find the transcript file, highlight the file, and click Open.
5. Select a Transcript Group from the menu.
See Creating a Transcript Group on page 238.
6. Enter the name of the Deponent.
7. Select the Deposition Date.
8. If you are uploading more than one transcript from the same day, specify the volume number to
differentiate between transcripts uploaded on the same date.
9. Select This transcript contains unnumbered preamble pages to indicate that there are pages prior
to the testimony. If you check this box, enter the number of preamble pages prior that occur before the
testimony. These pages will be numbered as “Preamble 0000#.” The numbering continues as normal
after the preamble pages.
10. If the transcript is password protected, enter the password in the Password field.
11. Click Upload Transcript.
12. After the upload is complete, refresh the Item List.
13. To view the transcripts that have been uploaded, select the Transcript Groups that you want to view and
click (Apply) on the Project Explorer panel.
See the Reviewer Guide for more information on viewing and working with transcripts.
Updating Transcripts
Project managers with the Upload Transcripts permission can update transcripts in transcript groups. You can
only update transcripts one at a time.
To update transcripts
1. Log in as a user with Upload Transcripts permissions.
2. Click the Project Review button next to the project in the Project List.
3. In the Project Explorer, right-click the Transcripts folder and click Update Transcript.
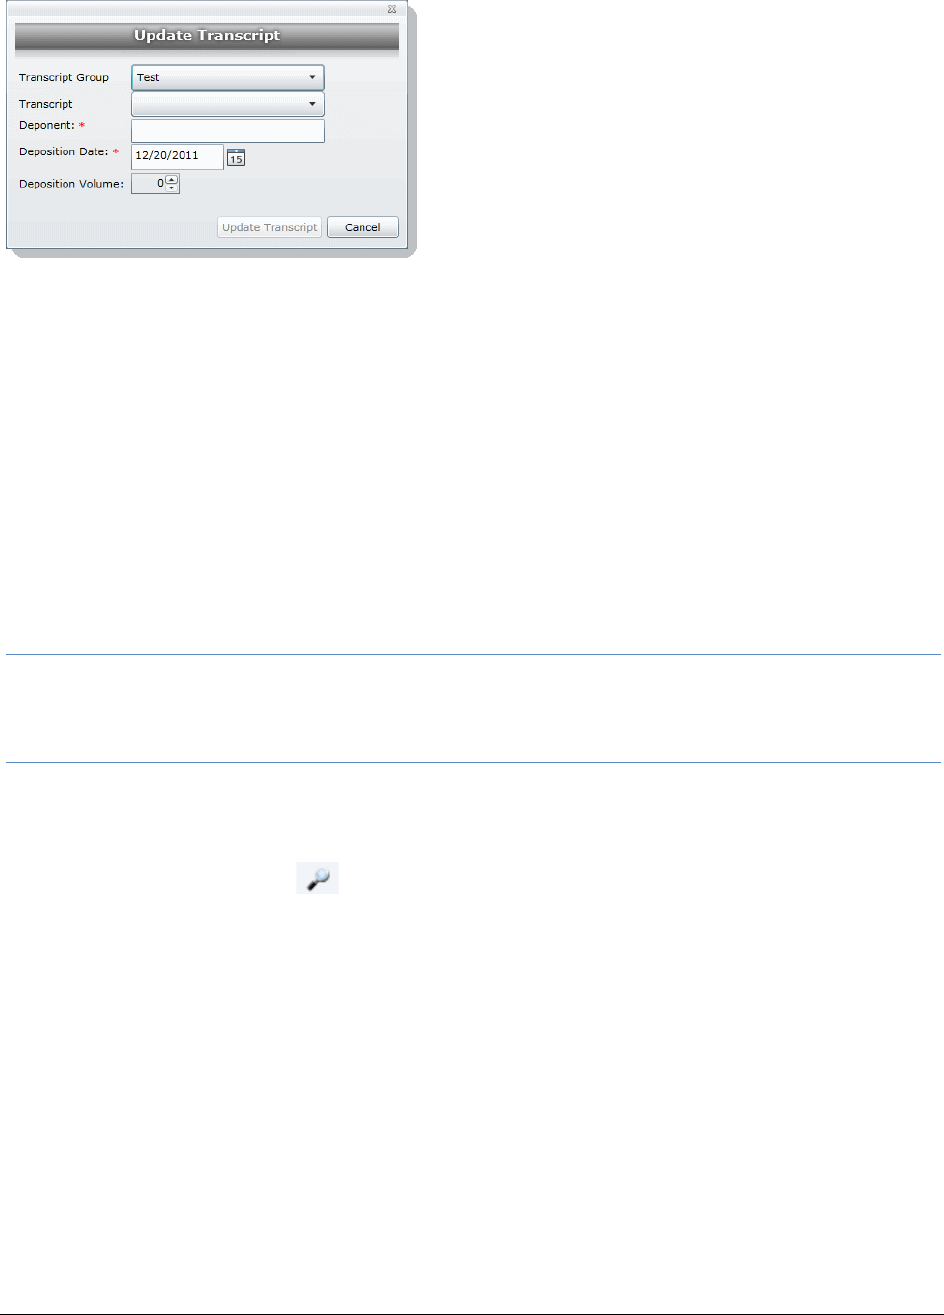
Managing Transcripts and Exhibits Creating a Transcript Group | 240
Update Transcript Dialog
4. Select a Transcript Group.
5. Select a Transcript.
6. Enter the Deponent name.
7. Enter the Deposition Date.
8. If you are uploading more than one transcript on the same day, specify the volume number to
differentiate between transcripts uploaded on the same date.
9. Click Update Transcript.
Creating a Transcript Report
Project/case managers with the Create Transcript Report permission can create a report of the notes and
highlights on a transcript. If there are no notes or highlights on a report, a report will not be generated.
Note: You can create a report containing issues with notes or a report containing issues without notes, but you
cannot create a report that contains both issues with notes and issues without notes. If you create a
report with notes without issues but the selected notes have been previously assigned to an issue, those
notes will not appear in the report.
To create a transcript report
1. Log in as a user with Create a Transcript Report permissions.
2. Click the Project Review button next to the project in the Project List.
3. From the Explore tab in the Project Explorer, right-click the Transcripts folder and click Transcript
Report.
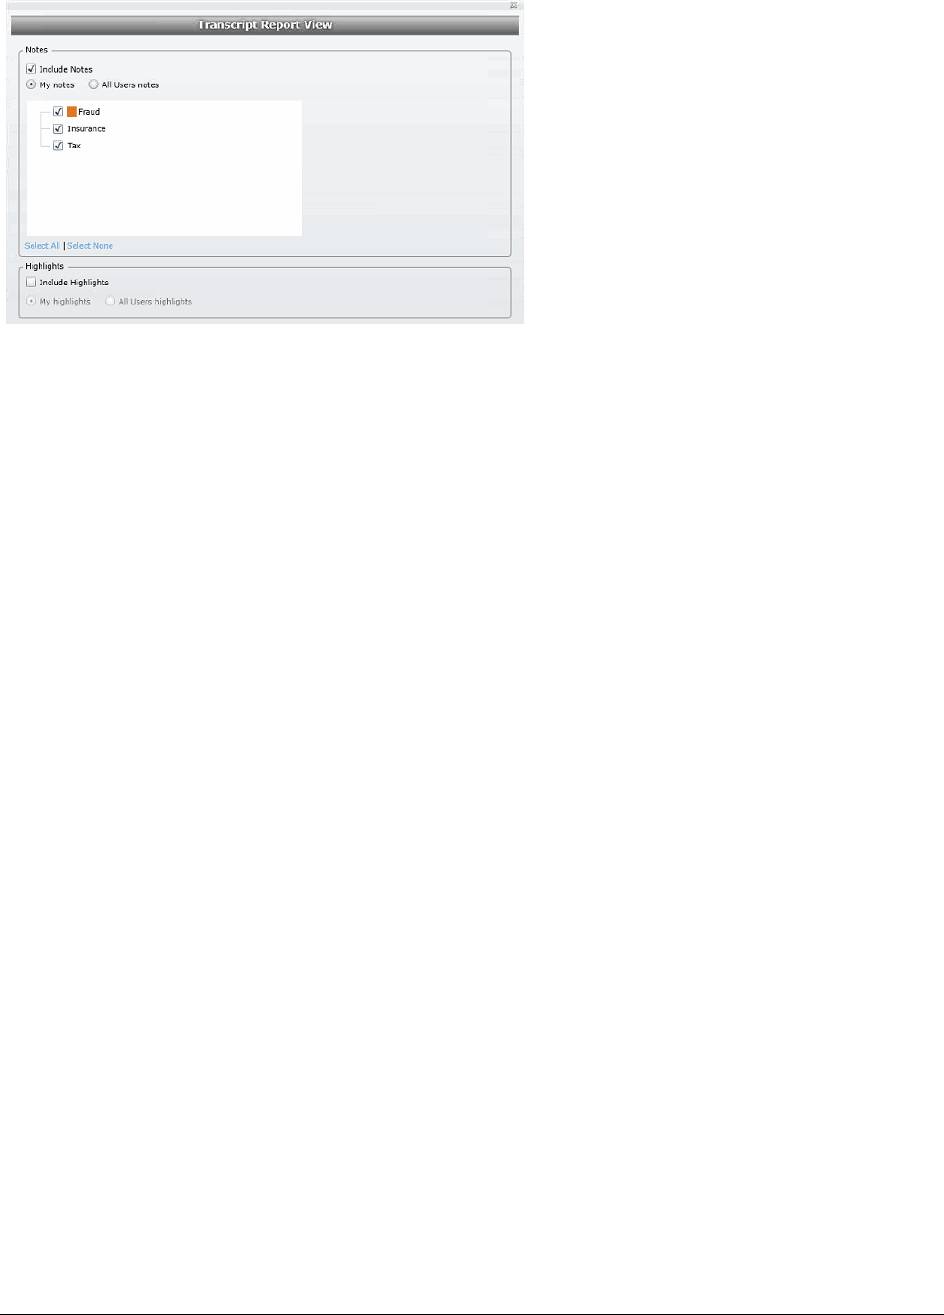
Managing Transcripts and Exhibits Creating a Transcript Group | 241
Transcript Report Dialog
4. Select Include Notes. You can mark whether to generate a report of all the users’ notes or just your
own notes.
5. Check any issues that you want included in the report. Click Select All to select all of the issues to
include or click Select None to deselect all of the issues.
6. Select Include Highlights. You can mark whether to generate a report of all the users’ highlights or just
your own highlights.
7. Click Generate Report.
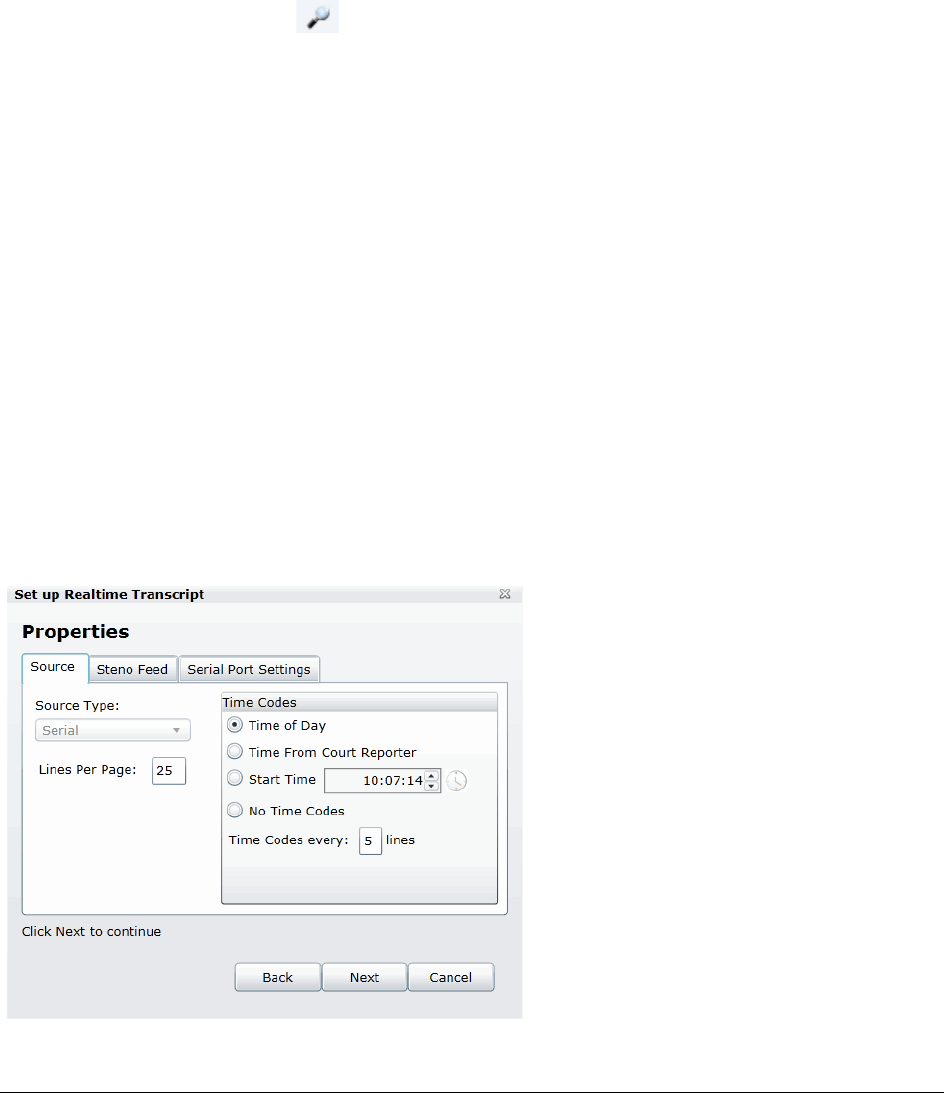
Managing Transcripts and Exhibits Capturing Realtime Transcripts | 242
Capturing Realtime Transcripts
You have the ability to run a Realtime transcript session and capture the stream from a court reporter’s
stenographer machine. You can either connect to a court reporter’s machine or run a demonstration of the
Realtime transcript with a simulated transcription.
To capture a Realtime transcript
1. Log in as a user with Realtime Transcripts permissions.
2. Click the Project Review button next to the project in the Project List.
3. From the Explore tab in the Project Explorer, right-click the Transcripts folder and select Start Realtime
Transcripts.
4. A dialog displays asking to start a new Realtime session or resume a previous session. Click Start New
Realtime Session.
5. Click Next.
6. Enter the options that you want associated with this transcript:
-Transcript Group: You must select a group for the realtime transcript. If no groups are defined, exit
the wizard and create a group. See Creating a Transcript Group on page 238.
-Deponent
-Deposition Date
-Volume: If you are capturing more than one transcript on the same day, specify the volume number
to differentiate between the transcripts captured on the same date.
7. Click Next.
8. Select the serial port that will contain the feed from the court reporter’s machine. The default port is
COM1. Once selected, ask the Court Reporter to type a few lines to test the port. If you do not see any
lines behind the wizard window, select another port and retry. If none of the ports work, check your
connections.
9. Click Next.
Set up Realtime Transcript Properties Dialog
Managing Transcripts and Exhibits Capturing Realtime Transcripts | 243
10. In the Set up Realtime Transcript Properties dialog, you have several options in setting up your
transcript.
11. Click Test to test the connection. Once the connection test is successful, click Finish.
Marking Realtime Transcripts
Once you have a successful connection and start receiving the transcript, you can mark it and link it to other
documents in the project. The Transcript window displays after connecting to the stenographer’s machine. The
Transcript window displays two panes: the Notes/ Linked pane and the Transcript pane. The following tables
describe the functions of the elements of the two panes.
Elements of the Set up Realtime Transcript Properties Dialog
Element Description
Source
Source Type Allows you to select from which port you are receiving the stenographer’s feed.
The default is the serial port.
Lines Per Page Allows you to enter how many lines you want to appear for each page of the
transcript.
Time Codes Allows you to stamp a time code on the transcript. You can choose to display the
time based on the following options:
-Time of Day - Marks the transcript with the time of day as indicated by your
system.
-Time From Court Reporter - Marks the transcript with the same time as indi-
cated by the court reporter’s stenographer machine.
-Start Time - Specifies the time stamped on the transcript.
-No Time Codes - Specifies that no time code is stamped on the transcript.
-Time Codes every x lines - Specifies how frequent the time code appears on
the transcript.
Steno Feed Allows you to set the options for the court reporter’s stenographer feed. Before
connecting and receiving the stenographer feed, make sure that you have the
correct serial settings for the stenographer feed.
Steno Feed Format Allows you to choose to receive the court reporter’s feed in either CaseView or
ASCII format.
Line Terminator Available only for ASCII format. Allows you to indicate line termination by
CRLF (carriage return line feed), CR only (Carriage return), or LF only (line
feed).
Serial Port Settings Allows you to configure the serial port settings for the stenographer feed. You
can set the following options:
-Port - The interface where the feed is transmitted. This will usually be COM1.
-Baud Rate - The speed in which the data is sent. You can select a rate
between 110 baud and 56000 baud.
-Data Bits - The number of data bits sent with each character. Most characters
will have eight bits (ddb8).
-Parity - Parity detects errors in the feed. You can set the parity to either None,
Even, Odd, Mark, and Space. The default setting is None.
-Stop Bits - Stop bits allow the system to resynchronize with the feed. The
default setting is one bit.
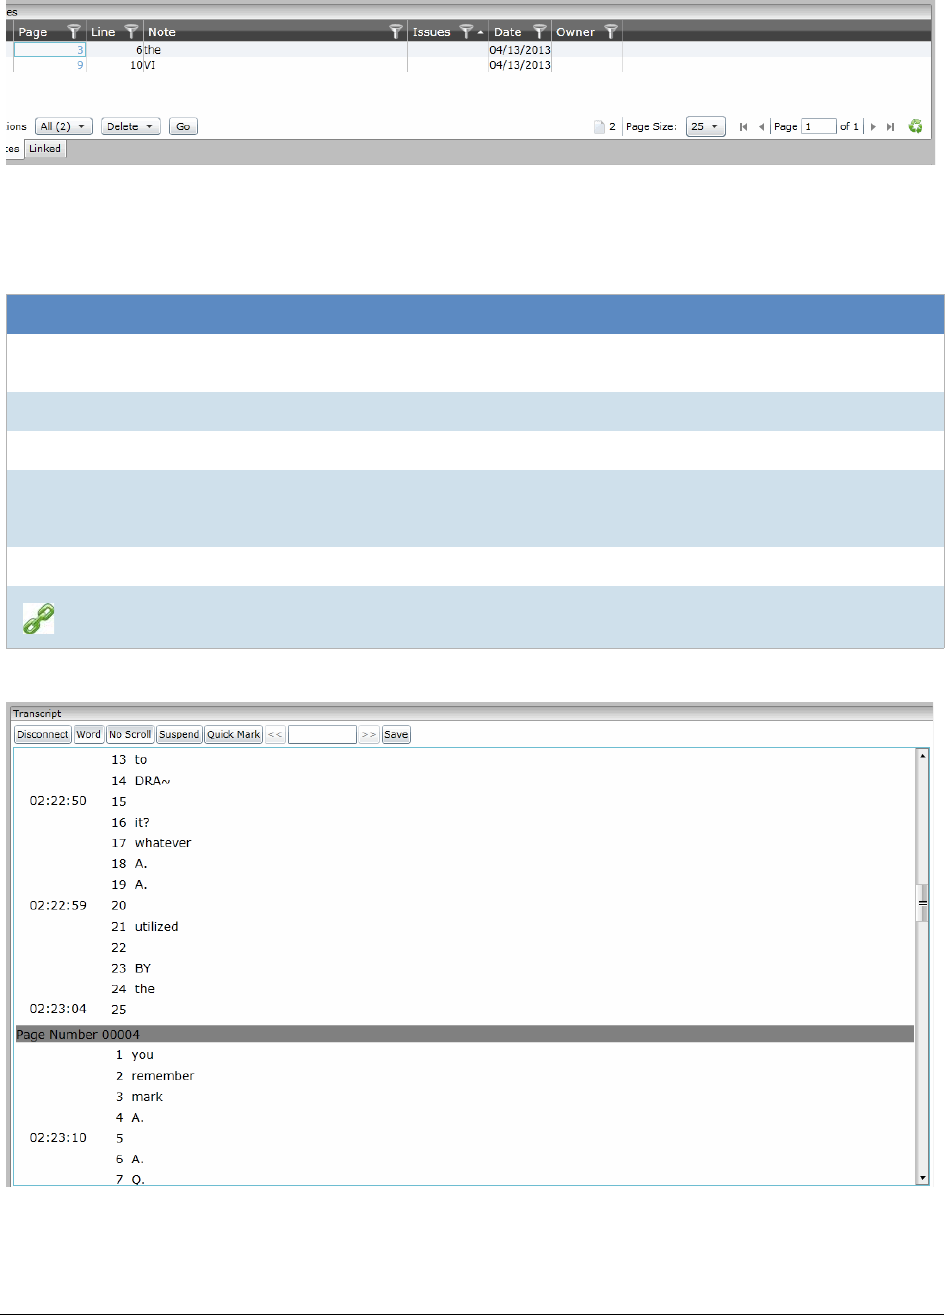
Managing Transcripts and Exhibits Capturing Realtime Transcripts | 244
Realtime Notes/Linked Panels
Realtime Transcript Panel
Realtime Notes/Linked Panel Elements
Element Description
Notes This tab manages the Quick Mark notes that are produced in the Realtime
transcript.
Actions Provides the ability to perform a selected task on the items within the panel.
Delete Provides the ability to delete any Quick Mark notes or links.
Filters Provides the ability to filter notes and linked documents. You can filter notes by
page, line, note, issues, date or owner. You can filter linked documents by DocID,
LinkObjectID, or file path.
Linked This tab manages links from the transcript to other documents in the project.
Provides the ability to link to other documents in the project.
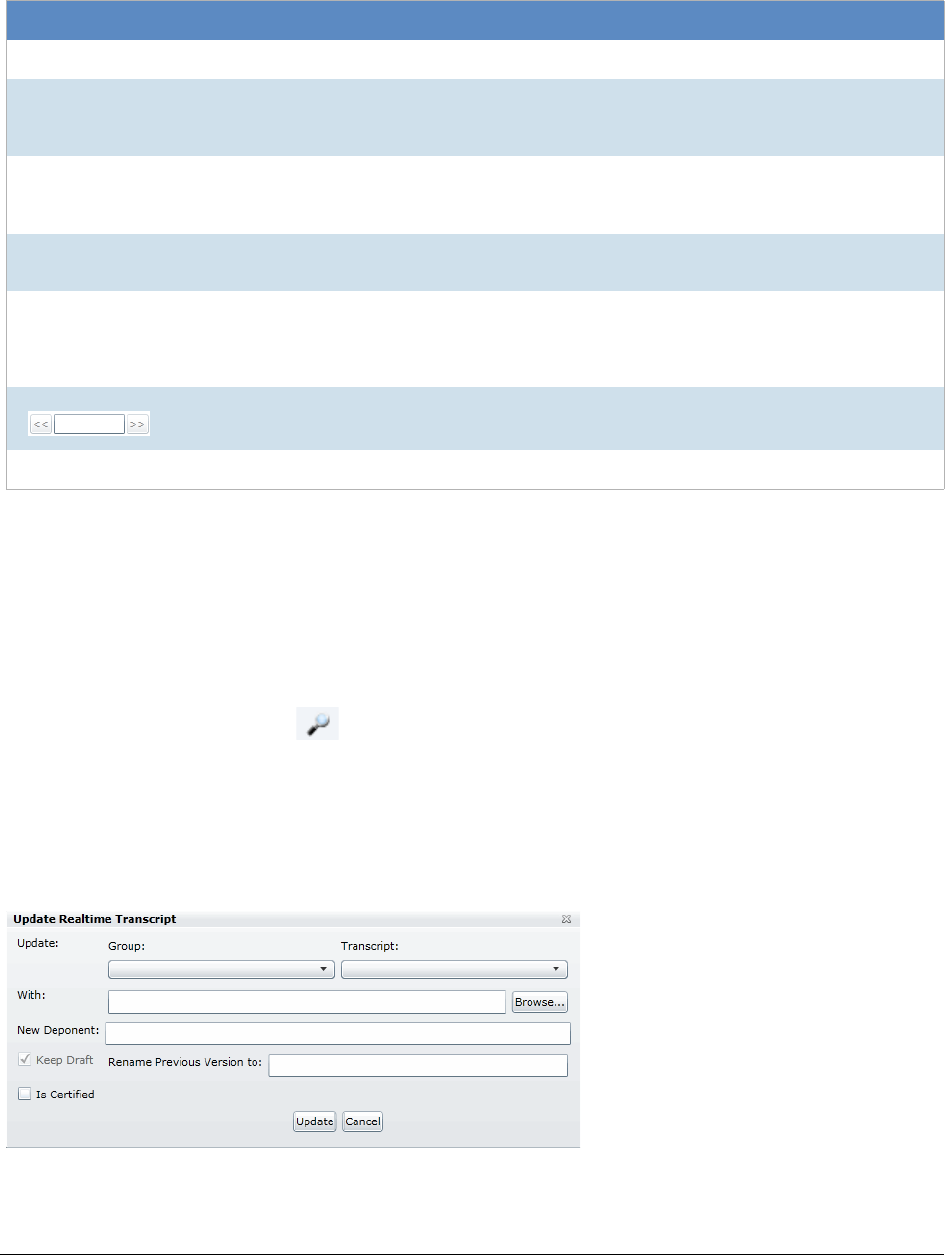
Managing Transcripts and Exhibits Capturing Realtime Transcripts | 245
Updating a Realtime Transcript
Project managers with the Update Realtime Transcript permission can replace an earlier saved version of a
Realtime transcript with a new version.
To update a Realtime transcript
1. Click the Project Review button next to the project in the Project List.
2. From the Explore tab in the Project Explorer, right-click the Transcripts folder and click Update
Realtime Transcript.
3. Enter the information in the dialog.
4. Click Update.
Update a Realtime Transcript Dialog
Realtime Transcript Panel Elements
Element Description
Disconnect This option allows you to disconnect from the court reporter’s feed.
Line/Word This option controls how the data is entered into the transcript. You can have the
data entered word by word, or allow a line to be completed and populated before
the data is transmitted.
No Scroll/Auto Scroll This option displays whether the feed scrolls or not. If No Scroll is selected, the
scroll bar will continue to move, but the feed will not move until you pull down the
scroll bar. Exercise this option by toggling.
Suspend/Continue This option allows you to either suspend or continue the feed. Exercise this
option by toggling.
Quick Mark This option allows you to quick mark the transcript. A quick mark is a note that
you can enter and add additional information to the transcript. The quick mark
will occur at the last known word/line. You can also quick mark the transcript by
clicking the space bar.
The search bar allows you to search for words or phrases within the transcript.
Save Allows you to save the transcript draft.
Managing Transcripts and Exhibits Capturing Realtime Transcripts | 246
Elements of the Realtime Transcript Dialog
Element Description
Update Allows you to enter the transcript that you want to replace. Select the transcript
name and group name from the pull-down menu.
With Allows you to enter the new transcript. You can enter the filename in the field or
browse to the location on the system.
New Deponent Allows you to add a new deponent to the transcript if you want.
Keep Draft Allows you to select to keep the original version that you are replacing.
Rename Previous
Version to: Allows you to rename the original version to avoid confusion between versions.
Is Certified Allows you to select whether the new version of the transcript is certified or not.
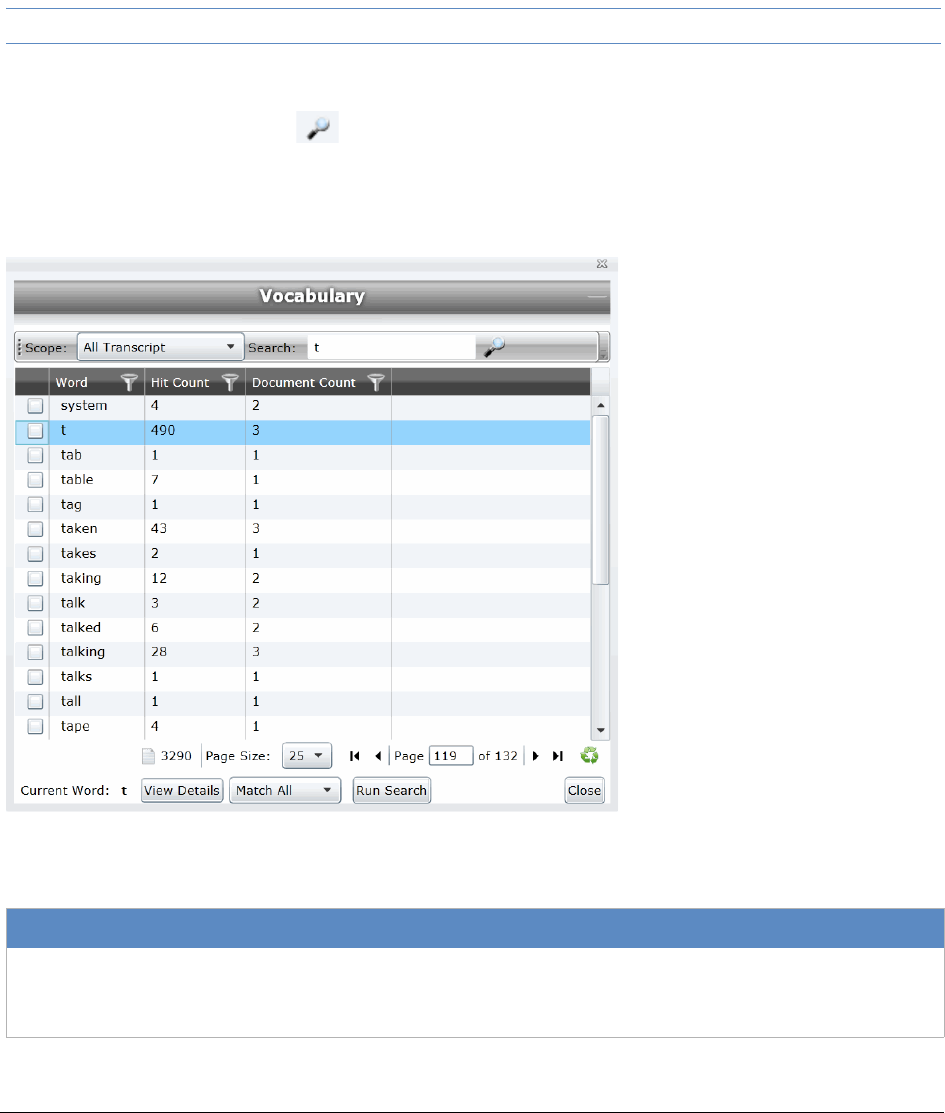
Managing Transcripts and Exhibits Using Transcript Vocabulary | 247
Using Transcript Vocabulary
The Transcript Vocabulary feature uses dtSearch to create an index of all of the unique words in a transcript. The
index lists all of the unique words contained in the specific transcript or all transcripts. (Noise words, such as an
and the, are not included in the index.) You can use the Transcript Vocabulary feature to isolate transcripts that
include specific words, and search for those words in the transcript. Navigate between highlighted terms and
view the highlighted terms in context of the transcript.
Note: The content of headers, preambles, and margins of the transcripts are included in the Vocabulary index.
To use Transcript Vocabulary
1. Click the Project Review button next to the project in the Project List.
2. Select Vocabulary from the Search Options menu.
The Vocabulary dialog appears.
Transcript Vocabulary Dialog
Elements of the Vocabulary Dialog
Element Description
Scope Narrows the scope of the vocabulary index as follows:
-All Transcript - Builds an index from all of the transcripts in the project.
-Transcript in List - Builds an index from the transcripts in the Item List.
Managing Transcripts and Exhibits Using Transcript Vocabulary | 248
Viewing Details of Words in the Vocabulary Dialog
In the Vocabulary dialog, you can view details of the documents that contain the word that you are examining.
Within the Documents Containing dialog, you can view a list of documents and filter by TranscriptName,
ObjectID, or Hit Count.
Note: The TranscriptName contains the deponent name, deposition date, and volume (if specified).
Select a document in the document list and click View Selected Document to open the document to view the
selected word. The document opens in the Natural Viewer and the selected word highlights in the Natural
Viewer. Click Close to exit the Documents Containing dialog.
Search Allows you to search for a word or a group of words in the vocabulary list.
Entering a letter in the search field retrieves a list of words that begins with the
letter entered.
Displays the word count of the vocabulary index. This count changes depending
upon the scope of the transcript vocabulary.
Page Size Changes the number of word rows displayed in the pane.
Page ___ of Navigates between pages of words listed.
Refreshes the word list.
View Details Displays more details on documents that contain the word in the highlighted row.
This word appears in the Current Word field.
Note: Only details of the highlighted word appear in the Current Word field, even
when other words are selected in the Vocabulary list.
When selected, a dialog appears. See Viewing Details of Words in the
Vocabulary Dialog on page 248.
Run Search Searches for documents containing certain words selected in the Vocabulary list.
Note: This search searches the entire project, not just transcript
documents.
Any documents found post back to the Item List. You can check any number of
words to include in the search.
Select Match All from the menu to return documents that contain all of the words
selected or Match Any to return documents that contain any of the words
selected.
Elements of the Vocabulary Dialog
Element Description
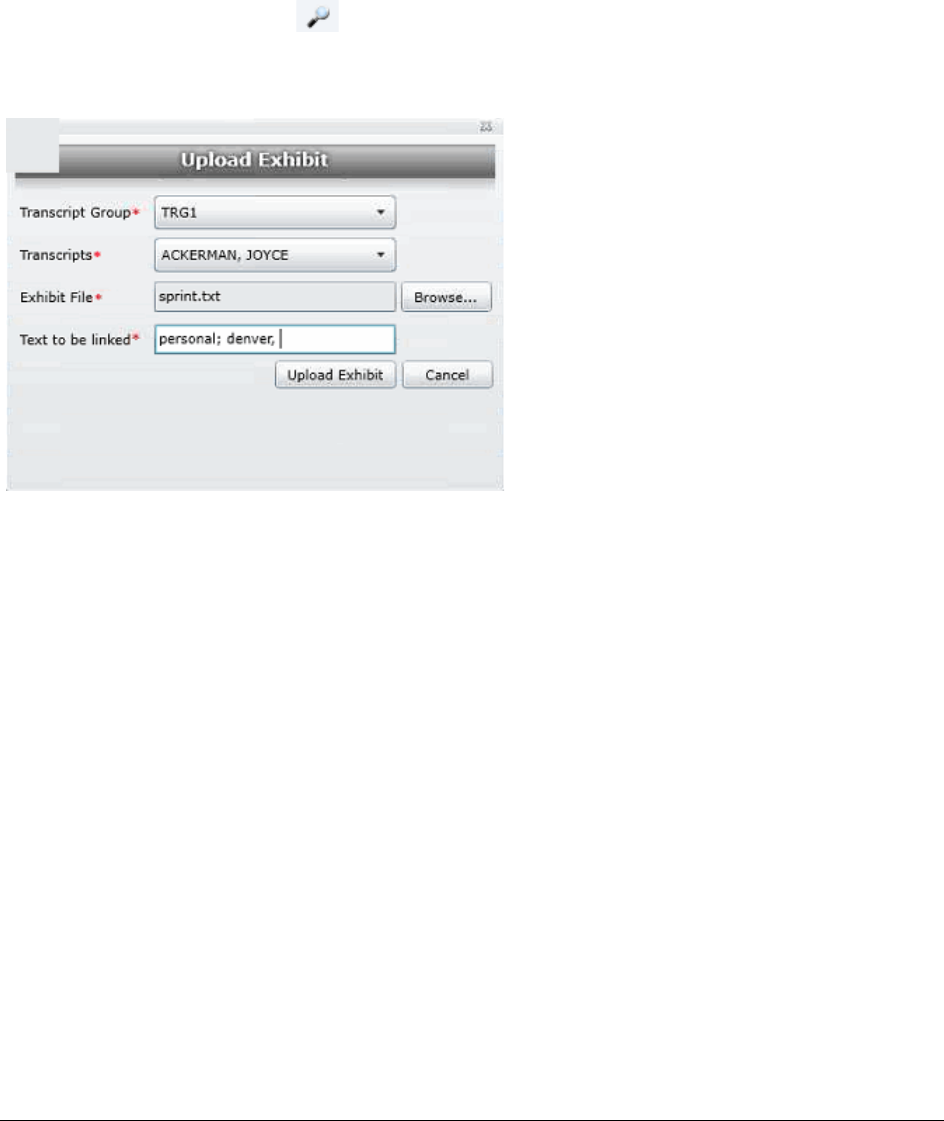
Managing Transcripts and Exhibits Uploading Exhibits | 249
Uploading Exhibits
Project/case managers with the Upload Exhibits permission can upload exhibits in Project Review. You can view
exhibits in the exhibits panel.
To upload an exhibit
1. Log in as a user with Upload Exhibits permissions.
2. Click the Project Review button next to the project in the Project List.
3. In the Project Explorer, right-click the Transcripts folder and click Upload Exhibits.
Upload Exhibit Dialog
4. Select the Transcript Group that contains the transcript to which you want to link the exhibit.
5. From the Transcripts menu, select the transcript to which you want to link the exhibit.
6. Click Browse, highlight the exhibit file, and click Open.
7. In the Text to be linked field, enter the text (from the transcript) that will become a link to the exhibit. You
can enter multiple text or aliases to be linked. Separate the terms by either a comma and/or a semi-
colon. Every occurrence of the text in the transcript becomes a hyperlink to the exhibit.
8. Click Upload Exhibit.
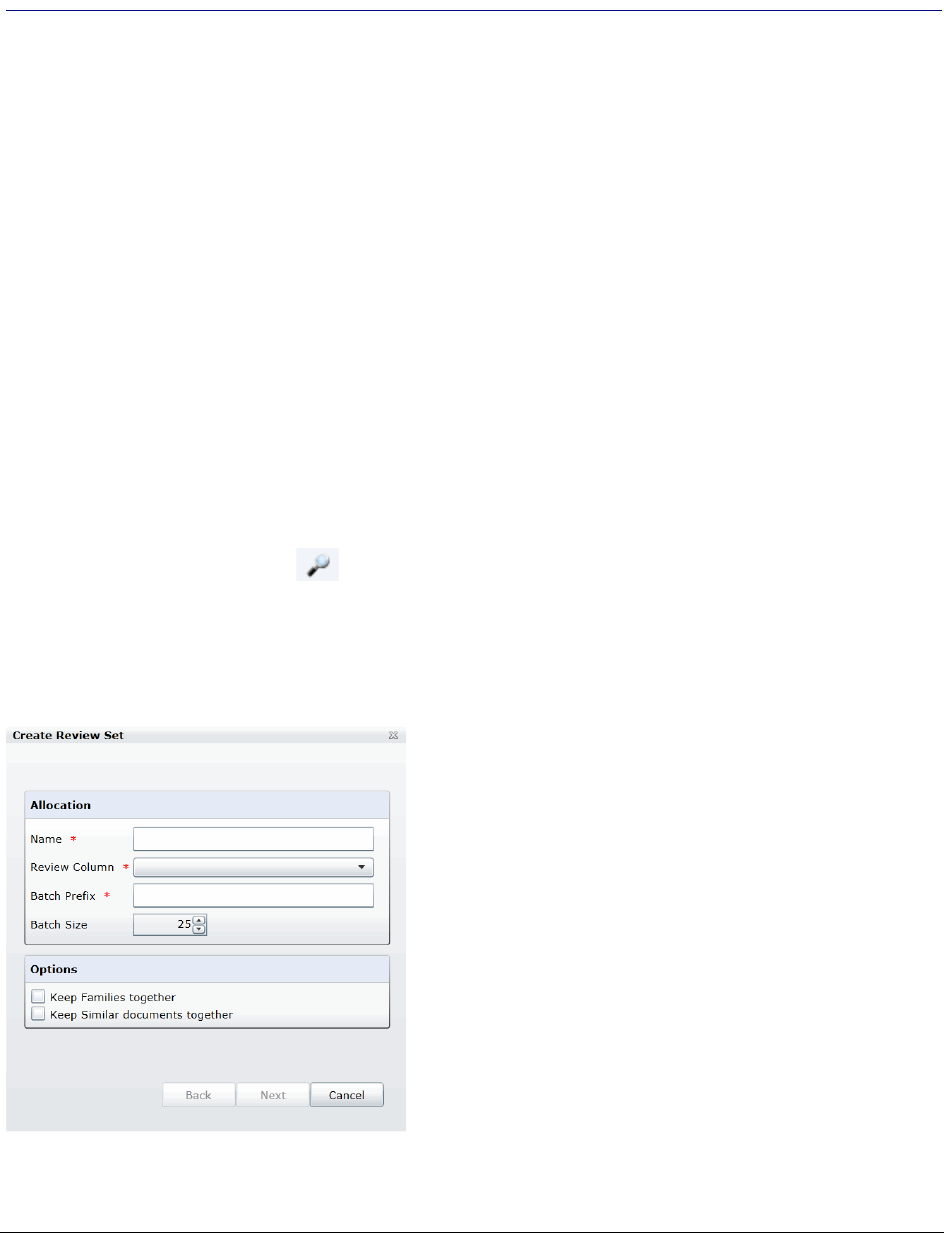
Managing Review Sets Creating a Review Set | 250
Chapter 23
Managing Review Sets
Review sets are batches of documents that you can check out for coding and then check back in. Review sets
aid in the work flow of the reviewer. It allows the reviewer to track the documents that have been coded and still
need to be coded. Project/case managers with Create/Delete Review Set permissions can create and delete
review sets.
Creating a Review Set
Project/case managers with Create/Delete Review Set permissions can create and delete review sets.
To create a review set
1. Log in as a user with Project Administrator rights.
2. Click the Project Review button next to the project in the Project List.
3. Click the Review Sets button in the Project Explorer.
See the Reviewer Guide for more information on the Review Sets tab.
4. Right-click the Review Sets folder and click Create Review Set.
Create Review Set Dialog
5. Enter a Name for the review set.
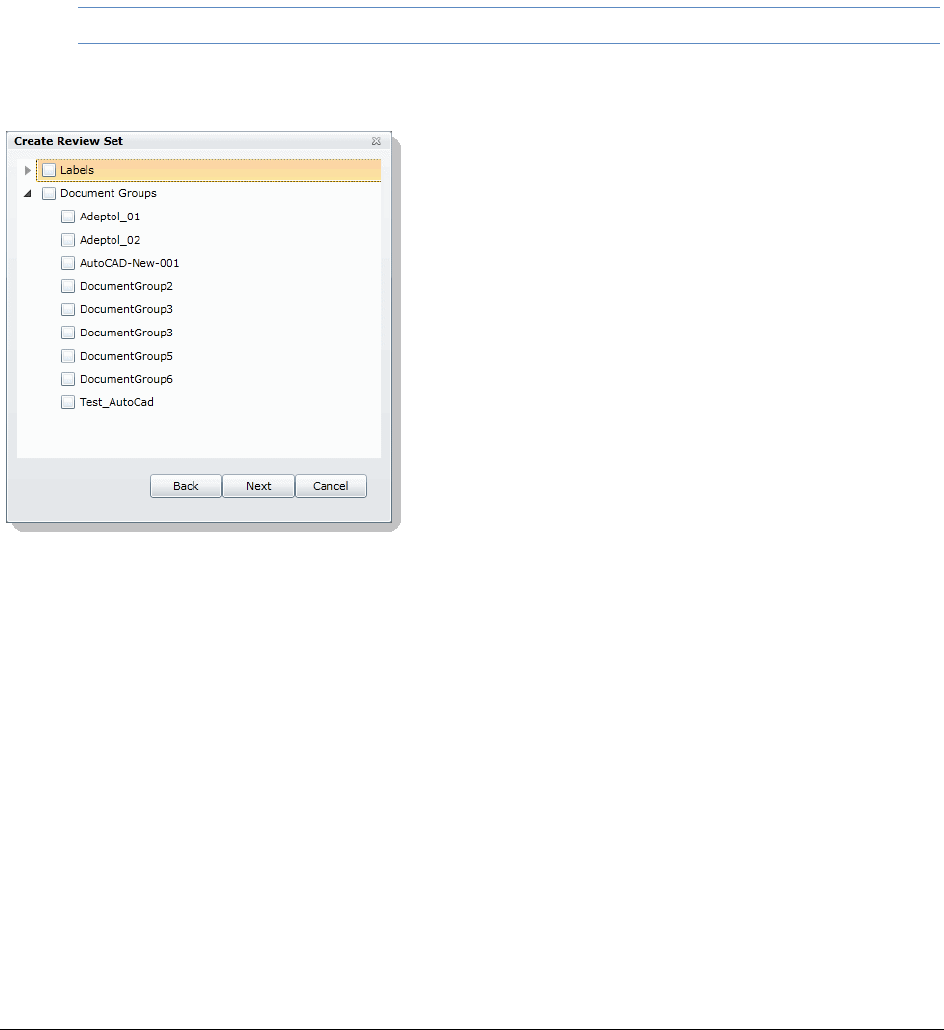
Managing Review Sets Creating a Review Set | 251
6. Select a Review Column that indicates the status of the review. New columns can be created in the
Custom Fields tab of the Home page.
See Custom Fields Tab on page 216.
7. Enter a prefix for the batch that will appear before the page numbers of the docs.
8. Increase or decrease the Batch Size to match the number of documents that you want to appear in the
review set.
9. Check the following options if desired:
-Keep Families together: Check this to include documents within the same family as the selected
documents in the batch.
-Keep Similar document sets together: Check this to include documents related to the selected
documents in the batch.
Note: Any “Keep” check box selected will override the restricted Batch Size.
10. Click Next.
Create Review Sets Dialog Second Screen
11. Expand Labels and check the labels that you want to include in the review set. All documents with that
label applied will be included in the review set. This is only relevant if the documents have already been
labeled by reviewers.
12. Expand the Document Groups and check the document groups that you want to include in the review
set.
13. Click Next.
14. Review the summary of the review set to ensure everything is accurate and click Create.
15. Click Close.

Managing Review Sets Deleting Review Sets | 252
Deleting Review Sets
Project/case managers with Create/Delete Review Set permissions can create and delete review sets.
To create a review set
1. Log in as a user with Project Administrator rights.
2. Click the Project Review button next to the project in the Project List.
3. Click the Review Sets button in the Project Explorer.
See the Reviewer Guide for more information on the Review Sets tab.
4. Expand the All Sets folder.
5. Right-click the review set that you want to delete and click Delete.
6. Click OK.

Managing Review Sets Renaming a Review Set | 253
Renaming a Review Set
Project/case managers with Manage Review Set permissions can rename review sets.
To rename a review set
1. Log in as a user with Project Administrator rights.
2. Click the Project Review button next to the project in the Project List.
3. Click the Review Sets button in the Project Explorer.
See the Reviewer Guide for more information on the Review Sets tab.
4. Expand the All Sets folder.
5. Right-click the review set that you want to rename and click Rename.
6. Enter a name for the review set.

Managing Review Sets Manage Permissions for Review Sets | 254
Manage Permissions for Review Sets
Project/case managers with Manage Review Set permissions can manage the permissions for review sets.
To rename a review set
1. Log in as a user with Project Administrator rights.
2. Click the Project Review button next to the project in the Project List.
3. Click the Review Sets button in the Project Explorer.
See the Reviewer Guide for more information on the Review Sets tab.
4. Expand the All Sets folder.
5. Right-click the review set that you want to manage permissions for and click Manage Permissions.
Assign Security Permissions Dialog
6. Check the groups that you want to grant permissions to the review set. Groups granted the Check In/
Check Out Review Batches permission will be able to check out the review sets to which they are
granted permission.
7. Click Save.

Project Folder Structure Project Folder Path | 255
Chapter 24
Project Folder Structure
This document describes the folder structure of the projects in your database. The location of the project folders
will differ depending on the project folder path where you saved the data.
Project Folder Path
When a project is created, a Project Folder is created in the Project Folder Path provided by the user that
creates the project. The Project Folder consists of alphanumeric characters auto generated by the application.
Project Folder example: 3fc04d13-1b48-40a5-80d3-0e410e8e9619.
Finding the Project Folder Path
You can find your project folder path by looking at the Project Details tab.
To find the project folder path
1. Log in to the application.
2. Select the project in the Project List panel.
3. Click on the Project Detail tab on the Home page.
4. Under Project Folder Path, the path is listed.

Project Folder Structure Project Folder Subfolders | 256
Project Folder Subfolders
Within the Project Folder, there are multiple subfolders. What subfolders that are available to view will depend
upon the project and the evidence loaded within the project. This section describes those subfolders.
Please note most of the files within the subfolders are in the DAT extension. This is the extension that the
application requires in order to read the contents of these files. The filename (<number>.dat) represents the
ObjectID of that document. It should match the ObjectID column displayed in the Project Review.
-CoolHTML: This folder contains the CoolHTML files. The application converts all email files into
CoolHTML files in order for the native viewer to display them.
-Native: This folder contains all the native files. This only pertains to Imported DII Documents and
Production Set Documents.
-Tiff: This folder contains the Image Documents. This only pertains to Imported DII Image Documents,
Production Set Image Documents, and Documents imaged using the “Imaging” option in the Item List
panel of the Project Review.
-PDF: This folder contains the Image Documents. These are imaged using the “Imaging” option in the Item
List panel of Project Review and selecting the pdf option.
-Graphic_Swf: This folder contains flash files created when imaging documents. There are two ways to
create these flash files:
Click on the Annotate button from the Image tab of the Document Viewer.
Select Imaging in the mass operations of the Item List panel and then select the Process for Image
Annotation option.
-Native_Swf: This folder contains flash files created when imaging documents. There are two way to
create these flash files:
Click on the Annotate button from the Natural tab of Document Viewer.
Select Imaging in the mass operations of the Item List panel and then select the Process for Native
Annotation option.
-Reports: This folder contains any report that is downloadable from within the program’s interface,
including project level reports such as Deduplication, Data Volume, Search, and Audit Log Reports.
-Slipsheets: This folder is a temporary location to place slipsheets during an imaging, production set, or
export job where images are requested. During the job if a particular document cannot be imaged, the
program will create a slipsheet for the document, which is stored in this file. As the job gets to completion,
the program will move that slipsheet into the appropriate folder (with the appropriate number in the
project of export and production sets.)
-Dts_idx: This folder contains the DT Search Index Files. These are needed to be able to search for full
text data.
-Email_body: This folder contains files that are the text of an email body.
-Filtered: This folder contains the files that are the text of the Native file extracted by the application at the
time of Add Evidence.
-OCR: This folder contains the files that are the text of the Native/Image files loaded via Import DII.
-JT: This folder contains files that are used for communication between processing host and processing
engine. This is internal EP communication.
-Jobs: This folder contains the jobs sent via the application (i.e. Import, Add Evidence, Cluster Analysis,
etc.) There are multiple Job folders:

Project Folder Structure Project Folder Subfolders | 257
AA: This folder contains the Additional Analysis Jobs which consist of Jobs from Import, Imaging,
Transcript Uploads, Clustering, etc.
This folder also contains subfolders for the respective jobs performed by the Additional Analysis jobs.
These folders contain compressed job information log files that are used for troubleshooting. The
user should not need to access these log files.
AE: This folder contains the jobs processed through Add Evidence.
This folder also contains subfolders for the respective Add Evidence jobs. These folders contain
compressed job information log files that are used for troubleshooting. The user should not need to
access these log files.
MI: This folder contains files for Index Manager jobs. These are run anytime you run another job to
help update the database.
This folder also contains subfolders for the respective jobs performed by the Index Manager jobs.
These folders contain compressed job information log files that are used for troubleshooting. The
user should not need to access these log files.
-EvidenceHistory.log: This folder contains a log file of Add Evidence, Additional Analysis, and Indexing
Jobs. A user should not need to access these log files.
Opening Project Files
To open any of the DAT files, you’ll need to know the original extension of the files. For example, if the file is in
the Tiff Folder, you know that it was originally a TIFF file. So if you change the extension from DAT to TIFF, you
can open the file and it’ll open as a TIFF File.
The files in the Native Folder are a little more complicated. You will need to match up the ObjectID to the one
shown in the Project Review and determine what kind of native file it is and then change it to that extension
accordingly. So that you do not alter the original file, it is best that you make a copy of the data files and then
change the extension accordingly.
Files in the Project Folder
In the main Project Folder, there and many files that are not in folders. Some of the loose files that you may
encounter include:
-EvidenceHistory.log: This is a log file of Add Evidence Jobs, Imaging Jobs, Production Sets, and
Clustering Jobs.

Loading Summation Data | 258
Part 5
Loading Summation Data
This part describes how to load Summation data and includes the following sections:
-Importing Data (page 259)
-Using the Evidence Wizard (page 260)
-Importing Evidence (page 269)
-Data Loading Requirements (page 272)
-Using Cluster Analysis (page 292)
-Editing Evidence (page 298)

Introduction to Loading Data Importing Data | 259
Chapter 25
Introduction to Loading Data
Importing Data
This document will help you import data into your project. You create projects in order to organize data. Data can
be added to projects in the forms of native files, such as DOC, PDF, XLS, PPT, and PST files, or as evidence
images, such as AD1, E01, and OFF files.
To manage evidence, administrators, and users with the Create/Edit Projects permission, can do the following:
-Add evidence items to a project
-View properties about evidence items in a project
-Edit properties about evidence items in a project
-Associate people to evidence items in a project
Note: You will normally want to have people created and selected before you process evidence.
See About Associating People with Evidence on page 262.
See the following chapters for more information:
To import data
1. Log in as a project manager.
2. Click the Add Data button next to the project in the Project List panel.
3. In the Add Data dialog, select on of the method by which you want to import data. The following
methods are available:
-Evidence (wizard): See Using the Evidence Wizard on page 260.
-Job (eDiscovery applications): See About Jobs on page 427.
-Import: See Importing Evidence on page 269.
-Cluster Analysis: See Using Cluster Analysis on page 292.
Using the Evidence Wizard Using the Evidence Wizard | 260
Chapter 26
Using the Evidence Wizard
Using the Evidence Wizard
When you add evidence to a project, you can use the Add Evidence Wizard to specify the data that you want to
add. You specify to add either parent folders or individual files.
Note: If you activated Cluster Analysis as a processing option when you created the project, cluster analysis will
automatically run after processing data.
You select sets of data that are called “evidence items.” It is useful to organize data into evidence items because
each evidence item can be associated with a unique person.
For example, you could have a parent folder with a set of subfolders.
\\10.10.3.39\EvidenceSource\
\\10.10.3.39\EvidenceSource\John Smith
\\10.10.3.39\EvidenceSource\Bobby Jones
\\10.10.3.39\EvidenceSource\Samuel Johnson
\\10.10.3.39\EvidenceSource\Edward Peterson
\\10.10.3.39\EvidenceSource\Jeremy Lane
You could import the parent \\10.10.3.39\EvidenceSource\ as one evidence item. If you associated a person to it,
all files under the parent would have the same person.
On the other hand, you could have each subfolder be its own evidence item, and then you could associate a
unique person to each item.
An evidence item can either be a folder or a single file. If the item is a folder, it can have other subfolders, but
they would be included in the item.
When you use the Evidence Wizard to import evidence, you have options that will determine how the evidence is
organized in evidence items.
Using the Evidence Wizard Using the Evidence Wizard | 261
When you add evidence, you select from the following types of files.
When you add evidence, you also select one of the following import methods.
Note: The source network share permissions are defined by the administrator credentials.
Evidence File Types
File Type Description
Evidence Images You can add AD1, E01, or AFF evidence image files.
Native Files You can add native files, such as PDF, JPG, DOC PPT, PST, XLSX, and so on.
Import Methods
Method Description
CSV Import This method lets you create and import a CSV file that lists multiple paths of
evidence and optionally automatically creates people and associates each
evidence item with a person.
Like the other methods, you specify whether the parent folder contains native
files or image files.
See Using the CSV Import Method for Importing Evidence on page 262.
This is similar to adding people by importing a file.
See the Project Manager Guide for more information on adding people by
importing a file.
Immediate Children This method takes the immediate subfolders of the specified path and imports
each of those subfolders’ content as a unique evidence item. You can
automatically create a person based on the child folder’s name (if the child folder
has a first and last name separated by a space) and have it associated with the
data in the subfolder.
See Using the Immediate Children Method for Importing on page 264.
Like the other methods, you specify if the parent folder contains native files or
image files.
Folder Import This method lets you select a parent folder and all data in that folder will be
imported. You specify that the folder contains either native files (JPG, PPT) or
image files (AD1, E01, AFF).
A parent folder can have both subfolders and files.
Using this method, each parent folder that you import is its own evidence item
and can be associated with one person.
For example, if a parent folder had several AD1 files, all data from each AD1 file
can have one associated person. Likewise, if a parent folder has several native
files, all of the contents of that parent folder can have one associated person.
Individual File(s) This method lets you select individual files to import. You specify that these
individual files are either native files (JPG, PPT) or image files (AD1, E01, AFF).
Using this method, each individual file that you import is its own evidence item
and can be associated with a person.
For example, all data from an AD1 file can have an associated person. Likewise,
each PDF, or JPG can have its own associated person.

Using the Evidence Wizard Using the Evidence Wizard | 262
About Associating People with Evidence
When you add evidence items to a project, you can specify people, or custodians, that are associated with the
evidence. These custodians are listed as People on the Data Sources tab.
In the Add Evidence Wizard, after specifying the evidence that you want to add, you can then associate that
evidence to a person. You can select an existing person or create a new person.
Important:
If you want to select an existing Person, that person must already be associated to the project. You
can either do that for the project on the Home page > People tab, or you can do it on the Data
Sources page > People tab.
You can create people in the following ways:
-On the Data Sources tab before creating a project.
See the Data Sources chapter.
-When adding evidence to a project within the Add Evidence Wizard.
See Adding Evidence to a Project Using the Evidence Wizard on page 266.
-On the People tab on the Home page for a project that has already been created.
About Creating People when Adding Evidence Items
In the Add Evidence Wizard, you can create people as you add evidence. There are three ways you can create
people while adding evidence to a project:
-Using a CSV Evidence Import.
See Using the CSV Import Method for Importing Evidence on page 262.
-Importing immediate children.
See Using the Immediate Children Method for Importing on page 264.
-Adding a person in the Add Evidence Wizard.
You can select a person from the drop-down in the wizard or enter a new person name.
See the Project Manager Guide for more information on creating people.
Using the CSV Import Method for Importing Evidence
When specifying evidence to import in the Add Evidence Wizard, you can use one of two general options:
-Manually browse to all evidence folders and files.
-Specify folders, files, and people in a CSV file.
There are several benefits of using a CSV file:
You can more easily and accurately plan for all of the evidence items to be included in a project by
including all sources of evidence in a single file.
You can more easily and accurately make sure that you add all of the evidence items to be included in
a project.
If you have multiple folders or files, it is quicker to enter all of the paths in the CSV file than to browse
to each one in the wizard.
If you are going to specify people, you can specify the person for each evidence item. This will
automatically add those people to the system rather than having to manually add each person.

Using the Evidence Wizard Using the Evidence Wizard | 263
When using a CSV, each path or file that you specify will be its own evidence item. The benefit of having multiple
items is that each item can have its own associated person. This is in contrast with the Folder Import method,
where only one person can be associated with all data under that folder.
Specifying people is not required. However, if you do not specify people, when the data is imported, no people
are created or associated with evidence items. Person data will not be usable in Project Review.
See the Project Manager Guide for information on associating a person to an evidence item.
If you do specify people in the CSV file, you use the first column to specify the person’s name and the second
column for the path.
If you do not specify people, you will only use one column for paths. When you load the CSV file in the Add
Evidence Wizard, you will specify that the first column does not contain people’s names. That way, the wizard
imports the first column as paths and not people.
If you do specify people, they can be in one of two formats:
-A single name or text string with no spaces
For example, JSmith or John_Smith
-First and last name separated by a space
For example, John Smith or Bill Jones
In the CSV file, you can optionally have column headers. You will specify in the wizard whether it should use the
first row as data or ignore the first row as headers.
CSV Example 1
This example includes headers and people.
In the wizard, you select both First row contains headers and First column contains people names check
boxes.
When the data is imported, the people are created and associated to the project and the appropriate evidence
item.
People, Paths
JSmith,\\10.10.3.39\EvidenceSource\JSmith
JSmith,\\10.10.3.39\EvidenceSource\Sales\Projections.xlsx
Bill Jones,\\10.10.3.39\EvidenceSource\BJones
Sarah Johnson,\\10.10.3.39\EvidenceSource\SJohnson
Evan_Peterson,\\10.10.3.39\EvidenceSource\EPeterson
Evan_Peterson,\\10.10.3.39\EvidenceSource\HR
Jill Lane,\\10.10.3.39\EvidenceSource\JLane
Jill Lane,\\10.10.3.39\EvidenceSource\Marketing
This will import any individual files that are specified as well as all of the files (and additional subfolders) under a
listed subfolder.

Using the Evidence Wizard Using the Evidence Wizard | 264
You may normally use the same naming convention for people. This example shows different conventions
simply as examples.
CSV Example 2
This example does not include headers or people.
In the wizard, you clear both First row contains headers and First column contains people names check
boxes.
When the data is imported, no people are created or associated with evidence items.
\\10.10.3.39\EvidenceSource\JSmith
\\10.10.3.39\EvidenceSource\Sales\Projections.xlsx
\\10.10.3.39\EvidenceSource\BJones
\\10.10.3.39\EvidenceSource\SJohnson
\\10.10.3.39\EvidenceSource\EPeterson
\\10.10.3.39\EvidenceSource\HR
\\10.10.3.39\EvidenceSource\JLane
\\10.10.3.39\EvidenceSource\Marketing
Using the Immediate Children Method for Importing
If you have a parent folder that has children subfolders, when importing it through the Add Evidence Wizard, you
can use one of three methods:
-Folder Import
-Immediate Children
-CSV Import
See Using the CSV Import Method for Importing Evidence on page 262.
When using the Immediate Children method, each child subfolder of the parent folder will be its own evidence
item. The benefit of having multiple evidence items is that each item can have its own associated person. This is
in contrast with the Folder Import method, where all data under that folder is a single evidence item with only one
possible person associated with it.
Specifying people is not required. However, if you do not specify people, when the data is imported, no people
are created or associated with evidence items. Person data will not be usable in Project Review.
See the Project Manager Guide for more information on associating a person to evidence.
When you select a parent folder in the Add Evidence Wizard, you select whether or not to specify people.
If you do specify people, the names of people are based on the name of the child folders.
Imported names of people can be imported in one of two formats:
-A single name or text string with no spaces
For example, JSmith or John_Smith

Using the Evidence Wizard Using the Evidence Wizard | 265
-First and last name separated by a space
For example, John Smith or Bill Jones
For example, suppose a parent folder had four subfolders, each containing data from a different user. Using the
Immediate Children method, each subfolder would be imported as a unique evidence item and the subfolder
name could be the associated person.
\Userdata\ (parent folder that is selected)
\Userdata\lNewstead (unique evidence item with lNewstead as a person)
\Userdata\KHetfield (unique evidence item with KHetfield as a person)
\Userdata\James Ulrich (unique evidence item with James Ulrich as a person)
\Userdata\Jill_Hammett (unique evidence item with Jill_Hammett as a person)
Note: In the Add Evidence Wizard, you can manually rename the people if needed.
The child folder may be a parent folder itself, but anything under it would be one evidence item.
This method is similar to the CSV Import method in that it automatically creates people and associates them to
evidence items. The difference is that when using this method, everything is configured in the wizard and not in
an external CSV file.
Using the Evidence Wizard Adding Evidence to a Project Using the Evidence Wizard | 266
Adding Evidence to a Project Using the Evidence Wizard
You can import evidence for projects for which you have permissions.
When you add evidence, it is processed so that it can be reviewed in Project Review.
Some data cannot be changed after it has been processed. Before adding and processing evidence, do the
following:
-Configure the Processing Options the way you want them.
See the Admin Guide for more information on default processing options.
-Plan whether or not you want to specify people.
See the Project Manager Guide for more information on associating a person to evidence.
-Unless you are importing people as part of the evidence, you must have people already associated with
the project.
See the Project Manager Guide for more information on creating people.
Note: Deduplication can only occur with evidence brought into the application using evidence processing.
Deduplication cannot be used on data that is imported.
To import evidence for a project
1. In the project list, click (add evidence) in the project that you want to add evidence to.
2. Select Evidence.
3. In the Add Evidence Wizard, select the Evidence Data Type and the Import Method.
See Using the Evidence Wizard on page 260.
4. Click Next.
5. Select the evidence folder or files that you want to import.
This screen will differ depending on the Import Method that you selected.
5a. If you are using the CSV Import method, do the following:
-If the CSV file uses the first row as headers rather than folder paths, select the First row contains
headers check box, otherwise, clear it.
-If the CSV file uses the first column to specify people, select the First column contains people’s
names check box, otherwise, clear it.
See Using the CSV Import Method for Importing Evidence on page 262.
Click Browse.
Browse to the CSV file and click OK.
The CSV data is imported based on the check box settings.
Confirm that the people and evidence paths are correct.
You can edit any information in the list.
If the wizard can’t validate something in the CSV, it will highlight the item in red and place a red
box around the problem value.
If a new person will be created, it will be designated by .
5b. If you are using the Immediate Children method, do the following:
If you want to automatically create people, select Sub folders are people’s names,
otherwise, clear it.
See Using the Immediate Children Method for Importing on page 264.
Click Browse.
Enter the IP address of the server where the evidence files are located and click Go.
Using the Evidence Wizard Adding Evidence to a Project Using the Evidence Wizard | 267
For example, 10.10.2.29
Browse to the parent folder and click Select.
Each child folder is listed as a unique evidence item.
If you selected to create people, they are listed as well.
Confirm that the people and evidence paths are correct.
You can edit any information in the list.
If the wizard can’t validate something, it will highlight the item in red and place a red box
around the problem value.
If a new person will be created, it will be designated by .
5c. If you are using the Folder Input or Individual Files method, do the following:
Click Browse.
Enter the IP address of the server where the evidence files are located and click Go.
For example, 10.10.2.29
Expand the folders in the left pane to browse the server.
In the right pane highlight the parent folder or file and click Select.
If you are selecting files, you can use Ctrl-click or Shift-click to select multiple files in one
folder.
The folder or file is listed as a unique evidence item.
6. If you want to specify a person to be associated with this evidence, select one from the Person Name
drop-down list or type in a new person name to be added.
See About Associating People with Evidence on page 262.
If you enter a new person that will be created, it will be designated by .
You can also edit a person’s name if it was imported.
7. Specify a Timezone.
From the Timezone drop-down list, select a time zone.
See Evidence Time Zone Setting on page 268.
8. (Optional) Enter a Description.
This is used as a short description that is displayed with each item in the Evidence tab.
For example, “Imported from Filename.csv” or “Children of path”.
This can be added or edited later in the Evidence tab.
9. (Optional) If you need to delete an evidence item, click the for the item.
10. Click Next.
11. In the Evidence to be Added and Processed screen, you can view the evidence that you selected so far.
From this screen, you can perform one of the following actions:
-Add More: Click this button to return to the Add Evidence screen.
-Add Evidence and Process: Click this button to add and process the evidence listed.
When you are done, you are returned to the project list. After a few moments, the job will start and the
project status should change to Processing.
12. If you need to manually update the list or status, click Refresh.
13. When the evidence import is completed, you can view the evidence items in the Evidence and People
tabs.
See Evidence Tab on page 155.

Using the Evidence Wizard Adding Evidence to a Project Using the Evidence Wizard | 268
Evidence Time Zone Setting
Because of worldwide differences in the time zone implementation and Daylight Savings Time, you select a time
zone when you add an evidence item to a project.
In a FAT volume, times are stored in a localized format according to the time zone information the operating
system has at the time the entry is stored. For example, if the actual date is Jan 1, 2005, and the time is 1:00
p.m. on the East Coast, the time would be stored as 1:00 p.m. with no adjustment made for relevance to
Greenwich Mean Time (GMT). Anytime this file time is displayed, it is not adjusted for time zone offset prior to
being displayed.
If the same file is then stored on an NTFS volume, an adjustment is made to GMT according to the settings of
the computer storing the file. For example, if the computer has a time zone setting of -5:00 from GMT, this file
time is advanced 5 hours to 6:00 p.m. GMT and stored in this format. Anytime this file time is displayed, it is
adjusted for time zone offset prior to being displayed.
For proper time analysis to occur, it is necessary to bring all times and their corresponding dates into a single
format for comparison. When processing a FAT volume, you select a time zone and indicate whether or not
Daylight Savings Time was being used. If the volume (such as removable media) does not contain time zone
information, select a time zone based on other associated computers. If they do not exist, then select your local
time zone settings.
With this information, the system creates the project database and converts all FAT times to GMT and stores
them as such. Adjustments are made for each entry depending on historical use data and Daylight Savings
Time. Every NTFS volume will have the times stored with no adjustment made.
With all times stored in a comparable manner, you need only set your local machine to the same time and date
settings as the project evidence to correctly display all dates and times.

Importing Evidence About Importing Evidence Using Import | 269
Chapter 27
Importing Evidence
About Importing Evidence Using Import
As an Administrator or Project Manager with the Create/Edit Projects permissions, you can import evidence for a
project.
You import evidence by using a load file, which allows you to import metadata and physical files, such as native,
image, and/or text files that were obtained from another source, such as a scanning program or another
processing program. You can import the following types of load files:
-Summation DII - A proprietary file type from Summation. See Data Loading Requirements on page 272.
-Generic - A delimited file type, such as a CSV file.
-Concordance/Relativity - A delimited DAT file type that has established guidelines as to what delimiter
should be used in the fields. This file should have a corresponding LFP or OPT image file to import.
Transcripts and exhibits are uploaded from Project Review and not from the Import dialog. See the Project
Manager Guide for more information on how to upload transcripts and exhibits.
About Mapping Field Values
When importing you must specify which import file fields should be mapped to database fields. Mapping the
fields will put the correct information about the document in the correct columns in the Project Review.
After clicking Map Fields, a process runs that checks the imported load file against existing project fields. Most
of the import file fields will automatically be mapped for you. Any fields that could not be automatically mapped
are flagged as needing to be mapped.
Note: If you need custom fields, you must create them in the Custom Fields tab on the Home page before you
can map to those fields during the import. If the custom names are the same, they will be automatically
mapped as well.
Any errors that have to be corrected before the file can be imported are reported at this time.
When importing a CSV or DAT load file that is missing the unique identifier used to map to the DocID file, an
error message will be displayed.
Notes:
-If a record contains the same values for the DocID as the ParentID, an error is logged in the log file and
the record is not imported. This allows you to correct the problem record and make sure all records in the
family are included in the loadfile correctly.

Importing Evidence Importing Evidence into a Project | 270
-In review, the AttachmentCount value is displayed under the EmailDirectAttachCount column.
-The Importance value is not imported as a text string but is converted and stored in the database as an
integer representing a value of either Low, Normal, High, or blank. These values are case sensitive and
in the import file must be an exact match.
-The Sensitivity value is not imported as a text string but is converted and stored in the database as an
integer representing a value of either Confidential, Private, Personal, or Normal. These values are case
sensitive and in the import file must be an exact match.
-The Language value is not imported as a text string but is converted and stored in the database as an
integer representing one of 67 languages.
-Body text that is mapped to the Body database field is imported as an email body stream and is viewable
in the Natural viewer. When importing all file types, the import Body field is now automatically mapped to
the Body database field.
Importing Evidence into a Project
To import evidence into a project
1. Log into the application as an Administrator or a user with Create/Edit Project rights.
2. In the Project List panel, click Add Evidence next to the project.
3. Click Import.
4. In the Import dialog, select the file type (EDII, Concordance/Relativity, or Generic).
4a. Enter the location of the file or Browse to the file’s location.
4b. (optional - Available only for Concordance/Relativity) Select the Image Type and enter the location
of the file, or Browse to the file’s location. You can choose from the following file options:
OPT - Concordance file type that contains preferences and option settings associated with the
files.
LFP - Ipro file type that contains load images and related information.
5. Perform field mapping.
Most fields will be automatically mapped. If some fields need to be manually mapped, you will see an
orange triangle.
5a. Click Map Fields to map the fields from the load file to the appropriate fields.
See About Mapping Field Values on page 269.
5b. To skip any items that do not map, select Skip Unmapped.
5c. To return the fields back to their original state, click Reset.
Note: Every time you click the Map Fields button, the fields are reset to their original state.
6. Select the Import Destination.
6a. Choose from one of the following:
Existing Document Group: This option adds the documents to an existing document group.
Select the group from the drop-down menu.
See the Project Manager Guide (or section) for more information on managing document
groups.
Create New Document Group: This option adds the documents to a new document group.
Enter the name of the group in the field next to this radio button.

Importing Evidence Importing Evidence into a Project | 271
7. Select the Import Options for the file. These options will differ depending on whether you select DII,
Concordance/Relativity, or Generic.
-General Options:
Enable Fast Import: This will exclude database indexes while importing.
-DII Options:
Page Count Follows Doc ID: Select this option if your DII file has an @T value that contains
both a Doc ID and a page count.
Import OCR/Full Text: Select this option to import OCR or Full Text documents for each
record.
Import Native Documents/Images: Select this option to import Native Documents and
Images for each record.
Process files to extract metadata: Selecting this option will import only the metadata that
exists on the load file and not process native files as you import them with a load file.
-Concordance/Relativity, or Generic Options:
First Row Contains Field Names: Select this option if the file being imported contains a row
header.
Field, Quote, and Multi-Entry Separators: From the pull-down menu, select the symbols for
the different separators that the file being imported contains. Each separator value must match
the imported file separators exactly or the field being imported for each record is not populated
correctly.
Return Placeholder: From the pull-down menu, select the same value contained in the file
being imported as a replacement value for carriage return and line feed characters. Each
return placeholder value must match the imported file separators.
8. Configure the Date Options.
-Select the date format from the Date Format drop-down menu.
This option allows you to configure what date format appears in the load file system, allowing the
system to properly parse the date to store in the database. All dates are stored in the database in a
yyy-mm-dd hh:mm:ss format.
-Select the Load File Time Zone.
Choose the time zone that the load file was created in so the date and time values can be converted
to a normalized UTC value in the database.
See Normalized Time Zones on page 166.
9. Select the Record Handling Options.
-New Record:
Add: Select to add new records.
Skip: Select to ignore new records.
-Existing Record:
Update: Select to update duplicate records with the record being imported.
Overwrite: Select to overwrite any duplicate records with the record being imported.
Skip: Select to skip any duplicate records.
10. Validation: This option verifies that:
-The path information within the load file is correct
-The records contain the correct fields. For example, the system verifies that the delimiters and fields
in a Generic or Concordance/Relativity file are correct.
-You have all of the physical files (that is, Native, Image, and Text) that are listed in the load file.
11. (optional) Drop DB Indexes. Database indexes improve performance, but slow processing when
inserting data. If this option is checked, all of the data reindexes every time more data is loaded. Only
select this option if you want to load a large amount of data quickly before data is reviewed.
12. Click Start.

Data Loading Requirements Document Groups | 272
Chapter 28
Data Loading Requirements
This chapter describes the data loading requirements of eDiscovery and Summation and contains the following
sections:
-Document Groups (page 272)
-Email & eDocs (page 275)
-Coding (page 277)
-Related Documents (page 280)
-Transcripts and Exhibits (page 281)
-Work Product (page 283)
-Sample DII Files (page 284)
-DII Tokens (page 288)k
Document Groups
Note: You can import and display Latin and non-Latin Unicode characters. While the application supports the
display of fielded data in either Latin or non-Latin Unicode characters, the modification of fielded data is
supported only in Latin Unicode characters.
Note: The display of non-Latin Unicode characters does not apply to transcript filenames, since transcript
deponents are defined by project users, or work product filenames, which are not displayed in the
application.
Images
The following describes the required and recommended formats for images.
Required
-A DII load file is required to load image documents. 0
-Group IV TIFFS: single or multi-page, black and white (or color), compressed images, no DPI minimum.
-Single page JPEGs for color images.

Data Loading Requirements Document Groups | 273
Full-Text or OCR
The following describes the required and recommended formats for full-text or OCR.
Required
-If submitting document level OCR, page breaks should be included between each page of text in the
document text file.
Failure to insert page breaks will result in a one page text file for a multi-page document. The ASCII
character 12 (decimal) is used for the “Page Break” character. All instances of the character 12 as page
breaks will be interpreted.
-Document level OCR or page level OCR.
-All OCR files should be in ANSI or Unicode text file format, with a *.txt extension.
-A DII load file. Loading Control List (.LST) files are not supported.
Recommended
-OCR text files should be stored in the same directories as image files.
-Page level OCR is recommended to ensure proper page breaks.
DII Load File Format for Image/OCR
Note: When selecting the Copy ESI option, the DII and source files must reside in a location accessible by the
IEP server; otherwise, import jobs will fail during the Check File process.
The following describes the required format for a DII load file to load images and OCR.
Required
-A blank line after each document summary.
-@T to identify each document summary.
-@T should equal the beginning Bates number.
-If OCR is included, then use @FULLTEXT at the beginning of the DII file (@FULLTEXT DOC or
@FULLTEXT PAGE).
-If @FULLTEXT DOC is included, OCR text files are assumed to be in the Image folder location with the
same name as the first image (TIFF or JPG) file.
-If @FULLTEXT PAGE is included, OCR text files are assumed to be in the Image folder location with the
same name as the image files (each page should have its own txt file).
-If @O token is used, @FULLTEXT token is not required.
-If Fulltext is located in another directory other than images, use @FULLTEXTDIR followed by the
directory path.

Data Loading Requirements Document Groups | 274
-The page count identifier on the @T line can be interpreted ONLY if it is denoted with a space character.
For example:
@FULLTEXT PAGE
@T AAA0000001 2
@D @I\IMAGES\01\
AAA0000001.TIF
AAA0000002.TIF
@T AAA0000003 1
@D @I\IMAGES\02\
AAA0000003.TIF
Import controls the Page Count Follows DocID option. If this option is deselected, the page count
identifier on the @T line would not be recognized.
Recommended
-DII load file names should mirror that of the respective volume (for easy association and identification).
-@T values (that is, the BegBates) and EndBates should include no more than 50 characters.
Non-alphabetical and non-numerical characters should be avoided.

Data Loading Requirements Email & eDocs | 275
Email & eDocs
You can host email, email attachments, and eDocs (electronic documents in native format) for review and
attorney coding, as well as associated full-text and metadata. It is also possible to include an imaged version (in
TIFF format) of the file at loading. A DII load file is required in order to load e-mail and electronic documents.
Note: You can import and display of Latin and non-Latin Unicode characters. While the application supports the
display of fielded data in either Latin or non-Latin Unicode characters, the modification of fielded data is
supported only in Latin Unicode characters.
Note: The display of non-Latin Unicode characters does not apply to transcript filenames, since transcript
deponents are defined by users, or work product filenames, which are not displayed.
General Requirements
The following describes the required and recommended formats for DII files that are used to load email, email
attachments, and eDocs.
A DII load file with a *.dii file extension, using only the tokens, is listed in DII Tokens (page 288).
-@T to identify each email, email attachment, or eDoc record.
-@T is the first line for each summary.
-@T equals the unique DocID for each email, email attachment, or eDoc record. There should be only one
@T per record.
-A blank line between document records.
-@EATTACH token is required for email attachments and @EDOC for eDocs. These tokens contain a
relative path to the native file.
-@MEDIA is required for email data with a value of eMail or Attachment. For eDocs, the @MEDIA value
must be eDoc.
-@EATTACH is required when @MEDIA has a value of Attachment and is not required when @MEDIA
has a value of eMail.
-To maintain the parent/child relationship between an e-mail and its attachments (family relationships for
eDocs), the @PARENTID and @ATTACH tokens are used.
-To include images along with the native file delivery, use the @D @I tokens at the end of the record.
-@O token is extended to support loading FullText into eDoc and eMails also.
If record has both @O and @EDOC/@EATTACH tokens, FullText is loaded from the file specified by the
@O token. If @O token does NOT exist for the record, FullText is extracted from the file specified by the
@EDOC/@EATTACH token.
-@AUTHOR and @ITEMTYPE tokens are NOT supported.
Recommended
-@T values (Begbates/DocID) should include no more than 50 characters. Non-alphabetical and
non-numerical characters should be avoided.
-Specify parent-child relationship in the DII file based on the following rule:

Data Loading Requirements Email & eDocs | 276
-In the DII file, email attachments should immediately follow the parent record, that is:
@T ABC000123
@MEDIA eMail
@EMAIL-BODY
Please reply with a copy of the completed report.
Thanks for your input.
Beth
@EMAIL-END
@ATTACH ABC000124; ABC000125
@T ABC000124
@MEDIA Attachment
@EATTACH \Native\ABC000124.doc
@PARENTID ABC000123
@T ABC000125
@MEDIA Attachment
@EATTACH \Native\ABC000125.doc
@PARENTID ABC000123

Data Loading Requirements Coding | 277
Coding
The following describes the required and recommended formats for coded data.
Recommended
-Coded data should be submitted in a delimited text file, with a *.txt extension.
-Use the following default delimiter characters:
Users can, however, specify any custom character in the Import user interface for any of the separators above.
-The standard comma and quote characters (‘,’ ‘”’) are accepted. When these characters are present
within coded data, different characters must be used as separators.
For instance,
DOCID|SUMMARY|AUTHOR
^DOJ000001^|^Test “Summary1”^|^Smith, John^
In the above file,
Field Separator |
Quote Separator ^
-Date field values should have any of the following formats. The date 16th August 2009 can be
represented in the load file as:
08/16/2009
16/08/2009
20090816
In addition, fuzzy dates are also supported. Currently only DOCDATE field supports fuzzy dates.
-If a day is fuzzy, then replace dd with 00.
-If a month is fuzzy, then replace mm with 00.
-If a year is fuzzy, replace yyyy with 0000.
Field Separator |
Multi-entry Separator ;
Return Placeholder ~
Quote Separator ^

Data Loading Requirements Coding | 278
-Time values should have any of the following formats. The time 1:27 PM can be represented in the load
file as:
1:27 PM
01:27 PM
1:27:00 PM
01:27:00 PM
13:27
13:27:00
Format Example
mm/dd/yyyy 00/16/2009 (month fuzzy)
08/00/2009 (day fuzzy)
08/16/0000 (year fuzzy)
00/16/0000 (month and year fuzzy)
08/00/0000 (day and year fuzzy)
00/00/2009 (month and day fuzzy)
00/00/0000 (all fuzzy)
08/16/2009 (no fuzzy)
yyyymmdd 00000816 (year fuzzy)
20090016 (month fuzzy)
20090800 (day fuzzy)
00000016 (year and month fuzzy)
00000800 (year and day fuzzy)
20090000 (month and day fuzzy)
00000000 (all fuzzy)
20090816 (no fuzzy)
dd/mm/yyyy 00/08/2009 (day fuzzy)
16/00/2009 (month fuzzy)
16/08/0000 (year fuzzy)
16/00/0000 (month and year fuzzy)
00/08/0000 (day and year fuzzy)
00/00/2009 (day and month fuzzy)
00/00/0000 (all fuzzy)
16/08/2009 – no fuzzy

Data Loading Requirements Coding | 279
Time values for standard tokens @TIMESENT/@TIMERCVD/@TIMESAVED/TIMECREATED will not be loaded
for a document unless accompanied by a corresponding DATE token DATESENT/ @DATERCVD/
@DATESAVED/@DATECREATED.
Recommended
-You can use Field Mapping where the user can select different fields to be populated from the DII/CSV
files. Fields would be automatically mapped during Import if the name of the database field matches the
name of the field within the DII/CSV file.
-Field names within the header row will appear exactly as they appear within the delimited text file. Use
consistent field naming for subsequent data deliveries.
-DocID/BegBates/EndBates values should include no more than 50 characters. Non-alphabetical and
non-numerical characters should be avoided.
-Coding file names should mirror that of the respective volume (for easy association and identification).
For example:
DOCID|TITLE|AUTHOR
^AAA-000001^|^Report to XYZ Corp^|^Jillson, Deborah;Ward, Simon;LaBelle, Paige^
^AAA-000005^|^Financial Statement^|^Mubark, Byju;Aminov, Marina^
^AAA-000008^|^Memo^|^McMahon, Brian^

Data Loading Requirements Related Documents | 280
Related Documents
You can review related documents the @ATTACHRANGE token or the @PARENTID and @ATTACH tokens.
The related documents must be coded in sequential order by their DOCID. The sequence determines the first
document and the last document in the related document set.
Note: Bates number of the first document in @ATTACHRANGE populates the ParentDoc column.
Note: @ParentID populates the ParentDoc field and @ATTACH populates the AttachIDs.
Either @Attachrange or @ParentID can be used at a time.
For example:
@ATTACHRANGE ABC001-ABC005
OR
@PARENTID ABC001
OR
@ATTACH ABC001;ABC002;ABC003;ABC004;ABC005

Data Loading Requirements Transcripts and Exhibits | 281
Transcripts and Exhibits
Note: You can import and display of Latin and non-Latin Unicode characters. While the application supports the
display of fielded data in either Latin or non-Latin Unicode characters, the modification of fielded data s
supported only in latin Unicode characters.
Note: The display of non-Latin Unicode characters does not apply to transcript filenames, since transcript
deponents are defined by users, or work product filenames, which are not displayed.
From Menu > Transcript > Manage, you can upload new transcripts to any transcript collection to which they
have access. All transcripts are displayed individually, and each has its own menu that controls various transcript
management functions.
Transcripts
The following describes the required and recommended formats for transcripts.
Required
-ASCII or Unicode files (*.txt) in AMICUS format.
Recommended
-Transcript size is less than one megabyte.
-Page number specifications:
All transcript pages are numbered.
Page numbers are up against the left margin. The first digit of the page number should appear in
Column 1. See the figure below.
Page numbers appear at the top of each page.
Page numbers contain no more than six digits, including zeros, if necessary. For example, Page 34
would be shown as 0034, 00034, or 000034.
The first line of the transcript (Line 1 of the title page) contains the starting page number of that
volume. For example, if the volume starts on Page 1, either 0001 or 00001 are correct. If the volume
starts on Page 123, either 0123 or 00123 are correct.
Line numbers appear in Columns 2 and 3.
Text starts at least one space after the line number. It is recommended to start text in Column 7.
No lines are longer than 78 characters (including letters and spaces).
No page breaks, if possible. If page breaks are necessary, they should be on the line preceding the
page number.
Consistent numbers of lines per page, if neither page breaks nor page number formats are used.
No headers or footers.
All transcript lines are numbered.
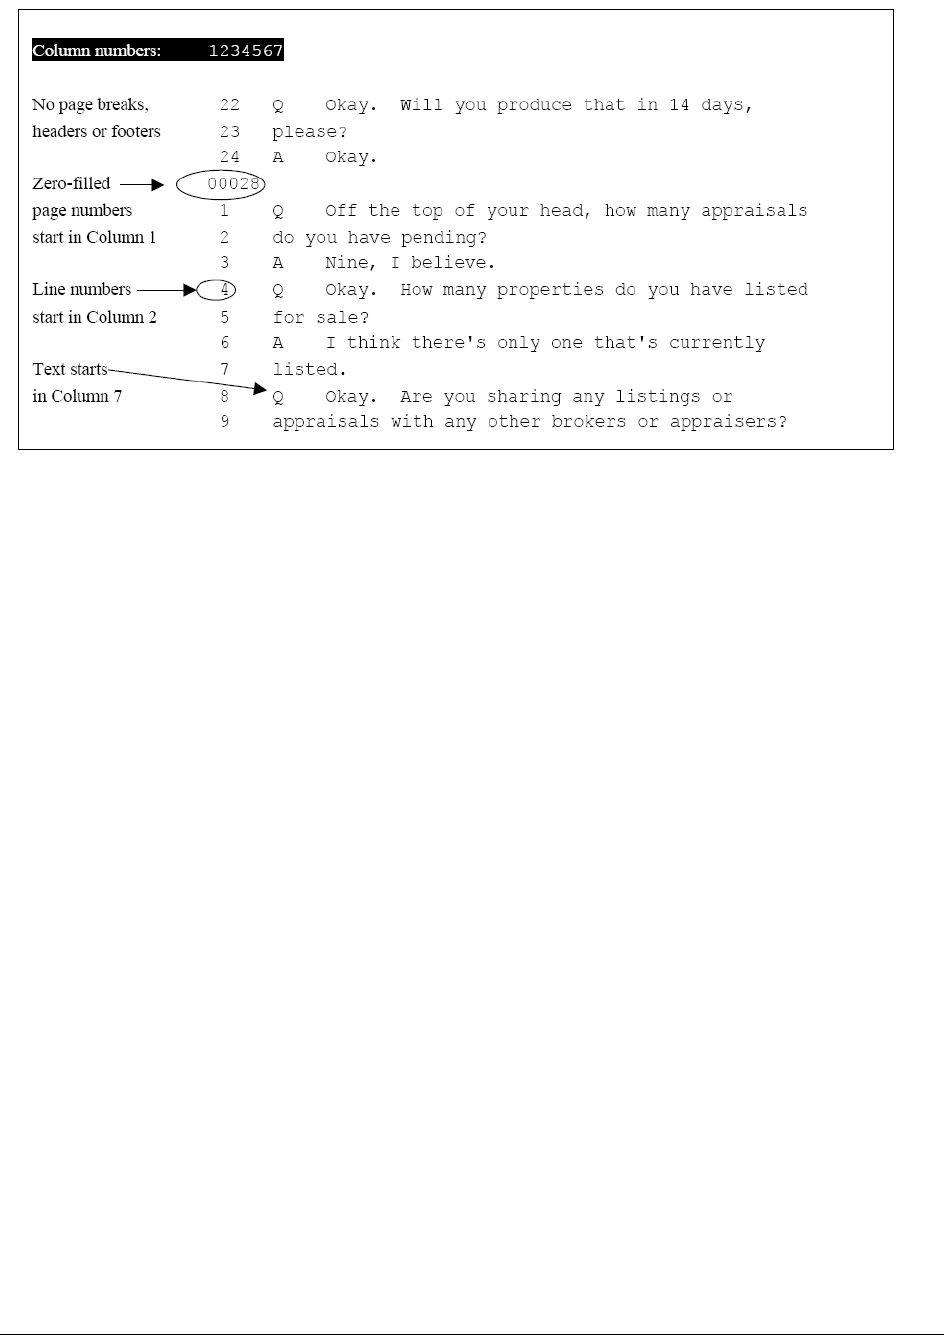
Data Loading Requirements Transcripts and Exhibits | 282
Preferred Transcript Format
Exhibits
The following describes the required format for Exhibits.
Required
-Exhibits that will be loaded must be in PDF format.
-If an Exhibit has multiple pages, all pages must be contained in one file instead of a file per page.

Data Loading Requirements Work Product | 283
Work Product
Note: You can import and display of Latin and non-Latin Unicode characters. While the application supports the
display of fielded data in either Latin or non-Latin Unicode characters, the modification of fielded data is
supported only in Latin Unicode characters.
Note: The display of non-Latin Unicode characters does not apply to transcript filenames, since transcript
deponents are defined by users, or work product filenames, which are not displayed.
From Menu > Work Product > Manage you can upload, view, and review Work Product files. Work Product can
be any type of file: text, word processing, PDF, or even MP3. (MP3 files are useful when you wish to send an
audio transcript or message to the members of the group who have access to Work Product). The application
does not maintain edits or keep version control information for the documents stored. Users working with Work
Product documents must have the appropriate native application, such as Microsoft Word or Adobe Acrobat, to
open them.

Data Loading Requirements Sample DII Files | 284
Sample DII Files
Note: You can import and display of Latin and non-Latin Unicode characters. While the application supports the
display of fielded data in either Latin or non-Latin Unicode characters, the modification of fielded data is
supported only in Latin Unicode characters.
Note: The display of non-Latin Unicode characters does not apply to transcript filenames, since transcript
deponents are defined by users, or work product filenames, which are not displayed.
Note: When selecting the Copy ESI option, the DII source files must reside in a location accessible by the IEP
server; otherwise, import jobs will fail during the Check File process.
eDoc DII Load Files
Required DII Format (eDocs)
@T SSS00000007
@MEDIA eDoc
@EDOC \folder\SSS00000007.xls
@T SSS00000008
@MEDIA eDoc
@EDOC \Native\SSS00000008.doc
Recommended DII format (eDocs)
@T ABC00000123
@MEDIA eDoc
@EDOC \Natives\ABC00000123.xls
@APPLICATION Microsoft Excel
@DATECREATED 05/25/2002
@DATESAVED 06/05/2002
@SOURCE Dee Vader

Data Loading Requirements Sample DII Files | 285
eMail DII Load Files
Required DII File Format for Parent Email (Emails)
@T ABC000123
@MEDIA eMail
@EMAIL-BODY
Please reply with a copy of the completed report.
Thanks for your input.
Beth
@EMAIL-END
@ATTACH ABC000124;ABC000125
Required DII File Format for Related Email Attachment (Emails)
@T ABC000124
@MEDIA Attachment
@EATTACH \Native\ABC000124.doc
@PARENTID ABC000123

Data Loading Requirements Sample DII Files | 286
Recommended DII Format for Parent Email (Emails)
@T ABC000123
@MEDIA eMail
@ATTACH ABC000124; ABC000125
@EMAIL-BODY
Please reply with a copy of the completed report.
Thanks for your input.
Beth
@EMAIL-END
@FROM Abe Normal (anormal@ctsummation.com)
@TO abcody@ctsummation.com; rob.hood@wolterskluwer.com
@CC Willie Jo
@BCC Jopp@ctsummation.com
@SUBJECT Please reply
@APPLICATION Microsoft Outlook
@DATECREATED 06/16/2006
@DATERCVD 06/16/2006
@DATESENT 06/16/2006
@FOLDERNAME \ANormal\Sent Items
@READ Y
@SOURCE Abe Normal
@TIMERCVD 1:36 PM
@TIMESENT 1:35 PM
Recommended DII Format for Related Email Attachments (Emails)
@T ABC000124
@MEDIA Attachment
@EATTACH \Native\ABC000124.doc
@PARENTID ABC000123
@APPLICATION Microsoft Word
@DATECREATED 05/25/2005
@DATESAVED 06/05/2005
@SOURCE Abe Normal
@AUTHOR Abe Normal
@DOCTITLE Sales Report June 2005

Data Loading Requirements Sample DII Files | 287
Recommended DII Format for Native Plus Images Deliveries (Email and eDocs)
(Append to the previous recommended DII formats for eDocs or email.)
@D @|\Images\
ABC000124-001.tif
ABC000124-002.tif
Data Loading Requirements DII Tokens | 288
DII Tokens
Data for all tokens must be in a single line except the @OCR…@OCR-END, @EMAIL-BODY … @EMAIL-END
and @HEADER … @HEADER-END.
TOKEN FIELD POPULATED DESCRIPTION OF USAGE
@T DOCID &
BEGBATES This token is required for each DII record. This must be the first
token listed for the document. This must be unique in the case.
The @BEGBATES or @DOCID should not be used. @T
ABC000123
@APPLICATION Application The application used to view the electronic document. For
example: @APPLICATION Microsoft Word
@ATTACH AttachDocs IDs of attached documents. For example: @ATTACH
ABC000124;ABC000125
@ATTACHRANG
E ParentDoc The document number range of all attachments if more than one
attachment exists. The beginning number in the range populates
the PARENTDOC. For example:
@ATTACHRANGE WGH000008 – WGH0000010
@ATTMSG Media & Native file is
copied into the file
system using the
path provided
The file name of the e-mail attachment (that is an e-mail message
itself) including the relative or absolute path to the document. The
relative path is evaluated using the path to the DII file as the root
path. The native file is then loaded. The Media field is populated
with the value eMail.
@BATESBEG
Begbates
Beginning Bates number, used with @BATESEND.
For example: @BATESBEG SGD00001
@BATESEND EndBates Ending Bates number. For example: @BATESEND SGD00055
@BCC EmailBCC Anyone sent a blind copy on an e-mail message.
For example: @BCC Nick Thomas
@C Custom Field Code used to load a custom field in the database. The syntax for
the @C token is: @C <FIELDNAME> <DATA> The FIELDNAME
value cannot contain spaces. For example, to fill in the
DEPARTMENT field of the database with the value Accounting,
the line would read: @C DEPARTMENT Accounting
@CC EmailCC Anyone copied on an e-mail message. For example: @CC John
Ace
Data Loading Requirements DII Tokens | 289
@D @I Link to images Required token for each DII record that has an image associated
with it. This designates the directory location of the image file(s).
Note that only the “@D @I” sequence is allowed. The “@D @V”
sequence is not recognized.
The following 2 examples are equivalent:
--Example 1
@D @I\Images\001\
ABC00123.tif
ABC00124.tif
--Example 2
@D @I\Images\
001\ABC00123.tif
001\ABC00124.tif. Note the directory should be relative to the
load file. If this token is in the record, it must be the last token in
the record.
Also UNC paths in the Image Directory field
(For example @D \\Server\PFranc\Images) are recognized but no
hard coded drive letters.
@DATECREATE
D CreationDateFT The date that the file was created. For example:
@DATECREATED 01/04/2003
@DATERCVD DeliveryTimeFT Date that the e-mail message was received.
@DATESAVED ModificationDateFT Date that the file was saved.
@DATESENT SubmitTimeFT Date that the e-mail message was sent.
@EATTACH Native file is copied
into the file system
using the path
provided
Relative path (from the load file location) of the native file to be
loaded. Valid for Attachments.
@EDOC Native file is copied
into the file system
using the path
provided
Same as @EATTACH except for eDocs.
For example
@EDOC \Attachments\ABC000123.xls
Valid for edocs only.
@EMAIL-BODY
@EMAIL-END Email body is copied
into a file in the file
system.
Body of an e-mail message. Must be a string of text contained
between @EMAIL-BODY and @EMAIL-END. The @EMAIL-END
token must be on its own line.
For example:
@EMAIL-BODY
Bill, This looks excellent. Ted
@EMAIL-END
@FILENAME Filename of the
native Original Filename of the native file (Edoc/Email/Attachment) For
example
@FILENAME AnnualReport.xls
@FOLDERNAME FolderNameID The name of the folder that the e-mail message came from.
For example: @FOLDERNAME \Inbox\Projects\ARProject
@FROM EmailFrom From field in an e-mail message.
For example: @FROM Kelly Morris
Data Loading Requirements DII Tokens | 290
@FULLTEXT N/A (text processing
directive) Determines how OCR is associated with the document. This token
should be placed at the top of the file, before any @T tokens. The
OCR files must have the same names as the images (not
including the extension), and they must be located in the same
directory. Variations: @FULLTEXT DOC - One text file exists for
each database record. The name of the file must be the same
name as the first image file. @FULLTEXT PAGE - One text file
exists for each page.
@FULLTEXTDIR Link to Full text
Directory The @FULLTEXTDIR token is a partner to the @FULLTEXT
token. @FULLTEXTDIR allows specifying a directory from which
the full-text will be copied during the import. Therefore, the full-text
files do not have to be located in the same directory as the images
at the time of import. The @FULLTEXTDIR token gives you the
flexibility to import the DII file and full-text files without requiring
you to copy the full-text files to the network first.
For example: @FULLTEXTDIR Vol001\Box001\ocrFiles
The above example shows a relative path. The application
searches for the full-text files in the same location as the DII file
that is imported and follows any subdirectories listed after the
@FULLTEXTDIR token. The @FULLTEXTDIR token applies to all
subsequent records in the DII file until it is changed or turned off.
@HEADER
@HEADER-END EmailHeader E-mail header content. The @HEADER-END token must be on its
own line. For example: @HEADER <Header Text> @HEADER-
END
@INTMSGID InternetMessageID Internet message ID. For example: @INTMSGID
<00180c34fe5$bf2d5$050@SKEETER>
@MEDIA Media Indicates the type of document. This must be populated with one
of the following values: {email, attachment, and eDoc} This value
is REQUIRED. This value is used by the application to determine
how to display the document. For example: @MEDIA eDoc
@MSGID EntryID E-mail message ID generated by Microsoft Outlook or Lotus
Notes. For example:
@MSGID 00E8324B3A0A800F4E954B8AB427196A1304012000
@MULTILINE Any custom field with
multiple lines Allows carriage returns and multiple lines of text to populate a
specified text field. Text must be between @MULTILINE and
@MULTILINE-END. The @MULTILINE-END token must be on its
own line.
For example:
@MULTILINE FIELDNAME Here is the first line.
Here is the second line.
Here is the third line.
Here is the last line.
@MULTILINE-END
@O OCRTEXT /
FULLTEXT is copied
into a file in the file
system
This token is used to load full-text documents. The text files can be
located someplace other than the image location as specified by
the @D line of the DII file. There can only be one text file for the
record. The value following the @O should contain the relative
path (from the load file location) of the .txt file. @O
\Text\ABC000123.txt
Data Loading Requirements DII Tokens | 291
@OCR @OCR-
END OCRTEXT is copied
into a file in the file
system
The @OCR and @OCR-END tokens offer the flexibility to include
the full-text (including carriage returns) in the DII file. The @OCR-
END token must appear on a separate line. For example: @OCR
<full-text extracted from the electronic document, which can span
multiple lines> @OCR-END
@PARENTID ParentDoc Parent document ID of an attachment. For example: @PARENTID
ABC000123
@PSTFILE0 PSTFilePath and
PSTStoreNameID The original PST File name and ID
1) The name and/or location of the .PST file.
2) The unique ID of the .PST file.
The two values are separated by a comma. The unique ID can be
any unique value that identifies the .PST file. For example:
@PSTFILE EMAIL001\PFranc.pst, PFranc_14April_07
The .PST file’s unique ID (the second value) is populated into the
PST ID field designated in eMail
Defaults.
The PST ID value specified by the @PSTFILE token is assigned
to the record it appears in and will apply to all subsequent e-mail
records. The value is applied until either the @PSTFILE token is
turned off by setting the token to a blank value or the value
changes. The @PSTFILE token can occur multiple times in a
single DII file and assign a different value each time. This allows
processing multiple .PST files and presenting the data for all .PST
files in a single DII file.
As a best practice, the @PSTFILE token should be placed above
the @T token.
@READ IsUnread (stores 0 if
Y and 1 if N) Notes whether the e-mail message was read. For example:
@READ Y
@RELATED
LinkedDocs
The document IDs of related documents.
For example: @RELATED WGH000006
@SOURCE Source Custodian of the data. You can quickly filter documents by this
field. @SOURCE Joe Custodian
@SUBJECT Subject The subject of an e-mail message. For example: @SUBJECT RE:
Town Issues
@TIMECREATED CreationDateFT Time the file/e-mail/edoc was created
@TIMERCVD DeliveryTimeFT Time that the e-mail message was received.
@TIMESAVED ModificationDateFT Time that the file/e-mail/edoc was last saved
@TIMESENT SubmitTimeFT Time that the e-mail message was sent.
@TO EmailTo To field in an e-mail message. For example: @TO Conner Stevens
@UUID
UUID
Customer-specific and unique identifier for a record (not used
internally by the application)
For example: @UUID AE01R95
Analyzing Document Content Using Cluster Analysis | 292
Chapter 29
Analyzing Document Content
Using Cluster Analysis
About Cluster Analysis
You can use Cluster Analysis to group Email Threaded data and Near Duplicate data together for quicker review.
Note: If you activated Cluster Analysis as a processing option when you created the project, cluster analysis will
automatically run after processing data and will not need to be run manually.
Cluster Analysis is performed on the following file types:
-Documents (including PDFs)
-Spreadsheets
-Presentations
-Emails
Cluster Analysis is also performed on text extracted from OCR if the OCR text comes from a PDF. Cluster
Analysis cannot be performed on OCR text extracted from a graphic.
To perform cluster analysis
1. Load the email thread or near duplicate data using Evidence Processing or Import.
2. On the Home page, in the Project List panel, click the Add Evidence button next to the project.
3. In the Add Data dialog, click Cluster Analysis.
4. Click Start.
You can view the similarity results in the Similar Panel in Review.
The data for the email thread appears in the Conversation tab in Project Review. The data for Near
Duplicate appears in the Related tab in Project Review.
An entry for cluster analysis will appear in the Work List.
Words Excluded from Cluster Analysis Processing
Noise words, such as “if,” “and,” “or,” are excluded from Cluster Analysis processing. The following words are
excluded in the processing:
a, able, about, across, after, ain't, all, almost, also, am, among, an, and, any, are, aren't, as, at, be, because,
been, but, by, can, can't, cannot, could, could've, couldn't, dear, did, didn't, do, does, doesn't, don't, either, else,

Analyzing Document Content Using Cluster Analysis | 293
ever, every, for, from, get, got, had, hadn't, has, hasn't, have, haven't, he, her, hers, him, his, how, however, i, if,
in, into, is, isn't, it, it's, its, just, least, let, like, likely, may, me, might, most, must, my, neither, no, nor, not, of, off,
often, on, only, or, other, our, own, rather, said, say, says, she, should, shouldn't, since, so, some, than, that, the,
their, them, then, there, these, they, they're, this, tis, to, too, twas, us, wants, was, wasn't, we, we're, we've, were,
weren't, what, when, where, which, while, who, whom, why, will, with, would, would've, wouldn't, yet, you, you'd,
you'll, you're, you've, your
Filtering Documents by Cluster Topic
Documents processed with Cluster Analysis can be filtered by the content of the documents in the evidence. The
Cluster Topic filter is created in Review under the Document Contents filter from data processed with Cluster
Analysis. Data included in the Cluster Topic is taken from the following types of documents: Word documents
and other text documents, spreadsheets, emails, and presentations.
In order for the application to filter the data with the Cluster Topic filter, the following must occur:
-Prerequisites for Cluster Topic (page 293)
-How Cluster Topic Works (page 293)
-Filtering with Cluster Topic (page 294)
-Considerations of Cluster Topic (page 294)
Prerequisites for Cluster Topic
Before Cluster Topic filter facets can be created, the data in the project must be processed by Cluster Analysis.
The data can be processed automatically when Cluster Analysis is selected in the Processing options or you can
process the data manually by performing Cluster Analysis in the Add Evidence dialog.
Evidence Processing and Deduplication Options (page 167)
How Cluster Topic Works
The application uses an algorithm to cluster the data. The algorithm accomplishes this by creating an initial set
of cluster centers called pivots. The pivots are created by sampling documents that are dissimilar in content. For
example, a pivot may be created by sampling one document that may contain information about children’s books
and sampling another document that may contain information about an oil drilling operation in the Arctic. Once
this initial set of pivots is created, the algorithm examines the entire data set to locate documents that contain
content that might match the pivot’s perimeters. The algorithm continues to create pivots and clusters
documents around the pivots. As more data is added to the project and processed, the algorithm uses the
additional data to create more clusters.
Word frequency or occurrence count is used by the algorithm to determine the importance of content within the
data set. Noise words that are excluded from Cluster Analysis processing are also not included in the Cluster
Topic pivots or clusters.
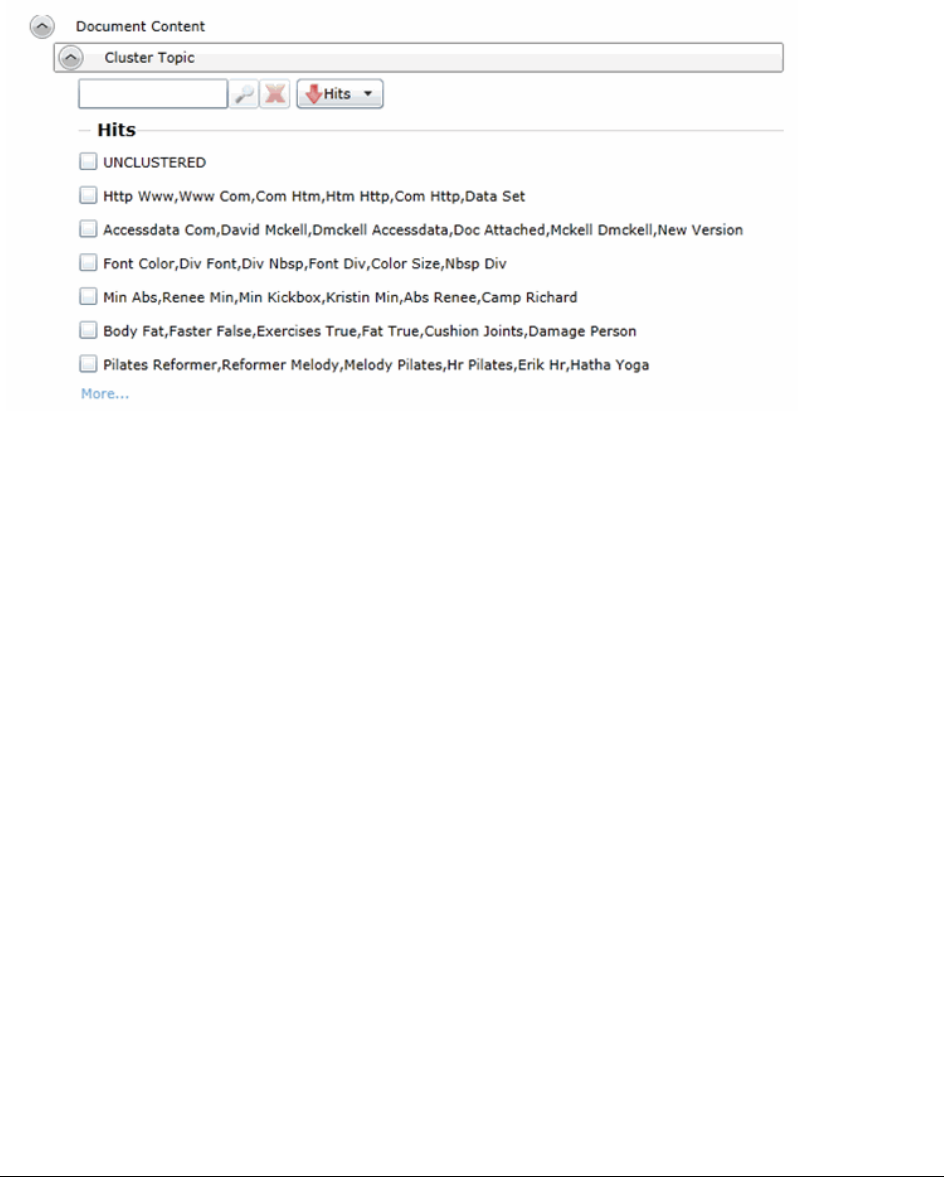
Analyzing Document Content Using Cluster Analysis | 294
Filtering with Cluster Topic
Once data has been processed by Cluster Analysis and facets created under the Cluster Topic filter, you can
filter the data by these facets.
Cluster Topic Filters
The topics of the facets available are cluster terms created. Documents containing these terms are included in
the cluster and are displayed when the filter is applied. Topics are comprised of two word phrases that occur in
the documents. This is to make the topic more legible.
The UNCLUSTERED facet contains any documents that are not included under a Cluster Topic filter.
For more information, see Filtering Data in Case Review in the Reviewer Guide.
Considerations of Cluster Topic
You need to aware the following considerations when examining the Cluster Topic filters:
-Not all data will be grouped into clusters at once. The application creates clusters in an incremental
fashion in order to return results as quickly as possible. Since the application is continually creating
clusters, the Cluster Topic facets are continually updated.
-Duplicate documents are clustered together as they match a specific cluster. However, if a project is
particularly large, duplicate documents may not be included as part of any cluster. This is to avoid
performance issues. You can examine any duplicate documents or any documents not included in a
cluster by applying the UNCLUSTERED facet of the Cluster Topic filter.
Analyzing Document Content Using Entity Extraction | 295
Using Entity Extraction
About Entity Extraction
You can extract entity data from the content of files in your evidence and then view those entities.
You can extract the following types of entity data:
-Credit Card Numbers
-Email Addresses
-People
-Phone Numbers
-Social Security Numbers
The data that is extracted is from the body of documents, not the meta data.
For example, email addresses that are in the To: or From: fields in emails are already extracted as meta data
and available for filtering. This option will extract email addresses that are contained in the body text of an email.
Using entity extraction is a two-step process:
1. Process the data with the Entity Extraction processing options enabled.
You can select which types of data to extract.
2. View the extracted entities in Review.
The following tables provides details about the type of data that is identified and extracted:
Type Examples
Credit Card
Numbers Numbers in the following formats will be extracted as credit card numbers:
16-digit numbers
used by VISA,
MasterCard, and
Discover in the
following formats.
For example,
-1234-5678-9012-3456 (segmented by dashes)
-1234 5678 9012 3456 (segmented by spaces)
Not:
-1234567890123456 (no segments)
-12345678-90123456 (other segments)
15-digit numbers
used by American
Express in the
following formats.
For example,
-1234-5678-9012-345 (segmented by dashes)
-1234 5678 9012 345 (segmented by spaces)
Notes:
Other formats, such as 14-digit Diners Club numbers, will not
be extracted as credit card numbers
Analyzing Document Content Using Entity Extraction | 296
Type Examples
Email
Addresses Text in standard email format, such as jsmith@yahoo.com will be extracted.
Note:
Email addresses that are in the To: or From: fields in emails are
already extracted as meta data and available for filtering. This
option will extract email addresses that are contained in the
body text of an email.
People Text that is in the form of proper names will be extracted as people.
Proper names in the content are compared against personal
names from 1880 - 2013 U.S. census data in order to validate
names.
Type Examples
Phone Numbers Numbers in the following formats will be extracted as phone numbers:
Standard 7-digit For example:
-123-4567
-123.4567
-123 4567
Not: 1234567 (not segmented)
Standard 10-digit For example:
-(123)456-7890
-(123)456 7890
-(123) 456-7809
-(123) 456.7809
-+1 (123) 456.7809
-123 456 7809
Not 1234567890 (not segmented)
Note: A leading 1, for long-distance or 001 for international, is
not included in the extraction, however, a +1 is.
Analyzing Document Content Using Entity Extraction | 297
Enabling Entity Extraction
To enable entity extracting processing options:
1. You enable Entity Extraction when creating a project and configuring processing options.
See Evidence Processing and Deduplication Options on page 167.
Viewing Entity Extraction Data
To view extracted entity data
1. For the project, open Review.
2. In the Facet pane, expand the Document Content node.
3. Expand the Document Content category.
4. Expand a sub-category, such as Credit Card Numbers or Phone Numbers.
5. Apply one or more facets to show the files in the Item List that contain the extracted data.
International Some international formats are extracted, for example,
-+12-34-567-8901
-+12 34 567 8901
-+12-34-5678-9012
-+12 34 5678 9012
Not 12345678901 (not segmented)
Other international formats are not extracted, for example,
-123-45678
-(10) 69445464
-07700 954 321
-(0295) 416,72,16
Notes:
Be aware that you may get some false positives.
For example, a credit number 5105-1051-051-5100 may also
be extracted as the phone number 510-5100.
Type Examples
Social Security
Numbers Numbers in the following formats will be extracted as Social Security Numbers:
-123-45-6789 (segmented by dashes)
-123 45 6789 (segmented by spaces)
The following will not be extracted as Social Security Numbers:
-123456789 (not segmented)
-12345-6789 (other segments)
Type Examples

Editing Evidence Editing Evidence Items in the Evidence Tab | 298
Chapter 30
Editing Evidence
Editing Evidence Items in the Evidence Tab
Users with Create/Edit project admin permissions can view and edit evidence for a project using the Evidence
tab on the Home page.
To edit evidence in the Evidence tab
1. Log in as a user with Create/Edit project admin permissions.
2. Select a project from the Project List panel.
3. Click on the Evidence tab.
4. Select the evidence item you want to edit and click the Edit button.
5. In the External Evidence Details form, edit the desired information.
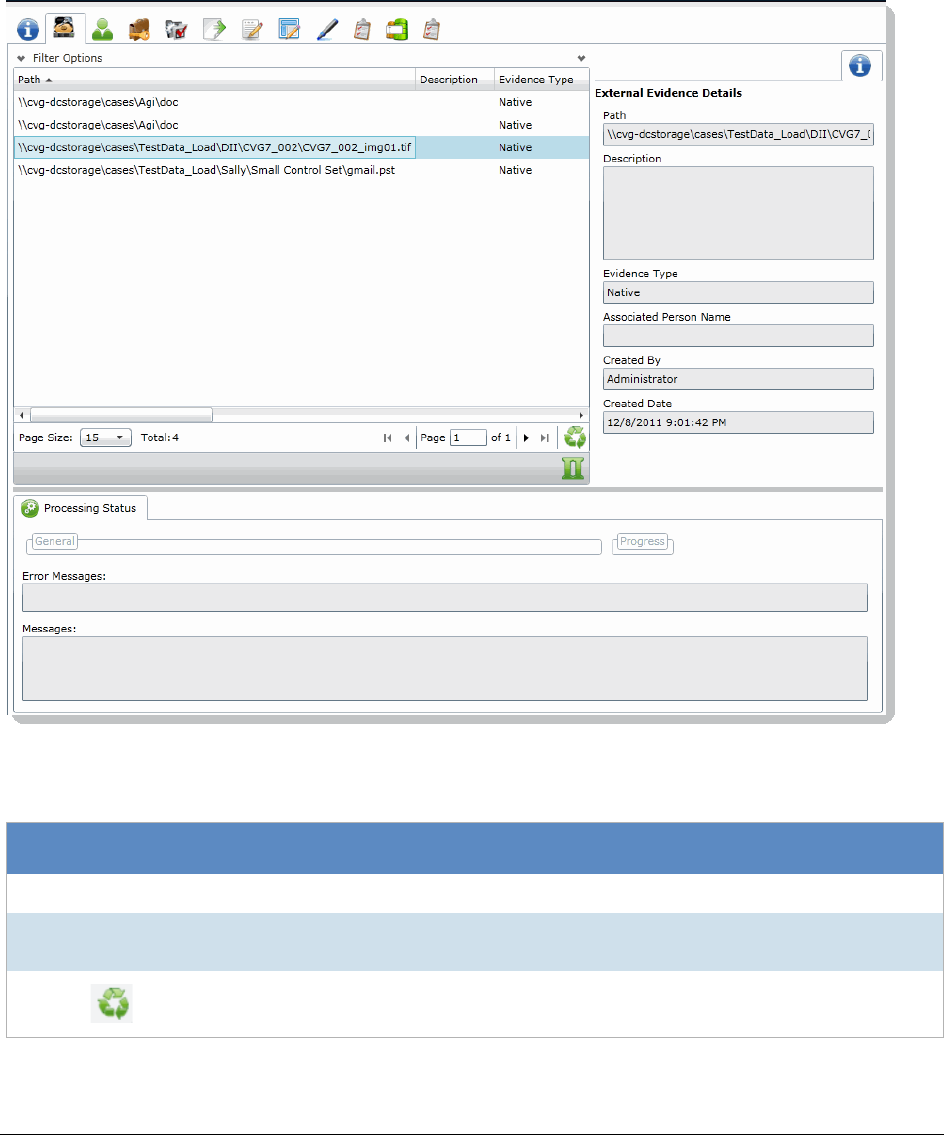
Editing Evidence Evidence Tab | 299
Evidence Tab
Users with permissions can view information about the evidence that has been added to a project. To view the
Evidence tab, users need one of the following permissions: Administrator, Create/Edit Project, or Manage
Evidence.
Evidence Tab
Elements of the Evidence Tab
Element Description
Filter Options Allows the user to filter the list.
Evidence Path List Displays the paths of evidence in the project. Click the column headers to sort by the
column.
Refresh
Refreshes the Evidence Path List.
Editing Evidence Evidence Tab | 300
Columns
Click to adjust what columns display in the Evidence Path List.
External Evidence
Details Includes editable information about imported evidence. Information includes:
-That path from which the evidence was imported
-A description of the project, if you entered one
-The evidence file type
-What people were associated with the evidence
-Who added the evidence
-When the evidence was added
Processing Status Lists any messages that occurred during processing.
Elements of the Evidence Tab (Continued)
Element Description

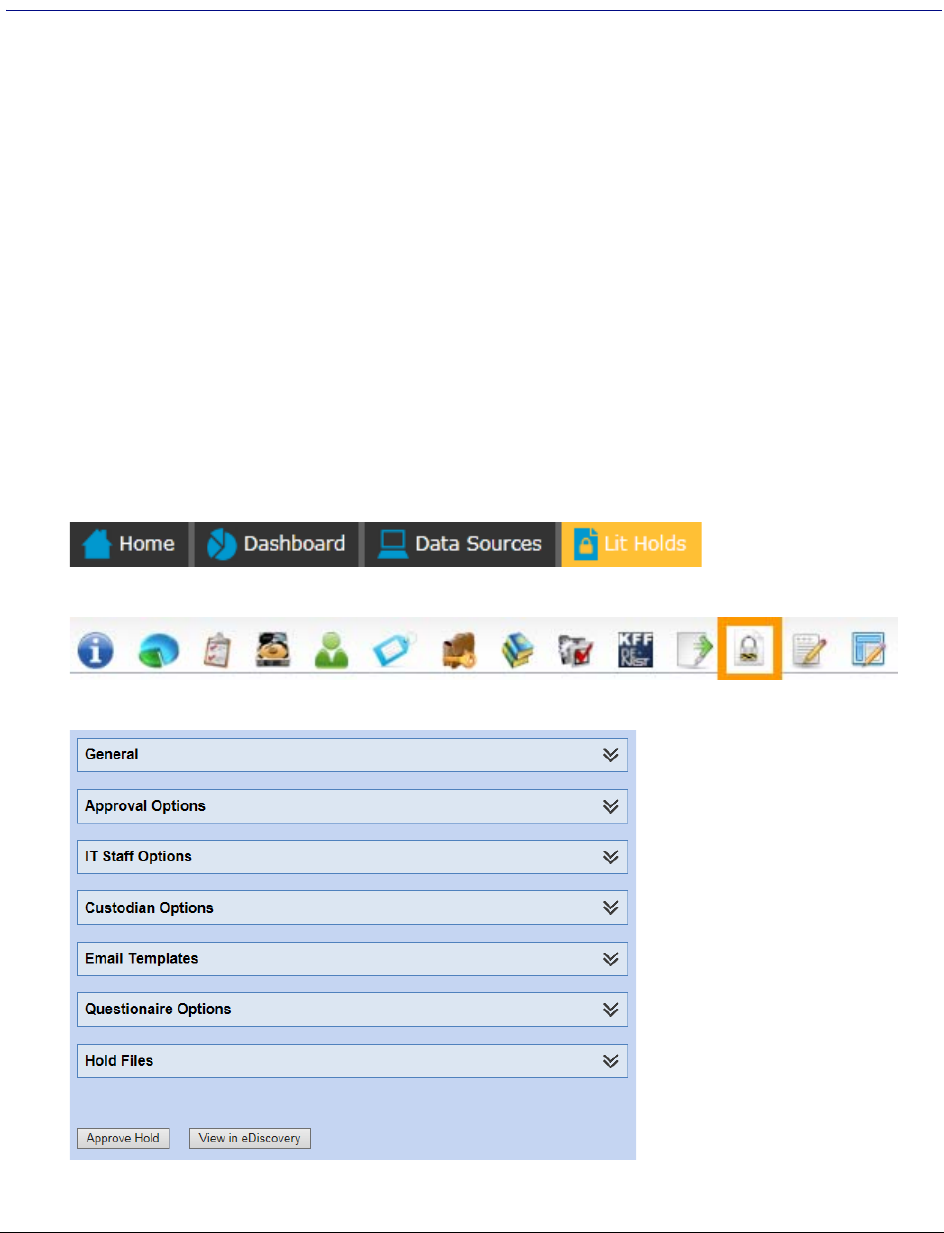
Using Litigation Holds About Litigation Holds | 302
Chapter 31
Using Litigation Holds
About Litigation Holds
AccessData’s Litigation Hold (lit hold) system is a notification management system that efficiently handles all
aspects and stages of the litigation hold process within your enterprise. The lit hold features offers email
notification templates and interview question templates, reports, histories, reminders, acceptance records,
interview response records, and centralizes the relevant data in one location.
You can use lit hold if you have an AccessData eDiscovery license or if you have purchased a special licence for
Summation.
There are three locations in the application where you can create, approve, and manage lit holds:
-The application Lit Holds tab
-The Lit Hold tab on the Home project page
-Dedicated HTML pages for different lit hold roles to view and approve holds

Using Litigation Holds Process for Using Litigation Holds | 303
Process for Using Litigation Holds
You must perform the following steps to use lit holds:
Configuring the System for Litigation Holds
There are several elements of the application that must be configured in order to use lit holds.
Configuring IIS for Lit Holds
Users with the proper roles can open links from notification emails to perform tasks, such as approve a hold. In
order to open the link correctly, the LitHoldNotification authentication settings must be configured.
By default, the configuration is set to use Active Directory for the IT and Person acceptance landing pages when
clicking links. However, you must change the setting from Active Directory and use Anonymous. This does not
affect the general use of Active Directory and IWA in the rest of the application.
To configure anonymous authentication
1. On the Windows Start menu, in the Search programs and files field, enter INetMgr.
2. In the Internet Information Services (IIS) Manager application, in the left pane, expand the top-most
server option.
3. Expand Sites > Default Web Site.
4. Click LitHoldNotification.
Process for using litigation holds
Step Description
1. Configuring the System for Litigation Holds (page 303)
a. Configuring IIS for Lit Holds (page 303)
b. Configuring Application Email Settings (page 304)
c. Configuring User Roles and Permissions for Lit Holds (page 304)
d. Configuring Projects and People (page 306)
2. Configuring Litigation Hold Settings (page 307)
a. Configuring Lit Hold General Settings (page 307)
b. Configuring IT Staff (page 308)
c. (Optional) Configuring Application Email Settings (page 304)
d. (Optional) Configuring Lit Hold Interview Templates (page 312)
3. Creating a Litigation Hold (page 318)
4. Managing Litigation Holds (page 326)
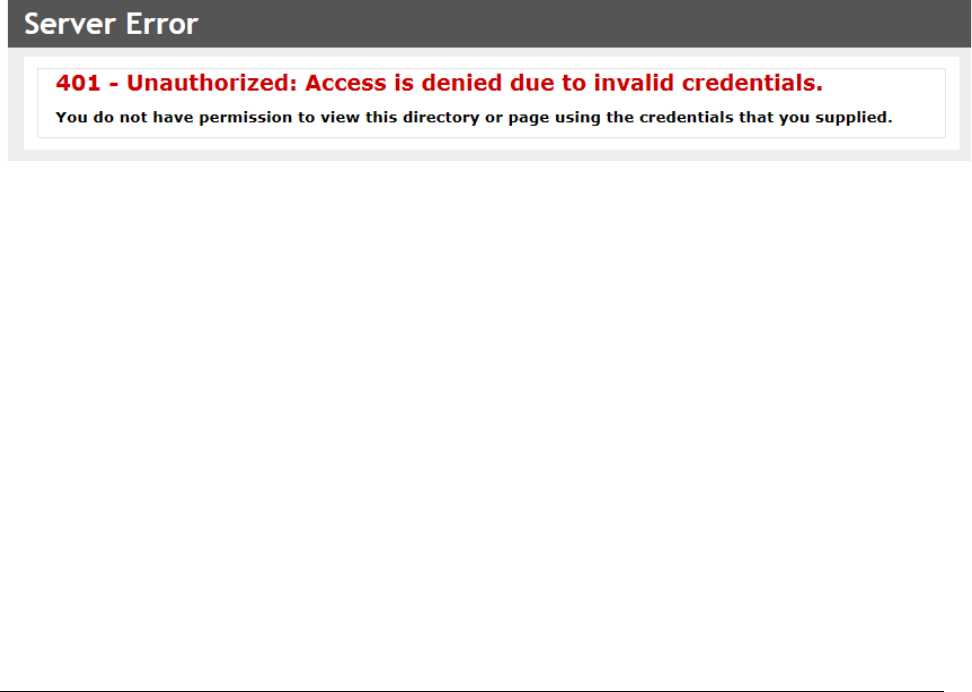
Using Litigation Holds Configuring the System for Litigation Holds | 304
5. In the middle pane, in the IIS section, double-click Authentication.
6. In the Authentication pane, under the Name column, right-click Windows Authentication, and then
click Disable.
At this point, all options are disabled.
7. In the Authentication pane, under the Name column, right-click Anonymous Authentication, and
then click Enable.
8. In the left pane, right-click LitHoldNotification, and then click Explore.
Notice the Web.config file.
9. Open Web.config in Notepad.
10. Locate the following line in the file:
<authentication mode="Windows"></authentication>
11. Change "Windows" to "None". The text is case-sensitive.
12. Locate the following line in the file:
<deny users="?"></deny>
13. Change "?" to "0".
14. Save Web.config, and then exit Notepad.
15. Close the Explore window where Web.config is displayed.
16. Exit the Internet Information Services (IIS) Manager window.
17. Restart IIS.
If this is not configured, when an approver or custodian gets an email and tries to open the link, they will see the
following:
Configuring Application Email Settings
The main purpose of a lit hold is sending notification emails to related individuals. Before you can send any
litigation hold notification emails, you must first make sure that you have configured Email Notification Server.
See Configuring the Email Notification Server on page 74.
Configuring User Roles and Permissions for Lit Holds
You must have system users that have permissions to create and manage lit holds.
For example, you must first have a user that has the permission to create lit holds. Secondly you must have a
user that has the permission to approve lit holds. These two roles may be performed by the same user or
different users.

Using Litigation Holds Configuring the System for Litigation Holds | 305
During the litigation hold creation process approvers are selected from the User List page. Only the users with
Administrators, Project Manager, Project Administrator, LitHold Managers, Approve Lit Holds rights in your
program database are loaded into the Approval page of the Hold Creation Wizard.
See Configuring and Managing System Users, User Groups, and Roles on page 47.
When configuring users to create and manage lit holds, you can configure two types of lit hold permissions:
-Global
-Project-specific
Global Lit Hold Roles and Permissions
You can use admin roles and global permissions. User with these permissions have global rights that are not
project-specific.
See About Admin Roles and Permissions on page 49.
You can use the following global roles and permissions
-Application administrator - A user with the application administrator role can configure lit hold and perform
all lit hold tasks for all projects.
-LitHold Manager - You can create a custom admin role and assign the Lit Hold Manager permission. A
user with the LitHold Manager permission can configure lit hold and perform all lit hold tasks for all
projects.
However, by itself, this permission neither lets the user see projects on the Home page nor access the Lit
Hold tab for a project. If you associate the user with this permission to a project, or give other project
admin permissions, the user can then see the project and the Lit Hold tab for the project.
Project-level Lit Hold Permissions
You can use project-specific permissions to grant lit hold permissions for specific projects. When you assign lit
hold project-specific permissions, the user can only perform lit hold tasks for those projects.
See Setting Project Permissions on page 197.
Users project-specific permissions can view the lit hold features in the following ways:
-They can access the main Lit Holds tab, but will only see the lit holds that are associated with the projects
they have permissions for.
-On the Home page, they can see the projects that they have permissions for and can access the project
Lit Hold tab.
Using Litigation Holds Configuring the System for Litigation Holds | 306
The following table displays the project level permissions and the tasks that they allow:
Note: When selecting a permission, the View Litholds permissions is also selected.
Configuring Projects and People
Litigation holds use the projects and people that exist in the application’s database. If you have not already
created these, you must do so before you send email notifications.
-Projects
During the creation of a litigation hold, it is required that you associate it with a project. When it first
becomes necessary to create a litigation hold, you can create a new legal to associate with the hold, or
you can use an existing project.
See Creating a Project on page 164.
-People
People are selected from your program person list during litigation hold creation. You can add people
manually (individually), or you can add people using Active Directory.
Using Active Directory and Integrated Windows Authentication can help to verify email addresses, and to
further authenticate people during their responses to email notifications. This system automatically inputs
the person’s email address into the Lit Hold creation People page.
See Configuring Active Directory Synchronization on page 70.
Project-level permissions
Permissions: Create
holds Approve
holds View
holds Edit
holds Delete
holds Activate/
Deactivate
View
hold
data Send
notices Hold
reports Custom
Properties
Project Admin xxxxx x x x x x
Create
Litholds x x x x x
Approve
Litholds xxx x x
View Litholds x x x x
Delete Litholds xx x x x
Hold Manager
(general tab x x x x x x x
Hold Manager
(project-level
tab)
xxxxxxxxx
Using Litigation Holds Configuring Litigation Hold Settings | 307
Configuring Litigation Hold Settings
Configuring Lit Hold General Settings
Before you create litigation holds, you configure your Litigation Hold general settings. Prior to this, make sure
you have configured your Email notification server.
See Configuring the Email Notification Server on page 74.
To configure Litigation Hold general settings
1. In the application console, click Lit Holds.
2. On the Lit Holds page, click LitHold Configuration.
3. On the LitHold Configuration page, set the options that you want.
See Lit Hold Configuration Options on page 307.
4. Click Save.
5. (Optional) In the Send Test Email to: field, enter a single email address of a recipient, and then click
Send Test Email.
Lit Hold Configuration Options
The following table describes the options that are available on the Lit Hold Configuration page.
See Configuring Lit Hold General Settings on page 307.
Lit Hold Configuration Options
Option Description
Email Sent From
Address Specifies the sender’s email address.
If desired, the IT department or a Network administrator can set up a default
“From” address that people cannot reply to.
See Configuring the Email Notification Server on page 74.
Website Base Address This is the base address of the server running Lit Hold. When approvers,
custodians, and IT Staff get notificaiton emails, it includes a link to an HTML page
when they accept the Lit Hold. This base address is used for that HTML page.
If this is not set correctly, the link to the HTML page will not work correctly.
The base address includes the protocol and server name, but not the application or
the page that is currently displayed.
For example,
http://<server_name_or_IP_address>/
Using Litigation Holds Configuring Litigation Hold Settings | 308
Configuring IT Staff
About Managing the IT Staff in a Litigation Hold
The IT Staff are those individuals in an organization that work with the organization’s file aging. During a lit hold,
they can receive notifications about lit holds.
IT Staff are first configured as a lit hold configuration option by the Lit Hold Manager or an administrator. Unlike
people and approvers, there is no default database list that populates the IT Staff list. Instead, individuals must
be entered manually.
IT staff are then associated to a Lit Hold in the creation wizard.
See Configuring an IT Staff Member for Use in a Litigation Hold on page 309.
See Editing an IT Staff Member on page 309.
See Deleting an IT Staff Member on page 310.
Individuals that you add to IT Staff become available for you to select from in the Hold Creation Wizard.
See Creating a Litigation Hold on page 318.
Default Escalation
Stage Two Email
Address
You can set two levels of escalation policies for person hold acceptance.
Stage One: If a person doesn't accept the hold within a number of specified days,
the first escalation email is sent to their manager.
Note: Stage One escalation requires one of the following:
- Active Directory to be configured previously. In the Manager field of the
Active Directory Account Screen, enter the manager that you want to be
notified for the first escalation email.
- In the litigation hold wizard, you can manually specify a stage one address.
See People Options (page 320).
Stage Two: After a specified number of days, the next escalation is sent to the
specified email address.
This field is where you configure the default email address for Stage Two
Escalations.
See People Options on page 320.
See Email Notifications Options on page 321.
Hold Report temporary
storage path You can specify a dedicated path for reports data.
Person/IT Acceptance
Message Lets you enter any message or instruction that you want the person or IT staff to
receive for their acceptance. The acceptance message displays at the bottom of
the Person and IT Staff Hold Notification pages, just above the Accept button. This
is the “By clicking accept you agree to the terms set forth.” message.
Save Saves the settings.
Send Test Email To Specifies a single recipient email address that receives the test email.
Send Test Email Sends a test email to the recipient specified above.
Lit Hold Configuration Options
Option Description

Using Litigation Holds Configuring Litigation Hold Settings | 309
Configuring an IT Staff Member for Use in a Litigation Hold
You must add individuals to IT Staff manually. Individuals that you add here become available for you to select
from in the Hold Creation Wizard.
See About Managing the IT Staff in a Litigation Hold on page 308.
To add an IT staff member for use in a litigation hold
1. On the Lit Holds page, click LitHold IT Staff.
2. On the Manage IT Staff page, click .
3. In the Add New IT Staff dialog box, set the options that you want.
See IT Staff Options on page 309.
4. Click OK to add the individual to the table on the Manage IT Staff page.
IT Staff Options
The following table identifies the options that are available in the Add New IT Staff dialog box and the Edit IT
Staff dialog box.
See Configuring an IT Staff Member for Use in a Litigation Hold on page 309.
See Editing an IT Staff Member on page 309.
Editing an IT Staff Member
Any edits or changes that you make here are propagated to existing litigation holds of which the individual may
be a part.
See About Managing the IT Staff in a Litigation Hold on page 308.
IT Staff Options
Option Description
First Name First name of the individual.
Middle Initial Middle initial of the individual.
Last Name Last name of the individual.
Email Email address of the individual. The address is where notifications are sent.
Title Given job title of the individual.
Username Computer username of the individual.
Domain Network domain where the individual’s computer resides.
Cancel Cancels the addition of the individual.
OK Adds the individual to the Manage IT Staff page.
Using Litigation Holds Configuring Litigation Hold Settings | 310
To edit an IT staff member
1. On the Lit Holds page, click LitHold IT Staff.
2. On the Manage IT Staff page, in the table, select a name whose information you want to edit.
3. Click .
4. In the Edit IT Staff dialog box, set the options that you want.
See IT Staff Options on page 309.
5. Click OK.
Deleting an IT Staff Member
Individuals that you delete are removed from the list of IT Staff that you can select from in the Hold Creation
Wizard and they are removed from all existing litigation holds.
See About Managing the IT Staff in a Litigation Hold on page 308.
To delete an IT staff member
1. On the Lit Holds page, click LitHold IT Staff.
2. On the Manage IT Staff page, in the table, select a name that you want to delete.
3. Click .
4. Click OK to confirm the deletion.
Configuring LitHold Email Templates
About Managing Email Templates for Use in Litigation Holds
Lit holds send email notifications to people, IT Staff, and the Hold Approver informing them of the status and
events of the lit hold. When creating a lit hold, you must specify the text of these email notifications.
To expedite this process, you can store and use text in email templates. When you create a lit hold, you can
choose the template that you want to use.
You can use predefined email templates, or create your own custom email templates. You can edit or delete
predefined email templates.
Templates are created and managed in the LitHold Email Templates section of the lit hold configuration
options.
Before creating a lit hold you should prepare the email templates that you want to use.
Note: It is possible that messages sent by the litigation hold notification system are flagged as junk email by
clients such as Microsoft Outlook. You may need to ensure that these messages are considered “trusted”
and not automatically filtered to a junk email folder.
See Template Type Options on page 311.
See Creating an Email Template for Use in Litigation Holds on page 311.
Using Litigation Holds Configuring Litigation Hold Settings | 311
Template Type Options
The following table describes the types of email templates that are available for a litigation hold.
See Creating an Email Template for Use in Litigation Holds on page 311.
Creating an Email Template for Use in Litigation Holds
You can create your own email templates from scratch, or you can use an existing email template as the basis
for a new template.
You can add basic HTML formatting to the message body of an email.
See About Managing Email Templates for Use in Litigation Holds on page 310.
Template Types
Template Type Description
Approval Sent to the litigation hold manager for their approval.
Stop Aging Acceptance Sent to the IT Staff describing the parameters of the hold, and linking them to the
Landing Page where they can view the Stop aging Letters and acknowledge
receipt of the litigation hold.
Stop Aging Reminder Reminds the IT Staff that they are still involved a litigation hold order.
Stop Aging Termination Notifies the IT Staff that their participation in the litigation hold order is no longer
necessary.
Hold Acceptance Notifies the people of the hold, and links them to the Landing page where they
can acknowledge receipt of the hold.
Hold Reminder Reminds the people of the litigation hold.
Hold Termination Notifies the people that the litigation hold has ended.
Hold Escalation Stage
One There are two levels of escalation policies for person hold acceptance.
Stage One: If a person doesn't accept the hold within a number of specified days,
the first escalation email is sent to their manager.
Note: Stage One escalation requires one of the following:
- Active Directory to be configured previously. In the Manager field of the
Active Directory Account Screen, enter the manager that you want to be
notified for the first escalation email.
- In the litigation hold wizard, you can manually specify a stage one
address. See People Options (page 320).
Stage Two: After a specified number of days, the next escalation is sent to the
specified email address.
This is the email template for a Stage One Escalation.
Hold Escalation Stage
Two This is the email template for a Stage Two Escalation.
Person Questions
Changed Reminder You may change the interview questions of a hold.
This is the email template that will remind people of the change in interview
questions and that they need to re-answer them.
Using Litigation Holds Configuring Litigation Hold Settings | 312
To create an email template for use in litigation holds
1. On the Lit Holds page, click Configuration.
2. Click LitHold Email Templates.
3. On the Email Templates page, in the Template Type drop-down list, select the type of template that
you want to create.
See Template Type Options on page 311.
4. In the Templates drop-down list, do one of the following:
-Click the name of an existing template.
-Click Create New Template.
5. In the Subject and Message Body fields, add or the delete the text that you want to appear in the email
for the given template type.
When you save the template, the text that you entered in the Subject field is also used for the template
name that appears in the Templates drop-down list.
You can use the HTML text editor to format the text as you would like to have it displayed. You can also
copy HTML text from another source.
6. (Optional) Click Macros. In the Name column, click a macro name to insert it into the message body
where your cursor was last located.
Based on the macro that you added to the message body, its associated information is inserted into the
email at the time it is sent. The associated information comes from the various fields that were filled at
the time you went through the Hold Creation Wizard to create the litigation hold.
You can enter macros manually if the “code” is already known.
Note: The Lit Hold email notification email template allows you to manually enter in the
[CompanyImage] macro. When the macro is not present in the template, the company image’s
placement defaults to the top center of the email.
7. (Optional) In the Send Test Email to: field, enter an email address of a single recipient, and then click
Send Test Email.
8. Click Save.
Configuring Lit Hold Interview Templates
About Managing Interview Templates for Use in Litigation Holds
When you create a lit hold, you have the option of specifying interview questions. These interview questions are
given to custodians when they accept a lit hold.
Interview questions are optional.
You can create interview templates with standard questions that you can re-use when you create a lit hold.
See Creating an Interview Template for Use in Litigation Holds on page 314.
See Editing an Interview Template on page 315.
See Deleting an Interview Template on page 316.
See Creating a Litigation Hold on page 318.
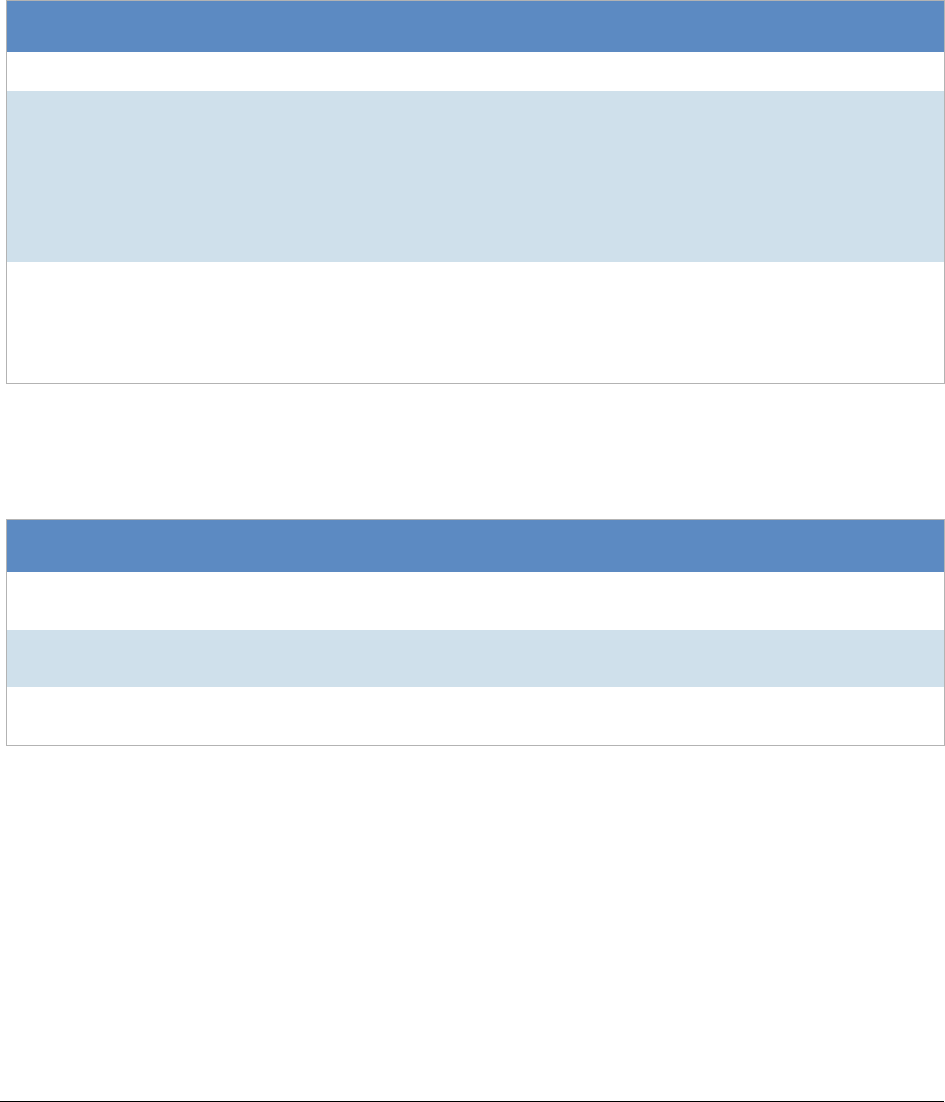
Using Litigation Holds Configuring Litigation Hold Settings | 313
About Interview Question and Answer Types
When you create an interview question template, you have flexibility in the kinds of questions, and potential
answers, that are used.
You can also specify that certain interview questions are required to answer.
In an interview question template, you can configure the following different types of interview questions:
You also have flexibility in the types of answers that accompany the check box and radio button questions. You
can configure the following answer types.
The following graphic is a sample of a template which has each of the three question types, and each of the
three answer types.
LitHold Interview Template Questions Types
Questions Type Description
Text Input Question When you use this question type, a user answers the question by typing text.
Selection Question
(Check Boxes) When you use this question type, you also create a set of answers that the user
can select from. The answers are provided as check boxes. The user can answer
the question by selecting any of the check boxes that apply.
You also have flexibility in the type of answers that you provide.
LitHold Interview Template Answer Types (page 313)
Depending on the type of question that you ask, you may want to provide a
selection for None.
Selection Question
(Radio Buttons) When you use this question type, you also create a set of answers that the user
can choose from. The answers are provided as radio buttons. The user can
answer the question by selecting only one radio button.
Depending on the type of question that you ask, you may want to provide a
selection for None.
LitHold Interview Template Answer Types
Questions Type Description
Add Answer The administrator specifies the text that accompanies the check box or radio
button and the user simply chooses which selection to make.
Add Input Answer The check box or radio button does not contain any accompanying text and the
user must input text after selecting it.
Add Input Answer with
Text The administrator specifies the text that accompanies the check box or radio
button and the user can also input text after selecting it.
Using Litigation Holds Configuring Litigation Hold Settings | 314
Sample of interview questions with the different types of questions and answers
The first question simply provides a box for the user to input the answer.
The second question provides check boxes for answers. The first answer is a simple check box with text
provided in the template. The second answer is a check box where the user inputs text after selecting it. The
third answer is a check box with text, but also includes a box for a user to input text.
The third question provides radio buttons with the three possible answer types.
The difference between questions with check boxes and questions with radio buttons is that with check boxes, a
user can select any and all check boxes. With radio buttons, the user can choose only one.
When creating a template, you can use the green up and down arrows on the right side to change the order the
questions.
Creating an Interview Template for Use in Litigation Holds
You can create any number of interview templates that contain the questions you want to ask people and others.
You specify which templates you want to use when you go through the Hold Creation Wizard.
See About Managing Interview Templates for Use in Litigation Holds on page 312.
To create an interview template for use in litigation holds
1. On the Lit Holds page, click on the Configuration tab
2. Click LitHold Interview Templates.
3. On the Manage Interview Templates page, click .
4. Enter a template name.
The name of the template appears in the Templates drop-down list in the LitHold Wizard.
5. Enter a template description.

Using Litigation Holds Configuring Litigation Hold Settings | 315
6. Add interview questions.
With the add button is a drop-down menu.
Select the type of question that you want to add.
See About Interview Question and Answer Types on page 313.
7. In the Question field, enter the text of the question.
8. (Optional) Select the Answer Required check box if you want to require an answer.
9. If you selected a Text Input Question (text input only), click Add.
10. If you selected a Select Question type with either check boxes or radio buttons, do the following:
10a. click the add button with the drop-down button in the lower left corner of the dialog.
10b. Select an answer type.
See About Interview Question and Answer Types on page 313.
10c. Enter as many answers as desired.
10d. Click Add.
11. Add all of the questions that you want to be in this template.
12. (Optional) To edit a question or an answer, highlight a question and click Edit.
13. (Optional) Highlight a question and use the green up and down arrows on the right side to change the
order of the question.
14. Click Save.
15. (Optional) Create additional templates with other questions.
Editing an Interview Template
You can edit an existing interview template to add or delete questions and answers to the template. You can also
check or uncheck questions as required or not.
See Creating an Interview Template for Use in Litigation Holds on page 314.
See About Managing Interview Templates for Use in Litigation Holds on page 312.
To edit an interview template
1. On the Lit Holds page, click on the Configuration tab
2. Click LitHold Interview Templates.
3. On the Manage Interview Templates page, highlight a template and click Edit.
Using Litigation Holds Configuring Litigation Hold Settings | 316
4. Make any desired changes.
5. Click Save.
Deleting an Interview Template
You can delete an existing interview template so it is no longer available to choose in the Hold Creation Wizard.
See Creating an Interview Template for Use in Litigation Holds on page 314.
See About Managing Interview Templates for Use in Litigation Holds on page 312.
To delete an interview template
1. On the Lit Holds page, click on the Configuration tab.
2. Click LitHold Interview Templates.
3. On the Manage Interview Templates page, highlight a template and click Delete.
4. Click OK to confirm.
Configuring Lit Hold Custom Properties
You can define and populate custom properties for lit holds. This can be useful in providing specific information
about a given lit hold. For example, you may want to have information about a custodian, such as their date of
hire, manager name, or employment status.
You can use the following types of property data:
-Text (For example, a manager’s name)
-Date (For example, a hire date)
-Choices (A list of options to select, for example Full-time and Part-Time)
You can also specify the following:
-If a property is required
-Default values
When you create a new lit hold, the custom fields that you have defined are displayed in the Wizard. You can
use default values or enter new values.
The custom properties and their values are displayed as columns in the lit hold list and in the Lit Hold Details
report.
To configure custom lit hold properties
1. On the Lit Hold page, click .
2. To add a new property, click .
3. Enter a name and description.
4. Specify whether or not this field is required.
5. Select the type of property.
6. For Choices, enter the optional choices separated by a Return.

Using Litigation Holds Configuring Litigation Hold Settings | 317
7. (Optional) For text, enter default text.
8. (Optional) Edit a property
9. (Optional) Delete a property.
Using Litigation Holds Creating a Litigation Hold | 318
Creating a Litigation Hold
You use the Litigation Hold Wizard to create and configure litigation holds.
To create a litigation hold
1. On the Lit Holds page, click New Hold.
2. For each page of the wizard, set the options that you want.
Lit Holds Options
3. Click Next.
4. On the Summary page, Click Save to save the hold.
5. In the Success dialog box, click Hold List.
6. In the Hold List view, select the litigation hold that you just created.
7. If you are the designated approver, click to approve the hold.
General Info Options
The following table describes the options that you can set on the General Info page of the Litigation Hold
Wizard.
See Creating a Litigation Hold on page 318.
General page See General Info Options on page 318.
Approval page See Approval Options on page 319.
IT Staff page See IT Staff Options on page 320.
People page See People Options on page 320.
Email Notifications page See Email Notifications Options on page 321.
Documents page See Documents Options on page 323.
Interview Questions page See Interview Questions Options on page 324.
Summary page See Summary on page 325.
General Info Page Options
Option Description
Name (Required) Sets the name of the litigation hold.
Description Describes the litigation hold.
Requested By Sets the name of the person who requested the litigation hold. This name is
included, by default, in the email notifications by using a macro.
Force Time
Constraints (Optional) Defines the time period associated with the hold. When the time period
expires, the system sends hold termination emails, and the hold is closed.
Using Litigation Holds Creating a Litigation Hold | 319
Approval Options
The following describes the options that you can set on the Approval page of the Litigation Hold Wizard.
No email notices to people (custodians) or IT Staff are sent until a hold is approved. When creating a hold, you
select those who can approve a lit hold.
Approvers are selected from the user list on the Approval page. Only the users who have rights to approve holds
are displayed on this page. To approve a hold, a user must have one of the following permissions:
-Global permissions using an Admin Role:
Application Administrator
Create/Edit Project
LitHold Manager
-Project-level permissions:
Approve Litholds
Configuring User Roles and Permissions for Lit Holds (page 304)
You can configure the following options:
Start Date (Required) Specifies the start date of the litigation hold.
Note: You cannot edit field after a hold has been approved.
End Date Specifies the end date of the litigation hold.
Custom Properties If you configured Custom Properties, enter in the data. Fields highlighted in blue are
required.
See Configuring Lit Hold Custom Properties on page 316.
Project (Required) Specifies the project that is associated with the litigation hold.
Approval Page Options
Option Description
Any Approver (Default) Any valid user that is listed in the table can approve the litigation
hold.
IMPORTANT: If you select this option, no Approval Notifications are sent, if
you select to send them.
All Selected You can select one or more Approvers and all of those users must approve
the litigation hold.
Send Acceptance Emails to
People and IT Staff on hold
approval.
After the hold is approved, acceptance notification e-mails are sent to the IT
staff and the people that are associated with the hold.
The emails that are sent are configured in the Lit Hold email templates.
See Configuring LitHold Email Templates on page 310.
General Info Page Options
Option Description

Using Litigation Holds Creating a Litigation Hold | 320
IT Staff Options
The following describes the options that you can set on the IT Staff page of the Litigation Hold Wizard.
You specify which IT Staff to send notification emails to.
See Configuring IT Staff on page 308.
The emails that are sent are configured in the Lit Hold email templates.
See Configuring LitHold Email Templates on page 310.
The litigation hold does not go into effect until all selected IT Staff have accepted it. When acceptance is
complete, aging notifications continue.
You can configure the following options:
People Options
The following describes the options that you can set on the People page of the Litigation Hold Wizard.
You specify which people to send notification emails to.
See Configuring Projects and People on page 306.
Send Approval Notifications Approval notification e-mails are sent to the approvers that are selected in
the Approval table list.
The emails that are sent are configured in the Lit Hold email templates.
See Configuring LitHold Email Templates on page 310.
IMPORTANT: This option does not work if you selected Any Approver.
Send Approval Reminder
every x days After a specified number of days, the approval notification e-mail is resent to
the approvers that are selected in the Approval table list.
IT Staff Page Options
Option Description
(Add New Staff Member) Add IT Staff members to the litigation hold.
<enter filter text here> If you have a large list of IT Staff, you can filter the list.
See Configuring IT Staff on page 308.
Enter some text related to any property and click the search icon.
To clear the filter, click the X icon.
Send Aging
Acknowledgement every x
Days
Re-sends the litigation hold Aging Acknowledgment email to the selected IT
Staff members who have not acknowledged every number of specified days.
This email continues to be sent until it is acknowledged.
Send Aging Reminder every x
Days Resends the litigation hold Aging Reminder email to the selected IT Staff
members every number of specified days.
Disable Termination emails When this option is selected, when a hold is terminated, IT Staff will not
receive the termination notices.
Approval Page Options
Option Description
Using Litigation Holds Creating a Litigation Hold | 321
The emails that are sent are configured in the Lit Hold email templates.
See Configuring LitHold Email Templates on page 310.
Multiple people can be involved in a litigation hold. However, only people that are already associated with the
selected project are displayed in the list.
You can also specify people within a hold to be excluded from the interview or escalation policies.
You can configure the following options:
Email Notifications Options
The following table describes the options that you can set on the Email Notifications page of the Litigation Hold
Wizard.
You configure the email notifications that will be sent from the lit hold.
You can do either of the following:
-Use content from a pre-configured template
See Configuring LitHold Email Templates on page 310.
-Modify content from a pre-configured template
-Create new content
People Page Options
Option Description
Display Person data sources
on acceptance page. Shows the sources of the person’s data on the Acceptance page.
Send Hold Acknowledgement
every x Days Sends the litigation hold Acknowledgment email to all selected people that
have not acknowledged, every number of specified days. This email
continues to be sent until it is acknowledged.
Send Hold Reminder every x
Days Re-sends the litigation hold Reminder email to all selected people every
number of specified days.
Escalations These settings allows you to set two levels of escalation policies for person
hold acceptance.
The emails that are sent are configured in the Lit Hold email templates.
See Configuring LitHold Email Templates on page 310.
Stage One: If a person doesn't accept the hold within a number of specified
days, the first escalation email is sent to their manager.
Stage One escalations are sent to one of two possible email addresses:
-Their manager’s email. This requires Active Directory to be configured
previously. In the Manager field of the Active Directory Account Screen,
enter the manager that you want to be notified for the first escalation
email.
-Override Escalation stage one email address: When specified, this email
address will be used instead of the manager’s email address as speci-
fied in Active Directory.
Stage Two: After a specified number of days, the next escalation is sent to
the specified email address.
Repeat: Both of these escalations can be set to repeat if necessary. People
within a hold can be excluded from the escalation policy if needed.
Using Litigation Holds Creating a Litigation Hold | 322
Some email notifications are required based on the options that you have chosen so far in the wizard.
The Required section of the Email Notifications page records the notifications that you have completed. The
Not Required section lists the notifications that are not necessary to complete.
You can configure the following options:
General Email Notification Page Options
Option Description
Load from Template Lets you select an email template for the associated tab.
See About Managing Email Templates for Use in Litigation Holds on page 310.
Load Loads the selected email template into the Edit tab.
Preview Opens the subject and message body of the email in a preview frame.
Edit Lets you edit the subject and message body of the email.
You can use the HTML text editor to format the text as you would like to have it
displayed. You can also copy HTML text from another source.
View Lets you view the email message with any macro fields populated with data. The
macro field data comes from the information that you entered on the wizard pages
prior to the Email Notifications page.
For example, the macro field [Hold Name] retrieves the name that was entered on
the General page of the Hold Creation Wizard.
In the predefined email templates that come with the system, some emails have
“XXXX” or “YYYY” in the message body. When a recipient receives the email,
these fields appear as requested data that a recipient must fill in with the
appropriate information.
Macros Lets you add, edit, or delete macro fields in the message body of the email. You
can edit the macro fields inserted into the message body by highlighting the text
between the brackets and changing the text.
The following macros are available for the email
Hold Name -Lets you insert the name of the hold.
Hold Requestor - Lets you insert the name of the person who requested the hold.
Time Frame Start - Lets you insert the date when the hold starts.
Time Frame End - Lets you insert the date when the hold ends.
Hold Person List - Lets you insert a list of people for the hold. This list must be
separated with commas.
Hold Description - Lets you insert the description of the hold.
Project Name - Lets you insert the name of the associated project.
View Hold Link - Lets you insert a Hold Link hyperlink into the email. The Hold
Link allows recipients of the email to view a list of active holds.
Send Test Email to You can send a test email so that you can verify the email notification.
Enter a single email address of a recipient, and then click Send Test Email.
Add CC: You can add additional email address of people other than the specified people
and IT staff that you would like to receive the email.
Using Litigation Holds Creating a Litigation Hold | 323
Documents Options
The following table describes the options that you can set on the Documents page of the Litigation Hold Wizard.
Documents are any supporting documents that you want to attach to the litigation hold notification emails. The
document files are stored on the hard drive of the Hold Manager who creates the hold. Attached documents
have read-only permissions.
Email Notification Page Options
Option Description
Approval tab Lets you edit the Approval email notification that is sent to users who are identified
on the Approval list.
Person Acceptance tab Lets you edit the Person Acceptance email that is sent to inform associated
people of the litigation hold and have them accept the hold.
Person Reminder tab Lets you edit the Person Reminder email that is sent to remind people of their
involvement with the hold.
Person Termination tab Lets you edit the Person Termination email that is sent to inform people that the
hold is complete and closed.
IT Acceptance tab Lets you edit the IT Staff Acceptance email that is sent to inform associated IT
Staff members of the litigation hold and have them accept the hold.
IT Reminder tab Lets you edit the IT Staff Reminder email that is sent to remind IT Staff members
of their involvement with the hold.
IT Termination tab Lets you edit the Person Termination email that is sent to inform people that the
hold is complete and closed.
Escalation Stage One
Escalation Stage Two
You can set two levels of escalation policies for person hold acceptance.
Stage One: If a person doesn't accept the hold within a number of specified days,
the first escalation email is sent to their manager.
There are two levels of escalation policies for person hold acceptance.
Stage One: If a person doesn't accept the hold within a number of specified days,
the first escalation email is sent to their manager.
Note: Stage One escalation requires one of the following:
- Active Directory to be configured previously. In the Manager field of the
Active Directory Account Screen, enter the manager that you want to be
notified for the first escalation email.
- In the litigation hold wizard, you can manually specify a stage one address.
See People Options (page 320).
Stage Two: After a specified number of days, the next escalation is sent to the
specified email address.
These tabs let you configure the Escalation email that is sent to inform managers
of the escalation.
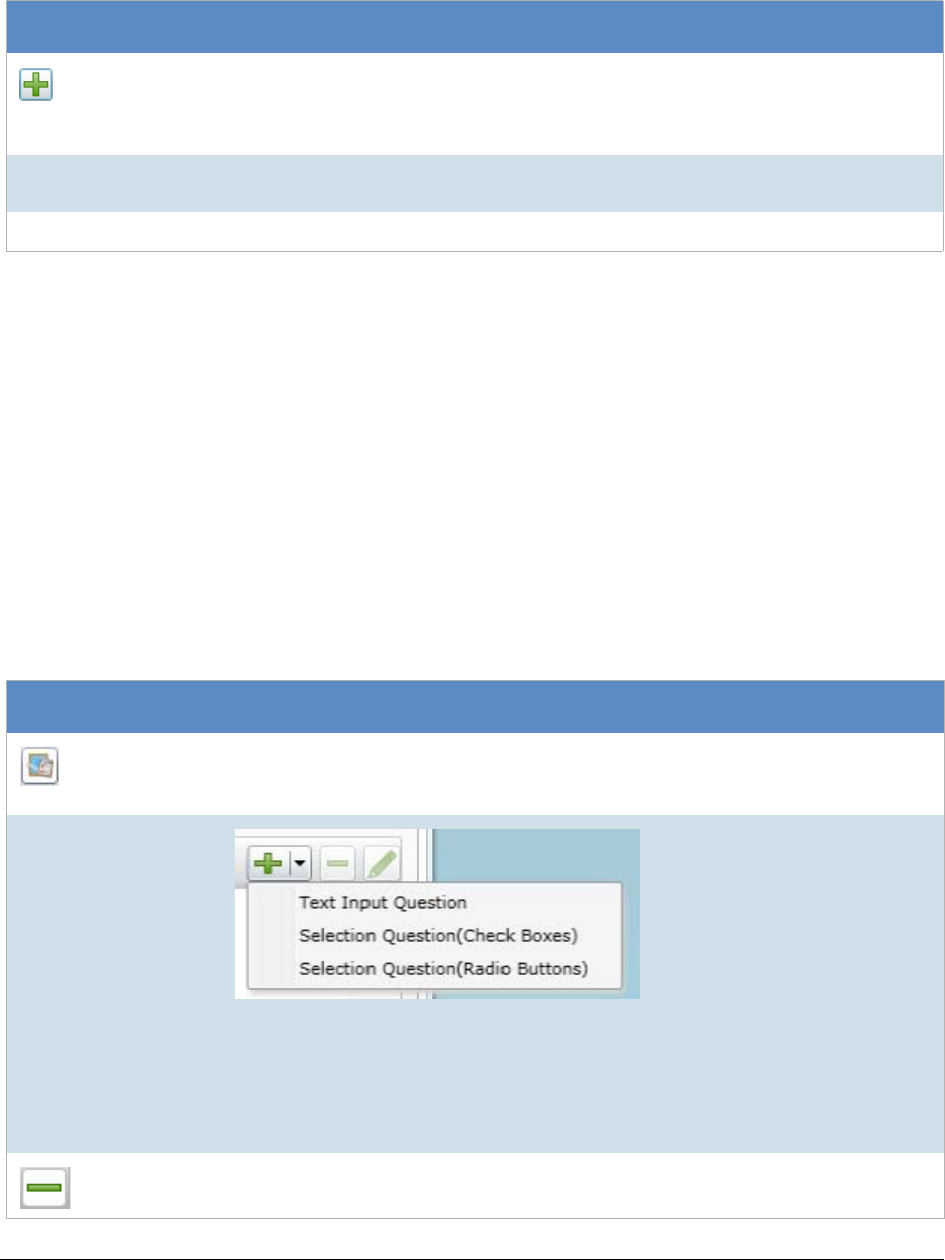
Using Litigation Holds Creating a Litigation Hold | 324
See Creating a Litigation Hold on page 318.
Interview Questions Options
The following table describes the options that you can set on the Interview Questions page of the Litigation
Hold Wizard.
See Creating a Litigation Hold on page 318.
You can create interview questions here or you can load questions from your templates.
When you create interview questions, you have a variety of options on how to configure the questions and
answers.
See About Interview Question and Answer Types on page 313.
Documents Page Options
Option Description
(Add supporting
files button)
Lets you add files in support of the litigation hold and have them categorized and
distributed by Notice - Person or Aging - IT Staff.
Documents that you add to a litigation hold are visible to the email recipient by way
of a link back to the landing page.
Description field Lets you double-click the description field of an added file and enter information
you want about the file.
Delete button Removes the file from the Supporting Documents table list.
Interview Questions Page Options
Option Description
(Load question
from template)
Lets you select a previously defined interview question template that has the
question set you want.
See About Managing Interview Templates for Use in Litigation Holds on page 312.
Add a interview
question
Specifies a question you want to ask recipients. You should enter and add one
question at a time.
For information on how to create and format questions and answers, see the
following:
About Interview Question and Answer Types (page 313)
Creating an Interview Template for Use in Litigation Holds (page 314)
Delete button Removes the highlighted question from the list.
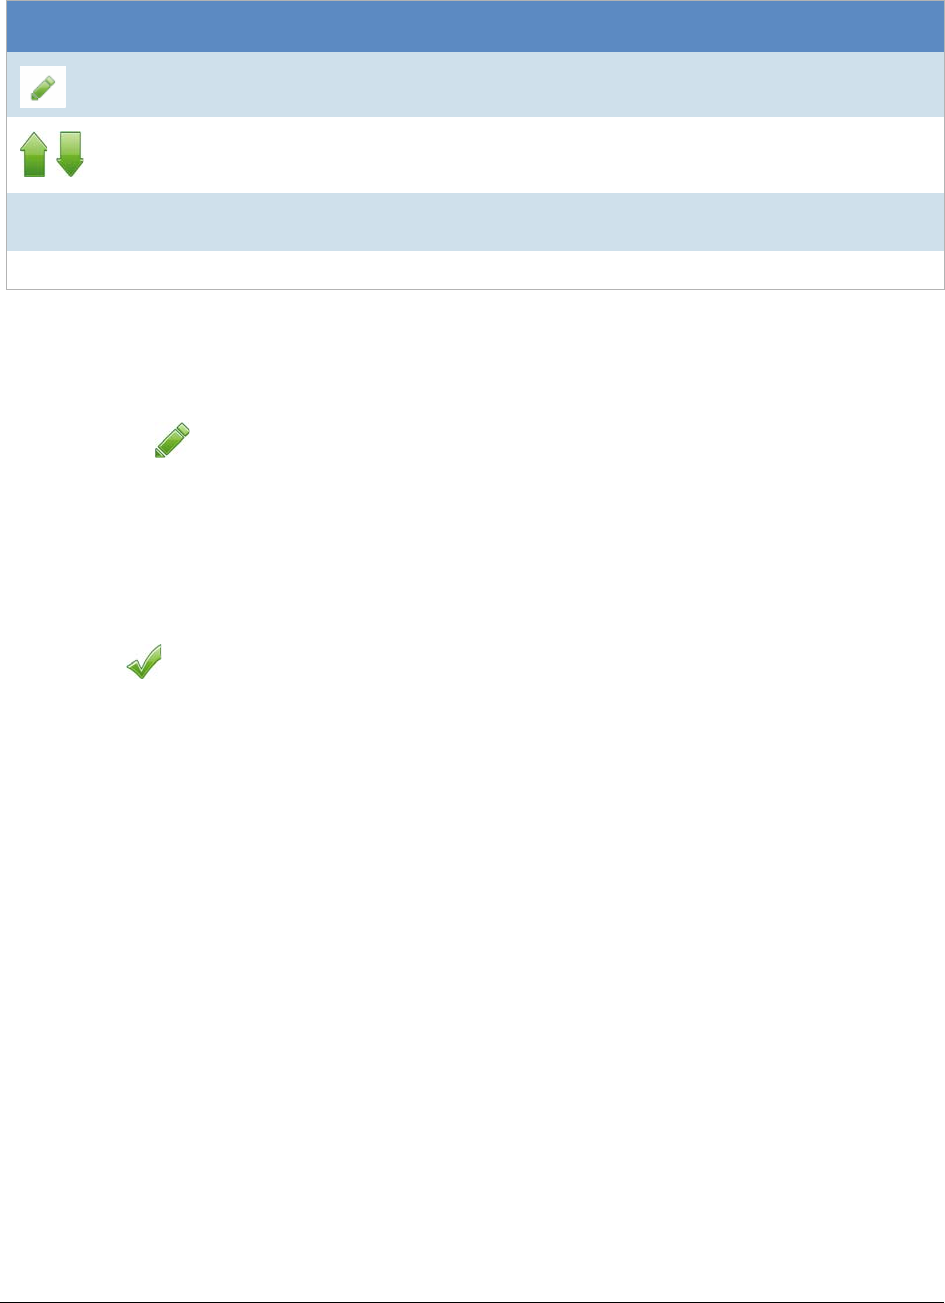
Using Litigation Holds Creating a Litigation Hold | 325
Summary
1. On the Summary page, do one of the following:
- Click in a upper-right corner of General or Approval sections to edit the information you want.
-In the left pane of the wizard, click a wizard page name to navigate the wizard pages and edit any
information you want. Click Summary in the left pane again to return to the Summary page and
activate the Save button.
2. Click Save to save the hold.
3. In the Success dialog box, click Hold List.
4. In the Hold List view, select the litigation hold that you just created.
5. Click (Approve Hold).
Edit button Edits the highlighted question in the list.
You can select a question and change its order in the list.
Allow Interview
Review Allows recipients to see the interview questions and their answers after they accept
the litigation hold notification.
Allow Modification If you select this option, people can change their answers after the initial interview.
Interview Questions Page Options
Option Description
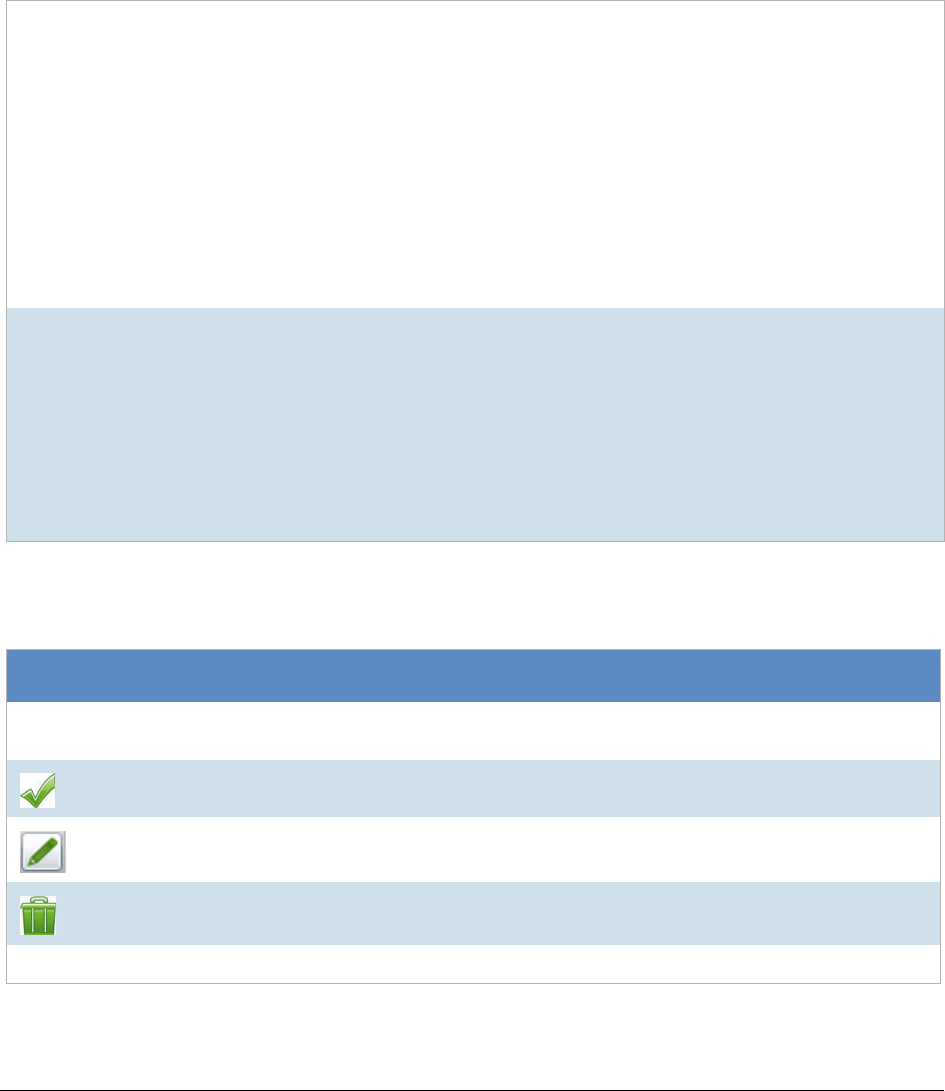
Using Litigation Holds Managing Litigation Holds | 326
Managing Litigation Holds
Using the Lit Hold Page
The Lit Hold page is the default view when you click Lit Holds in the application console.You can use the Lit
Hold page view to display all the litigation holds in the application and information about the hold.
There are two main elements of the Lit Hold page:
The following table describes each item in the Hold List page.
Lit Hold list You can view a list of lit holds in a grid. You can do the following to modify the
contents of the grid:
-Control which columns of data are displayed in the grid.
-Sort on the columns
-If you have a large list, you can apply a filter to display only the items you want.
See Managing Columns in Lists and Grids on page 39.
You can also perform the following lit hold actions:
-Create a hold
-Delete a hold
-Activate a hold
-Deactivate a hold
-Resubmit a hold
Lit Hold information tabs Below the list of holds, you can use tabs to see the following information about the
highlighted hold:
-Overall status
-Approvals
-List of Associated People
-List of the associate IT Staff
-Logs
-Email History
-Hold reports
Hold List Elements
Links Description
Action Depending on the permissions of the logged-in-user and the status of the hold,
you can do one of the following:
Approve If the logged-in-user is configured as an approver, and if a hold is waiting to be
approved, you can click this to approve the hold.
Edit Lets you view and edit the selected hold
Delete Deletes the selected hold.
Name The name of the lit hold.
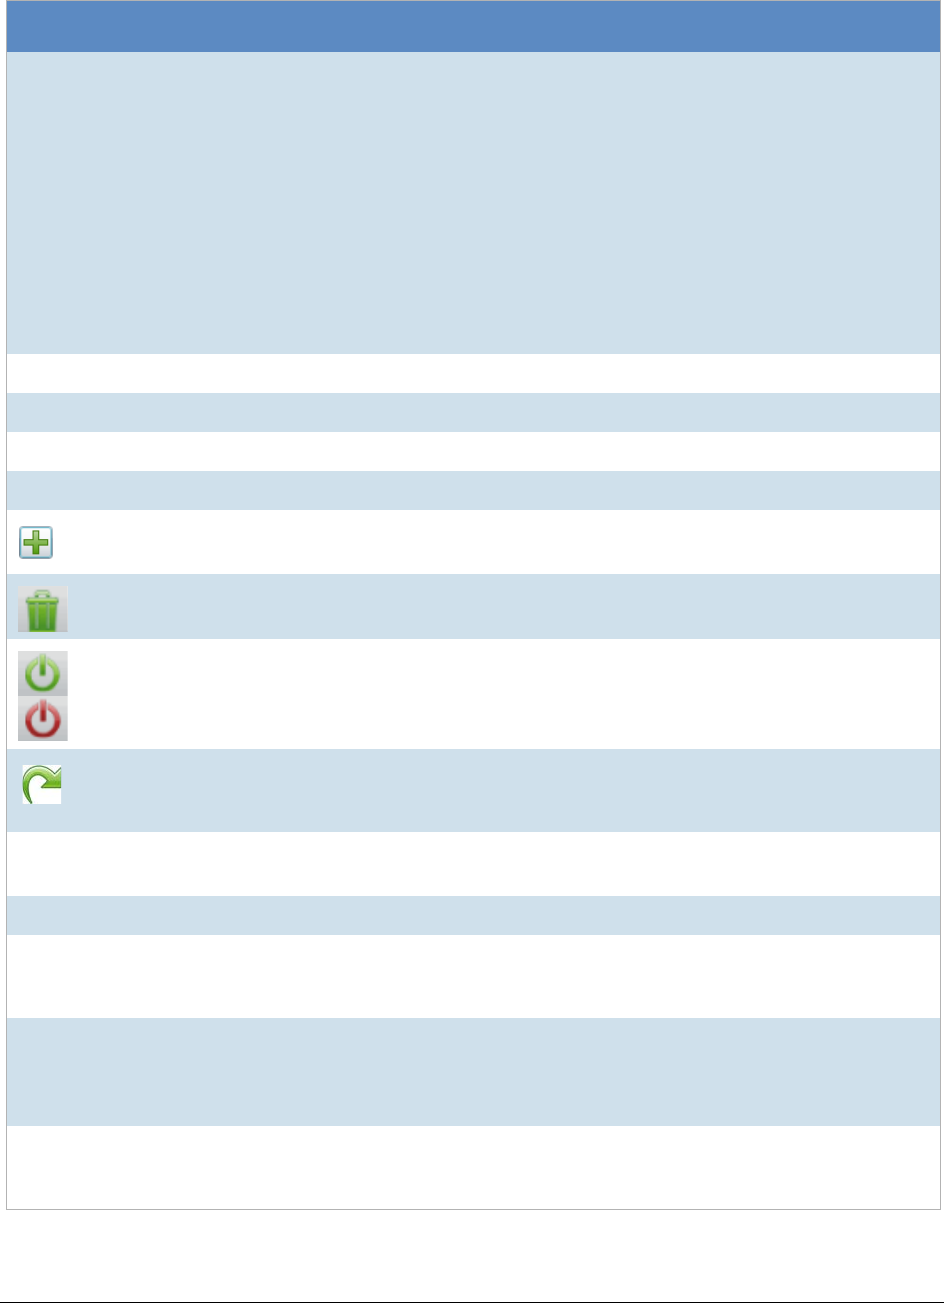
Using Litigation Holds Managing Litigation Holds | 327
Status Displays the status of each hold in the list:
-Awaiting Approval - The hold has been created but had not yet been approved.
-Waiting for Acknowledgements - The hold has been approved, but has not yet
been acknowledged by all IT Staff and Custodians.
-All Acknowledged - The hold has been approved and acknowledged by all IT
Staff and Custodians.
-Not Active - On of the following three conditions exists:
The hold has reached its forced end date.
The hold was Deactivated.
The hold was terminated by sending Stop Notices.
You can sort on the status or use the filter to display holds by a certain status.
Creation Date The creation date of each lit hold
# IT The number of IT Staff associated to each lit hold.
#People The number of People associated to each lit hold.
Active Whether or not the list hold is active. (Information only)
New Hold Lets you create a lit hold using Opens the Hold Creation Wizard.
See Creating a Litigation Hold on page 318.
Delete Hold Lets you delete the selected holds.
See Deleting a Litigation Hold on page 329.
Activate or
Deactivate hold
Lets you activate or deactivate the selected hold.
See Deactivating and Activating a Litigation Hold on page 328.
Resubmit Hold
Lets you resubmit a hold. This sets it back to its original state so that all actions
must be performed again.
See Resubmitting a Litigation Hold on page 329.
Overall Status Provides general status information about the highlighted hold.
See Viewing the Overall Status of a Litigation Hold on page 331.
Approvals Displays the approval status and type.
People Displays the names of the people that are associated with the selected hold.
You can click Preview Acceptance Page at the bottom of the tab to open the
Person Hold Notification page.
IT Staff Displays the IT Staff members that are associated with the selected hold.
You can click Preview Acceptance Page at the bottom of the tab to open the IT
Staff Hold Notification page.
See Configuring an IT Staff Member for Use in a Litigation Hold on page 309.
Log Displays filter options, a list of event types and related information, messages and
date stamp for the selected Hold.
See About the Hold Event Log for a Litigation Hold on page 332.
Hold List Elements
Links Description
Using Litigation Holds Managing Litigation Holds | 328
Editing a Litigation Hold
You can open an existing litigation hold to either edit the settings, or to just view the settings.
See Creating a Litigation Hold on page 318.
What you can change in a litigation hold depends on when you edit it. If the hold has not been approved, then
you can edit all properties.
After a hold has been approved, you cannot change general elements of hold such as the name, description,
start date, project, the approver, the IT staff, the approval and acceptance emails. However, you can add people.
When you save the hold, it performs necessary actions. For example, suppose that you have a hold that has
already been approved and acceptance emails have already been sent and all people have acknowledged the
hold. Before editing the hold, the hold status is All Acknowledged. When you edit the hold and add a new
person, the status is changed to Waiting for Acknowledgements and the acknowledgement email is sent to the
new person.
To edit a litigation hold
1. On the Lit Holds page, highlight a template and click (edit).
2. Click Next to navigate the pages of the hold so you can review the settings, or make any necessary
changes to existing settings.
3. When you have advanced to the Summary page, do one of the following:
-Click Cancel if you did not make any changes to the litigation hold settings, or you want to cancel any
changes you made to the hold.
-Click Save to save the litigation hold settings that you changed.
Deactivating and Activating a Litigation Hold
You can deactivate and then re-activate a litigation hold.
Deactivating a hold does not terminate or delete the hold; instead, the hold is “paused” or made not active,
regardless of any pending actions. While an hold is deactivated, scheduled email notifications, such as
reminders, are no longer sent. If you make the litigation hold inactive, its status is displayed as Not Active in the
Lit Hold view. Also, deactivated holds do not appear in the list on the HTML pages for IT Staff and people.
Email Distribution
History Displays filter options, a list of emails, and date stamp for the selected hold.
See About the Email Distribution History of a Litigation Hold on page 332.
Hold Reports Details the people involved in the hold, and the approval/acceptance status of the
approvers, people, and IT Staff.
See You can view the history of emails that were sent, their type, date sent, by
whom, recipient count, and subject. You can also use filtering to select a hold and
type of email. on page 332.
Hold List Elements
Links Description
Using Litigation Holds Managing Litigation Holds | 329
It is important to note that when you deactivate a hold, it is not terminated and people and IT staff do not receive
termination notices. The purpose of the deactivation is that you may want to temporarily deactivate a hold for
administrative reasons without sending out termination notices.
You can re-activate any hold that is not active. A hold may have been made not active by the following actions:
-The termination date has occurred - See General Info Options on page 318.
-A hold was deactivated - See Deactivating and Activating a Litigation Hold on page 328.
-A hold was manually stopped (terminated) - See Viewing the Overall Status of a Litigation Hold on
page 331.
When you activate a hold, it returns to the status it was in before it was made not active.
For example, if a hold had an Awaiting Approval status when it was deactivated, when re-activated, it will have
an Awaiting Approval status again. However, notifications are not sent out automatically. For example, if a hold
had an Waiting for Acknowledgments status when it was deactivated, when re-activated, it will not automatically
send out Acknowledgment Notices. You must do so manually on the Overall Status tab > Options. See Viewing
the Overall Status of a Litigation Hold on page 331.
If you make a litigation hold active, the hold’s last known status is displayed in the Lit Hold view.
Important:
When you deactivate or activate a hold, no email notification is sent notifying people of the change in
status.
To activate or deactivate a litigation hold
1. On the Lit Holds page, under the Lit Hold tab, select a litigation hold.
2. Click Activate or Deactivate either to activate or deactivate the litigation hold.
3. At the Confirms Holds dialog, click Ok.
Deleting a Litigation Hold
You can delete an existing litigation hold, even if the hold is not active.
Notification emails are not sent out if a litigation hold is deleted.
To delete a litigation hold
1. On the Lit Holds page, under the Lit Hold tab, select a litigation hold.
2. Click Delete. You can find this icon by the litigation hold and also at the bottom of the task pane.
3. (Optional) Check Keep Archive to remove the holds from the user interface but keep an archive record
of the litigation hold, such as IT staff, people, approver, histories, email templates, interview questions
and answers. These are stored in database tables.
4. Click Yes in the Confirm Deletion dialog to confirm the deletion.
Resubmitting a Litigation Hold
You can resubmit a hold. This creates a new copy of the hold and sets it back to its original state so that all
actions must be performed again. You can use this to replace a hold that is already in place or clone an existing
hold and leave the first one in tact.
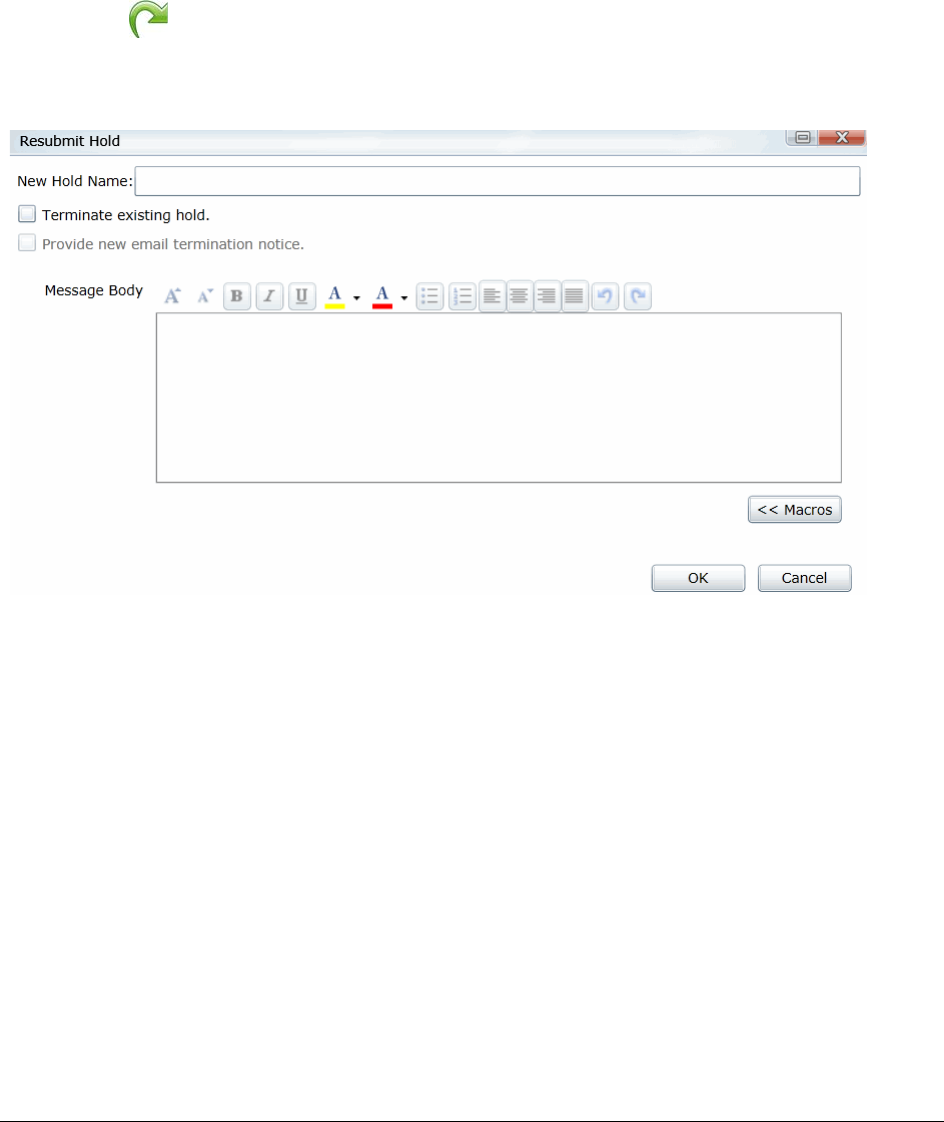
Using Litigation Holds Managing Litigation Holds | 330
If you replace the hold, you are given the opportunity to send out an email explain that the previous hold has
been replaced. A link is provided to acknowledge the new hold. This email functions as both a Termination
Notice and an Acknowledgment Notice.
See Creating a Litigation Hold on page 318.
To resubmit a litigation hold
1. On the Lit Holds page, under the Lit Hold tab, select a litigation hold.
2. Click Resubmit Hold at the bottom of the task pane.
3. The Resubmit Hold dialog appears.
Resubmit Hold Dialog
4. Enter the New Hold Name in the field provided.
5. You can check Terminate existing hold and/or Provide new email termination notice.
6. Add your information in the message body. You can format your text with basic word processing
commands.
7. Under Macros, find macros to add to the body of your message. These macros include:
-Hold Name
-Hold Requestor
-Time Frame Start
-Time Frame End
-Hold Person List
-Project Name
-View Hold Link
8. Click Ok.

Using Litigation Holds Managing Litigation Holds | 331
Viewing Information About Holds
You can view the overall status, approvals, IT Staff, and people of a selected litigation hold.
See Using the Lit Hold Page on page 326.
See Viewing the Overall Status of a Litigation Hold on page 331.
Viewing the Overall Status of a Litigation Hold
You can view the overall status of a highlighted hold, including the following:
-Whether or not it is active
-The number of IT Staff and People
-The configured time frame
-Which actions have been completed and by how many
For example, the hold may have four people associated with it. This will show how many of the people
have acknowledged the hold.
-Links to action options.
Send/Resend Notification - If the hold has not been approved, you can send a reminder notice to
the approver.
Send Acknowledgment Notices - This will send an acceptance reminder notice to any IT Staff or
custodians who have not acknowledged the hold.For example, suppose only some of the people
have acknowledged the hold. You can click the Send Acknowledgment Notices link. This will send
another email to only those people who have not acknowledged the hold.
Send Reminders Now - This will send the following notices: Hold Reminder to custodians and Stop
Aging Reminder to IT staff.
Sent Stop Notices - This will end (Deactivate) the hold and send the following notices: Hold
Termination to custodians and Stop Aging Termination to IT staff. You cannot perform this action until
the hold has been approved. You can Activate the hold at a later time. See See Deactivating and
Activating a Litigation Hold on page 328.
You can refresh the information shown on the tab to check the current status.
About the Approvals Tab
The Approvals tab displays the hold’s approval status and approval type. The option Send/Resend All
Approval Notices becomes inactive after the hold is approved.
About the People Tab
The People tab displays the list of people that are involved in the litigation hold; the Total, Accepted, and
Pending counts of all the people. The sent, visited, and accepted status of each person is displayed in a grid.
When you highlight a person in the grid, the associated Detail View shows the custodial options and responses
to interview questions.
About the IT Staff Tab
The IT Staff tab displays the total, accepted, and pending count of the IT Staff that are listed. The status of Sent,
Visited, Accepted, and End Notice is also displayed. When you select an IT staff name, the associated Detail
View area is displayed.
Using Litigation Holds Managing Litigation Holds | 332
About the Hold Event Log for a Litigation Hold
You can use Hold Event Log to review the events and messages of a selected litigation hold. You can also
apply filter options to select the Hold and Event Type. The Log pane displays the type, date and time, initiator,
and the message of each log item. Select a type item from the list to view the associated Message.
About the Email Distribution History of a Litigation Hold
You can view the history of emails that were sent, their type, date sent, by whom, recipient count, and subject.
You can also use filtering to select a hold and type of email.
About Lit Hold Reports
You can use Reports in the Holds to generate various predefined reports with summary or detailed information
about a particular litigation hold. Reports are generated in CSV format.
Email Distribution History Options
Option Description
Distribution Type Specifies the email template type that you want to filter the email through.
-Approval
Shows the litigation hold approval emails that were sent to any users on the
Approval list.
-Stop Aging Acceptance
Shows the stop aging acceptance emails that were sent to IT Staff informing them
of the litigation hold and requesting their acceptance of the hold.
-Stop Aging Reminder
Shows the stop aging reminder emails that were sent to IT Staff reminding them
that they still involved in a litigation hold.
-Stop Aging Termination
Shows the stop aging termination emails that were sent to IT Staff informing them
that their participation in the litigation hold is no longer necessary.
-Hold Acceptance
Shows the hold acceptance emails that were sent to custodians informing them of
the litigation hold and requesting their acceptance of the hold.
-Hold Reminder
Shows the hold reminder emails that were sent to custodians reminding them that
they are still involved in the litigation hold.
-Hold Termination
Show the hold termination emails that were sent to custodians informing them that
their participation in the litigation hold is no longer necessary.
Date Range Shows only emails that fall within the data range that is specified.
Subject Contains Shows only emails that contain the specified text in the subject field of the email.
Body Contains Shows only emails that contain the specified text in the message body of the email.
Apply Filter Applies the selected filter options to the email.
Reset Filter Resets all filter options to their default values.
Using Litigation Holds Managing Litigation Holds | 333
You can view the following types of reports for a given litigation hold.
Searching Litigation Holds
You can perform a search for litigation holds using text that is in the following:
-Hold data
Text in the litigation hold name
Text in the litigation hold description
- Notification data
Text in the email notifications
After performing a search, any holds with the search results are displayed in a list.
If a search resulted in hits, the search is saved for re-use.
You can export your searches and search results.
To perform a litigation hold search
1. On the Lit Holds page, click the Search Lit Holds tab.
2. Click Search All Holds.
3. Enter a Search Title for the saved search.
Available Litigation Hold Reports
Report More information
Holds Summary You can generate the Holds Summary report to display an overview of all litigation
holds, all active holds, and all Inactive holds. These reports list their approval and
acceptance status, associated project, and when it was created. Also included are
number of people and IT Staff associated with a litigation hold, and the current stage
of approval.
Hold Details You can generate the Hold Details report to display a detailed overview of a
litigation hold’s approvers, people, IT Staff, any associated document files, and
interview questions. Also included are the start and end dates of the hold, the
priority of the hold, and a description, if one was entered in the Hold Creation
Wizard.
Interview Responses You can generate the Interview Responses report to display the answers to
interview questions that are associated with a litigation hold.
Person Details You can generate a detail report of the people’ hold information.
Selected Project’s
Holds You can generate a summary of all holds in the selected project.

Using Litigation Holds Using Lit Hold Dashboard Widgets | 334
4. In the search terms field, enter the terms that you want to search for.
You can enter multiple terms separated by a space. It will perform an OR search function.
For example, the search terms security approval will return holds that contain either term.
It will also search for words that contain your term.
For example, a search term of prov will return prove, proved, approve, approved, approval, and so on.
5. You can choose the search to include Active Holds, Inactive Holds, or Both.
6. You can choose to search in Hold Data, Notification Data, or Both.
-Hold data
Text in the litigation hold name
Text in the litigation hold description
- Notification data
Text in the email notifications
7. Click OK.
8. A message is displayed showing the number of hits found.
9. If the search resulted in a hit, the search will be saved and displayed in the upper panel searches list.
If the search resulted with 0 hits, the search will not be saved.
10. The litigation holds that are hits for the search are displayed in the lower panel results list.
To view litigation hold search results
1. After a successful search, click a litigation hold in the search results panel.
2. On the right side, is an information panel. It may show a Hold Info tab, Notifications tab, or both
depending on where the search terms were found.
3. You can click either tab and the search term is highlighted in red.
4. You can also view details about the hold.
To delete a litigation hold search
1. Check the selection box for the hold or holds that you want to delete.
2. Click the Delete icon.
To export searches or search results
1. For either list, click Export.
2. Click OK.
To remove litigation holds from the search results list
1. In the lower pane, select the holds that you want to remove from the list.
2. Click Mark as Non-Responsive.
Using Lit Hold Dashboard Widgets
You can use the Dashboard to view Lit Hold data.
See Using the Dashboard on page 335.
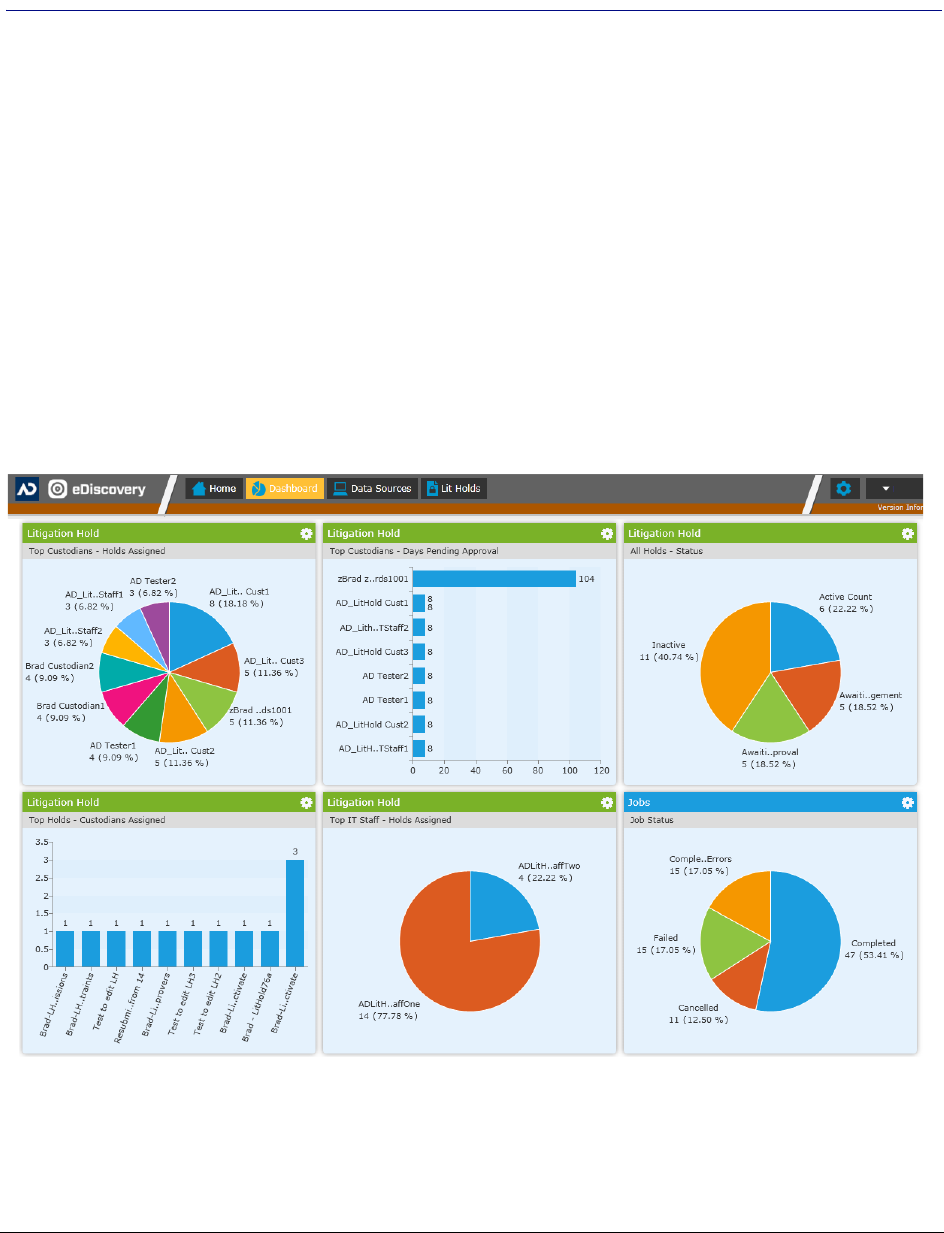
Using the Dashboard About the Dashboard | 335
Chapter 32
Using the Dashboard
About the Dashboard
The Dashboard allows you to view important information in an easy-to-read visual interface. The Dashboard has
different widgets that display the monitored data using a variety of charts.
You can customize most widgets in the following ways:
-The type of chart that is used, such as a pie chart, horizontal bar chart, or vertical bar chart.
-Whether to show information about all projects or selected projects.
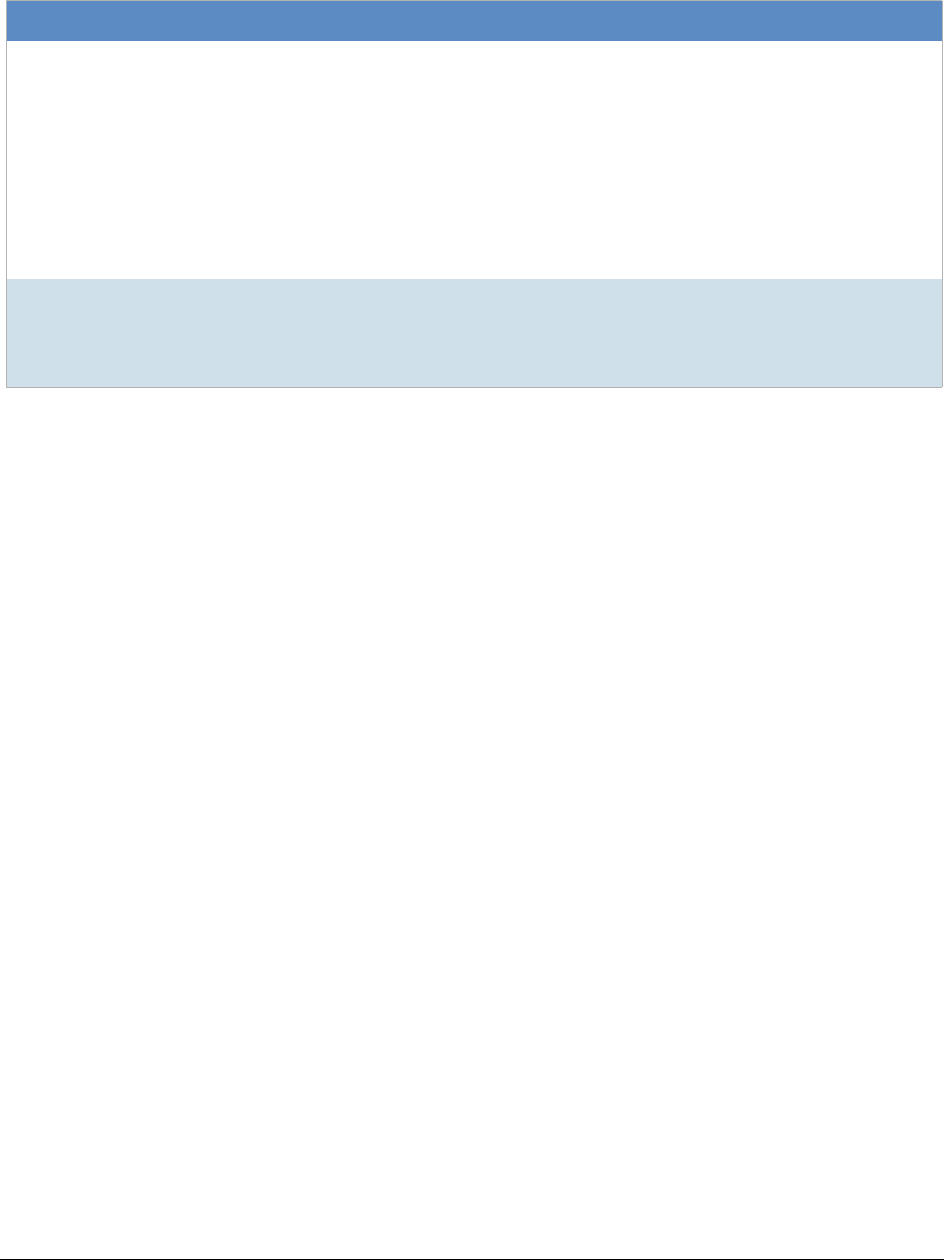
Using the Dashboard About the Dashboard | 336
Depending upon your product license, you can view widgets for the following features:
Dashboard widgets
Feature Description
Lit Hold (eDiscovery or Lit Hold license only)
You can view the following widgets:
-Most Recent Holds with Approval/Acceptance Status
-Top Custodians and the number of holds assigned
-Top Custodians and the number of days pending approval
-All Hold broken out by status
-Top holds and the number of custodians assigned
-Top IT Staff and the number of holds assigned
See Using Litigation Holds on page 302.
Jobs (eDiscovery only)
You can view the number of jobs broken out by their status: completed, completed with errors,
cancelled, or failed.
See About Jobs on page 427.
Using the Dashboard Configuring Dashboard Widgets | 337
Configuring Dashboard Widgets
The Dashboard tab has several widgets that display the monitored data. You can use the following elements to
view and filter the data.
To view Dashboard
1. Click the Dashboard tab at the top of the screen.
The Filter Case Chart Results Pane
In the Filter Case Chart Results pane, you can filter the items displayed in the widget.
Elements of Dashboard Widget
Element Description
Widget Options Clear the gear icon to configure the following options:
Changes the appearance of the chart. You can choose to display the
data in either pie, vertical bar, or horizontal bar chart form.
Filters the chart results by project. The button displays what projects are
being filtered and displayed. See The Filter Case Chart Results Pane on
page 337.
Refreshes the data in the widget. The button displays the last time that
the data had been refreshed, either manually or automatically.
Elements of the Filter Case Chart Results Pane
Element Description
Filter by selected case(s) Allows you to search for a specific case. Click Filter to filter by the search terms.
Selected cases only Posts only the selected projects to the widget. You can scroll down the project list
and check the projects that you want to display.
Unselect all Deselects all of the projects in the project list.
Apply/Apply - all cases Applies the selected projects to the Dashboard widget. This button displays the
number of projects selected. For example, if you have selected four cases, the
button displays Apply - 4 cases.
Cancel Returns you to the main widget.

Configuring and Using the Multi-Tenant Environment | 338
Part 7
Configuring and Using the
Multi-Tenant Environment
This part describes how to configure and use the Summation multi-tenant environment and includes the
following chapters:
-Understanding the Multi-Tenant Environment (page 339)
-Administrating a Multi-Tenant Environment (page 344)
-Using the Multi-Tenant Environment (page 352)

Understanding the Multi-Tenant Environment About the Summation Multi-Tenant Environment | 339
Chapter 33
Understanding the Multi-Tenant Environment
About the Summation Multi-Tenant Environment
If you are a hosting provider for AccessData Summation, you can use the multi-tenant environment feature to
segment application functionality for clients. You can create an segmented environment for each client.
The multi-tenant environment provides the following benefits:
-Each client has their own segmented and secure environment
Each client can only see the users and user groups in their environment
Each client can only see the projects and project data in their environment
Browsing to the server’s data locations in the application are disabled
-Each client has their own environment administrator called a SubAdmin
The SubAdmin helps eliminate “middle-man tasks” of your IT team
The Sub-Admin can to do the following for their own environment:
Create and manage their own users and user groups
Create and manage their own projects
Process their own evidence data
Export data
A segmented client environment is created by creating a SubAdmin user account. The SubAdmin is the
administrator of the segmented environment. The environment name is also the name of the SubAdmin. As a
result, the segmented environments are referred to as SubAdmin environments.
About SubAdmins
SubAdmins are application users that have a sub-set of administrative permissions for their environment only. A
SubAdmin is designated by having the Sub Administrator permission. The Sub Administrator permission is
granted by using an admin role.
SubAdmins are different from application administrators. While application administrators have permissions for
all aspects of the application, SubAdmins have a sub-set of administrator rights to the application within their
environment.
SubAdmins can do the following for their environment:
-Create and manage application users
-Create and manage user groups

Understanding the Multi-Tenant Environment About the Summation Multi-Tenant Environment | 340
-Create Projects
-Manage Projects including the following:
Assign project-level permissions to the users and user groups they created
Create and manage custom fields and tagging layouts
Create and manage tags
Create and manage markup sets and highlight profiles
View reports
-Add evidence to their projects
-Export evidence data
-Delete projects
Important:
SubAdmins can only see and manage the Users, User Groups, and Projects that are associated to
their environment.
See About Application Features Not Available in SubAdmin Environments on page 341.
SubAdmin accounts can be created in two different ways.
See Creating and Managing SubAdmins on page 345.
About Permissions and Security Within a SubAdmin Environment
A SubAdmin functions as the administrator for their environment. As a result, by default, SubAdmins have
administrative permissions for all users and projects in their environment.
When a SubAdmin creates users, by default, those users have no permissions. SubAdmins must grant project-
level permissions for their environment users in order for them see and access projects. SubAdmins can only
grant permissions for the projects that they have permissions for. As long as SubAdmins have not been given
permissions to other projects outside of their environment, SubAdmins and other users in the environment can
only access the projects in their own environment.

Understanding the Multi-Tenant Environment About Application Features Not Available in SubAdmin Environments |
About Application Features Not Available in SubAdmin
Environments
For overall system security, users in SubAdmin environments have access to only a sub-set of application
features.
For example, SubAdmins can create users and user groups, but cannot create admin roles. SubAdmins do not
have permissions to system-wide features, such as system configuration, the system and activity log, custodians
(people), litigation holds, and KFF/De-Nist.
The following is a list of application features that are not available to SubAdmins or any users created by
SubAdmins in their environment:
-Main tabs:
Data Sources
Lit Hold
Dashboard
-Management page:
All features (tabs) except Users and User Groups
-Home Page Project tabs:
Custodians tab
Lit Hold tab
Known File Filter (KFF/De-Nist) tab
-Create New Project page:
Custodians tab
KFF/De-Nist Options tab
Project Folder Path (must use LawDrop)
Job Data Path (must use LawDrop)
Sub Administrator drop-down
Create Project and Import Evidence button (Importing Evidence is done through LawDrop
-Project List
Add Evidence (must use LawDrop)
Custom Properties
-Ability to browse to data on a server
-Export
View or configure export paths (must use LawDrop)
Configure Slip Sheets
Access to Project Data
For security purposes, users in a SubAdmin environment cannot use the application to browse to and access the
file system on the Summation server environment. A new interface for managing data has been developed
called AccessData LawDrop™. LawDrop provides an interface for organizing data, adding data to projects, and
viewing exported data.


Understanding the Multi-Tenant Environment About Creating Projects in SubAdmin Environments | 343
About Creating Projects in SubAdmin Environments
Projects can be created in a SubAdmin environment. Users in a SubAdmin environment can only see and
access projects in their own environment.
About Creating Projects in a SubAdmin Environment
Projects can be created in a SubAdmin environment in the following ways:
About Project Folder Paths in a SubAdmin environment
When a project is created in a Sub-Admin environment, the following occurs:
-In the Project Folder Path, a sub-folder is created with the name of the Sub-Admin.
-The project folder is created under the SubAdmin sub-folder.
For example, suppose your default project folder path is the following:
\\1.1.1.1\Summation\Projects\
If you have projects that are not in a SubAdmin environment, the project folders will be created under that path.
For example:
\\1.1.1.1\Summation\Projects\abcd1234-ab12-ab12-abcdef123456
If you have a SubAdmin named SA1 and a project is created in that environment, the project folder will be the
following:
\\1.1.1.1\Summation\Projects\SA1\abcd1234-ab12-ab12-abcdef123456
Note: It is possible to create a project without assigning a SubAdmin and then later use the project’s
permissions to grant access to a SubAdmin. However, it is not created within the environment folder
structure. Also it will not appear as an associated project in columns and filters. See Viewing Projects
Associated to SubAdmins on page 350.
It is recommended to assign the SubAdmin when the project is created.
A SubAdmin creates a
project SubAdmins have permissions to create projects. When a SubAdmin creates a
project, it is created within that SubAdmin’s environment. A SubAdmin can only
see projects within their environment.
By default, SubAdmins have administrator permissions to projects in their
environment.
An application
administrator creates a
project and assigns it to a
SubAdmin
An application administrator can create a project, and within the Create New
Project wizard, can assign it to an existing SubAdmin. This action creates the
project within that SubAdmin’s environment and makes the SubAdmin an
administrator of that project.
See Creating and Managing Projects in SubAdmin Environments on page 350.
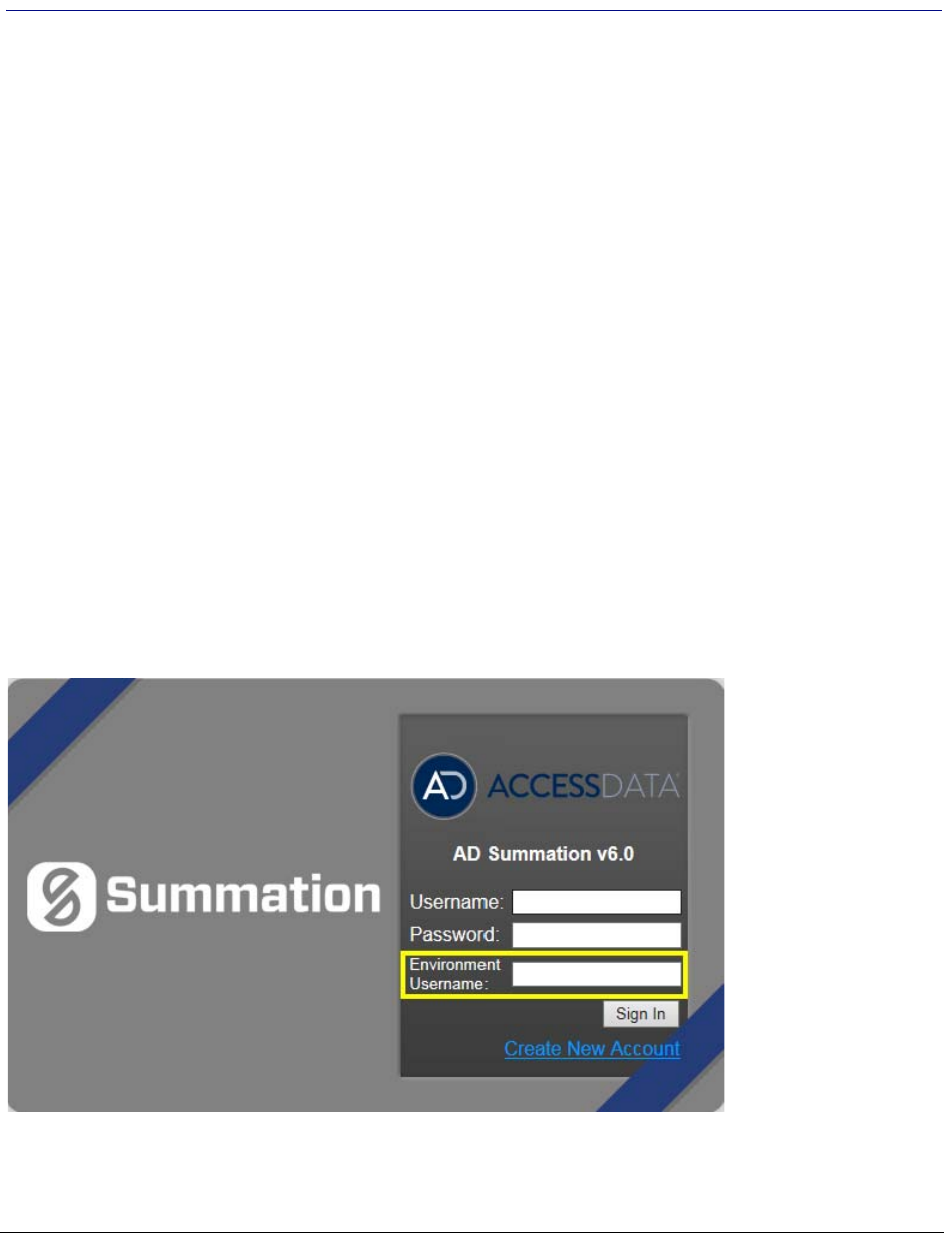
Administrating a Multi-Tenant Environment Enabling the Multi-tenant Login Page | 344
Chapter 34
Administrating a Multi-Tenant Environment
Application administrators do the following to configure and manage a multi-tenant environment:
-Enabling the Multi-tenant Login Page (page 344)
-Creating and Managing SubAdmins (page 345)
-Viewing and Managing SubAdmins, Users, and User Groups (page 348)
-Creating and Managing Projects in SubAdmin Environments (page 350)
-Administrating LawDrop™ (page 361)
Enabling the Multi-tenant Login Page
When users in a multi-tenant (SubAdmin) environment log in, they must include another piece of user data: an
Environment Username. The Environment Username is the name of the SubAdmin. In order for a user to enter
this value, the login page must be changed in include the Environment Username.
Important:
SubAdmins do not enter an Environment Username, only the users in the SubAdmin environment.
See Logging in as a SubAdmin on page 354.
Administrating a Multi-Tenant Environment Creating and Managing SubAdmins | 345
To enable the multi-tenant environment login page
1. On the server running the MAP component, browse to Program Files\AccessData\Map.
2. Edit the Web.config file.
3. Find the following line:
<add key="SelfSetupEnabled" value="false" />
4. Change the “false” value to “true”.
5. Save the Web.config file.
Creating and Managing SubAdmins
Creating SubAdmins
To create an segmented client environment, a SubAdmin must be created. Each SubAdmin has its own
environment.
SubAdmins are application users that have the Sub Administrator permission. The permission is granted using
an admin role. For general information about admin roles, see About Admin Roles and Permissions on page 49.
You can create and configure SubAdmins in the following ways:
Manually Creating and Configuring a SubAdmin
Only an application administrator can manually configure sub administrators. You configure sub administrators
by completing the following process:
1. Create a role for sub administrators and then assign the Sub Administrator permission to that to role.
2. Create one or more users, and then associate the users to the sub administrator role.
3. (Optional) Create a user group for sub administrators and associate the user group to the role and
users.
For general information about admin roles, see About Admin Roles and Permissions on page 49.
For general information about user groups, see Configuring and Managing User Groups on page 65.
For general information about users, see Managing Users on page 57.
Method Description
Manually by application
administrator An application administrator can manually create an admin role with the Sub
Administrator permission and user accounts for the SubAdmins that are
associated to the SubAdmin role
See Manually Creating and Configuring a SubAdmin on page 345.
Automatically by “Self
Setup” You can enable an option so that on the Summation login page, a user can click
a New User link that will let them create their own SubAdmin user account. This
account will automatically be linked to the SubAdmin role.
See Using SubAdmin Self Setup on page 347.

Administrating a Multi-Tenant Environment Creating and Managing SubAdmins | 346
To manually create a SubAdmin Role
1. Login as an application administrator.
2. Go to the Management page.
3. Click Admin Roles.
4. Verify that there is not already a SubAdmin role.
5. If no SubAdmin role exists, click Add.
6. Enter a name, such as SubAdmin, and description for the role.
7. Click OK.
8. Select the new role.
9. Click the Features tab.
10. Select the Sub Administrator radio button.
11. Click Save.
(Optional) To manually create a SubAdmin User Group
1. On the Management page, click User Groups.
2. Click Add.
3. Enter a name and description for the group.
4. Click OK.
5. Associate the group to the new SubAdmin role.
To manually create a SubAdmin User
1. On the Management page, click Users.
2. Click Add.
3. Enter the user details.
4. Click OK.
5. Associate the user to either the user group or new SubAdmin role.
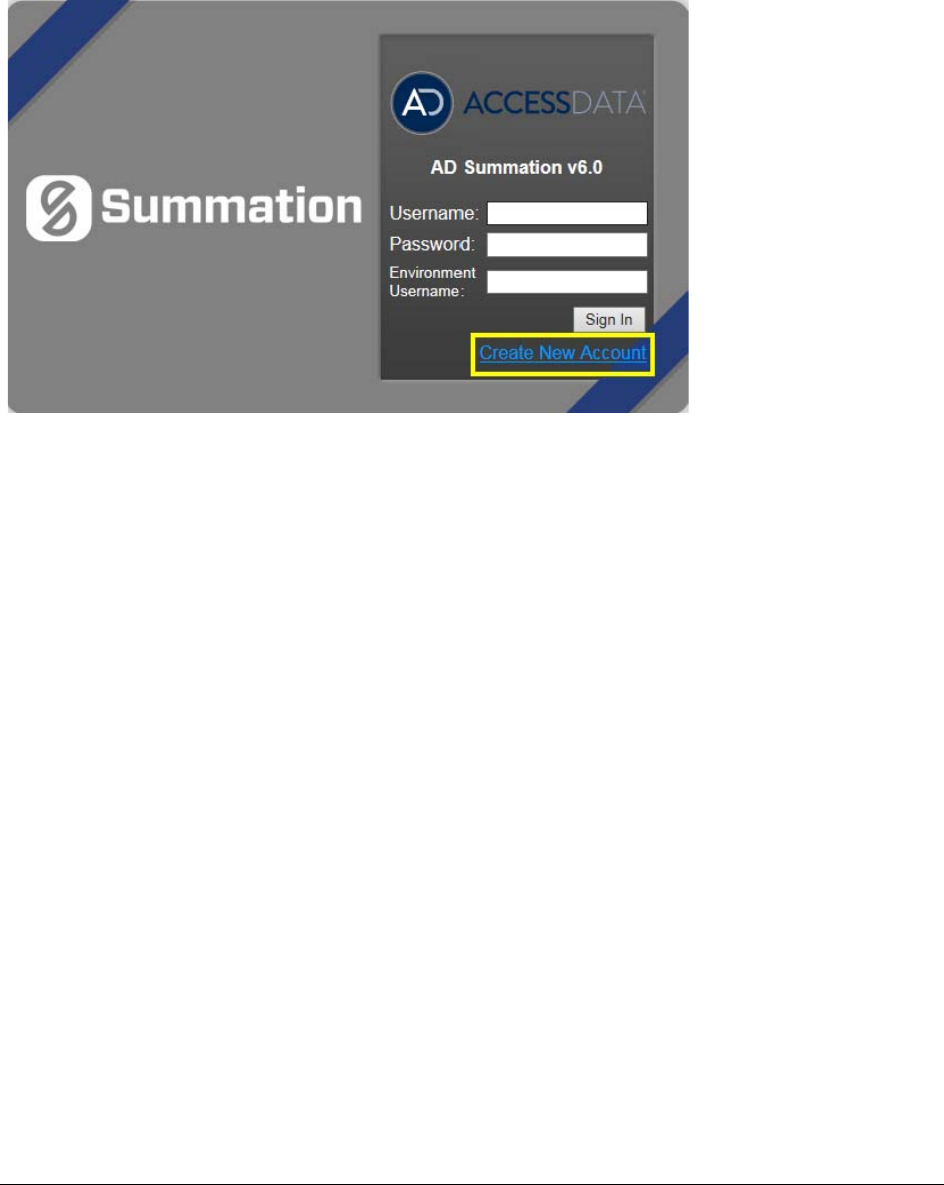
Administrating a Multi-Tenant Environment Creating and Managing SubAdmins | 347
Using SubAdmin Self Setup
To ease the required management tasks for application administrators, you can enable an option so that on the
Summation login page, a user can click a New User link that will let them create their own SubAdmin user
account.
Using this option as a hosting provider, you simply provide the URL of your Summation server to a client and
they create their own SubAdmin user. They can then log in and start managing their environment without any
configuration effort on your part.
The new account will automatically be linked to the SubAdmin role. Note the following scenarios:
-If you previously created an admin role for SubAdmins with the Sub Administrator permission, the user
will automatically be linked to that role.
-If you have not manually created an admin role for SubAdmins, the application will create an admin role
named Sub Admin and will assign the user to it.
The self setup feature requires that the multi-tenant login page be first enabled.
See Enabling the Multi-tenant Login Page on page 344.
A user can then access the self setup feature.
Creating Your Own SubAdmin Account (page 353)
Administrating a Multi-Tenant Environment Viewing and Managing SubAdmins, Users, and User Groups | 348
Viewing and Managing SubAdmins, Users, and User
Groups
As a hosting provider, you can do the following:
-View a list of the SubAdmin users that have been created
-View a list of the users and user groups that SubAdmins have created
-Manage SubAdmins and users in their environments
Viewing SubAdmins and SubAdmin Users
You can use filters and columns in the Users list to view which application users are SubAdmins and which users
are associated to SubAdmins.
For general information about using columns and filters, see About Content in Lists and Grids (page 38)
To view a list of SubAdmins and SubAdmin users
1. Log in as an application administrator.
2. Open the Management page.
3. Click the Users tab.
4. To use columns, do the following:
4a. Click Columns.
4b. Click Add for the Is_SubAdmin and Associated SubAdmin columns.
4c. (Optional) move these columns up higher in the list.
4d. Click OK.
4e. Click Refresh.
4f. View the Is_SubAdmin column.
For any SubAdmin, the value will be True.
4g. View the Associated SubAdmin column.
For any user created by a SubAdmin, the value will be the SubAdmin.
4h. You can sort on the columns to group items
5. To use the Is_SubAdmin filter, do the following:
5a. Click Filter Options.
5b. In the Property drop-down, select Is_SubAdmin.
5c. In the Value drop-down, select True.
5d. Click Apply.
All users who are SubAdmins are displayed.
6. To use the Associated SubAdmin filter, do the following:
6a. Click Filter Options.
6b. In the Property drop-down, select Associated SubAdmin.
6c. In the Operator drop-down, select an option, such as Contains.
6d. In the Value drop-down, enter a value, such as sub.

Administrating a Multi-Tenant Environment Viewing and Managing SubAdmins, Users, and User Groups | 349
6e. Click Apply.
All SubAdmin users that fit the filter are displayed.
Viewing SubAdmin User Groups
You can use filters and columns in the User Groups list to view which user groups are associated to SubAdmins.
For general information about using columns and filters, see About Content in Lists and Grids on page 38.
To view a list of SubAdmin user groups
1. Log in as an application administrator.
2. Open the Management page.
3. Click the User Groups tab.
4. Use the same procedures for viewing SubAdmin users above.
Managing SubAdmins, Users and User Groups
Application administrators can perform all user management tasks on SubAdmins. SubAdmins cannot manage
their own accounts.
Application administrators and SubAdmins can perform all user management tasks on SubAdmin users and
user groups.
SubAdmins cannot manage Admin Roles.
For information on managing user accounts, see Managing Users on page 57.

Administrating a Multi-Tenant Environment Creating and Managing Projects in SubAdmin Environments | 350
Creating and Managing Projects in SubAdmin
Environments
Creating Projects in SubAdmin Environments
An application administrator can create a project and assign it to a SubAdmin. This is an optional task as
SubAdmins can create their own projects.
See About Creating Projects in SubAdmin Environments on page 343.
This action creates the project in the SubAdmin’s environment.
See About Project Folder Paths in a SubAdmin environment on page 343.
Creating a project and assigning it to a SubAdmin
1. On the Home page, click Create New Project.
2. Enter a name and description for the project.
3. Enter other project details as needed.
4. In the Sub Administrator drop-down, select a SubAdmin that you want to assign the project to.
5. Click Create Project.
Important:
It is possible to create a project without assigning a SubAdmin in the wizard and then later configure
the project’s permissions to grant access to a SubAdmin.
This is not recommended.
The project will not appear as an associated project in columns and filters. See Viewing Projects
Associated to SubAdmins on page 350.
Also, it is not created within the environment folder structure.
Managing Projects in SubAdmin Environments
Viewing Projects Associated to SubAdmins
You can use filters and columns in the Projects list to view which projects are associated with SubAdmins. An
associated project is one of the following:
-A project that was created by a SubAdmin
-A project that was created by an administrator and assigned to the SubAdmin in the Create New Project
wizard
For general information about using columns and filters, see About Content in Lists and Grids (page 38)
To view a list of projects associated with a SubAdmin
1. Log in as an application administrator.
2. Open the Home page.
3. To use columns, do the following:
3a. Click Columns.
3b. Click Add for the Associated SubAdmin column.

Administrating a Multi-Tenant Environment Creating and Managing Projects in SubAdmin Environments | 351
3c. (Optional) move the column up higher in the list.
3d. Click OK.
3e. Click Refresh.
3f. View the Associated SubAdmin column.
For any project associated to a SubAdmin, the value will be the SubAdmin.
3g. You can sort on the columns to group items
4. To use the Associated SubAdmin filter, do the following:
4a. Click Filter Options.
4b. In the Property drop-down, select Associated SubAdmin.
4c. In the Operator drop-down, select an option, such as Contains.
4d. In the Value drop-down, enter a value, such as sub.
4e. Click Apply.
All SubAdmin users that fit the filter are displayed.
Managing Projects Associated with SubAdmins
Application administrators can perform all project management tasks on projects associated with SubAdmins.
SubAdmins can perform most all project management tasks on projects in their environment. For a list of
limitations, see About Application Features Not Available in SubAdmin Environments on page 341.
For general information on managing projects, see Introduction to Project Management on page 148.

Using the Multi-Tenant Environment About Using the Multi-Tenant Environment | 352
Chapter 35
Using the Multi-Tenant Environment
About Using the Multi-Tenant Environment
If your organization is using the Summation multi-tenant environment, there are a few unique aspects about
using Summation.
Generally, two type of users use the Summation multi-tenant environment:
-SubAdmins - Those who administer a client’s environment
-Environment User - Those who log in to the Summation console as reviewers and other roles
This chapter is divided into the following sections:
Performing SubAdmin Tasks (page 352)
Performing User Tasks (page 356)
Performing SubAdmin Tasks
Accessing the Summation Web-Based Console
You will be provided a URL by which to open the Summation console. You will need a username and password.
See Getting Started on page 22.
Depending on the environment do one of the following:
-You may be given a username and password for your SubAdmin account by which to log in. If this is the
case, continue to Logging in as a SubAdmin on page 354
-You may be instructed to create you own SubAdmin account. If this is the case, continue to Creating Your
Own SubAdmin Account on page 353
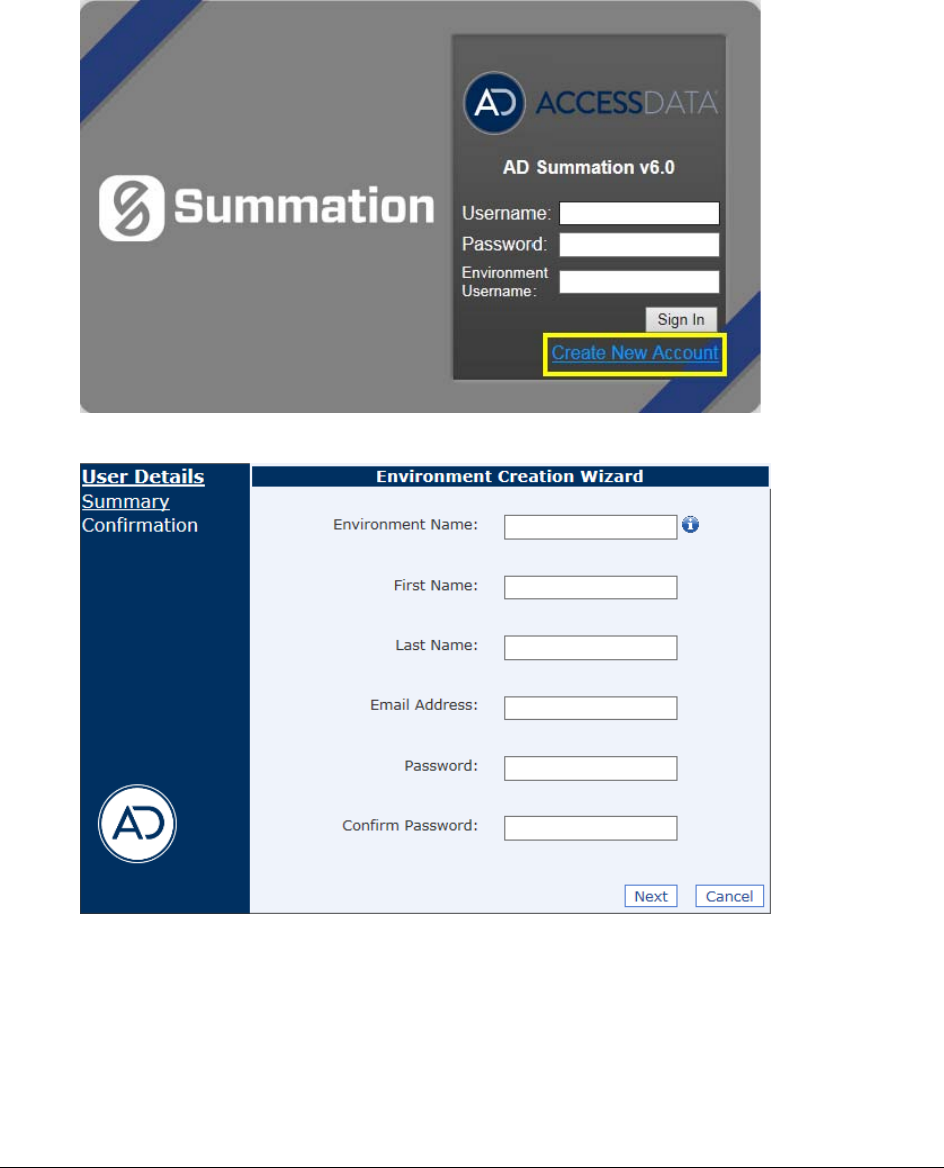
Using the Multi-Tenant Environment Performing SubAdmin Tasks | 353
Creating Your Own SubAdmin Account
In some environments, you may be instructed to create your own SubAdmin account.
To create your own SubAdmin account
1. In Internet Explorer, access the URL that was given to you.
2. On the login page, click Create New Account.
3. On the User Creation Wizard, enter the following:
-Username
-First name
-Last name
-email address
-A valid password
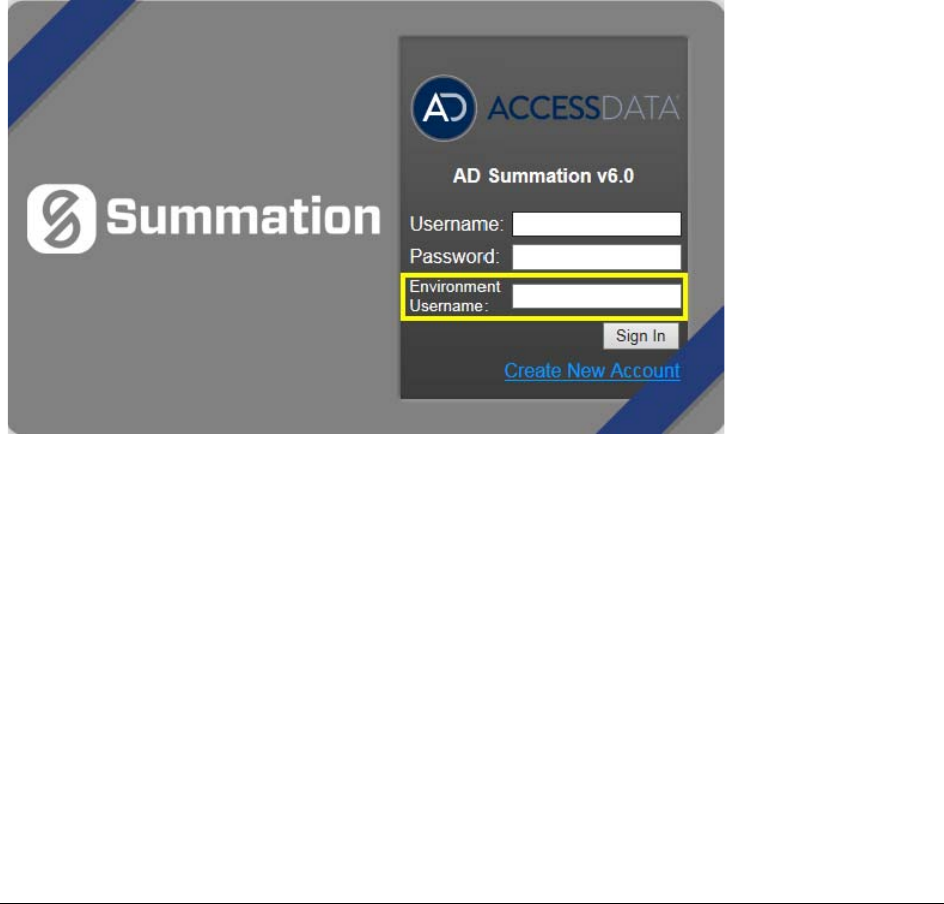
Using the Multi-Tenant Environment Performing SubAdmin Tasks | 354
4. Click Next.
5. Verify the information to make sure it is correct.
6. Store the credentials in a safe place. You will need these credentials each time you use the application.
7. Click Save.
8. Log in as the SubAdmin.
Logging in as a SubAdmin
Generally, SubAdmins log in and access the application the same as any other user.
See Getting Started on page 22.
SubAdmins do not enter an Environment Username. This value is only used for the users in your SubAdmin
environment.
See Users Logging into a Summation SubAdmin Environment on page 356.
Introduction to the SubAdmin’s User Interface
As a SubAdmin, you can view and user the Summation Console like any other user.
See Introducing the Web Console on page 30.
However, you are limited in accessing some areas of the application.
See About Application Features Not Available in SubAdmin Environments on page 341.

Using the Multi-Tenant Environment Performing SubAdmin Tasks | 355
SubAdmins Creating Users
SubAdmins can create users just like any other user with the proper permissions.
However, you can only see the users that are in your environment.
See About the Users Tab on page 52.
See Managing Users on page 57.
SubAdmins Creating User Groups
SubAdmins can create user groups just like any other user with the proper permissions.
However, you can only see the user groups that are in your environment. Also, you cannot associate a user
group to an admin role.
See Configuring and Managing User Groups on page 65.
SubAdmins Creating and Managing Projects
SubAdmins can generally create and manage project just like any other user with the proper permissions.
However, come project creation and management options are not available in a SubAdmin environment.
See About Application Features Not Available in SubAdmin Environments on page 341.
See Creating Projects on page 164.
SubAdmin Using LawDrop
For security purposes, users in a SubAdmin environment cannot use the application to browse to and access the
file system on the Summation server environment. A new interface for managing data has been developed
called AccessData LawDrop™. LawDrop provides an interface for organizing data, adding data to projects, and
viewing exported data.
See Understanding LawDrop™ on page 359.
See Using LawDrop™ on page 366.
SubAdmin Performing Exports
When you perform an export using a SubAdmin environment, you cannot access or provide a path to the files
system. You must save the export to LawDrop.
See Exporting Files to LawDrop on page 381.
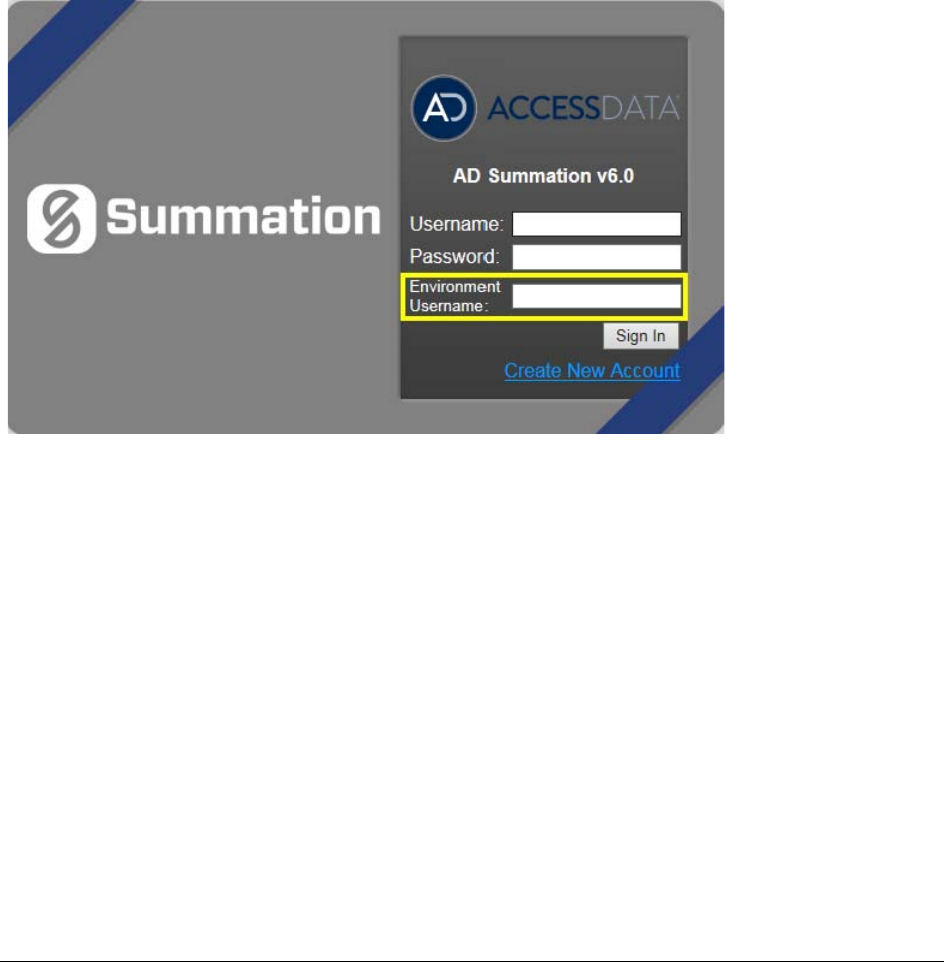
Using the Multi-Tenant Environment Performing User Tasks | 356
Performing User Tasks
Users Logging into a Summation SubAdmin Environment
Generally, you can login and access the application the same as any other user.
See Getting Started on page 22.
However, there is one exception. Users in a SubAdmin environment must include additional information when
logging in. They must also provide the Environment Username. This value is the name of the SubAdmin of your
environment.
For example, the SubAdmin name may be JSmith. The username may be BRoberts. You would enter BRoberts
as the Username and JSmith as the Environment Username
Using the Home Page
You will see any projects that you have been given permissions for.
See Introducing the Web Console on page 30.
Using Review
You can go into review for any projects that they have been given permissions for.
See Introduction to Project Review on page 19.


Understanding LawDrop™ About LawDrop | 359
Chapter 36
Understanding LawDrop™
About LawDrop
You can use LawDrop™ as an interface for application users to manage project evidence files without accessing
the file system on the Summation or eDiscovery server. This is beneficial for letting users who don’t have
permissions to access the server’s file system to add files to a project or access exported files. For example,
LawDrop is the only method to perform several tasks when using Summation in a hosted, multi-tenant
environment.

Understanding LawDrop™ About LawDrop | 360
You can use LawDrop to do the following:
Features of LawDrop
Feature Description
Upload files to the
Summation or
eDiscovery Server
You can use LawDrop to drag, drop, and upload files to the server.
You can upload files to two different types of locations in LawDrop
My DropSpace You can upload files to a location called My DropSpace. This is
a general area where you can upload, manage, and organize
evidence files.
Project Intake
Folders For every project in the system, LawDrop has a project Intake
folder. This folder acts as a staging area for files that you want
to add to a project.
When you have identified files that you want to add to a
project, you can copy them from the DropSpace to the Intake
folder for that project. (You can also upload files directly to an
Intake folder.)
From the project Intake folder, users with permissions can add
files as evidence to that project.
Share your uploaded
files with other users The person who uploads files in LawDrop is considered the owner of those files. By
default, when you use LawDrop, you can only see the files that you are the owner of.
However, you can share your uploaded files so that other users can access them as
well.
Where users see files that have been shared with them depends on where the files
were uploaded.
Sharing from My
DropSpace Each user has their own MyDropSpace folder.
When you share files from your MyDropSpace with another
application user, they can see those files in a LawDrop folder
called Shared with me.
Sharing from a
project Intake
folder
When you share files from a project Intake folder or sub-folder,
other users with permissions to that project can them see them
in the same Intake folder.
For example, a user may have permissions to add a file to an
Intake folder but not to add and process it in the project. Other
users with enhanced permissions can add and process shared
files in the project.
Sharing files with
external users You can also share files to people that are not application
users by specifying their email address. These external users
will receive an email with an HTML lick to the shared files.
Note: Currently, you cannot share files from a project Intake
folder with external users.
Download files You can download the files that you can access in LawDrop to your own computer.
Use LawDrop as a
destination when
exporting files
When performing an export, you can select LawDrop as the destination. After the
export, users with proper permissions can access the exported files within LawDrop
without having access to the server’s file system. Exported files are located in a
project’s Exports folder. Users can download the exported files to their own
computers.

Administrating LawDrop™ About Administrating LawDrop | 361
Chapter 37
Administrating LawDrop™
About Administrating LawDrop
About the LawDrop File Storage Folder Structure
There are two locations files to store files that are uploaded using LawDrop:
LawDrop file storage folder structure
Destination Description
DropSpace When users use LawDrop to upload files, they may upload files to a DropSpace
folder. An Administrator creates and specifies a share path to be used as the
parent DropSpace folder.
See Configuring the System for Using LawDrop on page 362.
When a user first accesses LawDrop, a sub-folder (with their user id) is created
under the parent DropSpace folder.
When a user uses LawDrop to upload files to the DropSpace, they are uploaded
here. Using LawDrop, users may create sub-folders under here.
For example:
\\Server\LawDrop_DropSpace_Share\dropspace\user ID\user-created
subfolders
Project intake folder Whenever a project is created, a folder for that project is created (using a guid as
the folder name) under the share path where you specified the project folder to
be stored.
See Project Folder Path on page 165.
See Default Evidence Folder Options on page 77.
Under that project guid folder, a lawdrop folder is created.
For example:
\\Server\Projects_share\ project guid\lawdrop
Under the lawdrop folder are two sub-folders:
-Intake - When a user uses LawDrop to upload files to a project folder, they
are uploaded here. Using LawDrop, users may create sub-folders under
here.
See Uploading and Managing Files in the File Upload Queue on page 371.
-Export - When you perform an export and select LawDrop as the destination,
the exported files are placed here.
See Viewing Exported Files in LawDrop on page 381.
For example:
\\Server\Projects_share\ project guid\lawdrop\export
\\Server\Projects_share\ project guid\lawdrop\intake

Administrating LawDrop™ Configuring the System for Using LawDrop | 362
If you are a system administrator, you can use the file system to view files that have been uploaded or exported
using LawDrop.
W A R N I N G:
Do not attempt to move or delete uploaded files using the files system.without contacting
Technical Support. Use the LawDrop interface to copy, move, or delete uploaded files.
Configuring the System for Using LawDrop
You must perform the following administrative tasks before using LawDrop:
-Configuring the LawDrop DropSpace Folder on page 362
-Configuring the System To Share LawDrop Files with External Users on page 363
Configuring the LawDrop DropSpace Folder
Before using LawDrop, an administrator must configure the file location to be used by LawDrop for the
DropSpace folder.
If the file location is not set, when any user clicks the LawDrop tab, they will see the following error:
The default path for user’s DropSpace folder is not set. Please the default path or contact your System
Administrator.
To configure the location of the DropSpace folder, you designate a folder just like you designate default project
data folders for your projects and job data.
See Default Evidence Folder Options on page 77.
To configure the LawDrop DropSpace path
1. Identify a location where you have adequate space to store all files that may be uploaded to the
DropSpace.
This location my be on the same or different drive as the Project Folder or Job Data paths.
2. Create a share that you will point to in the interface.
For example, if you use the following share path for your project folder:
\\Server\share\Projects
You may want to create the following share path:
\\Server\share\LawDrop_DropSpace.
3. As an administrator, log into the console.
4. Open the Management page.
5. Click System Configuration.
6. Click Project Defaults.
7. Enter the path for the LawDrop DropSpace Path.
8. Click the check mark to verify the path.
9. Click Save.
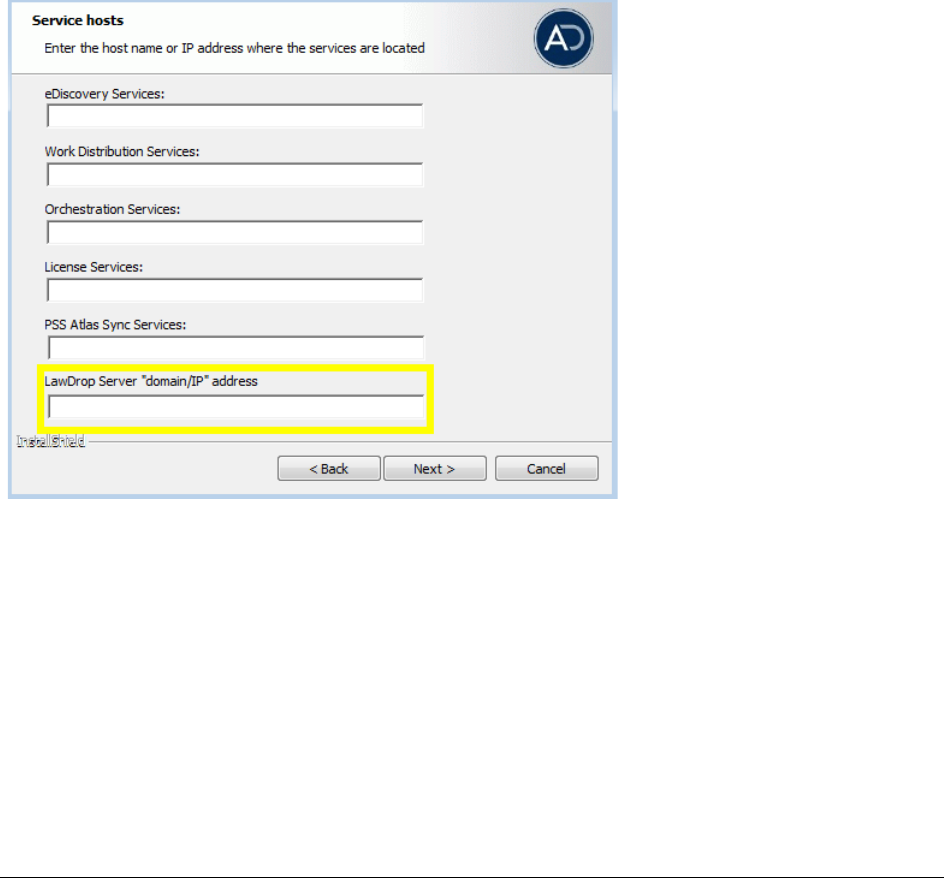
Administrating LawDrop™ Configuring the System for Using LawDrop | 363
Configuring the System To Share LawDrop Files with External Users
It is possible to share files and folders with users that are external to the application. This is done by providing
the email address of the external user in the Share dialog. An email is then sent to the external user and there is
an HTML link to the shared files.
In order for this to work properly, the following must be configured properly:
-The Email Server must be configured correctly. This allows the application to send emails.
See Configuring the Email Notification Server on page 74.
-The location of the LawDrop server must be configured correctly in the
AdgWindowsServiceHost.exe.config file.
See Configuring the AdgWindowsServiceHost.exe.config File below.
Configuring the AdgWindowsServiceHost.exe.config File
When you installed the application, you had the opportunity to configure the LawDrop Server domain/IP address.
By default, a value of “https://localhost/adg/map/web” is used.
In order for the external sharing to work, the “localhost” value must be changed to the actual server name or IP
address od the server running MAP.
If you did not change the localhost setting to the actual server name or IP address, you may change the setting
in a config file.
To verify or change the setting
1. On the server running MAP, navigate to and open in a text editor the following file:
Program Files\AccessData\Common\FTK\Business Services\AdgWindowsServiceHost.exe.config

Administrating LawDrop™ Configuring the System for Using LawDrop | 364
2. In the config file, find “LawboxFileDownloadUrlBase”.
<add key="LawboxFileDownloadUrlBase" value="https://localhost/ADG.MAP.Web...
3. Verify or change the value localhost to your server domain name or IP address of the server running
MAP.
For example, value="https://10.10.128.220/ADG.MAP.Web...
4. If you change the value, in the computer Services, you must restart the AccessData Business Services
Common.
Troubleshooting Sharing with External Users
-When you share a file or folder with an external user, the user should get an email from the application
server entitled New LawDrop Share.
If the user never receives the email, verify that email notifications for the application server are
working.
See Configuring the Email Notification Server on page 74.
You can try other email notifications, such as LitHolds or other email notification features.
-In the email, there is a link to View file.
If the link does not work, hover your mouse over the View file link and look at the URL.
If the link shows a URL with localhost, when you click the link, you will get the following:

Administrating LawDrop™ Configuring the System for Using LawDrop | 365
To fix this, you must do the following:
1. Follow the steps listed in Configuring the AdgWindowsServiceHost.exe.config File on page 363
2. Re-send the email through the Share dialog.
The link in the email must contain the updated path that is not localhost.
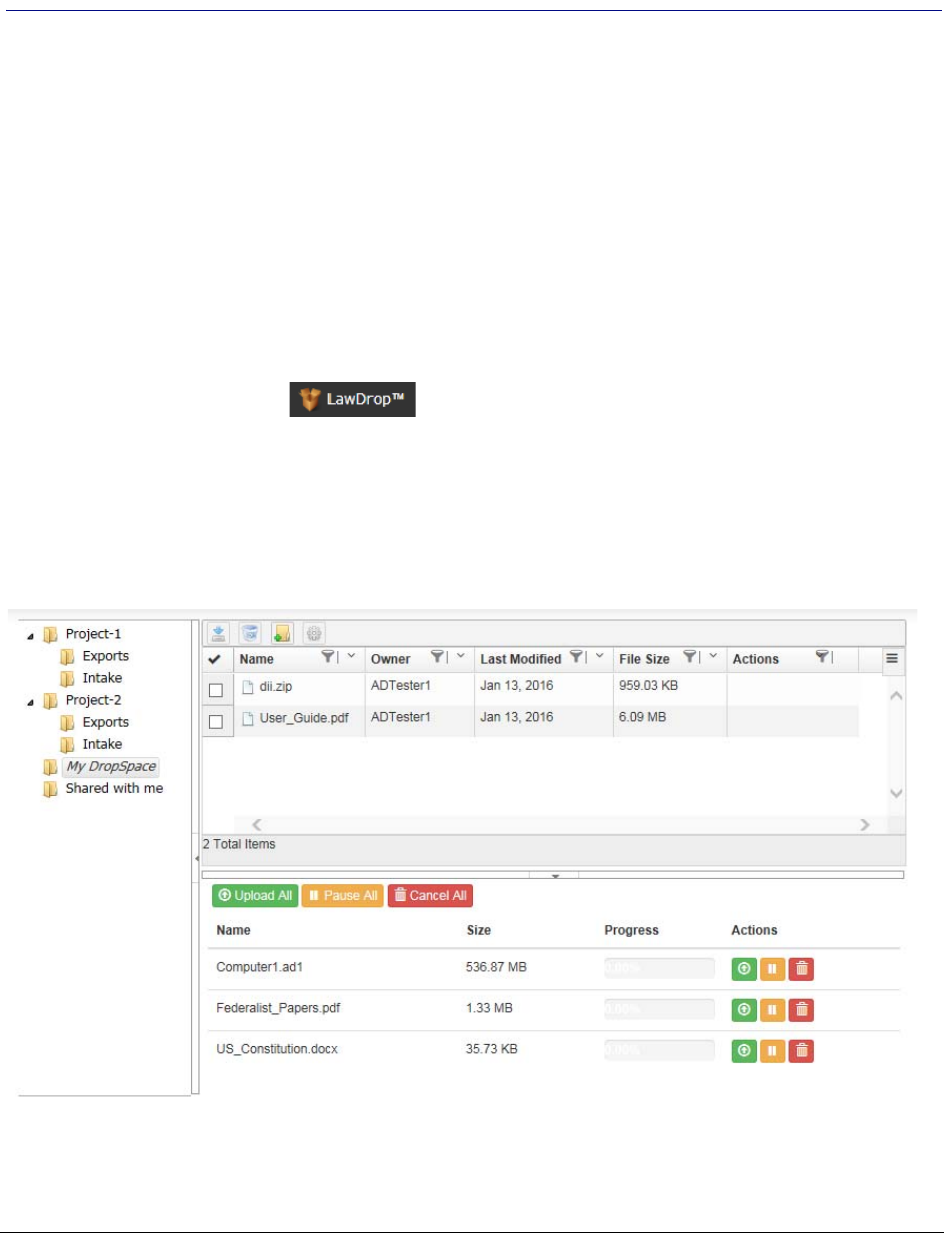
Using LawDrop™ Getting Started with LawDrop | 366
Chapter 38
Using LawDrop™
Getting Started with LawDrop
All application users can access the LawDrop page.
To access LawDrop
1. Log in to the application with your credentials.
2. Click the LawDrop™ tab .
If LawDrop is not configured properly, you will see the following error:
The default path for user’s DropSpace folder is not set. Please the default path or contact your System
Administrator.
See Configuring the System for Using LawDrop.
3. The LawDrop page is displayed.

Using LawDrop™ Getting Started with LawDrop | 367
About the LawDrop Page
The LawDrop page has several elements.
About the Folder List
On the left side of the LawDrop is the folder list. In the folder list, all users see the following folders:
-My DropSpace - This is where you can upload and organize files.
You can create sub-folders under this folder. This is a private folder. You only see the files that you
uploaded in the My DropSpace folder. You can share files that you have uploaded with other users.
-Shared with me - If other users share files from their My DropSpace folder with you, this is where you see
those files.
You cannot create sub-folders under this folder, but if other users have created sub-folders for their
shared files, you will see them.
You cannot upload or copy files to this folder.
In the folder list, you may also see the following:
-Project folders - If you have permissions to see any projects on the Home page, you will also see a folder
for each of those projects in LawDrop.
Under each project folder are two sub-folders:
Intake - You can upload and organize files for a project in the Intake folder.
You can create sub-folders under this folder.
Every file you upload to an Intake folder is private unless you share it.
See About Sharing Files and Folders on page 376.
If another user has shared a file from a project Intake folder with you, you will see it in the same
folder.
If you have project administrator permissions, you can add and process files from an Intake folder into
a project. (You cannot add files to a project directly from the My DropSpace folder. You must first copy
it to a project Intake folder.)
See Adding Evidence to Projects Using LawDrop on page 379.
Exports - If an export is performed in a project and saved to LawDrop, they are saved here. You can
see and download exported files.
See Exporting Files to LawDrop on page 381.
Important: Only those who have permissions to view export sets and production sets in Review can
see the exported files in LawDrop. (For example, Admin and Admin Reviewer, or if you created the
export set).
You cannot upload files to the project Exports folder.
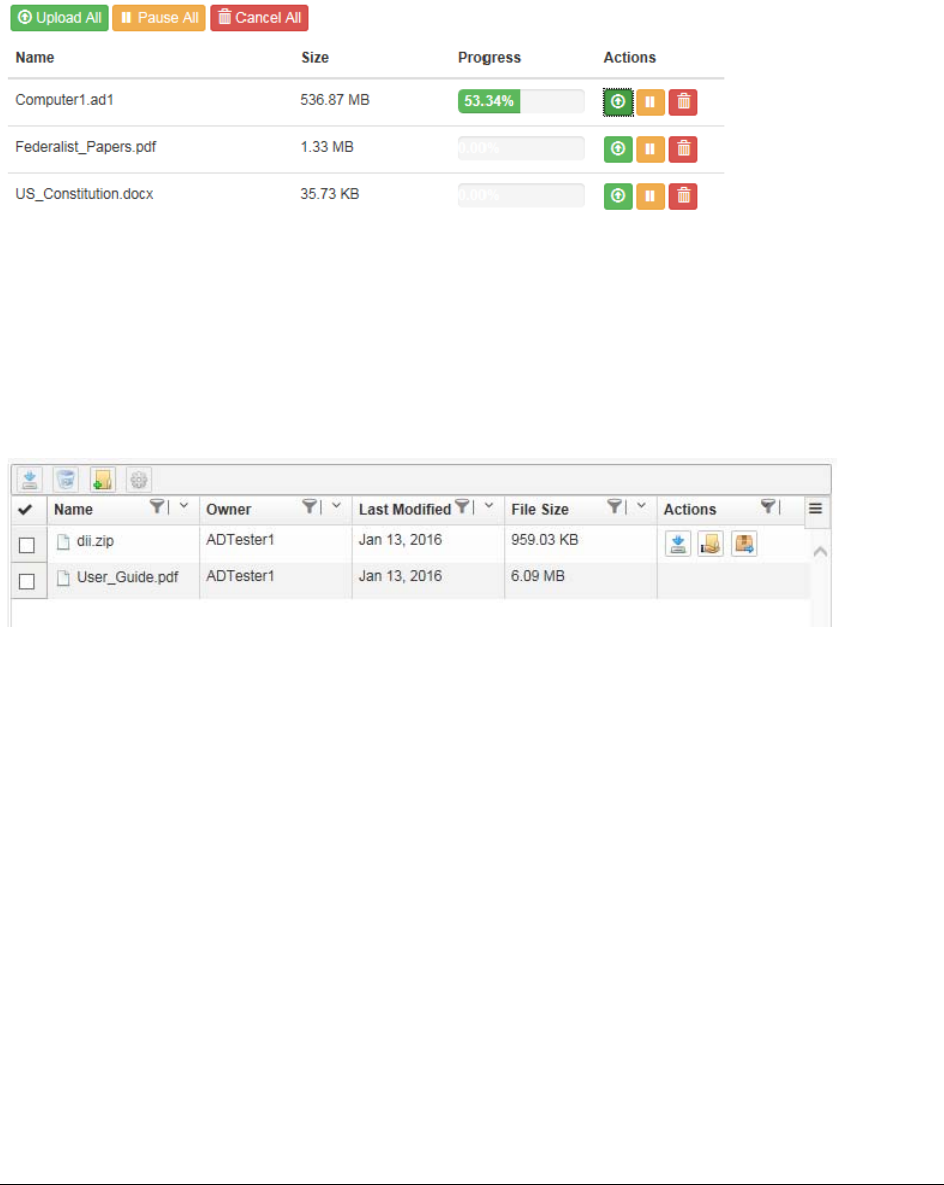
Using LawDrop™ Getting Started with LawDrop | 368
About the File Queue
You can add files to LawDrop by dragging and dropping files onto the LawDrop page. When you drag a file to
LawDrop, the file queue appears at the bottom of the LawDrop page. The file queue display a list files and their
upload status. You can show or hide the file queue.
See Dropping and Uploading Files to LawDrop on page 370.
See Viewing and Managing Uploaded Files on page 372.
About the Item List
After you have uploaded files to LawDrop, they are displayed in the Item List.
The item list displays the items that are in the currently selected folder in the folder list. You can also perform
actions on folders and files.
See Using the Item List Grid on page 372.
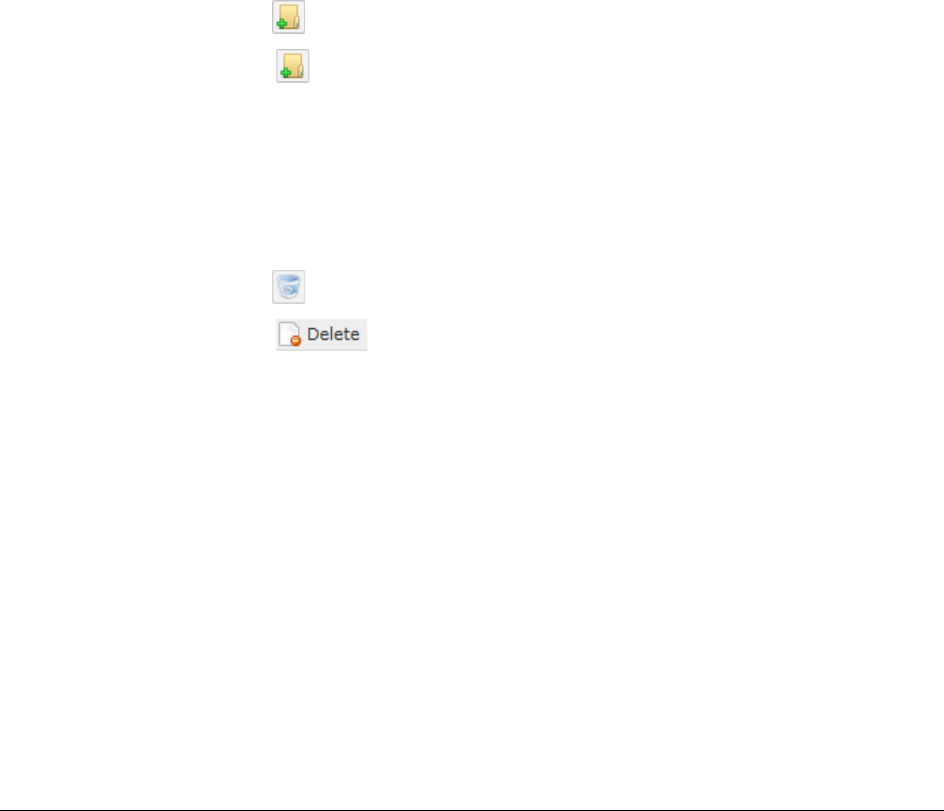
Using LawDrop™ Creating and Deleting Sub-Folders in LawDrop | 369
Creating and Deleting Sub-Folders in LawDrop
When you add files to LawDrop, you can upload them to one of the following:
-The My DropSpace folder
-A project Intake folder (if you have permissions to the project)
To help organize files that you upload, you can create sub-folders in either location. You can create multiple
levels of sub-folders.
You can upload files to the root of the folder or to a sub-folder. You can also copy and move files from one folder
or sub-folder to another.
See Moving and Copying Uploaded Items on page 373.
You can also delete sub-folders that you create in the My DropSpace folder.
To create a sub-folder
1. Open LawDrop.
2. In the folder list, click a folder, such as My DropSpace or a project Intake folder.
3. Do one of the following:
-In the tool bar, click New Folder.
-Right-click and click New Folder.
4. Enter a folder name.
5. Click Create.
To delete a sub-folder
1. In the My DropSpace folder list, click the sub folder that you want to delete.
2. Do one of the following:
-In the tool bar, click Delete.
-Right-click and click .
3. Confirm the deletion.

Using LawDrop™ Dropping and Uploading Files to LawDrop | 370
Dropping and Uploading Files to LawDrop
About Dropping and Uploading Files
You can add files to LawDrop by dragging and dropping files into a valid folder in LawDrop. When uploading files
to LawDrop, files are uploaded using HTML. There are no set limits to the size of uploads, however,
performance will be based on available bandwidth, network traffic, and the size of files.
You can upload files to the following LawDrop folders:
-My DropSpace and its sub-folders
-A project Intake folder that you have permissions for and its sub-folders
When you attempt to drop files to a LawDrop folder, if the folder is a valid folder, the color of the boundary turns
green. If it is an invalid folder, it does not turn green. For example, invalid folders include the Shared with me
folder, the root the project folder, and project Exports folder.
Uploading files is a two-step process:
1. You drop files onto a valid folder and the files are placed in the file upload queue.
2. You upload files from the queue into the folder.
During the upload, one file is uploaded at a time. File data is chunked into 1 MB chunks, and four chunks are
uploaded at a time. The chunks are uploaded to the server, then when the chunks are complete, they are saved
as the original file in the designated folder. If you lose your connection to the server during the upload, you
simply drop the file again to the queue and upload it. However, it will resume from previous spot when
connection was lost as it maintains the previous chunks that were uploaded.
About Dropping and Uploading Folders
Internet Explorer does not support dropping and uploading folders, only files. However, you may want to add and
process a complete folder using the Add Evidence Wizard. As a work-around, uploading a folder requires a four-
step process:
1. Create a .ZIP file of the folder that you want to upload.
2. Drag the .ZIP file onto a valid folder.
3. Upload the .ZIP file.
4. Use a LawDrop action to extract the .ZIP into a folder.
See Action Icons on page 375.
Dropping Files into the File Upload Queue
Important:
As a best practice, upload files to the My DropSpace folder and then copy files to a project Intake
folder
To drop files into the File Upload Queue
1. Open a File Explorer window with the files that you want to upload.
2. In the LawDrop folder list, click the folder that you want to upload files to.
3. Click and drag the files onto the LawDrop page.
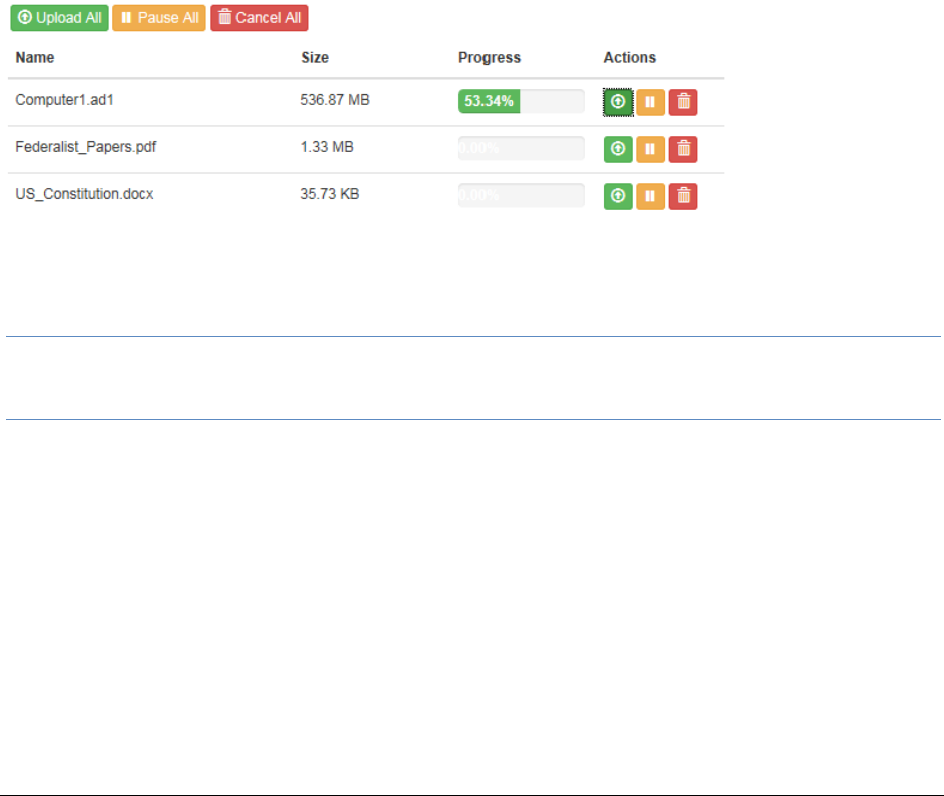
Using LawDrop™ Dropping and Uploading Files to LawDrop | 371
4. If the destination is a valid folder, the border around the item list turns green.
5. Release the mouse button to drop the files.
6. The file upload queue is opened and the files are displayed in the queue.
Uploading and Managing Files in the File Upload Queue
After you have dropped files in the file upload queue, you can do the following:
-Upload the files.
-Pause and resume the uploading of files
-Delete the files from the queue
You can perform actions on all files in the queue or on one individually.
While a file is uploading, an upload progress is displayed.
After a file has completed uploading, the file is removed from the queue.
If you upload the same file to a folder more than once, the later files will be appended with a (1), (2), and so on.
If files are currently uploading, and you click to go to a different a different place in the application, such as the
Home page, you are warned that leaving LawDrop will cancel all the uploads.
To upload files in the queue
Click either Upload All or the single upload icon.
Note: If you have more than one file in the queue and upload a single file, after that file is uploaded, all other
files in the queue will then be automatically uploaded. If you want to upload only one file, do the following:
click Pause All, then upload the single file.
To pause the uploading of files in the queue
Click either Pause All or the single pause icon.
The upload status indicator turns orange.
You can either resume the upload or cancel it.
To cancel or delete files in the queue
Click either Cancel All or the single delete icon.
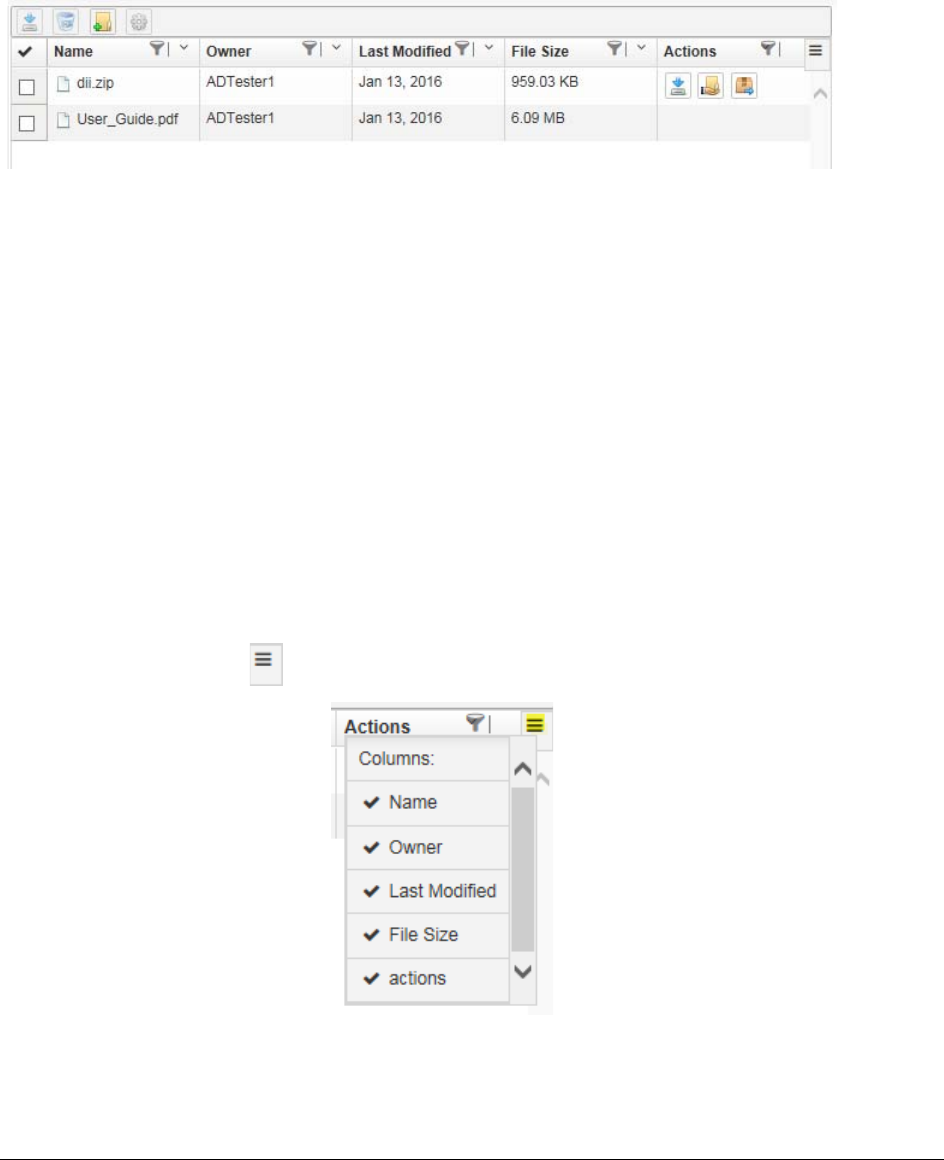
Using LawDrop™ Viewing and Managing Uploaded Files | 372
Viewing and Managing Uploaded Files
Using the Item List Grid
After you have uploaded files to LawDrop, they are displayed in the Item List.
The item list displays the items that are in the currently selected folder in the folder list.
By default, the item list displays the following columns:
-Name - The name of the file for folder.
-Owner - The login name of the user who uploaded the file.
-Last Modified - The date that the file was last modified.
-File Size - The size of the file.
-Actions - Displays icons for actions that you can perform on that one item.
You can do the following with the item list grid:
-Select which columns to display.
-Sort the item list by a column.
-Filter the item list by one or more columns. (Not currently working)
-See available actions for individual items in the list.
To select which columns to display
1. In the item list, click .
2. Select the columns to display .
To sort or filter the list by a column
Click the sort by or filter icon.
Important:
The filter action is currently no working.
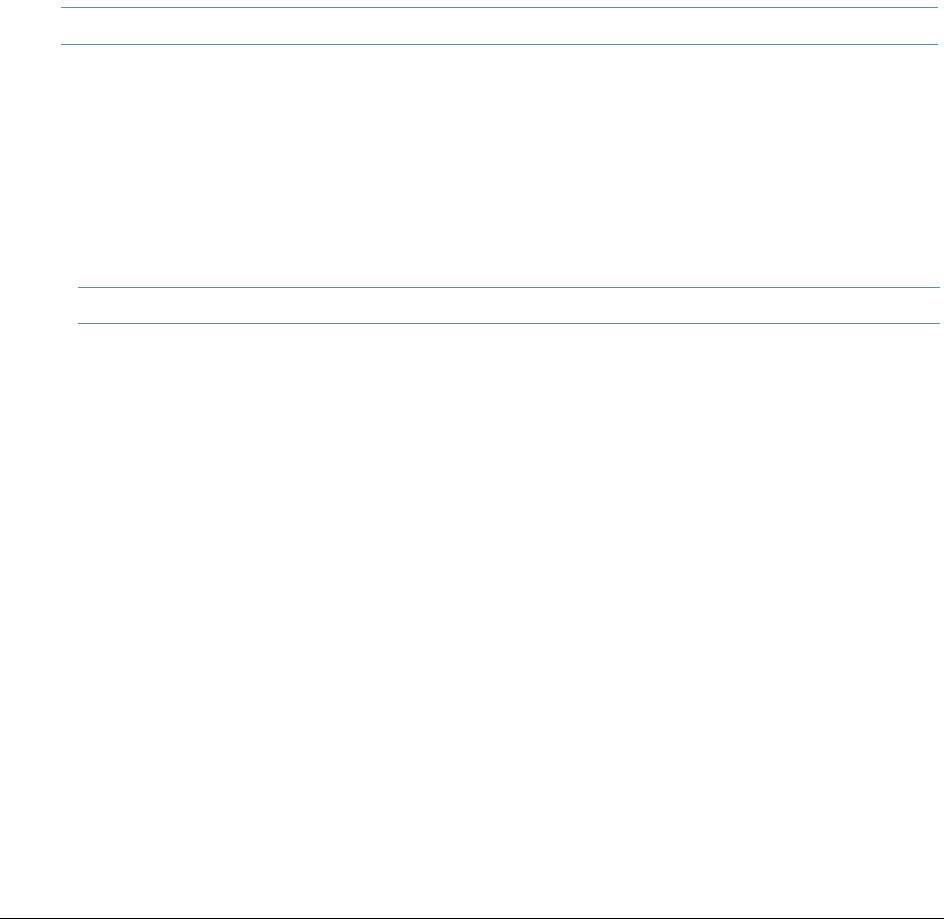
Using LawDrop™ Viewing and Managing Uploaded Files | 373
Moving and Copying Uploaded Items
You can use folders to organize uploaded files. You can also use a project Intake folder to organize or stage files
that you want to add to a project. See Adding Evidence to Projects Using LawDrop on page 379.
To help you organize files and folders, you can drag items from one folder to another. Depending on where you
are dragging items, the item will either be copied or moved:
Note the following scenarios:
-Within My DropSpace: If both the source and the destination of the drag is within My DropSpace, the file
or folder is moved.
Examples:
Suppose under your My DropSpace, you have a sub-folder named MDS1. If you have a file in your
My DropSpace and drag it to MDS1, it will move the file.
Suppose under your My DropSpace, you have two sub-folders named MDS1 and MDS2. If you have
a file in MDS1 and drag it to MDS2, it will move the file.
Note: If you move a file that has been shared, the sharing is removed.
-Outside of My DropSpace: If either the source or destination of the drag is outside of My DropSpace, the
file or folder is copied.
Examples:
If you drag a file in My DropSpace to a project Intake folder, the file will be copied.
If you drag a folder in Shared with me to a project Intake folder, the folder will be copied.
If you drag a folder in Shared with me to My DropSpace, the folder will be copied.
If you drag a file in a project Intake folder to a different folder, the file will be copied.
Note: If you drag and copy a file or folder from Shared with me, the copy will list you as the owner.
If you copy a file to a folder more than once, the later files will be appended with a (1), (2), and so on.
Note the following limitations:
-When dragging items to a project folder, you must drag it to the Intake sub-folder. You cannot drag items
to the root of a project folder or to a project’s Exports sub-folder.
-You cannot drag items from a project’s Exports sub-folder. (If needed you can download). See Viewing
Exported Files in LawDrop on page 381.
-You cannot drag items to the Shared with me folder. Items will only appear there after they have been
shared by another user. See Sharing Files and Folders on page 376.
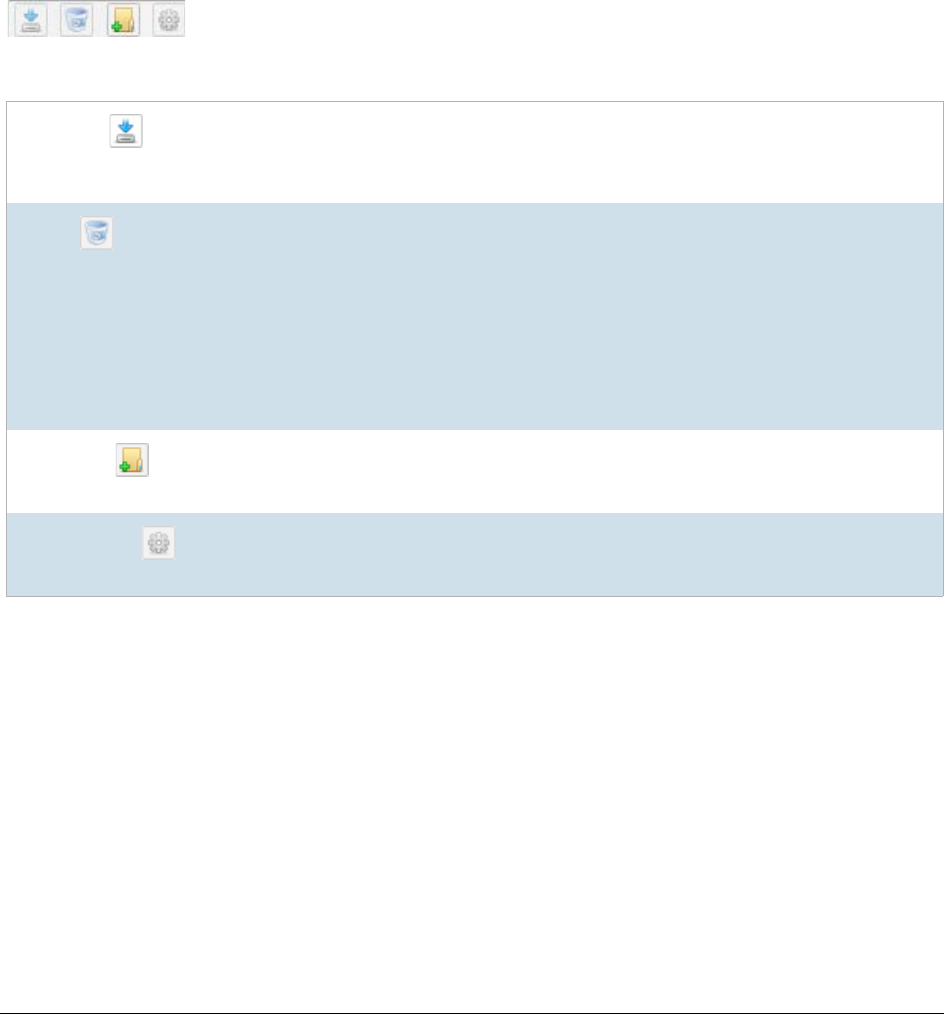
Using LawDrop™ Viewing and Managing Uploaded Files | 374
Performing Actions on LawDrop Items
Using the Tool Bar and Action Icons
You can use the action bar or action icons to perform actions on items in the list.
Tool Bar
Using the tool bar on the top of the action list, you can select one or more files or folders and then perform the
following actions: (some actions are not always available)
Law Drop Tool Bar
Download From within LawDrop, you cannot view the contents of files. For example, you
cannot view the contents of an uploaded DOCX file. To view a file, you can
download a file or folder then view it.
When you download a file or folder, they are downloaded as .ZIP files.
Delete In MyDropSpace, you can delete files that you uploaded or sub-folders that you
created.
You cannot delete the following files or folders:
-Items shared with you in the Shared with Me folder.
-Items shared with you in project Intake folders.
-Items in project Export folders.
See Creating and Deleting Sub-Folders in LawDrop on page 369.
Note: Files that have been processed or imported are no longer displayed in the
LawDrop project Intake folder.
New folder You can add sub-folders. (My DropSpace and project Intake folders only. Not
supported in Shared with Me or project Export folders.)
See Creating and Deleting Sub-Folders in LawDrop on page 369.
Add Evidence If you have project admin permissions you can select files or folders and add
them as evidence to a project. (Project Intake folders only.)
See Adding Evidence to Projects Using LawDrop on page 379.
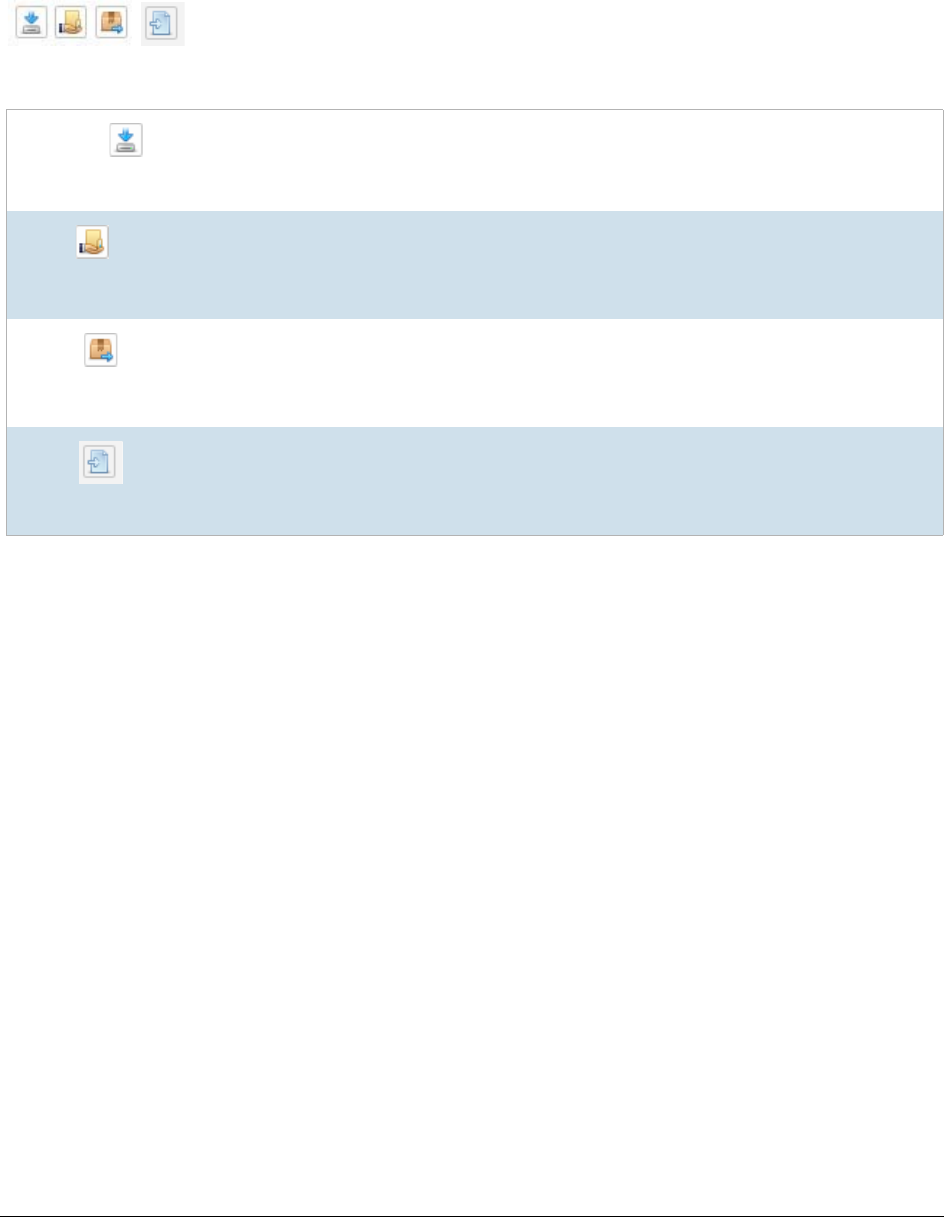
Using LawDrop™ Viewing and Managing Uploaded Files | 375
Action Icons
Using the action icons in the Actions column of the action list, you can perform the following actions on one
single folder or file at a time: (some actions are not always available)
Law Drop Action Icons
Download From within LawDrop, you cannot view the contents of files. For example, you
cannot view the contents of an uploaded DOCX file. To view a file, you can
download a file or folder then view it.
When you download a file or folder, they are downloaded as .ZIP files.
Share You can share a file or folder with another user.
(My DropSpace and project Intake folders only. Not supported in Shared with Me
or project Export folders.)
See Sharing Files and Folders on page 376.
Extract You can extract an uploaded zip file.
(My DropSpace and project Intake folders only. Not supported in Shared with Me
or project Export folders.)
See About Dropping and Uploading Folders on page 370.
Import You can import files as evidence. If you have project admin permissions you can
select files and add them as evidence using import.
(Project Intake folders only.)
See Importing Data on page 380.

Using LawDrop™ Sharing Files and Folders | 376
Sharing Files and Folders
About Sharing Files and Folders
Any files or folders that you upload are private. Even files that you upload to a project Intake folder are private to
you even if additional people are working in the same project. To let other people see and access files that you
upload, you can share them.
You can share individual files or folders. If you share folders, others will see all of the contents of that folder.
How and where others see items that you shared depend on multiple scenarios:
-Sharing with other Summation or eDiscovery application users:
Files and folders in My DropSpace
You can share items in your My DropSpace with any other application user.
When you share items in your My DropSpace folder, others see the items in their LawDrop Shared
with me folder.
When someone else share items in their My DropSpace folder with you, you see the files in your
Shared with me folder. If they have files under sub-folders, you will see them in the same
hierarchy.
Files and folders in project folders
If you share items in an Intake folder, others will see them in the same folder.
For others to see shared items in an Intake folder, they must be associated to the project. (There
are no specific project-level permissions required, just that they are associated to the project.)
You cannot share items in the Exports folder.
Instead, you can download the exported files. You can then re-upload them to your My DropSpace
and share them or you can make them available using a network share or email. See Viewing
Exported Files in LawDrop on page 381.
-Sharing with external users
My DropSpace - If you share items in your My DropSpace folder with an external user, the user
receives an email with a link to the files.
Project Folders - Not currently supported.
You can only share files that you uploaded (that you are the owner of). You cannot share files that were shared
with you. However, you can copy the item and then share the copied items.
You cannot delete files that were shared with you.
If you share a file or folder that is nested under other sub-folders, the person will see the hierarchy of folders.
However, they will only see files in the folder that was shared, not any folders higher.
Sharing Files and Folders with other Application Users
You can share one file or one sub-folder at a time.
To share files and folders with application users
1. Go to the LawDrop folder list and open the parent folder of the item that you want to share.
2. In the item list, for the sub-folder or file that you share, in the far right column, click the share icon.
Using LawDrop™ Sharing Files and Folders | 377
3. In the Shared options dialog, click in the Invite more people field.
4. Type the username of the person you want to share with.
Note the following:
-After typing the first three letters, any matches with application users will be displayed.
-If you are using a multi-tenant environment, type the name of your environment first, and then select
the username.
5. Click the name that you want to add.
6. Click Add.
The name is added to a list in the dialog. The first letter of the username is shown in a circle.
7. If desired, add additional user names.
8. When completed, click Done.
Sharing Files and Folders with External People
You can share files or folders with external people. To do this, you enter the person’s email address and the
person receives an email. The email includes a link to files on the server. When the person clicks the link, the
ZIP file with the shared items is automatically download.
You can share one file or one sub-folder at a time.
Note: You can only share files externally from your My DropSpace folder. Sharing from an InTake folder to an
external user is not supported.
There are settings that must be configured correctly in order for the email to work correctly. See Configuring the
System To Share LawDrop Files with External Users on page 363.
To share files and folders with external people
1. Go to your My DropSpace folder.
2. In the item list, for the sub-folder or file that you share, in the far right column, click the share icon.
3. In the Shared options dialog, click in the Invite more people field.
4. Type the email address of the person you want to share with.
Note that the name is notated with (external user).
5. Click the name that you want to add.
6. Click Add.
The name is added to a list in the dialog. The first letter of the username is shown in a circle.
7. If desired, add additional user names.
8. When completed, click Done.
9. An email is sent to the user.
10. If needed, you can re-send the email.

Using LawDrop™ Sharing Files and Folders | 378
Unsharing Files and Folders
You can unshare files and folders from a specific user or from all users. This will cause the files or folders to no
longer be visible to others.
To unshare files and folders
1. Go to the LawDrop folder list and open the parent folder of the item that you want to unshare.
2. In the item list, for the sub-folder or file that you unshare, in the far right column, click the share
icon.
3. In the Shared options dialog, do one of the following:
-To unshare a file of folder with a specific user, click the X on the far right of the user list.
-To unshare a file of folder with all users, click Unshare folder or Unshare file.

Using LawDrop™ Adding Evidence to Projects Using LawDrop | 379
Adding Evidence to Projects Using LawDrop
About Adding Evidence to Projects Using LawDrop
From LawDrop, you can add evidence in similar ways that you can use on the Home page:
-Adding Evidence Using the Add Evidence Wizard on page 379
-Importing Data on page 380
Note: If you using Summation in a sub-admin environment, you cannot add evidence to a project from the
Project List on the Home page. You can only add evidence to a project from LawDrop.
You can only add evidence to a project from the project Intake folder. If you want to add a file or folder that you
have uploaded to your My DropSpace, you can drag and copy it to an Intake folder.
You can delete files from a project Intake folder that have not yet been processed or imported. Files that have
been processed or imported are no longer displayed in the LawDrop project Intake folder.
See Moving and Copying Uploaded Items on page 373.
Important:
Only those who have administrator permissions to the project can add files to a project.
Adding Evidence Using the Add Evidence Wizard
Users with project administrator permissions can add files or folders to a project from LawDrop. When items are
added, the Add Evidence Wizard is opened and you complete the wizard.
See Using the Evidence Wizard on page 260.
Depending on the items that you select to add, you will have different options available in the Add Evidence
Wizard.
Note the following scenarios for adding evidence:
-The CSV Import method for adding shares is not supported from within LawDrop. Any CSV file will be
imported as a native file.
-When selecting items to add to a project, you can add either files or folders at one time, not both.
For example, you can add two or more files at one time, but not a file and a folder. This is because in the
Add Evidence Wizard, you must specify if you are adding files or folder.
-If you are adding loose files in AD1 or E01 format, add them without other types of files.
In the wizard, the Individual Files and Native Files options are selected by default. You must change the
Data Type from Native Files to Evidence Images.
-If you add one or more loose files of other formats, in the wizard, the Individual Files and Native Files
options are selected by default and all other options are disabled.
-If you add one or more folders, in the wizard, the Folder Import and Native Files options are selected by
default.
If the folder contains AD1 or E01 files, you must change the Data Type from Native Files to Evidence
Images.
Adding evidence to a project
1. Go to the LawDrop folder list and open the parent folder of the item that you want to add.
2. In the LawDrop item list, select one or more files or one or more folders.
Using LawDrop™ Adding Evidence to Projects Using LawDrop | 380
3. Click the Add Evidence icon.
4. The Add Evidence Wizard is opened.
The available options are based on the types of items selected.
5. Complete the wizard.
See Using the Evidence Wizard on page 260.
6. To view the status, go to the Evidence tab on the Home page.
See Evidence Tab on page 155.
Importing Data
Users with project administrator permissions can import files to a project from LawDrop. When items are added,
the Import wizard is opened and you complete the wizard.
See Importing Evidence on page 269.
From an Intake folder, you can import a file that is one the following formats:
-CSV
-DAT
-TXT
-DII
You can import the following types of load files:
-Concordance
-Generic
-Summation dii
Importing evidence into a project
1. Go to the LawDrop folder list and open the parent folder of the item that you want to add.
2. In the LawDrop item list, mouse over the file you want to import.
3. In the Actions column, click the Import icon.
4. The Import dialog is opened.
5. Select the import file type.
For the Concordance image type selection, you must know the name of the associated OPT or LFP file.
You can copy and paste the image name.
6. You cannot change the path.
7. Complete the dialog.
See Importing Evidence into a Project on page 270.
Important:
If you perform an import validation and find errors, you cannot edit the import file within LawDrop.
You must edit the original files and re-drop them into LawDrop.
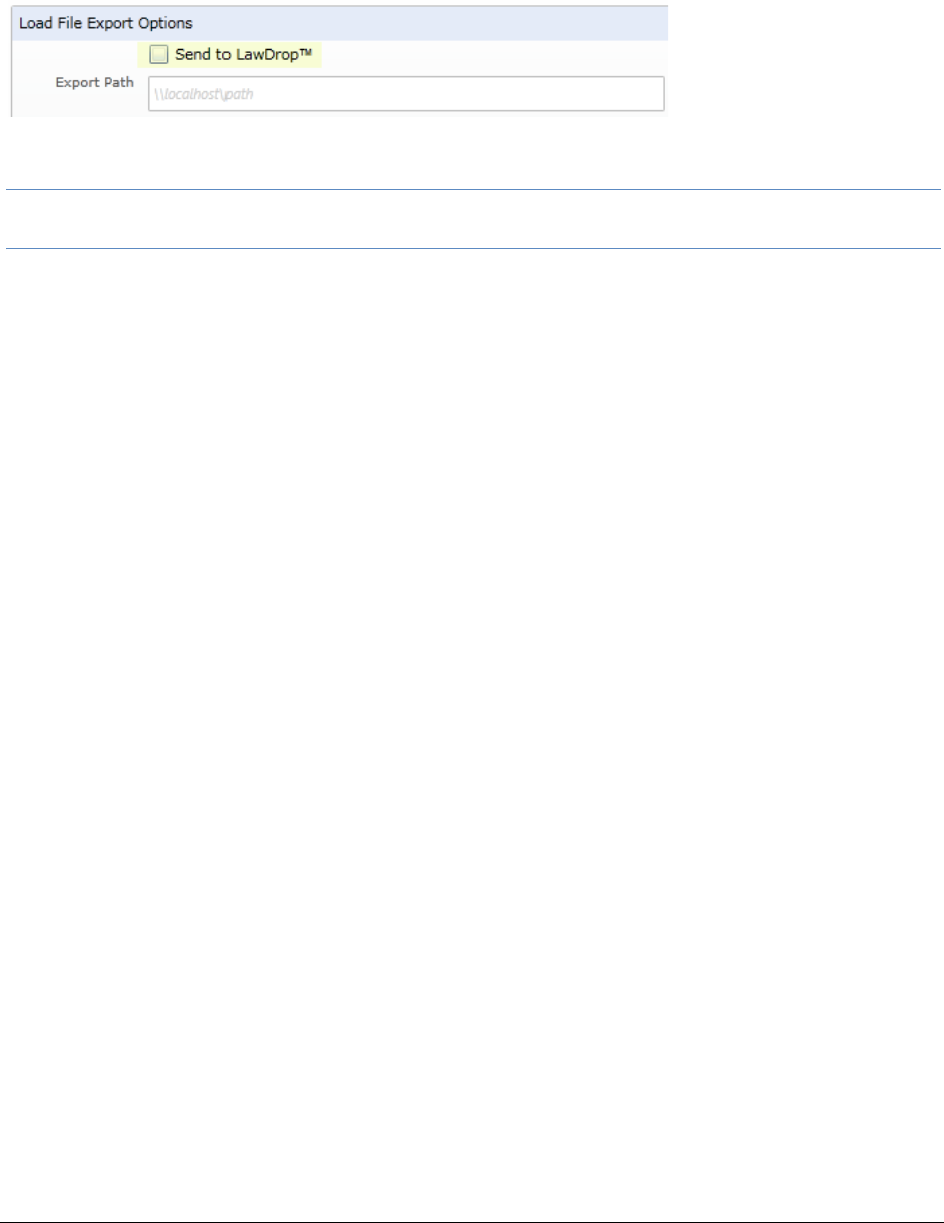
Using LawDrop™ Exporting Files to LawDrop | 381
Exporting Files to LawDrop
When you create an export, instead of selecting a file path, you can select to Send to LawDrop.
When you export to LawDrop, the Export Path is disabled.
Note: If you are in a Summation sub-admin environment, you cannot use an export path. You can only export to
LawDrop.
All other aspects of the export are completed as usual.
See About Exporting Data on page 257.
Viewing Exported Files in LawDrop
After an export is complete, exported files are viewable in the project’s Exports folder.
In order to view exported files, you must meet one of the following conditions:
-Be an administrator of the project
-Have Admin Reviewer permissions for the project
-Be the user who created the export
You can download exported files. Files are zipped and then downloaded. Be aware the exports can be quite
large and may take some time to download. As a result, download only one export at a time.
At this time, you cannot share items in the Exports folder. Instead, you can download the exported files. You can
then re-upload them to your My DropSpace and share them or you can make them available using a network
share or email.


Installing the AccessData Elasticsearch Windows Service About the Elasticsearch Service | 383
Chapter 39
Installing the AccessData Elasticsearch
Windows Service
About the Elasticsearch Service
The AccessData Elasticsearch Windows Service is used by multiple features in multiple applications, including
the following:
-KFF (Known File Filter) in all applications
-Visualization Geolocation in all applications
The AccessData Elasticsearch Windows Service uses the Elasticsearch open source search engine.
Prerequisites
-For best results with eDiscovery products and AD Lab and Enterprise, you should install the AccessData
Elasticsearch Windows Service on a dedicated computer that is different from the computer running the
application that uses it.
For single-computer installations such as FTK, you can install the AccessData Elasticsearch Windows
Service on the same computer as the application.
A single instance of an AccessData Elasticsearch Windows Service is usually sufficient to support
multiple features. However, if your network is extensive, you may want to install the service on multiple
computers on the network. Consult with support for the best configuration for your organization’s
network.
-You can install the AccessData Elasticsearch Windows Service on 32-bit or 64-bit computers.
-16 GB of RAM or higher
-Microsoft .NET Framework 4
To install the AccessData Elasticsearch Windows Service, Microsoft .NET Framework 4 is required. If
you do not have .NET installed, it will be installed automatically.
-If you install the AccessData Elasticsearch Windows Service on a system that has not previously had an
AccessData product installed upon it, you must add a registry key to the system in order for the service to
install correctly.
Installing the AccessData Elasticsearch Windows Service Installing the Elasticsearch Service | 384
Installing the Elasticsearch Service
Installing the Service
To install the AccessData Elasticsearch Windows Service
1. Click the AccessData Elasticsearch Windows Service installer.
It is available on the KFF Installation disc by clicking autorun.exe.
2. Accept the License Agreement and click Next.
3. On the Destination Folder dialog, click Next to install to the folder, or click Change to install to a
different folder.
This is where the Elasticsearch folder with the Elasticsearch service is installed.
4. On the Data Folder dialog, click Next to install to the folder, or click Change to install to a different
folder.
This is where the Elasticsearch data is stored.
Note: This folder may contain up to 10GB of data.
5. (For use with KFF) In the User Credentials dialog, you can configure credentials to access KFF Data
files that you want to import if they exist on a different computer.
This provides the credentials for the Elasticsearch service to use in order to access a network share
with a user account that has permissions to the share.
Enter the user name, the domain name, and the password. If the user account is local, do not enter any
domain value, such as localhost. Leave it blank instead.
6. In the Allow Remote Communication dialog, enter the IP address(es) of any machine(s) that will have
ThreatBridge installed. If you plan on installing ThreatBridge on the same server as the AccessData
Elasticsearch Windows Service, click Next.
7. Select Enable Remote Communication.
Note: If Enable Remote Communication is selected, a firewall rule will be created to allow
communication to the AccessData Elasticsearch Windows Service service for every IP address
added to the IP Address field. If no IP addresses are listed, then ANY IP address will be able to
access the AccessData Elasticsearch Windows Service.
8. In the following Allow Remote Communication dialog, accept the default HTTP and Transport TCP Port
values and click Next. However, if there are conflicts with these ports on the network, change the values
to use other ports.
9. The Configuration 1 dialog contains the following fields:
-Cluster name - This field automatically populates with the system’s name.
-Node name - This field automatically populates with the system’s name.
Note:If installing the AccessData Elasticsearch Windows Service on more than one system, allow
the first system to install with the system’s name in the cluster and the node fields. In the sec-
ond and subsequent systems, enter the first system’s name in the cluster field, and in the node
field, enter the name of the system to which you are installing.
-Heap size - This is the memory allocated for the AccessData Elasticsearch Windows Service.
Normally you can accept the default value. For improved performance of the AccessData
Elasticsearch Windows Service, increase the heap size.

Installing the AccessData Elasticsearch Windows Service Installing the Elasticsearch Service | 385
10. The Configuration 2 dialog contains the following options:
-Discovery - Selecting the default of Multicast allows the AccessData Elasticsearch Windows Service
search to communicate across the network to other Elasticsearch services. If the network does not
give permissions for the service to communicate this way, select Unicast and enter the IP
address(es) of the server(s) that the AccessData Elasticsearch Windows Service is installed on in
the Unicast host names field. Separate multiple addresses with commas.
-Node - The Master node receives requests, and can pass requests to subsequent data nodes. Select
both Master node and Data node if this is the primary system on which the AccessData
Elasticsearch Windows Service is installed. Select only Data node if this is a secondary system on
which the AccessData Elasticsearch Windows Service is installed. Click Next.
11. In the next dialog, click Install.
12. If the service installs properly, a command line window appears briefly, stating that the service has
installed properly.
13. At the next dialog, click Finish.
Troubleshooting the AccessData Elasticsearch Windows Service
Once installed, the AccessData Elasticsearch Windows Service service should run without further assistance. If
there are issues, go to C:\Program Files\Elasticsearch\logs to examine the logs for errors.
Integrating with AccessData Forensics Products | 386
Chapter 40
Integrating with AccessData Forensics
Products
Web-based products (Summation and eDiscovery) can work collaboratively with FTK-based forensics products,
(FTK, Lab, FTK Pro, and Enterprise).
Note: For brevity, in this chapter, all FTK-based products will be referenced as FTK and Summation and
eDiscovery applications will be referenced as Summation.
You can access the same project data on the same database to perform legal review and forensic examination
simultaneously. The benefit of this compatibility is that FTK provides some features that are not available in the
web-based products. For example, you can create projects in Summation and then open, review, and perform
additional tasks in FTK and then continue your work in Summation.
Using FTK, you can do the following with Summation projects:
-Open and review a project
-Backup and restore a project
-Add and remove evidence
-Perform Additional Analysis after the initial processing
-Search, index, and label data
-View graphics and videos
-Export data
Important:
For compatibility, the version of the web-based product and the version for FTK must be the same--
both must be 5.0.x or be 5.1.x. For example:
Summation 5.2.x must be used with FTK 5.2.x
Summation 5.5 must be used with FTK 5.5

Integrating with AccessData Forensics Products Installation | 387
Installation
You can install FTK and Summation on either the same computer or on different computers. The key is that they
share a common database. The database that the data is stored in is unified so that the data can be shared
between products.
It is recommended that you install the web-based product first, configure the database, and then install FTK and
point FTK to that database. The administrator account for the web-based product is the administrative account
for the database for FTK.
When launching FTK and logging into the database, you use the administrator credentials from the web-based
product.
Important:
For compatibility, the version for Summation and the version for FTK must be the same.
Important:
Note that FTK and Summation may use different versions of the processing engine. If this is the case
there will be information in the Release Notes.
Managing User Accounts and Permissions Between
FTK and Summation/eDiscovery
You can create a user account in either product and then use that user name in the other product.
Permissions
When users are assigned permissions in one application, such as Summation, the permissions of the user in
FTK are not affected.
Creating and Viewing Projects
Using either product, you can create projects and add evidence to that project. You can then use either product
to open the project and perform tasks on the project data.
You can have users in each program reviewing the data at the same time.
Managing Evidence in FTK
Adding Evidence using FTK
You can use FTK to add evidence to a project that was created in Summation. Reviewers in Summation can
then review the new evidence. Using FTK, you can add live evidence and static evidence. When you add
evidence, you can add image files (such as AD1, E01), individual files, physical drives, and logical drives.
Important:
When you collect volatile data in FTK, you cannot see it in Summation.

Integrating with AccessData Forensics Products Creating and Viewing Projects | 388
Processing Evidence using FTK
FTK provides processing options that are not available in Summation. You can utilize the processing abilities of
FTK and then review the data in Summation/eDiscovery. You can do all processing in FTK or you can perform an
Additional Analysis in FTK after an initial processing.
The following are examples of additional processing options that are available in FTK:
-Processing Profiles
-Known File Filter (KFF)
-Automatic File Decryption
-Create Thumbnails for Video
-Generate Common Video File
-Explicit Image Detection
-PhotoDNA
-Cerberus Analysis
When you create a project with specific processing options, those options are maintained when the project is
viewed in the other product. (15940)
Important:
If you create a project in Summation, process the evidence, then add more evidence using FTK, if
you compare the JobInformation.log files, the processing options applied by FTK are different from
Summation.
Managing Evidence Groups in FTK and People in Summation
It is important to note that FTK does not use people, but rather has evidence groups. Evidence groups let you
create and modify groups of evidence. In FTK, you can share groups of evidence with other projects, or make
them specific to a single project.
When you create people in a project in Summation, and then look at the project in FTK, the people will be listed
as evidence groups. The opposite is also true. If you create an evidence group in FTK, it will be listed as a
person in Summation.
Important:
When you use FTK to add data to an evidence group that was an existing Summation person, two
child entries of the same person are created for the data. When you look at the person data in
Summation, there will be two child objects under the person with the same name, one with
Summation data and the other with FTK data.
Reviewing Evidence in FTK
Searching Evidence using FTK
You can use FTK to search evidence in Summation projects. The search capabilities in FTK are more robust
than Summation. In FTK, you can perform an index search as well as a live search. Live search includes options
such as text searching, pattern searching, and hexadecimal searching.
Important: Note the following issue:

Integrating with AccessData Forensics Products Creating and Viewing Projects | 389
-Issue: The search results counts for the same project may be different when viewed in the different
products due to the way search options are executed in the respective products. For example:
Summation only search columns that are visible to the user. FTK will search columns that are not
visible to a eDiscovery user.
Re-indexing the data will change the search results.
-Because of FTK’s Live Search feature, FTK will return more search results hits than in Summation.
Labeling Evidence Using FTK
After searching and identifying data in FTK, you can label the data and then review the project in Summation and
see the labeled data. You can then perform additional review, culling, and export tasks.
Viewing Labeled Evidence in FTK
When reviewing data in Summation, you can label data, and then that labeled data is viewable in FTK. This can
be useful in workflow management. For example, when reviewing the data, you can label data indicating that it
needs additional analysis. When the project is opened in FTK, the labeled data is visible.
Exporting Data using FTK
You can review and cull data in Summation and then export the data from FTK using its export capabilities.
The following are examples of what you can export using FTK:
-Export files to an AD1 Image file
-Save file list information
-Export the contents of the project list to a word list
-Export hashes from a project
-Export search hits
-Export emails to PST or MSG
Viewing Documents Groups and Review Sets in FTK
Important: In Summation, there are separate views and permissions defined for Document Groups and Review
Sets. In FTK, Document Groups and Review Sets that were created in Summation are displayed within the
Manage Labels dialog.
Reviewing FTK Data in Summation
You can use the following review features in Summation to help manage the workflow of working with data that
was added and processed using FTK.
-Review the data by reviewers in the Web console.
-Cull the data and get the desired data set.
-Export the data using Summation using its export capabilities.

Integrating with AccessData Forensics Products Known Issues with FTK Compatibility | 390
Known Issues with FTK Compatibility
See the product’s and FTK Release Notes for a list of known issues with FTK Compatibility.
