Sandmartin DCM4-HDR Digital Video Broadcasting User Manual DCM4 HDR English V1 0
Sandmartin(Zhong Shan) Electronic Co., Ltd. Digital Video Broadcasting DCM4 HDR English V1 0
UserManual.wiki
>
Sandmartin
>
DCM4 HDR User Manual
DCM4-HDR_English_V1
Navigation menu
Upload a User Manual
Namespaces
Wiki Guide
HTML
PDF
Info
Views
User Manual
Discussion / Help
Navigation
![9Basic Operation 2. Basic Operation 2.1 Switch ‘ON’ the Settop First, plug in your Settop. Next, set the Power ON/OFF switch on the rear panel of the Settop to ‘ON’. Then, press the [Power] button on the front panel or remote control, to turn the Settop ON. When the Settop is first used, it will start a ‘First Time Setup’ walk-thru operation. ? Frequently Asked Question Q: My Settop is powered on, but the TV screen shows nothing: A: Make sure your TV is set to the correct video input. For example, if you have connected the Settop to the HDMI1 input of your TV, then you need to select the corresponding input of the TV. Q: My Settop is powered on, but only a “No Signal” display is shown. A: The channel you selected has no signal. This can be caused by several reasons: 1. The channel you selected currently has no programming from your cable provider. Select another channel. 2. The signal of the current TV channel is too weak. You can try changing to another channel with a stronger signal. If the problem still exists, please consult your local Cable TV Provider. 2.2 Standby Mode 1. Press the [Power] button on the front panel or remote control, to switch from operational mode [ON] to standby mode [OFF]. 2. In standby mode, press the [Power] button on the front panel or remote control, to switch to operational mode [ON]. The last active channel will be tuned and displayed. 3. To switch the Settop off completely, set the Power ON/OFF button on the Rear Panel to [OFF]. Or, you may unplug the main power cord from the AC wall outlet.](https://usermanual.wiki/Sandmartin/DCM4-HDR/User-Guide-1558720-Page-9.png)
![10Basic Operation 2.3 MUTE 1. Press the [Mute] button to mute the sound. An icon will be displayed on the screen to indicate the sound has been muted. 2. Press the [Mute] button again to restore the sound. 2.4 AUDIO 1. Press the [Audio] button to open the Audio Mode window. 2. Select the desired audio program with [CH▲/▼] and change the value with [VOL◄/►]. 2.5 LAST Press the [LAST] button to toggle between the current channel and the previously selected channel. *You may also use this [PGDN / RECALL] button when in the GUIDE to quickly page down thru the available channels. 2.6 Channel Numbers Enter the channel number directly with your remote control and confirm the number with the [OK] button, to change to the desired channel. 2.7 PPV <This section left blank intentionally> 2.8 GUIDE The Settop has an Electronic Program Guide (EPG) to help you navigate through all available channels. The EPG supplies information such as channel listings, program descriptions, and starting/ending times for all programs.](https://usermanual.wiki/Sandmartin/DCM4-HDR/User-Guide-1558720-Page-10.png)
![11Basic Operation Press the [GUIDE] button to display the Electronic Program Guide. NOTE: When in this menu, use the color buttons on your remote control to correspond to the color coded function (for example, the Green-Time feature is accessed by pressing the Green-GUIDE button on your remote). 1. Press the RED button on the remote control, which corresponds to the RED (Time) command on the bottom of the screen. You will then enter into the following screen. 2. Use the [VOL◄/►] buttons to select the chosen icon, then press the [OK] button to set that action. Press the [EXIT] button to return to the original EPG screen. 3. Press the GREEN button on the remote control, which corresponds to the GREEN (Timer) command on the bottom of the screen. You will then enter into the following screen. To navigate, press the [CH, VOL◄►] buttons and set related date, as well start time and duration. Using this Timer menu, you may set the Settop to tune your desired channel (or tune and record) at a preset time. Save your settings by highlighting ‘Save’ and pressing the [OK] button.](https://usermanual.wiki/Sandmartin/DCM4-HDR/User-Guide-1558720-Page-11.png)
![12Basic Operation 2.9 CH ▲/▼ Press the [CH▲/▼] buttons to change the channel. 2.10 VOL ◄/► Press the [VOL◄►] buttons to adjust the volume. 2.11 OK 1. Press the [OK] button to open the Channel List window. You can also select your different “Favorites” groups by pressing [VOL◄/►]. 2. Once you’ve selected the desired Channel / Favorites list, you can select the desired channel by pressing the [CH▲/▼] buttons to highlight the channel, then confirm it by pressing the [OK] button. 3. Press the [EXIT] button to return to normal TV viewing. You may also use the [OK] button to direct tune a channel. First, enter the desired Channel number using the remote control number keys, then press [OK] to tune that channel. You also use this [OK] button while setting features in the Settop Menu system. 2.12 MENU Press the [Menu] button to enter or exit the current menu. 2.13 EXIT Press the [Exit] button to exit the current menu. You may press this button to escape any on screen display or function, including: ZOOM, INFO, GUIDE, Channel List, etc.. 2.14 PAUSE 1. Press the [PAUSE] button and the picture will be paused, but the sound of the channel will still continue. 2. Press the [PAUSE] button again to return to normal viewing.](https://usermanual.wiki/Sandmartin/DCM4-HDR/User-Guide-1558720-Page-12.png)
![13Basic Operation 2.15 ZOOM 1. The [Zoom] button allows you to magnify the video. You may use this button during normal viewing, or you may press [PAUSE] and zoom a still picture. 2. Press the [Zoom] button the first time and you will see ‘ZOOM x1’ displayed in the lower right corner of the TV screen. Press [ZOOM] again and the image will enlarge to ‘ZOOM x2’. Press [Zoom] again, and repeat until you reach the desired magnification (Zoom has the following possible magnification settings: x1, x2, x4, x6, x8, x12, x16). 3. In “x2 ~ x16” Zoom mode, use the [CH▲/▼ / VOL◄/►] buttons to move the image center area to the portion of the video you want to view. 4. Press the [Exit] button to close the “Zoom” window. *You may also use this [PGUP / ZOOM] button when in the GUIDE to quickly page up thru the available channels. 2.16 INFO In TV mode, press [INFO] button can open information screen, in the window shows the parameters of current channel. Two dynamic bars at the bottom of the window reflect the signal intensity and signal quality of the current channel.](https://usermanual.wiki/Sandmartin/DCM4-HDR/User-Guide-1558720-Page-13.png)
![14Menu Operations 3. Channel Press [Menu] in the TV/radio mode to enter the main menu. 1. Press [CH▲/▼] to select the channel item. 2. Press [OK] to enter the selected item. In the channel menu: Press [CH▲/▼] to select the wanted menu item among TV Channel List, Radio Channel List, Channel setup, Favorite group list name and Delete All. Press [OK] to enter the selected item. 3.1 TV Channel List If you enter the channel list menu a window like the one below will open. 1. You can move the highlighted channel with [CH ▲/▼] and press [OK] to preview the highlighted program in the preview window. 2. Press [PGUP/PGDN] on the RCU to jump between the channels by pages. 3. Press [Vol◄/►] to switch satellite of the program group. 4. Press [Menu] or [Exit] buttons to enter TV playing mode. 5. The color buttons offer further functions to manage the channel list.](https://usermanual.wiki/Sandmartin/DCM4-HDR/User-Guide-1558720-Page-14.png)
![15Menu Operations 3.1.1 Favorite 1. Press [FAV] to open the favorite window. 2. You can select between 32 favorite groups with [CH▲/▼]. Press [OK] to assign the channel to a favorite group, press [EXIT] to exit favorite group. 3. Press [OK] again to remove the channel from the marked favorite group. 4. Press [MENU] button you will be asked “Are you sure to save?”. Select “Yes” to save the marked favorite group. Select “No” to cancel the operation. 5. To return to the TV channel list. The channels of favorite groups are indicated with a favorite icon behind the name. 3.1.2 Move Pressing the [Red] button in the TV channel list will open another window where you can choose between move the actual channel and swap the actual channel to the desired position, press [OK] to confirm it. a) Move 1. Press [Red] button to show a moving icon behind the channel name. 2. Move the channel to the desired position with [CH▲/▼]. Press [OK] to confirm the position. b) Swap 1. Press [Green] button to show a moving icon behind the channel name. 2. Move the channel to the desired position with [CH▲/▼]. Press [OK], then the selected channel will exchange the positions with the channel name on this position immediately.](https://usermanual.wiki/Sandmartin/DCM4-HDR/User-Guide-1558720-Page-15.png)
![16Menu Operations 3.1.3 Sort Press [Green] to open the sort window. Press [CH▲/▼] to select and [OK] to confirm your choice. The ways of sorting are: Default: Sort channel factory default. FTA/CAS: Sort channel by free and scrambled sequence. Free channels will be listed first and scrambled channels behind in the channel list. Lock: Unlocked channels are listed first end locked channels at the end. Name (A-Z): Sorting in Alphabetical order, ignoring “$” symbol. Name (Z-A): Sorting in Alphabetical order, ignoring “$” symbol. 3.1.4 Edit After pressing the [Yellow] button a window for entering the password will open. The default password is “0000”. You can delete, skip, lock and edit the channel. Press [MENU] to leave the channel editing. The system will ask you to confirm the saving of the changes you made. 3.1.4.1 Delete In channel edit menu press [Red] button will open another window where you can choose between delete one channel and delete all channel. Del One Press [Red] button to mark a channel for deleting. Marked channel will be deleted after you confirm to save the changes when you leave this menu. Del All a) Press [Green] button to show a deleting icon behind all channel name. b) Press [MENU] button you will be asked “Are you sure to save?”. Select “OK” to delete all channel. Select “Cancel” to cancel the operation.](https://usermanual.wiki/Sandmartin/DCM4-HDR/User-Guide-1558720-Page-16.png)
![17Menu Operations 3.1.4.2 Skip In channel edit menu, press [Green] button to place a skip icon behind the name of the highlighted channel. Marked channels will be skipped when you change channels in TV mode after you confirm to save the changes when you leave this menu. 3.1.4.3 Lock In channel edit menu, press [Yellow] button to place a lock icon behind the name of the highlighted channel. Marked channels will be locked and displayed only after password has been entered if you confirm to save the changes when you leave this menu. 3.1.4.4 Edit Pressing the [Blue] button in the TV channel list edit menu will open another window where you can choose between edit the actual channel and create a new channel. Edit Press [Red] button to edit the channel. 1. Selecting the name item with [OK] will display a button pad to show you how to edit the channel name. 2. On the “Video PID”, “Audio PID” and “PCR PID” items you can input numbers to modify the item’s value. 3. After modification select “Save” and press [OK] button to save the modified values and exit “Edit” mode. Or select “Exit” and press [OK] to leave edit mode without saving the modifications. Create Press [Green] button to open the create channel window.](https://usermanual.wiki/Sandmartin/DCM4-HDR/User-Guide-1558720-Page-17.png)
![18Menu Operations 1. Press [OK] on the “Satellite” item to display the satellite list. You can select the satellite for which you want to create a new channel. 2. With marked “TP Index” item press [OK] to display TP list, use [CH▲/▼] to select for which you want to create a new channel. Press [OK] to display the TP number where the channel can be found. The next three items will show the related parameters. 3. Highlight the “Name” item and press [OK] to display the button pad and edit the new channel’s name. In “Video PID”, “Audio PID” and “PCR PID” items you can enter the numbers directly to set these parameters of the new channel. 4. After modification select “Save” and press [OK] to save the new channel and leave the edit mode. Select “Exit” and press [OK] to exit the edit mode without saving the new channel. 3.1.5 Find 1. Press [Blue] button to open the “Find” window like showed beside. Press [CH▲/▼] / [Vol◄/►] to select the leading character of the channel name and press [OK] to confirm it. 2. After entering the character(s) highlight “OK” in the window and press [OK] on the RCU. 3. Press [Exit] button to close the find window and brings you back to the channel list. 3.2 Radio Channel List Basically the operation of “Radio Channel List” is same as “TV Channel List”, except that in the small channel window the radio Logo will be displayed.](https://usermanual.wiki/Sandmartin/DCM4-HDR/User-Guide-1558720-Page-18.png)
![19Menu Operations 3.3 Channel Setup When you enter the “Channel Setup” menu you will see a screen like beside: 1. Startup Channel: Press [OK] to enter “Startup Channel” menu to see the screen like showed beside: If you set of “Boot on Channel” to “On” you can edit the following two items. If the setting is “Off” the box always starts with the channel that was running when the box has been switched off. On the “Mode” item you can select either “TV channel” or “Radio channel”. On “Startup Channel” item you can open the channel list by pressing [OK]. Then you can select the channel of you choice. Press [OK] again to confirm. 2. Channel Play type: Use [CH▲/▼] to select, press [OK] to enter “Channel Play Type” menu. Here you can select the “playing channels” as “All”, “Free” or “Scrambled” with [Vol◄/►]. 3. If you select “Free” then all scrambled channels will be skipped when you change channels with [Vol◄/►]. 4. Press [Exit] to leave the “Channel Setup” menu.](https://usermanual.wiki/Sandmartin/DCM4-HDR/User-Guide-1558720-Page-19.png)
![20Menu Operations 3.4 Favorite group list name When you enter “Favorite group list name” menu with 32 favorite group will be displayed, press [OK] on the RCU to rename favorite group. Use [CH▲/▼] / [Vol◄/►] to select character, press [OK] to confirm it. After modification select “OK” of button bar and press [OK] on the RCU to rename the favorite group name and leave the edit mode. Press [Exit] on the RCU to exit the edit mode without saving the favorite group name. 3.5 Delete All To delete all channels: 1. Enter the password. The default password is “0000”. 2. After entering the password correct a safety question will show up where you have to confirm first 3. Select “OK” to delete all channels or “Cancel” to cancel the operation and confirm with [OK]. 4. In step 1 and step 2, pressing [Menu] will exit the function directly without saving. ? Frequently Asked Question Q: IF I incautiously delete all channels, what should I do? A: there are two ways to restore: To research all channels in the “Installation” menu. Use “Factory Default” function to restore all channels in the “Tools” menu.](https://usermanual.wiki/Sandmartin/DCM4-HDR/User-Guide-1558720-Page-20.png)
![21Menu Operations 4. Cable Installation When you enter to “Cable Installation” menu, there will display the screen like right: In “Installation” menu; 1. Press [▼/▲] key to select menu pages among Manual scan and Auto Scan. 2. Press [OK] key to enter the selected item. 4.1 Manual scan When you enter to “Manual scan” menu, there will display the screen like right: 1. You have to set the parameters of “First Frequency”, therefore use the number buttons of the RCU. 2. You have to set the parameters of “Second Frequency”, therefore use the number buttons of the RCU. 3. You have to set the parameters of “Second Frequency”, therefore use the number buttons of the RCU. 4. You have to set the parameters of “Scan Mode”, therefore use the number buttons of the RCU. 5. NIT Search: Press [Vol◄/►] to switch this function “Yes” or “No”. 6. Moving the highlight to “Search” item and press [OK] key to start scanning. 7. In the “Manual scan” menu, press [Exit] key to draw back from the scanning.](https://usermanual.wiki/Sandmartin/DCM4-HDR/User-Guide-1558720-Page-21.png)
![22Menu Operations 4.2 Auto Scan When you enter to “Auto Scan” menu, there will display the screen like right: 1. Moving the highlight to “OK” item and press [OK] key to start scanning. 2. Moving the highlight to “Cancel” item and press [OK] key to draw back from the scanning.](https://usermanual.wiki/Sandmartin/DCM4-HDR/User-Guide-1558720-Page-22.png)
![23Menu Operations 5. System Setup When you open the “System Setup” menu a window like the one beside will be opened. In “System Setup” menu: 1. Press [CH▲/▼] to select menu items among Language, TV System, Time & Timer setting, OSD Setting, Parental Lock, Power setting, TCP/IP Setting and MAC Setting. 2. Press [OK] to open the selected item. 5.1 Language After selecting the “Language” menu you will see a window like beside: 1. Menu Language: Press [Vol◄/►] to select languages. The selection of language include: English, German, French, Spanish, Italian, Portuguese, Turkish, Polish, Russian, Danish, Greek, Hungarian, Arabic, Farsi and Dutch. 2. First Audio: Some channels offer more than one audio language. This function allows you to set the preferred audio language for those channels. If a channel offers the same audio language as the “First Audio” you set the system will play this audio language as default. If the channel does not offer this audio language then the system will compare the offered languages with the second audio language. The selections of audio language include: English, German, French, Spanish, Italian, Portuguese, Turkish, Polish, Russian, Danish, Greek, Hungarian, Arabic, Farsi and Dutch. 3. Second Audio: If the channel has no audio language that corresponds with “First Audio” but with “Second Audio” the system will play the second audio language as default. If no audio language corresponds with the “Second Audio” then the default language of the current channel will be played](https://usermanual.wiki/Sandmartin/DCM4-HDR/User-Guide-1558720-Page-23.png)
![24Menu Operations instead. The selections of audio language include: English, German, French, Spanish, Italian, Portuguese, Turkish, Polish, Russian, Danish, Greek, Hungarian, Arabic, Farsi and Dutch. 4. Subtitle Language: In “OSD Setting”menu, use [Vol◄/►] to select “On” or “Off”. If the current channel has subtitle information, it will be displayed if this function is “On”. If this function is “Off” subtitles won’t be displayed. The selections of subtitle language include: English, German, French, Spanish, Italian, Portuguese, Turkish, Polish, Russian, Danish, Greek, Hungarian, Arabic, Farsi and Dutch. 5. Teletext: Press [Text] button in TV mode to open the teletext page. This service is depending on the support of the channel provider. If the channel does not support teletext information, it will show “No Teletext Data” on the screen. The selections of teletext language include: English, German, French, Spanish, Italian, Portuguese, Turkish, Polish, Russian, Danish, Greek, Hungarian, Arabic, Farsi and Dutch. 6. Press [Menu/Exit] to return back from “Language” menu. 5.2 TV System When you enter the “TV System” menu you will see the screen like below: 1. Display Mode is used to switch the display mode. In SD Mode, You can select from PAL / NTSC / Auto. In HD Mode, You can select from Auto / 576I / 480I / 576P / 720P_50 / 1080I_25 / 720P_50 1080I_30. Press [Vol◄/►] to switch the desired mode. 2. Aspect Mode is used to switch the screen aspect ratio mode. You can select the needed mode from Auto / 4:3 PS / 4:3 LB / 16:9 with [Vol◄/►]. 3. Video output is use for switching the screen aspect ratio mode. Now we provide below options: HD / SD. You can press [Vol◄/►] key to select each mode circularly. 4. Digital Audio Out is used to switch the output audio mode. You can select the needed mode from LPCM Out / BS Out with [Vol◄/►]. 5. Press [Menu/Exit] to return to the previous menu.](https://usermanual.wiki/Sandmartin/DCM4-HDR/User-Guide-1558720-Page-24.png)
![25Menu Operations 5.3 Time & Timer Setting When you enter “Time & Timer Setting” a menu with this 3 items will be opened. 1. Timer: Select “Timer” item and press [OK] to enter the “Timer” menu. You can press [CH▲/▼] to select item. The current time will be displayed in the first column. If the current time is incorrect, please modify it with the [Number] buttons. Timer Number: You can press [Vol◄/►] to switch the timer number. There are totally 16 timers. Timer Mode: Select how often the timer is running: Once, Daily, Weekly, Monthly and Yearly, or switch the timer to off. Timer Service: Select between TV Channel, Radio Channel and Message. When you select “TV Channel / Radio Channel”(timer setting for channel change and Wakeup channel / date) then you have further options you need to set: Wakeup Channel: Press [OK] to enter the channel list, and select the channel you want to see with [CH▲/▼], press [OK] to confirm it. Wakeup Date: Use number buttons to input your wakeup date. On Time: Use number buttons to input your wakeup time. If date and time are reached then no matter if the system is in standby mode or in playing mode, it will automatically switch to the channel you set and start to play.](https://usermanual.wiki/Sandmartin/DCM4-HDR/User-Guide-1558720-Page-25.png)
![26Menu Operations Duration: Here you can set the time you want to see or play this channel. When the time is reached, whenever the system is in standby mode or playing a channel, the system will automatically switch to the channel you select and play the channel within the duration time you set. The minimum duration unit is one minute. After the duration time, the system will automatically switch to Standby mode. When you select “Message”(reminding message) option in “Timer Service” then you can enter additional data: Wakeup Message: Press [Vol◄/►] to select the category of the wakeup message from Birthday, Anniversary and General. Wakeup Date: Use the [Number] buttons to input your wakeup date. On Time: Use the [Number] buttons to input your wakeup time. If date and time are reached, no matter if the system is in standby mode or in playing mode, it will automatically show a reminding message. The message will be displayed on the screen until you press [Exit] to close it. Duration: Here you can set the time you want to see or play this channel. When the time is reached, whenever the system is in standby mode or playing a channel, the system will automatically switch to the channel you select and play the channel within the duration time you set. The minimum duration unit is one minute. After the duration time, the system will automatically switch to Standby mode. Press [Exit] to leave the “Timer” menu.](https://usermanual.wiki/Sandmartin/DCM4-HDR/User-Guide-1558720-Page-26.png)
![27Menu Operations 2. Local Time Setting: When you select “Local Time Setting” and press [OK] then you will see a window like the one beside: GMT Usage: This item is used to set the time by using the time signal from the satellite. Press [Vol◄/►] to change the setting. The “GMT Offset” item is only available when “GMT Usage” is set to “On”. Press [Vol◄/►] to set the “GMT Offset” value. With every time you press the button the time offset will be increased /decreased by half an hour. Summer: Press [Vol◄/►] to switch this function “On” or “Off”. “Date” and “Time” items are only available when the “GMT Usage” is set to “Off”. Press [Vol◄/►] to select one item and use number buttons to input time and date directly. Time Display: Press [Vol◄/►] to switch this function “On” or “Off”. NOTE: If the current channel provides the correct time information, you will see the current time after you entered “Local Time Setting” menu. If the channel doesn’t provide time information, you have to input the date and time information manually. The most channels support the time signal. Press [Exit] to leave the “Time” menu. 3. Sleep Timer: Select “Sleep Timer” item and press [OK] to set the sleep timer. You will see “Sleep timer OFF / Sleep timer 10 / Sleep timer 30 / Sleep timer 60 / Sleep timer 90 / Sleep timer 120”. If you set a sleep time, the system will change to standby mode after the chosen time period.](https://usermanual.wiki/Sandmartin/DCM4-HDR/User-Guide-1558720-Page-27.png)
![28Menu Operations 5.4 OSD Setting When you select “OSD Setting” you will see a screen like beside: 1. Subtitle Display: Press [Vol◄/►] to select “Off”, “Standard” or “Teletext Subtitle”. If the current channel has subtitle information, it will be displayed if this function is “Standard” or “Teletext Subtitle”. If this function is “Off” subtitles won’t be displayed. 2. OSD Timeout: This setting determines the duration the info window is displayed on the screen when you change channels. Press [Vol◄/►] to set the time between 1 to 10 seconds. 3. Position: Press [Vol◄/►] select the position between top and bottom. 4. OSD Transparency: With this parameter you can set the transparency of the menus. Press [Vol◄/►] select the value between 10%, 20%, 30%, 40% and “Off”(means no transparency function). 5. Logo From USB: Press [Vol◄/►] to select “Off” and “On”. Set the image as background. 6. Load OSD Setting Default: If you want to reset your OSD settings to the default settings then select this item and press [OK]. 7. Press [Exit] button to leave the “OSD Setting” menu. 5.5 Parental Lock You can set a password for anyone who wishes to operate the “Installation” menu. You can also set the password to lock channels. Below you find how to set and change the password. 1. On “Parental Lock” press [OK] to open a dialogue box and input the password. After you entered the correct password, you will see a screen like beside:](https://usermanual.wiki/Sandmartin/DCM4-HDR/User-Guide-1558720-Page-28.png)
![29Menu Operations 2. Menu Lock: If Menu Lock is set to “Yes” then you need to enter the password every time you want to open the menu. If set to “No” then you can open the menu without entering the password first. 3. Channel Lock: If set to “Yes” then you need to enter the password before you can see those channels which have been marked as locked channels in the channel menu. If set to “No” then even those channels can be selected without entering the password first. 4. New Menu Password: Here you can change the existing password. You should do this after you set up the receiver the first time and every time when you think that your password is known by unauthorized persons. To change the password enter the new password in the “New Menu Password” item and repeat the same one in the “Confirm Password” item. If the passwords are not identically then you will see a warning message. If you entered the same new password in both fields then you will see the message “Saving Data, Please Wait…”. From now on you need to use the new password to open locked menus or locked channels. NOTE: The default password is 0000. 5. Basically the operation of “New Chan(channel) Password” is same as “New Menu Password”. 6. Press [Exit] to leave the “Parental Lock” menu. 5.6 Power setting When you select this option, you will see a screen like beside: 1. Automatic Standby: press [OK] to open the “Automatic Standby” menu. Automatic Standby: Press [Vol◄/►] to select “Off” and “On”. Time: Press [Vol◄/►] to select “1hr” ~ “8hr”.](https://usermanual.wiki/Sandmartin/DCM4-HDR/User-Guide-1558720-Page-29.png)
![30Menu Operations 2. LNB Power: If your receiver is connected to the LNB directly then you need to set the LNB Power to “On”. If your receiver is connected to a multi switch (SMATV signal distribution system) then it may be that you don’t need to provide the power to the LNB. But since this is depending on the kind of installed distribution system we recommend you to contact your installer or to refer to the user manual of this system to get the correct information. You also just can change this setting and check if you still can receive the channels. If the LNB Power is off and you still can see all channels then we recommend this setting. 3. Low Power Consumption: At this option, you could Enable / Disable the low power consumption mode. This mode allows saving current consumption when the receiver is stand-by. Low power consumption mode only can be enabled when the VCR Loopthrought option (see point 5.2.) is Settop master selected. By the other way, if you choose VCR master, then the Low Power Consumption option will not be active and the receiver will not be in LPC mode. 4. Press [Exit] button to leave this menu. 5. Press [Exit] button to leave this menu. 5.7 TCP/IP Setting 1. The Settop must be switched off. Please connect your Settop with the Internet-Router via the Ethernet Cable (RJ45) (not part of the delivery). 2. Switch Settop power on. 3. Enter into the main menu and User Options, also Select “TCP/IP” setting and confirm with [OK]. 4. To navigate in this menu please use V, V and [OK].](https://usermanual.wiki/Sandmartin/DCM4-HDR/User-Guide-1558720-Page-30.png)
![31Menu Operations 5. Enable (Auto IP) and move to [MENU] to confirm with [OK]. 6. In case you want to setup your Network manually, please disable Auto IP [disabled] and set the required parameter by using the number buttons on your remote control, move to [MENU] to confirm with [OK]. 5.8 MAC Setting When you select MAC Setting, you will see a screen like beside: 1. When you select Default, then all changes you made will be reset to default values. 2. Manual: Press [OK] and you will see below menu. You can enter the number, the RCU to select character. Press [Red] button will delete the character. Press [Yellow] button will shift the character.](https://usermanual.wiki/Sandmartin/DCM4-HDR/User-Guide-1558720-Page-31.png)
![32Menu Operations 6. Tools When you enter to “Tools” menu, you will see a screen like beside: In “Tools” menu: 1. Press [CH▲/▼] to select the wanted item among Information, Quick Setup, Factory Default, Software Upgrade, SatcoDX Auto Programming and CAS. 2. Press [OK] to enter the selected item. 6.1 Information 1. When you select the “Information” menu you will see a screen like beside. The screen displays data about the current channel. 2. Press [Exit] button to leave the information display. 6.2 Quick Setup When the Settop is used, which need to repeat set menu Language, First Audio, Second Audio, LNB Power, LNB2 Power, Single Search, Multi Satellite Search and Main Menu.](https://usermanual.wiki/Sandmartin/DCM4-HDR/User-Guide-1558720-Page-32.png)
![33Menu Settings 6.3 Factory Default When you press [OK] on the “Factory Default” item: 1. A dialogue box will occur where you need to enter the password. 2. After you input the correct password a warning message will be displayed like the one beside. 3. If you select “Yes” then all changes you made will be reset to default values. Make sure you really want to do this! 4. Press [Exit] in both steps will close the window without resetting the receiver. 6.4 Software Upgrade When you enter to “Software Upgrade” menu, you will see a screen like beside: 1. Press [CH▲/▼] to select the wanted item among USB-STB Upgrade, STB-STB Upgrade, Backup To USB, OTA Upgrade and Net Upgrade. 2. Press [OK] to enter the selected item. 6.4.1 USB-STB Upgrade This option allows updating the software of the receiver with the received data from a USB memory device. To do it, connect a USB memory device to the receiver and accede to this menu option. The last software version to be loaded must be placed at the root path of your USB device. 1. Upgrade Mode: the mode of the upgrade to be chosen, Press [Vol◄/►] to select Software, Whole, User](https://usermanual.wiki/Sandmartin/DCM4-HDR/User-Guide-1558720-Page-33.png)
![34Menu Settings Interface, Default DB, CAS and Ch.List & Setting. 2. In the “Software” item press [Vol◄/►] to select the file which you want to scan or press [OK] to open the “USB list” to select directly with [CH▲/▼], and press [OK] to finish the selection. 3. Start: Press [OK] to start upgrade. 4. Once the file has been loaded, it requires the conformity to end the upgrading process, writing into the receiver “Are you sure to burn flash ?”. Press [OK] to upgrade the receiver. In case during the reading of the file, it is corrupted or it would be a not appropriated for this model of receiver, an alert message would appear “Error reading the USB disk”. 5. After pressing [OK] the receiver will write into the Flash memory, and it will reboot to end the upgrading process. NOTE: The upgrade file is the binary file, *.bin. Only the files, which extend name is bin, would be displayed. User need put the upgrade file under root of USB card. 6.4.2 STB-STB Upgrade This function allows you to upgrade the software of the receiver. This can be done from PC to receiver or from a master receiver to a slave receiver. 1. Connect master receiver or PC to the slave receiver via serial interface (0-Modem cable). Enter the “Software Upgrade” menu of the master receiver and press [Vol◄/►] to change the upgrade mode. Upgrade modes include: Software, Whole, User Interface, Default DB, CAS and Ch.List & Setting. 2. Switch on the slave receiver. 3. Mark “Start” on the master reeciver and press [OK] to start upgrade. Wait until the display on the front panel shows “-END”. Then switch off the receiver and on again. Now the new software is used. 4. Press [MENU] to save the setting without upgrade.](https://usermanual.wiki/Sandmartin/DCM4-HDR/User-Guide-1558720-Page-34.png)
![35Menu Settings 6.4.3 Backup To USB This function allows you Dump Software and Ch.List & Setting fo the receiver to external hard drives. 1. press [Vol◄/►] to change the backup mode. backup mode include: Dump Software and Ch.List & Setting. 2. Mark “Start” on the master reeciver and press [OK] to start Backup. 3. Press [MENU/EXIT] to save the setting without Backup. 6.4.4 OTA Upgrade This function can upgrade the software of your receiver through data sent by a satellite. At the moment we offer satellite updates only through ASTRA1 and Hotbird satellites. 1. Select the satellite and TP or input the TP value and download PID. 2. Then mark “Start” and press [Enter] to begin the download of the upgrade. This may need up to 60 minutes. Therefore we suggest using of this function only if you don’t intent to watch TV during this time. 3. Auto OTA Config: The system could upgrade automatically in standby mode. 6.4.5 Net Upgrade After selecting “Net Upgrade” you will see a window like beside: Net upgrade supporting. Follow below operate methods: 1. Select one computer as FTP or HTTP server 2. Use create-bin.exe tool to create SW in](https://usermanual.wiki/Sandmartin/DCM4-HDR/User-Guide-1558720-Page-35.png)
![36Menu Settings computer, which used for STB upgrade. 3. Connect STB to Router, and then contact Router to computer. 4. Setting right Port, FTP use port 21, HTTP use port 80. 5. Setting right address, User name, Password in STB, which need meet computer parameter. 6. At last, press ‘Start’ button to update SW from computer. 6.5 SatcoDX Auto Programming This function is using the tables of the SatcoDX websites to update your channel and satellite lists. You need a special application which is available on the CD-ROM of the Tele-Satellite magazine. Install this software on your PC first. 1. Start the SatcoDX application on your PC. 2. Select “SatcoDX Auto Programming” item from the “Tools” menu and press [OK]. The screen will show the message “OK to Proceed”. 3. Press [OK] again and you will see the message “Ready to Download”. 4. In the PC application set the Baud Rate to 115200 and start the download procedure. ! Caution: The new download channels will delete the original channels list. Please be careful before using it. 6.6 CAS When you enter to “CAS” menu, you will see a screen like beside: CA In this option, you can find information about the conditional access system. If there is no card or it is placed incorrectly, information about “No card” &“Unknown” will be showed on the screen. With a FELEC-CAS card, information about the card will be showed. Note: Card must be inserted with chip in upper side.](https://usermanual.wiki/Sandmartin/DCM4-HDR/User-Guide-1558720-Page-36.png)
![37Menu Settings 7. Media Management When you enter to “Media Management” menu, you will see a screen like beside: In “Media Management” menu: 1. Press [CH▲/▼] to select the Media List, Media Control and Disk Information. 2. Press [OK] to enter the selected item. 7.1 Media List Press [CH▲/▼] to select the wanted item partition. Press [Red] button to open the “Rename” window like showed beside. Press [CH▲/▼] / [Vol◄/►] to select the leading character of the channel name and press [OK] to confirm it. If you enter the Media List menu a window like the one below will open. 1. Press [Vol◄/►] select the all, mp3, image, video, music list, picture list, video list, Record list. 2. You can move the highlighted Record with [CH▲/▼] to preview the highlighted program in the preview window. 3. Press [PGUP/PGDN] on the RCU to jump between the channels by pages. 4. Press [Menu] or [Exit] buttons to enter TV playing mode. 5. The color buttons offer further functions to manage.](https://usermanual.wiki/Sandmartin/DCM4-HDR/User-Guide-1558720-Page-37.png)
![38Menu Settings 7.1.1 All [Edit] Press [Red] button to open the “Edit” window like showed beside. The color buttons offer further functions to manage. 1. Rename Press [Red] button to open the “Rename” window like showed beside. Press [CH▲/▼] / [Vol◄/►] to select the leading character of the channel name and press [OK] to confirm it. After entering the character(s) highlight “OK” in the window and press [OK] on the RCU. Press [Exit] button to close the find window and brings you back to the Record list. 2. Delete In all edit menu press [Green] button will open another window where you can choose between delete one and delete all. Del One Press [Red] button to mark a “mp3 / image / video”for deleting. Marked “mp3 / image / video” will be deleted after you confirm to save the changes when you leave this menu. Del All a) Press [Green] button to show a deleting icon behind all “mp3 / image / video” name.](https://usermanual.wiki/Sandmartin/DCM4-HDR/User-Guide-1558720-Page-38.png)
![39Menu Settings b) Press [MENU] button you will be asked “Are you sure to save?”. Select “OK” to delete all “mp3 / image / video”. Select “Cancel” to cancel the operation. 3. Move Press [Yellow] button to show a moving icon behind the “mp3 / image / video / folder” name. Move the “mp3 / image / video / folder” to the desired folder list with [CH▲/▼]. Press [OK] to confirm the position. 4. Folder Press [Blue] button to open the “New Folder” window like showed beside. Press [CH▲/▼] / [Vol◄/►] to select the leading character of the folder name and press [OK] to confirm it. After entering the character(s) highlight “OK” in the window and press [OK] on the RCU. Press [Exit] button to close the find window and brings you back to the all list. [Add] In all menu press [Green] button will open another window where you can choose between add one and add all. Add One Press [Red] button to mark a “mp3 / image / video”for add. Marked “mp3 / image / video” will be add after you confirm to save the changes when you leave this menu.](https://usermanual.wiki/Sandmartin/DCM4-HDR/User-Guide-1558720-Page-39.png)
![40Menu Settings Add All a) Press [Green] button to show a add icon behind all “mp3 / image / video” name. b) Press [MENU] button you will be asked “Are you sure to save?”. Select “OK” to add all “mp3 / image / video”. Select “Cancel” to cancel the operation. [Find] Press [Blue] button to open the “Find” window like showed beside. Press [CH▲/▼] / [Vol◄/►] to select the leading character of the channel name and press [OK] to confirm it. After entering the character(s) highlight “OK” in the window and press [OK] on the RCU. Press [Exit] button to close the find window and brings you back to the all list. [play] The play offer further functions to manage. If you enter the play menu a window like the one below will open. The color buttons offer further functions to manage the channel list. Red: When you play music program, press [Red] will stop the program, press [Red] again will play the program continually. Green: When you play music program, press [Green] button to back the program fast. Yellow: When you play music program, press [Yellow] button to fast forward the program. Blue: Change play mode by [Blue] Key, and play mode include: Sequential / Random / Single repeat / all repeat. Press [Exit] to return to the previous menu.](https://usermanual.wiki/Sandmartin/DCM4-HDR/User-Guide-1558720-Page-40.png)
![41Menu Settings 7.1.2 Music Basically the operation of “mp3” is same as “all”. 7.1.3 Picture Basically the operation of “Picture” is same as “all”, except that in the Yellow buttons offer further functions to manage. In image menu press [Yellow] button will open another window. press [Red] to set the image as background. press [Green] to delete the image as background. 7.1.4 Video Basically the operation of “video” is same as “all”. 7.1.5 Music List The color buttons offer further functions to manage. [Delete] In media list menu press [Green] button will open another window where you can choose between add one image and add all image. Del One Press [Red] button to mark a image for add. Marked image will be add after you confirm to save the changes when you leave this menu. Del All a) Press [Green] button to show a add icon behind all image name. b) Press [MENU] button you will be asked “Are you sure to save?”. Select “OK” to add all image. Select “Cancel” to cancel the operation. [Find] Basically the operation of “Music List Find” is same as “all Find ”.](https://usermanual.wiki/Sandmartin/DCM4-HDR/User-Guide-1558720-Page-41.png)
![42Menu Settings 7.1.6 Picture List Basically the operation of “Picture List” is same as “Music List”, except that in the Yellow (Setup) buttons offer further functions to manage. Press [Yellow] button to open the “Setup” window. Select the item you want to adjust with [CH▲/▼] and change the value with [VOL◄/►] Size: Full and Real. Time: 0 Sec, 1 Sec, 2 Sec, 3 Sec, 4 Sec, 5 Sec, 6 Sec, 7 Sec, 8 Sec and 9 Sec. Repeat: On and Off. Effect: Normal, Shutters, Brush, Slide, Random and Fade. Mp3: On and Off. 7.1.7 Video list Basically the operation of “Video List” is same as “Music List”. 7.1.8 Record list If you enter the Record list menu a window like the one below will open. The color buttons offer further functions to manage the channel list. [Rename] 1. Press [Red] button to open the “Rename” window like showed beside. Press [CH▲/▼] / [Vol◄/►] to select the leading character of the channel name and press [OK] to confirm it. 2. After entering the character(s) highlight “OK” in the window and press [OK] on the RCU. 3. Press [Exit] button to close the find window and brings you back to the Record list.](https://usermanual.wiki/Sandmartin/DCM4-HDR/User-Guide-1558720-Page-42.png)
![43Menu Settings [Lock] In channel Record menu, press [Green] button to place a lock icon behind the name of the highlighted Record. Marked Records will be locked and displayed only after password has been entered if you confirm to save the changes when you leave this menu. [Copy] In channel Record menu, press [Yellow] button copy the recorded programme to another disk. Press [Vol◄/►] to switch select copy path, Select “OK” to add all image. Select “Cancel” to cancel the operation. [Delete] In channel Record menu, press [Red] button will open another window where you can choose between add one image and add all image. Del One Press [Red] button to mark a image for add. Marked image will be add after you confirm to save the changes when you leave this menu. Del All c) Press [Green] button to show a add icon behind all image name. d) Press [MENU] button you will be asked “Are you sure to save?”. Select “OK” to add all image. Select “Cancel” to cancel the operation.](https://usermanual.wiki/Sandmartin/DCM4-HDR/User-Guide-1558720-Page-43.png)
![44Menu Settings 7.2 Media Control 1. Reserved TMS Size: Press [Vol◄/►] to switch between “0 MB / 200 MB and 500 MB”. Select “MENU / EXIT”, press [MENU / EXIT] to reset to make tms size valid now. Select “Cancel” press [OK] to cancel the operation. 2. Jump Step Value: Press [Vol◄/►] to switch between “1 mins / 3 Mins / 5 Mins / 10 Mins / 15 Mins”. The value control the step of I◄◄/►►I operation. 3. Record Type: Press [Vol◄/►] to switch between “TS and PS”. 4. Disk: Press [Vol◄/►] to switch between /C /D..... 5. Format Disk: If you want to delete the hard disk totally, you can do it with the [OK] Button Format and the hard disk will be completely erased. Caution: This process will delete also saves you have made with Backup tools. 7.3 Disk Information 1. When you select the “Disk Information” menu you will see a screen like beside. The screen displays data about the current HDD. 2. Press [Exit] button to leave the information display.](https://usermanual.wiki/Sandmartin/DCM4-HDR/User-Guide-1558720-Page-44.png)
![45Menu Settings 8. Internet When you enter to “Internet” menu, you will see a screen like beside: In “Media Management” menu: 1. Press [CH▲/▼] to select the Weather, Internet radio and Flickr. 2. Press [OK] to enter the selected item. 8.1 Weather The correct network configuration allows receiving actual Weather data. 1. Display of the current time and date. 2. Display of the current temperature. 3. Display of the humidity. 4. Display of the lowest and highest temperature of the day and next day’s preview. 5. Selection of the country, to navigate with [Vol◄/►]. 6. Selection of the City, to navigate with [Vol◄/►]. 7. Actualization of the data with [start]. Note: According to network capacity the connection time may varies. 1234567](https://usermanual.wiki/Sandmartin/DCM4-HDR/User-Guide-1558720-Page-45.png)
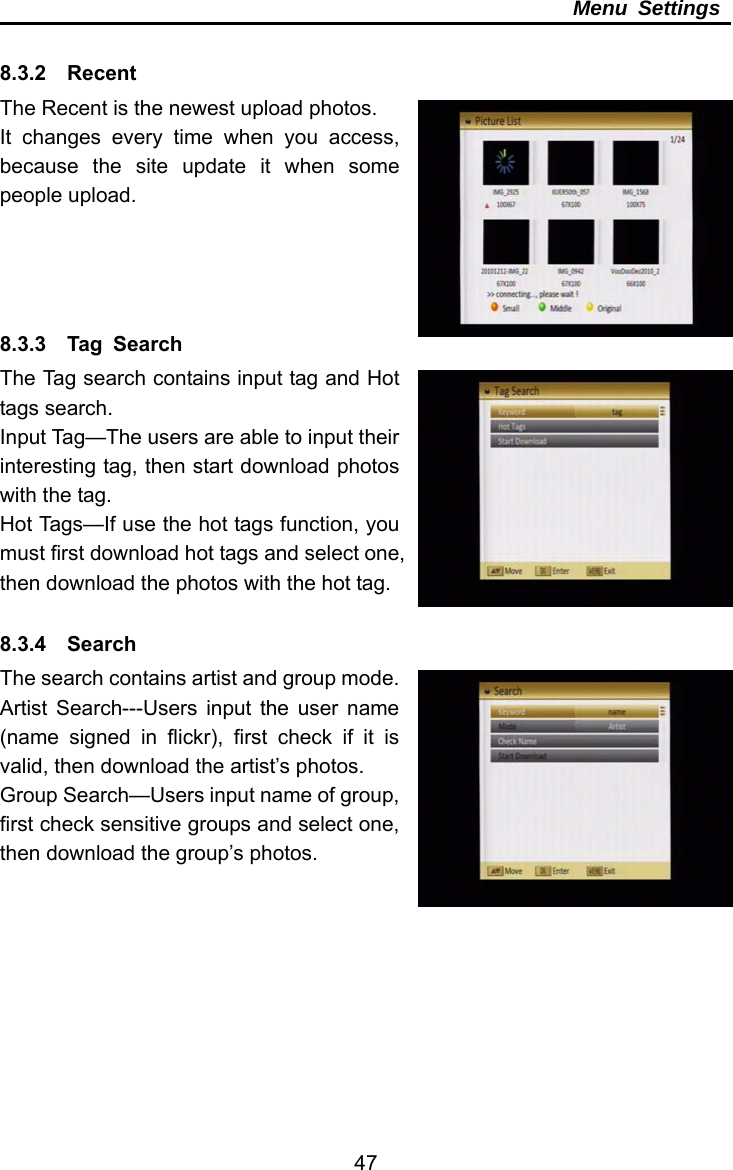
![46Menu Settings 8.2 Internet Radio 1. Please select “Genre” and set the program type by using the [Vol◄/►] on your remote control. 2. Please select” start point” and set the routine by using the Number buttons on your remote control. After finish above two steps, then move to “start” to confirm with [OK]. 3. Please select” key word” and set the singer name you preferred by using the Number buttons on your remote control in case is not preconfigured. After finish step 3, then move to “search” to confirm with [OK] Note: According to network capacity the loading time may varies. 8.3 Flickr The main menu contains 4 modules: Date, Recent, Tag Search and Search You can choose their way to share the photos list, and you can choose a photo to show the full screen by photo size (small, middle, original) 8.3.1 Date You can input Date, Photos count and Page Number. Then start to download date interesting photos. Date—Default is 2009-01-01. Today and yesterday’s photo sets maybe are null. Photos count—Default is 24, max is 30. Page Number—Default is 1, max is 80.](https://usermanual.wiki/Sandmartin/DCM4-HDR/User-Guide-1558720-Page-46.png)