Soleus Air 360 Micathermic Heater W Remote Hm5 15R 32 Users Manual 07 10
HM5-15R-32 to the manual 25ea7efd-bc88-4016-a86c-2e8b47c8f429
2015-02-02
: Soleus-Air Soleus-Air-360-Micathermic-Heater-W-Remote-Hm5-15R-32-Users-Manual-447141 soleus-air-360-micathermic-heater-w-remote-hm5-15r-32-users-manual-447141 soleus-air pdf
Open the PDF directly: View PDF ![]() .
.
Page Count: 10

© 2007 Soleus Air International
HM5-15R-32 360º Micathermic
Heater w/ Remote
Model No. HM5-15R-32
3092402

2
Thank you for choosing a Soleus Air Micathermic heater. This owner’s manual will provide you with
valuable information necessary for the proper care and maintenance of your new product. Please take
a few moments to thoroughly read the instructions and familiarize yourself with all the operational
aspects of your new Soleus Air Micathermic heater.
For your own records, please attach a copy of your sales receipt to this manual. Also, write the store
name/location, date purchased, and serial number below:
Store Name: ____________________________________________________
Location: ______________________________________________________
Date Purchased: _________________________________________________
Serial Number (located on back of unit): ______________________________
IMPORTANT INSTRUCTIONS
Before using your Soleus Air personal heater, please read this owner’s manual carefully. Store this manual in a
safe place for future reference.
1. Read ALL instructions before using this unit.
2. CAUTION: Risk of Electric Shock. DO NOT open or try to repair the heater yourself.
3. This heater is hot when in use. To avoid burns, DO NOT let bare skin touch hot surfaces. If provided,
use handles when moving this heater.
4. Keep combustible materials, such as furniture, pillows, bedding, paper, clothes, and curtains at least 3
ft from the front of the heater and keep them away from the sides and rear. DO NOT place towels or
other objects on the heater.
5. Extreme caution is necessary when any heater is used by or near children or the disabled, or when the
heater is left operating and unattended.
6. DO NOT operate any heater with a damaged cord or after the heater malfunctions, has been dropped
or damaged in any manner. Return heater to authorized service facility for examination, electrical or
mechanical adjustment, or repair.
7. This heater is not intended for use in bathrooms, laundry areas and similar indoor locations. NEVER
locate heater where it may fall into a bathtub or other water container. To protect against electrical
hazards, DO NOT immerse in water or other liquids.
8. DO NOT touch the control panel or plug with a wet hand.
9. DO NOT run cord under carpeting. DO NOT cover cord with throw rugs, runners, or similar
coverings. Arrange cord away from traffic area and where it will not be tripped over.
10. DO NOT insert or allow foreign objects to enter any ventilation or exhaust opening as this may cause
an electric shock or fire, or damage the heater.
11. To prevent a possible fire, DO NOT block air intakes or exhaust in any manner. DO NOT use on soft
surfaces, like a bed, where openings may become blocked.
3
PRODUCT INFORMATION & SPECIFICATIONS
Micathermic heating technology combines two popular heating technologies to create the ideal room heater.
Using radiant and convection heat, Micathermic heaters are able to achieve full power within minutes and
provide a consistent and comfortable silent heat without causing dry spots.
DISCLAIMER
ALL INFORMATION AND THE TECHNICAL SPECIFICATIONS PRESENTED IN THIS USER’S MANUAL ARE THE
PRESENTATION OF THE MANUFACTURER. SOLEUS INTERNATIONAL HAS NOT CONDUCTED INDEPENDENT
TEST TO THE INFORMATION AND THE SPECIFICATIONS PRESENTED HEREWITHIN.
12. A heater has hot and arcing or sparking parts inside. DO NOT use in areas where gasoline, paint,
explosive and/or flammable liquids are used or stored. Keep unit away from heated surfaces and open
flames.
13. Avoid the use of an extension cord because the extension cord may overheat and cause a risk of fire.
However, if you have to use an extension cord, the cord shall be No16.AWG minimum size and rated
not less than 1500W.
14. To avoid fire or shock hazard, plug the unit directly into a 120 V AC electrical outlet.
15. To disconnect heater, turn controls to OFF, then remove plug from outlet. Pull firmly on the plug, DO
NOT unplug by pulling on the cord.
16. Always unplug the unit before moving or cleaning, or whenever the heater is not in use.
17. Use only for intended household use as described in this manual. Any other use not recommended by
the manufacturer may cause fire, electric shock, or injury to persons. The use of attachments not rec-
ommended or sold by unauthorized dealers may cause hazards.
18. Always use on a dry, level surface.
19. DO NOT use outdoors.
20. WARNING: To reduce the risk of fire or electric shock, DO NOT use this unit with any solid-state
speed control device.
21. DO NOT attempt to repair or adjust any electrical or mechanical functions on this unit. Doing so will
void your warranty. The inside of the unit contains no user serviceable parts. Qualified personnel
should perform all servicing only.
22. Connect to properly grounded outlets only.
23. SAVE THESE INSTRUCTIONS.
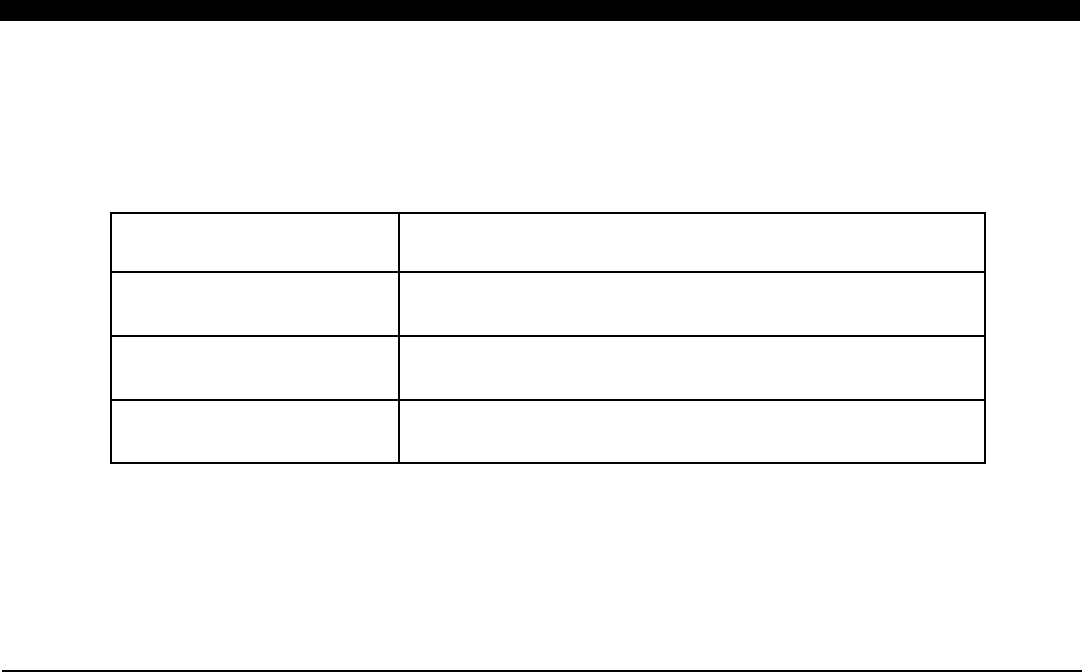
Voltage Rating 120 V (60Hz)
Power Consumption 750W (LOW) / 1500W (HIGH) / 750W (ECO)
Unit Size 13.6 in. (W) x 13.6 in. (D) x 25.7 in. (H)
Unit Weight 9.5 lbs

4
IN THE BOX
• MICATHERMIC HEATER
• REMOTE CONTROL
• REMOTE CONTROL BATTERY
• INSTRUCTION BOOKLET
• 4 - LEGS
Tip-Over Safety Feature
This heater is equipped with a tip-over safety feature. Once the heater is tipped over, an internal switch will
automatically shut the heater off. Once the heater is restored to an upright position, the heater will reset. To
continue operation, turn on the heater using the supplied remote control or the control panel on the heater.
Overheat Safety Feature
This heater is equipped with a overheat safety feature. When the heaters internal components reach a certain
temperature that could cause overheat and possible fire, the heater will automatically shut off. To reset the
heater, unplug the heater power cord from the electrical outlet for 10 minutes. After 10 minutes, plug the
heater into the electrical outlet and turn on using the supplied remote control or the control panel on the heater.
WARNING: It is normal for the power cord to feel warm to the touch; however, a loose fit between the outlet
and the plug may cause overheating of the plug. If this occurs, try inserting the plug into a different outlet.
Contact a qualified electrician to inspect the original outlet for damage.
SAFETY FEATURES
WARNING: This heater is for use on 120 volts. The
cord has a plug as shown in A. An adapter as shown in
C is available for connecting three-blade grounding-
type plugs to two-slot receptacles. The grounding lug
extending from the adapter must be connected to a
permanent ground such as a properly grounded outlet
box. The adapter should not be used if a three-slot
grounded receptacle is available.
DO NOT DEFEAT THE SAFETY PURPOSE OF
THE GROUNDED PLUG.
• 4 - WHEELS
• 4 - RUBBER FEET
• 4 - WHEEL SCREWS
• 4 - SMALL BLACK SPRING WASHERS
• 4 - SMALL GREY WASHERS
5
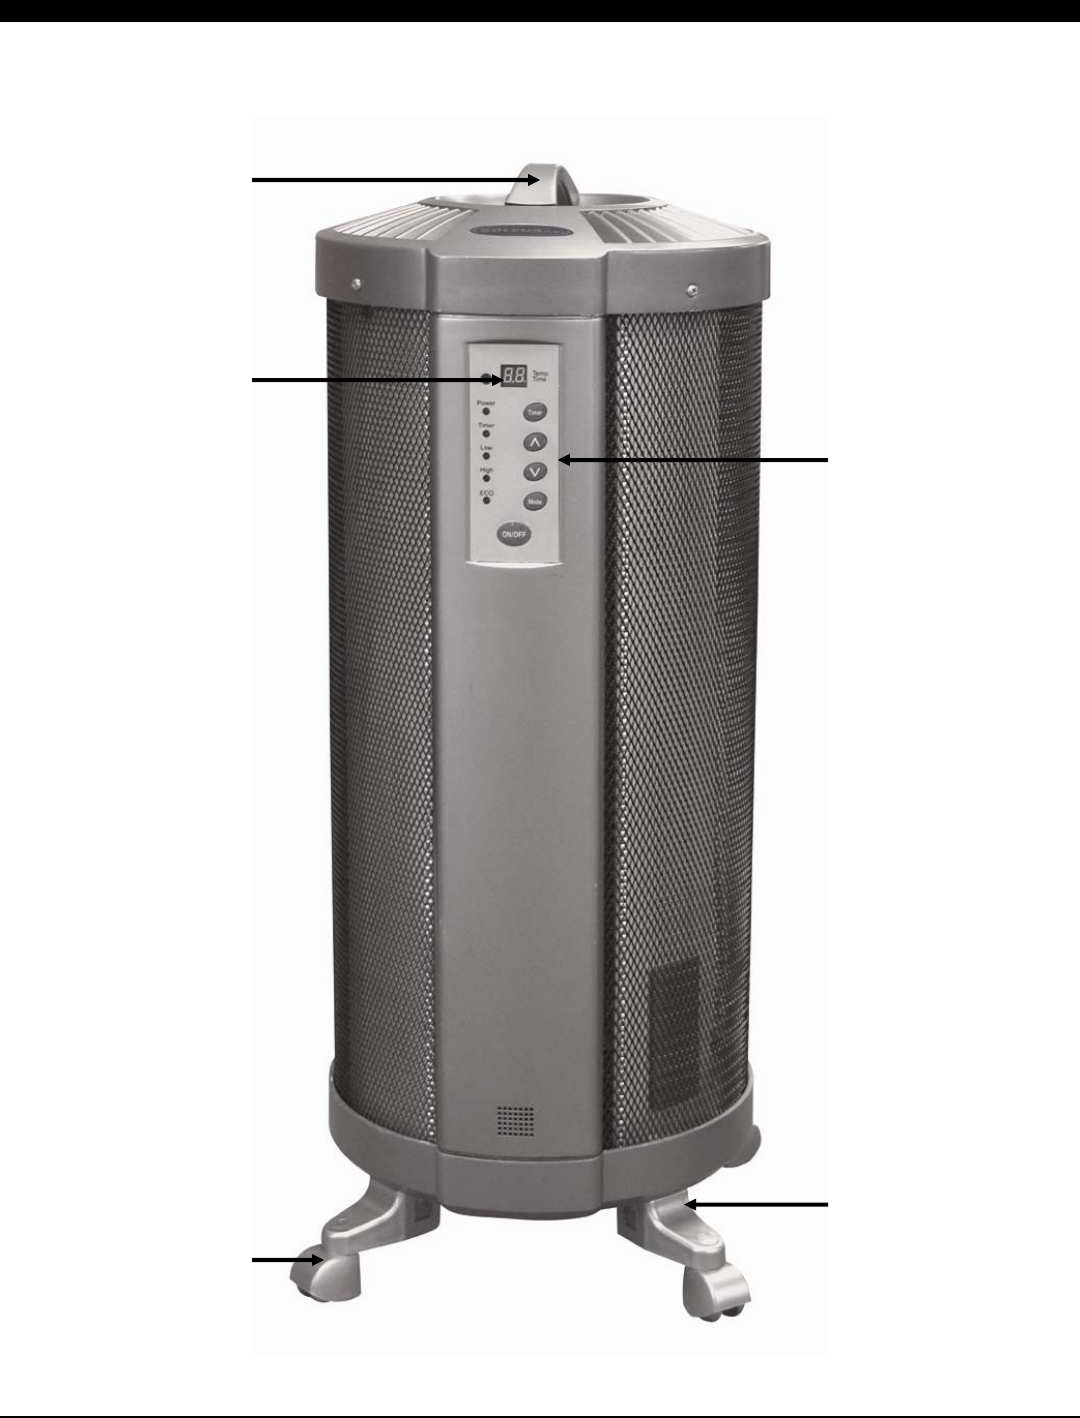
PRODUCT DIAGRAM
CARRY HANDLE
WHEELS
LEGS
DIGITAL DISPLAY
CONTROL PANEL

6
ASSEMBLY
TOOLS NEEDED: Phillips Head Screwdriver
This heater requires assembly of the LEGS and WHEELS only. There are 3 ways to assemble the LEGS and
WHEELS of the heater. The first way is to used both the LEGS and WHEELS. Assembling the heater in this
manner will allow the heater to be rolled using the supplied wheels. The second assembly method uses the
LEGS only, and the third method uses small RUBBER FEET (included) instead of the LEGS and WHEELS.
Using the LEGS and WHEELS assembly, or LEGS only assembly will result in more stability and less chance
of the heater possibly tipping over.
LEGS and WHEELS assembly
1. Attach the WHEELS to the LEGS using the supplied WHEEL SCREWS and WASHERS.
2. Place the WHEEL SCREW inside the wheel (see Figure A below). The screw head should be placed
between the WHEELS. The threads of the screw will show through the top of the WHEEL.
3. Place the SMALL BLACK SPRING WASHER over the thread of the screw and on top of the wheel.
4. Place the SMALL GREY WASHER over the thread of the screw and on top of the SMALL BLACK
WASHER.
5. Tighten the screw to attach the WHEEL to the LEG. Repeat this process for the other WHEELS and
LEGS.
6. After assembling the WHEELS and LEGS is complete, simply place the LEGS over the 4 LEG MOUNTS
on the bottom of the heater. Once the LEGS are snapped in, assembly is complete.
LEGS only assembly
1. Place the LEGS over the 4 LEG MOUNTS on the bottom of the heater. Once the LEGS are snapped in
assembly is complete.
Rubber Stopper assembly
1. Place each of the 4 RUBBER FEET on the bottom of the 4 LEG MOUNTS.
2. Each RUBBER FOOT has a connector that must be placed inside the small hole on the bottom of the LEG
MOUNTS.
3. Assembly is complete once the RUBBER FEET are firmly attached to the LEG MOUNTS.
WHEEL SCREW
WHEEL
SMALL BLACK SPRING WASHER
SMALL GREY WASHER
LEG
FIGURE A
7
OPERATING INSTRUCTIONS
CONTROL PANEL & REMOTE OPERATION
1. Place the heater on a firm, level surface and plug into a grounded 120V 60Hz power outlet. Only operate
heater in upright position with caster wheels attached.
2. Turn the heater on by pressing the On/Off button on the control panel or the supplied remote control.
3. Select a heat setting:
On the control panel, press the MODE button to toggle between the two heat settings; LOW (750W) and
HIGH (1500W) . When using the remote control press either HIGH or LOW buttons to select the
preferred power setting.
4. Adjust the thermostat by pressing the arrows on the control panel or remote control. The digital readout
will display the selected temperature.
5. Once you have chosen the desired temperature, the heater will remain on until the room temperature
increases to the temperature on the digital display. The heater will cycle on and off to maintain the desired
room temperature.
6. This heater is equipped with a 12-hour automatic shut-off timer. To activate the timer, press the TIMER
button on the control panel or remote control. Each press of the timer button will increase the heater oper-
ating time by one hour. The digital readout will display the number of hours you have selected. To turn
off the timer, simply press the TIMER button until the digital readout displays your current selected
temperature.
7. The indication lights on the control panel communicate how the product is operating. The POWER light
will turn-on when the unit is operating. The TIMER light will turn on when the timer has been activated.
8. Unplug the heater when not in use.
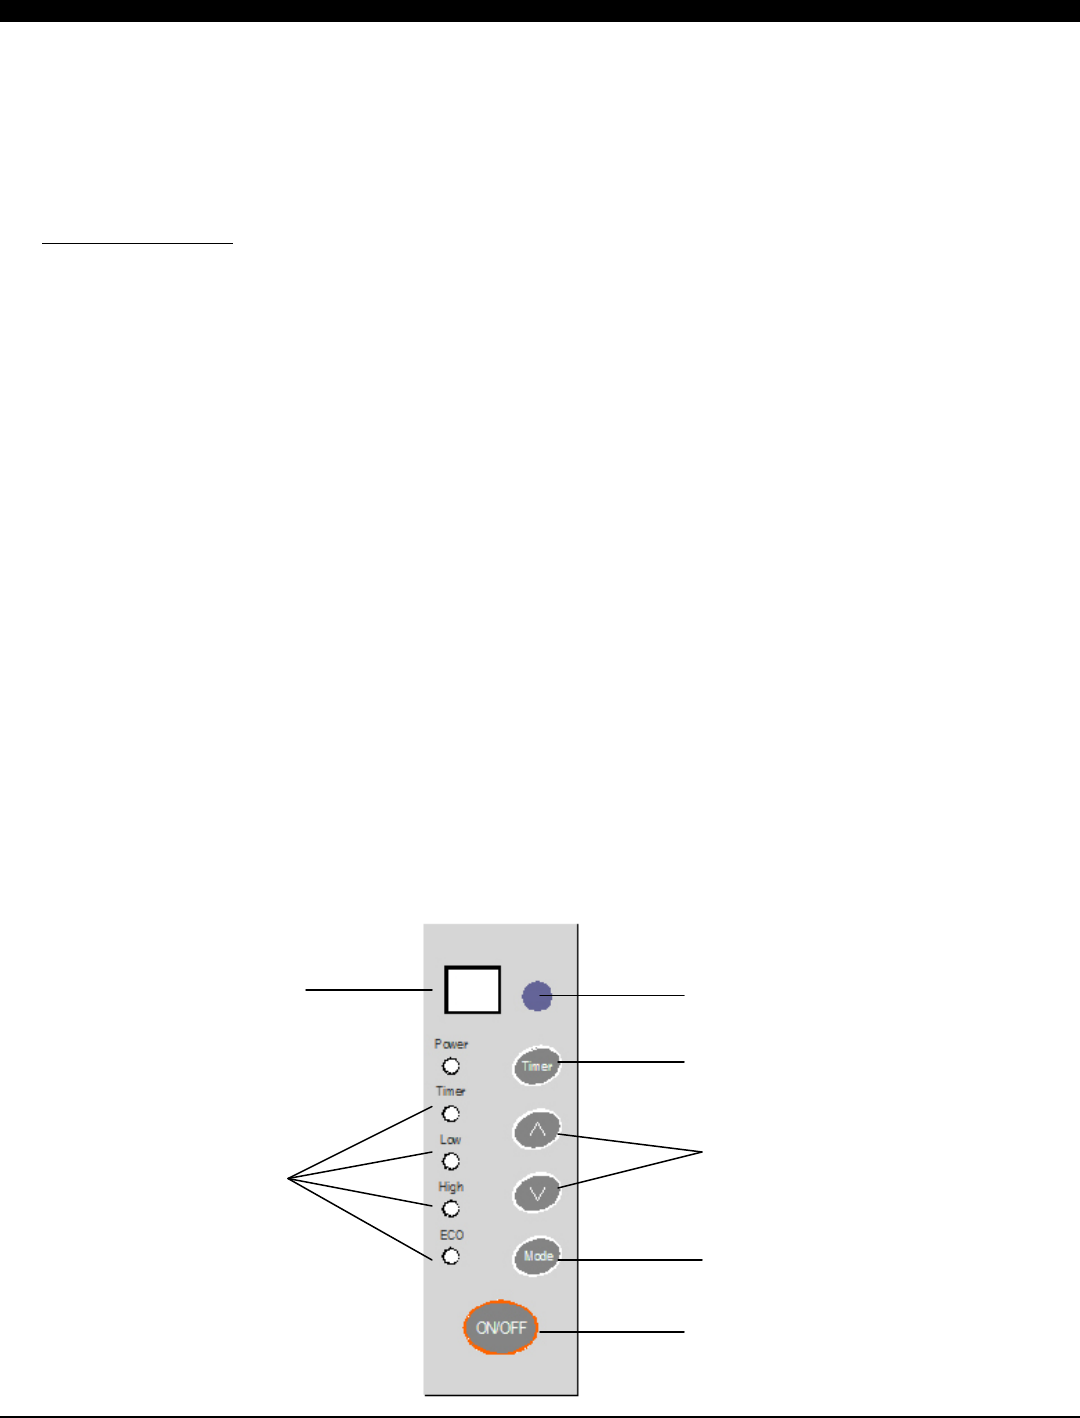
Receiver for Remote Control
Timer Select Button
Temperature Select Buttons
Mode Select Button
On/Off Button (Power)
Temperature & Timer
Display
Indication Lights

8
OPERATING INSTRUCTIONS (CONTINUED)
OPTIMAL OPERATING CONDITIONS
To get the most out of your Soleus Air Micathermic heater, follow these helpful hints:
1. All electric heaters are limited to maximum of 1500 watts (per UL and ETL requirements). Due to this
limitation all electric heaters can heat approximately 150 square feet. Micathermic heaters fit in this
category, but they are able to provide a more comfortable and consistent heat than other heating
technologies.
2. For optimal performance, place the heater in a room and close all windows and doors. This will confine the
heat to the area that needs it most.
3. To save energy and in turn save money in the winter, place the heater in a room or area that needs extra
heat instead of raising the thermostat on your central heating system. This heater will function very well as
an additional heating source and can easily maintain the temperature in most rooms and attached
bathrooms. There is no need to increase the heat in the entire house when you only need comfort in the
room in which you are currently located.
ABOUT ECO MODE
ECO mode is an energy saving function that limits the amount of electricity consumed by the heater. Once the
heater reaches a preset temperature, ECO mode will automatically turn on. Once ECO mode is on, the heater
will decrease energy consumption to 750 watts while still maintaining the set temperature on the digital
thermostat.

9
MAINTENANCE
1. Unplug the unit and let it cool completely.
2. To keep the heater clean, the outer shell may be cleaned with a soft, damp cloth. You may use a mild
detergent if necessary. After cleaning, dry the unit with a soft cloth. CAUTION: DO NOT let liquid
enter the heater.
3. DO NOT use alcohol, gasoline, abrasive powders, furniture polish, or rough brushes to clean the
heater. This may cause damage or deterioration to the surface of the heater.
4. DO NOT immerse the heater in water.
5. Wait until the unit is completely dry before use.
STORAGE
Store the heater in a cool, dry location when not in use. If available, use the retail packaging and pack up the
heater to prevent dust from collecting on and inside the heater.
TROUBLESHOOTING
If the heater will not operate, please check the following before seeking repair of service:
1. Check if the power cord is plugged into an electrical outlet, if not, plug in.
2. Check if electricity to the main fuse is working.
3. Check if the heater is set to ON by confirming the light on the control panel is lit. If not, press the
POWER button to turn on the unit.
4. Check if the heater is on a level surface. If the tip-over safety mechanism inside the heater is engaged
the heater will not run.
5. The room temperature has reached the temperature on the digital display of the heater. Increase the
temperature on the display so the heater will continue operation or wait for the room temperature to
drop below the set temperature on the heater.

10
WARRANTY
One Year Limited Warranty
Soleus International Inc. warrants the accompanying Soleus Air heater to be free of defects in material and workman-
ship for the applications specified in its operation instruction for a period of ONE (1) year from the date of original re-
tail purchase in the United States.
If the unit exhibits a defect in normal use, Soleus International Inc. will, at its option, either repair or replace it, free of
charge within a reasonable time after the unit is returned during the warranty period.
As a condition to any warranty service obligation, the consumer must present this Warranty Certificate along with a
copy of the original purchase invoice.
THIS WARRANTY DOES NOT COVER:
• Damage, accidental or otherwise, to the unit while in the possession of a consumer not caused by a defect in
material or workmanship.
• Damage caused by consumer misuse, tampering, or failure to follow the care and special handling provisions
in the instructions.
• Damage to the finish of the case, or other appearance parts caused by wear.
• Damage caused by repairs or alterations of the unit by anyone other than those authorized by Soleus Interna-
tional Inc.
• Freight and Insurance cost for the warranty service.
ALL WARRANTIES, INCLUDING ANY IMPLIED WARRANTY OF MERCHANT ABILITY ARE LIMITED TO
ONE-YEAR DURATION OF THIS EXPRESS LIMITED WARRANTY. SOLEUS INTERNATIONAL INC.
DISCLAIMS ANY LIABILITY FOR CONSEQUENTIAL OR INCIDENTAL DAMAGES AND IN NO EVENT
SHALL SOLEUS INTERNATIONAL INC’S LIABILITY EXCEED THE RETAIL VALUE OF THE UNIT FOR
BREACH OF ANY WRITTEN OR IMPLIED WARRANTY WITH RESPECT TO THIS UNIT.
This warranty covers only new products purchased from our authorized dealers or retailers. It does not cover used, sal-
vaged, or refurbished products.
As some states do not allow the limitation or exclusion of incidental or consequential damages, or do not allow
limitation on implied warranties, the above limitations and exclusions may not apply to you. This warranty gives you
specific legal rights, and you may also have other rights that vary from state to state.
For Technical Support and Warranty Service
Please Call (888) 876-5387
Or Write To:
Soleus International Inc.
9451 Telstar Ave.
El Monte, CA 91731 USA
www.soleusair.com
