Tomy TFY7292C Baby Monitor - Child Unit User Manual Manual Y7289C
TOMY International, Inc. Baby Monitor - Child Unit Manual Y7289C
UserManual.wiki
>
Tomy
>
TFY7292C User Manual
>
Manual - Y7289C
Contents
1.
Manual - Y7289C
2.
Manual - Y7291C
Manual - Y7289C
Navigation menu
Upload a User Manual
Namespaces
Wiki Guide
HTML
PDF
Info
Views
User Manual
Discussion / Help
Navigation
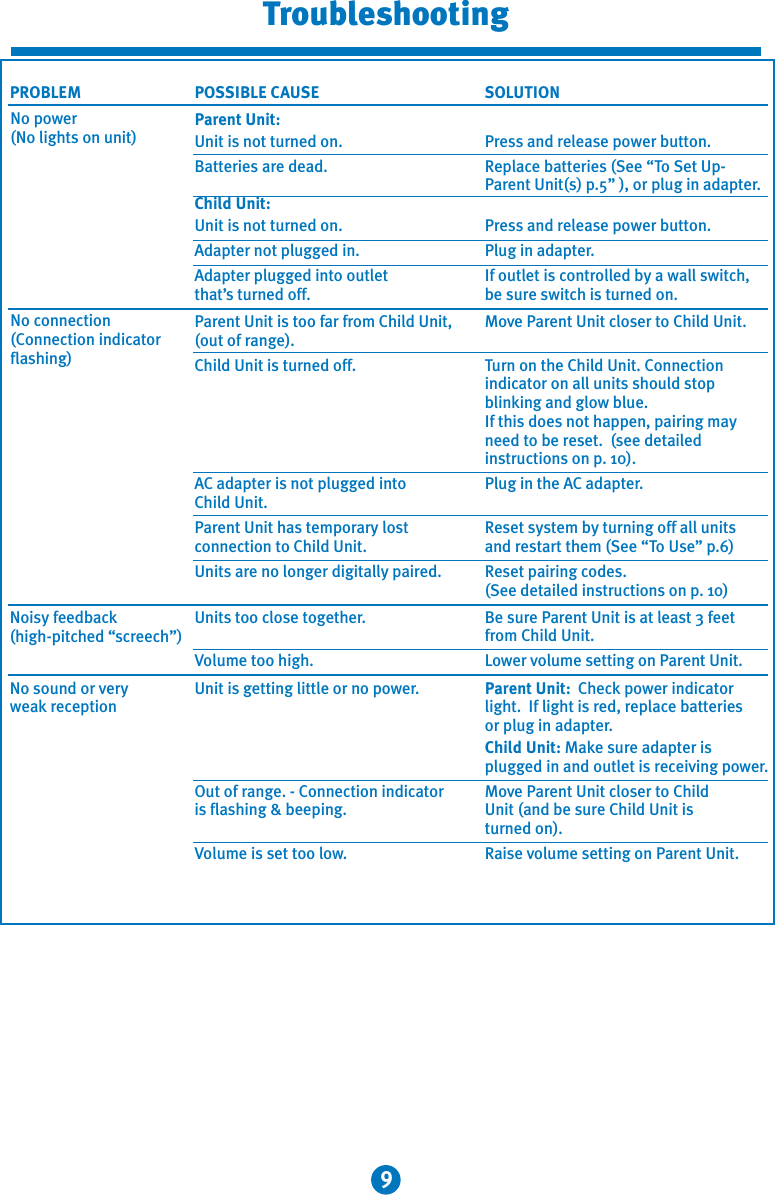
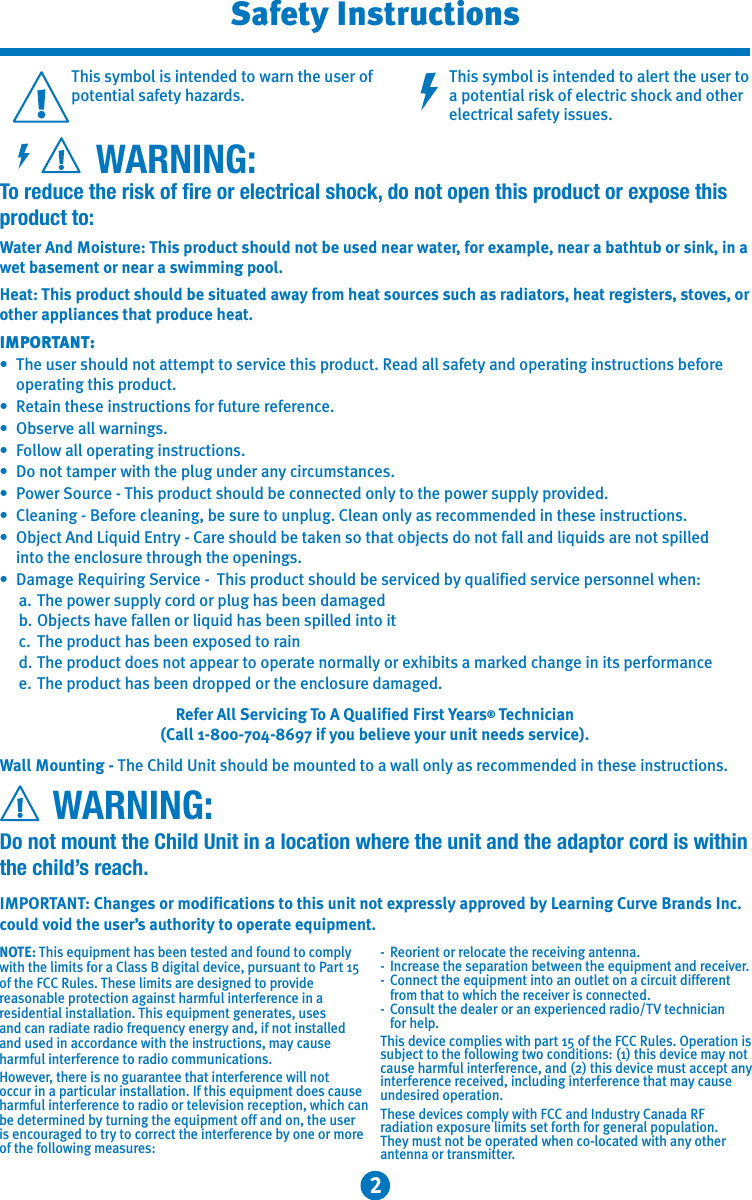
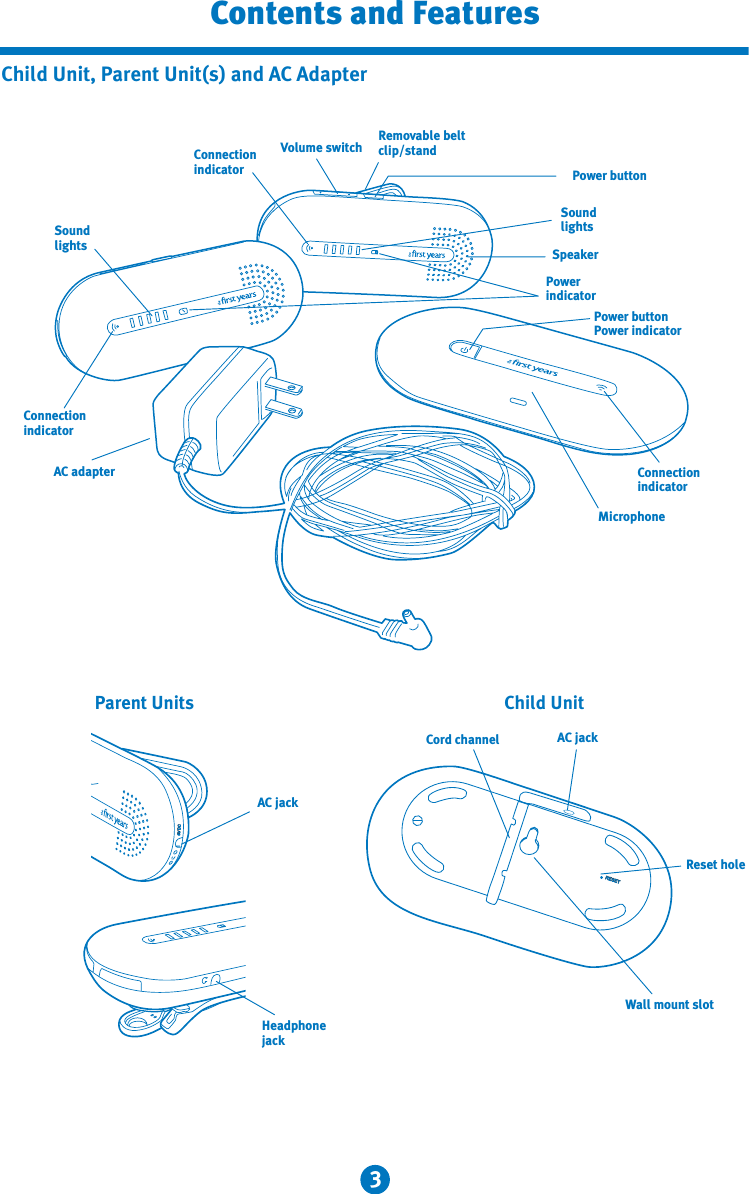
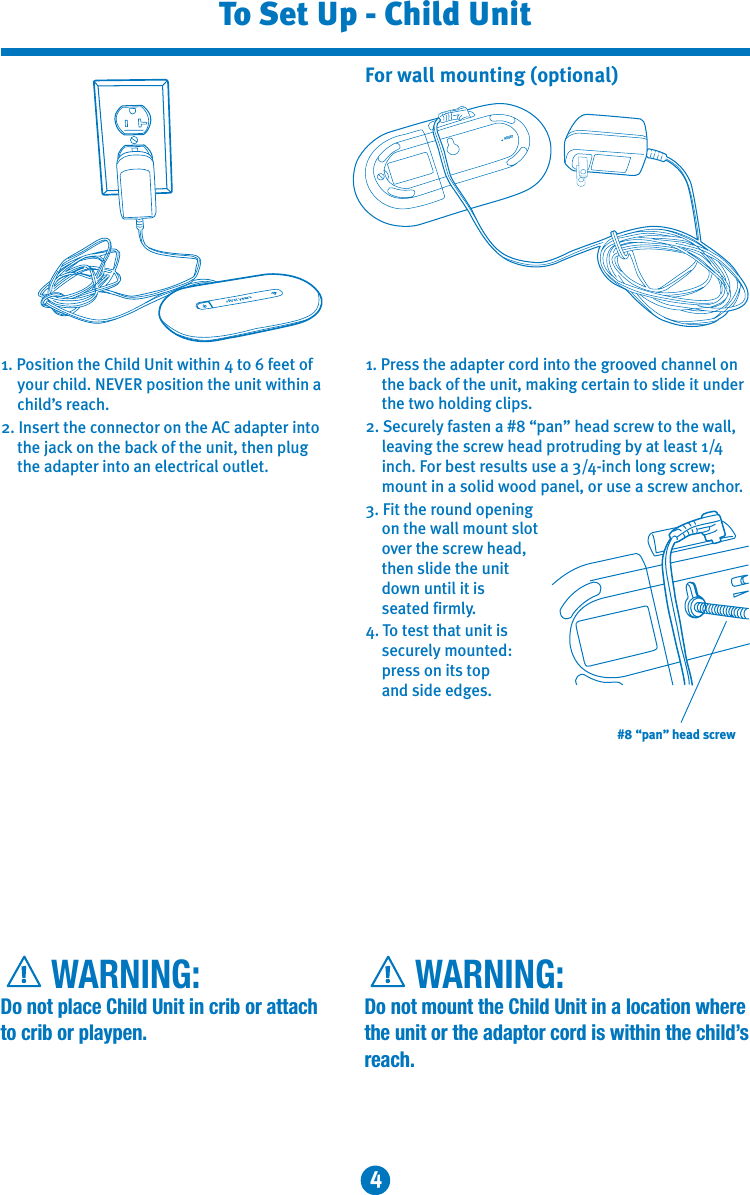
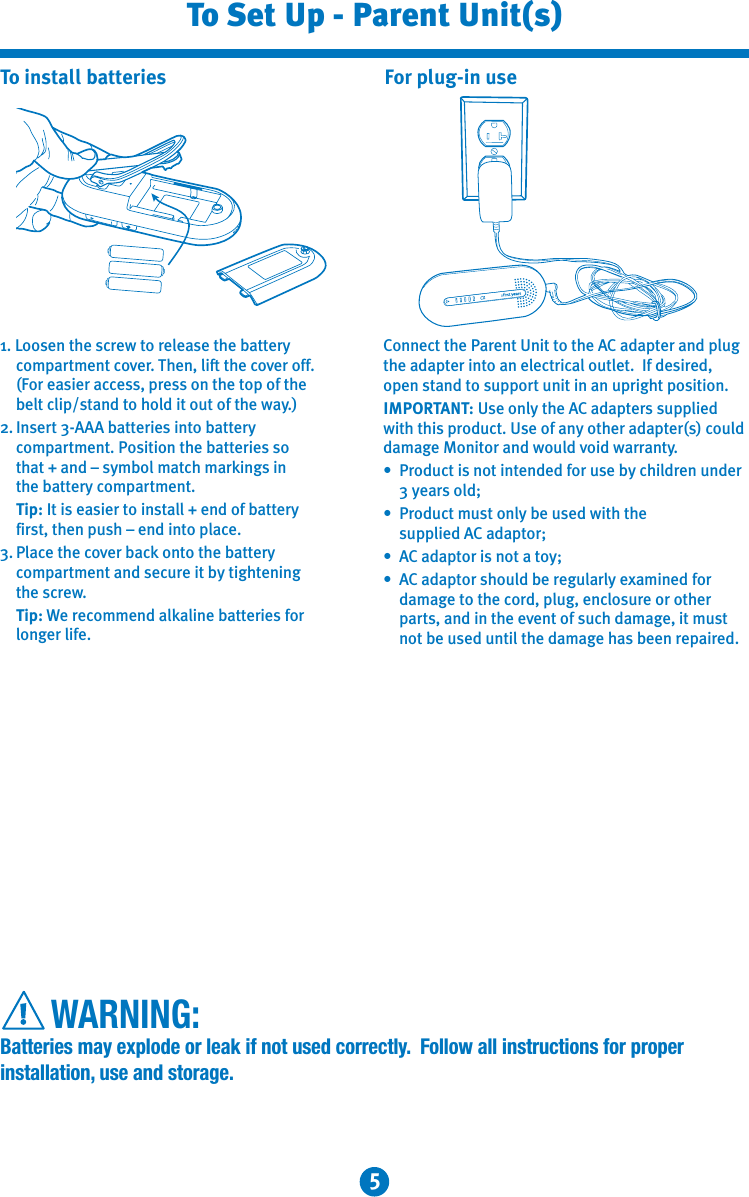
![MODELS: Y7289 AND Y7290• To prevent electric shock or strangling by the cord, do not place the monitor in, or attach it to, a crib or playpen.• Never place these units within a child’s reach.• The product is designed to assist in the monitoring of children, not as prevention for injury to or loss of a child.• This product is not a substitute for proper adult supervision. All children should be supervised at all times by responsible adults.WARNING:True Choice™ Digital Monitor(A100 and A200)Questions? Comments?Contact Consumer Carewww.learningcurve.com800-704-8697!Note: A100 comes with one Child Unit, one Parent Unit and two AC adapters. A200 comes with one Child Unit, two Parent Units and three AC adapters. Except for setting up (and using) the second Parent Unit, instructions for both models are the same.QUICK START INSTRUCTIONSYou’ll find detailed instructions inside. Please read the safety instructions on page 2.Set up the Parent Unit(s)• For portable use: Install the 3 AAA batteries (not included). Battery compartment is located on the back of the unit. Loosen screw to release it, and lift cover off (for easier access, press on top of belt clip to hold it out of the way). Insert 3 AAA batteries aligning + and – symbols to match markings in battery box. Tip: Use Alkaline batteries for longer use.• For plug-in use: Connect one of the AC adapters providedSet up the Child’s Unit• Place the Child Unit near your child (within 6 feet, but well beyond child’s reach).• Connect the remaining AC adapter to the unit and plug into wall outletTo Use:1 Press and release to turn the Child Unit on and wait for connection indicator to blink.2 Press and release the button on the side of the Parent Unit to turn it on.3 Connection indicators on all units should glow blue indicating connection.4 Press [+] or [-] to adjust volume of Parent Unit(s).5 Keep the Parent Unit within hearing distance.Before returning this product to the store for any reason, please contact our Parent Service Center at 1-800-704-8697 or www.learningcurve.comOften, we can provide helpful tips and instructions to resolve your problem quickly over the phone or by e-mail.Parent UnitsChild Unit](https://usermanual.wiki/Tomy/TFY7292C.Manual-Y7289C/User-Guide-1196556-Page-1.png)
![6To UsePress on the top of the belt clip to open; slide it onto waistband or belt and release.Or, lift the tip of the stand away from the unit, and set the unit on any flat surface.TIP: Belt clip/stand can be removed from the Parent Unit to give you a smaller unit that is easy to slip in your pocket.Belt Clip/StandYou may connect a headphone (not supplied) to the Parent Unit, if desired. When headphone is used, sound will not come out of the speaker.Finder FeatureIf you should misplace the Parent Unit, turn off the Child Unit. Wait 5 seconds, and the Parent Unit will begin to beep and will continue beeping until it is found and turned off (or batteries are exhausted). Turn Child Unit on before turning the Parent Unit back on.Note: This feature will not work if Parent Unit is turned off or has lost power.411. Press and release the power button on the Child unit to turn it on and wait for the connection indicator to blink.2. Press and release the power button on the Parent Unit to turn it on.3. Be certain that Power and Connection Indicators on both units are glowing blue.4. For P200, perform steps 2 and 3 to turn on the second Parent Unit.5. On the Parent Unit, press + and/or - to adjust volume to the desired level.6. Keep the Parent Unit within hearing distance.TIP: A loud screeching sound will occur if Parent Unit at a high volume level is brought close to the Child Unit. This is feedback that is common with audio devices. To avoid this it is best to either lower the volume or shut off the Parent Unit when entering the Child's room .To turn Parent Unit off: Press and release power button.To turn Child Unit off: Press and release power button.Note: Turning units off conserves battery power.Important: Power indicator on the Parent Unit will turn red when battery power is low. Batteries in should be replaced as soon as possible. Follow instructions under “To Set Up.” [Page 5]RangeThe distance you can separate the units and still maintain a connection will vary based on the layout and construction of your home. To test the Monitor’s workable range, walk through your house and yard listening for the volume and clarity of the sounds being transmitted. Out of range warning: If the Parent Unit is taken to a location where the connection with the Child Unit is lost, the Connection Indicator will flash and the unit will beep after 5 seconds. This warning will stop when unit is brought back into range.3221Parent unitChild unitHeadphone Use44322111](https://usermanual.wiki/Tomy/TFY7292C.Manual-Y7289C/User-Guide-1196556-Page-6.png)