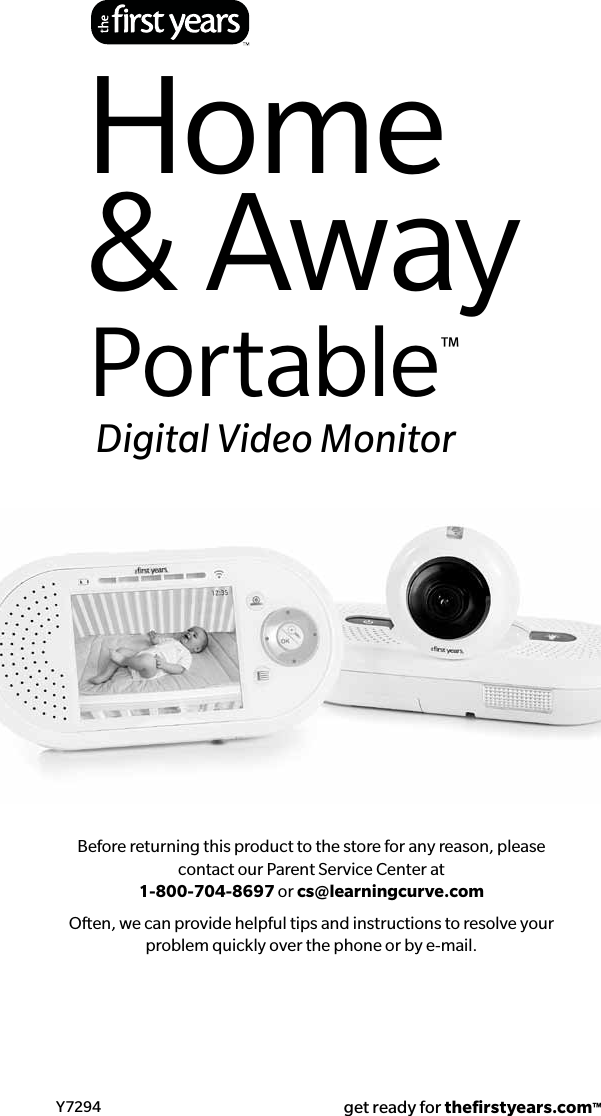
Tomy TFY7294C 2.4GHz FHSS Baby Unit User Manual
TOMY International, Inc. 2.4GHz FHSS Baby Unit Users Manual
UserManual.wiki
>
Tomy
>
TFY7294C User Manual
Users Manual
Navigation menu
Upload a User Manual
Namespaces
Wiki Guide
HTML
PDF
Info
Views
User Manual
Discussion / Help
Navigation
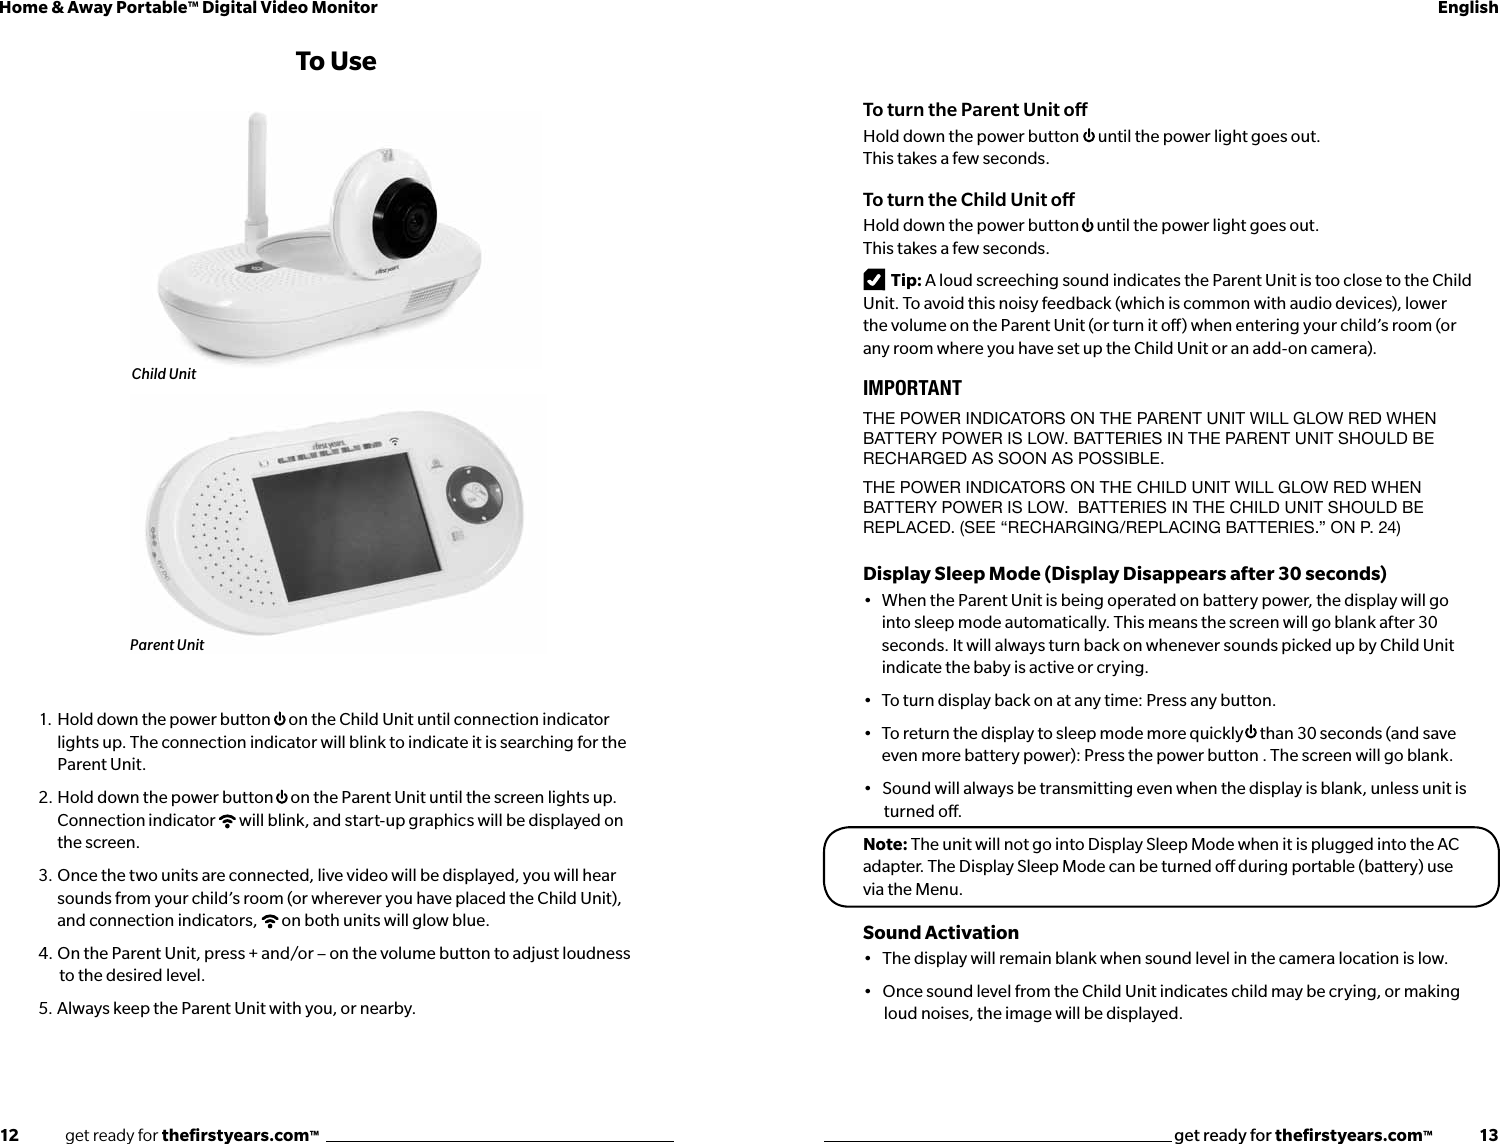
![16 get ready for thefirstyears.com™get ready for thefirstyears.com™ 17Home & Away Portable™ Digital Video Monitor EnglishVideo Display The display screen will show live images being transmitted by the Child Unit.Clock: The current time of day is shown in the upper right corner of the display. Time is set using the Menu (see page 18 for full instructions).Camera Scan ButtonThis button allows you to scan through multiple cameras if you have added cameras to your video monitoring system.OK/Zoom ButtonZoom Function Press the button once to zoom in on the image. Press the button again to revert to original size.OK Function The button is also used to select options when Parent Unit is in Menu mode.Directional Pad Pan FunctionIf you have already zoomed in on the display, use the directional pad to move around to obtain the desired view.Note If directional pad is pressed and you have not pressed , image will automatically zoom and move in direction pressed.Menu NavigationThe directional pad is also used to navigate menu options when Parent Unit is in Menu mode.Menu ButtonThe Menu Button allows you to change current settings for various preferences (see section that follows for complete details).Parent Unit Indicators and ControlsPower/Battery Level Indicator•Blue glow indicates full power.•Red glow indicates battery power is low. Recharge as soon as possible.•Purple glow indicates battery is charging.•No light indicates no power. Unit will not work until turned on or recharged.Connection Indicator•Blue glow when connected to Child Unit•Blinking blue light means that connection has not been made or is lost.Sound Level LightsNo lights indicates lowest volume.All lights indicates highest volume.Volume Control [ + , - ]Press either side of the volume control button to make sounds louder (+) or softer (-).Talkback ButtonPress the button while speaking. Your child will be able to hear your voice.Note • While using the Talkback button, you will not hear any sounds being transmitted by the Child Unit.• When using more than one camera, the talkback feature will link to the camera in the location you are currently viewing.OKOKsample video display14512345678910101198762311](https://usermanual.wiki/Tomy/TFY7294C/User-Guide-1428252-Page-9.png)
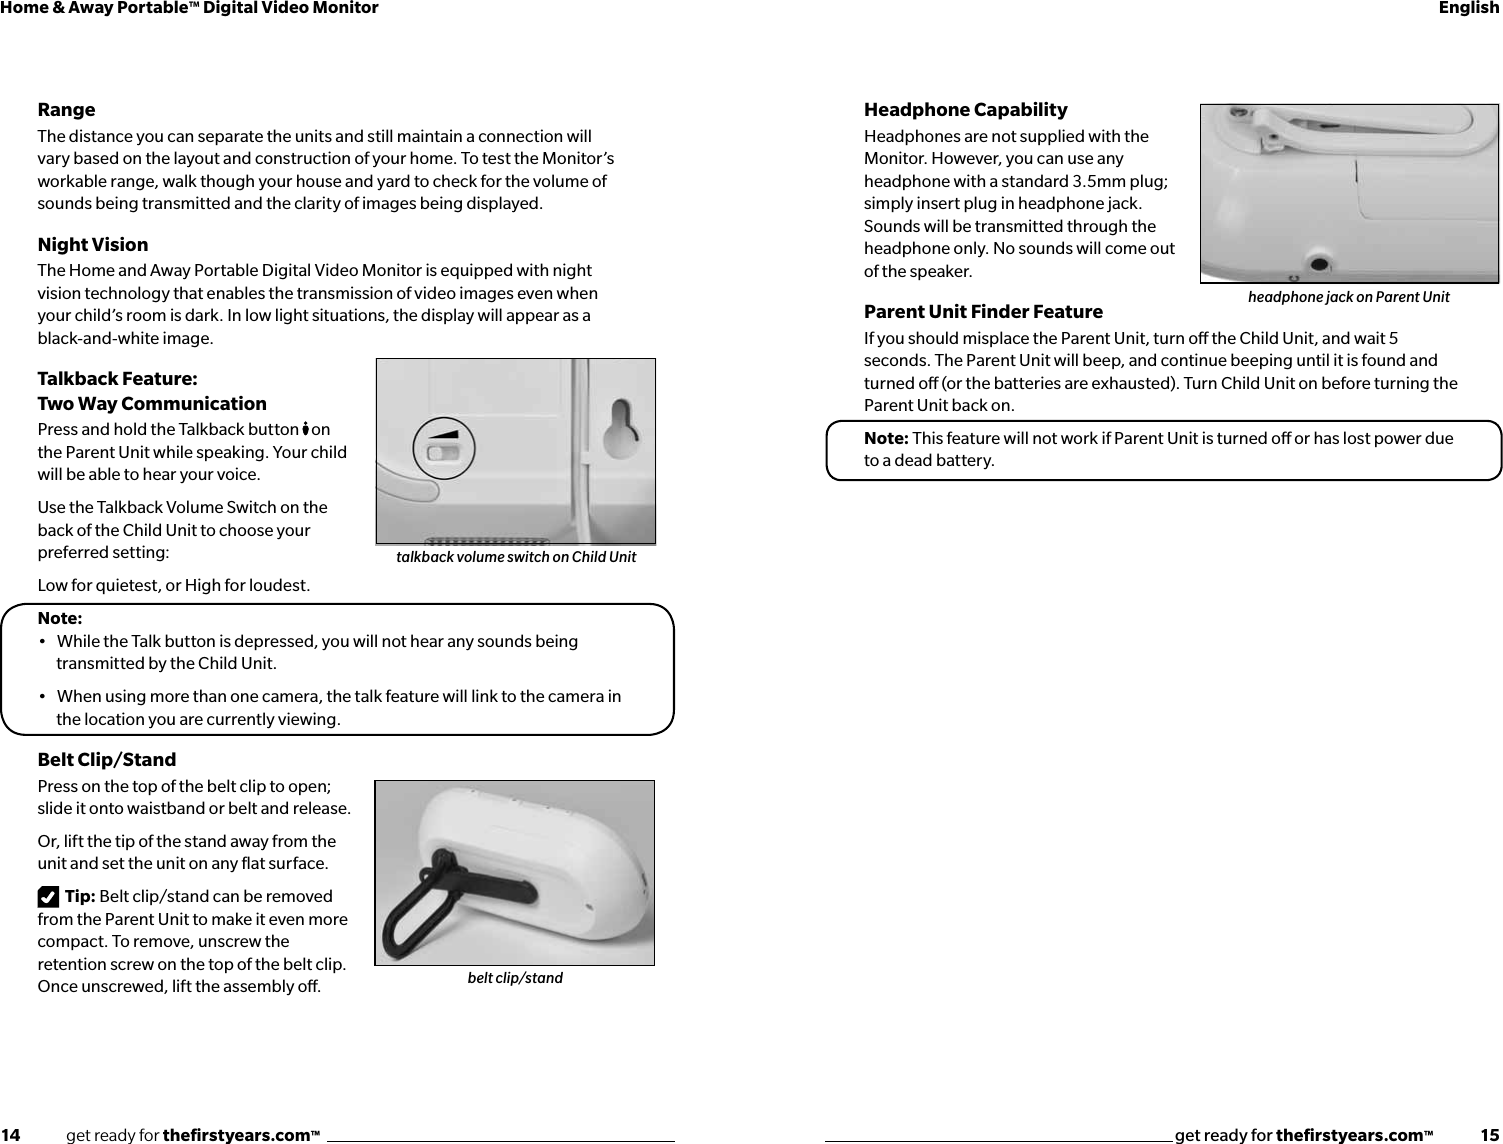
![18 get ready for thefirstyears.com™get ready for thefirstyears.com™ 19Home & Away Portable™ Digital Video Monitor EnglishMenu Choices—Your Preferences for Selected FeaturesYou have the option of setting menu preferences for the Monitor features listed below. To review or change any preferences, press the Menu button. Use the directional pad to scroll through the available menu choices. Use the OK button to make and accept changes.NightlightTo turn the nightlight (on the Child Unit) ON or OFF from the parent unit:1. Press the Menu button.2. Press the OK button to change the setting for the Nightlight.3. Press Menu button to return to the display mode.Note: When Child Unit is being powered by batteries, Nightlight will turn o automatically after 60 seconds. You can use this Menu feature to turn it back on at any time.BrightnessTo set the brightness of the display on the Parent Unit:1. Press the Menu button.2. Use the top or bottom of the directional pad to scroll through the list of preferences until “Brightness” is highlighted. 3. Press the OK button.4. A Brightness Selector Scale will appear, displaying five possible settings. The current setting will be shown Use the directional pad to move the box to the right to make the display brighter, or to the left to make the display darker. 5. Press the OK button to confirm your selection.Reminder: If you do not press the OK button, no change will be made. 6. Press the Menu button to return to the display mode.ClockTo select a 24-hour clock or a 12-hour clock, and to set the current time:1. Press the Menu button.2. Use the top or bottom of the directional pad to scroll through the list of preferences until “Clock” is highlighted. 3. Press the OK button.4. A “12hr/24hr” Preference screen will appear. The current setting will be with a highlighted. Use the sides of the directional pad to move the box to the right to choose a 24-hour clock , or to the left to choose a 12-hour clock and press OK button to accept. 5. A digital clock display will now appear showing [t12:00u] the current time setting. 6. To set the time:a. Select the hours in the display using the top or bottom of the directional pad.b. Press the right side of the directional pad to go to the first minute digit.c. Use the top or bottom sides of the directional pad to select this digit. d. Press the right side of the directional pad to go to the second minute digit.e. Use the top or bottom sides of the directional pad to select this digit. f. Once you are satisfied this is the correct time, press the OK button to accept it. Reminder: If you do not press the OK button, no change will be made. 7. Press the Menu button to return to the display mode.Add/Remove Camera To add or remove cameras for your video monitoring system:1. Press the Menu button.2. Use the top or bottom of the directional pad to scroll through the list of preferences until “Add/Remove Camera” is highlighted. 3. Press the OK button.4. Select whether you want to Add or Remove a camera on next screen using the sides of the directional pad to highlight your choice.5. Press the OK button.6. Follow the screen prompts to complete this operation.24HR12HR](https://usermanual.wiki/Tomy/TFY7294C/User-Guide-1428252-Page-10.png)