Tomy TFY7500C Baby Monitor (Baby Unit) User Manual
TOMY International, Inc. Baby Monitor (Baby Unit) Users Manual
UserManual.wiki
>
Tomy
>
TFY7500C User Manual
Users Manual
Navigation menu
Upload a User Manual
Namespaces
Wiki Guide
HTML
PDF
Info
Views
User Manual
Discussion / Help
Navigation
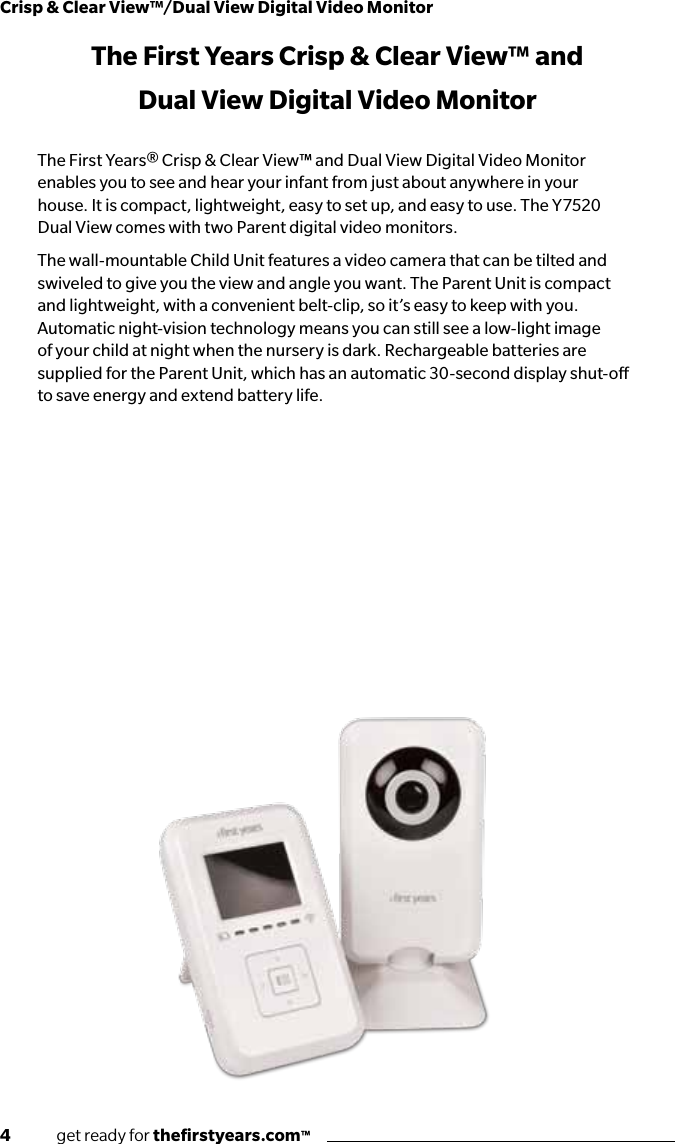
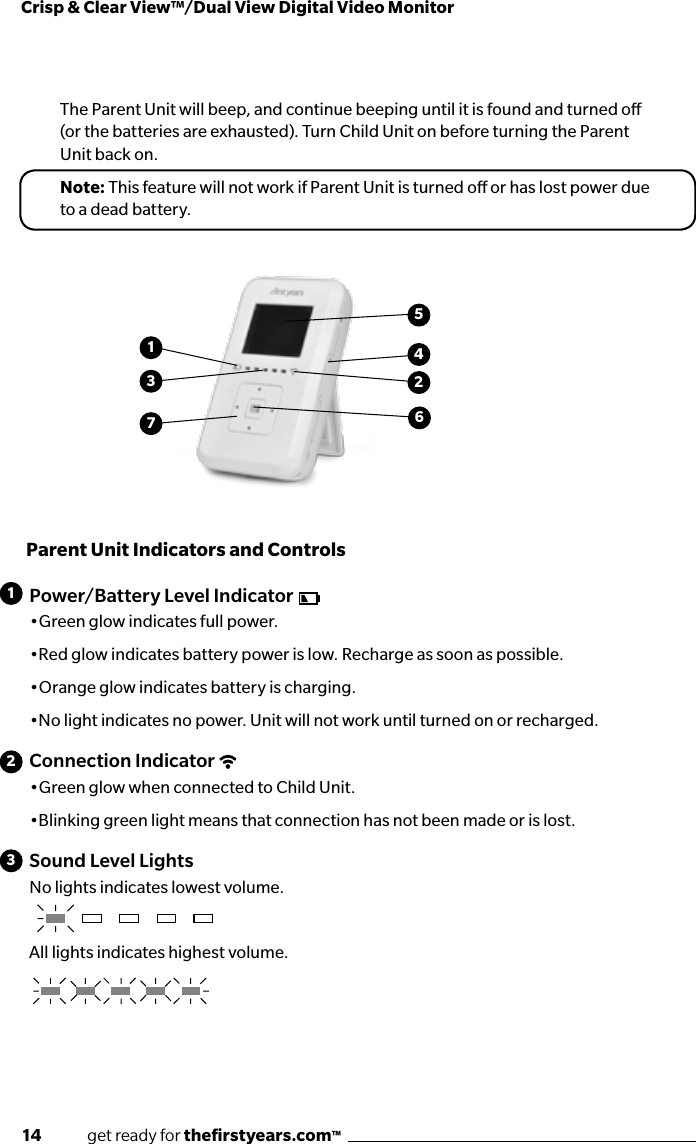
![get ready for thefirstyears.com™ 15English456Volume Control [ + , - ]Press either side of the volume control button to make sounds louder (+) or softer (-).Video Display The display screen will show live images being transmitted by the Child Unit.Menu ButtonThe button is used to select the Menu mode. The Menu Button allows you to change current settings for various preferences (see section that follows for complete details).Zoom/Pan FunctionTo zoom in 2x hit any of the directional buttons. The display will zoom and pan in the direction pressed. To zoom out push the menu button.Directional Pad If you have already zoomed in on the display, use the directional pad to move around to obtain the desired view.Note If directional pad is pressed and you have not pressed , image will automatically zoom and move in direction pressed.Menu NavigationThe directional pad is also used to navigate menu options when Parent Unit is in Menu mode.7](https://usermanual.wiki/Tomy/TFY7500C/User-Guide-1618125-Page-15.png)