Tomy TFY7685C See and Share Video Monitor User Manual Manual
TOMY International, Inc. See and Share Video Monitor Manual
UserManual.wiki
>
Tomy
>
TFY7685C User Manual
Manual
Navigation menu
Upload a User Manual
Namespaces
Wiki Guide
HTML
PDF
Info
Views
User Manual
Discussion / Help
Navigation
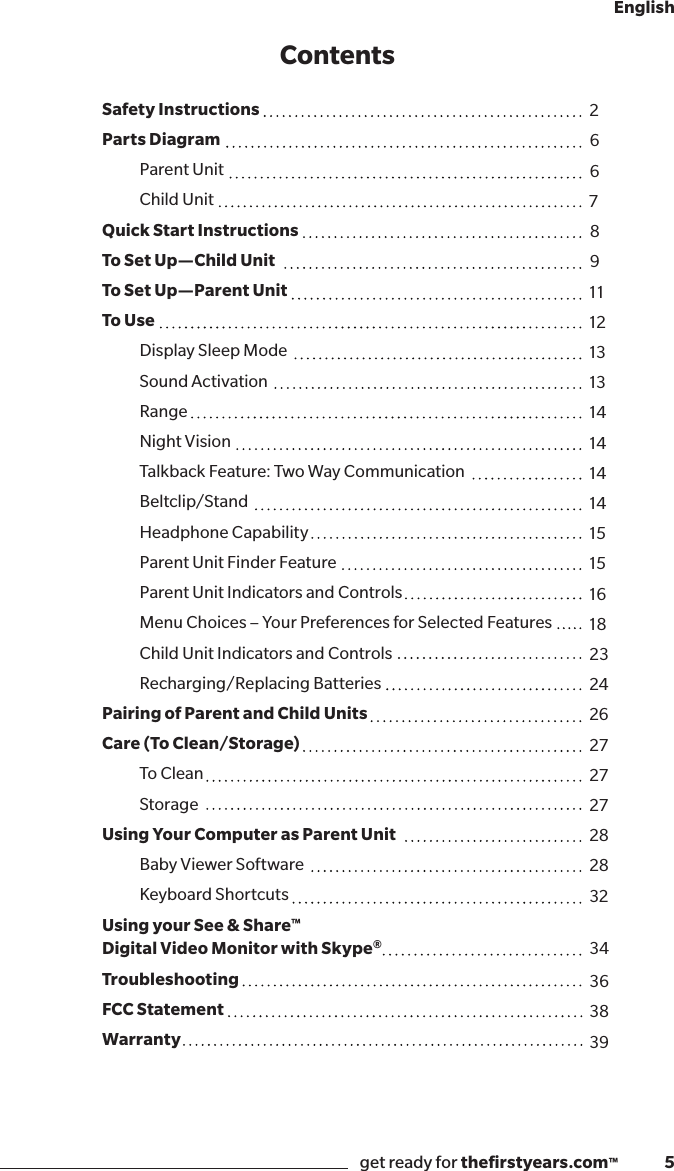
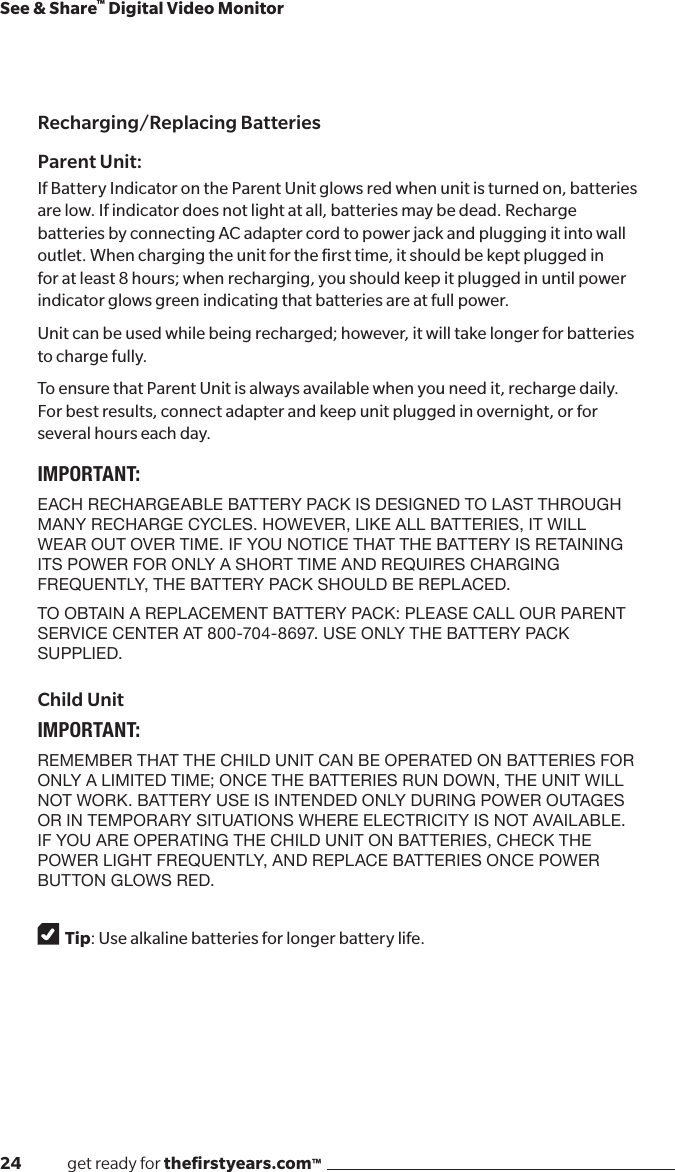
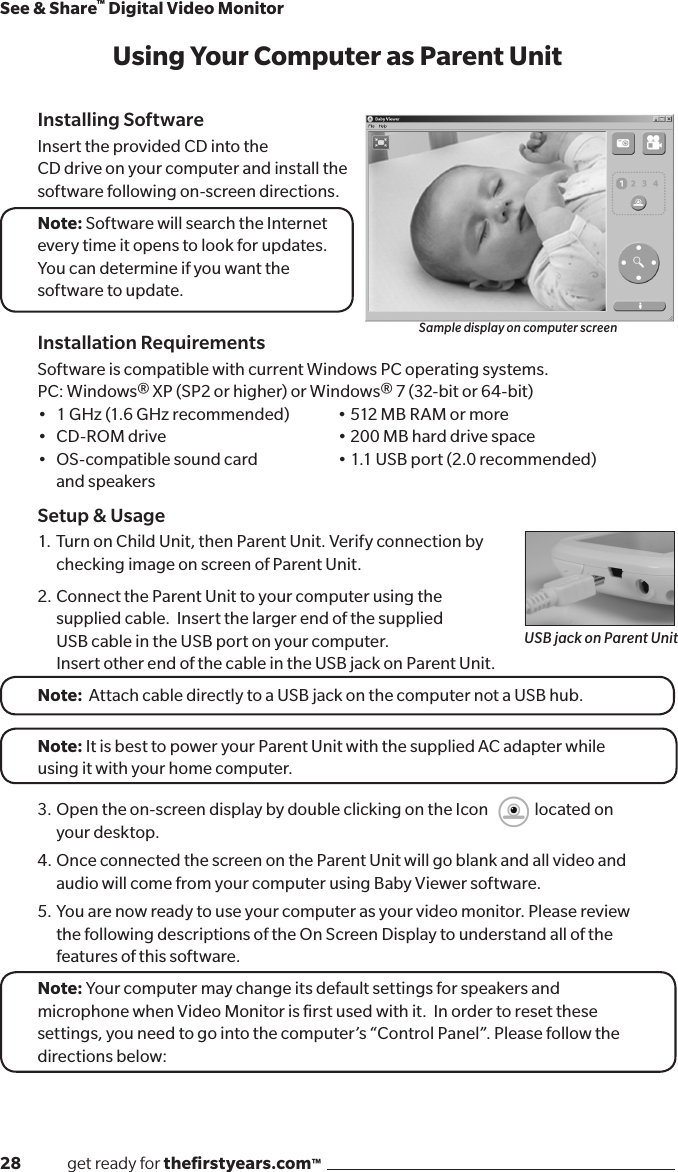
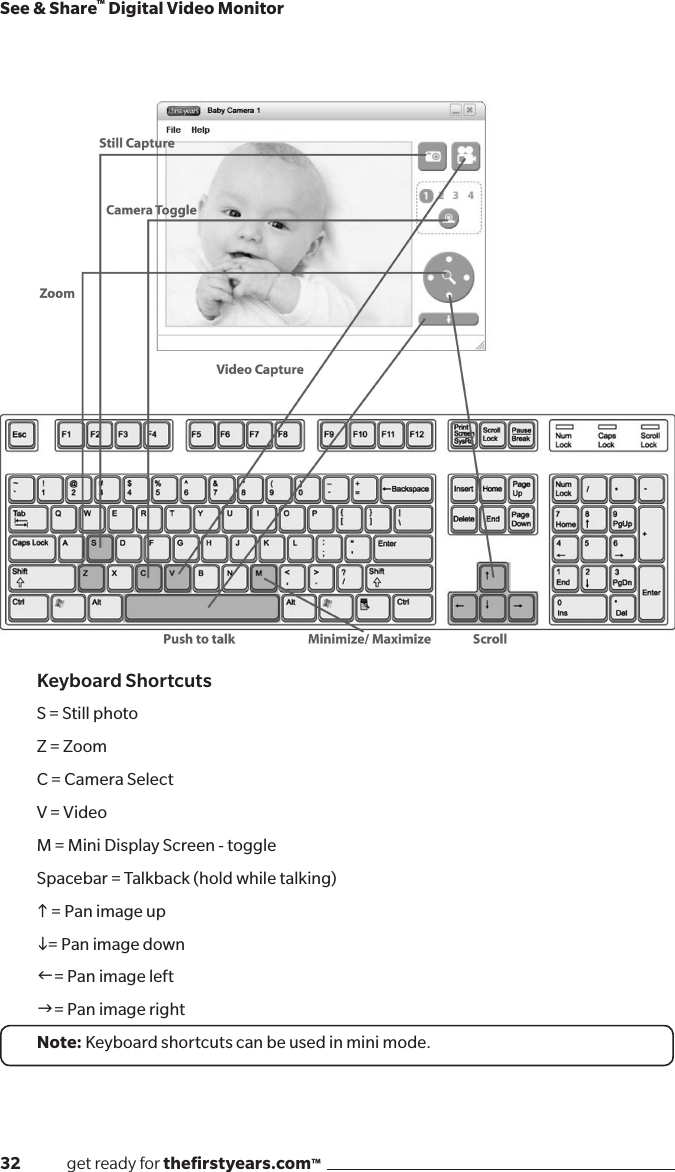
![16 get ready for thefirstyears.com™See & Share™ Digital Video MonitorParent Unit Indicators and ControlsVolume Control [ + , - ]Press either side of the volume control button to make sounds louder (+) or softer (-).Power/Battery Level Indicator•Greenglowindicatesfullpower.•Redglowindicatesbatterypowerislow.Rechargeassoonaspossible.•Greenpulsatingindicatesbatteryischarging.•Nolightindicatesnopower.Unitwillnotworkuntilturnedonorrecharged.Sound Level LightsNo lights indicates lowest volume.All lights indicates highest volume.Connection Indicator•GreenglowwhenconnectedtoChildUnit.•Blinkinggreenlightmeansthatconnectionhasnotbeenmadeorislost.Camera Scan ButtonThis button allows you to scan through multiple cameras if you have added cameras to your video monitoring system.1324512 3 4 65 789](https://usermanual.wiki/Tomy/TFY7685C/User-Guide-2107749-Page-16.png)
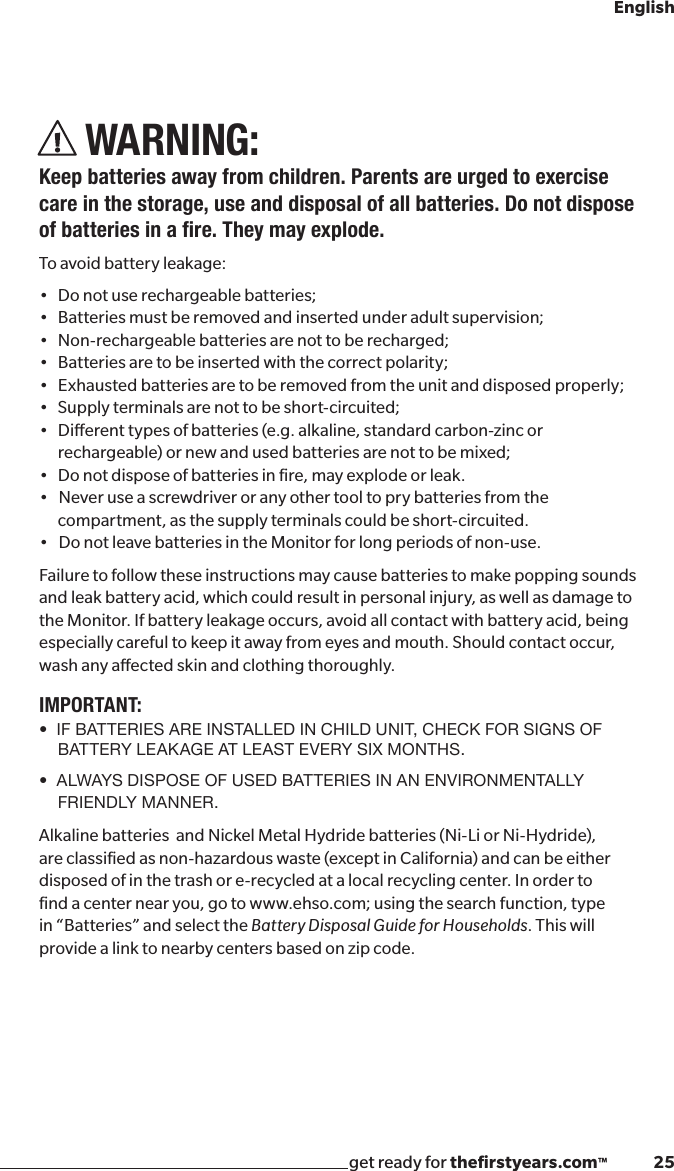
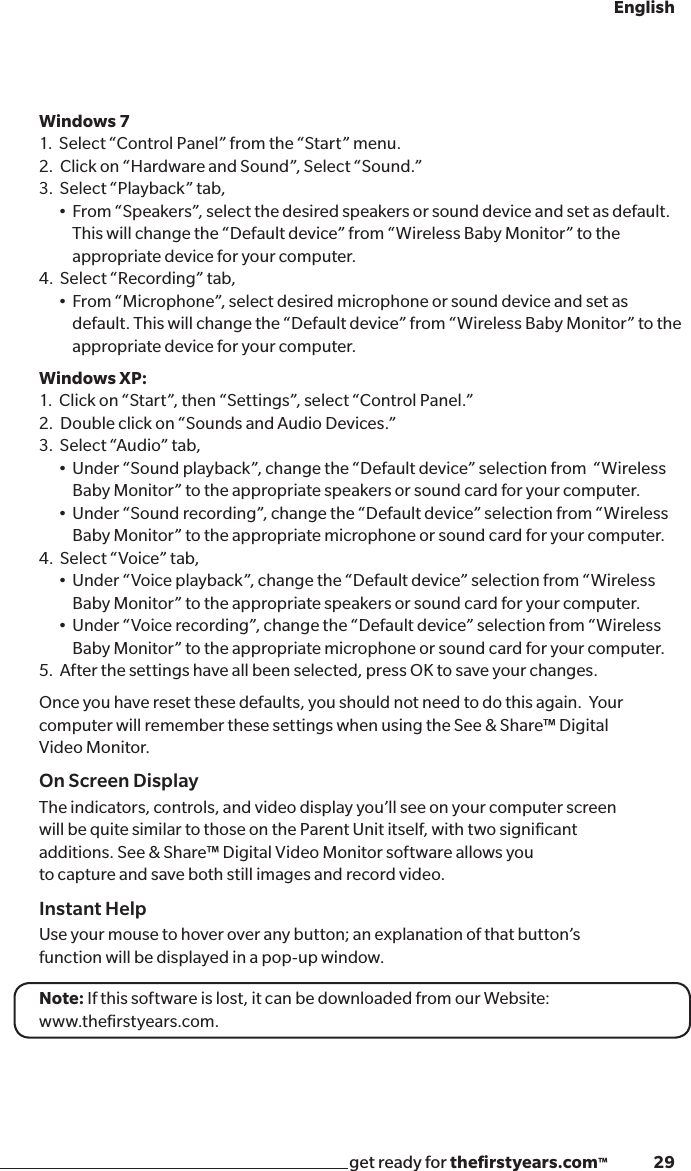
![get ready for thefirstyears.com™ 19English4. A “12hr/24hr” preference screen will appear. The current setting will be highlighted. Use the sides of the directional pad to move the box to the right to choose a 24-hour clock, , or to the left to choose a 12-hour clock, , and press OK button to accept. 5. A digital clock display will now appear showing [t12:00u] the current time setting. 6. To set the time:a. Select the hours in the display using the top or bottom of the directional pad.b. Press the right side of the directional pad to go to the first minute digit.c. Use the top or bottom sides of the directional pad to select this digit. d. Press the right side of the directional pad to go to the second minute digit.e. Use the top or bottom sides of the directional pad to select this digit. f. Once you are satisfied this is the correct time, press the OK button to accept it. Reminder: If you do not press the OK button, no change will be made. 7. Press the Menu button to return to the display mode.Add/Remove Camera To add or remove cameras for your video monitoring system:1. Press the Menu button.2. Use the top or bottom of the directional pad to scroll through the list of preferences until “Add/Remove Camera” is highlighted. 3. Press the OK button.4. Select whether you want to Add or Remove a camera on next screen using the sides of the directional pad to highlight your choice.5. Press the OK button.6. Follow the screen prompts to complete this operation.24HR 12HR](https://usermanual.wiki/Tomy/TFY7685C/User-Guide-2107749-Page-19.png)