Technicolor Delivery Technologies Belgium TG233 Wi-Fi 5GHz Access Point User Manual
Technicolor Delivery Technologies Belgium Wi-Fi 5GHz Access Point
Contents
- 1. User Manual
- 2. User Manual_Statement
User Manual
Need more help?
Additional help is available online at www.technicolor.com.
TECHNICOLOR WORLDWIDE HEADQUARTERS
1, Rue Jeanne d'Arc 1
92443 Issy-les-Moulineaux
France
www.technicolor.com
*DSL37173390*
DSL37173390
Copyright 2013 Technicolor. All rights reserved.
DMS-QIG-20130131-0000 v2.0. Printed in EU.
QUICK INSTALLATION GUIDE
Technicolor MediaAccess TG233
Station
Access Point
AUTO
GE
GE
3
1
65
4
2
1
Setting up your Wi-Fi Media Bridge
Step 1: Carefully read the Safety Instructions and Regulatory Notices
Carefully read the Safety Instructions and Regulatory Notices included in the box before continuing
with the installation of your Wi-Fi Media Bridge.
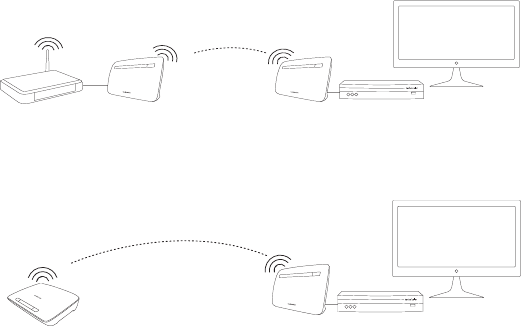
Step 2: Choose which of the following scenarios applies to your home
Scenario 1: TG233 Video Bridge
Your gateway is not a 5GHz gateway. You want to use one Wi-Fi Media Bridge near your
gateway, and one near your set-top box. Continue with “Step 3: Set up one Wi-Fi Media Bridge
near your gateway”.
Scenario 2: Xtream Video Bridge
Your gateway is a 5GHz gateway. You only need a Wi-Fi Media Bridge near your set-top box.
Continue with “Step 4: Set up one Wi-Fi Media Bridge near your set-top box”.
set-top box and TVAuto modeAuto or
Access Point mode
Technicolor Xtream or other 5GHz gateway set-top box and TV
Auto mode
2
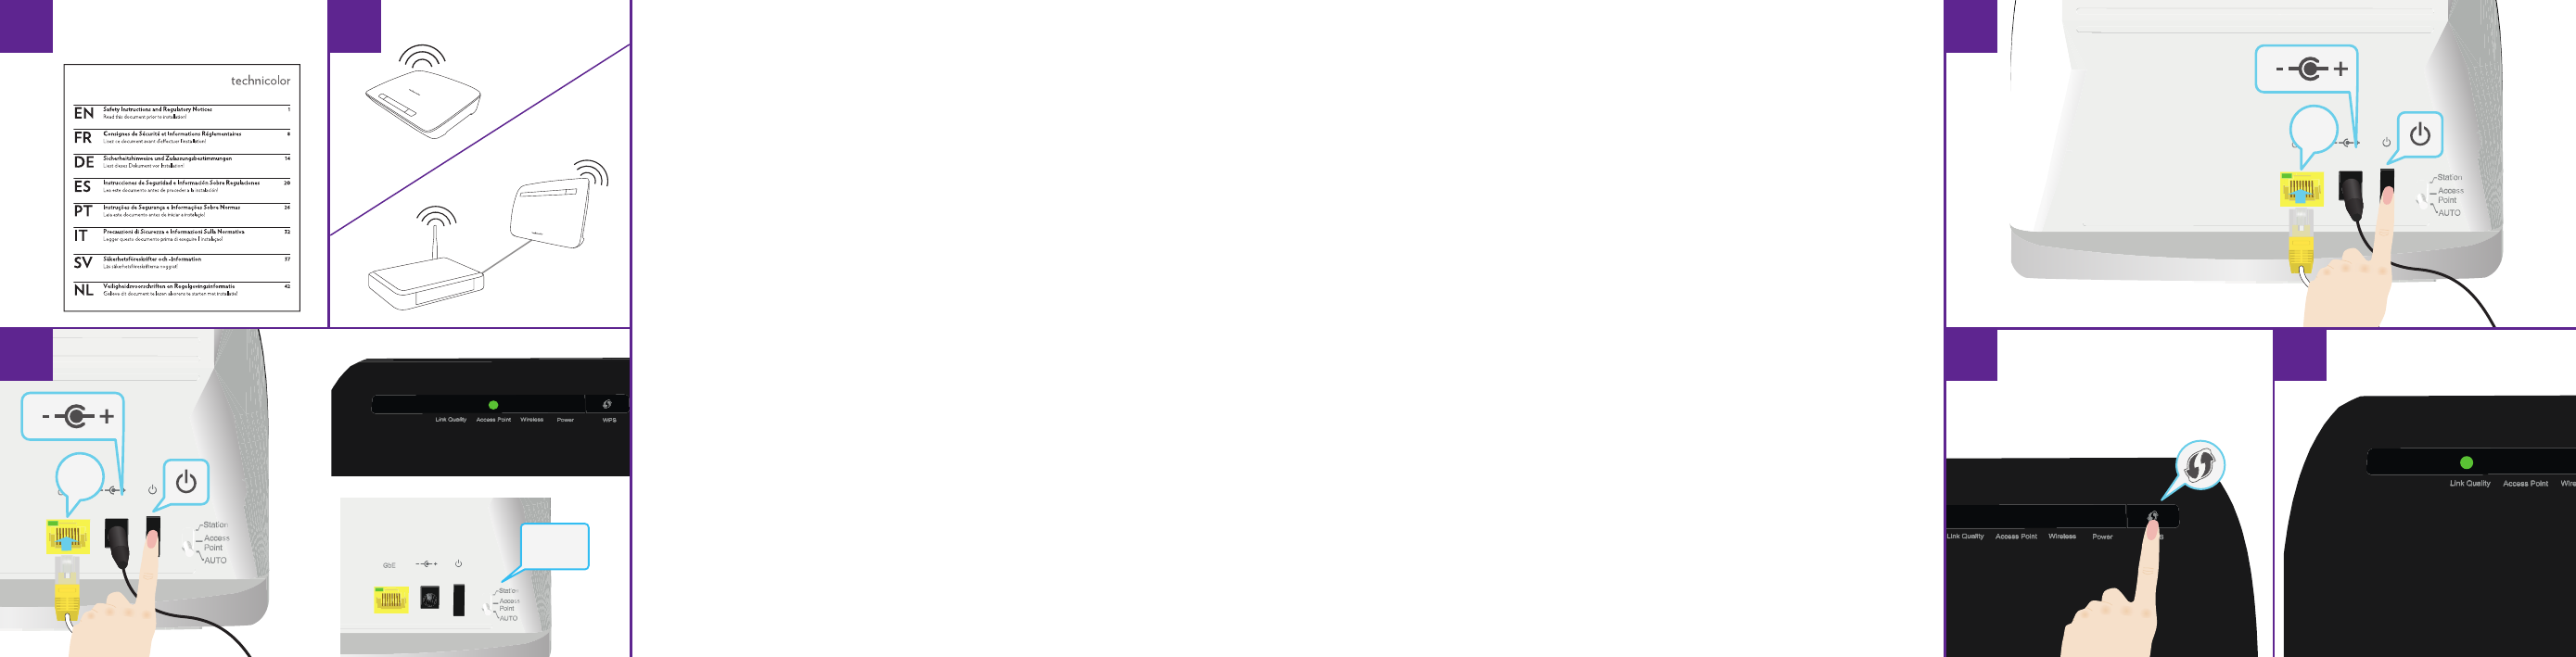
Step 3: Set up one Wi-Fi Media Bridge near your gateway
1Make a wired connection to the Wi-Fi Media Bridge.
1Connect one end of the Ethernet cable (this is the cable with the yellow connectors) to the
yellow Ethernet port on the back of your Wi-Fi Media Bridge.
2Connect the other end of the Ethernet cable to your gateway.
2Connect the power supply adapter.
1Plug the connector of the electric power supply adapter into the Wi-Fi Media Bridge power
inlet port.
2Plug the adapter into a nearby power outlet.
3Turn on the Wi-Fi Media Bridge.
Wait two minutes. The Power LED must be solid green. If this is not the case, check the
connections you made in the previous steps.
4After two minutes, check the Access Point LED on the front panel. This LED must be green. If
this is not the case:
1Switch the Wi-Fi Media Bridge to Access Point mode using the switch on the back panel.
2Restart the Wi-Fi Media Bridge by turning the power off and on again.
3Wait two minutes and check the Access Point LED again.
Step 4: Set up one Wi-Fi Media Bridge near your set-top box
1Make a wired connection to the Wi-Fi Media Bridge.
1Connect one end of the Ethernet cable (this is the cable with the yellow connectors) to the
yellow Ethernet port on the back of your Wi-Fi Media Bridge.
2Connect the other end of the Ethernet cable to your set-top box.
2Connect the power supply adapter.
1Plug the connector of the electric power supply adapter into the Wi-Fi Media Bridge power
inlet port.

3
2Plug the adapter into a nearby power outlet.
3Turn on the Wi-Fi Media Bridge.
Wait two minutes. The Power LED must be solid green. If this is not the case, check the
connections you made in the previous steps.
Step 5: Make a wireless connection between both sides
1Make sure your Wi-Fi Media Bridge has been turned on for at least two minutes. Shortly press the
WPS ( ) button on the front panel of the Wi-Fi Media Bridge near your gateway (for scenario
1) or on the gateway itself (for scenario 2).
2The WPS LED ( ) on the front panel starts blinking orange.
3Within two minutes, start WPS on the Wi-Fi Media Bridge near your set-top box.
4After some time The WPS LED ( ) on the front panel turns green. Shortly after, the Wireless
LED turns green as well. The wireless connection is now successfully established.
What if the WPS LED is blinking red?
This indicates that the Wi-Fi Media Bridge could not make a wireless connection.
Do the following:
1Wait until the red blinking LED goes out, then try using WPS again.
2Reposition the Wi-Fi Media Bridge slightly and try again.
If you still have trouble connecting to the Wi-Fi Media Bridge, refer to the user manual on
www.technicolor.com for more detailed information.
Step 6: Optimize the link quality
You may need to optimize the link quality of the Wi-Fi Media Bridge. To do this, check the color of
the Link Quality LED on the front panel of the Wi-Fi Media Bridge near your set-top box. If it is:
Green: the link quality is optimal. You are now finished.
4
Orange: the link quality is average. Change the position of the Wi-Fi Media Bridge until the LED
turns green.
Red: the link quality is bad. Change the position of the Wi-Fi Media Bridge until the LED turns
green or orange.
Step 7: Optional: add an additional set-top box to the wireless network
If you have more than one set-top box you wish to connect to the wireless network, simply repeat
the procedure from “Step 4: Set up one Wi-Fi Media Bridge near your set-top box” using another Wi-
Fi Media Bridge.