Verifone VX820CTLS POS Terminal User Manual DOC282 003 EN A book
VeriFone Inc POS Terminal DOC282 003 EN A book
UserManual.wiki
>
Verifone
>
VX820CTLS User Manual
User Manual
Navigation menu
Upload a User Manual
Namespaces
Wiki Guide
HTML
PDF
Info
Views
User Manual
Discussion / Help
Navigation
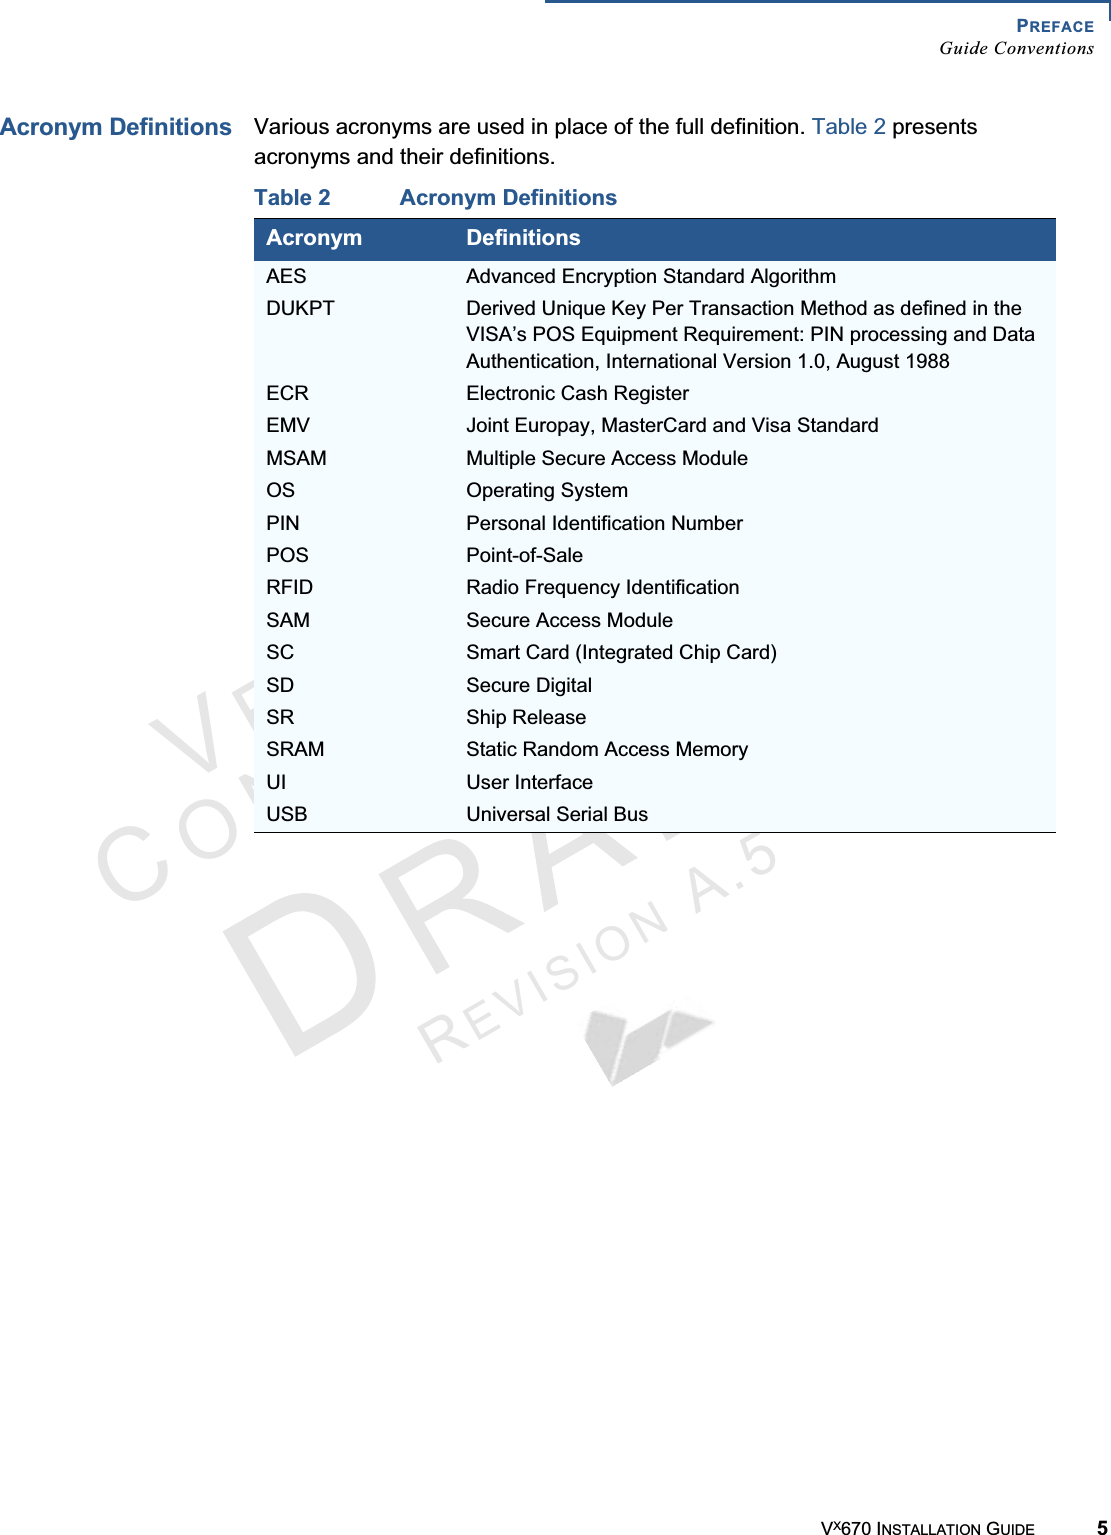

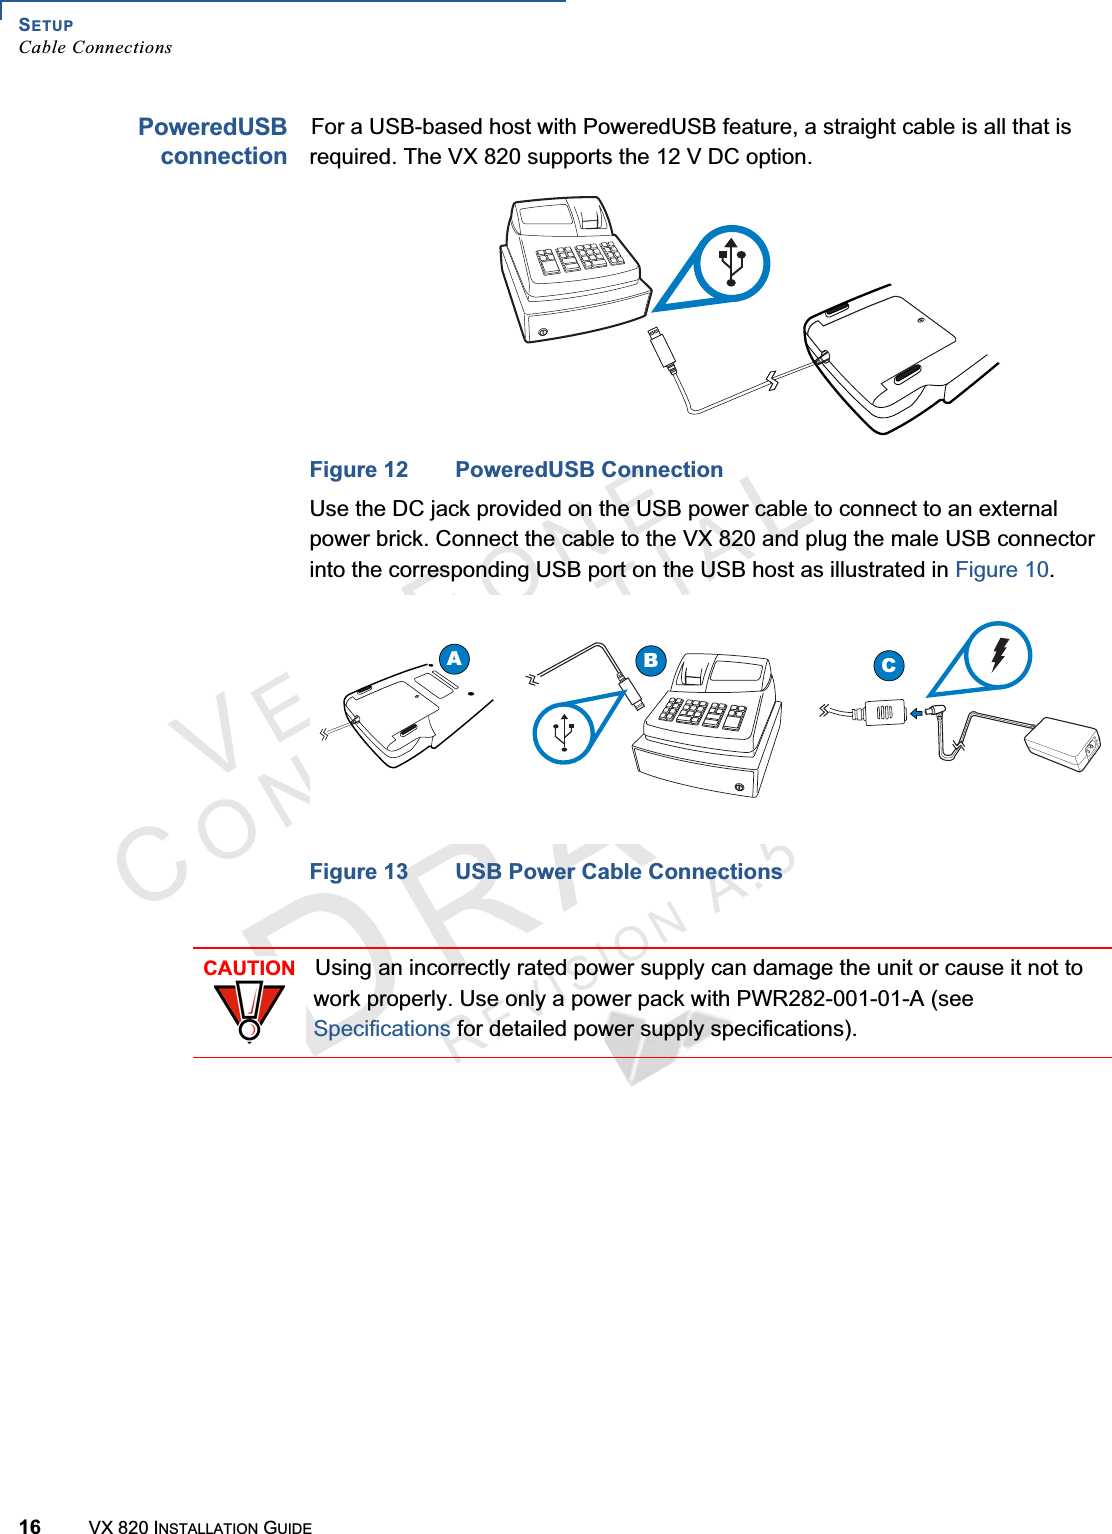
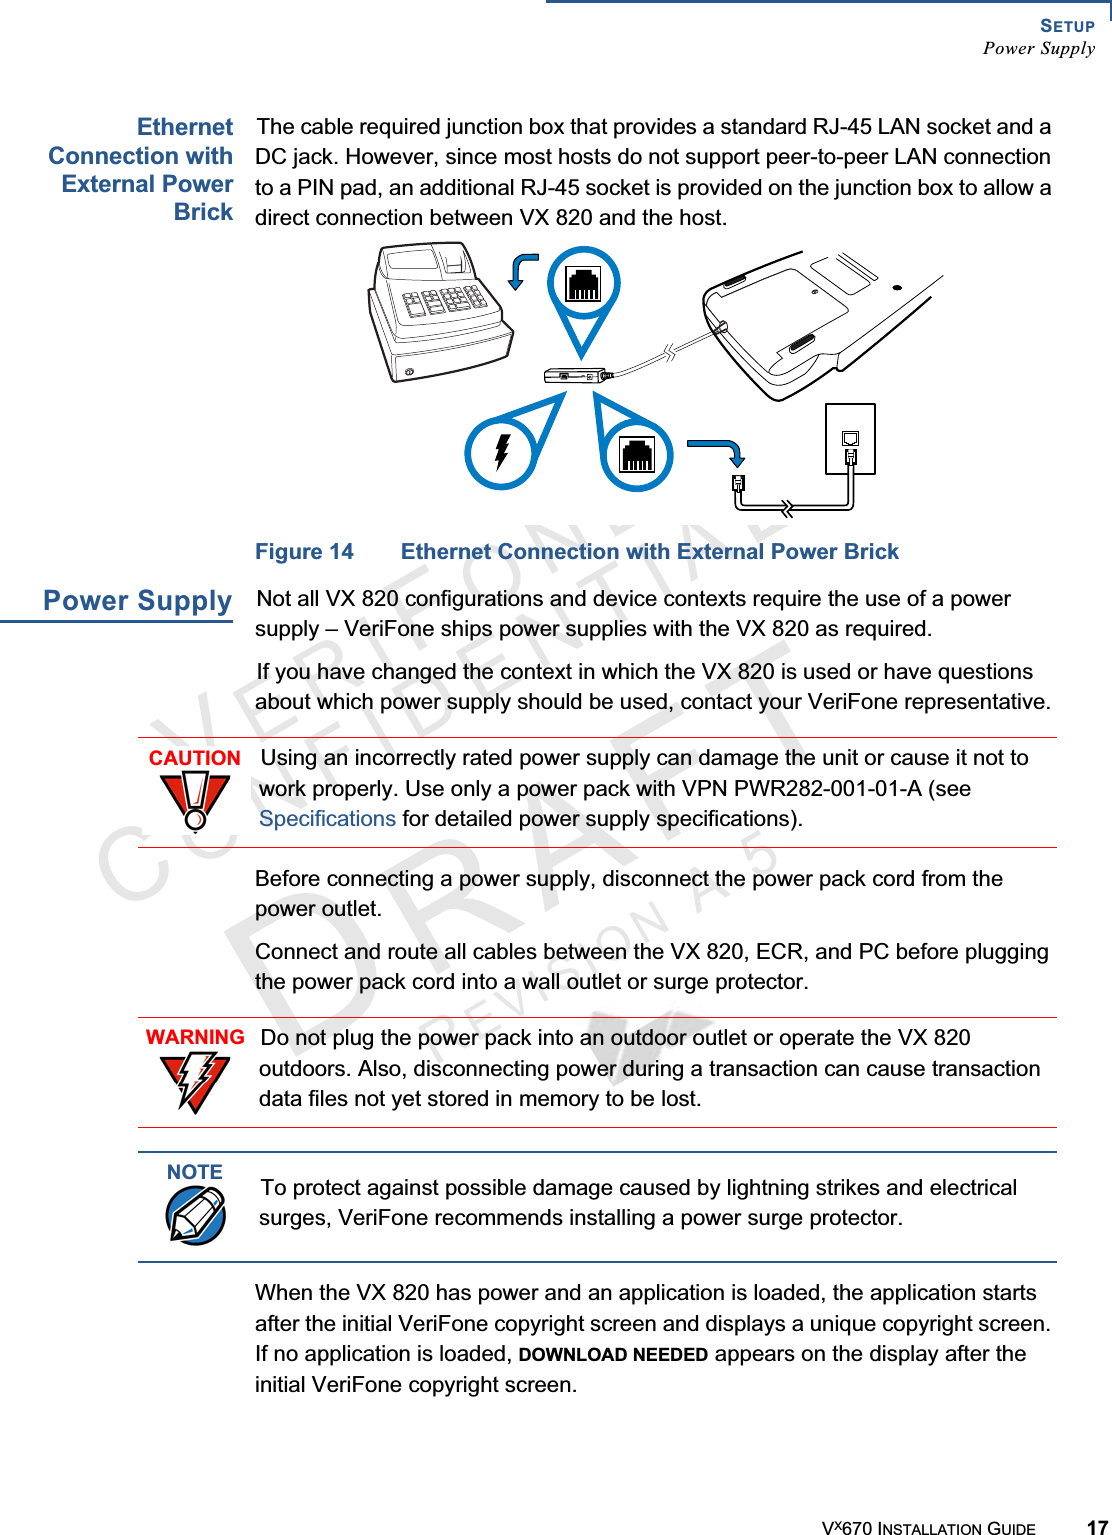
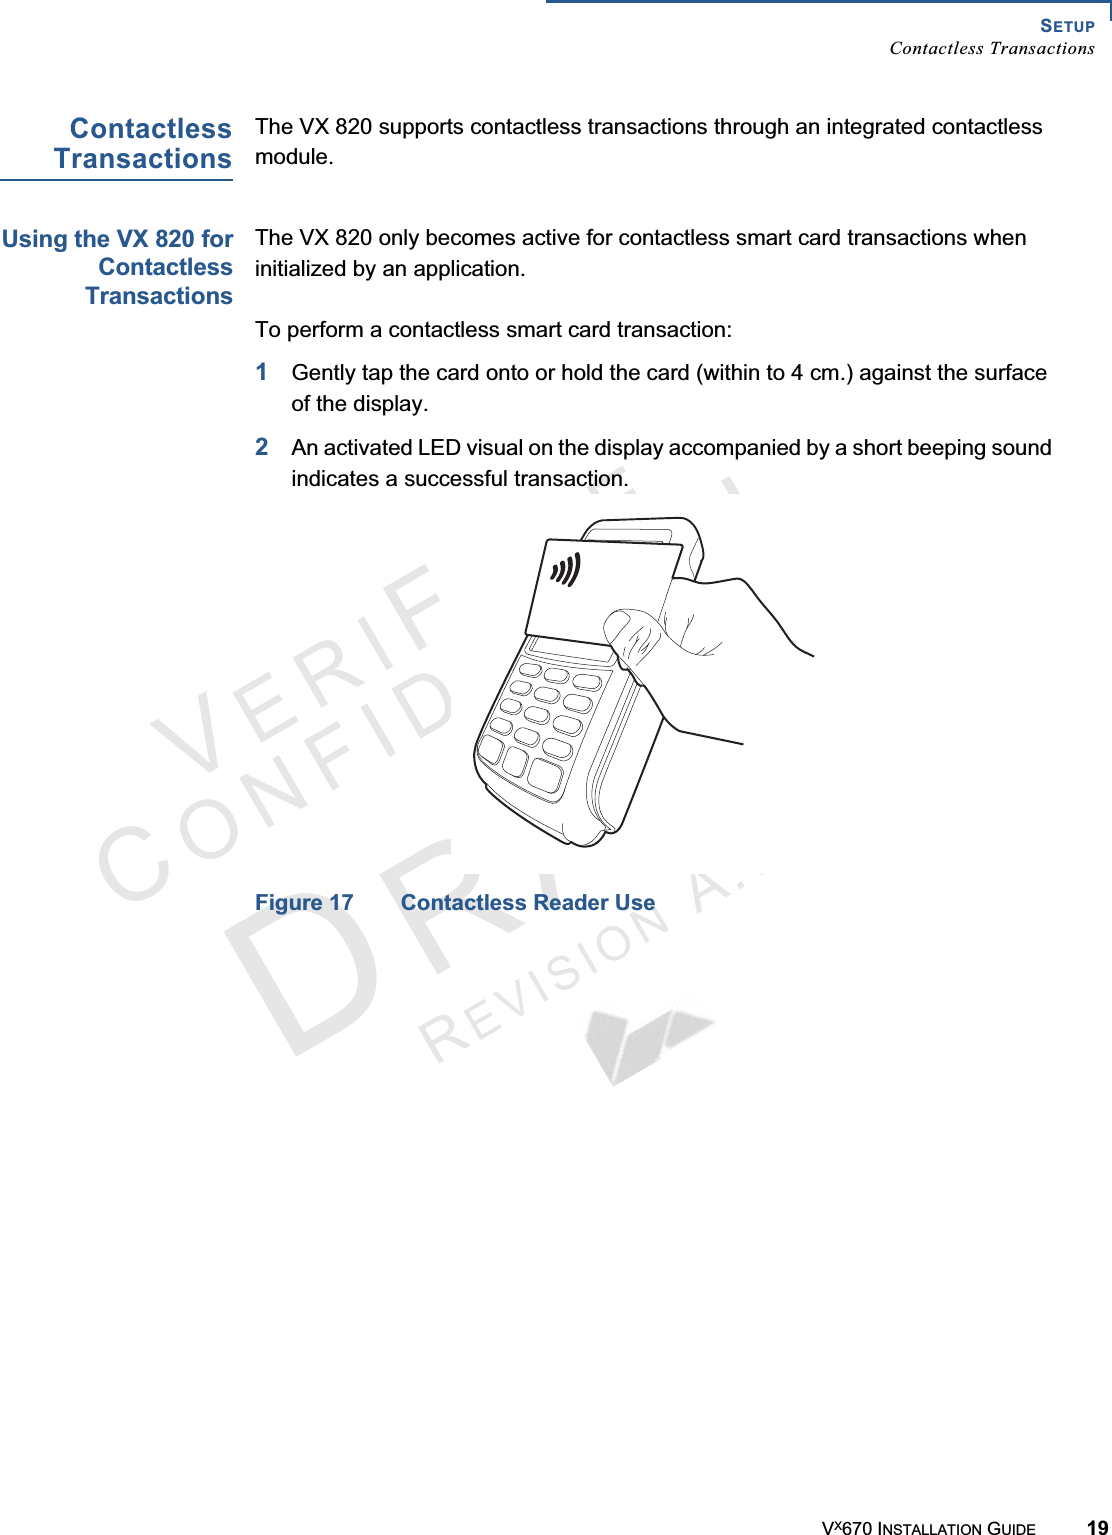
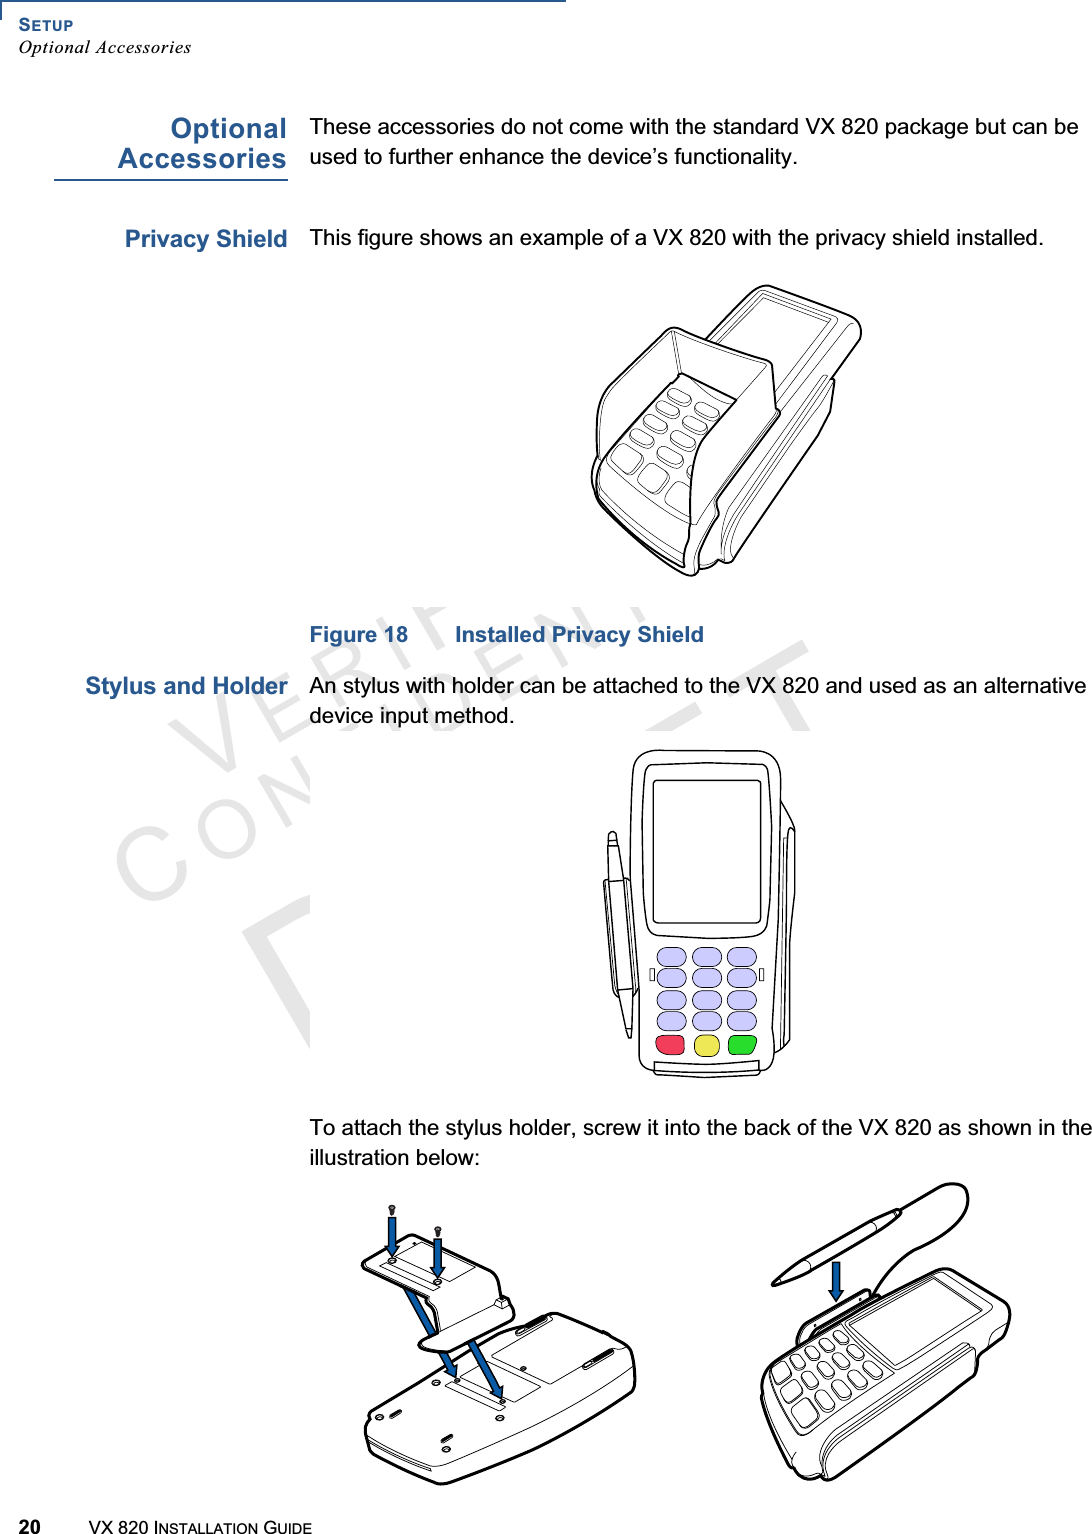
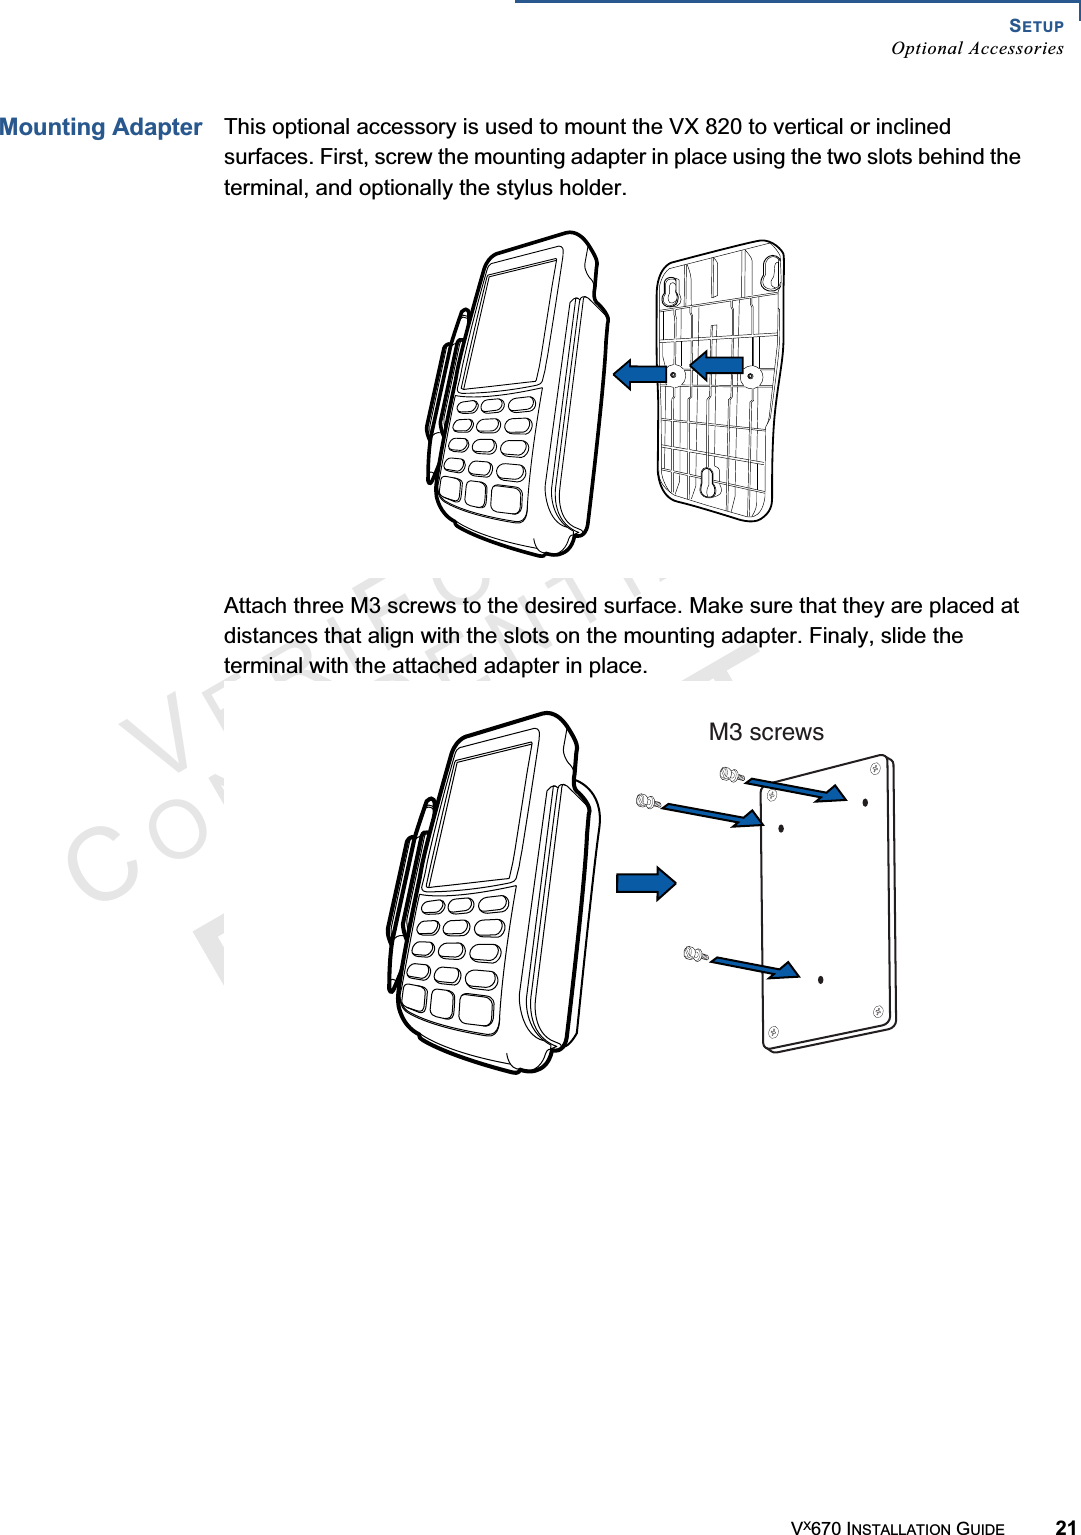
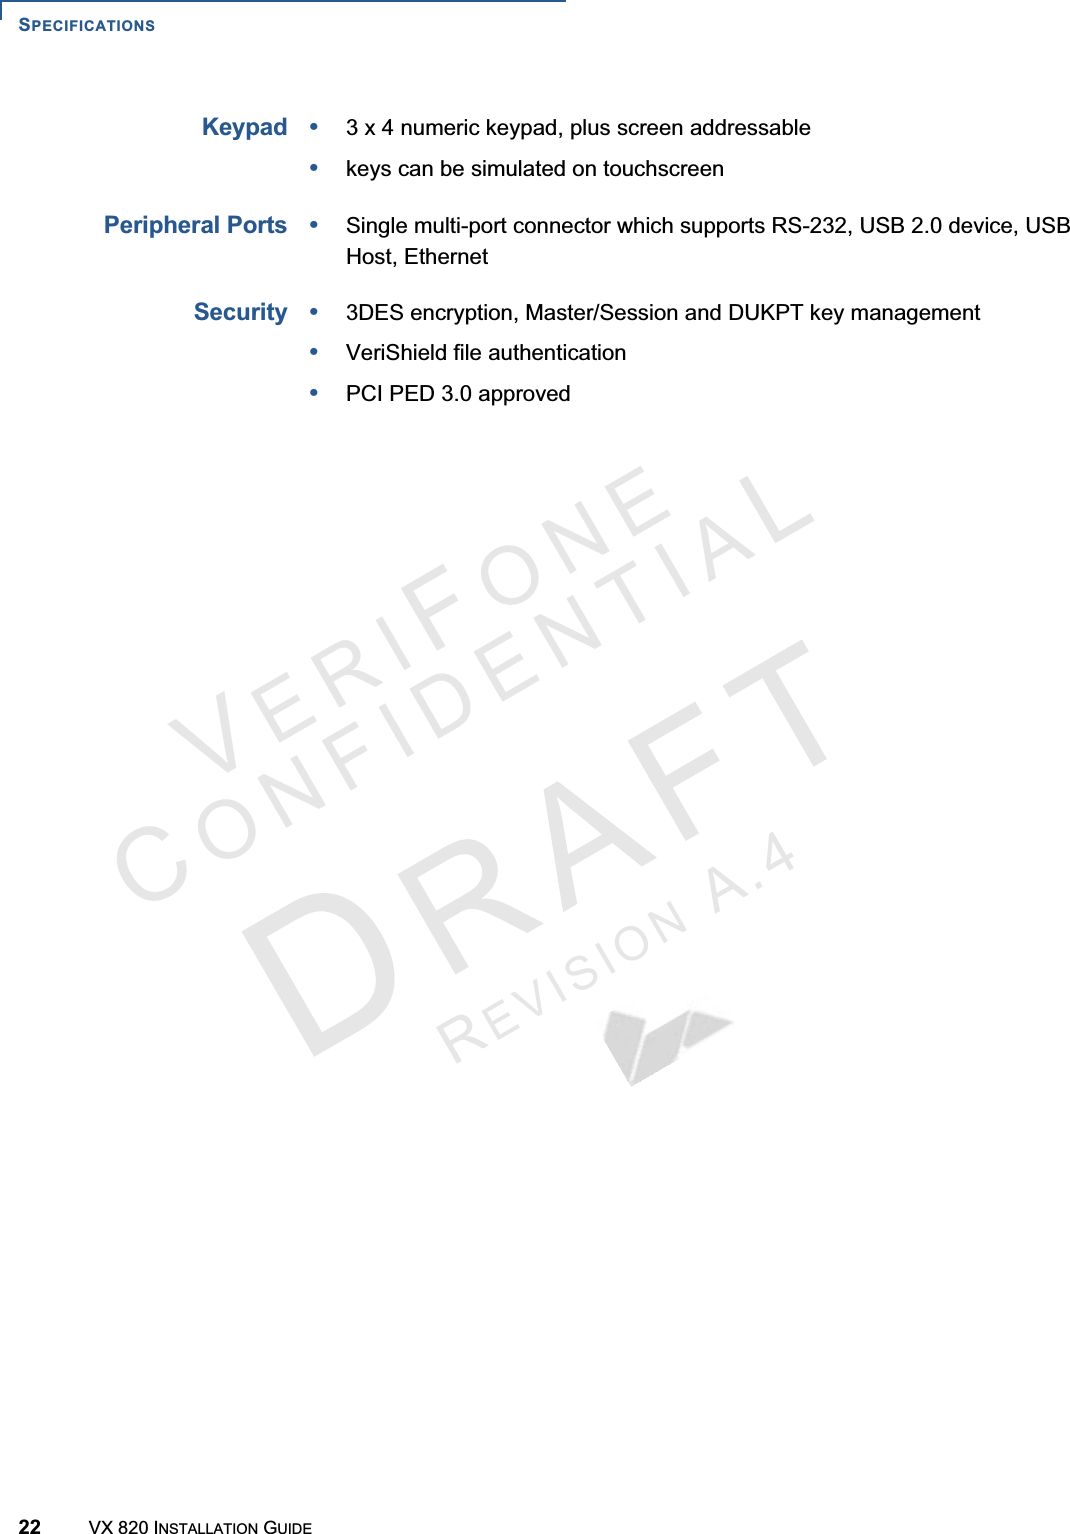
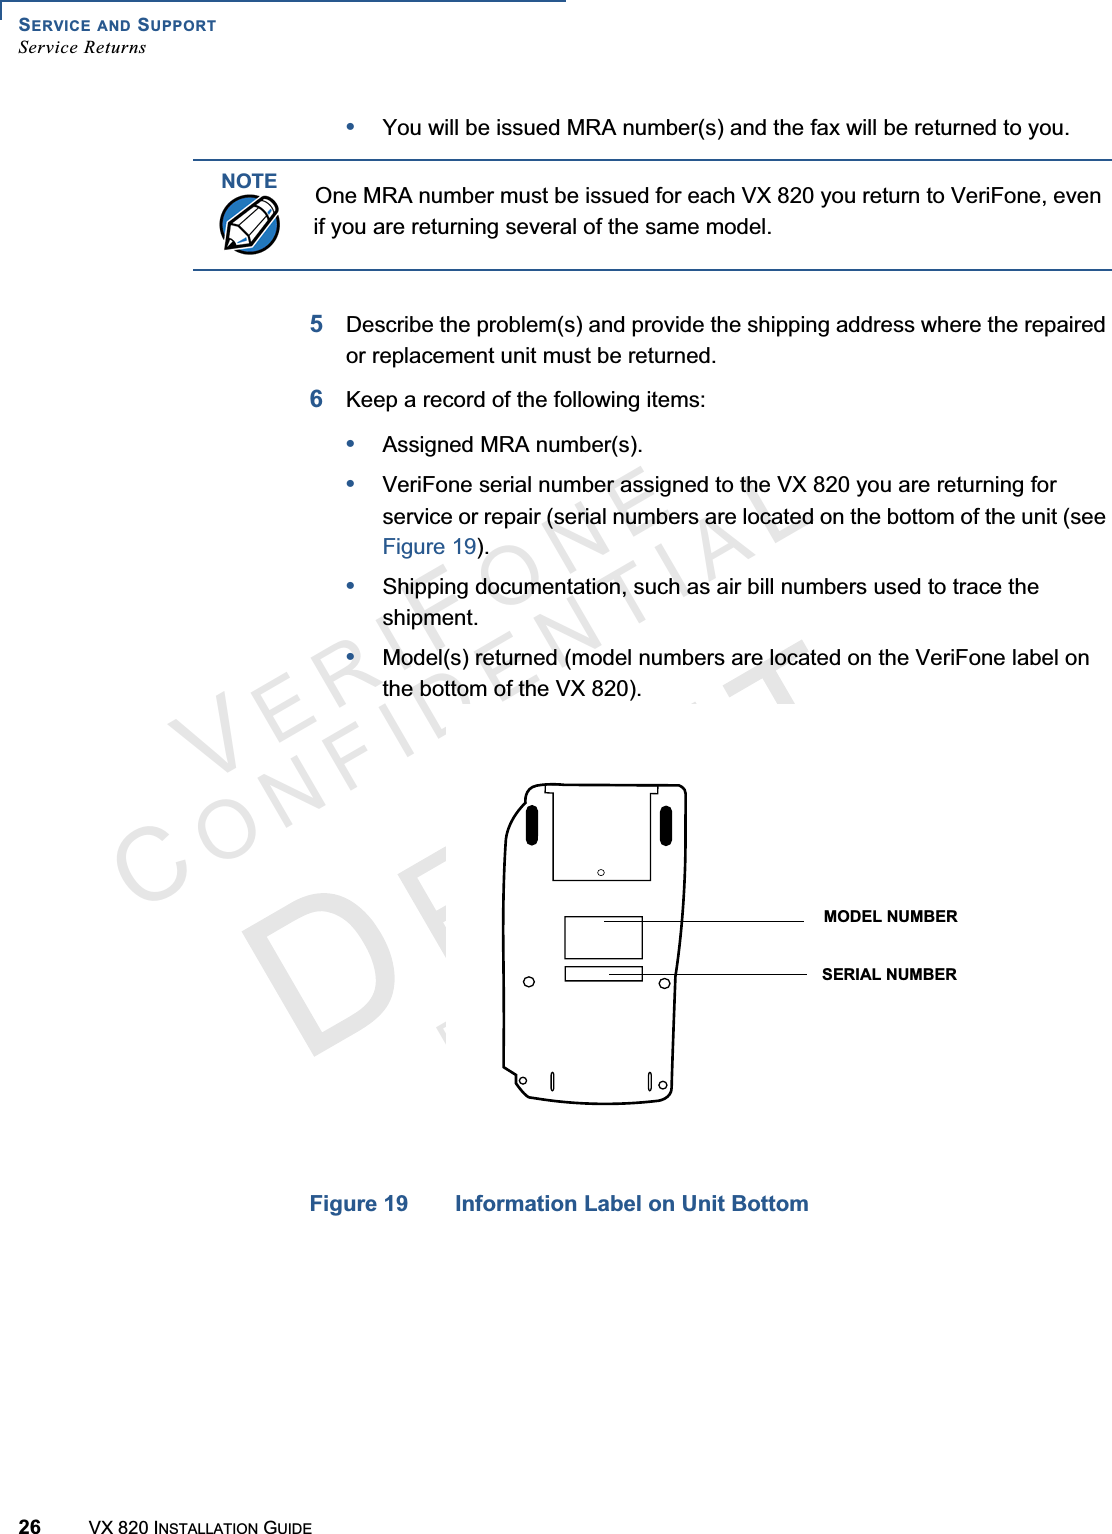
![SETUPExamine VX 820 FeaturesVX670 INSTALLATION GUIDE 11VERIFONECONFIDENTIALREVISIONA.5ExamineVX 820 FeaturesBefore you continue with the installation process, familiarize yourself with the VX 820 features: Figure 2 VX 820 FeaturesThe VX 820 includes the following features:•Atouch-screen display.•Three color-coded function keys below the keypad (CANCEL [RED],BACKSPACE [YELLOW], ENTER [GREEN]).•Amagnetic card reader, built into the right side. An icon shows the proper swipe direction, with the stripe facing down and towards the keypad.•Asmart card reader, built into the unit’s front side. An icon indicates the proper card position and insertion direction. •ASAM (Security Access Module) compartment, built into the back side of the unit. The VX 820 contains multiple-SAM (MSAM) cardholders to support multiple stored-value card programs or other merchant card requirements. •An optional Micro SD Card slot built into the back side of the unit.TOUCH-SCREENTELCO KEYPADCOLOR-CODED FUNCTION KEYSMAGNETIC CARDREADERSMART CARD READERDISPLAY](https://usermanual.wiki/Verifone/VX820CTLS/User-Guide-1326116-Page-13.png)