ZEBEX Z-2050 Mobile Data Collector User Manual Z 2050 UserMan
Zebex Industries Inc Mobile Data Collector Z 2050 UserMan
ZEBEX >
User Manual
ESC
CLR
F5
F7
F8
F6
ENT
ENT
SCAN
SPACE
0
7
8
9
4
5
6
1
ABC
DEF
PQR
GHI
YZ
MNO
VWX
JKL
STU
2
3
(@)
F1
F2
F3
F4
SFT
TAB
BS
,
Z-2050 Mobile Data
Collector
User Manual


1
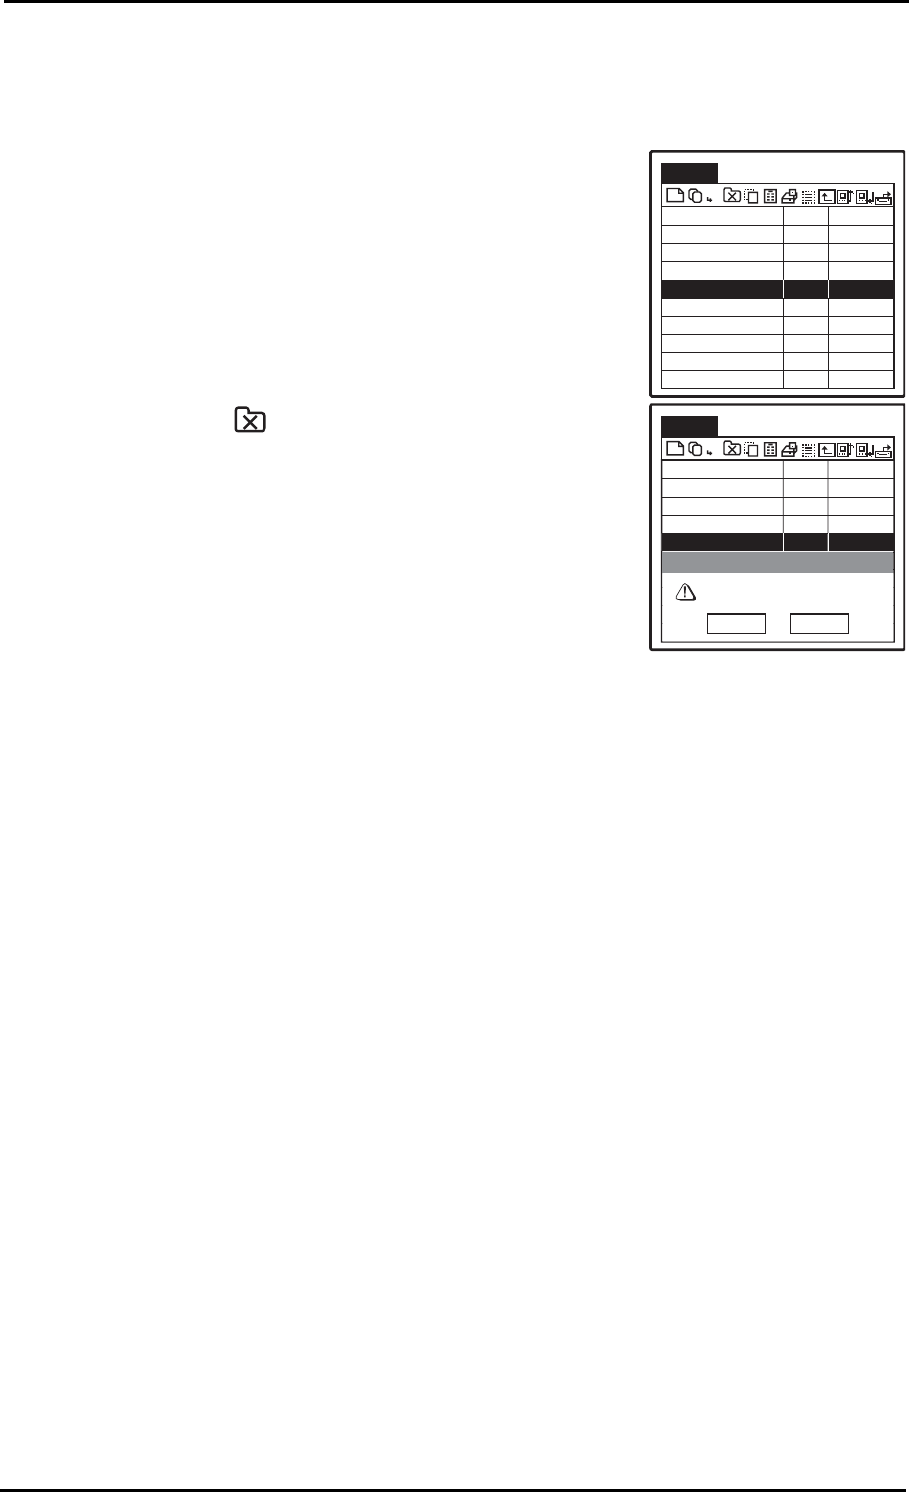
Table of Contents
1
Preface ................................................................. 1
About This Manual ...................................................................................................1
Symbols used in this manual ..........................................................................1
Copyright..................................................................................................................2
Safety Information....................................................................................................2
Laser Safety ...................................................................................................2
Safe Operation ...............................................................................................4
Overview ............................................................... 5
System Requirements..............................................................................................5
Unpacking ................................................................................................................5
.................................................................................................................................6
Charging the battery ................................................................................................7
Charging the battery separately in the cradle .................................................8
Inserting the battery .................................................................................................9
Inserting an SD card ..............................................................................................11
Connecting to a PC................................................................................................13
Connecting via the COM1 port .....................................................................13
Connecting via USB .....................................................................................14
Connecting the Z-2050 directly via USB .......................................................15
About the Product ..................................................................................................16
Features .......................................................................................................16
Applications and uses: ..................................................................................16
Getting Started...................................................... 17
Turning on for the First Time..................................................................................17
Key Functions ...............................................................................................18
Software Installation...............................................................................................19
Using the software for the first time .......................................................................21
DirectSync ....................................................................................................22
Software Development Kit (SDK)...........................................................................23
Scanning Barcodes................................................................................................26
System Reset.........................................................................................................27
Using the Cold Reset Function .....................................................................27
Using the Warm Reset Function ...................................................................28
Using the Scanner................................................... 29
Desktop Features...................................................................................................29
Application ....................................................................................................30
System Information .......................................................................................37
Using the FileMgr Tool Bar ...........................................................................39
File Manager Menus .....................................................................................46
Console ........................................................................................................50

2
Inputting Data.........................................................................................................61
Using the On-Screen Keyboard ....................................................................61
Using the Alphanumeric Keypad ..................................................................61
Using Handwritten Input ...............................................................................61
Network Connections.............................................................................................64
Creating a new Dial-Up Connection .............................................................66
Creating a new LAN Connection ..................................................................67
Creating a new WLAN Connection ...............................................................68
Network Connect Screen ..............................................................................69
Data Backup / Restore...........................................................................................71
Backing Up Data ...........................................................................................71
Technical Information.............................................. 75

About This Manual - 1
Preface
About This Manual
Thank you for your purchase of the Zebex Z-2050 mobile data
collector. This product is at the forefront of portable data terminal
technology and this manual will provide information on the many and
varied options available to you, the user.
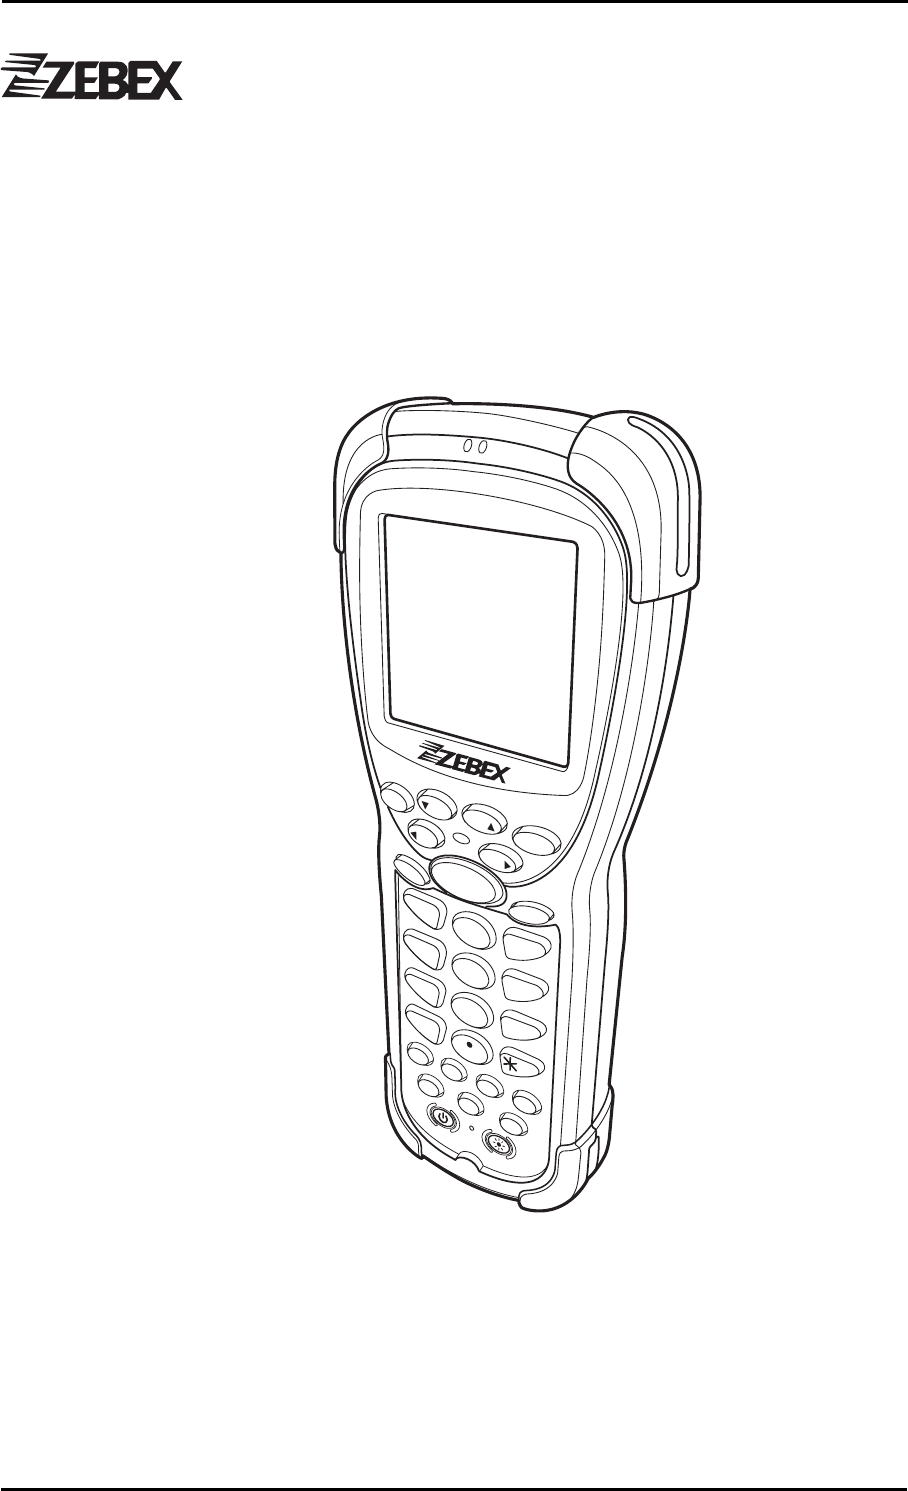
The Z-2050 is a compact, ergonomic and durable portable data termi-
nal. It is designed with an integrated wireless communication and 1D/
2D with optional barcode data capture, touch screen and 30-key
keypad. The design is ideal for the mobile worker as it simple and easy
to use anywhere along a supply chain. It complies with IP 54 regula-
tions.
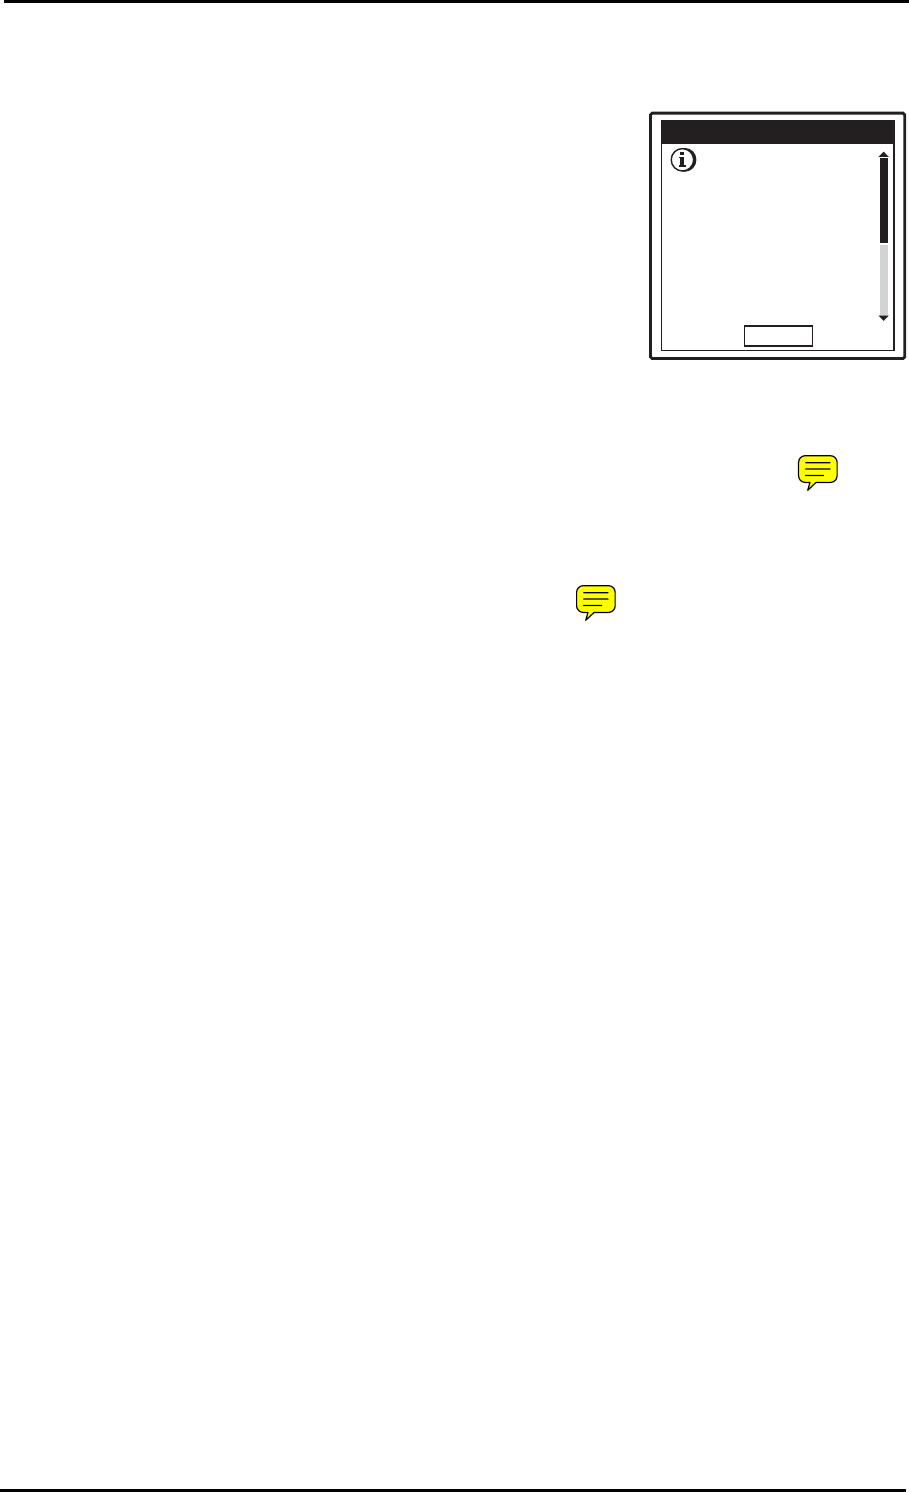
Symbols used in this manual
WARNING
The warning symbol denotes information that MUST be
observed by the user. Failure to observe these warnings
may result in personal injury or irreversible damage to the
hardware.
NOTE
The note symbol denotes information that is important and
should be observed.

2 - Copyright
Copyright
Zebex Industries Inc. makes no warranty of any kind with regard to
this material, including, but not limited to, the implies warranties of
merchantability and fitness for a particular purpose. Zebex Industries
Inc. shall not be liable for errors contained herein or for incidental
consequential damages in connection with the furnishing, perfor-
mance or use of this product.
Zebex Industries Inc. will be under no liability in respect of any defect
arising from fair wear and tear, wilful damage, negligence, abnormal
working conditions, failure to follow the instructions and warnings, or
misuse or alteration or repair of the products without written
approval.
No part of this document may be reproduced, transmitted, stored in a
retrieval system, transcribed or translated into any language or com-
puter language in any form or by any means electronic, mechanical,
magnetic, optical, chemical, manual or otherwise, with express writ-
ten consent and authorization.
We reserve the right to make changes in product design without reser-
vation and without notification. The material in this guide is for infor-
mation only and is subject to change without notice.
Zebex is a registered trademark of ZEBEX INDUSTRIES INC.
© Copyright 2006 Zebex.
Safety Information
Your safety is of the utmost importance so please observe and follow
the following guidelines that allow you to use the scanner in a safe
and responsible way.
Laser Safety
The Z-2050 laser scanner complies with safety standard IEC 825-
1(1993) for a Class 2 laser product. It also complies with U.S.
21CFR1040 as applicable to a Class IIa laser product. Avoid staring at
direct laser light as the laser beam may hurt your eyes.
Federal Communication Commission (FCC)
Statement
15.21
You are cautioned that changes or modifications not expressly
approved by the part responsible for compliance could void the user’s
authority to operate the equipment.

Safety Information - 3
15.105(b)
This equipment has been tested and found to comply with the limits
for a Class B digital device, pursuant to part 15 of the FCC rules. These
limits are designed to provide reasonable protection against harmful
interference in a residential installation. This equipment generates,
uses and can radiate radio frequency energy and, if not installed and
used in the accordance with the instructions, may cause harmful
interference to radio communications. However, there is no guarantee
that interference will not occur in a particular installation. If this
equipment does cause harmful interference to radio or television
reception, which can be determined by turning the equipment off and
on, the user is encouraged to try to correct the interference by one or
more of the following measures:
• Reorient or relocate the receiving antenna.
• Increase the separation between the equipment and receiver.
• Connect the equipment into an outlet on a circuit different from that
to which the receiver is connected.
• Consult the dealer or an experienced radio/TV technician for help.
Operation is subject to the following two conditions:
This device may not cause interference;
This device must accept any interference, including interference that
may cause undesired operation of the device.
FCC RF Radiation Exposure Statement
This equipment complies with FCC radiation exposure limits set forth
for an uncontrolled environment. End users must follow the specific
operating instructions for satisfying RF exposure compliance. This
transmitter must not be co-located or operated in conjuction with any
other antenna or transmitter.

4 - Safety Information
Safe Operation
WARNING
• Be careful when using the Z-2050; do not drop or knock
the device as irreversible damage to the unit may occur.
• Keep the Z-2050 away from water or any other liquids.
• Do not operate the Z-2050 under extreme temperatures.
• Use only the battery and charger supplied by the manu-
facturer. The use of third-party batteries or chargers may
either damage the unit or shorten the life of the device.
• Unplug the power adapter and cradle if the device is not
being used for long periods of time.
• Do not attempt to service this product yourself. All servic-
ing should be carried out be qualified Zebex personnel or
Zebex-approved engineers.

System Requirements - 5
Overview
System Requirements
Windows XP Operating System
64 MB RAM
50 MB free HDD space
COM1 port
USB ports
WLAN transmitter (optional)
Bluetooth transmitter/receiver (optional)
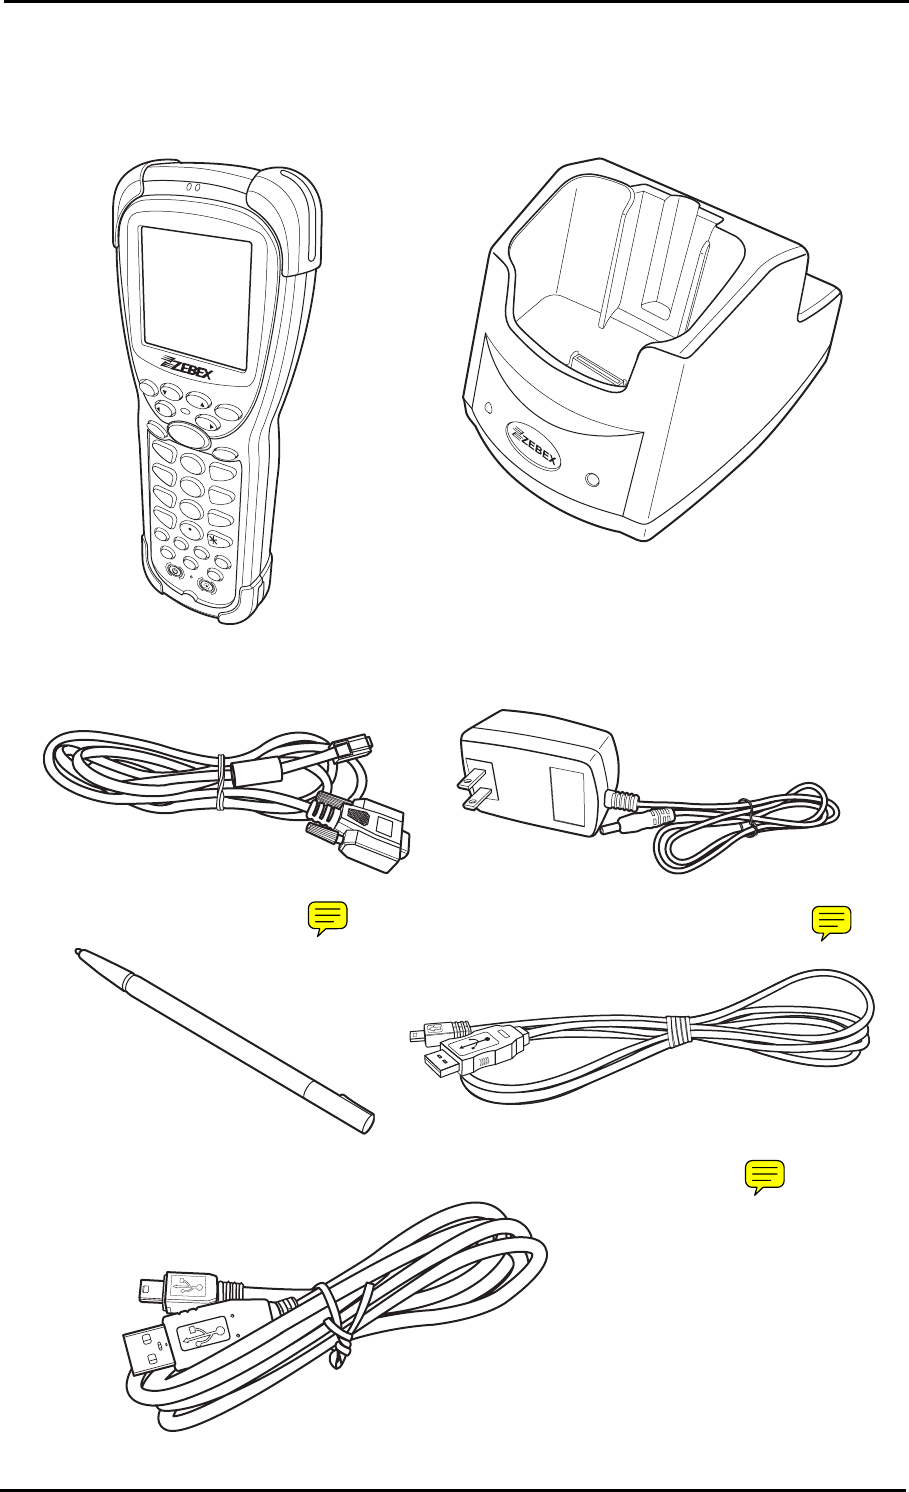
Unpacking
The Z-2050 package should contain the following:
Z-2050 Bar Mobile Data Collector
Docking cradle
1 Stylus
1 AC Mains power cable
1 USB cable (Scanner to USB)
1 USB cable (Cradle to USB)
1 RS-232 / COM1 cable
1 Li-ion 3.7V rechargeable battery
1 Software CD
User Manual
SDK Reference Manual
6 -
ESC
CLR
F5
F7
F8
F6
ENT
ENT
SCAN
SPACE
0
7
8
9
4
5
6
1
ABC
DEF
PQR
GHI
YZ
MNO
VWX
JKL
STU
2
3
(@)
F1
F2
F3
F4
SFT
TAB
BS
,
Docking Cradle
Z-2050
Mobile Data
Collector
RS-232 / COM1 cable AC Mains power adapter
Stylus Pen USB cable (Scanner to USB)
USB cable (Cradle to USB)
Charging the battery - 7
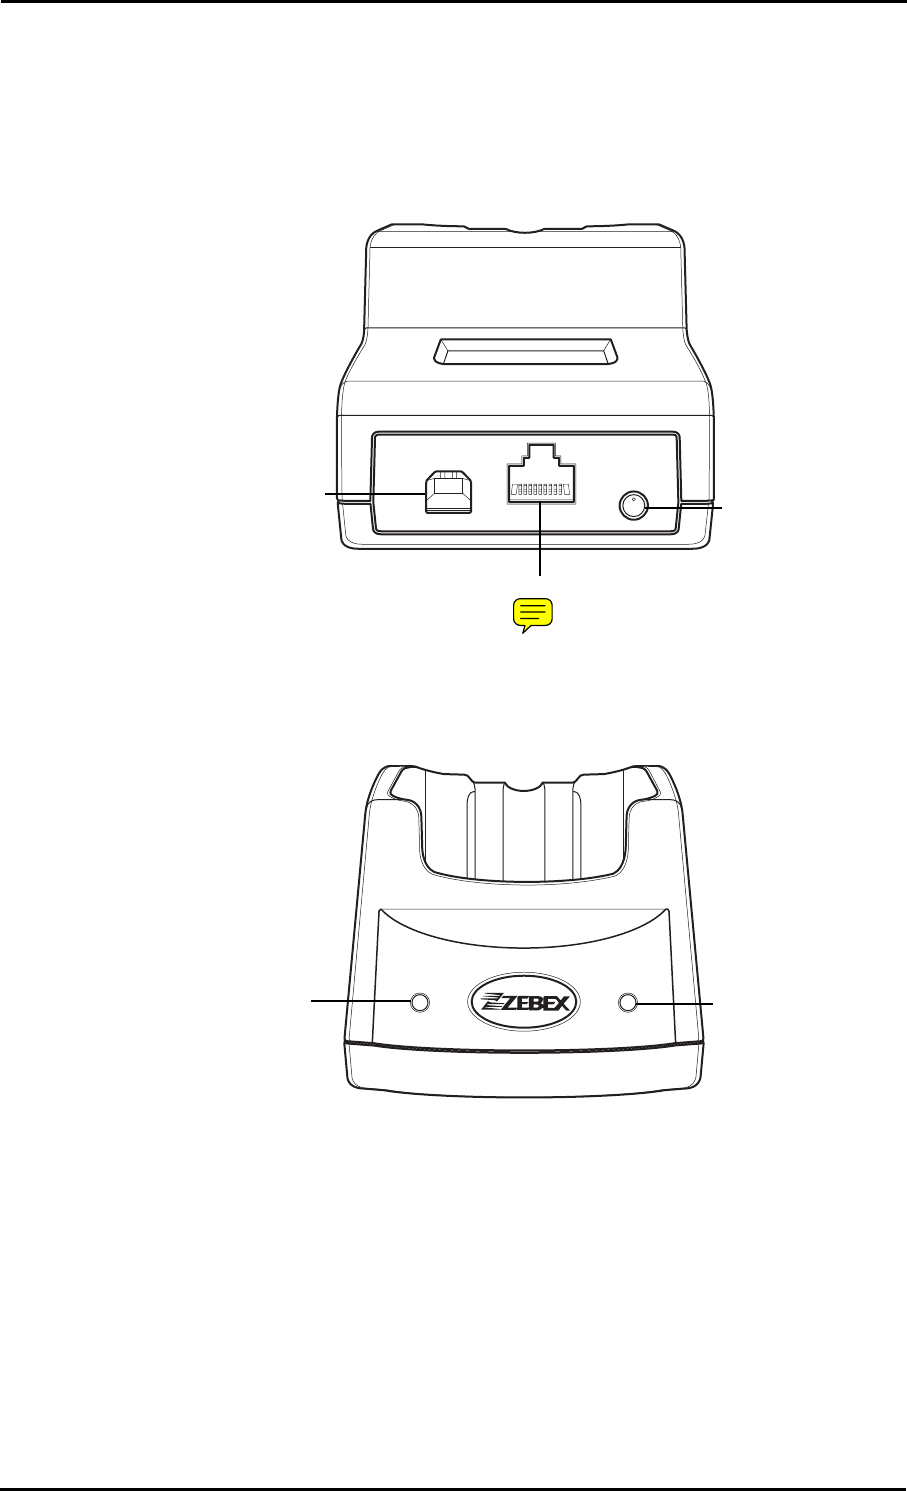
Charging the battery
The Li-ion 3.7V rechargable battery can be charged whilst inserted in
the device itself or independently via the recharging slot at the back
of the cradle.
Cradle - rear view
Cradle - front view
Cradle LEDs
Right LED - This is lit when a battery is inserted into the rear compart-
ment of the cradle for recharge. It remains lit until the
charge is complete.
Left LED - This is lit when the cradle is connected to AC power.
AC Power
Adapter
Jack In
RS232/COM1 Interface Connector
USB Interface
Right LED
Left LED
8 - Charging the battery
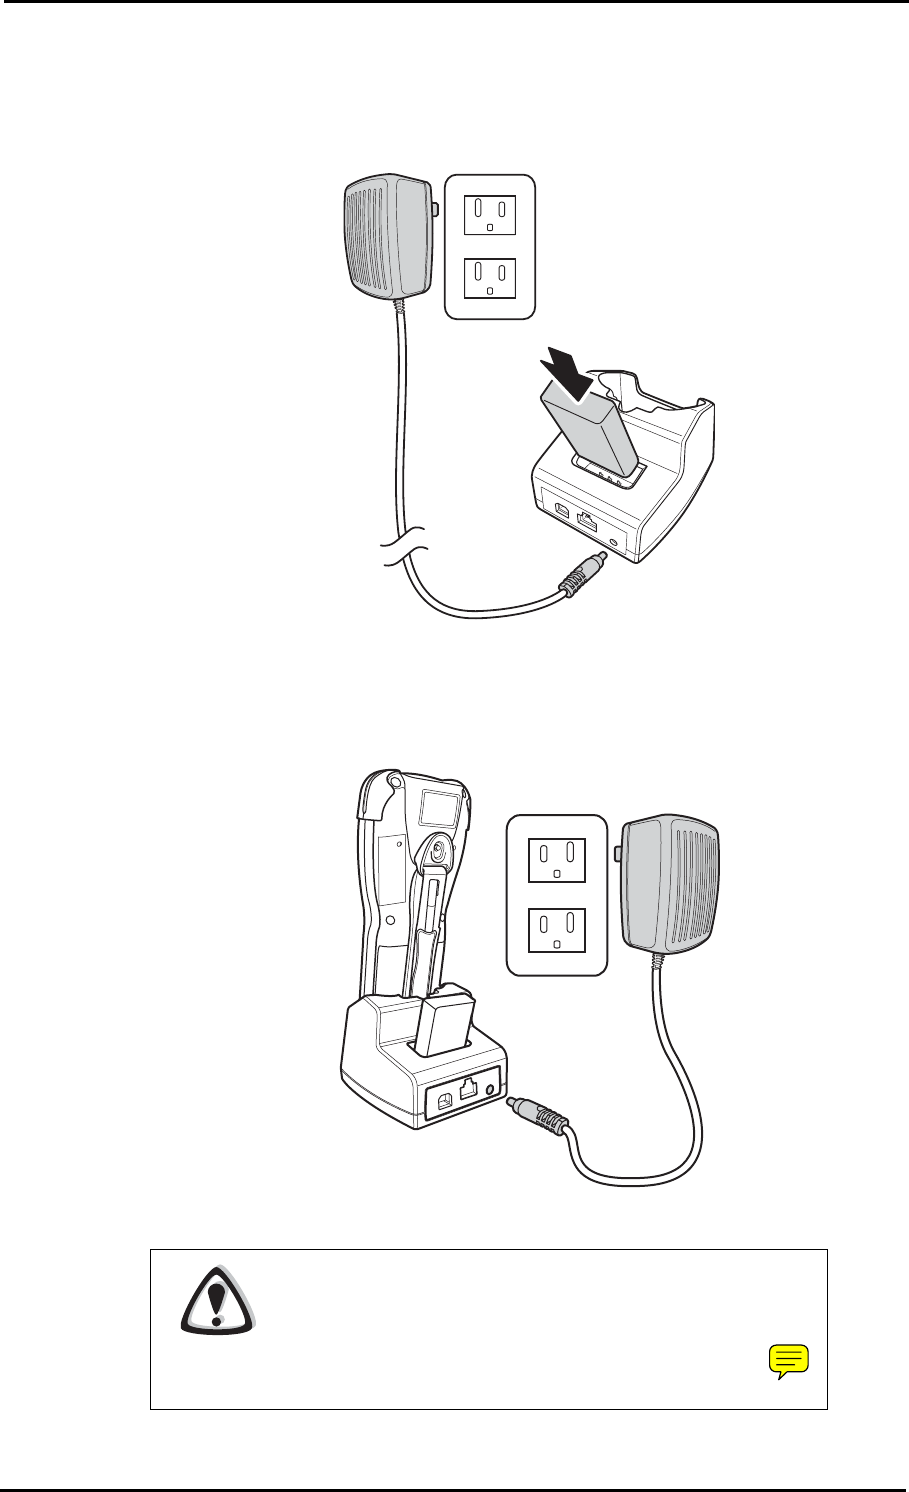
Charging the battery separately in the cradle
1. Insert the battery into the compartment at the rear of the cradle.
2. Connect the AC mains adapter power jack to the cradle and the
other to mains power.
NOTES
• When charging the battery for the first time, charge for at
least 12 hours prior to use.
• When charging the battery in the rear compartment of the
cradle, charging time will be doubled (approximately).

Inserting the battery - 9
Inserting the battery
When inserting the battery for the first time, follow these directions:
1. Slide the lock latch to the left to open the battery compartment.
2. Push up to open the battery compartment cover.
3. Insert the battery as shown.
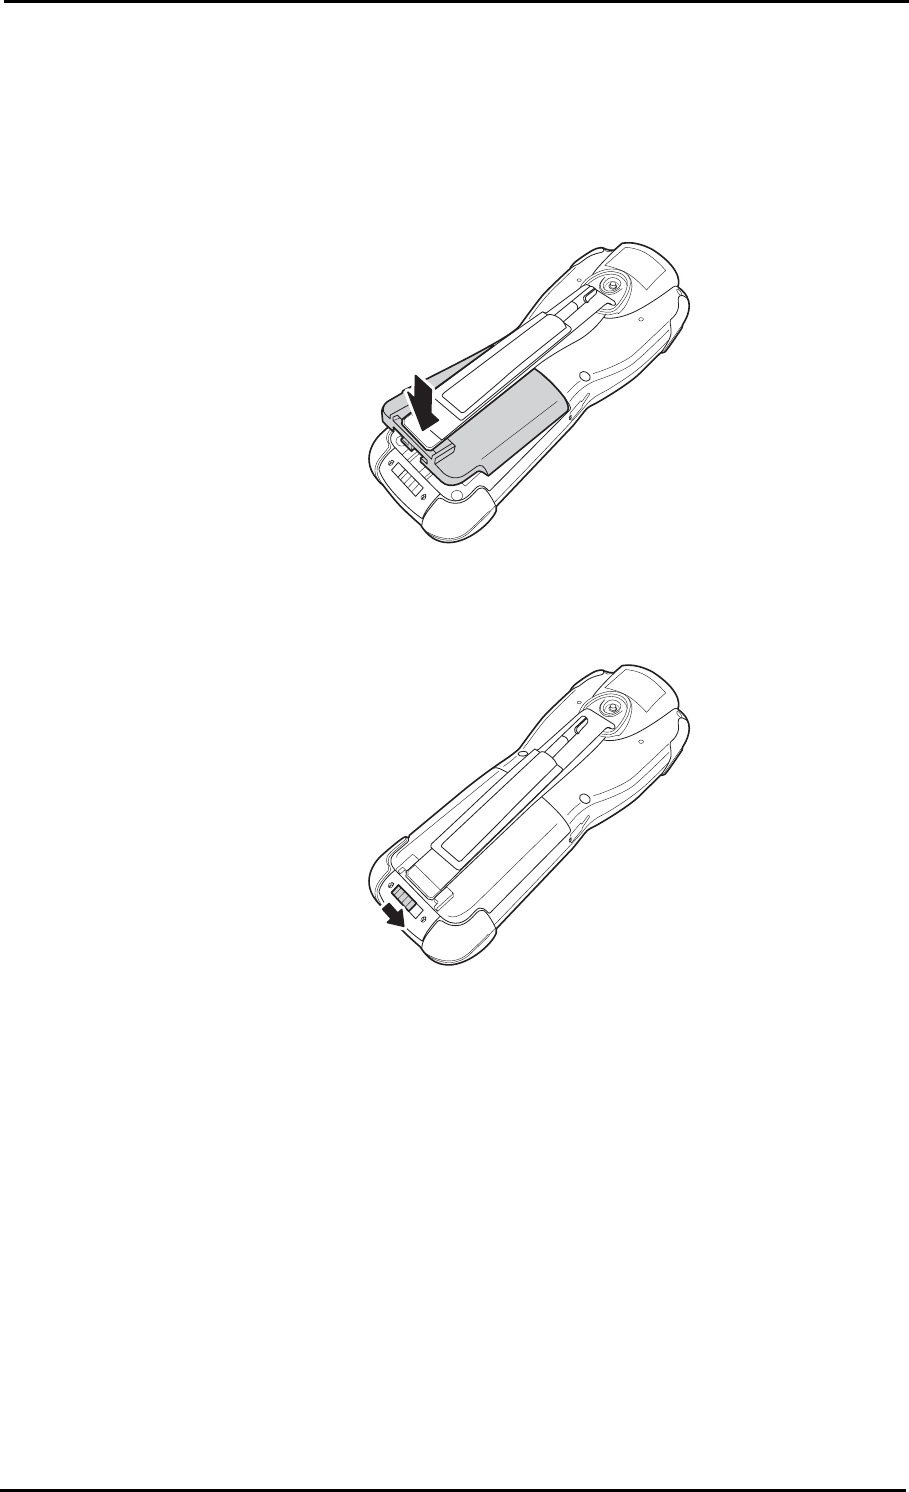
10 - Inserting the battery
4. Push down the compartment cover until it clicks into place.
5. Lock the battery compartment by sliding the latch to the right
until it locks into place.
Inserting an SD card - 11
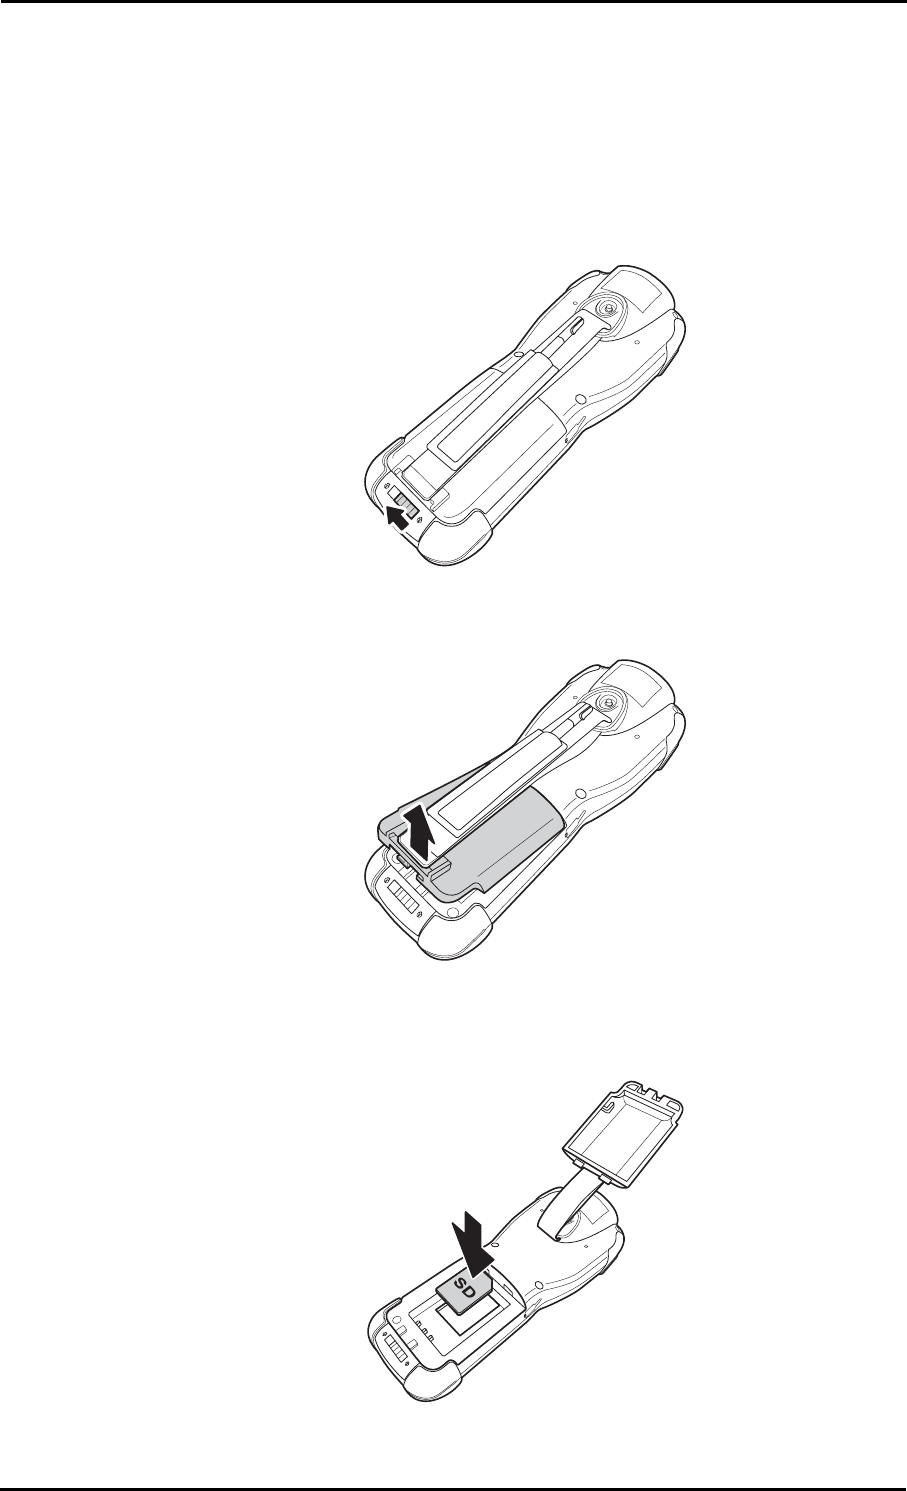
Inserting an SD card
The Z-2050’s internal storage capacity can be expanded with the use
of an SD card. To insert the SD card, follow these directions:
1. Slide the lock latch to the left to open the battery compartment.
2. Push up to open the battery compartment cover.
3. Remove the battery and place the SD card in the compartment,
making sure that the gold connectors are face down.
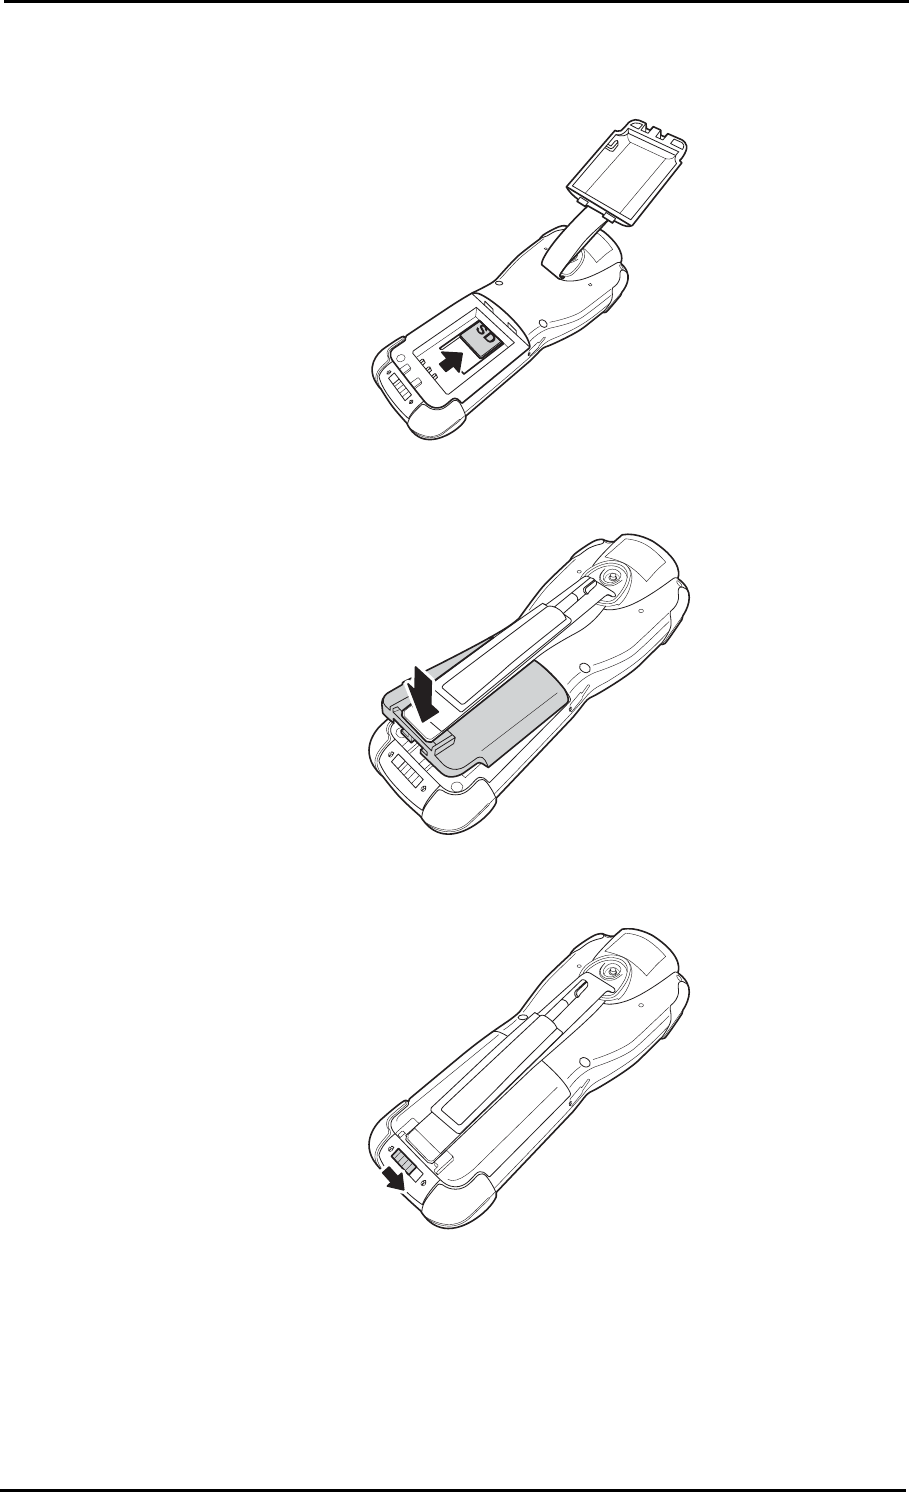
12 - Inserting an SD card
4. Slide the SD upwards into the card slot.
5. Replace the battery and close the compartment door.
6. Lock the battery compartment by sliding the latch to the right
until it locks into place
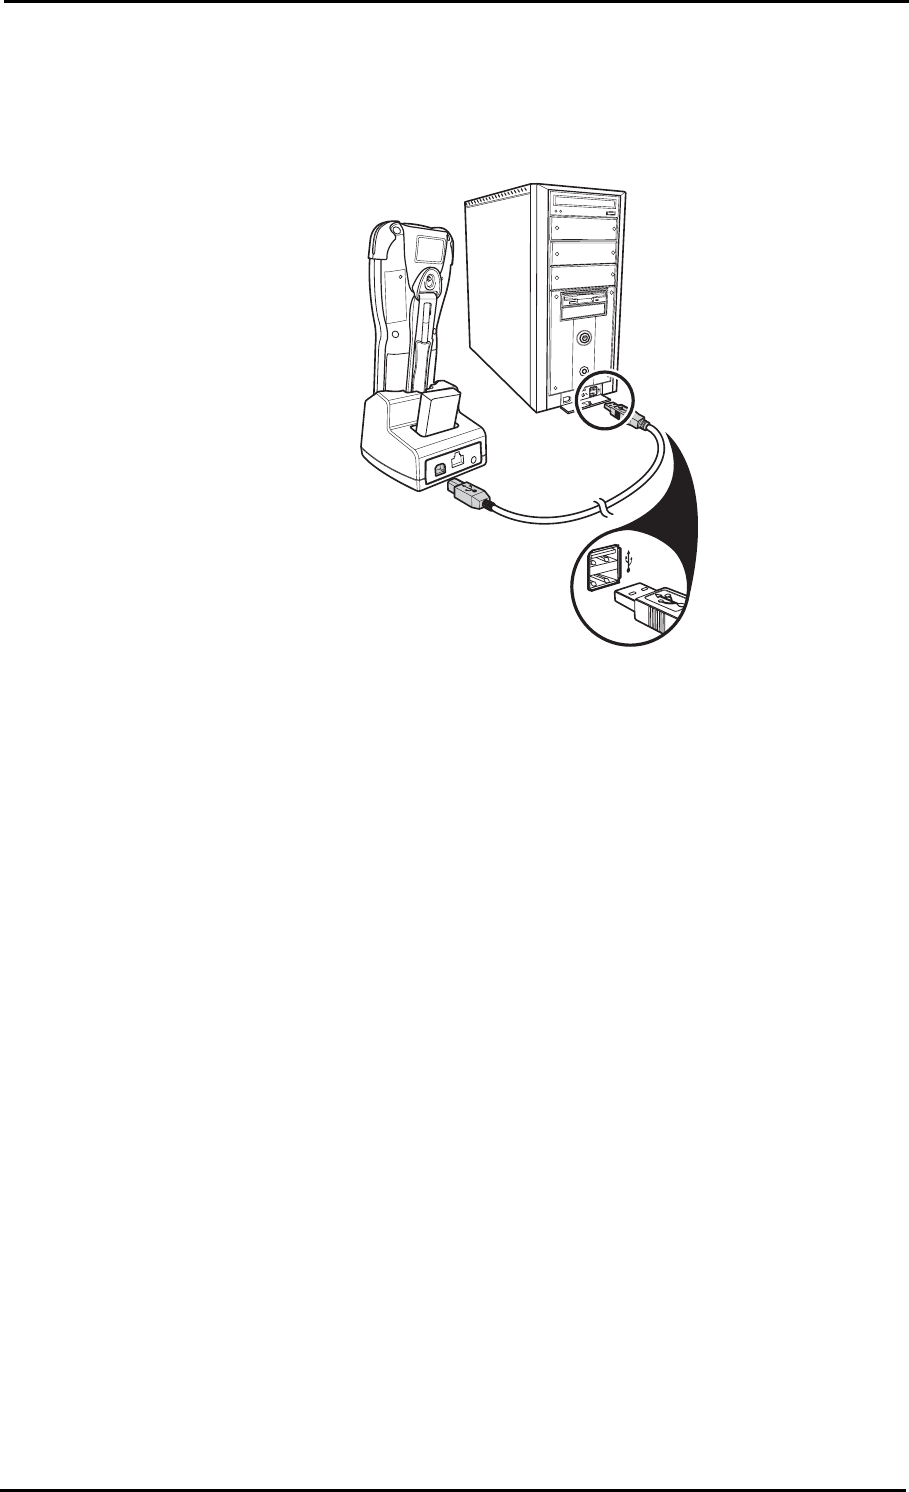
Connecting to a PC - 13
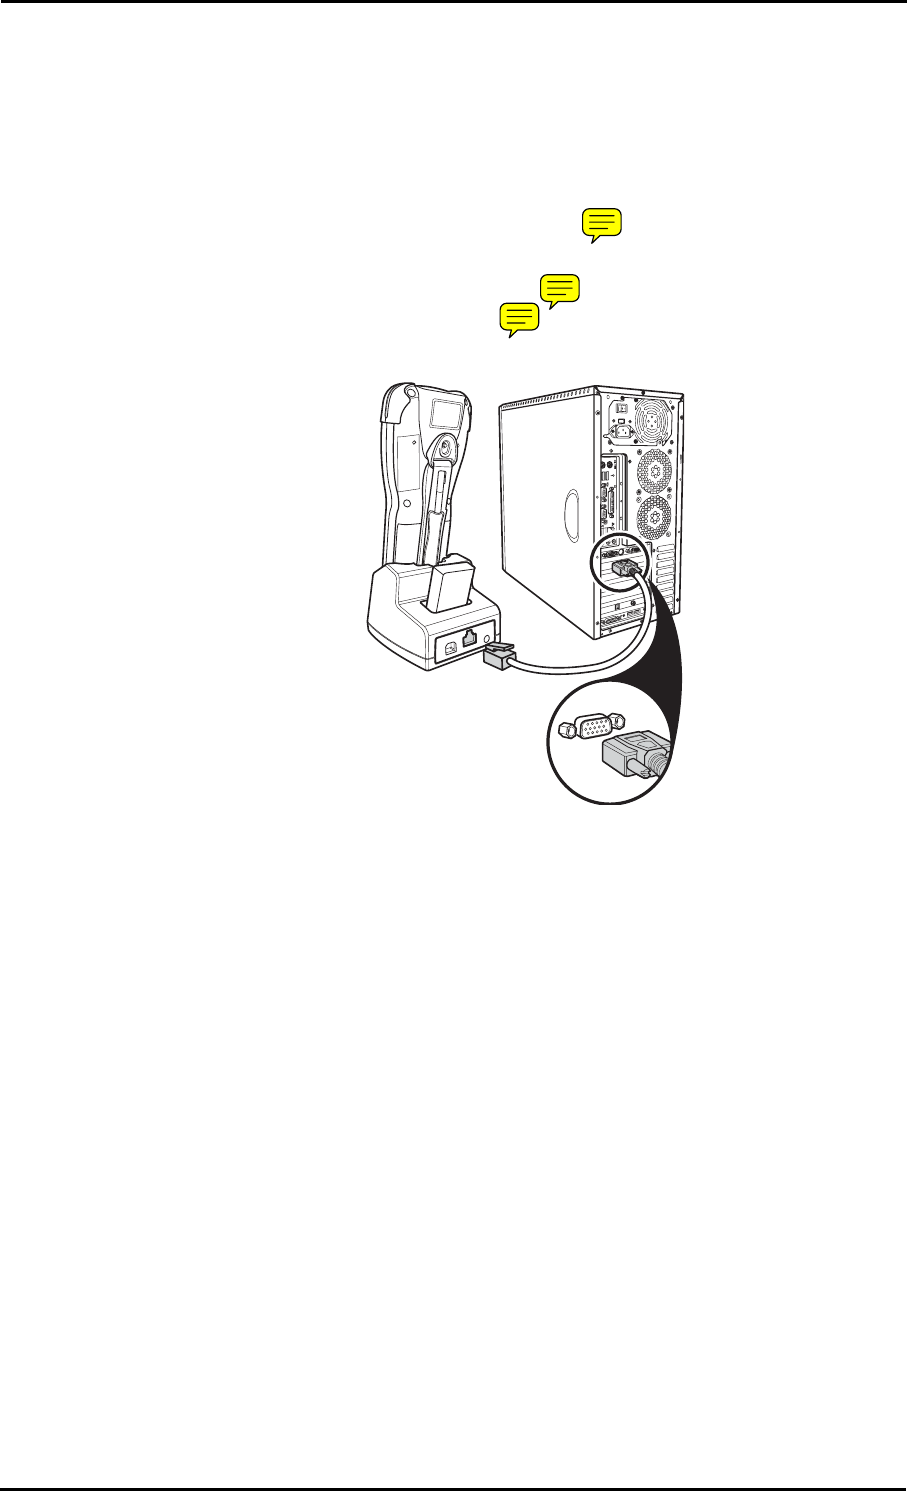
Connecting to a PC
In order to use the software supplied with the Z-2050, the mobile data
collector must be connected to a PC.
Connecting via the COM1 port
In order for the sync software to work properly, the cradle must be
connected to your computer’s COM1 port. Attach one end of the
RS-232 cable to the RS-232/COM1 interface connector on the cradle
and the other to the COM1 port on your PC.
TV OUT
PDIF-OUT
SDIF-OUT
LCD
14 - Connecting to a PC
Connecting via USB
The cradle must also be connected via one of your PC’s USB
ports.Attach one end of the cable to the USB interface on the cradle
and the other to your PC.
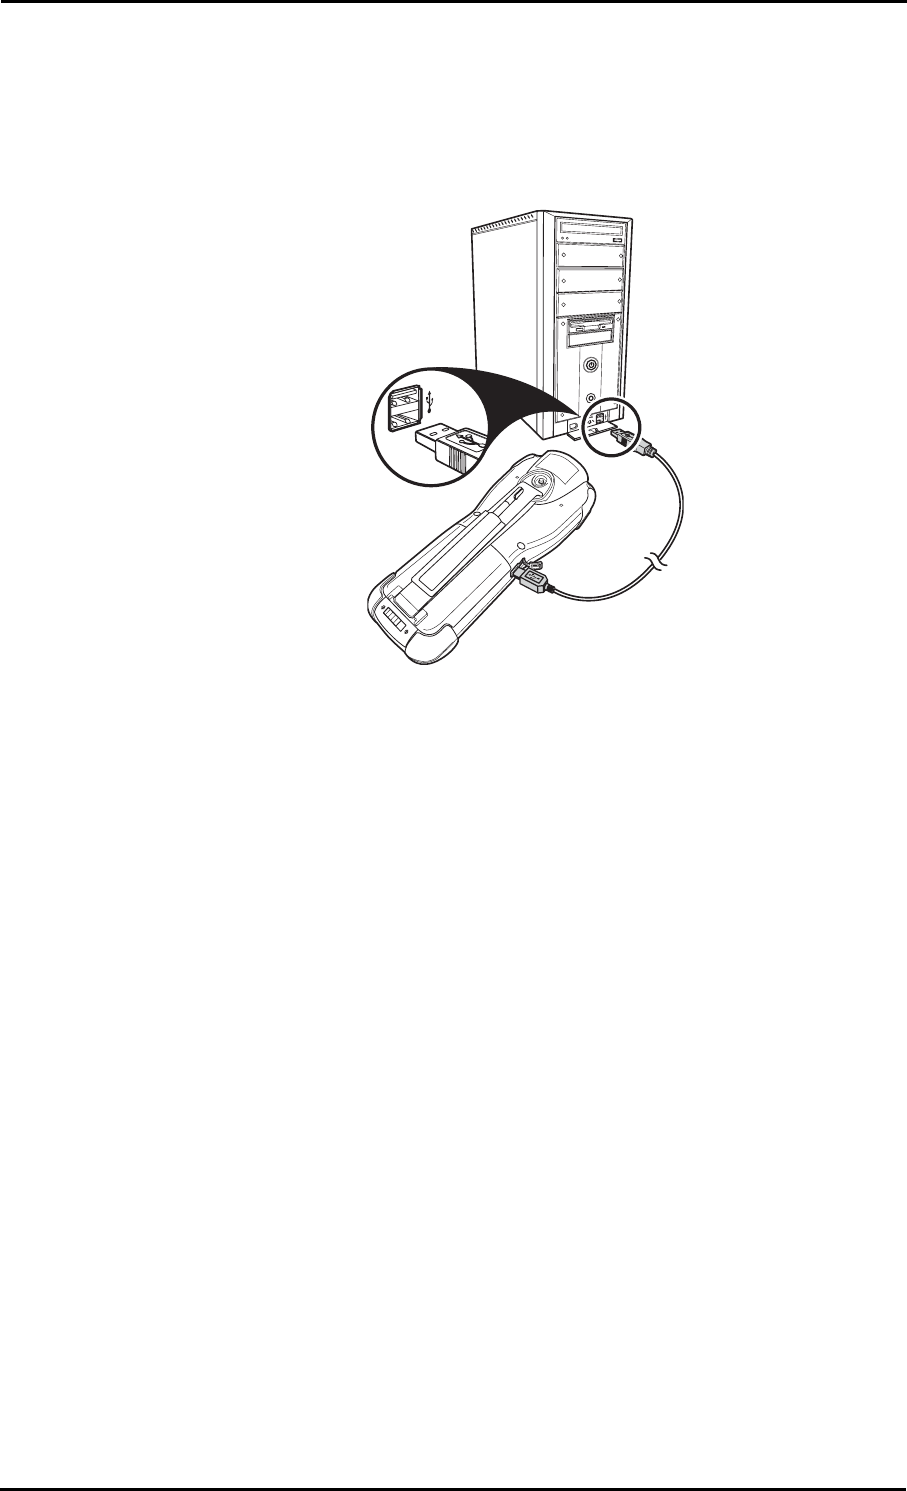
Connecting to a PC - 15
Connecting the Z-2050 directly via USB
You can connect the Z-2050 directly to your PC, without the need for
the cradle, using the USB cable, attaching it to the port on the left
hand side of the device.

16 - About the Product
About the Product
The Z-2050 is a compact, ergonomic and durable portable data termi-
nal. It is designed with an integrated wireless communication and 1D/
2D with optional barcode data capture, touch screen and 30-key
keypad. The design is ideal for the mobile worker as it simple and easy
to use anywhere along a supply chain. It complies with IP 54 regula-
tions. The Z-2050 is also expandable with WLAN communication vi the
CF slot and offers expandable memory through the SD slot.
The Z-2050 features a MOTOROLA Dragonball 32 bit processor and pro-
prietary operating system. This combination delivers high perfor-
mance, low power consumption and the diversity of a wireless
networking platform. Compared with other systems currently avail-
able on the market, it is the most cost-effective, offering optimum
performance.
Features
• Scan and access real-time data anytime and anywhere
• Bluetooth-enabled and Wi-Fi 802.11b communications
• Durable ergonomic design for comfort and portability
• Easy to read, backlit LCD screen with touch panel
• Cable-free scanning using Bluetooth technology, class 1 specifica-
tion
• Easy to use VC 6.0 development environment and communication
software
• Supports GUI, database and networking over 1000 APi
• 4 MB core flash and 64 MB data flash memories, 8 MB SDRAM
• Rechargeable li-Ion battery for power management
• Integrated wither 1D or 2D
• Proprietary OS supports delivery of wireless communications
Applications and uses:
• Retail /Manufacturing / Education / Health care
• Logistics and packaging handling markets
• Inventory and asset management
• Shipping and receiving
• Express delivery tracking
• Meter recording.
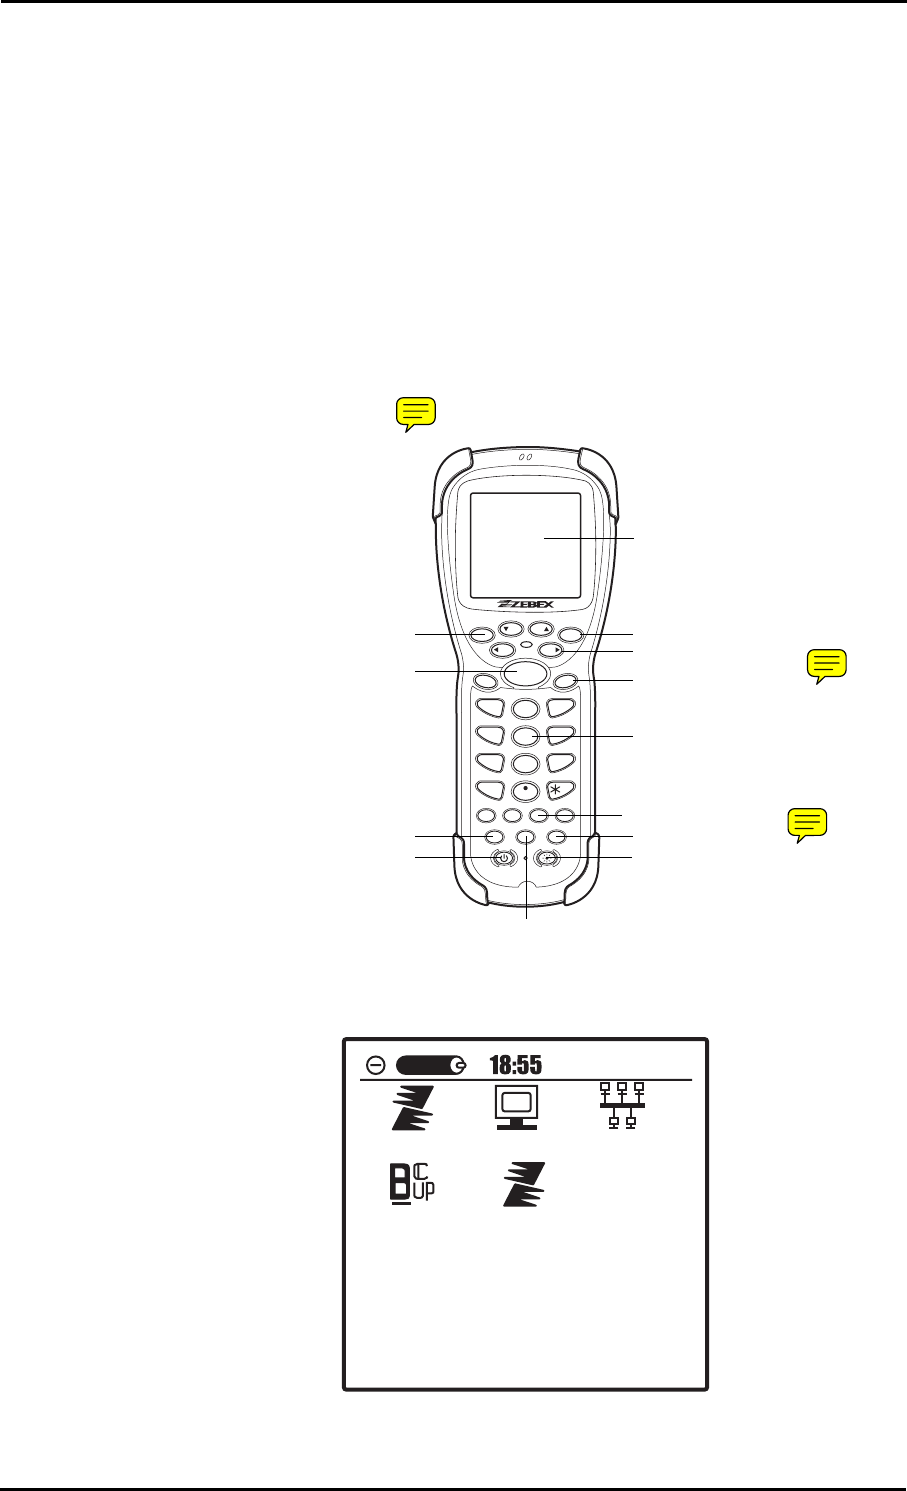
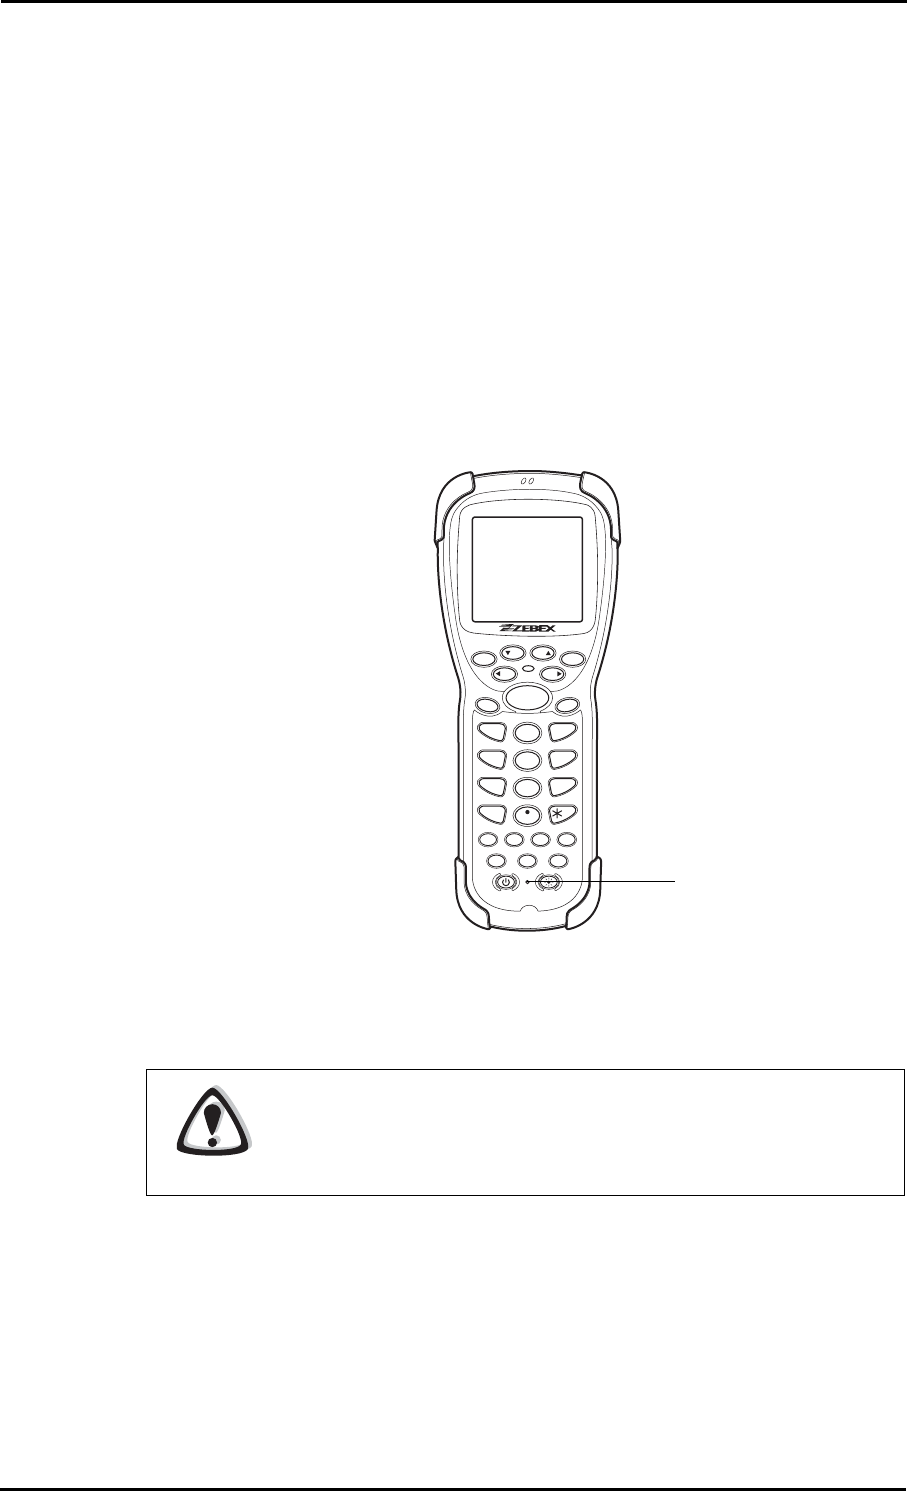
Turning on for the First Time - 17
Getting Started
Turning on for the First Time
Once a full battery charge is completed, insert the battery as shown in
“Charging the battery” on page 7.
1. Press the power on button.
2. You will be prompted to configure the touch screen.
3. Touch each crosshair to complete the configuration.
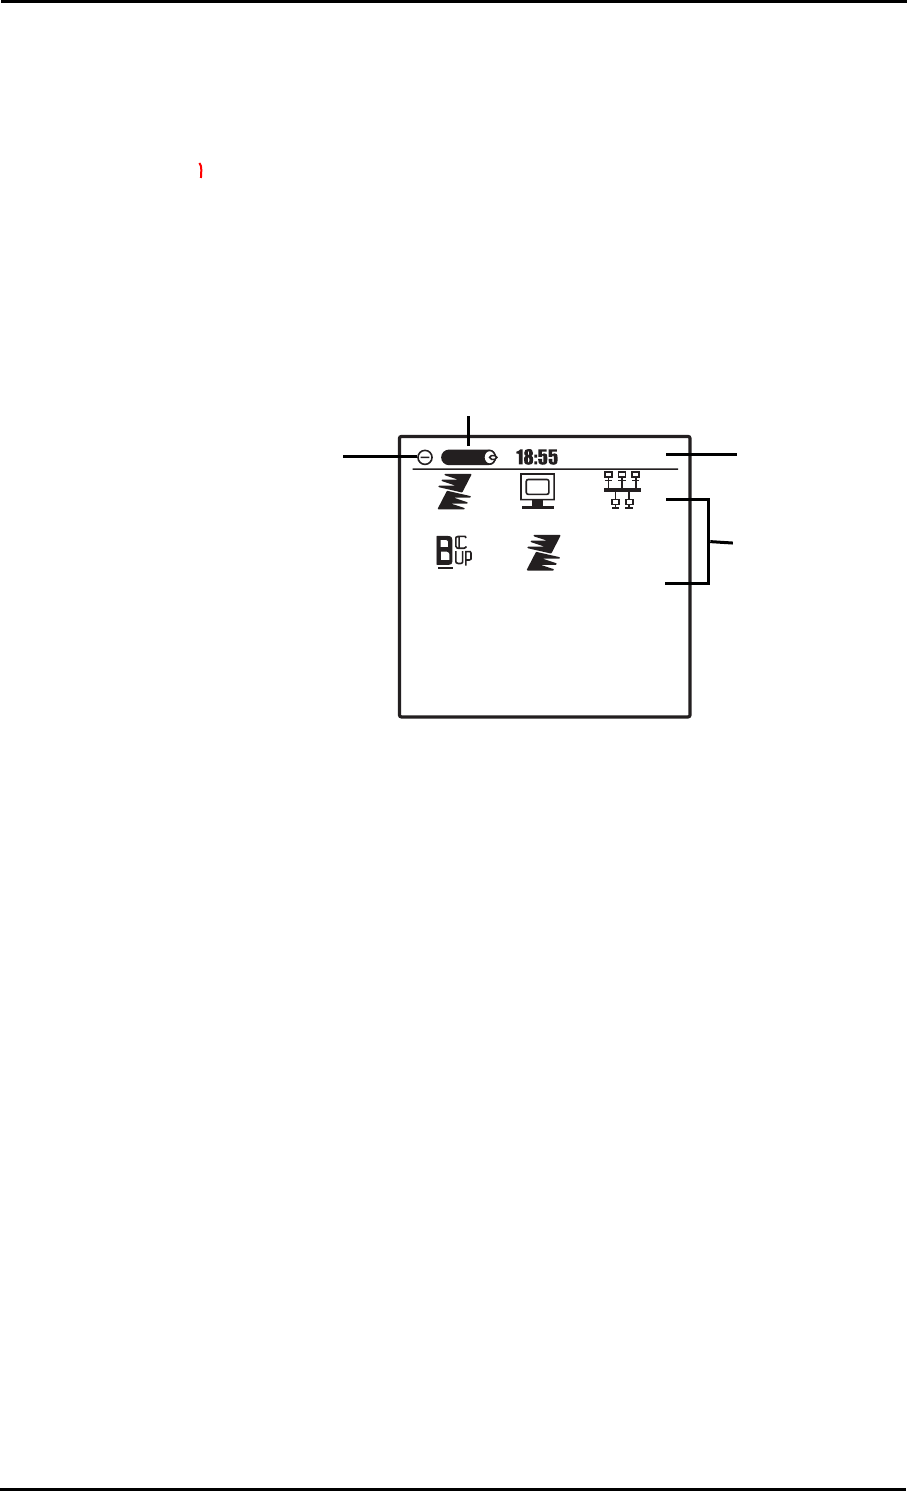
Once the touch screen has been configured, the main desktop screen
appears:
ESC CLR
F5
F7 F8
F6
ENT ENT
SCAN
ABC
1
I
H
G
3
R
Q
P
6
Z
Y
9
4
JKL
7
STU
DEF
2
MNO
5
VWX
8
SPACE
0
(@)
F1 F2 F3 F4
SFT TAB BS
,
Main
FileMgr
Console
Network
Backup
Bluetooth
LCD screen
Alphanumeric keypad
Scan button
Backlight button
Power button
Escape button Clear button
Favorite keys 5-8
Shift key
Ta b k e y
Backspace key
Enter key
Favorite/Arrow keys 1-4
18 - Turning on for the First Time
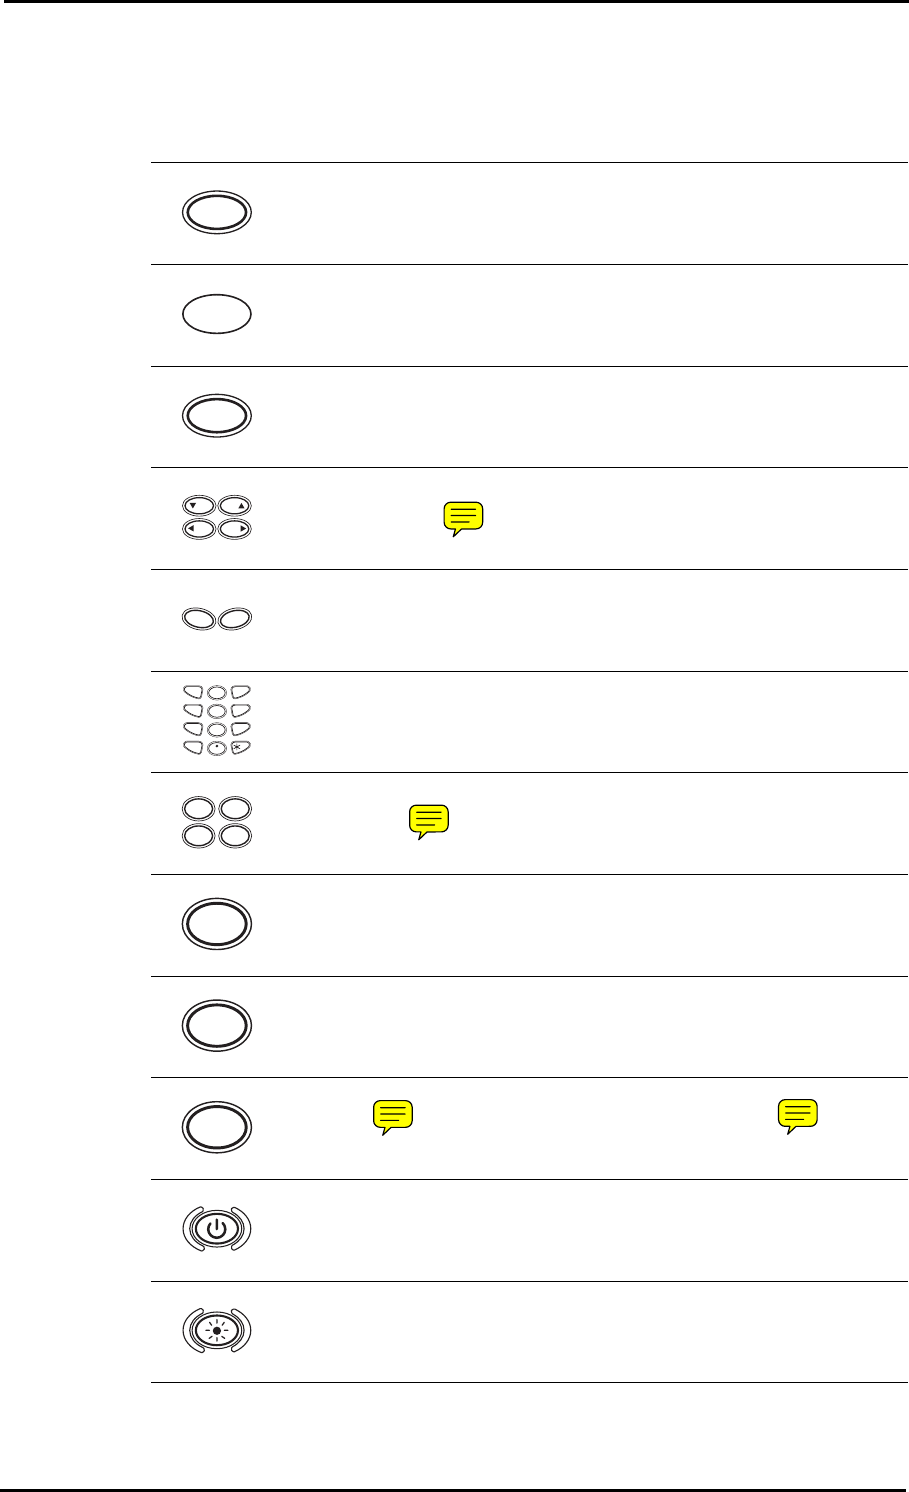
Key Functions
Key Name Function
Escape Press to leave the current screen.
Scan Press and hold to scan a barcode.
Clear Press to clear any data from the
screen.
Favorite/Arrow
keys 5-8
Press these to move around the
screen or to access favorites
numbered 5-8.
Enter keys Press to confirm entries or
commands.
Alphanumeric keypad Press to enter data, in either
numerical or alphabetical format.
Favorite keys 1-4 Press to access favorites
numbered 1-4.
Shift Press to change method input. Choose
from upper or lower case alphabetical
input and numeric input.
Tab Press to add a tab indent.
Backslash Press to enter a backslash.
Power on /off Press to turn the power on or off.
Backlight Press to turn the LCD backlight on or
off.
ESC
SCAN
CLR
F5
F7 F8
F6
ENT ENT
ABC
1
I
H
G
3
R
Q
P
6
Z
Y
9
4
JKL
7
STU
DEF
2
MNO
5
VWX
8
SPACE
0
(@)
,
F1
F2
F3
F4
SFT
TAB
BS
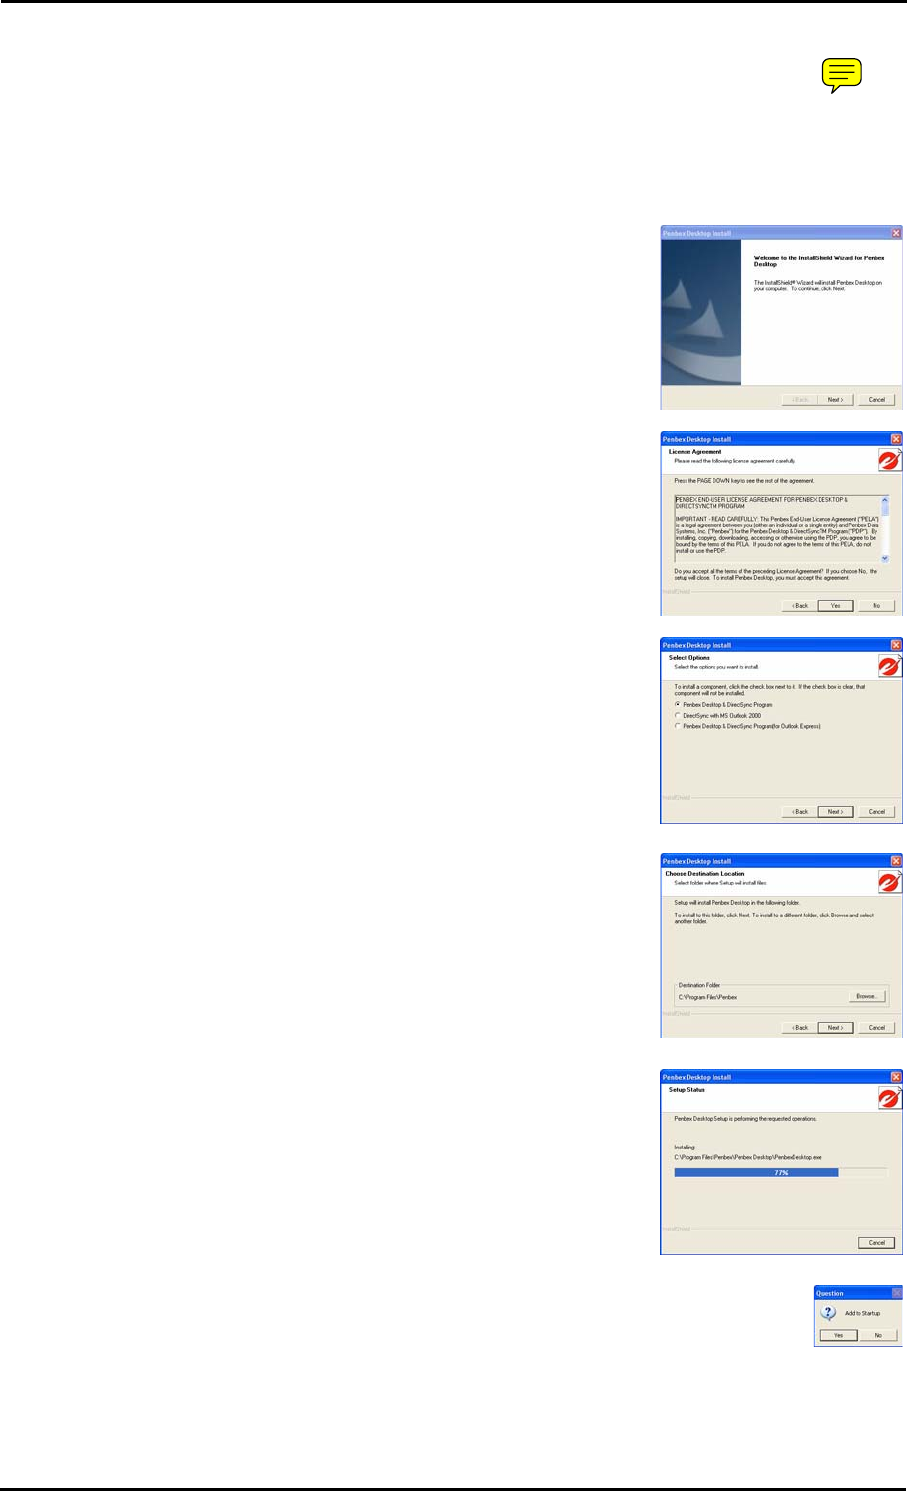
Software Installation - 19
Software Installation
To configure the Penbex Desktop program, use the software cd that
came with the device. Insert the CD and the setup program will run
automatically.
1. Click Next to begin installation.
Click Yes to agree to the license terms and
conditions.
2. Select which option you wish to install:
• Penbex Desktop & DirectSync program
• DirectSync with MS Outlook 2000
• Penbex Desktop & DirectSync program
(for Outlook Express)
3. Click Next to continue. Select a folder
where the program files will be installed.
4. The setup program will install all necessary
files.
5. A dialog window appears.Click Yes to add the Penbex
desktop program to your startup menu.

20 - Software Installation
6. A confirmation window will appear upon
successful installation. Click Finish to exit.
Using the software for the first time - 21
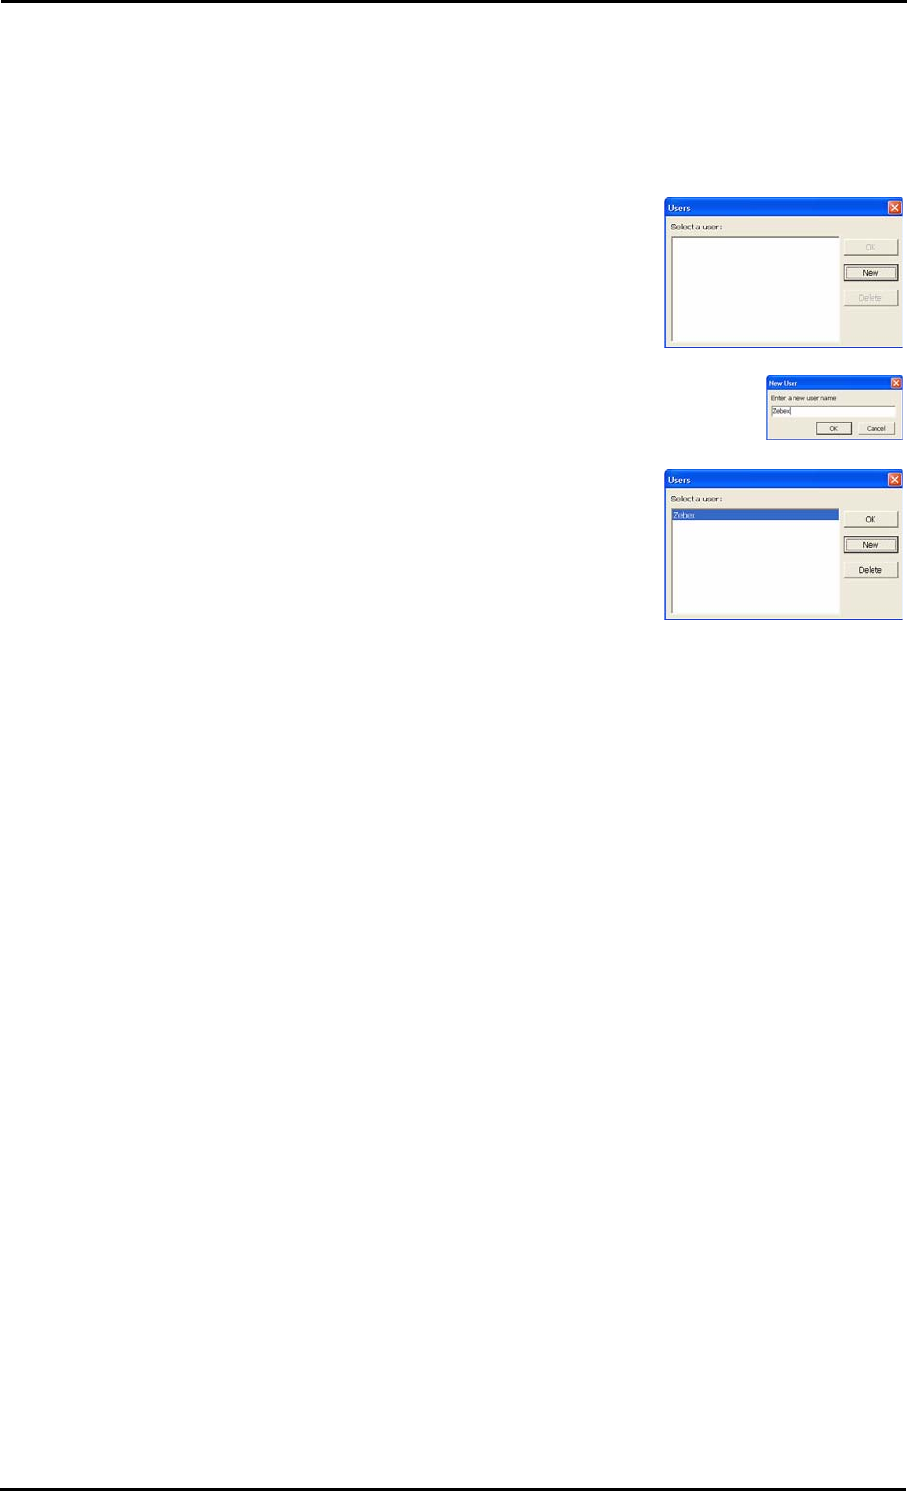
Using the software for the first time
When using the software for the first time, certain settings that need
must be configured.
1. Double click the Penbex Desktop icon on
your desktop. You will be prompted to
select a user. As this is the first time the
program has been run, click New to enter
one or more users.
2. Enter a new user name. Click OK to continue.
3. The new user now appears in the list.
Select the user and click OK.
22 - Using the software for the first time
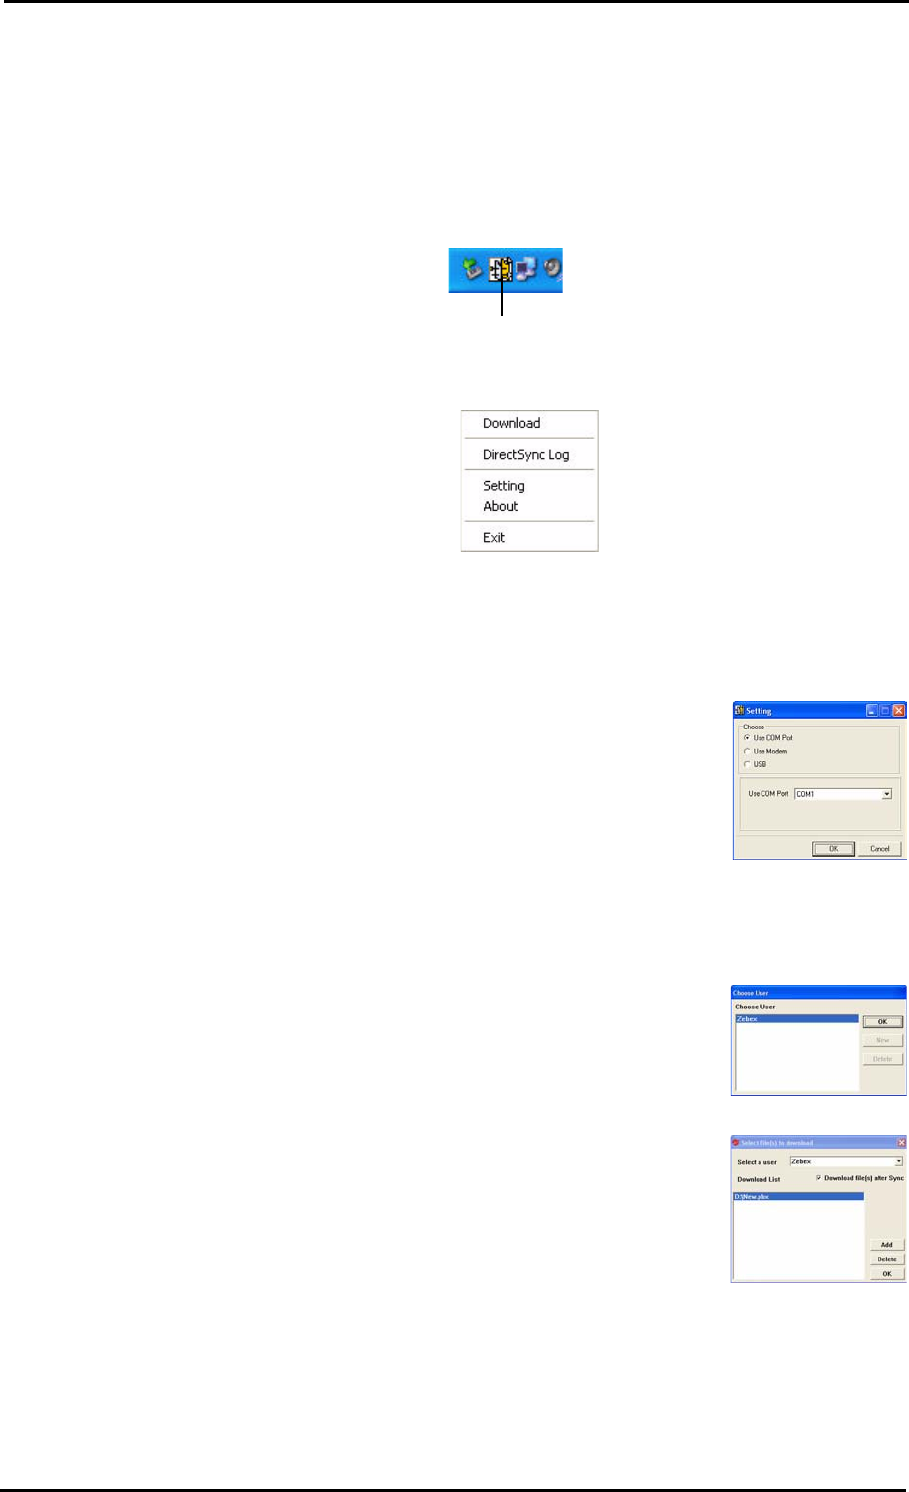
DirectSync
DirectSync is automatically installed along with the desktop program.
Double-click on the DirectSync icon on your desktop. The program will
run in the background but is accessible via an icon in the notification
area of your desktop.
Right click on the icon and the DirectSync menu will appear.
DirectSync Log
Click to display all recent DirectSync activity.Setting
Click to select which interface to use (COM1,
Modem, USB). If COM1 is selected, choose which
COM port you wish to use from the drop down menu.
Download
Click to download files from your PC onto the Z-2050.
1. Select your user name from the list that appears.
2. Click Add to add the files you wish to download.
Should you want to delete a file you have added
to the list, select the file and click Delete.
3. Click OK to download the files.
DirectSync Icon

Software Development Kit (SDK) - 23
Software Development Kit (SDK)
The Penbex OS that is the core of the Z-2050 features a unique modu-
lar system architecture that allows you to develop and add your own
custom-built applications to get the most out of the device.
It features a user-intuitive and easy-to-use UI, which also features a
Chinese-English handwriting recognition system, making it accessible
to a wide range of users.
The Z-2050 comes with a Software Development Kit (SDK) which works
in conjunction with the Penbex OS. It is a powerful and versatile soft-
ware package that allows you to customize the Z-2050 to meet your
specific needs.
The simplicity of its system is the key, eliminating a steep learning
curve and allowing you to pick up and develop your own applications
within a short space of time.
Refer to the SDK Reference Manual for more detailed information.
Below are listed the main features and requirements of this powerful
development kit.
Software Requirements:
• Microsoft VC 6.0 Environment
• ANSI C Syntax
• Penbex OS Architecture
• Penbex Objects
Documents
• Documents for APIs, objects' behavior, messages.
• Developing/Debugging procedures for external applications.
Emulator
• Workspace for IDE environment running on VC 6.0
• Header files for IDE environment running on VC 6.0
• OS library for IDE environment running on VC 6.0
Localization Support
• Supported languages: Simplified Chinese, Traditional Chinese,
English, Spanish and German
• Input: offers PinYin input for simplified Chinese
• Offers Windows-like message boxes to display system messages.

24 - Software Development Kit (SDK)
Development Features of the SDK
The SDK allows you to use both UI and GUI objects to build new appli-
cations that can be used with the Z-2050. UI (User Interface) objects
are the simple building blocks of the system and include:
• Label
•Button
•List
• Table
• Toolbar
• Whiteboard
• Progress Bar
• Menu Bar
• Keyboard
• Message Box
• Scroll Bar
• Combo Box
•Tree
• Single-Line Editor
• Multiple-Line Editor
• Field
GUI objects are more complex applications and include:
• SysGetDate() (to get the system date)
• SysGetTime() (to get the system time)
• GetFilename() (to get the file name)
• SysEngKB() (to use the system keyboard)
As mentioned above, creation of applications using the SDK, UI and
GUI objects is explained in much more detail in the SDK Reference
Manual.

Software Development Kit (SDK) - 25
The UI objects are divided into the following categories:
• Label
•Button
•List
• Table
• Toolbar
• Whiteboard
• Progress Bar
• Menu Bar
• Keyboard
• Message Box
• Scroll Bar
• Combo Box
•Tree
• Single-Line Editor
• Multiple-Line Editor
• Field
26 - Scanning Barcodes
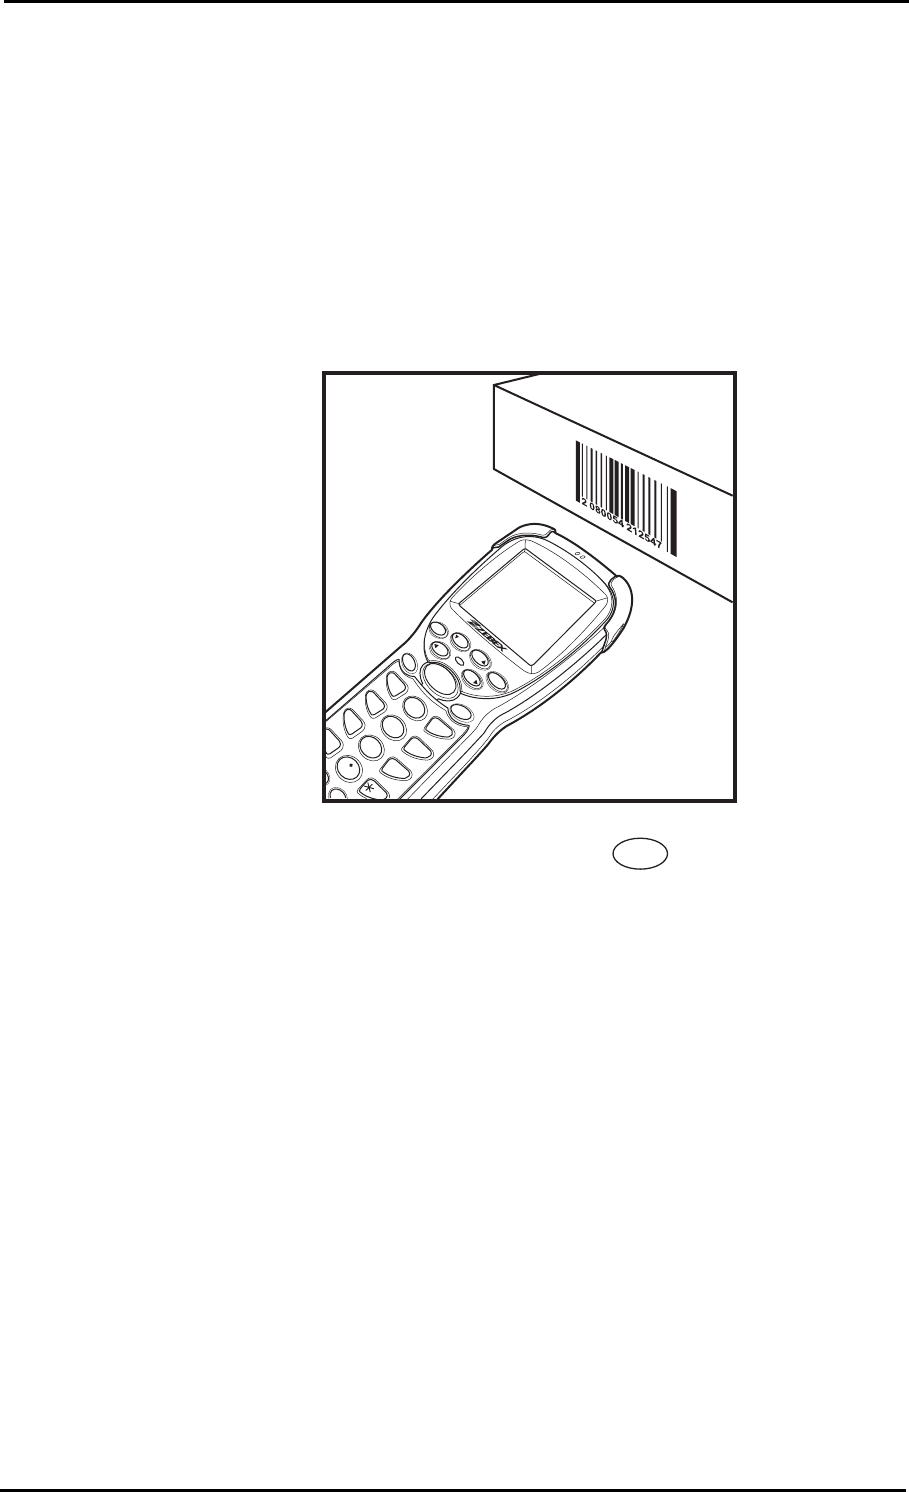
Scanning Barcodes
The Z-2050 is a highly versatile tool that can scan a wide range of bar-
codes (see “Barcode Settings and Symbologies” on page 59 for more
details) but it is imperative that it is used in the correct manner.
To scan a barcode:
1. Hold the Z-2050 horizontally and point it directly at the barcode
you wish to scan.
2. Once in the correct position, press the button.
An audible alarm is heard and the barcode digits will appear on the
LCD screen if the scan is successful.
SCAN
ESC
F8
CLR
F5
F7
F6
ENT
ENT
ABC
1
I
H
G
3
R
Q
P
6
Z
Y
9
4
JKL
7
STU
DEF
2
MNO
5
VWX
8
SPACE
0
(@)
F3
SCAN
System Reset - 27
System Reset
Using the Cold Reset Function
Cold reset allows you to return the scanner to the default factory set-
tings, wiping all data from the memory.
To use cold reset:
1. Remove the black cap on the stylus to reveal the needle.
2. Insert the needle into the reset button space, between the power
and backlight buttons.
3. Press down gently, holding the power button at the same time.
All factory defaults will be restored.
WARNING
Cold reset will erase ALL pre-configured data on the scanner.
Check carefully to make sure you have uploaded all important files
to your PC before proceeding with the reset.
ESC CLR
F5
F7 F8
F6
ENT ENT
SCAN
ABC
1
I
H
G
3
R
Q
P
6
Z
Y
9
4
JKL
7
STU
DEF
2
MNO
5
VWX
8
SPACE
0
(@)
F1 F2 F3 F4
SFT TAB BS
,
Reset
button

28 - System Reset
Using the Warm Reset Function
Warm reset allows you to reset the scanner without wiping any config-
uration data or files.
To use warm reset:
1. Remove the black cap on the stylus to reveal the needle.
2. Insert the needle into the reset hole, between the power and
backlight buttons.
3. Press down gently.
The machine will reset itself. Proceed with the screen calibration pro-
cess as explained in “Turning on for the First Time” on page 17.
NOTE
Following a cold or warm reset, you will be asked whether you want
to format the Z-2050’s flash disk or not. Formatting the disk will
erase ALL data.
Desktop Features - 29
Using the Scanner
Desktop Features
The Z-2050 Mobile Data Collector is equipped with a multi-function
desktop program manager that helps you to utilize the collected data
with ease.
The Desktop tool bar contains the Desktop menu icon, power indica-
tor, Date/Time, and the Group drop down list.
Tap the Desktop menu icon in the upper left corner of the main screen
to display Application and System drop down menus.
Main
FileMgr
Console
Network
Backup
Bluetooth
Desktop
Menu
Date/Time
Group list
Application
icons

30 - Desktop Features
Application
The Application menu enables you to download, delete, group the
applications or receive applications via IrDa function.
Application
Download...
Set My Card Path...
Delete...
Group...
Beam...
Change Icon
System Info
Desktop Features - 31
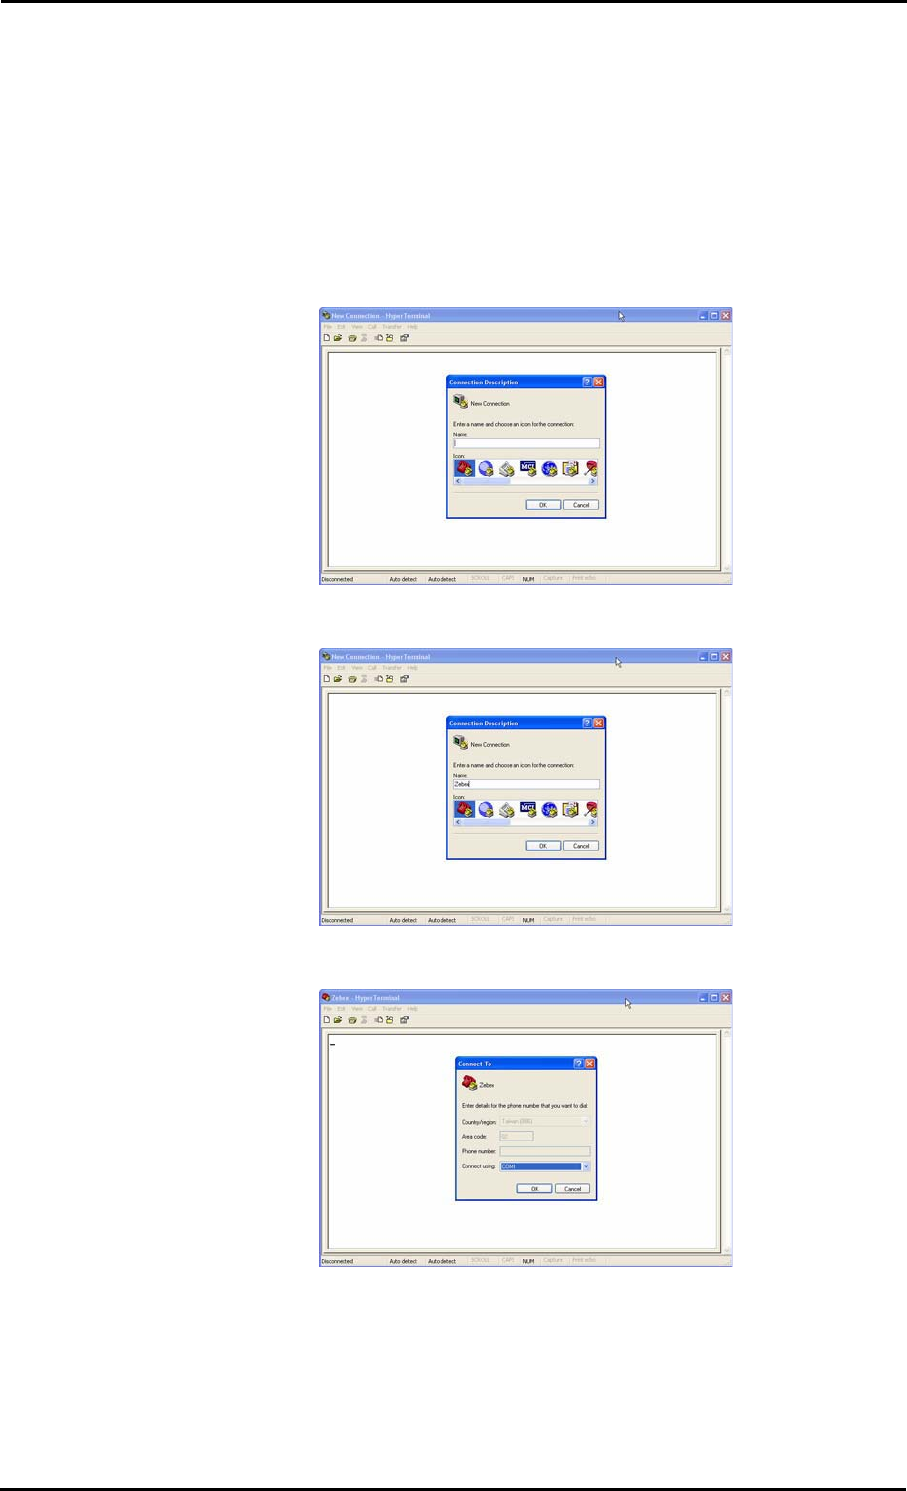
Downloading applications or files
You can download applications from PC to the Z-2050 for enhanced
performance.
To install an application on the Z-2050, do the following:
1. Go to the Start menu and select All Programs/Applications/Com-
munications/Hyperterminal.
2. Create a new connection.
3. Enter a name for the connection. Click OK to continue.
4. Select COM1 in the Connect Using field. Click OK to continue.
5. Configure the COM1 properties. Set the Bits per second rate to
57600 and Flow Control to None. Click OK to continue.
32 - Desktop Features
6. Select Send file from the Transfer menu. The Send File dialog box
appears.
7. Select the file you want to upload to the Z-2050 and select Ymo-
dem as protocol. Click Send to continue.
A file send progress screen appears. You will be notified upon success-
ful file transfer.
NOTE
The applications that are installed on the Z-2050 are stored in RAM
memory. You can delete them manually or automatically with a cold
reset.

Desktop Features - 33
Deleting Applications
You can delete the applications that you have downloaded from the Z-
2050.
Note: Built-in applications on the Z-2050 cannot be deleted
To delete an application, do the following:
1. Select Delete in the Application drop down menu. A window dis-
playing the applications installed on the Z-2050 appears.
2. Tap an application you wish to delete.
3. A warning box prompts for confirmation to delete the application.
Ta p Yes to proceed. The chosen program is deleted.
Group Application
The Desktop program enables you to group application icons into dif-
ferent categories. All built-in applications are listed in the main
group.
To group application icons, do the following:
1. Select Group from the Application
menu. The group screen appears; all
applications and the groups they belong
to are displayed.
2. Tap the group name next to the applica-
tion you wish to move.
3. A drop down list of all available groups
appears. Tap the group you wish to move
the respective application to.
4. Tap the check mark in the top right hand corner to return to the
main screen.
To edit a group, select Edit Group from the drop down menu group.
Group Application
FileMgr
Console
Network
Backup
DemoScan
Bluetooth
IrdaTest
Main
Main
Main
Main
Main
Main
Main
34 - Desktop Features
Editing Groups
You can add, delete, rename groups or merge applications from
Unfiled Group to a chosen group in the Edit Group function.
1. Select Edit Group from the Application
menu.
2. The editing screen appears.
Adding Groups
1. Tap to add a new group.
2. Enter the new group’s name.
3. Tap the check mark to confirm and create
the new group.
Edit Group
Main
A
B
Edit Group
Main
A
B
Rename group
Enter a new group's name:
Main
Desktop Features - 35
Renaming Groups
1. Tap to rename an existing group.
2. Enter the group’s new name.
3. Tap the check mark to confirm.
Deleting Groups
1. Tap to delete a group. A warning dia-
log appears.
2. Click OK to proceed or Cancel.
Merging groups
1. Tap to merge two existing groups. A
warning dialog appears.
2. Click OK to proceed or Cancel.
Beam Application Programs
The Beam option enables you to transfer
application programs that are downloaded to
your Z-2050 to another Z-2050 Mobile Data
Collector device via IrDa.
Edit Group
Main
A
B
Rename group
Enter a new group's name:
Main
Edit Group
Main
A
B
Are you sure to delete this
group ? All records in this
group will be moved to the
"Unfiled" group !!
OK Cancel
Delete group
Edit Group
Main
A
B
Are you sure to merge from
"Unfiled" group to your
selected group ?
OK Cancel
"Unfiled" group to
?
FileMgr A:\DATABASE\
FileName Size Date
02/17/0.66
02/17/0.1K
DEMO.DBF
PASSWORD.INI
A
B
Connecting...
CANCEL
IrDA Communication
36 - Desktop Features
Change Icon
Select this option to toggle between large and small icon views dis-
played on the LCD screen.
Set My Card path
The Z-2050 is equipped with an expansion memory card slot that
enables you to expand memory for additional software applications
and back up your data.
When an expansion card is inserted into the Z-2050, it automatically
creates a new group called My Card for the *.pbx files stored in the
expansion card path.
1. Select My Card from the Group menu to
view the contents of your expansion
card.
2. Open the Application menu and tap My Card Path to view the cur-
rent path of your expansion card.
NOTE
An external memory card must be inserted to use this function oth-
erwise a warning dialog will appear.
Main
FileMgr
Console
Network
Backup
Bluetooth
Main
FileMgr
Console
Network
Backup
Bluetooth
Main
FileMgr
Console
Network
Backup
Bluetooth
All
Main
My Card
Unfiled
Edit group ...
Desktop Features - 37
System Information
Disk View
Disk View displays the available memory disks and their respective
memory status.
1. Tap the drive to view the contents of the
specific drive.
2. Tap the Disk View title bar to show Path
and Type menus.
3. Tap Path to show a list of available drives
on the Z-2050.
4. Tap a specific drive to view its contents.
OS Version
Select this option to display OS version infor-
mation for the Z-2050.
Application
Disk View
About Desk
OS Version
Device Information
Serial Number
System Info
Disk View
A:
Name A:
Free: 4.71 M
OK Cancel
/Download
/Penbex
/Database
Main
FileMgr
Console
Network
Backup
DemoScan
Bluetooth
IrdaTest
05:53
Penbex OS Version
OK
v2.2 Beta 1.17.00-1021
ID: 0-0201-2-2-1.06
Copyright 2003
Penbex Data Systems, Inc.
All rights reserved.
http://www.penbex.com
38 - Desktop Features
Device Information
Select this option to view the hardware
information for the Z-2050.
Serial number
Select this option to view the hardware serial number for the Z-2050.
About Desktop
Select this option to view the desktop information for the Z-2050 OS.
Device Information
CPU : MOTOROLA
68VZ328
ROM Size : 4096 (K
Bytes)
RAM Size : 8192 (K
Bytes)
NAND Size : 65536 (K
Bytes)
Display color : Gray Scale
Display Horizontal Pixels :
OK
Desktop Features - 39
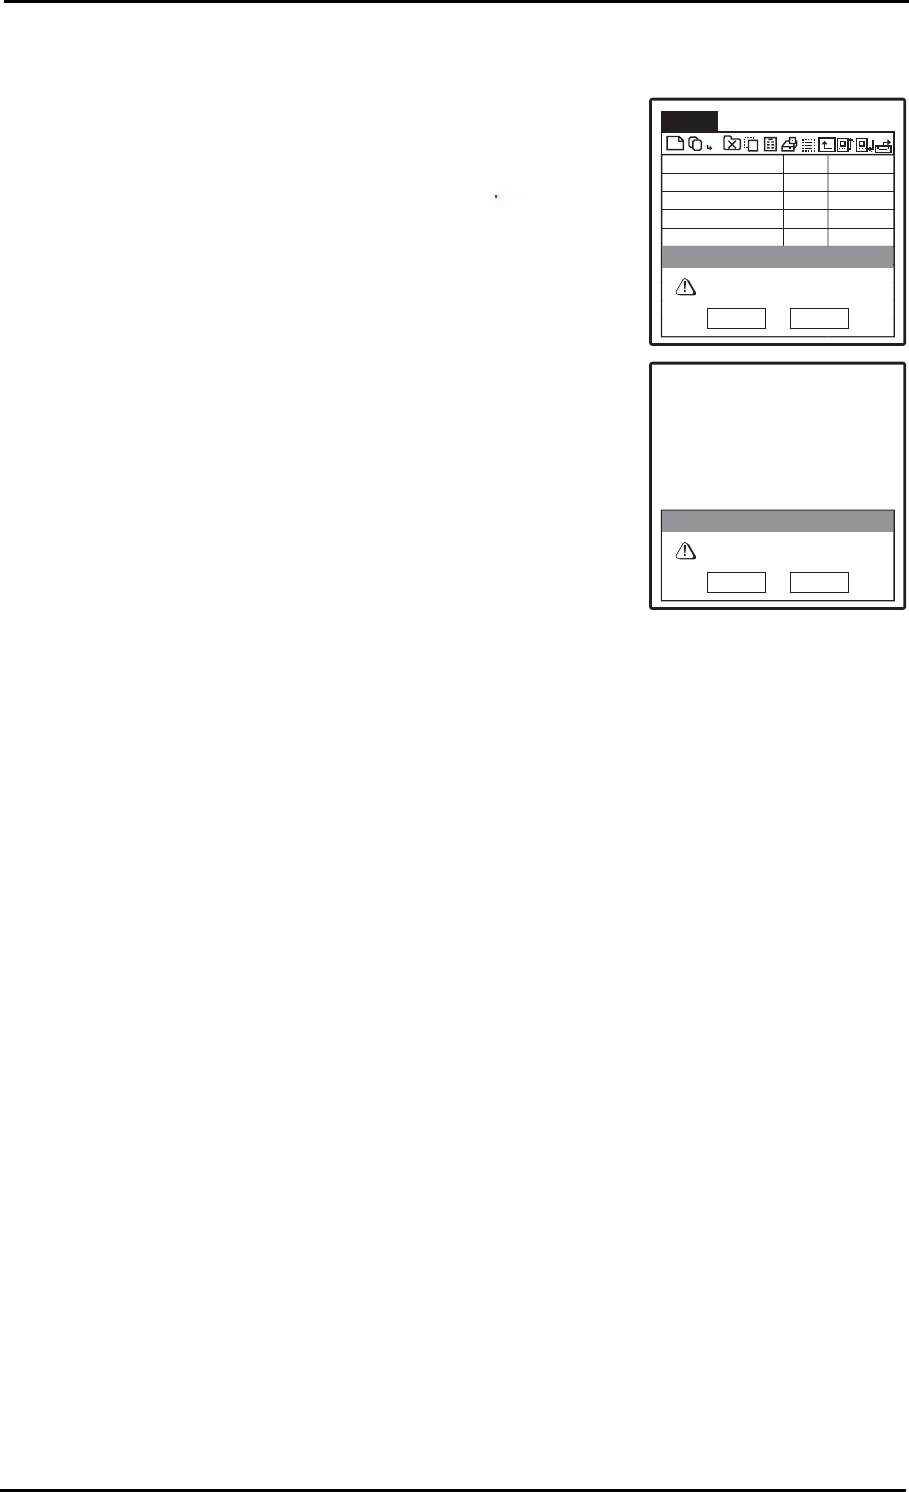
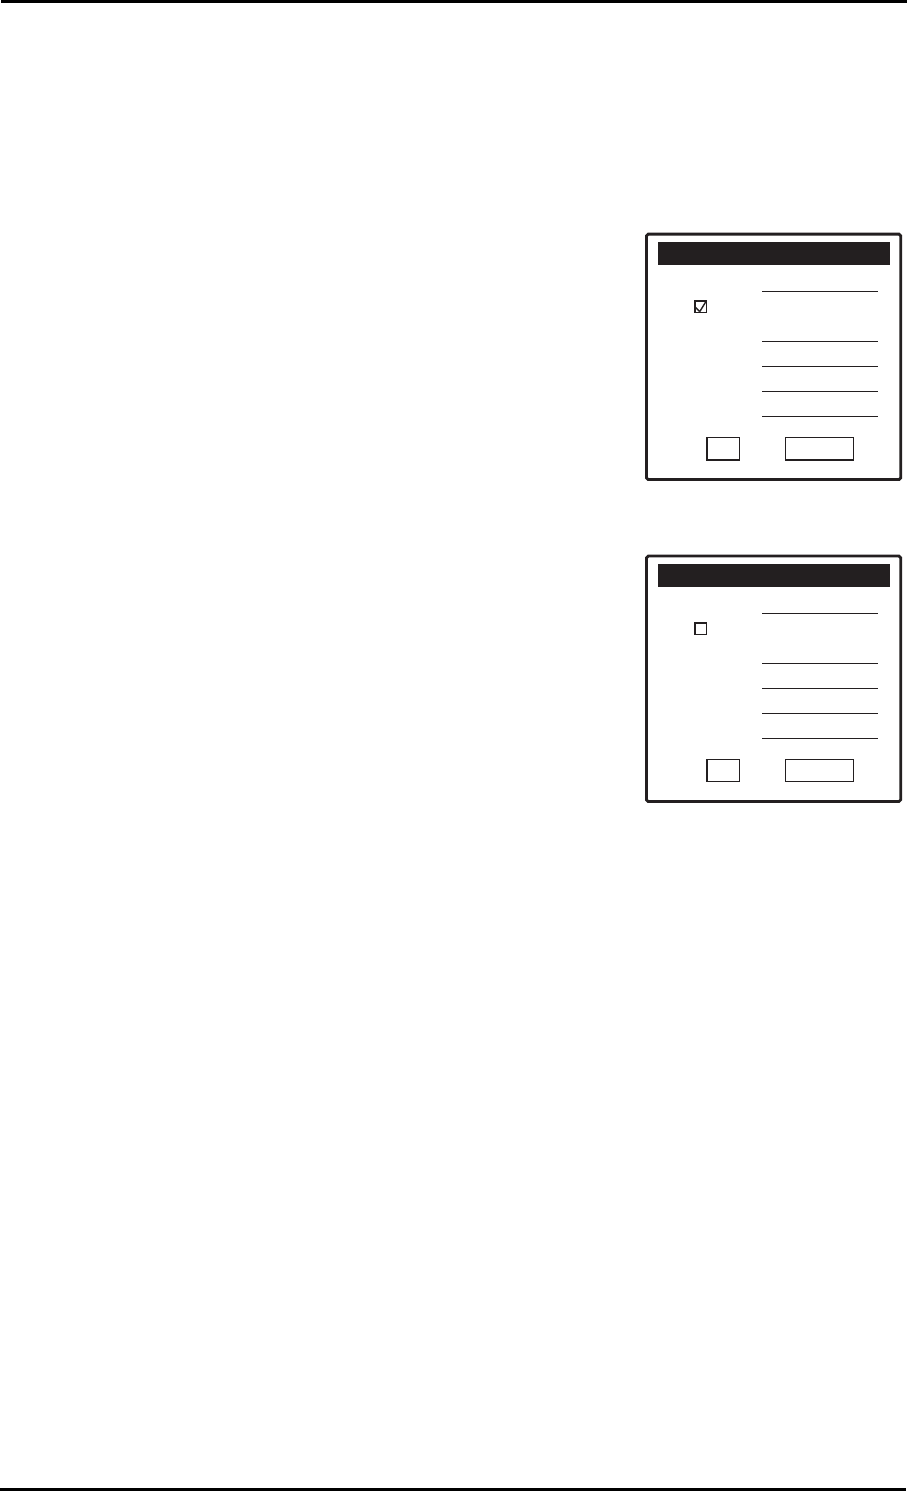
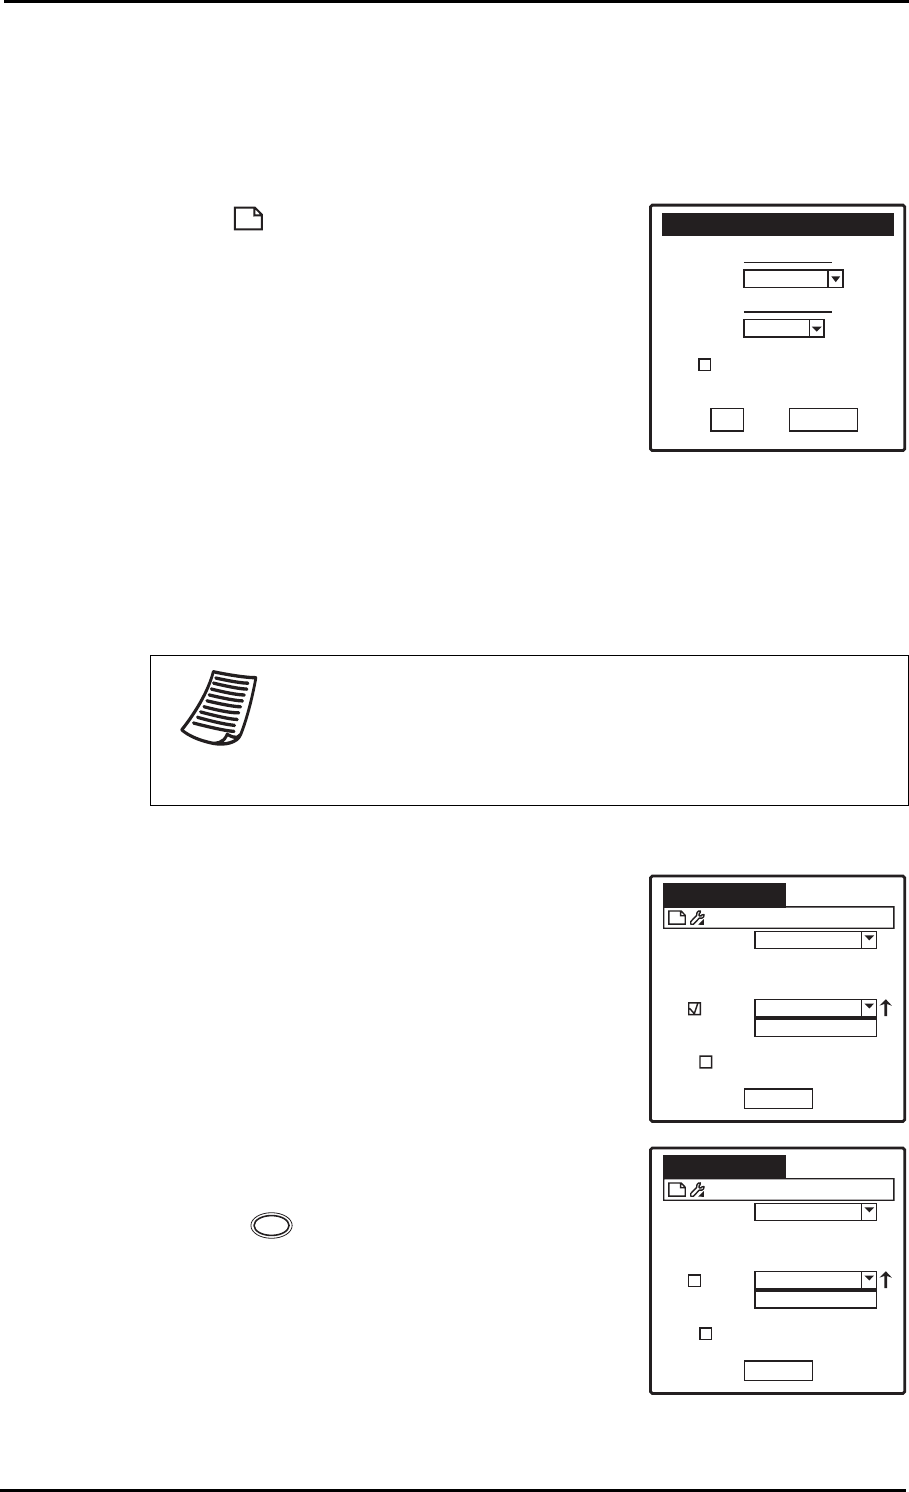
Using the FileMgr Tool Bar
The File Manager displays the current contents of your local disks. It is
equipped with a quick access tool bar which enables you to manage
the data saved on the Z-2050 with the following functions:
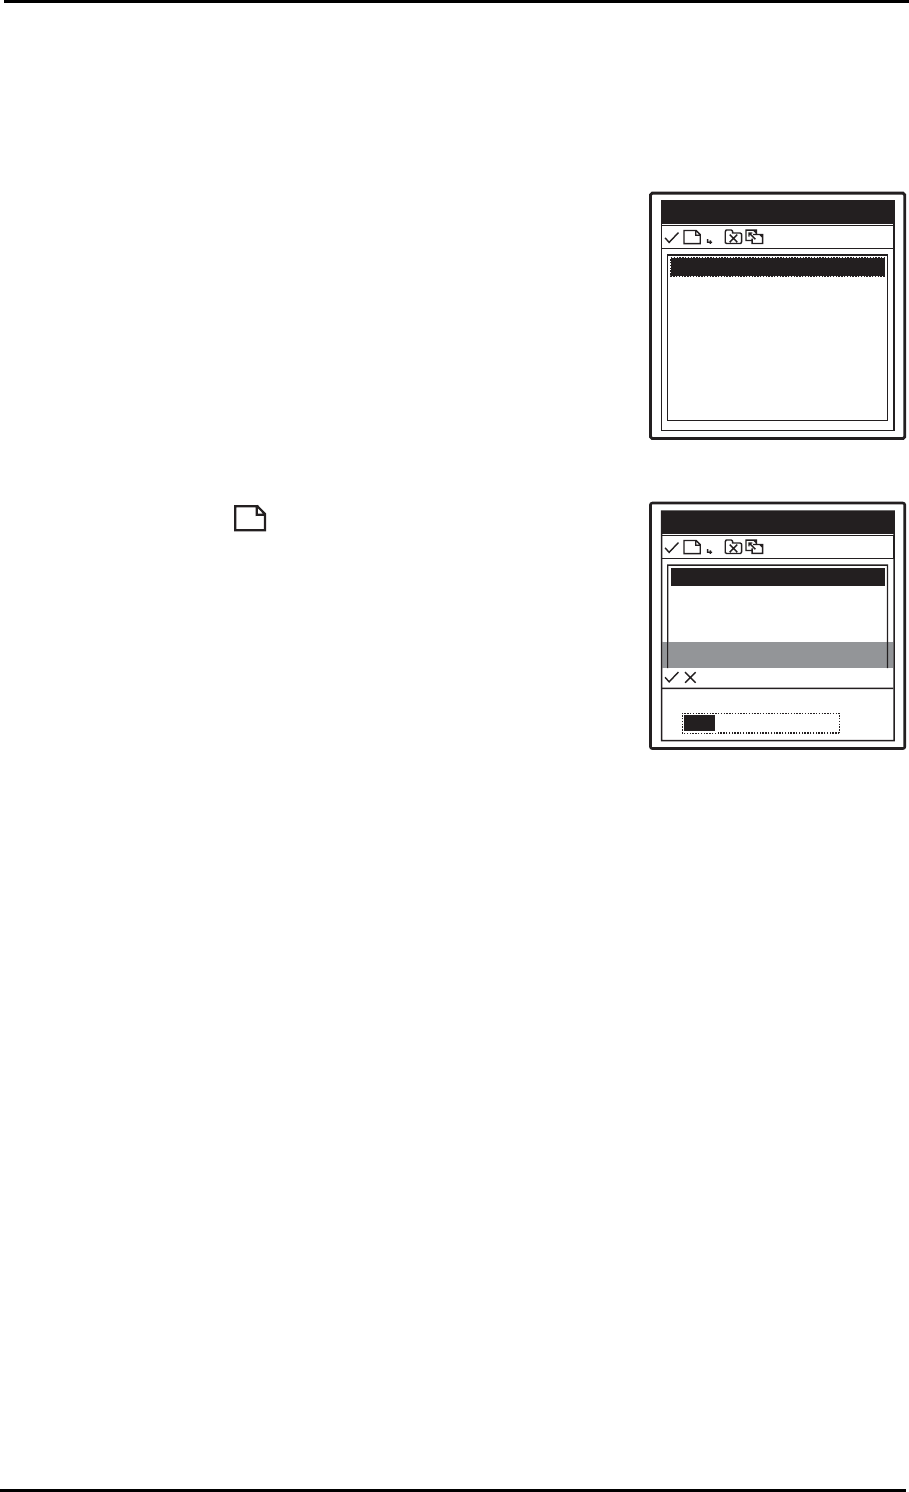
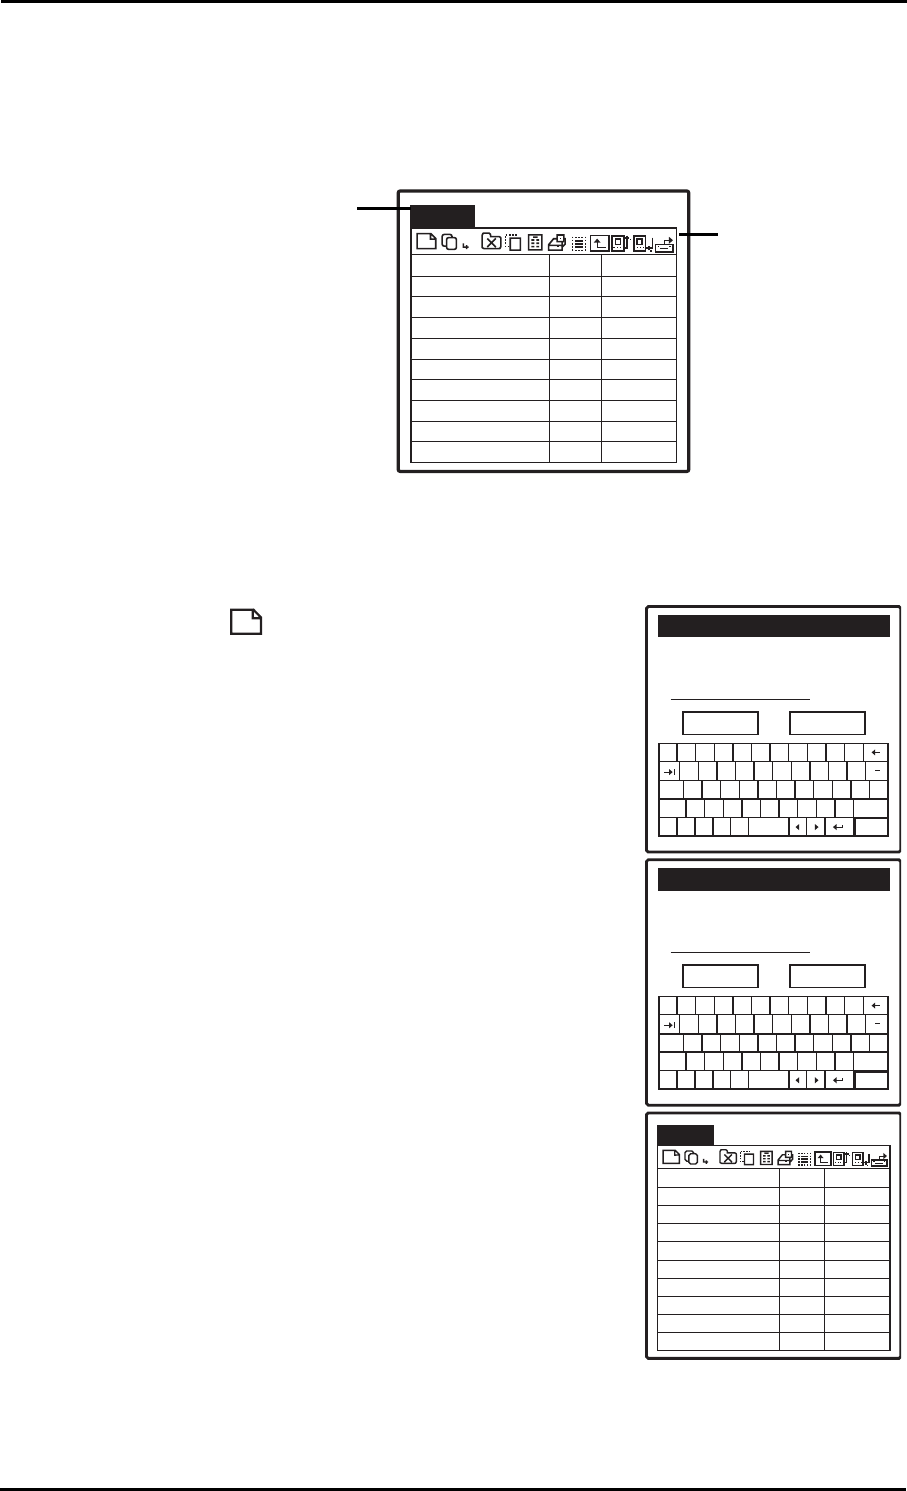
Create a new folder
To create a new folder, do the following:
1. Tap on the tool bar, the following
screen appears.
2. Use the on-screen keypad or the stylus to
enter the name for the new folder. Tap
OK to confirm.
3. The new folder created is now listed in
the FileMgr main screen.
FileMgr A:\
FileName Size Date
02/17/0.
02/15/0.
02/15/0.
/DATABASE
/DOWNLOAD
/PENBEX
A
B
Tool bar
FileMgr drop
down menu
Make New folder Name
Please specify a new folder
name.
OK Cancel
1234567890
qwertyuiop
asdfghjkl;'
zxcvbnm,.
@
123
[]\=/
cap
shift
Make New folder Name
Please specify a new folder
name.
OK Cancel
1234567890
qwertyuiop
asdfghjkl;'
zxcvbnm,.
@
123
[]\=/
cap
shift
Zebex
FileMgr A:\
FileName Size Date
02/17/0.
02/15/0.
02/15/0.
/DATABASE
/DOWNLOAD
/PENBEX
A
B
/ZEBEX
02/21/0.
40 - Desktop Features
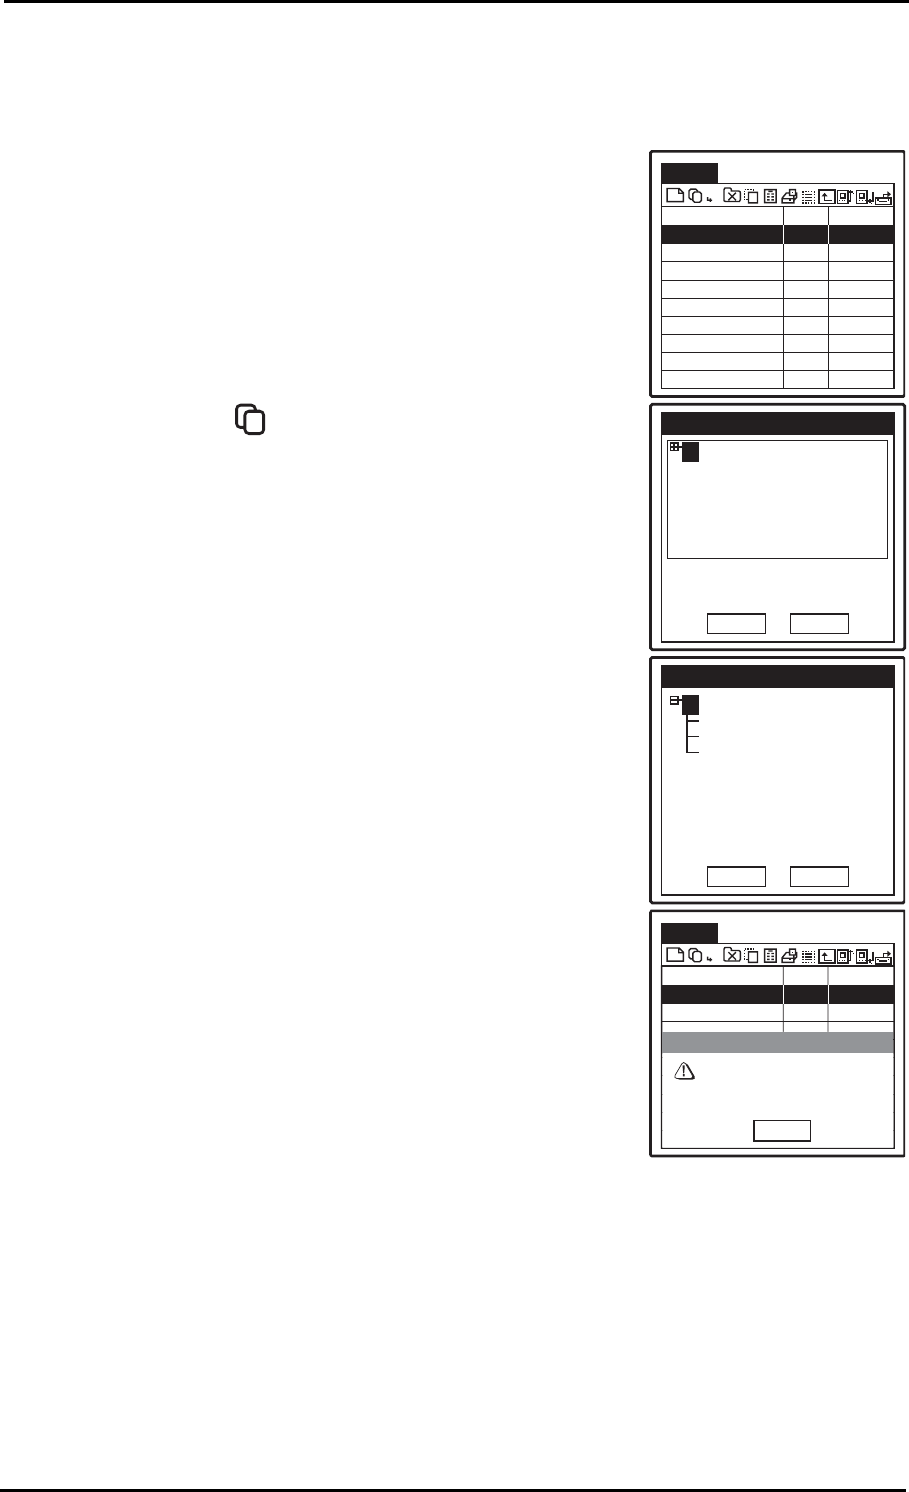
Copy To
To copy a file to a selected folder, do the following:
1. Tap the file you want to copy.
2. Tap on the options bar, the following
screen appear.
3. Tap the root of the disk drive to display
the contents of the folders and the free
disk space.
4. Tap the destination folder to save the
copied file. Tap OK to confirm.
5. A dialog box appears displaying the task
result. (success/failure) Tap OK to exit
the menu.
FileMgr B:\
FileName Size Date
02/17/0.1K
PASSWORD.INI
A
B
Copy to
A:
Name A:
Free: 4.72 M
OK Cancel
Copy to
A:
Name A:
Free: 4.71 M
OK Cancel
/Download
/Penbex
/Database
FileMgr B:\
FileName Size Date
02/17/0.1K
PASSWORD.INI
A
B
OK
Finish
Copy Total Files: 1
Success: 1
Failure: 0
Desktop Features - 41
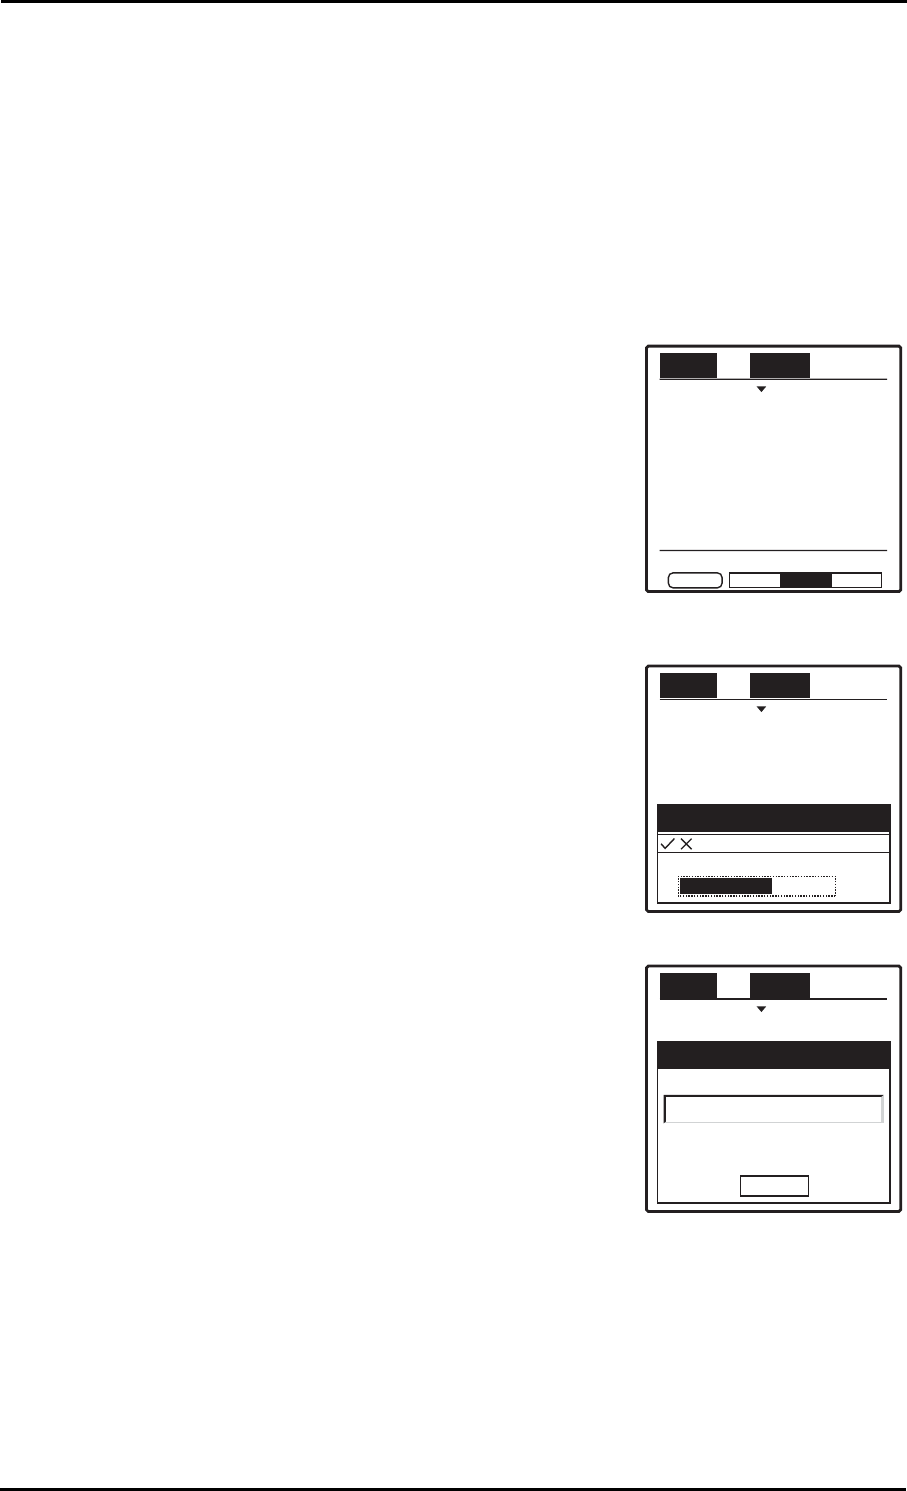
Rename
To specify a new name for a existing file, do the following:
1. Tap the file you want to rename.
2. Tap on the options bar. A warning
dialog appears to confirm renaming of
the folder. Press OK to proceed.
3. Use the on-screen keypad or the stylus to
enter the new file name. Tap OK to con-
firm.
4. File name has been modified. The new
file name is displayed on the FileMgr
main screen.
FileMgr A:\
FileName Size Date
02/17/0.
02/15/0.
02/15/0.
/DATABASE
02/17/0.
PASSWORD.INI 1K
/DOWNLOAD
/PENBEX
A
B
FileMgr A:\
FileName Size Date
02/17/0.
02/15/0.
02/15/0.
/DATABASE
02/17/0.
PASSWORD.INI 1K
/DOWNLOAD
/PENBEX
A
B
Are you sure ?
OK
Rename
CANCEL
Make New File Name
PASSWORD.INI Please
specify a new name.
PASSWORD.INI
OK Cancel
1234567890
qwertyuiop
asdfghjkl;'
zxcvbnm,.
@
123
[]\=/
cap
shift
42 - Desktop Features
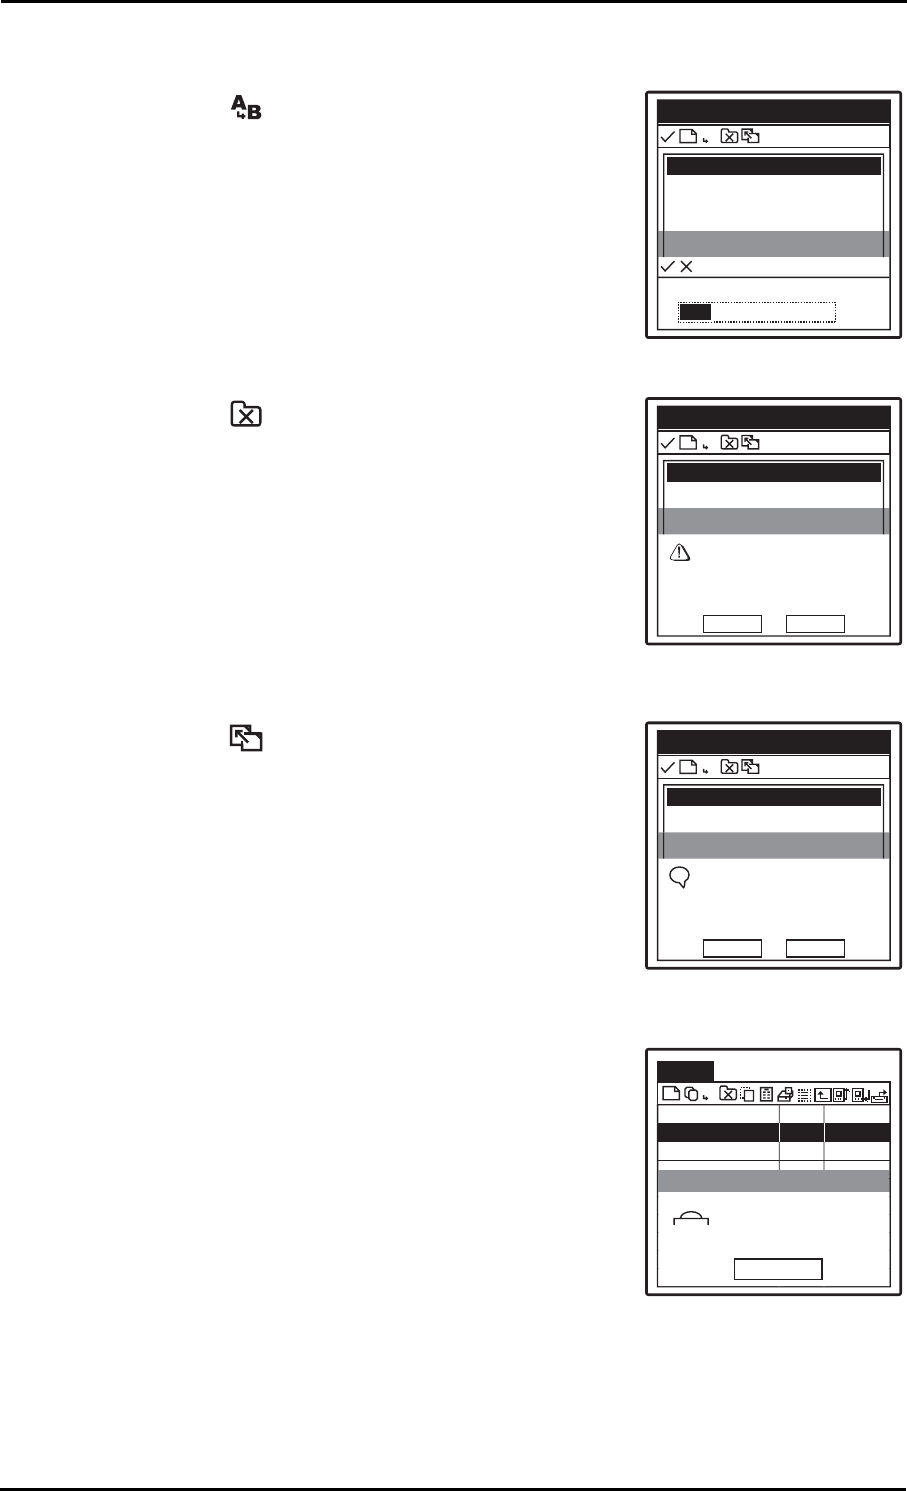
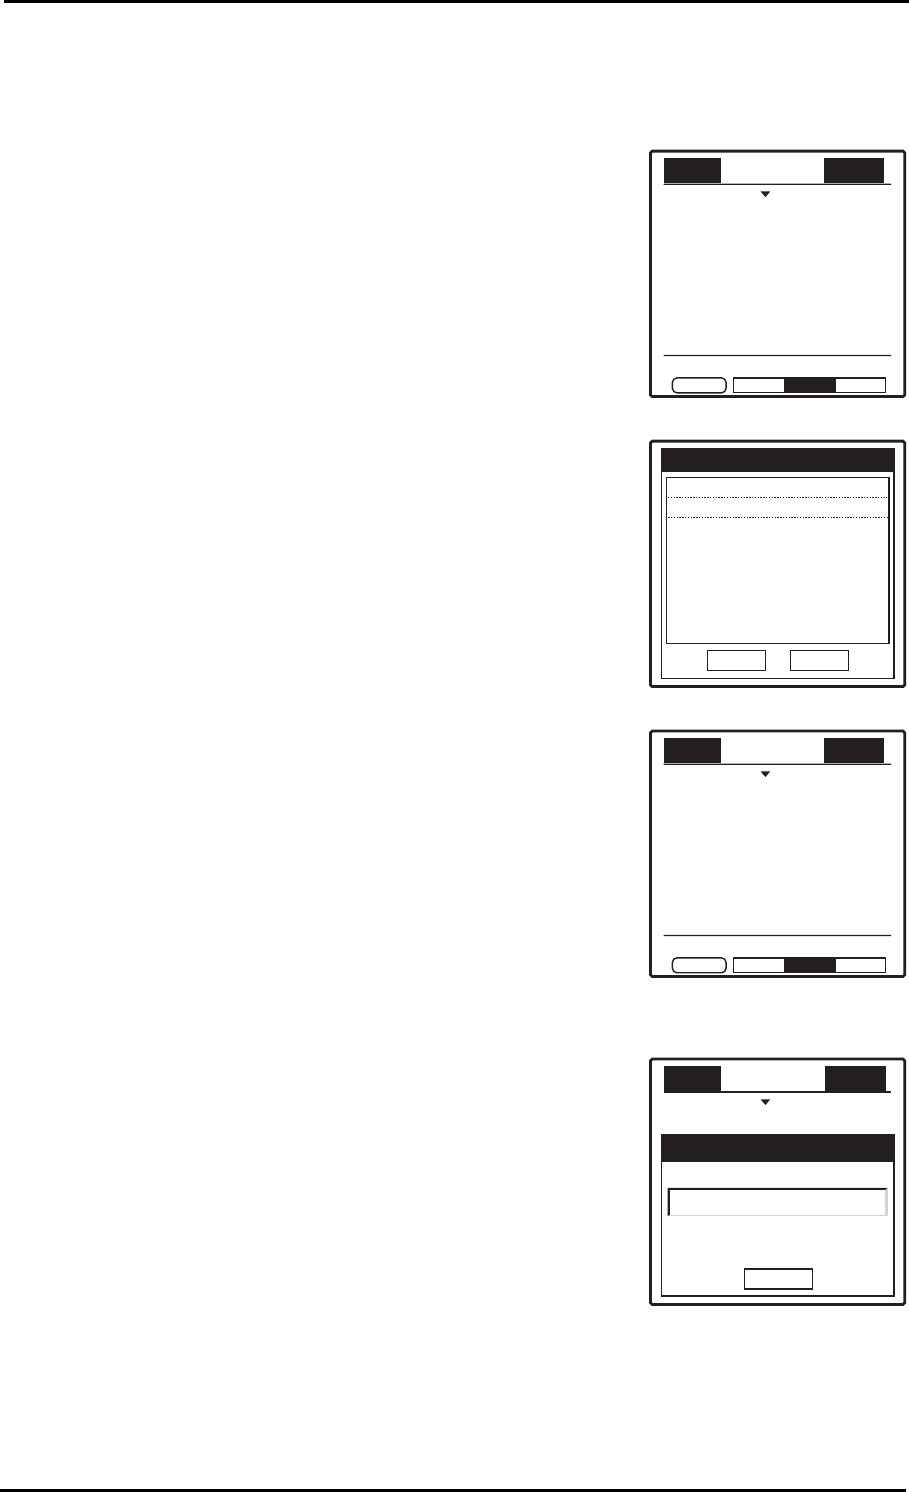
Delete
To delete a file from disk, do the following:
1. Tap the file you want to delete.
2. Tap on the options bar. A warning
dialog appears to confirm deletion of the
selected file. Tap OK to confirm.
The selected file is now deleted from the
Z-2050.
FileMgr A:\
FileName Size Date
02/17/0.
02/15/0.
02/15/0.
/DATABASE
02/17/0.
PASSWORD.INI 1K
/DOWNLOAD
/PENBEX
A
B
FileMgr A:\
FileName Size Date
02/17/0.
02/15/0.
02/15/0.
/DATABASE
02/17/0.
PASSWORD.INI 1K
/DOWNLOAD
/PENBEX
A
B
Are you sure ?
OK
Rename
CANCEL

Desktop Features - 43
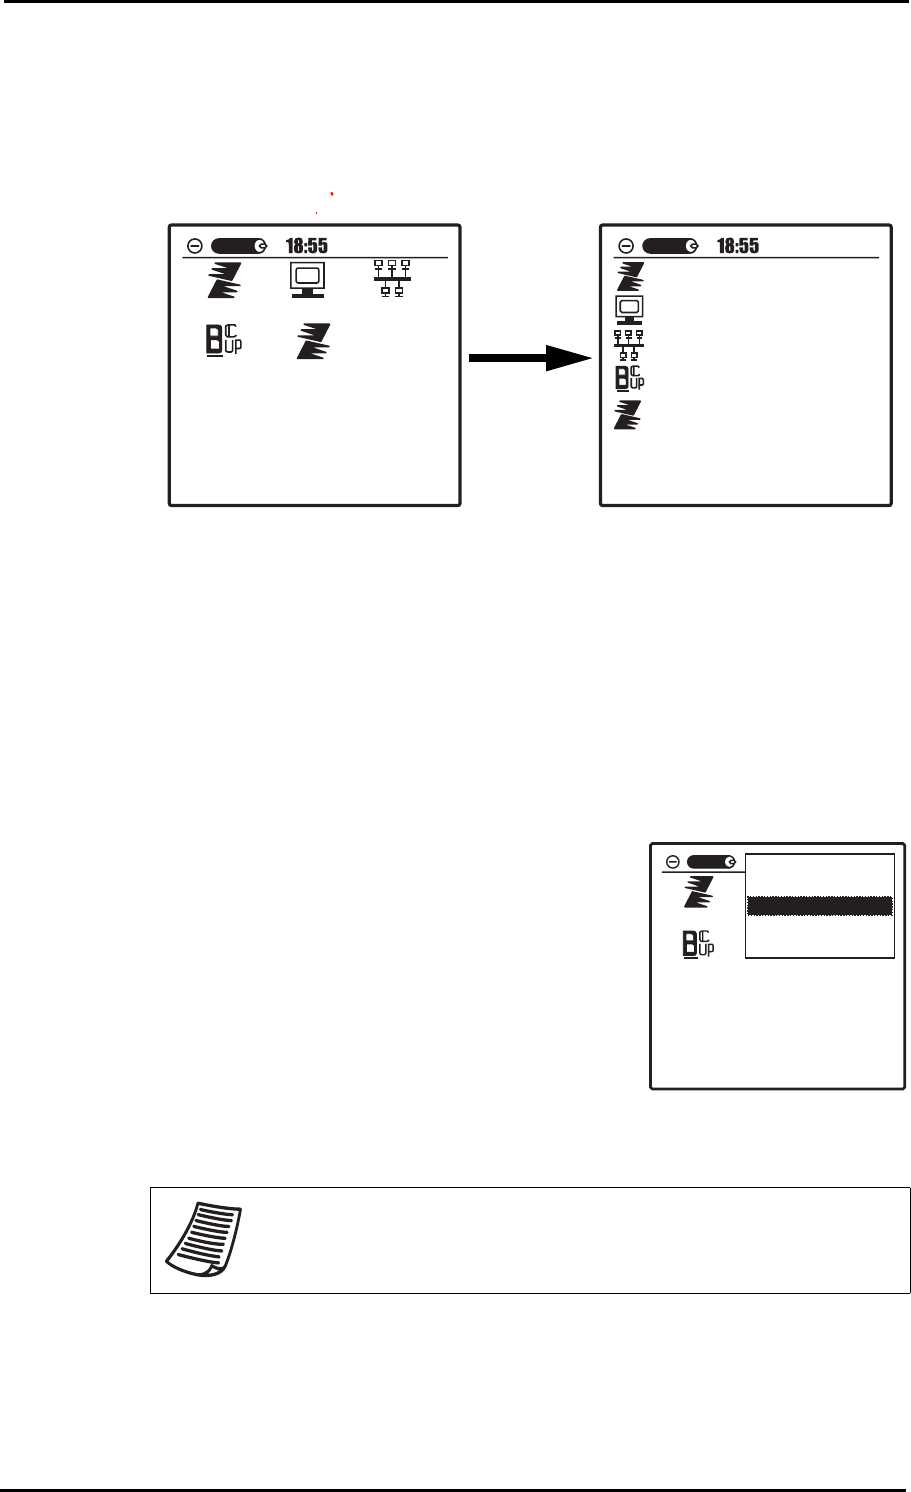
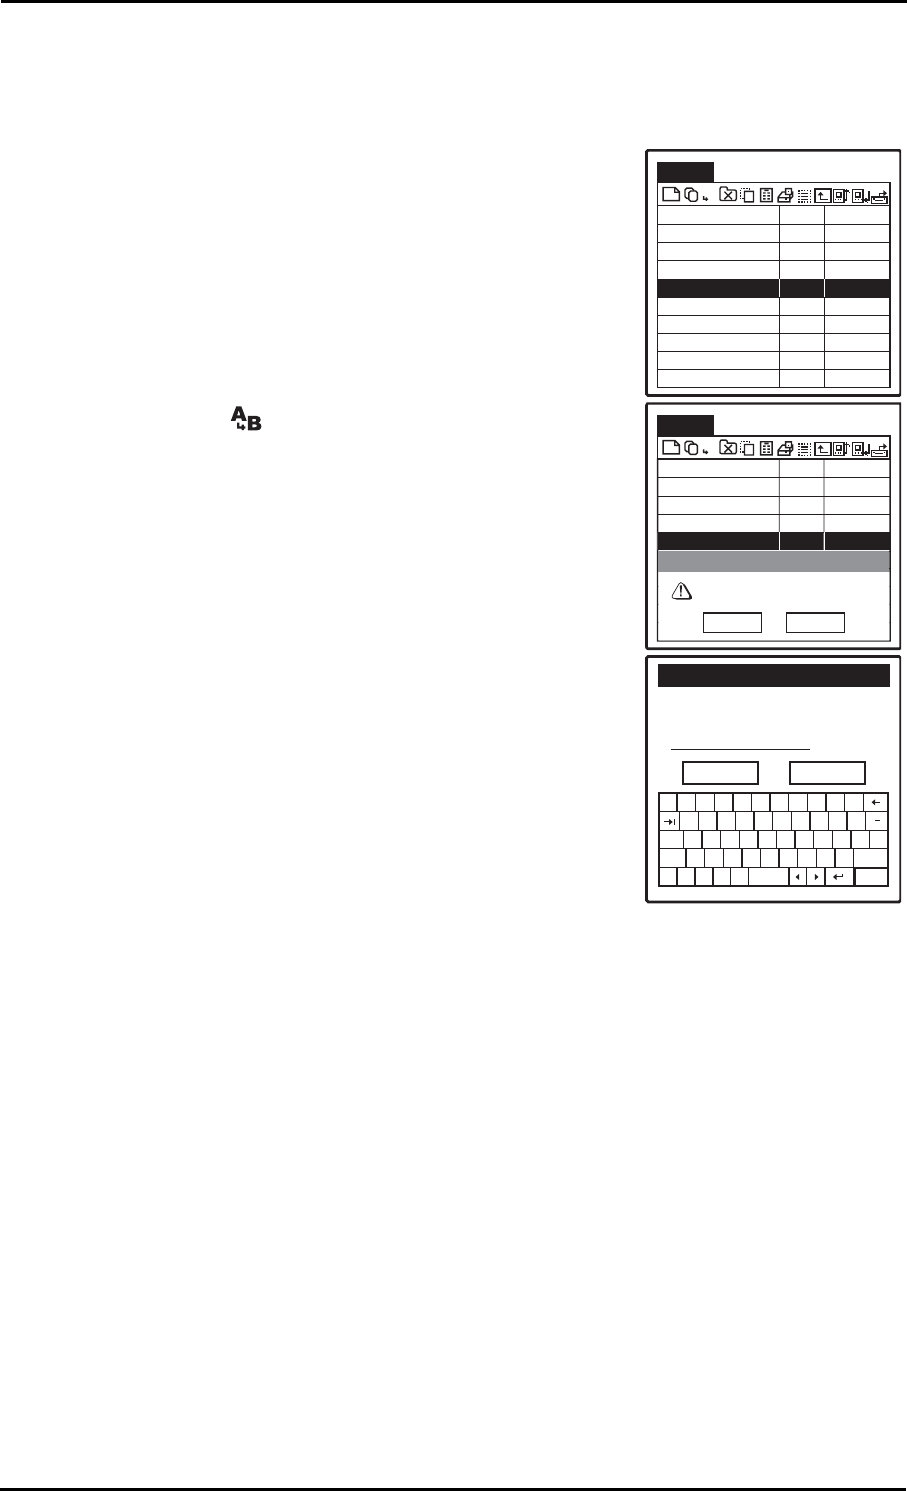
Move To
To move a file to a selected folder, do the following:
1. Tap the file you want to move.
2. Tap icon on the options bar, the fol-
lowing screen appear.
3. The screen displays all the available fold-
ers and the respective free disk space.
4. Choose the destination disk or path to
save the selected file. Tap OK to confirm.
5. A dialog box appears displaying task
result. (success/failure) Tap OK to exit
the menu.
FileMgr B:\
FileName Size Date
02/17/0.1K
PASSWORD.INI
A
B
FileMgr A:\
FileName Size Date
02/17/0.
02/15/0.
02/15/0.
/DATABASE
02/17/0.
PASSWORD.INI 1K
/DOWNLOAD
/PENBEX
A
B
Are you sure ?
OK
Move To
CANCEL
Copy to
A:
Name A:
Free: 4.72 M
OK Cancel
FileMgr A:\
FileName Size Date
02/17/0.
02/15/0.
/DATABASE
/DOWNLOAD
A
B
OK
Finish
Move Total Files: 1
Success: 1
Failure: 0
44 - Desktop Features
Disk info
To view the disk information of the current drive, do the following:
1. Tap on the options bar, the following
screen appears.
2. The screen displays the information of
the disk drive, disk type, total disk size,
used disk space, remnant, and the maxi-
mum block of the selected disk.
3. Tap OK to exit and return to the FileMgr
main screen.
Select Drive
To choose the designated disk drive, do the following:
1. Tap on the options bar, and a drop down list of the available
disks appears.
2. Tap the desired disk drive. The memory is switched to the chosen
disk drive.
The files saved on the chosen disk are displayed on the main
screen.
Return to previous level
Tap to return to the previous level of the folder tree.
Select All
Tap to select all the files in the current folder or drive. Tap the
icon a second time to deselect all.
Disk Info
A:\
Ram Disk
5,156,864 Bytes
215,040 Bytes
4,941,824 Bytes
4,810,752 Bytes
Disk:
Disk Type:
Total Size:
Used Size:
Remnant:
Max Block:
4%
OK
Desktop Features - 45
Upload files
The Z-2050 enables you to upload data to a notebook or PC via Hyper-
Terminal program with Ymodem protocol.
For instructions on how to configure the Z-2050 and Hyperterminal on
your PC, refer to “Downloading applications or files” on page 31.
1. Tap the file you wish to upload.
2. Tap to begin uploading the file. The
progress screen appears.
3. Tap Cancel at any time to cancel the
download.
Download files
You can download files to the Z-2050 from a notebook or PC via Hyper-
Terminal program with Ymodem protocol.
For instructions on how to configure the Z-2050 and Hyperterminal on
your PC, refer to “Downloading applications or files” on page 31.
1. Tap the file you wish to download.
2. Tap to begin downloading the file.
The progress screen appears.
3. Tap Cancel at any time to cancel the
download.
Upload files
Waiting connection...
Current File:
Time:
A:\DATABASE\PASSWORD.INI
0%
0%
Cancel
Download files
Downloading file(s)
A:\DOWNLOAD\
0%
Cancel
46 - Desktop Features
File Manager Menus
In addition, tapping the File Manager icon on the upper left corner of
the screen displays the drop down menus for File, System, and Option.
File
The File menu enables you to manage the files on the database by cre-
ating a new folder, copying, renaming, deleting, moving, uploading or
downloading files.
Select a command from the drop down list to proceed; refer to the
above sections above for more information on each command.
System
The System menu provides you with commands to run application on
disk, display disk information, select a different disk source, format a
disk, or perform disk defragmentation.
A:\
FileName Size Date
02/17/0.
02/15/0.
02/15/0.
/DATABASE
/DOWNLOAD
/PENBEX
A
B
File
New Folder
Upload files
Download files
Copy To
Rename
Delete
Move To
System Option
A:\
FileName Size Date
02/17/0.
02/15/0.
02/15/0.
/DATABASE
/DOWNLOAD
/PENBEX
A
B
File
Run AP
Disk Info
Change Disk
Format Disk
Defrag Disk A:
System Option
Desktop Features - 47
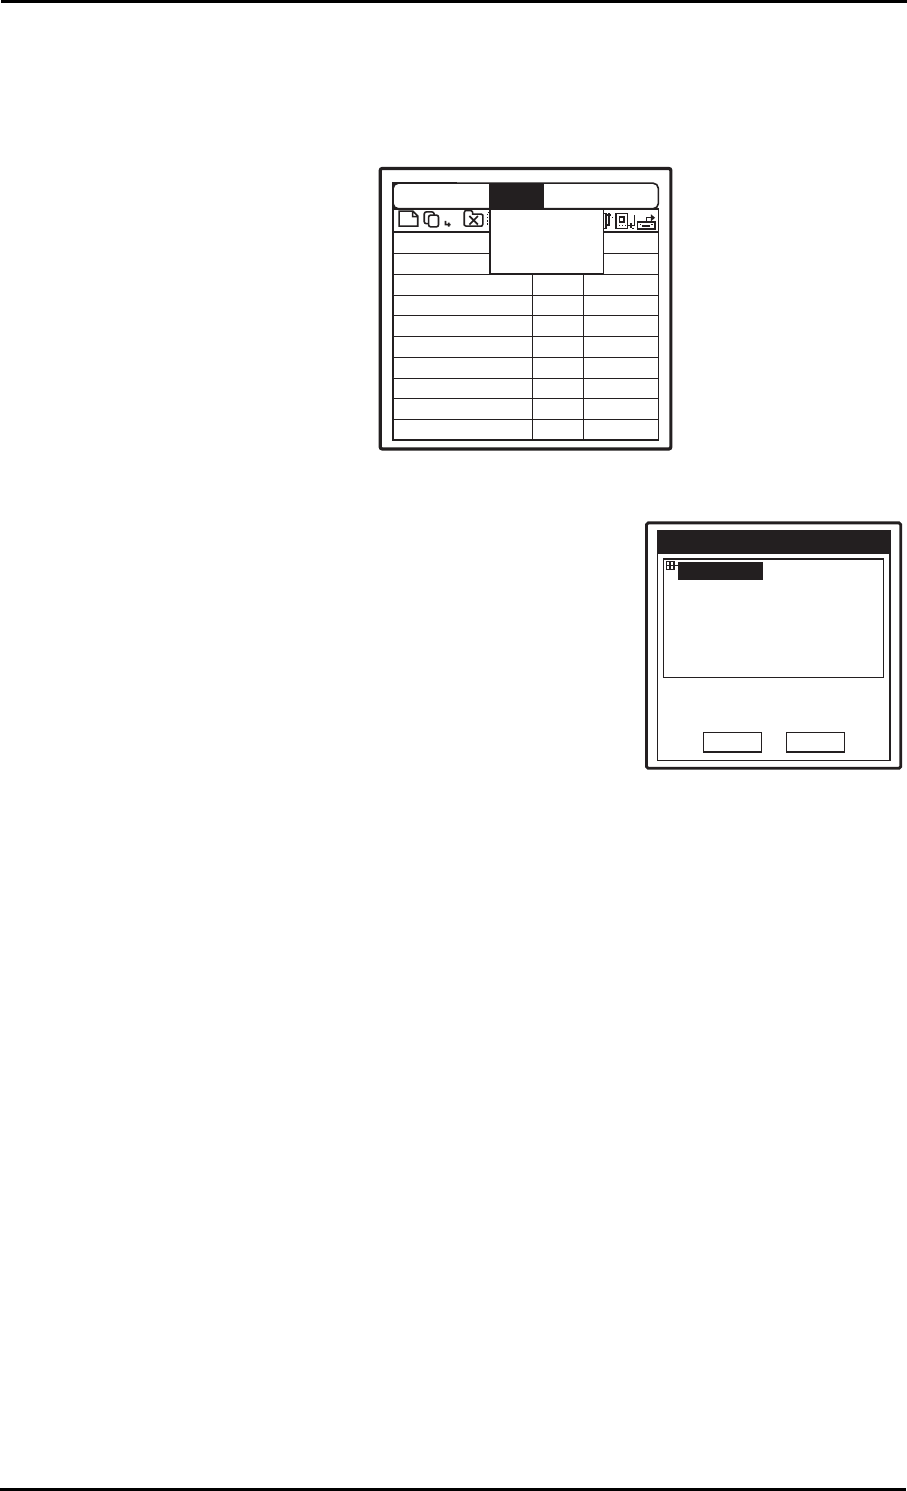
Run AP
Select this option to run an application you have downloaded onto
your Z-2050.
1. Select the application you wish to run from the file manager.
2. Select Run AP from the System menu.
Disk Info
See “Disk info” on page 44.
Change Disk
See “Select Drive” on page 44.
Format disk
Select this option to format the current disk.
1. A warning dialog appears.
2. Tap OK to format the disk.
3. The disk will be formatted.
WARNING
Before formatting any disks, ensure that you have backed up all
valuable data.
48 - Desktop Features
Defrag Disk A:
Select this option to defragment disk A.
1. A warning dialog appears.
2. Tap OK to defragment the disk.
3. A dialog box appears if successful.
4. Tap OK.
FileMgr A:\
FileName Size Date
02/17/0.
02/17/0.
02/17/0.
/DATABASE
02/17/0.
PASSWORD.INI 1K
/DOWNLOAD
/PENBEX
A
B
Are you sure ?
OK
CANCEL
Defrag Disk A:
Defragment Finish
OK
CANCEL
Finish
Desktop Features - 49
Option
The Option menu allows you to view the set receive path, File Man-
ager help file and File Manager version information.
Receive Path
This screen displays the folder in which
received files will be stored.
The default setting is A:\Download.
Ta p OK to return to the File Manager.
Help
Select this option to view the File Manager help file.
About FileMgr
Select this option to view general information about this version of
File Manager.
A:\
FileName Size Date
02/17/0.
02/15/0.
02/15/0.
/DATABASE
/DOWNLOAD
/PENBEX
A
B
File
Receive Path
Help
About FileMgr
System Option
Receive Path
A:\Download
Name A:\Download
Free: 4.72 M
OK Cancel
50 - Desktop Features
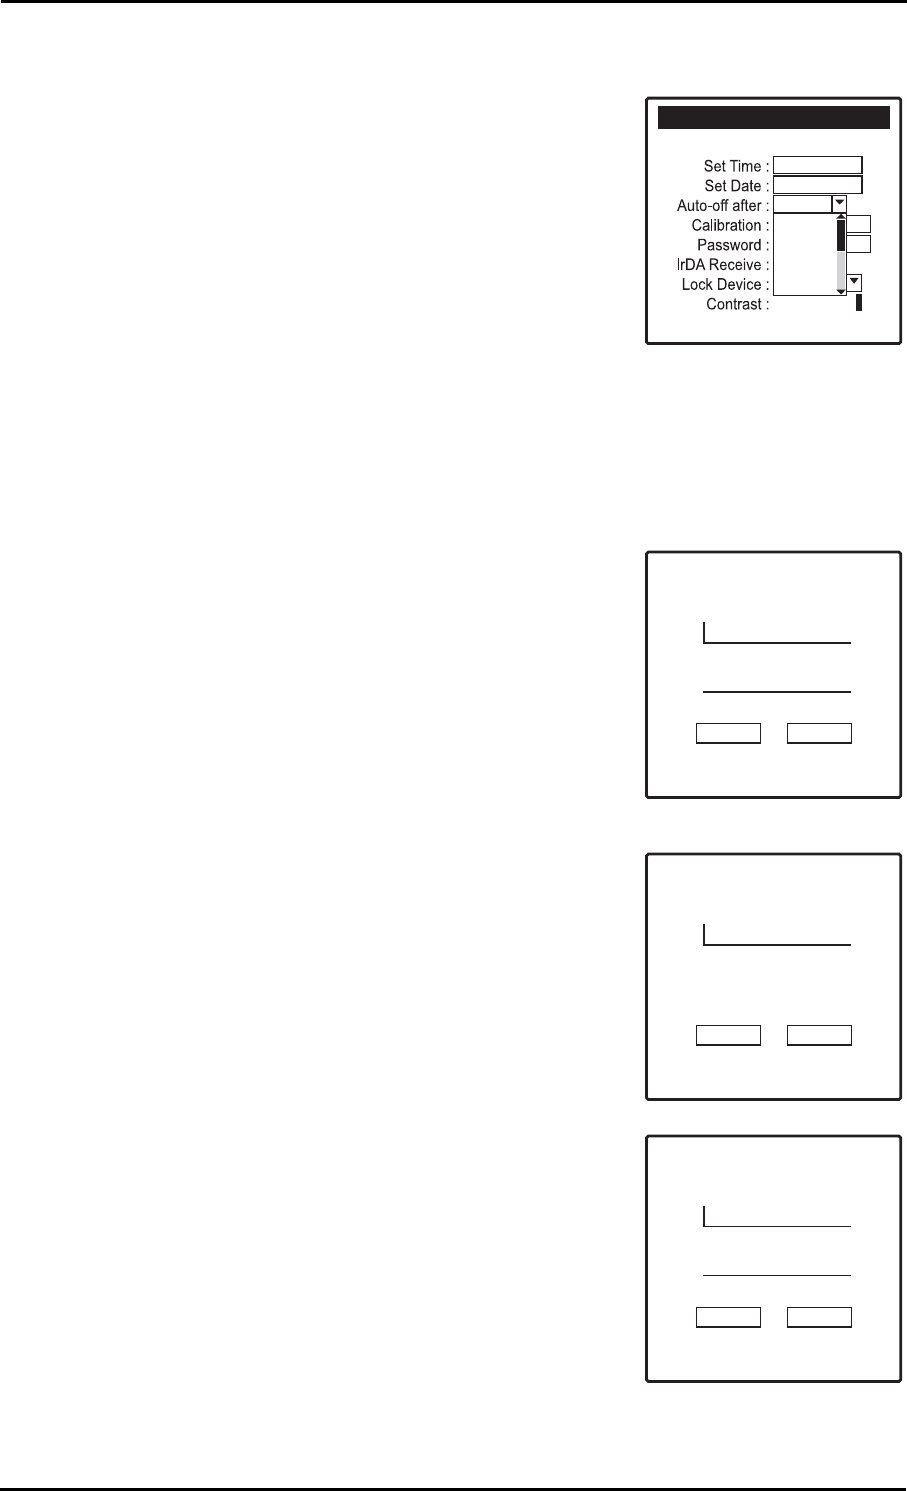
Console
The Console application enables you to configure settings for the Z-
2050. Tap the Console icon to enter Console application.
Tap the main bar to and the drop down menu appears.
General Settings
Upon entering the Console main screen the general settings are dis-
played. This screen can also be accessed by selecting General from
the drop down menu.
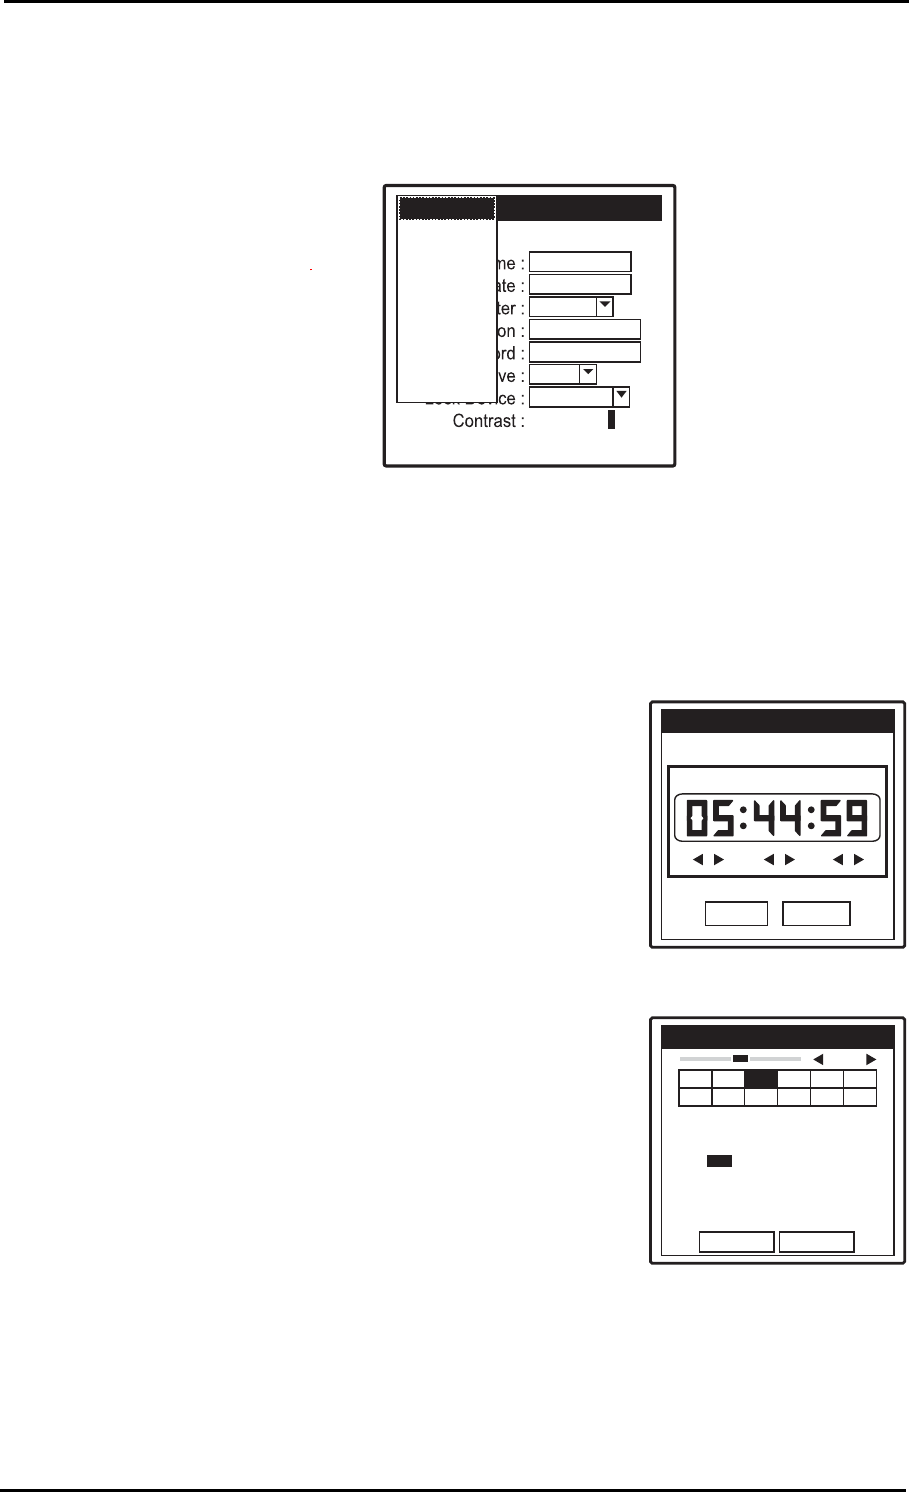
Set Time
1. Tap the Set Time field to adjust time set-
tings.
2. Use the arrows to adjust the time.
3. Tap OK to confirm and return to the main
Console screen.
Set Date
1. Tap the Set Date field to adjust data set-
tings.
2. Select the date, month and year using
the on-screen calender.
3. Tap OK to confirm and return to the main
Console screen.
Console -- General
19 : 35
18
4 MIN
2004.02.17
On
Password
Calibration
Unlock
General
Bluetooth
USB Device
Barcode
Mail
LCD
Owner
Sound
Pen
Time
HOUR MIN SEC
OK CANCEL
Date
OK CANCEL
S M T W T F S
26 27 28 1 2 3 4
5 6 7 8 9 10 11
12 13 14 15 16 17 18
19 20 21 22 23 24 25
26 27 28 29 30 31
2006
Jan Feb Mar Apr May Jun
Jul Aug Sep Oct Nov Dec
Desktop Features - 51
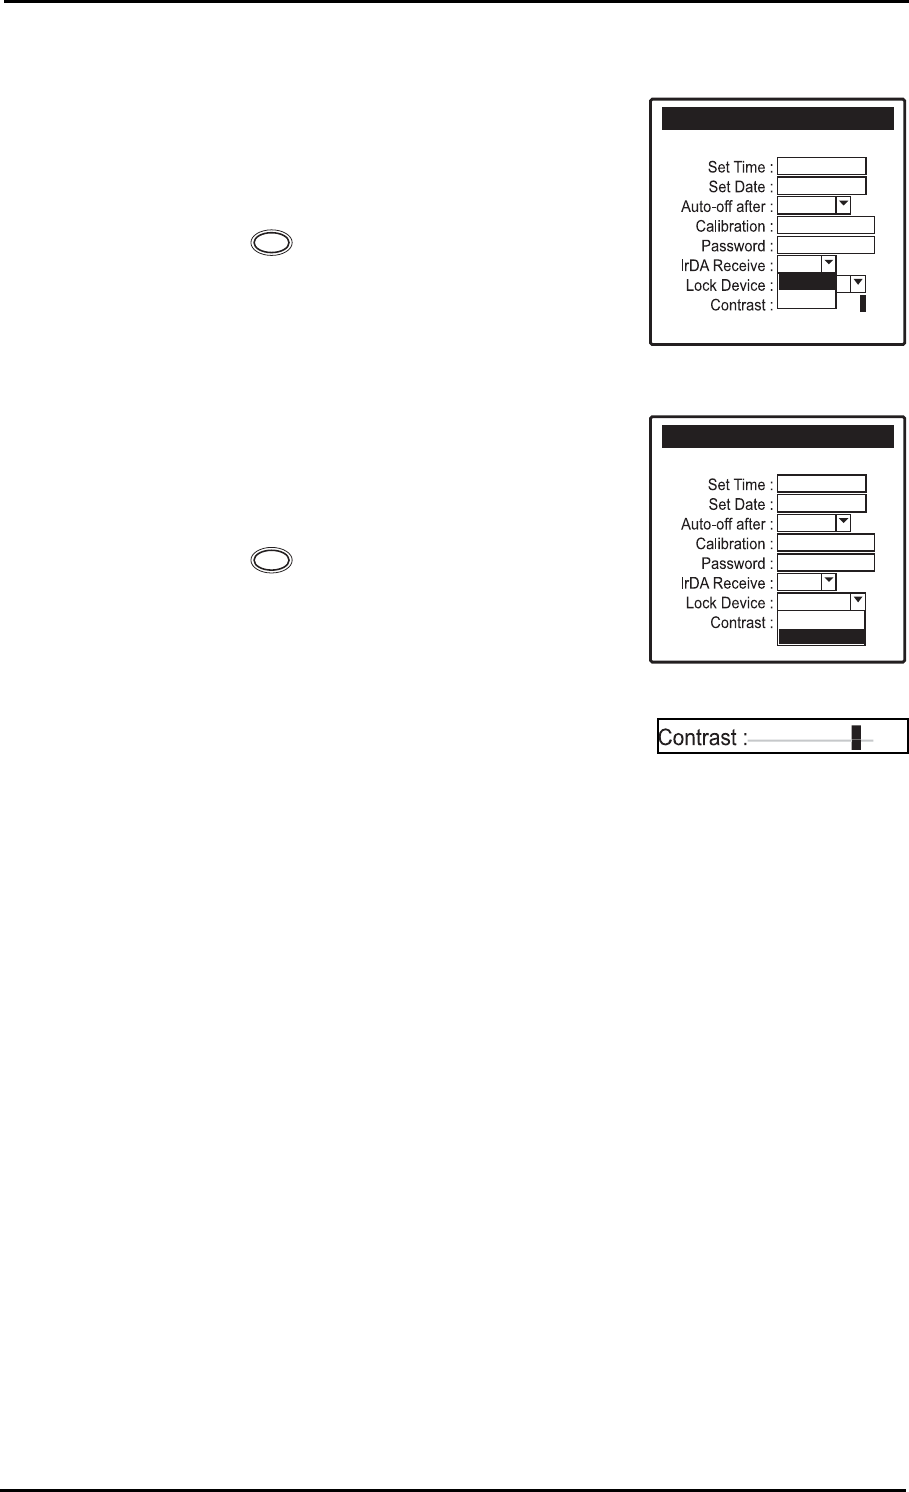
Auto-off after
1. Tap the arrow in the Auto-off after field
to enter the drop down menu.
2. Select the length of time after which the
Z-2050 will turn itself off when not in
use.
Calibration
1. Tap the Calibration field to re-calibrate the Z-2050.
2. Tap each of the cross-hairs as they appear (as described in “Turning
on for the First Time” on page 17).
Password
1. Tap the Password field to adjust pass-
word settings.
2. Enter a password and re-confirm.
3. Tap OK to confirm and return to the main
console screen.
4. The password field now shows
--Assigned--.
To change an existing password
1. Tap the Password field.
2. Enter your existing password and click
OK.
3. Enter the new password and re-confirm.
4. Tap OK to confirm and return to the main
console screen.
Console -- General
05 : 47
1F
6 MIN
2006.03.06
On
Password--
Calibration
Unlock
1 MIN
2 MIN
3 MIN
4 MIN
5 MIN
Password :
OK Cancel
Confirm Password :
Input your Password :
OK Cancel
Password :
OK Cancel
Confirm Password :
52 - Desktop Features
IrDA Receive
1. Tap the arrow in the IrDA Receive field
to enter the drop down menu.
2. Select Yes or No to turn the receive func-
tion on or off.
3. Press to return to the main Console
screen.
Lock Device
1. Tap the arrow in the Lock Device field to
enter the drop down menu.
2. Select Lock or Unlock to lock or unlock
the Z-2050.
3. Press to return to the main Console
screen.
Contrast
Use the stylus to hold and drag the slider to
adjust screen contrast settings.
Console -- General
05 : 49
1F
6 MIN
2006.03.06
On
--Assigned--
Calibration
Unlock
Off
On
ESC
Console -- General
05 : 49
1F
6 MIN
2006.03.06
On
--Assigned--
Calibration
Unlock
Lock
Unlock
ESC
18
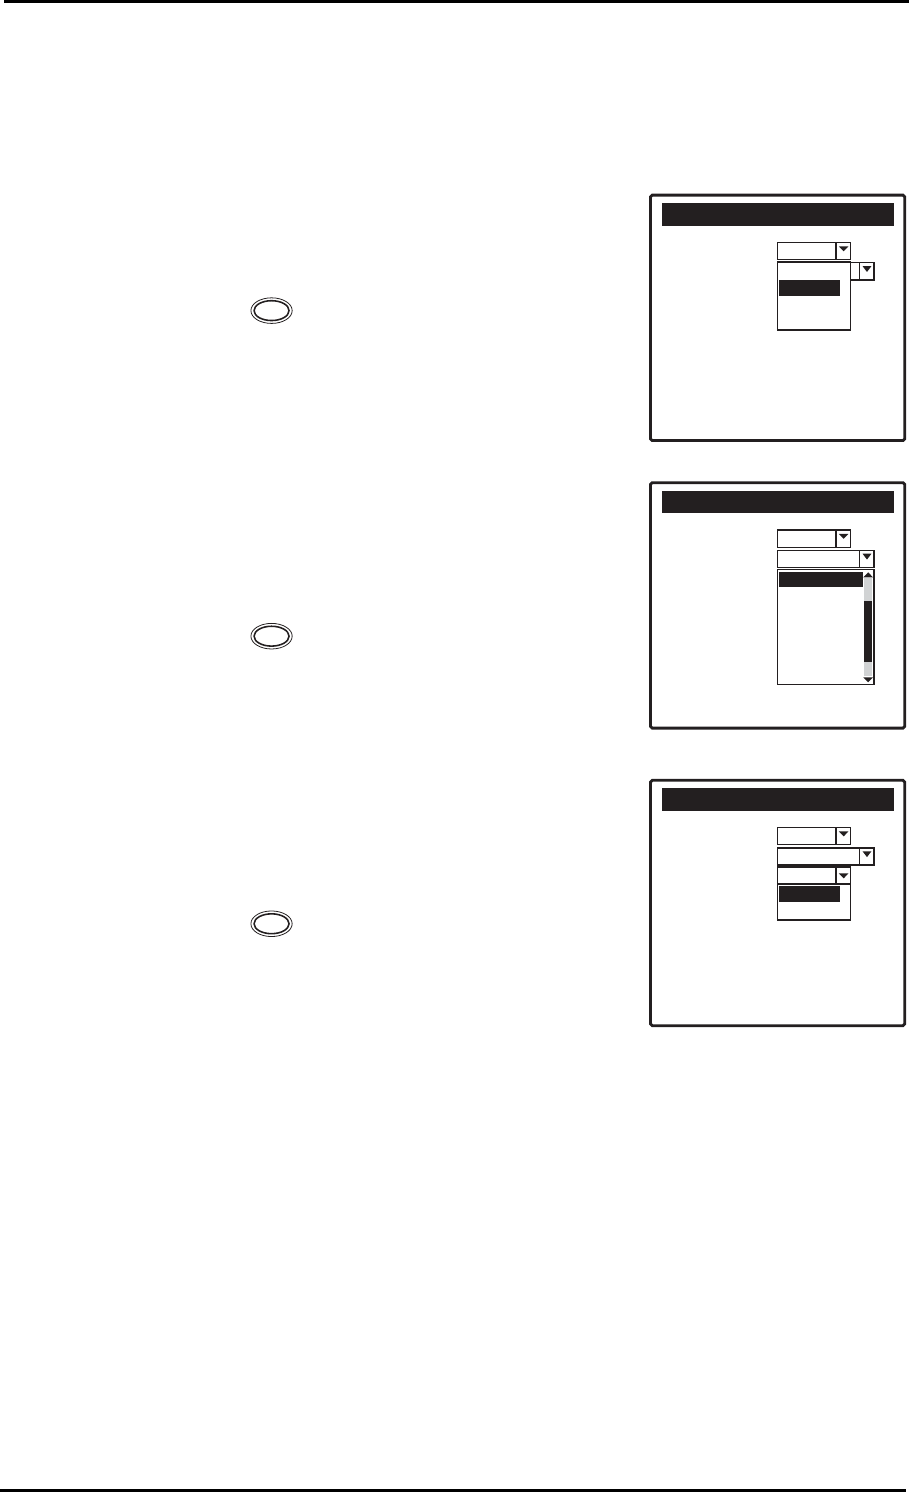
Desktop Features - 53
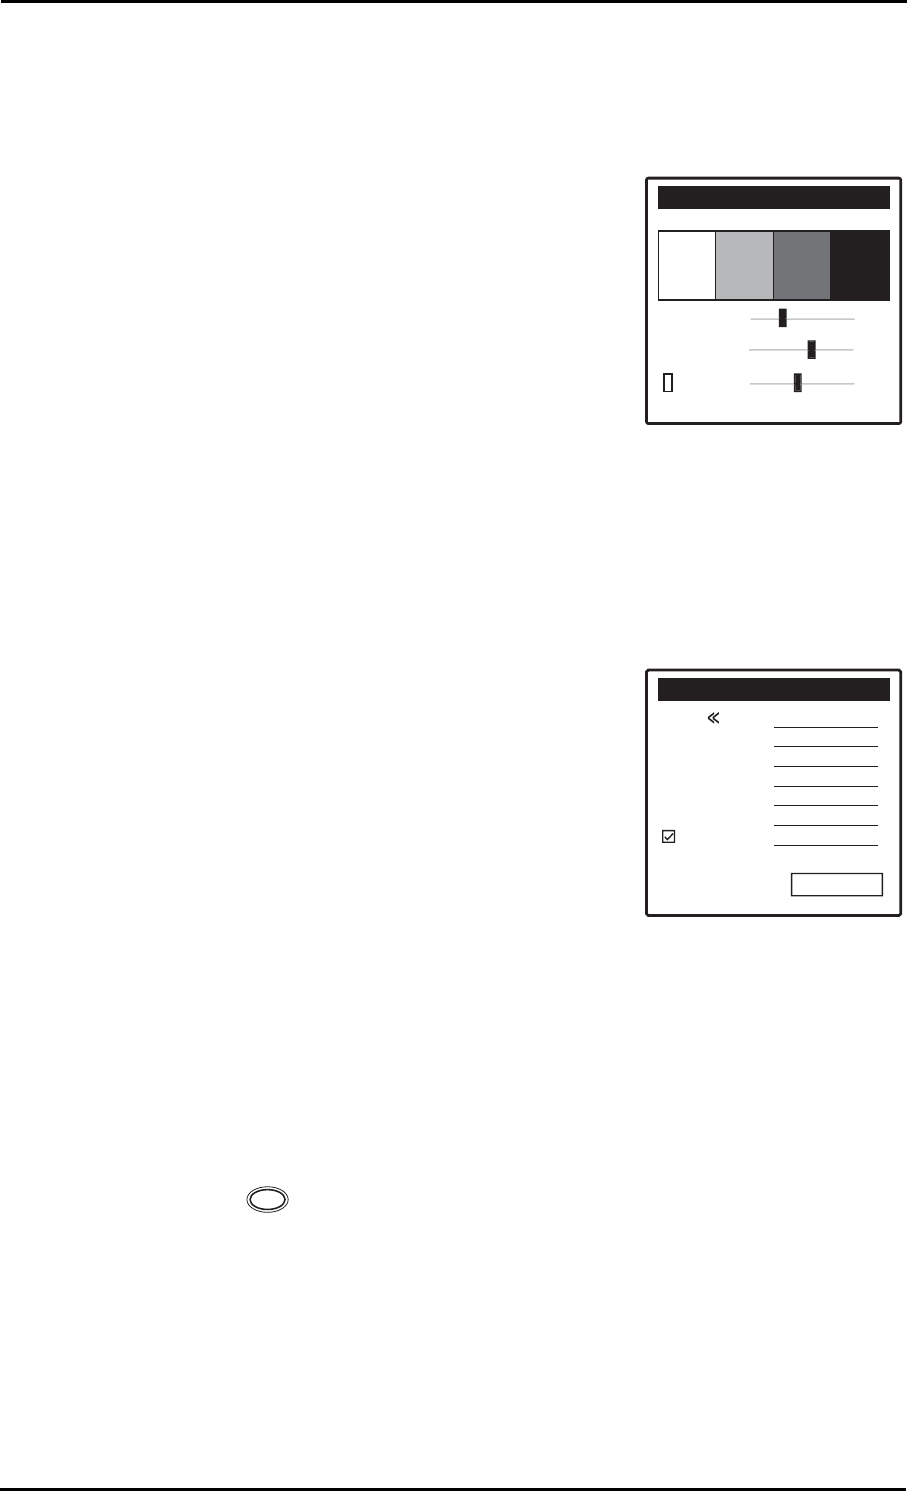
LCD Settings
Select LCD from the drop down menu to enter the LCD settings
screen.
Light Gray
Hold and drag the slider to adjust the light
gray level.
Dark Gray
Hold and drag the slider to adjust the dark
gray level
Cursor
Hold and drag the slider to adjust the color
and appearance of the cursor on screen.
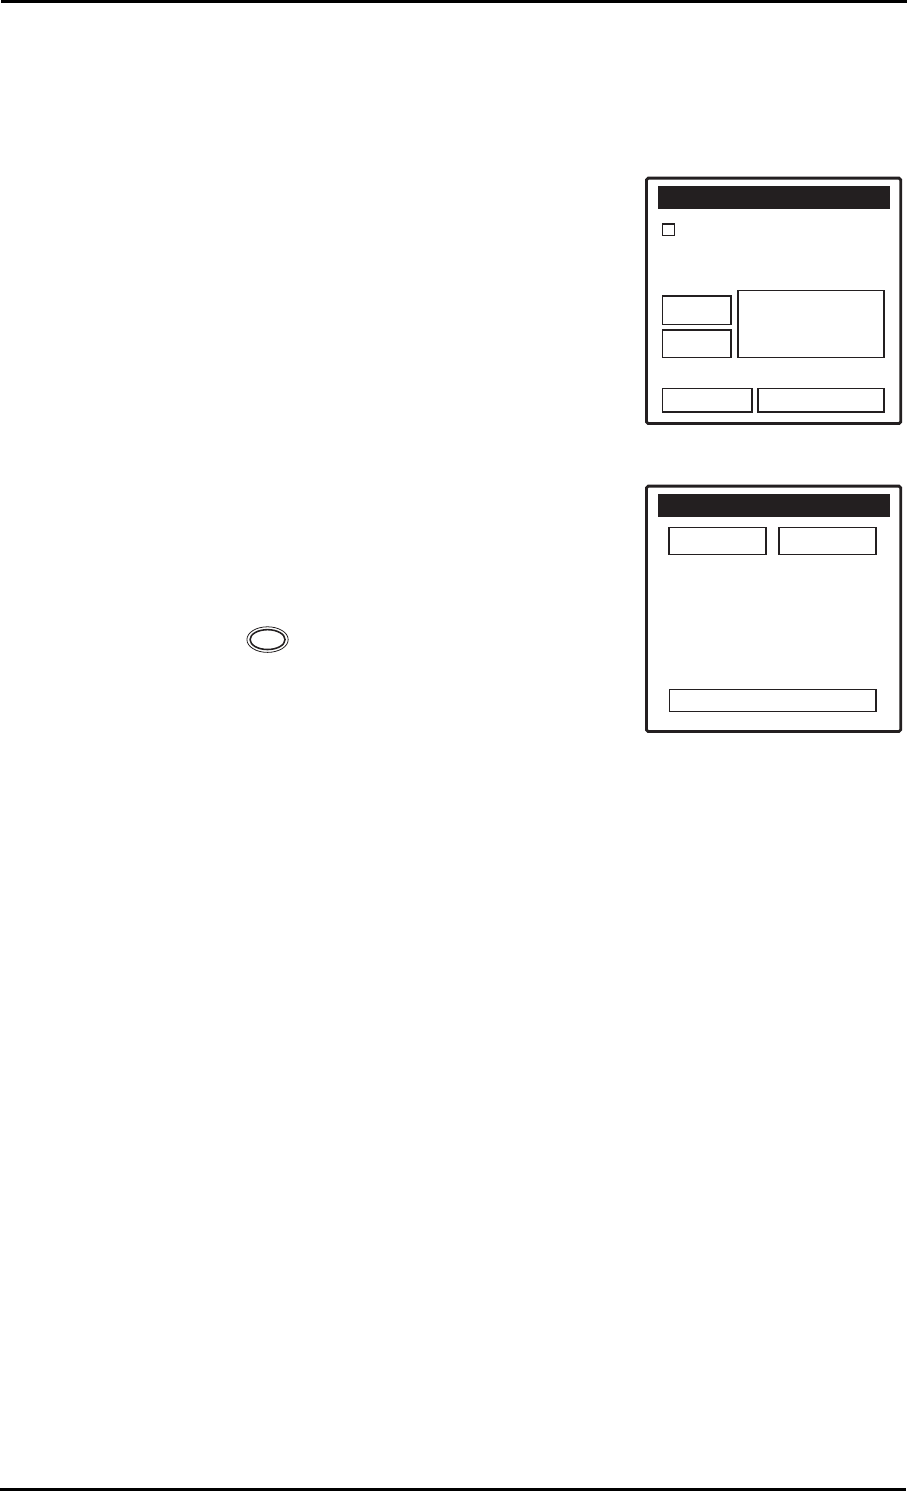
Mail Settings
Select Mail from the drop down menu to enter the mail settings
screen.
1. Enter the service name.
2. Enter the return mail address.
3. Enter the mail account name.
4. Enter the account password.
5. Enter the POP3 server settings.
6. Enter the SMTP server settings
7. Tap the check box if you wish to keep in
server.
Deleting Configurations
If you need to delete a whole mail configuration, do the following:
1. Tap the Delete button in the bottom right hand corner of the
screen.
2. A warning dialog appears, asking you to confirm the deletion.
3. Tap OK to confirm or Cancel.
4. Press to return to the main Console screen.
Console -- LCD
31Cursor
08Dark Gray
04Light Gray
Console -- Mail
Service
Return Mail :
Account :
Password :
POP3 :
SMTP :
Keep In Server
Account 1
Delete
ESC
54 - Desktop Features
Owner Settings
Select Owner from the drop down menu to
enter the owner settings screen.
1. Enter any information about the owner in
the text field.
2. Press to return to the main Console
screen.
Sound Settings
Select Sound from the drop down menu to enter the sound settings
screen.
System Sound
1. Tap the arrow in the System Sound field
to enter the drop down menu.
2. Select On or Off to turn the sound on or
off.
3. Press to return to the main Console
screen.
Alarm Sound
1. Tap the arrow in the Alarm Sound field to
enter the drop down menu.
2. Select the alarm sound length; Off or
between 1 - 30 seconds.
3. Press to return to the main Console
screen.
Sound Volume
1. Tap the arrow in the Sound Volume field
to enter the drop down menu.
2. Select the volume level from Level 1 - 5.
3. Press to return to the main Console
screen.
Console -- Owner
123
ESC
Console -- Sound
Level 3
5 Sec
On
Alarm 1
System Sound
Sound Volume
Alarm Sound
Alarm Music
ESC
Console -- Sound
Level 3
5 Sec
Off
Alarm 1
System Sound
Sound Volume
Alarm Sound
Alarm Music
4
Sec
5 Sec
10 Sec
15 Sec
20 Sec
25 Sec
30 Sec
ESC
Console -- Sound
Level 3
5 Sec
Off
Alarm 1
System Sound
Sound Volume
Alarm Sound
Alarm Music
Level
1
Level
2
Level
3
Level
4
Level
5
ESC

Desktop Features - 55
Alarm Music
1. Tap the arrow in the Alarm Music field to
enter the drop down menu.
2. Select the alarm music from Alarm 1 - 5.
3. Press to return to the main Console
screen.
Console -- Sound
Level 3
5 Sec
Off
Alarm 1
System Sound
Sound Volume
Alarm Sound
Alarm Music
Alarm 1
Alarm 2
Alarm 3
Alarm 4
Alarm 5
ESC
56 - Desktop Features
Pen Settings
Select Pen from the drop down menu to enter the pen settings screen.
Pen Width
1. Tap the arrow in the Pen Width field to
enter the drop down menu.
2. Select from 1 - 4 pixels as the pen width.
3. Press to return to the main Console
screen.
Idle Time
1. Tap the arrow in the Idle Time field to
enter the drop down menu.
2. Select from 0.2 seconds - 2 seconds as
the idle time.
3. Press to return to the main Console
screen.
Full Screen
1. Tap the arrow in the Full Screen field to
enter the drop down menu.
2. Select On or Off to turn full screen mode
on or off.
3. Press to return to the main Console
screen.
Console -- Pen Writing
Level 3
1 Pixel
2 Pixels
Pen Width :
Full Screen :
Idle Time :
2
Pixels
3 Pixels
4 Pixels
ESC
Console -- Pen Writing
0.6 Second
2 Pixels
Pen Width :
Full Screen :
Idle Time :
Level 3
Alarm 1
0.6 Second
0.8 Second
1.0 Second
1.2 Second
1.4 Second
1.6 Second
1.8 Second
ESC
Console -- Pen Writing
On
On
2 Pixels
0.6 Second
Pen Width :
Full Screen :
Idle Time :
Off
ESC
Desktop Features - 57
Bluetooth Settings
Select Bluetooth from the drop down menu to enter the bluetooth
settings screen.
1. Tap the check box to enable the blue-
tooth function.
2. Click ADD to enter the bluetooth BDA.
Click DEL to delete a previous BDA.
3. Enter your bluetooth password.
4. Tap Pair to pair devices or Connect to
connect to bluetooth.
Using the Bluetooth Function
1. Tap Connect BT to connect your blue-
tooth device.
2. Enter text in the field.
3. Tap Test BT to send.
4. Press to return to the main Console
screen.
Console -- Bluetooth Setting
Bluetooth Enabled
BT BDA
BT Password
Pair Connect
ADD
DEL
Bluetooth Test
Connect BT
Test BT
Disconnect
ESC

58 - Desktop Features
USB Device Settings
1. Select USB Device from the drop down
menu to enter the USB device settings
screen.
2. Tap the arrow in the USB Device field to
enter the drop down menu.
3. Select Disk A, B or C as the USB device.
4. Press to return to the main Console
screen.
Console -- USB Device Setting
Disk A
USB Device
Console -- USB Device Setting
Disk A
Disk A
Disk B
Disk C
USB Device
ESC
Desktop Features - 59
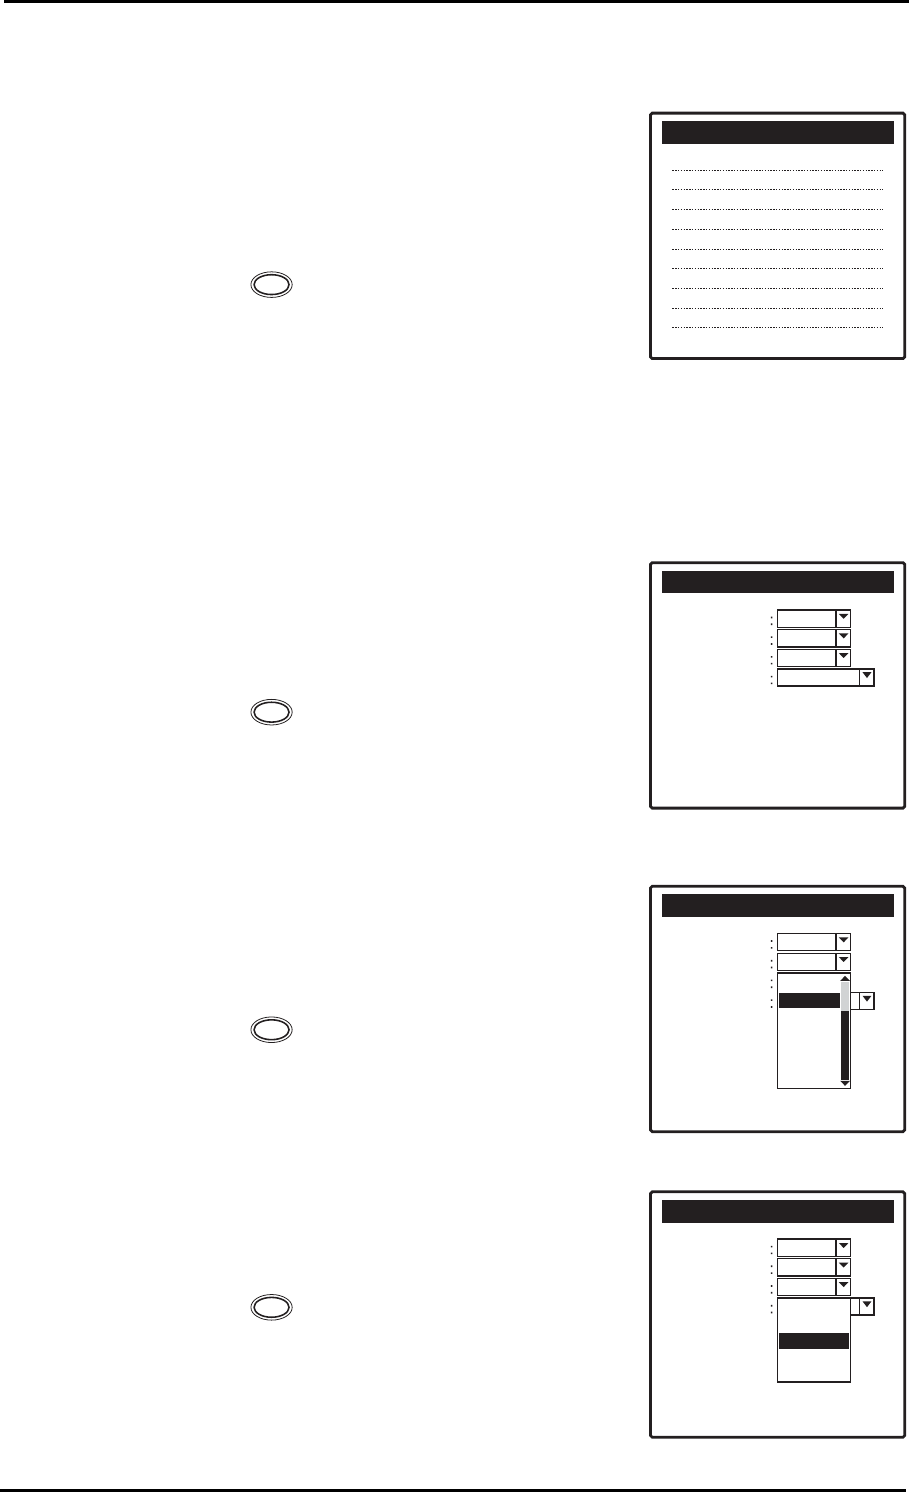
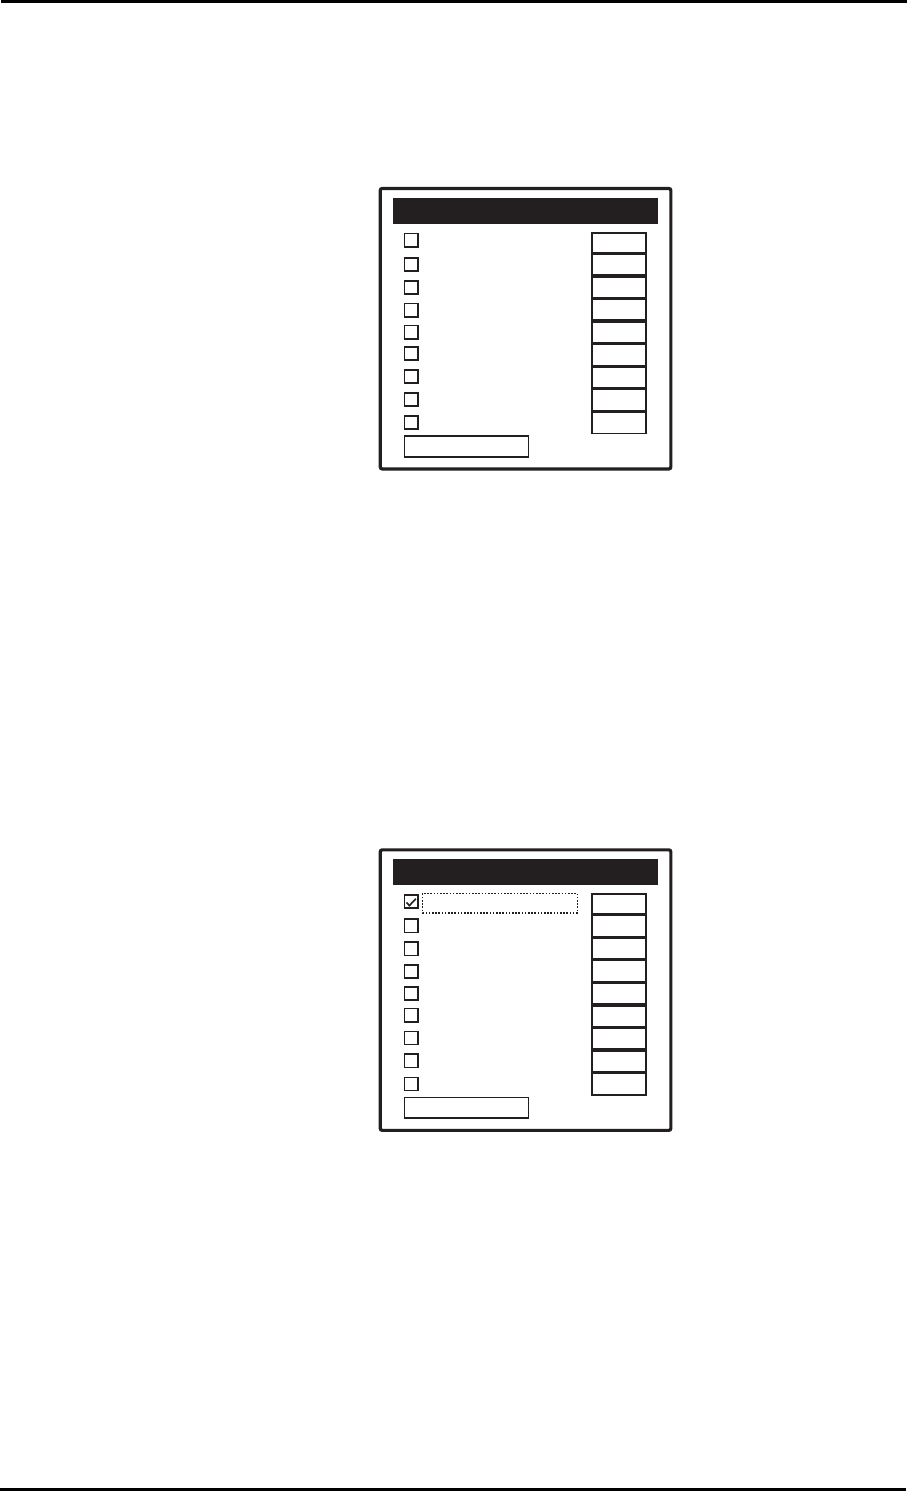
Barcode Settings and Symbologies
Select Barcode from the drop down menu to enter the barcode set-
tings screen.
The Z-2050 can be configured to enable the following:
•EAN/UPC
• Code 39
• Codabar
•ITF2 of 5
• Code 128
• Code 93
•MSI
•RSS
• Code ID
To enable any of all of these options, tick the check box to next to
each description.
Ta p Set to confirm.
Console -- Barcode Setting
EAN/UPC Enabled
Code 39 Enabled
Codabar Enabled
ITF 2 of 5 Enabled
Code 128 Enabled
Code 93 Enabled
MSI Enabled
RSS Enabled
Code ID Enabled
Pre/Suffix
Set
Set
Set
Set
Set
Set
Set
Set
Set
Console -- Barcode Setting
EAN/UPC Enabled
Code 39 Enabled
Codabar Enabled
ITF 2 of 5 Enabled
Code 128 Enabled
Code 93 Enabled
MSI Enabled
RSS Enabled
Code ID Enabled
Pre/Suffix
Set
Set
Set
Set
Set
Set
Set
Set
Set
60 - Desktop Features
EAN/UPC Settings
When EAN/UPC is enabled and you click Set, a second screen will
appear. Here you can configure EAN/UPC settings in more detail.
1. To enable any of the EAN/UPC types, tick the check box next to
each description:
•UPC-A
•UPC-E
•UPC-E1
• UPC-A Check
•EAN-8
•EAN-13
• Bookland EAN
• UPC-E Check
• UPC-E1 Check
• UPC-E1 to EAN
2. Press to return to the main Console screen.
Supplementals
1. Tap the arrow in the Supplementals field to enter the drop down
menu.
2. Select from the following options:
• Decode
• Ignore
• Auto Discriminate
• Enable 378/379
• Enable 978
• Enable Smart
3. Press to return to the main Console screen.
Redundancy
1. Tap the arrow in the Redundancy field to enter the drop down
menu.
2. Select from 2-19 as the redundancy setting.
3. Press to return to the main Console screen.
EAN UPC Setting
UPC-A
UPC-E
UPC-E1
UPC-A Check
UPC-E to EAN
Supplementals
Redundancy
EAN-8
EAN-13
Bookland EAN
UPC-E Check
UPC-E1 Check
UPC-E1 to EAN
Decode
2
ESC
ESC
ESC

Inputting Data - 61
Inputting Data
Using the On-Screen Keyboard
The quickest way to enter data into the Z-2050 is via the on screen
keyboard. Use the stylus to input data and then tap the check box in
the top right hand corner of the screen to confirm.
The on screen keyboard is accessed by double-clicking on the field
into which you are inputting data.
Using the Alphanumeric Keypad
You can also enter data via the alphanumeric keypad. To enter a let-
ter, tap the corresponding key the appropriate amount of times.
For example, to enter the letter C, tap the key three times.
Press the key to toggle between alphabetical and numerical
input.
Using Handwritten Input
You can also enter data using the handwriting recognition function and
the stylus.
The full screen pen writing function must be turned on in order to get
the most out of this function - see “Pen Settings” on page 56 for
instructions on how to do this.
1234567890
qwertyuiop
asdfghjkl;'
zxcvbnm,.
@
123
[]\=/
cap
shift
ABC
1
SFT
62 - Inputting Data
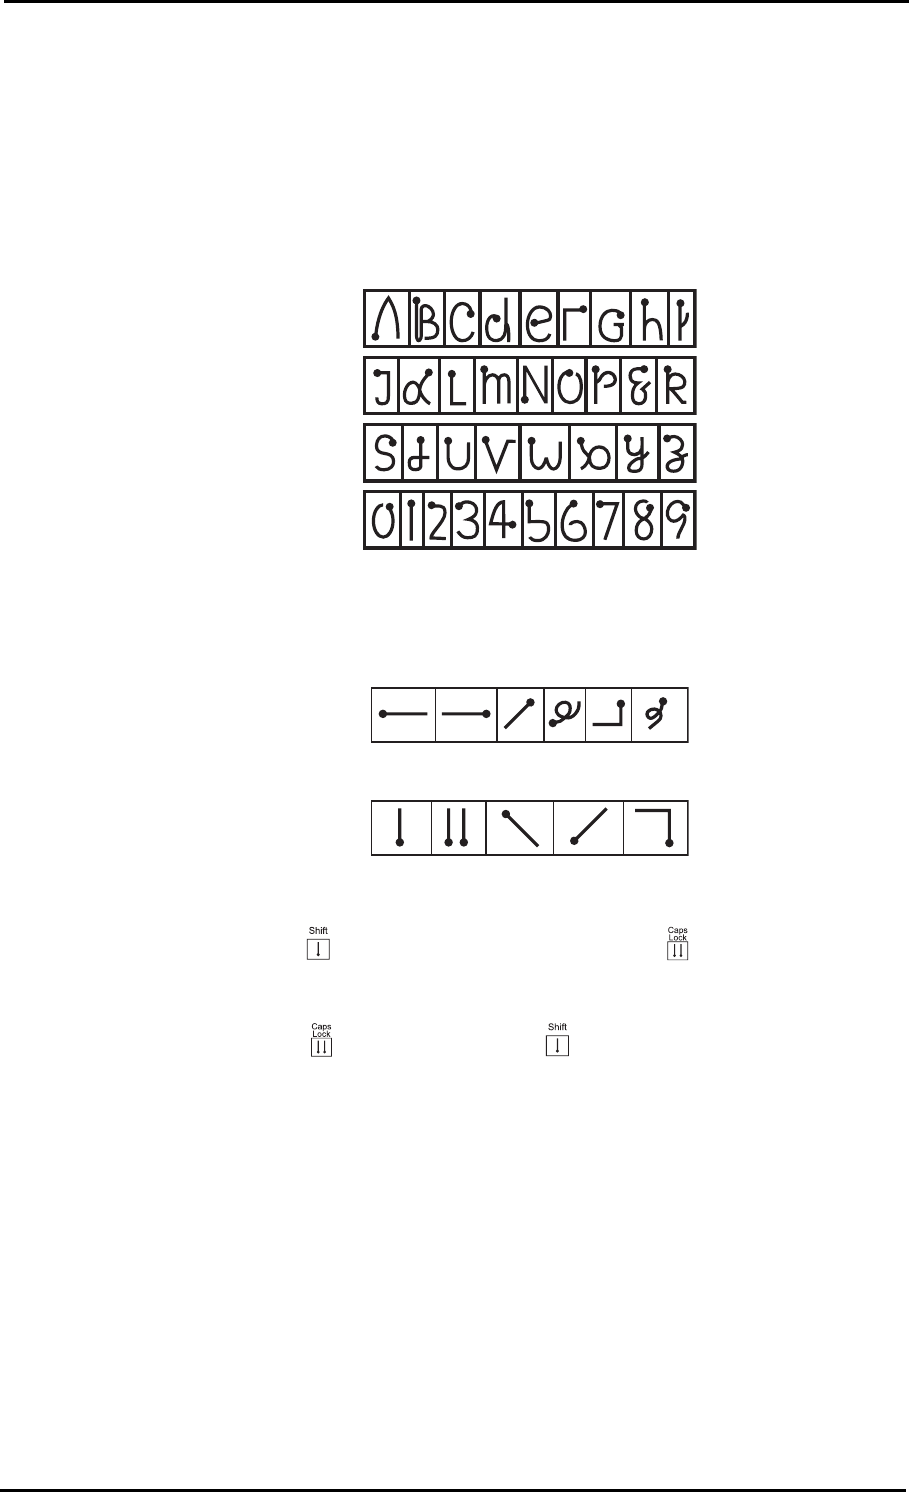
Handwriting script
In order to use this function, you must become familiar with a certain
set of script characters. They resemble regular letters but as the sty-
lus must remain in contact with the screen when writing, they require
a different technique. As soon as the stylus is lifted from the screen,
the Z-2050 will interpret and enter that letter into the text field.
You must familiarize and practice the following script style.
Be careful to observe the starting point of each of the strokes.
Punctuation, spacing and other editing commands are also possible:
Caps Lock Mode
Use two shift strokes to activate caps lock .
Lower Case Mode
Use caps lock and a single shift stroke to turn off caps lock.
Space
Shift Undo
Back
Space
New
Line
Caps
Lock
Symbol
Shift
Cut
English
Chinese
Copy Paste
Inputting Data - 63
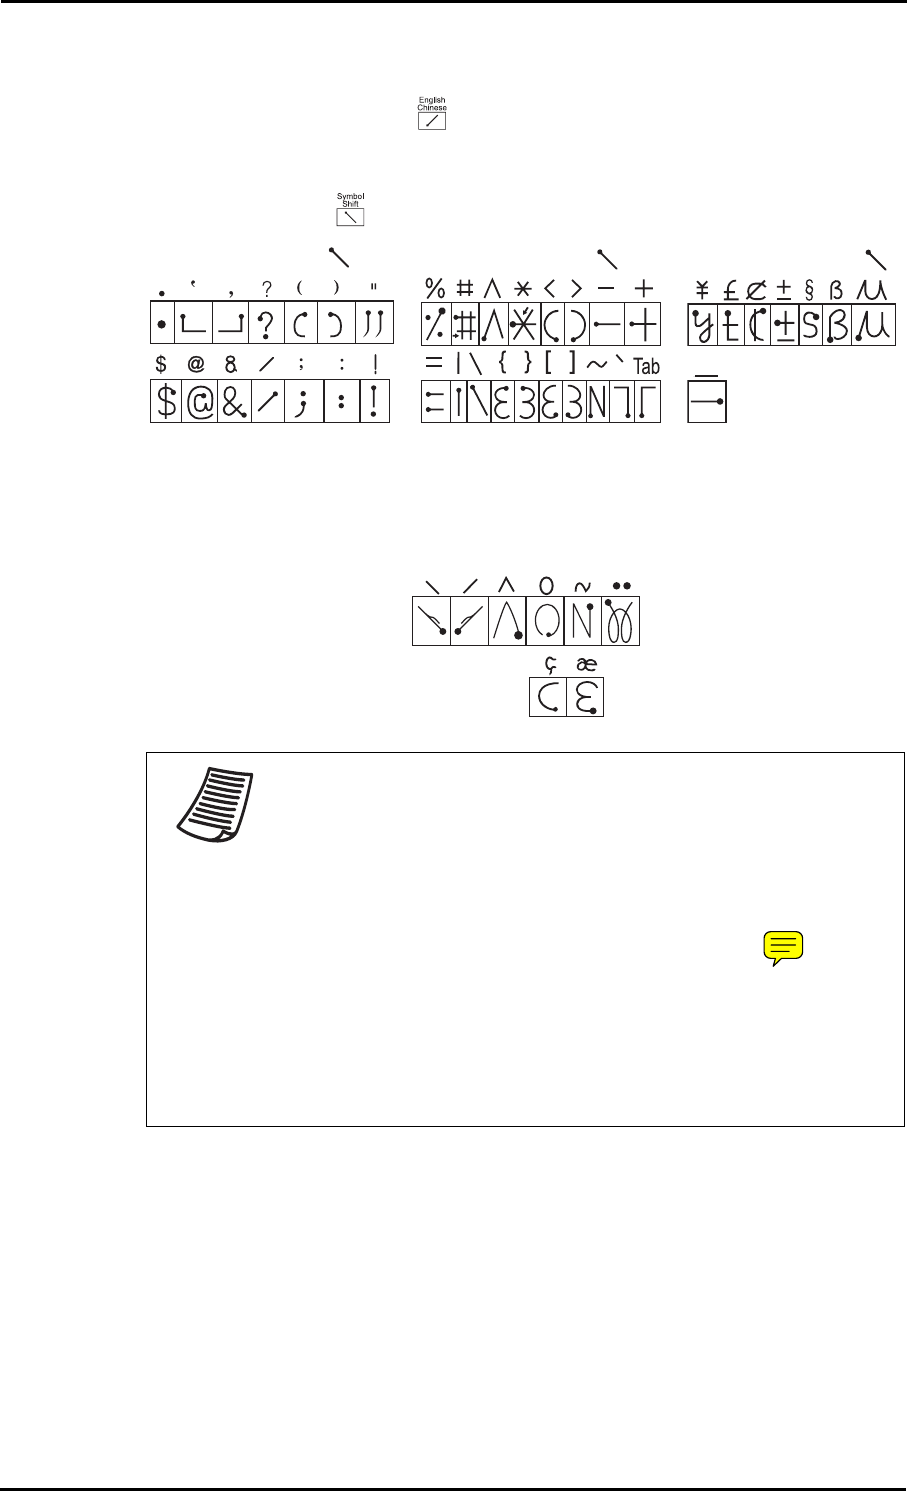
Change language
Use the English/Chinese stroke to change between languages.
Symbol shift
The symbol shift stroke is used to write a whole range of symbols:
Accents
See the following table for strokes when using accents:
NOTE
1. Observe the following when using the handwriting
function:
2. Write as clearly as possible.
3. Do not take too much time writing each character
as the system may time out.
4. Ensure the stylus is always in contact with the
screen until you have finished writing each
character.
5. Practice writing each character stroke to ensure
efficiency and accuracy.
Symbol shift= Symbol shift=
Symbol shift=
A
ccentstrokes: write the stroke
below, then the letter.
Additional
Non-English
Characters
64 - Network Connections
Network Connections
Creating a Network Connection for the First Time
In order to connect to local or remote networks, you must create sep-
arate connections on the Z-2050.
1. Tap Network from the main desktop screen.
2. The network wizard will ask if you want
to create a new connection. Click Yes to
continue.
3. Select the type of connection you wish to
create; either via Dial-up or through a
Local Area Network (LAN).
Creating additional Network Connections
Additional dial-up/LAN/WLAN connections can be created at anytime
from the Network Connect screen.
1. Tap Network from the main desktop screen.
2. Tap to enter the drop down menu.
3. Select from New LAN,New Dial-up or
New WLAN.
See below for more details on how to config-
ure each of these respective connections.
Network--Connect
Network Wizard
There is no setting,do you
want to create one ?
Yes N o
?
Network Wizard
Please select the network type:
New Dial-up
New LAN
CancelOK
Network--Connect
New LAN
New Dial-up
New WLAN
WLAN:
Status:
Set as default
Connect
Default
Not connected

Network Connections - 65
Viewing Connection Settings
The second menu in the Network Connect screen provides information
on your Dial-up and LAN settings.
1. Tap Network from the main desktop screen.
2. Tap to enter the drop down menu.
3. Select Lan Settings or WLAN Settings to
view details.
Network--Connect
Lan Settings
WLAN Settings
WLAN:
Status:
Set as default
Connect
Default
Not connected
66 - Network Connections
Creating a new Dial-Up Connection
Select New Dial-up from the network wizard screen or New Dial-up
from the drop down menu. The New Dial-up screen appears.
1. Enter your ISP name.
2. Enter your account details (the login
details provided to you by your Internet
Service Provider).
3. Enter your password.
4. Enter the phone number you use to dial
into your Internet Service Provider.
5. Enter the DNS Server settings.
6. Tap OK to complete the configuration.
NOTE
Ask your ISP for DNS server settings. Some do not require such a
setting, in which case you can leave this field blank.
New Dial-up
Name:
Account :
Password :
Phone :
DNS Server :
CancelOK
. . .
Network Connections - 67
Creating a new LAN Connection
Select New LAN from the network wizard screen or New LAN from the
drop down menu. The New LAN screen appears.
LAN Settings using DHCP
1. Enter an name for the LAN setting.
2. Tap the DHCP check box. The system will
automatically scan and configure all set-
tings automatically.
3. Tap OK to confirm and save all settings.
LAN Settings without DHCP
1. Enter an name for the LAN setting.
2. Leave the DHCP check box unchecked.
3. Enter your IP address (ask your network
administrator for these details).
4. Enter your subnet mask settings.
5. Enter your gateway settings.
6. Enter your DNS server settings.
7. Tap OK to confirm and save all settings.
New LAN
Name: Zebex LAN
DHCP
IP Address :
Subnet Mask :
Gateway :
DNS Server :
CancelOK
. . .
. . .
. . .
. . .
New LAN
Name: Zebex LAN
DHCP
IP Address : 10 10 22 123
Subnet Mask : 255 255 0 0
Gateway : 10 0 0 111
DNS Server : 10 200 1 1
CancelOK
. . .
. . .
. . .
. . .
68 - Network Connections
Creating a new WLAN Connection
Once you have created a LAN connection, WLAN connection settings
become available.
1. Tap Network from the main desktop screen.
2. Tap and select New WLAN. The con-
figuration screen appears.
3. Enter a profile name for the WLAN con-
nection.
4. Select Mode. Choose from Infrastructure
or 802.11 AdHoc from the drop down
menu.
5. Enter SSID settings (default is set to
ANY).
6. Select Rate. Choose from 1MHz,2MHz,5.5MHz,11MHz or Auto-
matic from the drop down menu.
7. Tap the check box to enable Power Save mode.
8. Tap OK to confirm and save all settings.
To disable your WLAN connection, do the following:
1. Tap Network from the main desktop
screen. The Network--Connect screen
appears.
2. Tap the WLAN check box so it is no longer
selected.
3. Press to return to the main Console
screen.
NOTE
When Mode is set to 802.11 AdHoc, the Channel field becomes
active. Select from Channels 1-11 to adjust channels should you
experience communication problems between the Z-2050 and your
WLAN transmitter.
Configuration
Profile:
Power Save Enabled
SSID : ANY
Mode : Infrastructure
Rate : Antomatic
CancelOK
Network--Connect
Profile:
WLAN:
Status:
Set as default
Connect
Default
Not connected
Zebex
Network--Connect
Profile:
WLAN:
Status:
Set as default
Connect
Default
Not connected
Zebex
ESC

Network Connections - 69
Network Connect Screen
Once an initial network connection has been configured, the network
wizard will no longer appear when you tap Network from the main
desktop screen.
Instead the Network--Connect screen appears. Here you can modify
options related to your connections.
Profile
Select this option to choose a connection profile from the drop down
list.
WLAN
Tap the check box to enable/disable. You can select the WLAN profile
you wish to use from the drop down list. Tap the arrow next to the
profile name to view details of link status (State, Current Channel,
Current Tx Rate, Link Quality and Signal Strength).
Status
Displays whether or not the connection is active.
Set as default
Tap the check box to set the current connection as your default set-
ting.
Connect
Tap to connect to the selected connection.
Network--Connect
Profile:
WLAN:
Status:
Set as default
Connect
Default
Not connected
Zebex

70 - Network Connections
Option
Tap the top left hand corner to enter the network connect drop down
menu. Two options are available here.
Auto Disconnect
Select this option to set the system idle time after which the connec-
tion will be terminated.
1. Tap the Idle Time field.
2. Enter a preferred value (in minutes) from
1-99.
3. Press to confirm all changes and
return to the Network Connect screen.
About Network
Select this option to view general information about this version of
Network Manager.
Auto Disconnect
About Network ex
WLAN:
Status:
Set as default
Connect
A:\
Option
Default
Not connected
Auto Disconnect
Max idle time: 20min.
ESC
Data Backup / Restore - 71
Data Backup / Restore
The Z-2050 features a data backup system which allows you to backup
all data, including system settings and AP data, to an external mem-
ory card. You can also restore any previously backed-up data from a
memory card using this function.
Backing Up Data
1. Tap Backup from the main desktop screen.
2. Ensure you have a memory card inserted
and tap Backup.
3. Tap the three information tabs at the
bottom of the screen to view further
information:
• Size: Displays folder size
• Record: Displays folder records
• Date: Displays when the folder was
last updated
4. Select one or more folders you wish to backup.
5. Tap Start to begin the backup process. A
dialog appears.
6. Enter a name for the backup file and tap
the check mark to confirm.
7. The backup begins. Tap Stop at any time
to cancel the process.
Backup Backup Restore
Disk C:
Select0Size0
System 17
Download 8
Start Size DateRecord
Backup Backup Restore
Disk C:
System 3K
Download 1K
Backup
Backup path name :
20060306.000
Backup Backup Restore
Disk C:
System 3K
Download 1K
Backup
File copy is beging performed...
Download Processing ...
Stop
0%
72 - Data Backup / Restore
Restoring Data
1. Tap Backup from the main desktop screen.
2. Ensure you have the memory card
inserted and tap Restore.
3. The Backup list appears. Select which
backup file you wish to restore. Tap OK.
4. You will be taken back to the main
Restore screen. Tap Start to restore the
data.
5. A warning dialog appears. Click OK to
continue or CANCEL to abort the restore.
6. The restore begins. Tap Stop at any time
to cancel the process.
Backup Restore
Disk B:
Select0Size0
System 17
Download 8
Start Size DateRecord
Restore
Backup list
20060306.000
20060306.001
OK
CANCEL
Backup Restore
Disk B:
Select0Size0
System 17
Download 8
Start Size DateRecord
Restore
20060306.00
Backup Restore
Disk B:
System 3K
Download 1K
Restore
File copy is beging performed...
Download Processing ...
Stop
0%
Restore
Data Backup / Restore - 73
Backup Option Menu
Tap the top left hand corner of the main backup screen to enter the
backup menu.
Select All
Select this option to select all of the folders in the list.
Select None
Select this option to select none of the folders in the list.
Card Info
Select this option to view card information, including total capacity
and free capacity.
View Log
Select this option to view the backup log
Help
Select this option to view the Backup Manager help file.
About Backup
Select this option to view general information about this version of
Backup Manager.
NOTE
The Select All command is particularly useful when backing up/
restoring whole disks. Select All and then tap Start to backup/
restore an entire disk.
Disk B:
System N/A
Download N/A
Option
Select All
Select0Size0
About Backup
Select None
Card Info
View Log
Help
Start Size Record Date

74 - Data Backup / Restore
Technical Information - 75
Technical Information
Z-2050 Specifications
System
CPU MOTOROLA MC68VZ 33MHz
RAM 8 MB SDRAM
ROM 4 MB for core flash memory
64 MB for data flash memory
LCD Display FSTN 2.5”, 160 X 160 with touch panel
Back Light Green EL back light
Operating System Proprietary OS with emulator
Power
Main Battery 3.7V 2,200 mAH Li-ion rechargeable
Back-up 3V, 25 mAH, rechargebale lithium battery
Battery Life 8 hours without wireless communication activated
Scanning
Performance
1D, 2D, (optional SKU)
Light Source Visivle laser diodie 650 nm
Scan Rate 39± 3 scans per second (bi-directional)
Min. Print Contrast Min. 25% absolute dark/light reflectance measure at 650nm
Decoding
capability
Barcode Symbologies UPC/ EAN/ JAN, Code 128/EAN 128, Code 39, Code 93, Interleaved 2 of
5, Diescrete 2 of 5, Codabar, MSI/Plessey
Card Slots 1 x CE card, 1 x SD card (optional)
RFID 13.56 MHz, compliance with ISO 14443 and ISO 15693
Interfaces
Bluetooth Bluetooth 1.2 spec. class one
IrDa Standard IrDA 1.1
USB USB 1.0
RS-232 Programmable up to 115,200 bps
WLAN 802.1b (optional)
Dimensions 190.5 mm (L) x 75.0 mm (W) x 47.8 mm (H)
Weight Approx. 240 g (battery included)

76 - Technical Information
Environmental
Operating Temp. 0°C ~ 50°C
Storage Temp. -10°C ~ 60°C
Operating Humidity 10% ~ 70% (non-condensing)
Storage Humidity 5% ~ 70% (non-condensing)
Regulatory Approvals CE & FCC Part 15B, 15 C
Cradle Single slot USB / RS-232 charging cradle with spare battery slot
Software &
Development
Microsoft VC 6.0 development environment
Supports GUI, database and networking over 1,000 API
Emulation software tool for program development and debug
Z-2050 Specifications