• User manual • Warranty card Thanks for choosing BOYA! The BY-M1 Pro is an universal lavalier microphone, which compatible with smartphones, PC, cameras, audio recorders, and other recording devices etc. On it's compact body, there are a few special and useful functions that distinguish BY-M1 Pro to other general microphones in the market.
• User manual • Warranty card Thanks for choosing BOYA! The BY-M1 Pro is an universal lavalier microphone, which compatible with smartphones, PC, cameras, audio recorders, and other recording devices etc. On it's compact body, there are a few special and useful functions that distinguish BY-M1 Pro to other general microphones in the market.
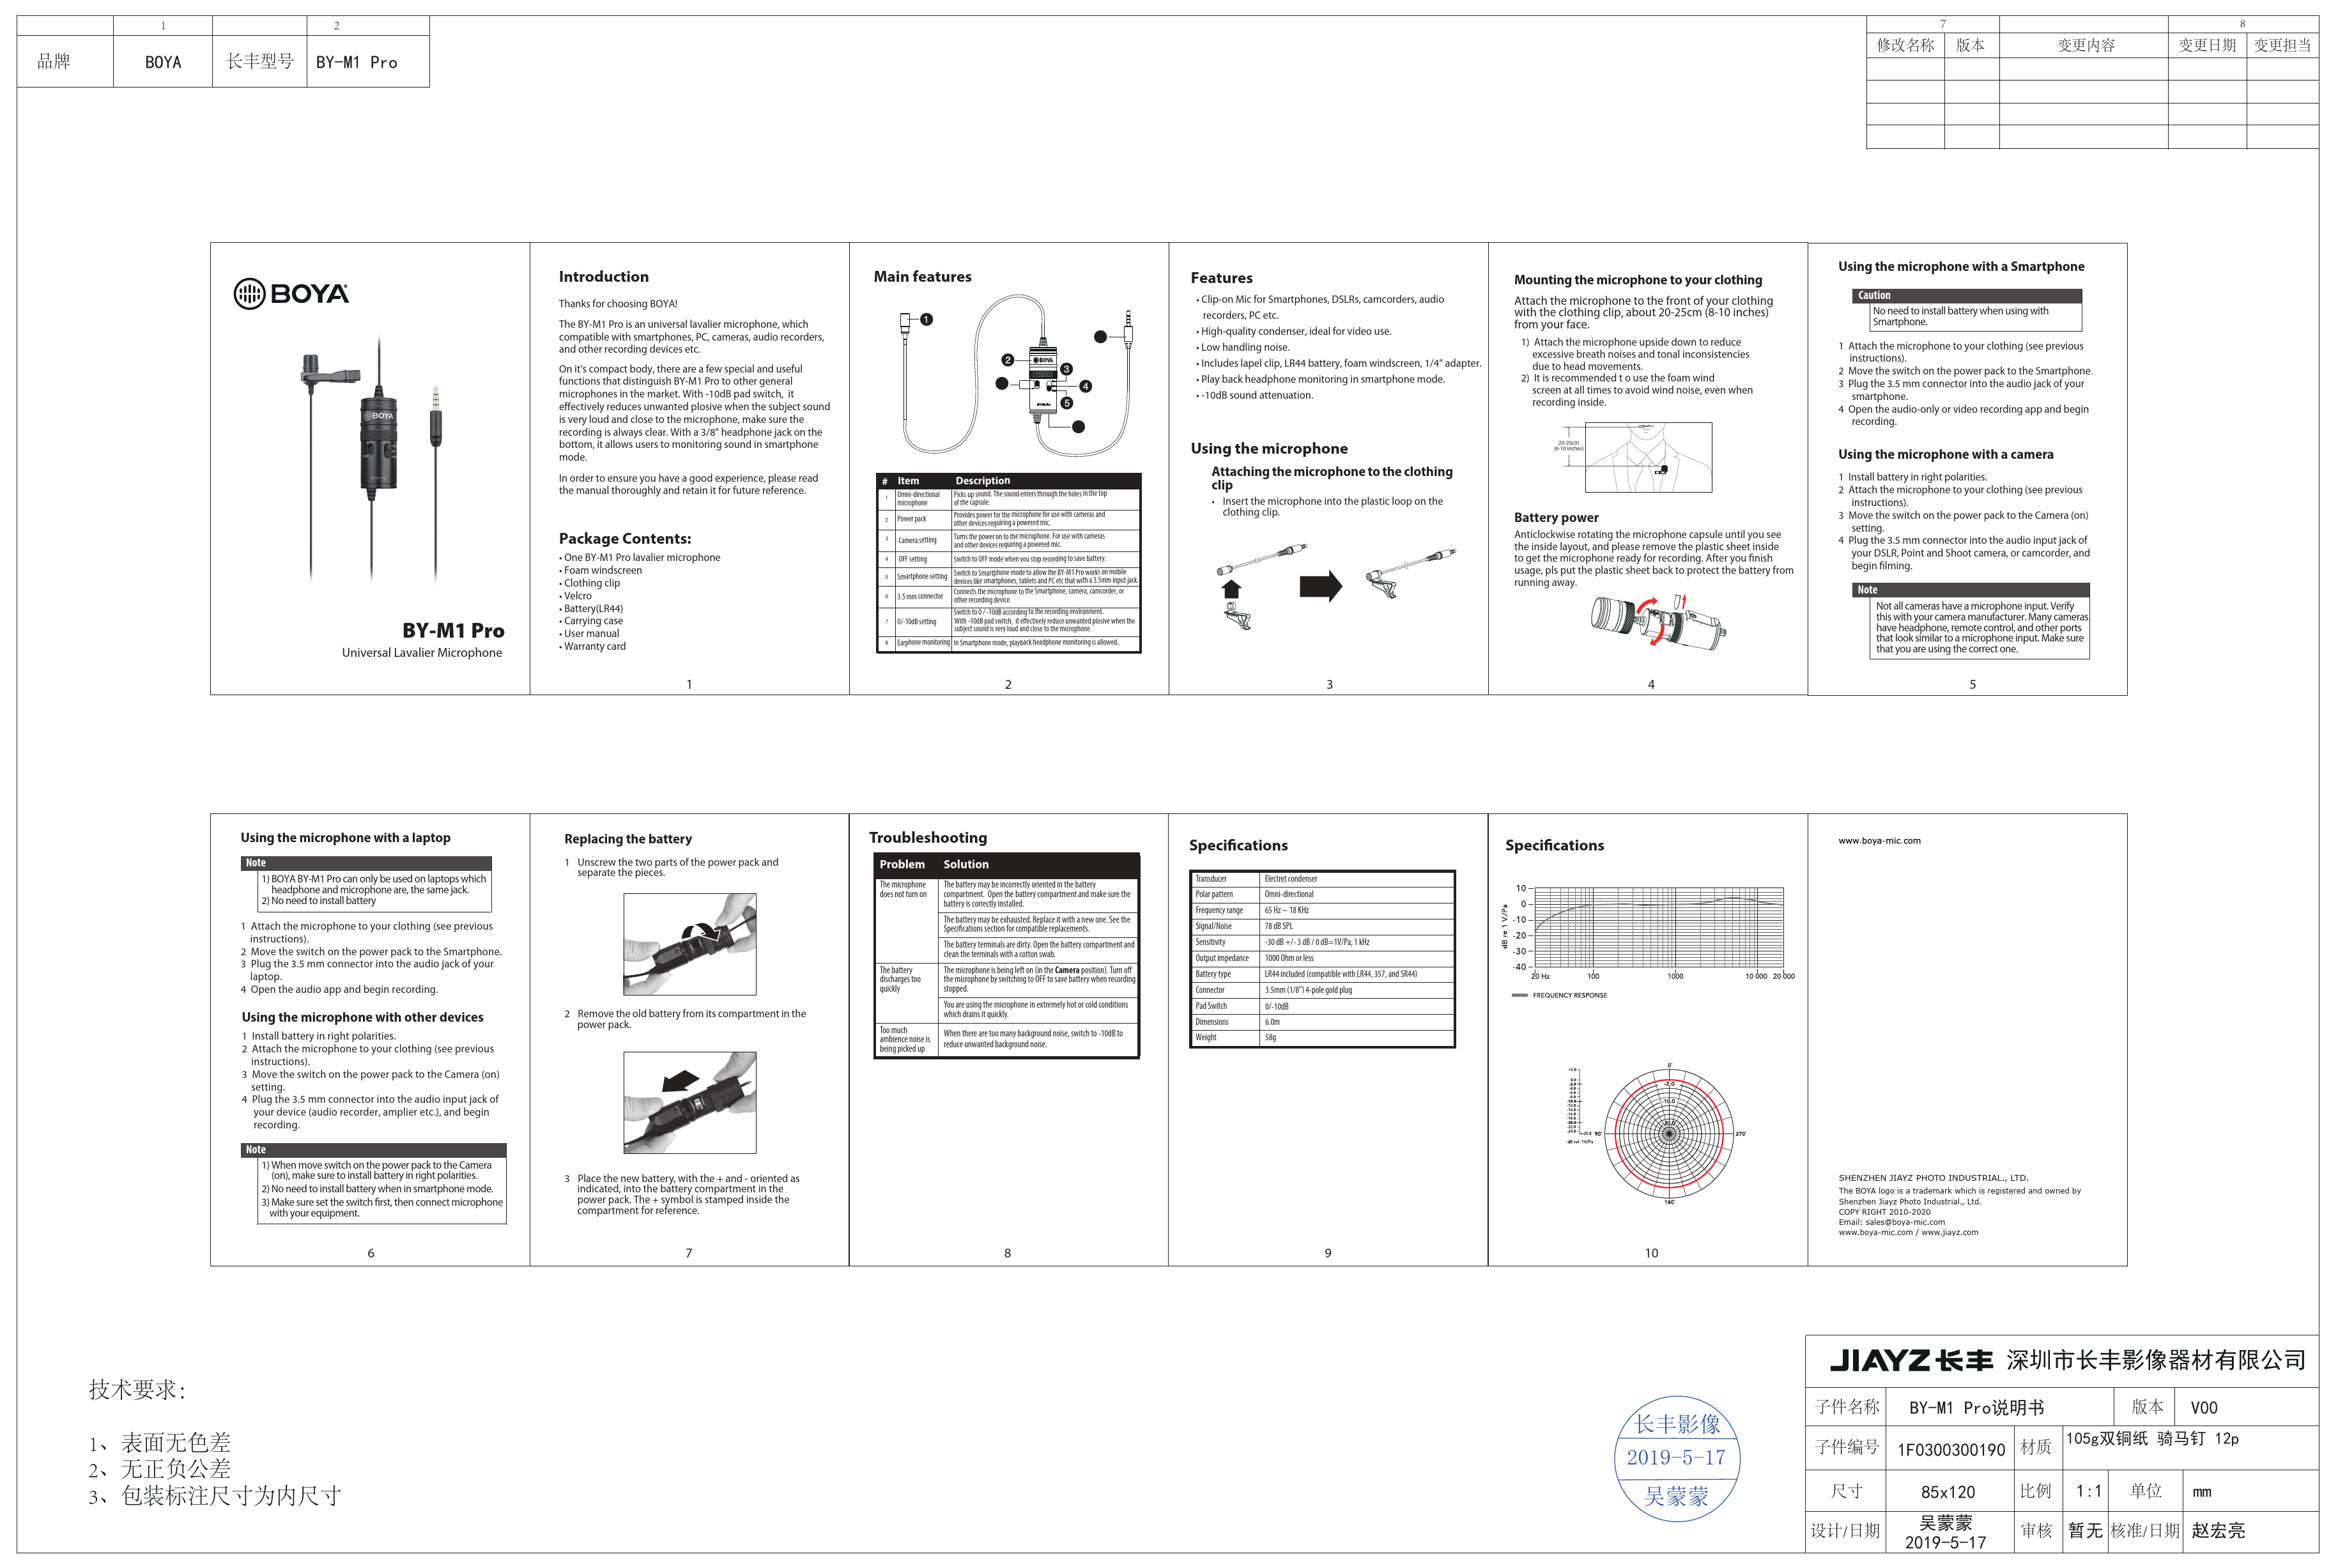
BOYA


 BY-M1 Pro


BY-M1 Pro
Universal Lavalier Microphone

Introduction
Thanks for choosing BOYA!
The BY-M1 Pro is an universal lavalier microphone, which compatible with smartphones, PC, cameras, audio recorders, and other recording devices etc.
On it's compact body, there are a few special and useful functions that distinguish BY-M1 Pro to other general microphones in the market. With -10dB pad switch, it e ectively reduces unwanted plosive when the subject sound is very loud and close to the microphone, make sure the recording is always clear. With a 3/8" headphone jack on the bottom, it allows users to monitoring sound in smartphone mode.
In order to ensure you have a good experience, please read the manual thoroughly and retain it for future reference.
Package Contents:
· One BY-M1 Pro lavalier microphone · Foam windscreen · Clothing clip · Velcro · Battery(LR44) · Carrying case · User manual · Warranty card
1

Main features

# Item
1 Omni-directional microphone
2 Power pack

Description
Picks up sound. The sound enters through the holes in the top of the capsule.
Provides power for the microphone for use with cameras and other devices requiring a powered mic.

3 Camera setting

Turns the power on to the microphone. For use with cameras and other devices requiring a powered mic.

4 OFF setting

Switch to OFF mode when you stop recording to save battery.

5

Smartphone setting

Switch to Smartphone mode to allow the BY-M1 Pro works on mobile devices like smartphones, tablets and PC etc that with a 3.5mm input jack.

6

3.5 mm connector

Connects the microphone to the Smartphone, camera, camcorder, or other recording device.

7 0/-10dB setting

Switch to 0 / -10dB according to the recording environment.
With -10dB pad switch, it e ectively reduce unwanted plosive when the subject sound is very loud and close to the microphone.

8 Earphone monitoring In Smartphone mode, playback headphone monitoring is allowed.

2

Features
· Clip-on Mic for Smartphones, DSLRs, camcorders, audio recorders, PC etc.
· High-quality condenser, ideal for video use. · Low handling noise. · Includes lapel clip, LR44 battery, foam windscreen, 1/4" adapter. · Play back headphone monitoring in smartphone mode. · -10dB sound attenuation.

Mounting the microphone to your clothing
Attach the microphone to the front of your clothing with the clothing clip, about 20-25cm (8-10 inches) from your face.
1) Attach the microphone upside down to reduce excessive breath noises and tonal inconsistencies due to head movements.
2) It is recommended t o use the foam wind screen at all times to avoid wind noise, even when recording inside.

Using the microphone
Attaching the microphone to the clothing clip
· Insert the microphone into the plastic loop on the clothing clip.

20-25cm (8-10 inches)
Battery power
Anticlockwise rotating the microphone capsule until you see the inside layout, and please remove the plastic sheet inside to get the microphone ready for recording. After you nish usage, pls put the plastic sheet back to protect the battery from running away.

3

4

Using the microphone with a Smartphone
Caution
No need to install battery when using with Smartphone.
1 Attach the microphone to your clothing (see previous instructions).
2 Move the switch on the power pack to the Smartphone 3 Plug the 3.5 mm connector into the audio jack of your
smartphone. 4 Open the audio-only or video recording app and begin
recording.
Using the microphone with a camera
1 Install battery in right polarities. 2 Attach the microphone to your clothing (see previous
instructions). 3 Move the switch on the power pack to the Camera (on)
setting. 4 Plug the 3.5 mm connector into the audio input jack of
your DSLR, Point and Shoot camera, or camcorder, and begin lming.
Note
Not all cameras have a microphone input. Verify this with your camera manufacturer. Many cameras have headphone, remote control, and other ports that look similar to a microphone input. Make sure that you are using the correct one.
5

Using the microphone with a laptop
Note
1) BOYA BY-M1 Pro can only be used on laptops which headphone and microphone are, the same jack.
2) No need to install battery
1 Attach the microphone to your clothing (see previous instructions).
2 Move the switch on the power pack to the Smartphone. 3 Plug the 3.5 mm connector into the audio jack of your
laptop. 4 Open the audio app and begin recording.
Using the microphone with other devices
1 Install battery in right polarities. 2 Attach the microphone to your clothing (see previous
instructions). 3 Move the switch on the power pack to the Camera (on)
setting. 4 Plug the 3.5 mm connector into the audio input jack of
your device (audio recorder, amplier etc.), and begin recording.
Note
1) When move switch on the power pack to the Camera (on), make sure to install battery in right polarities.
2) No need to install battery when in smartphone mode. 3) Make sure set the switch rst, then connect microphone
with your equipment.
6

Replacing the battery
1 Unscrew the two parts of the power pack and separate the pieces.
2 Remove the old battery from its compartment in the power pack.
3 Place the new battery, with the + and - oriented as indicated, into the battery compartment in the power pack. The + symbol is stamped inside the compartment for reference.
7

Troubleshooting

Problem Solution

The microphone does not turn on
The battery discharges too quickly
Too much ambience noise is being picked up

The battery may be incorrectly oriented in the battery compartment. Open the battery compartment and make sure the battery is correctly installed.
The battery may be exhausted. Replace it with a new one. See the Speci cations section for compatible replacements.
The battery terminals are dirty. Open the battery compartment and clean the terminals with a cotton swab.
The microphone is being left on (in the Camera position). Turn o the microphone by switching to OFF to save battery when recording stopped.
You are using the microphone in extremely hot or cold conditions which drains it quickly.
When there are too many background noise, switch to -10dB to reduce unwanted background noise.

Speci cations

Transducer Polar pattern Frequency range Signal/Noise Sensitivity Output impedance Battery type Connector Pad Switch Dimensions Weight

Electret condenser Omni-directional 65 Hz ~ 18 KHz 78 dB SPL -30 dB +/- 3 dB / 0 dB=1V/Pa, 1 kHz 1000 Ohm or less LR44 included (compatible with LR44, 357, and SR44) 3.5mm (1/8") 4-pole gold plug 0/-10dB 6.0m 58g

8

9

Speci cations
10

SHENZHEN JIAYZ PHOTO INDUSTRIAL., LTD.
The BOYA logo is a trademark which is registered and owned by Shenzhen Jiayz Photo Industrial., Ltd. COPY RIGHT 2010-2020 Email: sales@boya-mic.com www.boya-mic.com / www.jiayz.com


a a a

 2019-5-17


 BY-M1 Pro

 V00

105g  12p
 1F0300300190


85x120
 2019-5-17

 1:1  mm
Adobe Illustrator CC 22.0 (Macintosh) 3-Heights(TM) PDF Optimization Shell 4.8.25.2 (http://www -tools.com)