PreSonus Revelator io24 2-Channel Audio Interface for Streamers Owner's Manual
File info: application/pdf · 107 pages · 16.25MB
User Guide A—8.5X11
User Guide A„8.5X11
Headphone Output. Connect your headphones here. Level can be controlled from the Home screen using the Encoder. ... Outs and Headphone output on your Revelator io24 View
Full PDF Document

If the inline viewer fails, it will open the original document in compatibility mode automatically. You can also open the file directly.
Extracted Text
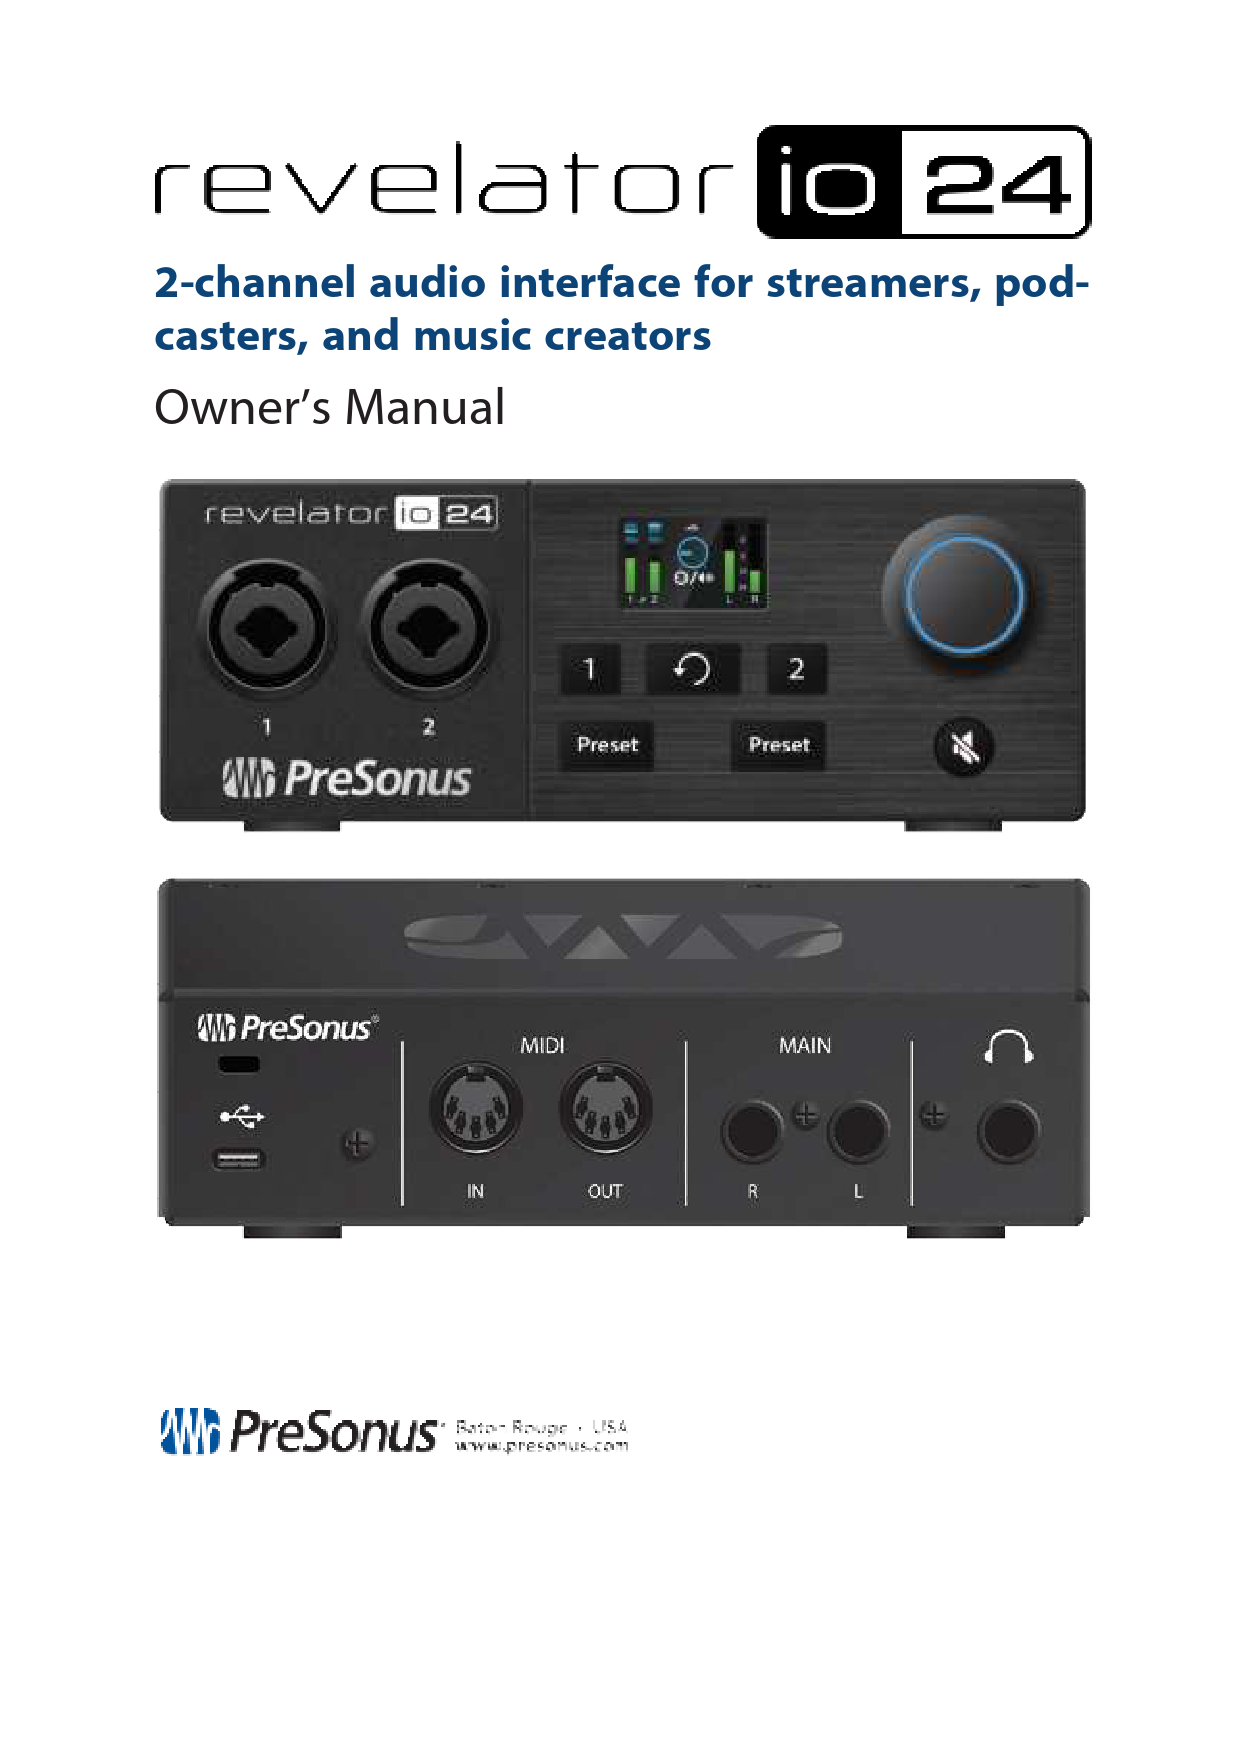
2-channel audio interface for streamers, podcasters, and music creators
Owner's Manual

Table of Contents

Table of Contents

2

1. Overview

5

1.1 Introduction

5

1.2 What is in the box

5

1.3 What is in your MyPreSonus account

6

2. Connections and Controls

13

2.1 Front Panel

13

2.2 The Screen

14

2.3 Back Panel

16

2.4 Connection Diagram

18

2.5 Setting the Microphone Level

19

2.6 Setting Main Output level

20

2.7 Setting Headphone level

20

2.8 Setting Monitor blend

21

3. Universal Control

23

3.1 The Launch Window

23

3.2 Launch Window Menu Items

25

Windows

27

macOS

29

Using Revelator io24 for Skype

31

Using Revelator io24 for Zoom

32

Windows:

33

macOS:

34

Using Revelator io24 for Google Meet

36

Using Revelator io24 for OBS

38

3.3 Using Revelator io24 with iOS/iPadOS devices

39

3.4 Using Revelator io24 with Android devices

40

3.5 Using Revelator io24 on Chromebook

41

Using Revelator io24 with Zoom on Chromebook

42

Using Revelator io24 with Google Meet on Chromebook

42

4. Presets and Scenes

44

4.1 Preset Management

44

4.2 Changing Preset Button Slots

45

4.3 Storing New Presets

48

4.4 Exporting/Importing Presets

51

4.5 Scenes - Save and Recall

53

4.6 Sharing Scenes and Presets

54

5. Fat Channel and Voice Effects

55

5.1 Fat Channel and Voice Effects

55

6. Mixing and Loopback Audio

63

6.1 What is Loopback Audio?

63

6.2 Routing

63

6.3 Mixer Controls

64

6.4 Microphone Channel Controls

64

6.5 Mixer Channel Controls

64

6.6 Main Output Controls and Mix Selection

65

6.7 Feedback Loops are Bad

67

7. Advanced Features and Customization Tools

68

7.1 Settings Menu

68

7.2 Advanced Fat Channel and Voice Effects Controls

69

7.3 High Pass Filter

70

7.4 Noise Gate

70

7.5 Compressor

71

7.6 Standard Compressor

72

7.7 Tube Leveling Amplifier

73

7.8 Class-A FET Compressor

74

7.9 Changing the Signal Chain

74

7.10 Equalizer

75

7.11 Standard EQ

75

7.12 Passive Program EQ

76

7.13 Vintage 1970s EQ

77

7.14 Limiter

78

7.15 Voice FX

78

7.16 Doubler

78

7.17 Detuner

79

7.18 Vocoder

80

7.19 Ring Modulator

80

7.20 Filters

81

7.21 Delay

82

8. Studio One Artist Quick Start

83

8.1 Installation and Authorization

83

8.2 Setting Up Studio One Artist

85

8.3 Configuring Audio Devices

85

8.4 Configuring MIDI Devices

86

Setting up an External MIDI Keyboard Controller from the Start Page

87

Setting up an External MIDI Sound Module from the Start Page

89

8.5 Creating a New Song

90

8. Configuring Your I/O

92

8. Creating Audio and Instrument Tracks

94

8.1 Recording an Audio Track

95

8.2 Adding Virtual Instruments and Effects

95

9. Resources

98

9.1 Gain Staging 101: Begin at the Beginning

98

9.2 Step 1: Setting the Microphone Gain

98

9.3 Step 2: Setting the EQ and Dynamics

99

9.4 Step 3: Setting Your Mix--The Unity Myth

99

9.5 Microphone Tips and Tricks

100

9.6 Pickup Patterns

100

9.7 Handling Noise

100

9.8 How Close is Too Close?

100

9.9 Problematic Pronunciation

101

9.10 Putting it All Together

101

9.11 Technical Specifications

102

10. Legal

105

11. Dinner is Served!

106

1. Overview
1.1 Introduction

Thank you for purchasing the Revelator io24 audio interface! Revelator io24 is the perfect audio interface for live streaming or podcasting, and is a powerful recording solution for voice-overs and music production in your home studio. It's designed to deliver polished, professional-sounding results with ease. Once you've registered your Revelator io24 at my.presonus.com, you'll be able to download your drivers, a complimentary copy of Studio One Artist, additional plug-ins, content, and more. It's our gift to you for becoming a PreSonus customer.
We suggest you read this manual to familiarize yourself with the features and applications for your Revelator io24 before trying to connect it to your computer. This will help you to avoid problems during installation and use.
Throughout this manual you will find Power User Tips. These tips and tricks will help you to become a Revelator io24 expert--as well as help you to better understand audio terminology, so you can get the most from your purchase and get the best sound quality possible.
Thanks for joining the PreSonus family. We're glad you're here.
1.2 What is in the box
Your Revelator io24package contains:
Revelator io24 USB audio interface

1. Overview

5

1M USB-C-to-USB-A Cable. Use this to connect your Revelator io24 to a USB port on your computer or a powered USB hub.
Quick Start Guide. Use this as a handy reference guide to your hardware features while you familiarize yourself with your new interface.

PreSonus Health, Safety, and Compliance Guide. Legal language to cure your insomnia.
Warranty/Registration Card.

1.3 What is in your MyPreSonus account

There's more to your Revelator io24 than what comes in the box! Let's take a moment to register your Revelator io24 and download the digital products that come with it. These include:

l

Universal Control. Unlock the StudioLive inside your Revelator io24 with Universal Control.

This installation package also includes your audio driver controls that you will need to use advanced

Revelator io24 features.

l Studio One Artist. Studio One Artist is our award-winning recording and production software. It's also designed to be intuitive and easy to use, so whether you're a seasoned professional or just starting out, Studio One Artist has the tools you need to make a great recording.

l Studio Magic Bundle. Over $1000 USD worth of plug-ins, sounds, and more; Studio Magic supercharges your Studio One Artist experience!

1.3 What is in your MyPreSonus account

6

Step 1: Register Revelator io24
To download your digital products, you must first create a MyPreSonus account. This account lets you manage all your PreSonus product registrations, provides curated educational content, and is the portal to all tech support and service inquiries. Let's get started! 1. In your Internet browser of choice, visit my.presonus.com and
click "Create Account" Power User Tip: If you already have a MyPreSonus account, please log in and skip to step 5.
2. Fill in the form with the required information. Make sure to verify that you are, in fact, human and agree to our PreSonus Terms of Use. If you'd like to receive occasional emails about promotions and new video content, check that box now as well.

3. Click "Save."

1.3 What is in your MyPreSonus account

7

4. Click "Go to MyPreSonus" to log into your shiny new MyPreSonus account. 5. Click "Register a Product."

6. In the pop-up menu, click on the Hardware tab.

7. Select your purchase date and enter your Revelator io24 Serial Number. You can find your serial number on the bottom of your interface as well as on your Quick Start Guide.
8. Click Register. 9. Click View Product to download your companion software.

1.3 What is in your MyPreSonus account

8

Step 2: Download and Install Universal Control
1. From the Revelator io24 product listing in MyPreSonus, click the "Download Universal Control" button at the top. MyPreSonus will scan your computer and present the correct installer for your operating system.
2. Locate the Universal Control installer in your Downloads folder. Double click to open it. 3. Follow the onscreen instructions to install Universal Control.

See Section 3 for information and use instructions for all the advanced features available in Universal Control.
Step 3: Download and Install Studio One Artist (Optional)
1. From the Revelator io24 product listing in MyPreSonus, locate Studio One Artist from the product listing. Quick links to every digital product that comes with your Revelator io24 will be listed here. Click the "Download Installer" button at the bottom of the Studio One Artist listing. MyPreSonus will scan your computer and present the correct installer for your operating system.

1.3 What is in your MyPreSonus account

9

2. Locate the Studio One installer in your Downloads folder. Double click to open it. l Windows: Launch the Studio One Artist installer and follow the onscreen instructions.
l Mac: Drag the Studio One Artist application into the Applications folder on your Mac hard drive.
3. Locate Studio One in your Applications and launch it. When Studio One is launched for the first time on your computer, it will communicate with your My.PreSonus account and verify your registration. To ensure a seamless authorization process, make sure to download your installer to the computer on which you will be using it, and be sure that your computer is connected to the Internet when you launch the application for the first time.

1.3 What is in your MyPreSonus account

10

Power User Tip: You may be prompted to enter your My.PreSonus user account information. Clicking "Remember Credentials" will allow you to have immediate access to any content you purchase from shop.presonus.com.
Studio One Artist comes bundled with an array of demo and tutorial materials, instruments, loops, and samples. The first time you launch Studio One Artist, you will be prompted to install its companion content. Select the content you wish to add and click "Install." The content will automatically begin to download and install from your My.PreSonus user account.
Power User Tip: To select only a portion of the available content, click on "Show Packages." From here you can customize your content installation.
See Section 8 for a Getting Started guide to help your start recording and mixing in Studio One Artist.
Step 4: Download and Install Studio Magic (Optional)
From the Revelator io24 product listing in MyPreSonus, you will also find a complete list with links to all the Studio Magic products that came with your Revelator io24 registration. Click on the "View More Details" button below any product you'd like to install.

1.3 What is in your MyPreSonus account

11

Studio Magic software is developed by many different manufacturers, so MyPreSonus will send you to their respective websites for download and installation.

1.3 What is in your MyPreSonus account

12

2. Connections and Controls
2.1 Front Panel

Microphone Inputs. Your Revelator io24 interface is equipped with high-quality microphone preamplifiers for use with all types of microphones. The Revelator io24 features XMAX-L solid-state microphone preamps that are optimized for bus power.
Both input channels on your Revelator io24 interface are equipped with combo jacks. This convenient connector accepts either a �-inch or an XLR connector.
Instrument / Line-Level Inputs. The �-inch connectors on Channels 1 and 2 can be used with passive instruments (guitar, bass, etc.) or line-level devices (synthesizers, signal processors, etc.).
Please note: As with any audio input device, plugging in a microphone or an instrument, or turning phantom power on or off, will create a momentary spike in the audio output. Because of this, we highly recommend that you turn down the channel trim before changing connections or turning phantom power on or off. This simple step will add years to life of your audio equipment.
Multipurpose Encoder Knob. This is a lot more than a simple volume knob! It's also a button, and can be used to control many features of your Revelator io24:
l From the Home screen, press it to cycle through Headphone volume, Main volume, and Monitor Blend. Rotate to edit the selected option.
l From the Channel screen, press to cycle through +48v, Gain, and High-pass filter options. Rotate to edit the selected option.

2. Connections and Controls

13

2.2 The Screen
The screen displays metering, preset selection, and other important information.
The following information is displayed on Revelator io24's Home screen. This is the default screen you'll see when you first use Revelator io24.
1. Input Meters. These meters indicate the input level of the analog inputs on your Revelator io24. The red Clip indicator will light when your input signal reaches -0.5 dBFS. At this level, the signal will begin to overload the analog-to-digital converters and exhibit signs of clipping. Use the gain controls to keep the signal below this level.
2. Output Meters. These meters indicate the signal level received from the first two driver returns (Main
Left/Right). These meters display the signal level before the main output level control. 3. Output Volume/Blend. This indicates output volume of the currently-selected output (Headphones
or Mains) just like a volume knob--as well as Monitor Blend. 4. Encoder status. Lets you know if the Encoder Knob is controlling Headphone output level, Main out-
put level, or monitor Blend (direct vs. hardware.) 5. USB Status indicator. Confirms that Revelator io24 is connected via USB and functioning normally. 6. Preset indicators. These lights indicate the preset selection of both channels. If presets are
bypassed, both will be dark. 7. Input Clip indicator. Lights red when the incoming signal is too loud for the converter, causing dis-
tortion. 8. Output Clip indicator. Lights red when the outgoing signal is too loud. 9. Stereo link indicator. This icon informs you that Channels 1 and 2 are configured for use as a single
stereo channel for use with stereo instruments like keyboards. This feature can be activated in Universal Control, or by pressing both channel buttons on Revelator io24 simultaneously. 10. +48v indicator. Informs you if +48v power has been activated--required for most condenser microphones.
WARNING: Phantom power is only required for condenser microphones and can severely damage some dynamic mics, especially ribbon mics. Therefore, switch phantom power off when it is not required. Consult the user documentation that came with your microphone before engaging phantom power.
XLR connector wiring for phantom power: Pin 1 = GND Pin 2 = +48V Pin 3 = +48V
The following information is displayed on Revelator io24's Channel screens. Press Channel Select

2.2 The Screen

14

Buttons 1 or 2 to bring it up. Press the Back button to return to the Home screen.
From the Channel screen, the Encoder Knob can be pressed to cycle through the following options:
1. Gain. Rotate the Encoder to turn input Gain up or down. Use this to bring your connected instrumet or microphone signals up or down to suitable recording levels. Avoid aforementioned clipping.
2. High-pass filter 80Hz. Rotate the Encoder to turn
the High-pass filter on and off. This can be used to cut low-end rumble and other unwanted low frequencies from your recordings. 3. +48v Phantom Power. Rotate the Encoder to enable/disable +48v power for attached condenser microphones.
Other information on the Channel screen includes:
4. Input Meter. This meter indicates the input level of the selected channel on your Revelator io24, just like on the Home screen.
5. Gain reduction meter. If you're running any compression or limiting via Revelator io24's DSP (Digital Signal Processing), the amount of gain reduction being applied will be indicated by this blue meter.
6. Preset indicators. These lights indicate the preset selection of the currently-selected channel, including none.
Channel Select Buttons. Press to display information about Input 1 or input 2 on the screen.
Back Button. Returns display on screen to default Home view
Preset Selectors. Cycles through presets for inputs 1 and 2, respectively. Press to cycle through Presets; press and hold to bypass Presets.

2.2 The Screen

15

Mute. Enables/Disables the Main Outs. Has no effect on Headphone Out.
2.3 Back Panel

USB-C Port. Use this port to connect your Revelator io24 to your computer. While the Revelator io24 connects using USB-C, it is fully compatible with USB 2.0 and 3.0 connections. Use the USB-C to A cable that came with your Revelator io24 if your computer has a USB-A connection rather than a USB-C connection. Please note: The Revelator io24 is backward compatible with USB 2.0 and USB 3.0 speed connections. USB 1.1 is not supported.
Kensington Lock. Connect this port to a Kensington lock to prevent theft.
Headphone Output. Connect your headphones here. Level can be controlled from the Home screen using the Encoder.

2.3 Back Panel

16

Main Outs. These are the Main outputs for the Revelator io24. The output level of the Main outputs is controlled by the Main level control on the front of the unit. Playback streams 1 and 2 are routed to these outputs.
MIDI I/O. This is the MIDI input and output connections. MIDI stands for "Musical Instrument Digital Interface." However, MIDI can be used for many things other than instruments and sequencing. The MIDI inputs and outputs allow connection to a variety of MIDIequipped hardware, such as keyboard controllers, and can be used to send and receive MIDI Machine Control and MIDI Time Code. Note: MIDI does not carry audio signals but is frequently used to trigger or control an audio source, such as a virtual instrument or hardware synthesizer. You should ensure that MIDI data is correctly sent and received by the appropriate hardware or software. You may also need to route hardware sound sources' audio to the inputs of your Studio-series interface. Please consult the User's Manual of your MIDI devices for help with MIDI setup and usage.

2.3 Back Panel

17

2.4 Connection Diagram

Standalone controls
While many of the features available for your Revelator io24 can be found in Universal Control, critical controls are available right at your fingertips. Most of these settings can be changed from Universal Control to customize your Revelator io24 to your application and needs.
The most important thing to remember is that the Multipurpose Encoder on your Revelator io24 can be used for nearly everything! From either the Home or Channel screen, pressing the Encoder will cycle through the available options, and rotating it will adjust the parameters.
From the Home screen you can:
l Adjust your Headphone volume l Adjust your Main Out volume l Blend your mix between your input signal and the playback from your computer
And from the Channel screen you can:
l Set your mic level l Toggle +48v phantom power l Toggle the 80Hz High-pass filter

2.4 Connection Diagram

18

2.5 Setting the Microphone Level
To set your Revelator io24's input level, press the Channel button for the Channel you would like to use. Next, press the encoder to cycle through the available options. A yellow underline will indicate the currently-selected option. Once you've selected the Gain setting--it's shown below the Channel indicator number and measured in dB (decibels)--turn the Encoder to set the desired gain level.
Power User Tip: If your input level is too loud, the clip indicator will display in red above the input level meter. This means that your input signal is clipping, and will begin to sound distorted. If your input signal clips, it will overload the analog-to-digital converters and cause digital distortion. Digital distortion sounds terrible, and cannot be undone if recorded. Because of this, it's important to keep your eye on this indicator while you're setting your levels. Check out Section 9 for other recording tips.

2.5 Setting the Microphone Level

19

2.6 Setting Main Output level
By default, the Encoder knob on your Revelator io24 controls the output level of your Main Outputs--the outputs you have your speakers connected to. From the home screen, press the Encoder repeatedly until the speaker icon appears below the Volume indicator. Then rotate the Encoder to set the desired Main output level.
2.7 Setting Headphone level
From the home screen, press the Encoder repeatedly until the headphone icon appears below the Volume indicator. Then rotate the Encoder to set the desired Headphone output level.

2.6 Setting Main Output level

20

2.8 Setting Monitor blend

Revelator io24 provides an easy way to create a blend between your input signal and the playback from your computer. This lets you listen to your performance in real-time without any latency (delay).
From the home screen, press the Encoder repeatedly until the XLR/speaker icon appears below the Volume indicator. Then rotate the Encoder to set the desired monitor Blend balance.
Turning the knob to the left will increase the level of the input signal relative to the playback from your computer. Turning it to the right will increase the level of the playback from your computer relative to the input signal.

Power User Tip: Universal Control lets you create a custom mix between your input signals, main computer playback, and both stereo loopback audio channels. So when you're ready to dial in your headphone mix, go to
Section 6 to learn more!

Selecting Presets

EQ and compression are the secret behind the professional broadcast studio sound we all know so well. Your Revelator io24 has you covered with 8 easy-to-use, professionally crafted processing and effects presets. These presets are designed to give you great-sounding results with no audio engineering experience required!

The first two presets can be accessed right from the Preset buttons on your Revelator io24. To cycle through them, press the Channel 1 or Channel 2 Preset buttons repeatedly. The default Presets for Channel 1 are Broadcast and Vocal. Channel 2's default presets are Broadcast and Acoustic Guitar.

When Channels 1 and 2 are linked for stereo operation, available factory presets include several options optimized for stereo recordings, including: Stereo Acoustic, Stereo Piano, Stereo DJ, and more!

2.8 Setting Monitor blend

21

Power User Tip: But wait! There's more! No really, there are a lot more. Open up Universal Control to access the other presets. You'll also find an additional 12 preset slots (6 per channel) to create your own. You can choose any two of these 12 total presets to be accessible directly from the Preset buttons on your Revelator io24. See Section 4.1 for information on creating and storing presets.
By default, the sound you hear in your headphones will be the sound that is recorded. If you'd like to use presets for monitoring purposes only, you can open up Universal Control and change that setting. See Section 6 to learn how. To bypass the presets, just press and hold the Preset button for the desired Channel. The Preset indicators on Revelator io24's screen will go dark.
Power User Tip: Bypass the presets when you want a clean sound with no effects--great for processing your recording later, or when you want to monitor through plug-ins inside your favorite recording application.
For more on presets, check out Section 4.

2.8 Setting Monitor blend

22

3. Universal Control
The Revelator io24 is so much more than a great-sounding USB interface--and the secret to its advanced features and mixing capability is unlocked with Universal Control.
Before proceeding, please make sure you have followed the instructions in Section 1.3.2 and have downloaded and installed Universal Control.
3.1 The Launch Window
Get ready for lift off! When Universal Control is launched, you will see the Launch window. From this window, you can manage all the driver settings for your Revelator io24.

Sample Rate. Changes the sample rate. You can set the sample rate to 44.1, 48, 88.2, or 96 kHz. (With Multi Mode on macOS, the sample rate is limited to 44.1 and 48 kHz.) A higher sample rate will increase the fidelity of the recording, but will also increase the file size and the amount of system resources necessary to process the audio.
Power User Tip: For most applications, leaving this setting on 48 kHz will yield the best results with the least amount of hassle.
Block Size (Windows only). Sets the buffer size. From this menu, you can set the buffer size from 64 to 8,192 samples. Lowering the buffer size will lower latency, which is the amount of time it takes for your audio to go from Revelator io24 to the computer and back to your ears; however, this will also increase performance demands on your computer. In general, you will want to set the buffer size as low as your

3. Universal Control

23

system can safely support. If you begin to hear pops, clicks, or distortion in your audio path, try raising the buffer size. When adjusting the block size, the Safe mode will automatically change to provide the best performance.
Power User Tip: Your Revelator io24 features built-in zero-latency monitoring so you can leave your Block Size high and the performance demands on your computer low. In general, you can use the default block size, but if you're using an older computer that is having trouble keeping up, go ahead and raise this setting. Experiment to find what works best for you!
Device Mode (macOS only). By default, your Revelator io24 presents itself as a single audio interface with 6 inputs and 6 outputs. But when you're ready to use the loopback audio streams to record or route audio to multiple applications at the same time (like the output of a Skype call to the audio input of your Facebook Live stream), that's where Multi Mode comes in. In this mode, your Revelator io24 will show up as 3 different devices on your computer: Revelator IO 24, Revelator IO24 Virtual A, and Revelator IO 24 Virtual B. Each of these devices has 2 inputs and 2 outputs. This is great for applications like Skype that only allow you to use the first two inputs and outputs of any audio interface. PreSonus recommends that you use Multi mode for the best experience. Note that in Multi mode, sample rate options are limited to 44.1 kHz or 48 kHz. For more information on how loopback audio works and how to use it for your podcasts, streams, and more, see Section 6.
Power User Tip (for Windows Users): On Windows, is always in Single Mode. If you are using WDM for applications like Skype, your Web Browser, etc., look for the Revelator IO 24 name in respective applications' audio setup menus. If you are using ASIO for applications like Studio One and other DAWs, look for "PreSonus DSP USB" in respective applications' audio setup menus.

3.1 The Launch Window

24

3.2 Launch Window Menu Items
l File Menu. Manages devices connected to Universal Control.

l Show All Devices. Launches all control windows for all supported devices connected to your computer.
l Close All Devices. Closes all open control windows. l Sign Out.Signs out of your My.PreSonus user account. l Check for Updates Connects to your My.PreSonus user account to check for updates for Universal
Control.
l Transfers. Displays recent downloads from your My.PreSonus user account. l About Universal Control. Displays version and build date information. l Quit. Quits the Universal Control application and all hardware control windows. l Settings Menu. Provide customization options to personalize your Universal Control experience.

3.2 Launch Window Menu Items

25

l Always on Top. Keeps the Universal Control Launch window on top whether it is the currently active application or not.
l Run at Startup. Launches Universal Control automatically when your computer boots. l Preferences. Sets language and appearance options (see below). l Rescan Network. Scans your computer's connections for all supported PreSonus products. l Language. Sets the language (English, French, German, Korean, Simplified Chinese, or Spanish).
Power User Tip: The Launch Window will inform you when a new firmware update is available for yourRevelator io24 --or other PreSonus hardware!
Using Your Revelator io24 with Popular Applications
If you've never used an audio interface, your computer and every application on it are currently sourcing audio from the built-in microphone and routing audio out to the onboard sound card. To use Revelator io24 with any application that can access audio inputs or outputs or both, you must first set up your computer to use Revelator io24 as an audio interface.
This section will take you through some of the most common use cases. If you are using an application not listed in this section, you'll need to check with the documentation that came with it.
Using Revelator io24 for System Audio
The easiest way to make your Revelator io24 seen by just about any application on your computer is to set it up as the default sound source for your computer. Not only will this prompt most video conferencing and streaming applications to look for Revelator io24, it will also set your default Internet browser to use Revelator io24 as well.
Power User Tip: Setting your Revelator io24 as the default sound card for your system will also route music

3.2 Launch Window Menu Items

26

streaming applications like Spotify and Apple Music to the headphone output on your new interface. If you do not want to use your interface this way, it is best to configure Revelator io24 as the audio I/O only for the applications for which you want to use it.
Windows
1. Click on start icon in lower left corner
2. Click on Settings gear icon 3. Click on System

Windows

27

4. Click on Sound
5. Click on "Choose your Output Device" and choose Playback L/R (2-Revelator IO 24) 6. Click on "Choose your input device" and choose Stream Mix A L/R (Revelator IO 24)

Your Revelator io24 is ready to use!

Windows

28

macOS
1. From the Apple Menu, go to System Preferences.
2. Click on Sound.

3. Click on the Outputs tab and select Revelator IO 24 from the device list. This will route all audio from your computer to the Main Outs and Headphones on your Revelator io24.

macOS

29

4. Click on the Inputs tab and select Revelator IO 2 Stream Mix A from the device list. This will set your Revelator io24 interface as the input source for your computer.

Your Revelator io24 is ready to use!

macOS

30

Using Revelator io24 for Skype
1. From the Skype menu, go to "Audio & Video Settings." 2. Under Microphones, select "Revelator IO 24 Stream Mix A." This will route the audio from your Revel-
ator io24 to your Skype call. 3. Under Speakers, select "Revelator IO 24." This will route the audio from your Skype call to the Main
Outs and Headphone output on your Revelator io24. Power User Tip: If you would like to record your Skype call, select Revelator IO 24 Virtual A or Revelator IO 24 Virtual B from the Speaker menu. See Section 6 for more information on using loopback audio.

Using Revelator io24 for Skype

31

Using Revelator io24 for Zoom
l Launch Zoom, and click the cog wheel icon to enter Zoom Preferences.

Using Revelator io24 for Zoom

32

l Click the "Audio" tab.

Windows:
l Set Speaker to Playback L/R (2-Revelator IO 24) l Set Microphone to Stream Mix A L/R (2-Revelator IO 24) l Uncheck the box marked "Automatically adjust microphone volume"

Windows:

33

Power User Tip: When this option is selected, the sliders in Zoom will not have any effect on the Speaker output or Microphone Input gain, as these are controlled by the Revelator io24 itself-- either by the on-board controls and/or through the Universal Control software.
macOS:
l Set Speaker to Revelator IO 24 l Set Microphone to Revelator IO 24 Stream Mix A l Uncheck the box marked "Automatically adjust microphone volume"

macOS:

34

Power User Tip: When this option is selected, the sliders in Zoom will not have any effect on the Speaker output or Microphone Input gain, as these are controlled by the Revelator io24 itself--either by the on-board controls and/or through the Universal Control software. Mac users will see that the sliders do not move and will snap back to the zero position indicating that these controls in Zoom are disabled. Scroll down and click on Advanced.
In Zoom's Advanced Audio settings menu, please ensure Echo Cancellation is set to Auto.
If you need to switch your audio device to Revelator io24 while in a meeting, select the arrow next to the Mute Button to select your audio device list.

macOS users running Revelator io24 in Single Mode will see Revelator IO 24 appear in Zoom's Microphone and Speaker selections as follows:

macOS:

35

All Windows users and Mac users running Revelator io24 in Multi Mode will see Revelator IO 24 appear in a list similar to this:

Using Revelator io24 for Google Meet
Open Google Meet, and click on the vertical dots in the lower right corner of the Google Meet window. In the pop-up menu, choose "Settings" by the cog icon.

Using Revelator io24 for Google Meet

36

Google Meet's Audio menu will be highlighted by default. If Revelator io24 is not already selected, click the down arrow under Microphone and Speakers and click on "Revelator IO 24." Mac Users running Revelator io24 in Single Mode will see one instance of Revelator IO 24 shown as follows:
Windows Users and Mac Users running Revelator io24 in Multi Mode will see multiple instances of Revelator IO 24. This is normal. Choose "Revelator IO 24 Stream Mix A" for your microphone, and "Revelator IO 24" for your speakers.

Using Revelator io24 for Google Meet

37

Power User Tip: Google Meet will switch audio devices automatically to the last device connected to your system. There is a chance that the next time you open Google Meet that it may default to a different audio device without notifying you. Be sure to check your audio settings to make sure Revelator io24 is selected. PreSonus has no control over how this device selection works.
Using Revelator io24 for OBS
1. Click on Settings under "Controls"
2. Click "Audio."Under Mic/Auxiliary Audio, select Revelator IO 24.

Using Revelator io24 for OBS

38

3. If you would like to source the audio for other applications, you can set Mic/Auxiliary Audio 2 and 3 to Revelator IO 24 Virtual A and B respectively. Please note, you must route the output for those applications to the same device. For example, if you would like the audio output from your Skype call to be available on Auxiliary Audio 2, you would set "Revelator IO 24 Stream Mix A" as both the Speaker output for Skype and the input source for Auxiliary Audio 2. Please see Section 6 for more information.
4. Under Advanced, set the Monitoring Device to Revelator IO 24. This will route the output audio from OBS to the Main Outs and Headphone Outputs on Revelator io24.

5. Click Apply. 6. Click OK. Your Revelator io24 is now set-up for OBS!
3.3 Using Revelator io24 with iOS/iPadOS devices
Revelator io24 works when connected directly to iOS/iPadOS devices like iPads, though you should be

3.3 Using Revelator io24 with iOS/iPadOS devices

39

aware of the following:
When connected to iPad Pro tablets with USB-C ports, Revelator io24 will function as intended without additional power or direct connect. However, there's no way to charge the iPad while Revelator io24 is connected.
All other iOS devices with Lightning connectors will require the use of the Apple Lightning to USB 3 Camera Adapter which features a pass-through for a power cable.
Revelator io24 will not work when connected directly to an iPhone, as it requires additional power.
Note: You must use the Apple Lightning to USB 3 Camera Adapter, not the Lightning to USB cable.

3.4 Using Revelator io24 with Android devices
Revelator io24 works great when connected directly to Android devices. If you find your Android device doesn't provide enough power, an externally-powered USB hub can be connected to your Android device to provide additional power to your Revelator io24.

3.4 Using Revelator io24 with Android devices

40

3.5 Using Revelator io24 on Chromebook
While Chromebooks are compatible with Revelator io24, there is no way to run Universal Control for advanced editing of the settings or effects presets beyond what is directly accessible on the interface itself. That said, Audio setup in Google Chromebooks is very simple. 1. After connecting the Revelator io24 to your Chromebook, select the taskbar menu in the lower right
corner (by the clock) to bring up the system menu.
2. Select the greater than symbol (>) to the right of the volume slider to enter Audio Settings and select your audio device. The green circle with the check mark indicates your preferred device. If Revelator io24 is not already selected, select it here for both Output and Input.

3.5 Using Revelator io24 on Chromebook

41

Using Revelator io24 with Zoom on Chromebook
You can use Revelator io24 on a Chromebook to conduct Zoom meetings.
Chrome does not install an application for Zoom like it does on macOS or Windows. Instead, on Chromebook, Zoom installs a widget for the Chrome browser, through which you can select your audio device and toggle some advanced audio settings.
l Launch Zoom and start a Zoom meeting. l Once you are in a Zoom meeting, you can change your audio device by selecting the up arrow next to
the microphone icon in the lower left corner of the screen.

l Select Revelator io24 as your Microphone and Speaker. l Click on Audio Settings to access the Advanced options menu. l Ensure that the box labeled "Automatically adjust microphone volume" is not checked.

l You can adjust both Input gain and speaker playback volume on the Revelator io24 manually. There are no other advanced menu options as found in the Mac / Windows versions of Zoom.
Using Revelator io24 with Google Meet on Chromebook
Revelator io24 will work with Google Chromebook for Google Meet. l Open Google Meet and start a meeting.
Once you're in a Google Meeting, select the vertical dots in the lower right corner of your Google

Using Revelator io24 with Zoom on Chromebook

42

Meet window to open the Options menu. l Click on the Settings Cog icon.
Google Meet's Audio menu will be highlighted by default. If Revelator io24 is not already selected, click the down arrow under Microphone and Speakers and click on "Revelator IO 24: USB Audio #1;1,1."

Power User Tip:Google Meet will automatically switch to the last audio device connected to your system. There is a chance that the next time you open Google Meet that it may choose a different audio device without notifying you. Be sure to check your audio settings to make sure Revelator io24 is selected. PreSonus has no control over how this device selection works.
.

Using Revelator io24 with Google Meet on Chromebook

43

4. Presets and Scenes
4.1 Preset Management
Your Revelator io24 can access 2 presets using the Preset button... but there are 6 more presets created by PreSonus for you to enjoy--plus another 6 preset slots for you to create custom presets. These presets are all available from Universal Control.
To view the advanced features, click on Revelator io24 from the Device List in the Universal Control launch window.

In the upper left corner, you will see the Preset Manager. Let's take a quick tour:

4. Presets and Scenes

44

1. Hot Key. This preset slot lets you store a setting to use on the fly. It overrides the current presets and must be toggled off before you can use the other presets again. This is great when you want to throw a quick effect on your voice.
1. Note that the Hot Key works only with whichever channel Voice FX are assigned to--default is Channel 1.
2. Preset Slots 1-2. This corresponds to the two Preset slots on your Revelator io24. These are the presets that are available from the front panel Preset buttons. You can choose to keep the factory presets, or change them as you see fit.
3. Save Preset. Click on this button to save a preset to one of the 6 user slots. Rename it, if you like. 4. Preset List. Click on the Preset name to view the Preset dropdown menu. This will let you view every
Preset available and quickly select the one you want.
5. Preset Selection Knob. Use your mouse's scroll wheel to turn this knob and audition presets in realtime.
4.2 Changing Preset Button Slots
To change one of the presets available fromRevelator io24:

4.2 Changing Preset Button Slots

45

l Click to select the slot you would like to change.
l Select the desired preset using either the Preset selection knob or selecting it from the dropdown menu.
Let's try it!
In our example, we're going to change the "blue" preset from "Broadcast" to "Vintage Channel."

4.2 Changing Preset Button Slots

46

1. From the Preset Slot list, select "Broadcast"

2. Click on the dropdown menu and select "Vintage Channel" from the list.

3. "Vintage Channel" is now the preset stored in this slot.

4.2 Changing Preset Button Slots

47

That's it!
4.3 Storing New Presets
We're going to get into all the Fat Channel settings later (Section 5), but while we're here, let's talk about storing new Presets. To store a new preset to one of the 6 User Slots:

4.3 Storing New Presets

48

1. Click on the Save Preset button.

2. Select the user slot to which you want to store it.

3. Enter the name you'd like to use.

4.3 Storing New Presets

49

4. Click Store.

Done!

4.3 Storing New Presets

50

4.4 Exporting/Importing Presets
Revelator io24 can save two presets per channel on the hardware unit itself. This is useful for times when you want to use Revelator io24 with a device that doesn't run Universal Control--for example, a Chromebook, iPad, or a camera with an audio input.
You can Import and Export Presets from Universal Control to Revelator io24 and vice-versa. This way, you can build a wide inventory of presets to use for many different applications--and always make sure you have them ready for whatever task comes your way.
To Export a new preset to one of the 6 User Slots:
1. Click on the Save Preset button.

2. Select the device preset that you want to Export.

4.4 Exporting/Importing Presets

51

3. Click on the right arrow to Export the Preset. The Preset will appear in the list.
To find where the exported Preset has been stored on your computer, right-click on it and choose Show in Finder (Mac) or Show in Explorer (Windows). Have fun sharing this file with other Revelator io24 users!
To Import a new preset to one of the 6 User Slots:

4.4 Exporting/Importing Presets

52

1. Click on the desired Preset in the Local Presets list. 2. Click on the left arrow to load the Preset into the first available Empty Device Preset slot.

Now, if you'd like that new Preset stored in one of the positions available from the Preset buttons on your Revelator io24, follow the instructions in Section 4.1.1 and customize away!
4.5 Scenes - Save and Recall
Scenes allow you to store all of the Revelator io24's settings for recall at a later time. This is useful for if you have various projects that require specific settings--you won't have to set up every little detail of your Revelator io24 every time you change projects! For example, you might have a podcasting setup with a preset for your frequent guest, and also have a setup you like for recording acoustic guitar.
Use Scenes to quickly jump from one configuration to another without having to adjust multiple settings!
To store a Scene:
1. Set up your Revelator io24 just the way you like it for a particular application before storing the Scene. 2. Click the Scenes menu on the top right of Universal Control.

4.5 Scenes - Save and Recall

53

3. Click Store and name your Scene. Click OK.

To Recall (load) a Scene, simply click the Scene you want from the Scene List and then click Recall.
To delete a Scene, right-click it in the Scene List and choose Delete.
4.6 Sharing Scenes and Presets
Exporting a Scene or Preset creates a Scene or Preset file.
To share Presets and Scenes with your friends, all you need to do is send the desired Scene or Preset file to your friend, either via e-mail or a PreSonus Sphere Workspace.
If someone is kind enough to share a Preset or Scene with you, it can be imported to Universal Control simply by placing the file in the correct folder.
Folder locations for sharing and import are listed below. Note that these folders won't be found on your system if you have not Exported Scenes or Presets of your own.
Windows:
l Scenes are stored in: C:\Users\YOUR_USER_NAME\Documents\PreSonus\Revelator IO\Scene l Presets are stored in: C:\Users\YOUR_USER_NAME\Documents\PreSonus\Revelator IO\Fat
macOS:
l Scenes are stored in: /Users/YOUR_USER_NAME/Documents/PreSonus/Revelator IO/Scene l Presets are stored in: /Users/YOUR_USER_NAME/Documents/PreSonus/Revelator IO/Fat

4.6 Sharing Scenes and Presets

54

5. Fat Channel and Voice Effects
5.1 Fat Channel and Voice Effects
The Fat Channel provides essential signal processing tools to sculpt your sound, as well as Voice FX section to warp, distort, and bounce it around. These are the effects that are stored with a preset. A dedicated Reverb processor is also available, but it is important to note that Reverb is not stored with a Preset. More on Reverb in Section 5.1.7. If you're new to audio processing, the Fat Channel section provides easy-to-use presets for each processor block. This section will go through the controls available as well as provide some useful information on how these processors affect your sound.
If you are an advanced user, more granular control is available for each processor. To view every parameter available, click on the Advanced (...) button. For more information, please refer to Section 7.2.

High Pass Filter (HPF)
Also known as a low-end roll-off filter, the High Pass Filter (HPF) lets you cut all frequencies below a specified point, letting the frequencies above that point pass through unchanged. This filter can be handy when you want to reduce the "boominess" or "muddiness" of a vocal and improve the overall clarity. Note that this is a digital high-pass filter that is independent of the hardware high-pass filter discussed in section 2.1.1
Choose between 40 Hz, 80 Hz, and 160 Hz.

5. Fat Channel and Voice Effects

55

Power User Tip: When looking at frequency ranges in audio, it's important to know that the smaller the number, the lower the frequency is. The 40 Hz and 80 Hz settings can be especially useful in reducing the "rumble" from a nearby road or any background electrical noise or hum.
If you would like more granular control, please see Section 7.2.1 on advanced High Pass Filter settings.
Gate
Noise gating is the process of removing unwanted sounds from your audio by cutting (or attenuating) all signals below a set threshold. The gate will remain "open" as long as the signal is louder than the set threshold. Noise gates were originally designed to help eliminate extraneous noise and unwanted artifacts from a recording, such as hiss, rumble, or transients from other instruments in the room. Since hiss and noise are not as loud as the intended audio source (You!), a properly set gate will only allow the intended sound to pass through; the volume of everything else is lowered. Not only will this strip away unwanted artifacts, it will also add definition and clarity to the desired sound.
Choose between Low, Moderate, and High. Low will provide the least amount of gating, High will provide the most.

5.1 Fat Channel and Voice Effects

56

Ready to build your own gate? See Section 7.2.2 for advanced Noise Gate controls.

Compressor (Comp)
Audio signals have very wide peak-to-average signal-level ratios (sometimes referred to as dynamic range) which is the difference between the loudest level and the softest level. This can create problems when you're setting input levels because when enough gain (or volume) is applied to capture the softest level at its best, one cough, laugh, or excited moment can overload the input, resulting in distortion... and not the cool kind.
A compressor works by limiting the dynamic range of an audio source to make it sound more consistent and even. By setting the maximum level, the compressor makes sure that any audio signal that exceeds that volume is reduced to match it.
Choose between Low, Moderate, High, and De-Ess. Low will provide the least amount of compression, High will provide the most. Compression presets optimized for electric guitar, bass guitar, vocals, and acoustic guitar are also available.

Use the De-Ess setting if you notice a lot of "sibilance" in your speech. Sibilance is the pronounced presence of the "s" or "sh" sound. Depending on your accent and speech pattern, it can be more or less pronounced.
Power User Tip: While it may be charming in casual speech, sibilance can quickly become distracting because it resonates at a higher frequency that can become grating when heard repeatedly. The goal of a de-esser is not

5.1 Fat Channel and Voice Effects

57

to remove the "s" sound entirely, rather, it's intended purpose is to level it out so that it's even with the rest of the consonants. In other words, you'll still sound like you.

For more advanced compression controls and to learn about the different compressor models onboard your Revelator io24, see Section 7.2.3.

Equalizer (EQ)

An equalizer, or EQ, is a filter that allows you to adjust the volume level of a frequency or range of frequencies within an audio signal. In its simplest form, an EQ will let you turn the treble and bass up or down, allowing you to adjust the coloration of your car stereo or your television. In professional audio circles, equalization is a highly sophisticated art that can be used to sculpt the tone of instruments in a mix, counteract anomalies in a room, or just pump up the bass.

Regardless of its application, good equalization is critical to a good sound. When used correctly, an equalizer can provide the impression of nearness or distance, "fatten" or "thin" a sound, and help blend or provide separation between similar sounds in a mix, allowing both to be heard as intended.

Choose between the following preset EQ settings:
l Vocal l Vintage l Bass-Boost l Mid-Boost l Band Pass l Female Vox l Broadcast l Keys l Electric Guitar l Acoustic Guitar l Electric Bass
Power User Tip: The best way to pick the best EQ setting for your voice is to experiment. Everybody's voice is unique and because EQs are entirely dependent on the frequency of the source, your ears are your best tool in finding the right sound for your voice.
Like the Compressor, Revelator io24 offers advanced controls and several EQ models to choose from when you're ready to dive deeper. See Section 7.2.5 for Advanced EQ Controls.

5.1 Fat Channel and Voice Effects

58

Limiter

True to its name, a Limiter sets the upper dynamic range of your signal and prevents the source from exceeding it by "limiting" it to that threshold. If you're thinking that sounds a lot like what we just told you a compressor does, you're catching on! A limiter is different from a compressor in a very critical way: Unlike a compressor, which works gradually to reduce the signal, the limiter prevents virtually any increase in gain at the upper end of the dynamic range. In other words, you can try to get as loud as you want, but the limiter is going to stop that volume spike like a brick wall.
Choose between Low, Moderate, and High. Low will provide the least amount of limiting, High will provide the most.
Ready to dial in a customized Limiter setting? See Section 7.2.6 for advanced Limiter controls.

Voice FX
Need an effect for your Sci-Fi podcast? Want to add a little spookiness to your Halloween stream? Voice FX are here to give you fun, fantastical effects for your audio. Expect crazy echoes, distortions, warbles, robot voices, and more.

5.1 Fat Channel and Voice Effects

59

Don't forget--just because they're called Voice FX, doesn't mean they can only be used on voices... Experiment with different sound sources!
Note: Revelator io24's Voice FX can only be used on one of the two Inputs at a time. You can select Channel 1 or 2 for use with Voice FX from the Settings menu.
Like the rest of the Fat Channel, each Voice Effect has advanced controls. See Section 7.2.7 to find out more.

Reverb
Reverberation--or reverb, as it is more commonly known--is perhaps the most widely-used effect in recording. Natural reverb is created by sound waves reflecting off of a surface or many surfaces. For example, when you walk across the wooden stage in a large hall, thousands of reflections are generated almost instantaneously as the sound waves bounce off the floor, walls, and ceilings. These are known as early reflections, and their pattern provides psycho-acoustic indications as to the nature of the space that you are in, even if you can't see it. As each reflection is then reflected off of more surfaces, the complexity of the sound increases, while the reverb slowly decays.
The reason for the widespread use of reverb in audio recording is fairly self-evident: Human beings don't live in a vacuum. Because our brains receive cues about the nature of the space around us based partially on audio reflections, a sense of space can make an audio recording sound more natural and, therefore, more pleasing.
The Reverb in Revelator io24 is independent of your presets, so you can use the same Reverb setting on any preset you like.

5.1 Fat Channel and Voice Effects

60

To adjust the amount of Reverb you hear in your mix, raise or lower the Reverb Fader in the mixer. See Section 6.2.2 for more information on your Revelator io24 mixer.

l Preset. Choose between Small, Medium, and Large. These presets emulate room size. In general, the bigger the room size, the more reverberant it will be.
l Size. This setting adjusts the length of each reflected sound as well as how often you hear them.
l HPF (High Pass Filter). Like the High Pass Filter in Fat Channel, this setting will cut frequencies in the reverb's output below the threshold you set here.

5.1 Fat Channel and Voice Effects

61

Power User Tip: This is especially helpful for bass-rich sound sources (baritone voice, acoustic guitar) as adding too much reverb in low frequencies can muddy your sound.
l Pre-Delay. Pre-Delay is the time (in milliseconds) between the end of the initial sound and the moment when the first reflections become audible.
Power User Tip: Imagine you're on a stage in a large music hall. You stand on the very edge of the stage and shout "Hello world!" toward the center of the hall. There will be a brief pause before you hear the first noticeable reflections of your voice, because the sound waves can travel much further before encountering a surface and bouncing back. Adjusting the pre-delay parameter on a reverb allows you to change the apparent size of the room without having to change the overall Size. This will give your mix a little more transparency by leaving some space between the original sound and its reverb.
l Reverb (Amount). To change the amount of Reverb affecting Channels 1 and 2, use the Reverb control at the top of either Channel to dial in the amount to taste.

5.1 Fat Channel and Voice Effects

62

6. Mixing and Loopback Audio
Revelator io24 is equipped with a powerful yet easy-to-use mixer that lets you blend your input signals with three stereo audio streams. These can include playback from a recording application like Studio One, the audio from a Skype call, the sounds from your favorite video game, or all three at the same time.
If you're just starting out and only plan on recording your voice, you won't ever need to use the mixer. However, when you're ready to start adding call-in audio to your podcast or creating more elaborate streams, this mixer will solve a myriad of routing problems and headaches.
Revelator io24's Loopback streams will be listed as "Revelator IO 24 Virtual A" and "Revelator IO 24 Virtual B" in software configuration menus.
macOS users, please note: All the mixer descriptions in this section assume that you have enabled Multi Mode. This will provide you with the best user experience. If you haven't enabled Multi Mode, please take a step back to Section 3.1 and do so now.
6.1 What is Loopback Audio?
Loopback audio is the industry term for routing audio from one application to another. Applications that use audio interfaces, like your Revelator io24, are designed to receive audio from one audio device and send audio to one audio device. This means that most applications can only send to and receive from an audio interface... not from other applications.
This can present a challenge in certain situations... but Revelator io24's Loopback mixer is here to save the day. Still wondering why loopback audio is so cool? Here are some great uses:
l Make your Podcast Guests feel like they're right there in the studio with you. Not only can you easily record the audio from your Zoom guest, you can combine your mic signal with audio from Studio One--and send the entire mix to Zoom by selecting one of your Revelator io24's Stream Mix Outputs as the source for Zoom. Your guests hear both your voice and your audio add-ons while you record just their voice!
l Create Professional Screencasts. Most screen-capture applications let you include your mic OR your system audio. With Revelator io24's mixer and virtual loopback streams, you can create a mix of both your mic and your system sound, then use a Revelator io24 Stream Mix Output as the source for your screen-capture application.
l Make a Gameplay Video. Just like with making a screencast, loopback audio makes recording Gameplay audio and your mic at the same time quick and easy. Being able to create two separate mixes for your stream and your chat means you can send music to your stream--but not to your teammates in-game.
6.2 Routing
l The Virtual A and B channels of the mixer represent inputs to the Revelator io24 from host applications, and will be listed as "Revelator io24 Stream Mix A" and "Revelator io24 Stream Mix B" in host software configuration menus. So if, for example, you wanted Skype audio to appear on the Virtual A channel of the mixer, you would choose "Stream Mix A" as the Speakers (Output) in Skype's configuration menu to send audio from Skype to the Revelator io24 mixer.
l The mixer's Stream Mix A and B are mix sends from the Revelator io24 to host applications, and will be listed as "Revelator io24 Stream Mix A" and "Revelator io24 Stream Mix B" in host software configuration menus. So if, for example, you wanted to send Stream Mix A--a mix of your voice and

6. Mixing and Loopback Audio

63

Skype audio to OBS, for example, you would Choose "Stream Mix A" as the Audio Input Capture device in OBS.
6.3 Mixer Controls
6.4 Microphone Channel Controls
1. +48v. Engages/disengages +48v power for use with condenser microphones like the PreSonus PX-1 or M7.
2. Gain. Use this control to set the gain for your connected microphone or instrument. Gain can also be set using the Encoder knob on your Revelator io24.
3. Reverb. Use this control to set the amount of Reverb applied to the signal. Reverb settings can be set up to taste using the Reverb section. See section 5.1.7 for more on Reverb.
4. Pan. This sets the pan position for your signal in every stereo mix. Pan sets the position of the microphone relative to the left and right side of the mix. When the Pan is set to the center position, your microphone will sound equally in both the left and right side of the mix. As you turn it to the right, it will be louder in the right side. As you turn it to the left, it will be louder in the left side.
5. Clip Light. This light will illuminate red when the input signal is too loud and clipping. If your input signal clips, it will overload the Revelator io24's analog-to-digital converters, causing digital distortion. This sounds terrible. If you record a signal with digital distortion, there is no undoing it or fixing it. And because of this, it's important to keep your eye on this indicator while you're setting your levels.
6. Channel Meter. This meter displays the current level of your microphone before the fader level.
7. Gain Reduction Meter. This meter displays the amount of gain reduction being applied to your microphone signal by the gate, compressor and/or limiter.
8. Microphone Channel Fader. Controls the Overall Level of the Microphone Channel in the currently selected mix. 9. Mute. Mutes the signal in every stereo mix. 10. Solo. Solos the signal in every stereo mix. 11. Channel Link. Clicking this links Channels 1 and 2 to act as a single stereo Channel, suitable for stereo instruments like keyboards. 12. Channel Name. Double-clicking on "Channel 1" will let you customize the name of the channel.
6.5 Mixer Channel Controls
Your Revelator io24 mixer has four Channels:

6.3 Mixer Controls

64

1. Playback. This is the output channel for the Revelator io24 Playback Device in each stereo mix. 2. Virtual A. This is the output channel for the Revelator io24 Virtual A Device in each stereo mix. 3. Virtual B. This is the output channel for the Revelator io24 Virtual B Device in each stereo mix. 4. Reverb. This is the output channel for the Reverb in each stereo mix. The higher you set the fader,
the more Reverb you will hear.
Each channel has the same controls:

1. Channel Meter. This meter displays the current level of the channel before the fader (#2) level.

2. Channel Fader. Controls the Overall Level of the Channel in the currently selected mix.

3. Mute. Mutes the Channel in your currently-selected mix. Note that the microphone channel Mute is global and mutes the channel across all mixes.

the channel across the Main Mix mix.

4. Solo. Solos the Channel in your currently-selected mix. Note that the Input channel Solos are global and solos

5. Channel Name. Double-clicking on the default name will let you customize the name of the Channel.

6.6 Main Output Controls and Mix Selection

Revelator io24 gives you very fine, detailed control over the details of the three different mixes that you can send to your Loopback streams and outputs.
l Main. The Main Output Controls affect the physical outputs of your Revelator io24, including Main Outputs, Headphones, etc. Anything you can plug a cable into.
l Stream Mix A. This is the audio mix that will be routed to Stream Mix A (USB 3/4). l Stream Mix B.This is the audio mix that will be routed to Stream Mix B (USB 5/6).

6.6 Main Output Controls and Mix Selection

65

1. Main Out. Master volume control for your Main outputs (your speakers)
2. Phones. Master volume control for your Headphone Output.
3. Blend. Control your direct monitoring signal in relation to your software monitoring signal. Left = more direct, right = more from software.
1. Revelator io24's Mix Selection Controls let you create four unique mixes to send to four different outputs. This is useful if, for example, you have backing music running during your podcast, but don't want to send the backing music to a guest on your show calling over Skype. You can create custom mixes for Main, Steam Mix A or Stream Mix B.
4. Main. Click on this tab to bring up the Main Mix for the Revelator io24 Device.
5. Stream Mix A. Click on this tab to bring up the mix for Stream Mix A.
6. Stream Mix B. Click on this tab to bring up the mix for Stream Mix B.
7. Phones Listen. You can listen to any of the four mixes by clicking on the headphone icon. This will route the selected mix to your headphones instead of the Monitor mix, so you can audition your other mixes.
8. Link. You can quickly copy your Phones mix settings to any other Mix by clicking this Link button.
9. Mono/Stereo. Each mix can toggled between mono and stereo. Use the mono control when routing loopback audio to an application that only accepts one input, or when you wish to monitor in mono.
10. Mix Clip. When this light illuminates, your mix is too loud and triggering the output limiter, which can introduce distortion. You can fix this by lowering the overall output level or by lowering each channel in the mix.
11. Output Fader. Sets the overall output level of the currently selected mix.
12. Mix Meter. Displays the overall level of the current mix.
13. Mute. Mutes the currently selected mix.
14. Mix Name. Each Mix name can be customized by clicking on the default name below the Main output fader.

6.6 Main Output Controls and Mix Selection

66

6.7 Feedback Loops are Bad
While loopback audio and the Revelator io24 mixer makes it really easy to mix and record the sound of one piece of software into another, there is also the potential to send the output of a software application back into itself and create what is known as a "feedback loop."

Whenever you're recording using the Revelator io24 mixer with an application that offers monitoring, like Studio One or OBS, you must either disable monitoring or mute the return channel in your Revelator io24 mixer to avoid creating a feedback loop.
Applications like Skype and Zoom have a "mix minus" feature that removes the input signal from the output signal, so you don't have to worry about this if you're just recording a video chat. This feature is on by default, all the time.

6.7 Feedback Loops are Bad

67

7. Advanced Features and Customization Tools
7.1 Settings Menu

Your Revelator io24 features several customizable features. Press the Settings button in the upper right corner to get started.

1. Reset All. Click this button to reset your Revelator io24 to its factory default state.
2. Fat Channel on USB Stream Outputs. By default, your Revelator io24 will record audio just as you hear it in your headphones, complete with the Fat Channel preset. If you would like to record only the raw unprocessed audio, but still listen to the presets while you record, disable "Fat Channel on USB Stream Outputs."
3. Output Delay. Use an output delay to help sync audio to video if you're experiencing sync issues between your audio and video. Use the drop-down menu to choose the desired Outputs, and the Delay knob to set the amount of delay in milliseconds. (Similar features are sometimes called "lip sync" on some TVs) USB 1/2 = Main USB 3/4 = Virtual A USB 5/6 = Virtual B
4. Preset Button Mode. By default, your Revelator io24 offers two presets via the Preset buttons on the interface itself. If you find yourself only using one, you can simplify this accordingly by clicking here.

7. Advanced Features and Customization Tools

68

When One or Two Preset Button Mode is engaged, you will only see the respective number of presets in the Revelator io24 mixer as well; the unused presets will be greyed out. Note that in single Preset slot mode, the Preset button on Revelator io24 will toggle between the loaded preset and bypass. In two-Preset slot mode, bypass is still achieved by pressing and holding the Preset button on Revelator io24. 5. Channel Mute Sync. With this enabled, clicking Mute on a channel mutes the channel in all outputs: Main, Stream Mix A, and Stream Mix B. 6. Voice Effects. By default, your Revelator io24's Voice FX are only available on Channel 1. Use this control to make them available on Channel 2. Only one channel can use Voice FX.
7.2 Advanced Fat Channel and Voice Effects Controls
To open the advanced Fat Channel and Voice Effects Controls, click on the Fat Channel menu at the top right of Universal Control, or click "Fat Channel."
To edit any of the effects, click on the name of the desired processor from the tabs at the top of the screen. This will bring its controls into focus.

7.2 Advanced Fat Channel and Voice Effects Controls

69

7.3 High Pass Filter
Use this control to set the High-Pass Filter frequency threshold for the selected Channel or Output Bus. The filter's threshold can be set from 24 Hz to 1 kHz. When the threshold is set to its lowest point, the filter is off. The high-pass filter's slope is -12 dB/8va.
Power User Tip: A high-pass filter attenuates all frequencies below the set threshold. Usethe Fat Channel high-pass filter to remove unwanted low frequencies from your source signal, rather than trying to EQ them out.
7.4 Noise Gate

1. On/Off. Turns the Noise Gate on or off in the signal chain.
2. Threshold. Sets the signal level that bisects the signals you wish to keep from the signals you want to attenuate. Signals below this level are attenuated according to the setting of the Range parameter. Signals above this level pass through unaffected.
3. Range. Sets the amount of attenuation applied to a signal when its level falls below the Threshold. Lower settings pull signal level down further, all the way to -, if desired. Higher settings pull the signal down to a lesser extent, de-emphasizing noise and other nuisance signals more subtly (without a

7.3 High Pass Filter

70

"hard" cut-off). Note: Range is disabled when the Expander is engaged. 4. Key Filter. This sets the frequency at which the gate will open. Setting a specific frequency, in addi-
tion to a specific decibel level, provides more sonic shaping.
Power User Tip: A properly set key filter on a gate can greatly improve the overall sound quality of a mix. For example, if you are recording outside, the road noise may be loud enough to open the gate. This is where a key filter can come in handy. By setting the key filter to remove some of those low frequencies, the gate won't be as apt to open for the next passing car.
5. Attack. Sets the time it takes for the gate to "open" when a signal passes the threshold.
Power User Tip: A fast attack rate is crucial for percussive instruments. Slow-rising signals such as vocals and bass guitar require a slower attack; with these signals, a faster attack can cause an audible click. All gates have the ability to click when opening but a properly set gate will never click.
6. Release. Sets the time it takes for the gate to "close" when a signal falls beneath the threshold.
7. Key Listen. Press the button to engage or disengage the Key Listen function. It will illuminate to indicate that the Key Listen is active. When Key Listen is enabled, you will be listening to the frequency that Key Listen is set to.
8. Expander Mode. Press the button or turn the encoder to switch between Gate and Expander functions for this processor.
Power User Tip: Gate release times should typically be set so that the natural decay of the instrument or vocal being gated is not affected. Shorter release times help to clean up the noise in a signal but may cause "chattering" with percussive instruments. Longer release times usually eliminate chattering and should be set by listening carefully for the most natural release of the signal.
7.5 Compressor
As previously mentioned, a compressor is a dynamics processor that reduces the dynamic range of a signal by attenuating it by a set ratio when it exceeds a defined threshold. Your Revelator io24 is equipped with three compressor models from which to choose: Standard, Tube, and FET.
These distinct compressor plug-in models have their own set of controls and behavior:
l Standard Compressor. A clean and full-featured compressor that offers transparent dynamic range reduction.
l Tube Leveling Amplifier. A model of a tube-based optoelectronic compressor, with simple, quick controls and a classic tonal character.
l Class-A FET Leveling Amplifier. A model of a Class-A FET-based compressor, with an aggressive, punchy tonal character.
To change the compressor model, click on the dropdown menu. Note: The compressor will turn off whenever a new model is loaded and must be re-enabled for you to hear its effect on your voice.

7.5 Compressor

71

7.6 Standard Compressor

1. On/Off. Turns the Compressor on or off in the signal chain.
2. Threshold. Sets the level above which the compressor begins to attenuate the signal.
3. Ratio. Sets the relationship between the amount a signal goes above the threshold, and the amount it is attenuated. At a 1-to-1 ratio (often written as 1:1), no compression occurs. At a 4:1 ratio, a signal that passes the threshold by 8 dB is attenuated to within 2 dB of the threshold (dividing by four). The higher the ratio you choose, the more pronounced the compressor effect becomes.
4. Attack. Sets the time it takes for the compressor to begin attenuating a signal, once it passes the threshold.
5. Release. Sets the time it takes for the compressor to stop attenuating a signal once it falls below the

7.6 Standard Compressor

72

threshold. 6. Auto. Press to toggle Auto mode on or off. When Auto mode is active, the Attack and Release
controls become inoperative, and a preprogrammed attack and release curve is used. In this mode, the attack is set to 10 ms, and the release is set to 150 ms. All other compressor parameters can still be adjusted manually. 7. Soft. Press to toggle Soft knee on or off. When set to "on," compression will be applied more gradually over time when the Threshold is reached by the input signal.
Power User Tip: Very short compressor release times can produce a choppy or "jittery" sound, especially when compressing instruments that have a lot of low-frequency components, such as a rich acoustic guitar. Very long release times can result in an over-compressed, or "squashed," sound. All ranges of release can be useful, however, and you should experiment to become familiar with different sonic possibilities.
8. Gain. Sets the amount of "makeup gain" to apply to a signal. Once a signal is compressed, its overall level is often reduced. This gain control lets you bring it back up to the proper level after compression occurs.
9. Key Filter. This sets the frequency at which the compressor will engage. The compressor will still process the entire frequency range, but it is only engaged when the specified frequency is present.
10. Key Listen. Press to listen the signal being used to trigger the compressor, as set with the Key Filter control (including the effects of the high-pass filter). Press again to switch back to the normal channel signal.
7.7 Tube Leveling Amplifier

1. On/Off. Turns the Compressor on or off in the signal chain.
2. Gain. Sets input gain to the compressor. Because this type of compressor operates in a different way than a standard compressor, much of the way that it affects signals is based on the input level. Try different settings to see what suits your needs.
3. Peak Reduction. Sets the amount of peak reduction to apply to the signal. Higher settings result in more gain reduction and more pronounced compression effect.
4. Compressor/Limiter Toggle. The button below toggles the Tube Leveling Amplifier between its compressor and limiter modes. When in compressor mode, it acts with a variable ratio of 1:1-10:1. When in limiter mode, it acts with a variable ratio of 10:1-20:1, more aggressively limiting peaks.
5. Key Filter. This sets the frequency at which the Tube Leveling Amplifier will engage. It will still process the entire frequency range, but it is only engaged when the specified frequency is present.
6. Key Listen. Press to listen to the signal being used to trigger the compressor, as set with the Key

7.7 Tube Leveling Amplifier

73

Filter control (including the effects of the high-pass filter). Press again to switch back to the normal channel signal.
7.8 Class-A FET Compressor
1. On/Off. Turns the Compressor on or off in the signal chain. 2. Input Gain. Sets input gain to the compressor. This setting affects the action of the compressor, so
feel free to try various settings to find the optimal effect for your needs. 3. Output Gain. Sets the amount of "makeup gain" to apply to a signal. Once a signal is compressed, its
overall level is often reduced. This gain control lets you bring it back up to the proper level after compression occurs. 4. Attack. Sets the time it takes for the compressor to begin attenuating a signal once it passes the threshold. 5. Release. Sets the time it takes for the compressor to stop attenuating a signal once it falls below the threshold. 6. Ratio. Sets the Ratio for the compressor. The following Ratios are available: 4:1, 8:1, 12:1, 20:1, or All. 7. Key Filter. This sets the frequency at which the compressor will engage. The compressor will still process the entire frequency range, but it is only engaged when the specified frequency is present. 8. Key Listen. Press to listen to the signal being used to trigger the compressor,as set with the Key Filter control (including the effects of the high-pass filter). Press again to switch back to the normal channel signal.
7.9 Changing the Signal Chain
The Compressor and EQ can be reordered in the signal path. By default, the signal passes through the compressor before passing through the EQ. When reordered, the EQ is placed before the compressor in the signal path.

7.8 Class-A FET Compressor

74

Power User Tip: Placing the compressor before the EQ allows you to make dramatic changes to the EQ settings without needing to alter the compressor setting. However, if you place the EQ before the compressor, you can better control different frequencies, achieving a more natural response.
7.10 Equalizer
As previously mentioned, an EQ (or equalizer) is a tone control that lets you make changes in the tonal balance of a signal. You can boost or cut the level of ranges of frequencies, to make corrective or creative changes to the signal. Like the compressor, your Revelator io24 is equipped with three EQ models from which to choose: Standard, Passive, and Vintage. These distinct EQ models have their own set of controls and behavior: l Standard EQ. A clean and full-featured EQ that offers transparent tone shaping. l Passive Program EQ. A model of a tube-based EQ with simple, quick and a classic tonal character. l Vintage 1970s EQ. A model of a classic solid-state EQ, with simple, musical frequency settings and
a lot of character. To change the EQ model, click on the dropdown menu. Note: The EQ will turn off whenever a new model is loaded and must be re-enabled for you to hear its effect on your voice.
7.11 Standard EQ

7.10 Equalizer

75

1. On/Off. Turns the EQ on or off in the signal chain. 2. Frequency. This control sets the center frequency at which signals are boosted or cut for the cur-
rently selected band. 3. Gain. Sets the amount by which the selected frequency will be boosted or cut. 4. Q. Sets the Q (or width) of the current EQ band. Larger Q values affect a narrower range of fre-
quencies. Lower Q values affect a wider range. 5. Low Shelf On/Off. Enables/disables the low shelf EQ. When the Shelf button is not engaged, the
Low band is parametric. Enabling the Shelf button turns the Low band into a low-shelving EQ that alters, by a fixed amount, a band of low frequencies at and below a user-selected shelving frequency.
Power User Tip: A low shelving EQ is like a bass-control knob on a stereo. In this mode, the Center Frequency control selects the shelving frequency.
6. Low Band Select. Enables/Disables the Low Band and enables the Frequency, Gain, and Q for this band.
7. L-Mid Band Select. Enables/Disables the Low-mid Band and enables the Frequency, Gain, and Q for this band.
8. H-Mid Band Select. Enables/Disables the High-mid Band and enables the Frequency, Gain, and Q for this band.
9. High Band Select. Enables/Disables the High Band and enables the Frequency, Gain, and Q for this band.
10. High Shelf On/Off. Enables/disables the high shelf EQ. When the Shelf button is not engaged, the High band is a parametric EQ. Enabling the Shelf button turns the High band into a high shelving EQ that alters, by a fixed amount, a band of high frequencies at and above a user-selected shelving frequency.
Power User Tip: A high shelving EQ is like a treble-control knob on a stereo. In this mode, the Center Frequency control selects the shelving frequency.
7.12 Passive Program EQ

1. On/Off. Turns the EQ on or off in the signal chain.
2. Low Boost. Sets the level of boost applied around the chosen low frequency. This control interacts nicely with the Low Attenuation control, allowing for boosts in apparent bass energy while keeping overall bass energy within optimal limits.
3. Low Attenuation. Sets the level of attenuation applied around the chosen low frequency. his control

7.12 Passive Program EQ

76

interacts nicely with the Low Boost control, allowing for boosts in apparent bass energy while keeping overall bass energy within optimal limits. 4. Low Frequency Select. Sets the center frequency of the band covered by the Low Boost and Low Attenuation controls. 5. High Bandwidth. Sets the Q (or width) of the effect of the high EQ band. 6. High Boost. Sets the level of boost applied around the chosen high frequency. 7. High Attenuation. Sets the amount of attenuation applied in a shelving fashion to frequencies at and above the chosen high frequency. 8. High Frequency. Sets the center frequency of the high EQ band. 9. Attenuation Select. Sets the frequency at and above which the High Attenuation control attenuates treble content.
7.13 Vintage 1970s EQ
1. EQ On/Off. Enables/disables the EQ globally. Touch to toggle on or off. 2. Low Frequency. Sets the shelving frequency for the Low Band. 3. Low Gain. Sets the Gain for the Low Band. 4. Low-Mid Frequency. Sets the center frequency for the Low-Mid Band. 5. Low-Mid Gain. Sets the Gain for the Low-Mid Band. 6. High-Mid Frequency. Sets the center frequency for the High-Mid Band. 7. High-Mid Gain. Sets the Gain for the High-Mid Band. 8. High Gain. Sets the Gain for the High Band.

7.13 Vintage 1970s EQ

77

7.14 Limiter

This encoder sets the threshold of the limiter for the selected channel or output bus. When the signal's amplitude (level) exceeds the threshold setting, the limiter is engaged. Turning the knob counterclockwise lowers the threshold, so limiting begins at a lower amplitude. The Limiter ratio is :1.

7.15 Voice FX
Your Revelator io24 is equipped with six Voice FX processors that can make your voice sound ethereal, otherworldly, or just plain weird... your choice! This section will go through each effect in detail. Note that while you can use any of these effects with the Fat Channel and Reverb, you can only use one effect at a time. To enable/disable the Voice FX of your choice, use the power button in the Voice tab.
7.16 Doubler
The Doubler will enhance your voice with a natural doubling effect that will add richness and depth with just a hint of reverb.

7.14 Limiter

78

l Lows. Use this control to boost the low-frequency content. l Width. This control adjusts the stereo image. l Wet/Dry. Blends the affected sound with the dry sound of your voice. Set to 100% to only hear the
processed sound. Set to 0% to only head the dry sound.
7.17 Detuner
True to its name, the Detuner will artificially lower your voice.

l Tune. Sets the amount your voice will be lowered.
l Wet/Dry. Blends the affected sound with the dry sound of your voice. Set to 100% to only hear the processed sound. Set to 0% to only head the dry sound.

7.17 Detuner

79

7.18 Vocoder
Think of a vocoder as a "talking synthesizer." Your voice is sent through a filter and essentially removed so that only the synthesized sound after it was modulated by the filter remains. This results in a synthesized sound that pulses to the tempo of your voice with the same tonal characteristics.

l Freq. Sets the frequency of the filter. l Type. Choose between three filter types: Noise, Sawtooth, Rectangle l Wet/Dry. Blends the affected sound with the dry sound of your voice. Set to 100% to only hear the
processed sound. Set to 0% to only head the dry sound.
7.19 Ring Modulator
A Ring Modulator basically takes two separate signals (your voice and an oscillator) and creates a new signal that is made up of the sum and differences of the original sources. All of this is a fancy way of saying: it makes you sound like a robot.

7.18 Vocoder

80

l Dist. Controls the amount of distortion from zero to over-the-top. l Freq. Sets the frequency of the oscillation. l SC Freq. Sets the frequency of the Sub Carrier. l Sub Carrier. You can choose to add a low frequency oscillation to your signal or not by engaging or
disengaging the Sub Carrier. l Wet/Dry. Blends the affected sound with the dry sound of your voice. Set to 100% to only hear the
processed sound. Set to 0% to only head the dry sound.
7.20 Filters
This is a custom filter bank that allows you to create some truly otherworldly effects!

7.20 Filters

81

l Tune: Adjusts the pitch of the affected signal from high to low. l Damping: Adjusts the amount of high-frequency content sent through feedback (4.) in the affected
signal. l Wet/Dry: Blends the affected ("wet") sound with the un-affected, ("dry") sound of your voice. Set to
100% to only hear only the processed sound. Set to 0% to only head the dry sound. l Feedback: Adjusts length of echo effect. l Distortion: Add some grit and edge to the affected sound, like an overdriven guitar ampllifier.
7.21 Delay
A delay essentially creates an echo, although you can often use delays to create more complex timebased effects. The source signal is delayed so that it is heard later than it actually occurred.

l Time. This is the time (in milliseconds) between the source signal and its echo. The simplest delay effect is a single repeat. A short delay between 30 and 100 ms can be used to create slap-back echo, while longer delay times produce a more distant echo.
l Feedback. Variable feedback, or regeneration, produces multiple decaying repeats. Increasing the feedback value increases the number of echoes, as well as the resonance that is created as one echo disappears into another.
l Wet/Dry. Blends the affected sound with the dry sound of your voice. Set to 100% to only hear the processed sound. Set to 0% to only hear the dry sound.

7.21 Delay

82

8. Studio One Artist Quick Start
Whether you are about to record your first album or your fiftieth, Studio One Artist provides you with all of the tools necessary to capture and mix a great performance. Power User Tip: As a valued PreSonus customer, you are eligible for a discount upgrade to Studio One Professional. For more details on the Studio One upgrade program for PreSonus customers, please visit https://shop.presonus.com/products/software/studio-one-prods.
8.1 Installation and Authorization
Once you have installed the drivers for your audio interface and connected it to your computer, you can use the included PreSonus Studio One Artist music-production software to begin recording, mixing, and producing your music. To install Studio One Artist, log into your My PreSonus account and register your interface. Your product key for Studio One Artist will automatically be registered to your My PreSonus account, along with your hardware registration.

8. Studio One Artist Quick Start

83

Downloading and Running the Studio One Installer

To install Studio One Artist, download the Studio One Artist installer from your My PreSonus account to the computer on which you will use it.
l Windows: Launch the Studio One Artist installer and follow the onscreen instructions.
l Mac: Drag the Studio One Artist application into the Applications folder on your Mac hard drive.
Authorizing Studio One
When Studio One is launched for the first time on your computer, it will communicate with your My PreSonus account and verify your registration. To ensure a seamless authorization process, make sure to download your installer to the computer on which you will be using it, and be sure that your computer is connected to the Internet when you launch the application for the first time.
Power User Tip: You may be prompted to enter your My PreSonus user account information. Clicking "Remember Credentials" will allow you to have immediate access to any content you purchase from the PreSonus Marketplace.
Installing Bundled Content for Studio One Artist
Studio One Artist comes bundled with an array of demo and tutorial materials, instruments, loops, and samples. The Studio One Artist bundle includes all that you need to begin producing music.

8.1 Installation and Authorization

84

The first time you launch Studio One Artist, you will be prompted to install its companion content. Select the content you wish to add and click "Install." The content will automatically begin to download and install from your My PreSonus user account.
Power User Tip: To select only a portion of the available content, click on "Show Packages". From here you can customize your content installation.
8.2 Setting Up Studio One Artist
Studio One Artist was designed to work with PreSonus interfaces and provides unique interoperability and simplified setup. When Studio One Artist is launched, by default you will be taken to the Start page. On this page, you will find document-management and device-configuration controls, as well as a customizable artist profile, a news feed, and links to demos and tutorials from PreSonus. If your computer is connected to the Internet, these links will be updated as new tutorials become available on the PreSonus Web site.
Complete information on all aspects of Studio One Artist is available in the Reference Manual PDF located within Studio One. The information in this tutorial covers only the basic aspects of Studio One Artist and is intended to get you set up and recording as quickly as possible.
8.3 Configuring Audio Devices
In the middle of the Start page, you will see the Setup area. Studio One Artist automatically scans your system for all available drivers and selects a driver. By default, it will choose a PreSonus driver if one is available.

8.2 Setting Up Studio One Artist

85

If you do not see your device listed on the Start page when you launch Studio One, click on the Configure Audio Devices link in the Setup area to open the Options window.

In the Options window, click on the Audio Setup tab and select your device driver from the pull-down.
8.4 Configuring MIDI Devices
From the External Devices window in Studio One Artist, you can configure your MIDI keyboard controller, sound modules, and control surfaces. This section will guide you through setting up your MIDI keyboard controller and sound modules. Please consult the Reference Manual located within Studio One for complete setup instructions for other MIDI devices.

8.4 Configuring MIDI Devices

86

If you are using a third-party MIDI interface or USB MIDI-controller keyboard, you must install any required drivers for these devices before beginning this section. Please consult the documentation that came with your MIDI hardware for complete installation instructions. If you do not have any MIDI devices, please skip this section.
Setting up an External MIDI Keyboard Controller from the Start Page
A MIDI keyboard controller is a hardware device that is generally used for playing and controlling other MIDI devices, virtual instruments, and software parameters. In Studio One Artist, these devices are referred to as Keyboards, and they must be configured before they are available for use. In some cases, your MIDI keyboard controller is also used as a tone generator. Studio One Artist views the controller and tone-generation functions as two different devices: a MIDI keyboard controller and a sound module. The MIDI controls (keyboard, knobs, faders, etc.) will be set up as a Keyboard. The sound modules will be set up as an Instrument. You can set up your external MIDI devices from the Setup area in the Start page. Before setting up a new Song for recording, take a moment to configure external devices. Make sure you have connected the MIDI Out of your external MIDI controller to a MIDI In on your PreSonus audio interface (if available) or other MIDI interface. If you are using a USB MIDI controller, connect it to your computer and power it on.
Click on the Configure External Devices link in the Setup area on the Start page to launch the External Devices window.

Setting up an External MIDI Keyboard Controller from the Start Page

87

Click the Add button. This will launch the Add Device window.

From the menu on the left, select your MIDI controller from the list of manufacturers and models. If you do not see your MIDI controller listed, select New Keyboard. At this point, you can customize the name of your keyboard by entering the manufacturer and device names.

Setting up an External MIDI Keyboard Controller from the Start Page

88

l You must specify which MIDI channels will be used to communicate with this keyboard. For most purposes, you should select all MIDI channels. If you are unsure of which MIDI channels to choose, select all 16.
l Studio One allows you to filter out specific control functions. If you would like Studio One to ignore Aftertouch, Pitch Bend, Program Change, or all CC messages, enable filtering for any or all of these messages.
l In the Receive From drop-down menu, select the MIDI interface input from which Studio One Prime will receive MIDI data (that is, the MIDI port to which your keyboard is connected).
l If this is the only keyboard that you will use to control your external synthesizers and virtual instruments, you should check the box next to Default Instrument Input. This will automatically assign your keyboard to control all MIDI devices in Studio One Prime.
l Click "OK." You're all set up!
Power User Tip:In the Send To drop-down menu, select the MIDI interface output from which your Studio One will send MIDI data to your keyboard. If your keyboard controller doesn't need to receive MIDI data from Studio One, you can leave this unselected.
If you have a sound module that you'd like to connect, leave the External Devices window open and proceed to the next part of this section. If not, you can close the window and skip to the next section.
Setting up an External MIDI Sound Module from the Start Page
MIDI instrument controllers (keyboards, MIDI guitars, etc.) send musical information, in the form of MIDI data, to tone modules and virtual instruments, which respond by generating sound as instructed. Tone modules can be standalone sound devices or can be integrated into a MIDI instrument, such as a keyboard synthesizer. Studio One Artist refers to all tone generators as Instruments. Once you have set up your MIDI keyboard controller, take a moment to configure your sound module.
Make sure you have connected the MIDI In of your external sound module to the MIDI Out of your MIDI interface.
In the External Devices window, click the Add button.

Setting up an External MIDI Sound Module from the Start Page

89

Select your device in the menu on the left. If your device is not listed, select New Instrument. At this point you can customize the name of your keyboard by entering the manufacturer and device names.
l Specify which MIDI channels will be used to communicate with this sound module. For most purposes, you should select all MIDI channels. If you are unsure of which MIDI channels to select, we suggest you select all 16.
l In the Send To menu, select the MIDI interface output from which Studio One Prime will send MIDI data to your sound module. Click "OK" and close the External Devices window. You are now ready to start recording in Studio One Prime.
The rest of this Quick Start Guide will go over how to set up a Song and will discuss some general workflow tips for navigating through the Studio One Artist environment.
8.5 Creating a New Song
Now that you've configured your audio and MIDI devices, let's create a new Song. We'll start by setting up your default audio I/O.
From the Start page, select "Create a New Song."

8.5 Creating a New Song

90

In the New Song window, name your Song and choose the directory in which you'd like it saved. You'll notice a list of templates on the left. These templates provide quick setups for a variety of devices and recording situations. The section will describe creating a Song from an empty session.
Power User Tip: If you plan to import loops into your Song, make sure that the Stretch Audio Files to Song Tempo option is selected. This will automatically import loops at the correct tempo.

8.5 Creating a New Song

91

8. Configuring Your I/O
Click on Song | Song Setup to set your sample rate and resolution and configure your audio I/O.
Click on the Audio I/O Setup tab.

8. Configuring Your I/O

92

From the Inputs tab, you can enable the inputs for your Revelator io24, including the Loopback Inputs that you'd like to have available. You can create a mono input using Input 1 of your Revelator io24, or a stereo pair using both inputs as shown here-- plus two Stereo Inputs: one for Stream Mix A L/R and another for Stream Mix B L/R.

Click on the Outputs tabs to enable any or all of the outputs on your Revelator io24. In the lower right corner, you will see the Audition Select menu. This allows you to choose the output from which you will audition audio files prior to importing them into Studio One Artist. In general, you will want this to be the main output bus. You can also create and two moreStereo Outputs; one for Virtual Output A L/R and another for Virtual Output B L/R.

Power User Tip: If you would like this I/O configuration to be the same every time you open Studio One, click the Make Default button

8. Configuring Your I/O

93

8. Creating Audio and Instrument Tracks
In the upper left corner of the Arrange window, you will notice several buttons. The button furthest to the right is the Add Tracks button. Click on this button to open the Add Tracks window.
In the Add Tracks window, you can customize the track name and color, add a preset rack of effects, and set the physical source for the input and output of your audio tracks. Most important, you can select the number and type of tracks you'd like to create. l Audio. Use this track type to record and playback audio files. l Instrument. Use this track to record and playback MIDI data to control external MIDI devices or vir-
tual instrument plug-ins. l Automation. This track type lets you create automated parameter controls for your session. l Folder. This track helps you to manage your session as well as to quickly edit multiple tracks at once. Power User Tip: If you would like to add an audio track for each of the available inputs, go to Track | Add Tracks for All Inputs.

8. Creating Audio and Instrument Tracks

94

Note: Instrument tracks are nearly identical to audio tracks. The Input Source list for Instrument tracks lists available external MIDI devices as well as any virtual instruments that have been added to the Song.
8.1 Recording an Audio Track

To begin recording, create an audio track from the Add Tracks window, set its input to Input 1 on yourRevelator io24, and connect a microphone to the same input.
Select Record Enable on the track. Turn up the Input 1 level on your audio interface while speaking/singing into the microphone. You should see the input meter in Studio One Artist react to the input. Adjust the gain so the input level is near its maximum without clipping (distorting).
You are now ready to start recording. For complete instructions, please consult the Studio One Reference manual located in Help | Studio One Reference Manual.
8.2 Adding Virtual Instruments and Effects
You can add plug-ins and instruments to your Song by dragging-and-dropping them from the browser. You can also drag an effect or group of effects from one channel to another, drag in customized effects chains, and instantly load your favorite virtual-instrument preset without ever scrolling through a menu.
Opening the browser.

In the lower right corner of the Arrange window are three buttons:
l The Edit button opens and closes the audio and MIDI editors. l The Mix button opens and closes the Mixer window.

8.1 Recording an Audio Track

95

l The Browse button opens the browser, which displays all of the available virtual instruments, plug-in effects, audio files, and MIDI files, as well as the pool of audio files loaded into the current session.
Drag-and-Drop Virtual Instruments

To add a virtual instrument to your session, open the browser and click on the Instrument button. Select the instrument or one of its patches from the Instrument browser and drag it into the Arrange view. Studio One Artist will automatically create a new track and load the instrument as the input.
Drag-and-Drop Effects
To add a plug-in effect to a track, click the Effects button in the browser and select the plug-in or one of its presets in the effects browser. Drag-and-drop the selection over the track to which you would like to add the effect.
Drag-and-Drop Audio and MIDI Files

Audio and MIDI files can be quickly located, auditioned, and imported into your Song by dragging them from the file browser into the Arrange view. If you drag the file to an empty space, a new track will be

8.2 Adding Virtual Instruments and Effects

96

created with that file placed at the position to which you dragged it. If you drag the file to an existing track, the file will be placed as a new part of the track.

8.2 Adding Virtual Instruments and Effects

97

9. Resources
9.1 Gain Staging 101: Begin at the Beginning
It may seem counter-intuitive to boost the signal closest to its source and cut it later in the signal path if it is too loud, but this is precisely the best way to get a noise- and feedback-free recording. That said, you don't want to gain it up too much at the beginning either. If you find that you must cut the signal at every component that sits after the input-trim stage to avoid distortion, you've probably set the trim too high. Then, and only then, should you gain it down.
9.2 Step 1: Setting the Microphone Gain
First, plug in your microphone into your desired Channel input and activate +48v if your mic requires it. Put on your headphones and listen.

Turn the Encoder knob clockwise while speaking into the microphone. Watching for the signal/clip indicator to turn red, then back it down until the level indicator is green only.

9. Resources

98

9.3 Step 2: Setting the EQ and Dynamics
After you have set the input gain, you can use your channel EQ to sculpt your source. The more bands your EQ offers, the more control you will have, but you'll also add more potential for improper gain staging, so use with caution. This is also true with compression.
To set the EQ, you will need to adjust both the channel and the main faders to 0.0 dB. (AKA "unity.") This is just for the purposes of dialing in the sound you want. You'll dial in the mix next.
Often, when people are new to using an equalizer, they listen for what is missing from their source signal and try to boost it in. But that's not always the best solution. Sometimes removing the frequencies that are drowning out the ones you want works best.
Dynamics processors can be difficult to work with at first, because they both reduce gain and amplify it. Let's take a look at a compressor for a moment. A compressor works by lowering the dynamic range-- and by extension, the gain--of a signal, but it also gives you a make-up gain control that allows you to get some of that back. If you apply a lot of gain reduction to a signal, then boost it too far with the make-up gain, your sound can get very unwieldy very fast. As with an EQ, only compress a signal as much as you need to (unless you're using it for a creative effect), and only gain it back up as far as you have to for it to cut through your mix.
9.4 Step 3: Setting Your Mix--The Unity Myth
There is an unfortunate rumor that persists in the darker corners of the audio-nerd Internet. It states that all your faders should be set to unity (that bold line in the middle of the fader markings at 0 dB). But if you do this, you will limit the dynamic range of your signals--and not in a good way.
That bold mark next to your faders means just one thing: The channel and output mix level controls are not adding or removing any amplitude (volume) to or from your signal.
Why do you need to know this? For input gain staging and dialing in your EQ and dynamics, of course!
With the channel and the main faders at unity, you can listen to an individual channel unadulterated while you're setting your input gain level and adjusting your EQ and dynamics to sculpt the sound. Once that's done, the fat line in the middle of the channel has largely served its purpose. Are you getting too much of your animated guest caller in your headphones? By all means, go ahead and lower it. Need to give your own channel a little gas to compete? That's what that 10 dB above unity is for.

9.3 Step 2: Setting the EQ and Dynamics

99

Like everything in audio, however, these rules aren't absolute, especially in a live sound situation. If you are gaining up a channel well above unity just for it to be heard in your mix, maybe your other channels are too loud. Try lowering the levels of the rest of your mix.
9.5 Microphone Tips and Tricks
Like any tool, a microphone must be used properly to get the best result. Professional broadcasters or vocalists will tell you that good microphone technique is crucial to getting a good recording. How many times have you listened to a podcast where it sounded like there was a wall between the on-air talent and their microphone? Or the microphone was so close you could hear each breath and every popping `P' sounded like a mini explosion in your headphones?
Proximity to the microphone is the most common issue when anyone begins the process of learning proper mic technique, but other issues, like background noise and improper gain staging, will exacerbate a poorly positioned microphone. Don't worry, we've all been there, and PreSonus has put together this tutorial to help you mitigate the most common mistakes people make when getting started recording their voice with a microphone.

9.6 Pickup Patterns
Microphones are designed with different pickup patterns. A pickup pattern represents the particular areas around the microphone's capsule where it is most sensitive to sound. The most common pattern for vocal and broadcast microphones is called Cardioid, because it's heart-shaped.
9.7 Handling Noise
Holding a microphone too roughly will create problematic handling noise. While this is fine for a stage performance where the sheer volume of the instruments on stage will mask this noise, in an audio recording made from a quiet location, handling noise becomes a distraction from the primary sound source. And in this case, that source is you! Handling noise can be eliminated by mounting your microphone to a stand or boom arm, particulary one with a shock mount.
9.8 How Close is Too Close?
Microphones are designed to pick up sound; that's their job. When folks are first learning to use a microphone, there is a natural tendency to speak too softly or too loudly. This is where monitoring yourself through headphones is especially helpful. As a general rule, if it sounds good in your headphones, it will

9.5 Microphone Tips and Tricks

100

sound good in your recording.
A good starting point is to position your mouth about four inches from the microphone. If you project your voice naturally, you may need to sit a little further back. The good news is that good microphone technique quickly becomes muscle memory once you get the hang of it, so the more you practice, the less awkward it becomes.
9.9 Problematic Pronunciation
Depending on your natural speaking style, additional adjustments may be necessary:
Plosives. Plosives are bursts of air that are picked up by the microphone that sound like a sort of low thump or booming sound when recorded. They can occur with any consonant, but occur most commonly when you say `P' or `B' sounds. The audio industry has battled these natural speech events for so long that there is a specialized hardware tool to combat them: pop filters! A pop filter sits between your mouth and microphone and slows down and disperses these bursts of air, shielding the microphone from picking them up. The other advantage of a pop filter is that it they can be used for maintaining a fixed position in front of your microphone, and are especially useful when recording with a condenser microphone.
Sibilance. Sibilance occurs when you make a consonant sound by directing your breath to the back of your teeth using your tongue. The most common examples of problematic sibilants are `S' and `Z' sounds. Depending on your speech pattern, you may naturally exaggerate these sounds without noticing--and this may be a habit that you wish to alter while you're recording. Luckily, if this is a habit you cannot or do not want to break, you can fix most sibilance issues in post-production as long as you are multi-tracking your podcast using a dynamics effect called a de-esser, which your Revelator io24 happens to have onboard! See Section 5.1.3 for more information. Professional DAW applications, like PreSonus Studio One, are also equipped with a de-esser plug-in especially for this purpose.
Power User Tip: If you are recording a several speakers at once with your Revelator io24, using a de-esser can cause more problems than it solves, because over-using a de-esser or putting one where it is not needed can turn all your `S' sounds to "Th" sounds, and you can easily give someone a lisp they don't have, which they are unlikely to appreciate.
9.10 Putting it All Together
Once you've practiced your microphone placement and technique, do some practice recordings to find out what works for you and what doesn't. Just sit in front of the microphone and talk as you would if you were chatting with a friend. The more natural you feel behind the microphone, the more engaging your performance will be. Letting your natural charisma and charm come across is the best way to engage your audience.

9.9 Problematic Pronunciation

101

9.11 Technical Specifications Specifications
Audio Interface

Type

USB-CTM Compatible USB 2.0

Sample Rates

44.1kHz, 48kHz, 88.2kHz, 96kHz

Bit Depth

24 bit

ADC Converter Dynamic Range

105 dB

DAC Converter Dynamic Range

105 dB

Hardware Controls: Direct Monitor, Mic Gain, Headphone Level, Mute, Preset Select

Software Controls: Mic Gain, Monitor Mix, Preset Management

Onboard DSP

PreSonus StudioLive Fat Channel: High Pass Filter, Noise Gate / Expander, 3 Compressor models, 3 EQ models, and Limiter;

Voice Effects: Doubler, Vocoder, Ring Modulator, Comb Filter, Detuner, Delay, Reverb

Microphone Inputs

Maximum Level

"10 dBu (�0.5 dBu, min gain)"

Gain Range

60 dB

Frequency Response

20 Hz - 20 kHz (+0.1dB/-0.3 dB, unity gain, unwtd)

THD + N

0.005% (1 kHz, -1 dBFS, min gain)

EIN

-126 dBu (A-weighted, 150,

max gain)

9.11 Technical Specifications

102

Input Impedance Phantom Power Instrument Inputs Maximum Level Gain Range Frequency Response THD + N Input Impedance Main Outputs Type Maximum Level Frequency Response THD + N Headphone Output Maximum Power Frequency Response THD + N Impedance Working Range Physical Height
9.11 Technical Specifications

1.4 k "+48 VDC (10 mA total)"
"+10 dBu (min gain) 50 dB 20 Hz � 20 kHz (+0.1dB/-0.3 dB, unity gain, unwtd) 0.005% (1 kHz, min gain) 1M
�" TRS, Female "+10 dBu (1 kHz, unity gain, zbalanced) 20 Hz � 20 kHz (+0.1dB/-0.3 dB, unity gain, unwtd) 0.003% ( 1 kHz, -1 dBFS, unity gain)
30 mW / channel @ 56 20 Hz � 20 kHz (+0.1dB/-0.5 dB, unity gain, unwtd) 0.050 % (1 kHz, 0 dBFS, loaded) 32 to 300
2.5" (63.5mm)
103

Width Depth Weight

6.25" (158.8mm) 6.25" (158.8mm) 2lbs (0.9kg)

9.11 Technical Specifications

104

10. Legal
No part of this document may be reproduced or transmitted in any form or by any means and is protected by U.S. and International copyright laws. Reproduction and distribution of this document without written permission of PreSonus is prohibited. Unless otherwise indicated below, the trademarks, service marks, and logos contained herein (the "Marks") are owned or controlled by PreSonus or licensed to PreSonus. �2021-2021 PreSonus Audio Electronics, Inc. All Rights Reserved. AudioBox USB, Capture, CoActual, EarMix, Eris, FaderPort, FireStudio, MixVerb, Notion, PreSonus, PreSonus AudioBox, QMix, RedLightDist, SampleOne, Sceptre, StudioLive, Temblor, Tricomp, WorxAudio, and the Wave Logo are registered trademarks of PreSonus Audio Electronics, Inc. Studio One is a registered trademark of PreSonus Software Ltd.
ASIO is a trademark and software of Steinberg Media Technologies GmbH. VST is a trademark of Steinberg Media Technologies GmbH. USB Type-C and USB-C are registered trademarks of USB Implementers Forum. Mac, macOS, iOS, and iPadOS are registered trademarks of Apple, Inc., in the U.S. and other countries. Windows is a registered trademark of Microsoft, Inc., in the U.S. and other countries. Other product names mentioned herein may be trademarks of their respective companies. All specifications subject to change without notice... except the recipe, which is a classic.

10. Legal

105

11. Dinner is Served!
Added bonus: PreSonus' previously Top Secret recipe for...
Andouille & German Red Cabbage Po-Boys Ingredients:
l 1 small Onion l 3 Tbsp. fresh Ginger l 1 small head Red Cabbage l 1 tsp Salt l 3 Tbsp. Honey l � cup Red Vinegar l 12 oz Andouille or Bratwurst Sausage sliced lengthwise l � lb. Muenster Cheese l Creole or German Mustard to taste l 1 loaf French Bread
Cooking Instructions:
l Heat 2 tablespoon vegetable oil in large skillet. Add onions and ginger, then cook them for about 3 minutes until onions begin to wilt. Add cabbage, vinegar, and honey, and then cook for about 5 minutes. Add salt to taste and set aside.
l Heat oil in a skillet till hot. Add sausage cut side down till nice and brown, turn and cook for about 5 minutes till thoroughly cooked.
l Slice bread lengthwise, lay a bed of cabbage, then sausage, and cheese on top. Toast under the broiler or in a hot oven till cheese is melted and bread is crisp.
l Spread mustard on bread. Sandwich can then be cut into 2-3 pieces and shared (or not if you're really hungry).
BONUS: Extra cabbage can be used as a condiment with meat, eggs, sandwiches, etc.

11. Dinner is Served!

106

2-channel audio interface for streamers, podcasters, and music creators
Owner's Manual

Part# 70-12000167-A

11. Dinner is Served!

107