Introduction
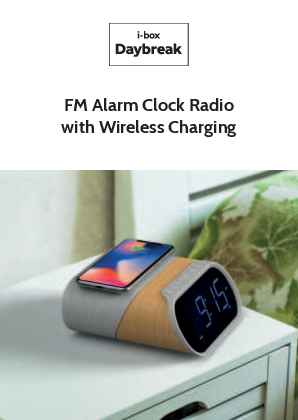
The i-box Daybreak elevates the bedside alarm clock radio, offering features designed to help you wake up feeling refreshed. Key features include 10W fast wireless charging for Qi-enabled devices, plus additional charging via two 2.1A USB ports. Independent dual alarms provide weekday options and a choice of radio, tone, or natural sounds for waking. Enjoy stereo FM radio through 5W speakers and playback of your favorite music via Bluetooth. The Daybreak combines impressive stereo sound with a modern, stylish design, making it the perfect bedside companion.
Visit: www.iboxstyle.com
Important Safety Information
Important - Please read these instructions fully before installing or operating your speaker.
- Keep away from flame sources such as lighted candles.
- Do not expose to dripping or splashed fluids. Objects filled with liquids, such as vases, must not be placed close to the speaker.
- The unit should not be exposed to direct sunlight, very high or low temperature, moisture, vibrations, strong magnetic fields, high frequencies, and dusty environments.
- Do not place the product in enclosed bookcases or racks without proper ventilation. Ventilation should not be impeded by covering the ventilation openings with items, such as newspapers, table-cloths, curtains, etc.
- Never attempt to insert wires, pins, or other such objects into the vents or openings of the unit.
- Do not disassemble or modify the alarm clock; there are no user-serviceable parts.
- If the alarm clock is damaged in any way or malfunctions, do not use. Consult a qualified service engineer.
- Do not use abrasives, benzene, thinner, or other solvents to clean the surface of the unit. To clean, wipe with a clean soft cloth and a mild detergent solution.
- Do not dispose of this product with household waste at the end of its life cycle; hand it over to a collection center for the recycling of electrical and electronic appliances.
Box Contents
- i-box Daybreak Alarm Clock Radio with wireless charging
- DC power adaptor
Controls & Features
Top Panel
Visual description: The top panel features a circular area for wireless charging and several buttons.
- Wireless charging location ?
- Previous song / Down button [◀️]
- Play/Pause button [▶️/⏸️]
- Next song / Up button [▶️]
- Snooze/Sleep/Dimmer button [?/?/?]
- Volume down / Alarm set button [?/?]
- Volume up / Clock set button [?/⏰]
- Standby mode (long press >2s) / Function key (short press) [⚡/⚙️]
Back Panel
Visual description: The back panel contains various connection ports and an antenna.
- DC adapter jack (9V) [?]
- Wire antenna [?]
- Headphone socket (3.5mm) [?]
- AUX In (3.5mm) [?]
- USB Charging port 1 (5V) [?]
- USB Charging port 2 (5V) [?]
Bottom Panel
Visual description: The bottom panel has a door for the backup battery compartment.
- Back up battery compartment door [? compartment]
Backup Battery Note: These batteries (1x AAA) are for backup only and will not power your Daybreak; they save time, date, and alarm settings when mains power is disconnected.
Display Features & Indicators
Visual description: The display shows time, indicators for various modes, and day of the week.
- PM Indicator [PM]
- Alarm 1 Indicator (Radio/Sound) [? 1]
- Time/Frequency/Nature Sound/Mode display
- Alarm 2 Indicator (Beep) [? 2]
- Bluetooth Indicator [?]
- AUX Indicator [AUX]
- Day Indicator (Mon-Sun) [?]
- Wireless charging indicator [?]
- FM Radio Indicator [?]
Getting Started
Powering Up
Before setup, fully unwind the wire antenna (10). Connect the supplied power adapter to an electrical outlet and the power socket (9) on the back panel. The Daybreak will power up in standby mode.
Visual: Diagram showing antenna (10) unwound and power adapter connected to socket (9).
Setting the Clock, Date, and Time (In Standby mode)
Setting 24 Hour / 12 Hour Display:
- Decide between 24-hour (military time) or 12-hour AM/PM display.
- Press the Function key (8) [⚙️], then long press the Clock Set key (7) [⏰] to start. The default is 24-hour.
- Press the Clock Set key (7) [⏰] to confirm 24-hour, or press the Forward key (4) [▶️] then the Clock Set key (7) [⏰] to select 12-hour display.
Visual: Display showing "0:00 24H" and then "12H".
Setting Year:
- Press the Previous/Down key (2) [◀️] and Next/Up key (4) [▶️] to select the year (e.g., 2020).
- Press the Clock Set key (7) [⏰] to confirm.
Visual: Display showing "2000 / 2020".
Setting Month:
- Press the Previous/Down key (2) [◀️] and Next/Up key (4) [▶️] to select the month (e.g., November).
- Press the Clock Set key (7) [⏰] to confirm.
Visual: Display showing "0 00 / 1 1 00".
Setting Day:
- Press the Previous/Down key (2) [◀️] and Next/Up key (4) [▶️] to select the day of the month (e.g., 22nd).
- Press the Clock Set key (7) [⏰] to confirm.
Visual: Display showing "1 1 00 / 1 1 22".
Setting Hour:
- Press the Previous/Down key (2) [◀️] and Next/Up key (4) [▶️] to select the hour (e.g., 12).
- Press the Clock Set key (7) [⏰] to confirm.
Visual: Display showing "0:00 / 12:00".
Setting Minute:
- Press the Previous/Down key (2) [◀️] and Next/Up key (4) [▶️] to select the minutes (e.g., 23).
- Press the Clock Set key (7) [⏰] to confirm.
Visual: Display showing "12:00 / 12:23".
Example: The time and date are set to 12:23 PM, November 22nd, 2020.
Setting Alarm 1 (In Standby mode)
Setting Time:
- Long press the Alarm Set key (6) [?] to enter alarm setting mode.
- Use the Previous/Down key (2) [◀️] and Next/Up key (4) [▶️] to select the hour, then press the Alarm Set key (6) [?] to confirm.
- Use the Previous/Down key (2) [◀️] and Next/Up key (4) [▶️] to select the minutes, then press the Alarm Set key (6) [?] to confirm.
Visual: Display showing "0:00" then "6:00" for hour, and "6:30" for minute.
Setting Sound:
Choose the wake-up sound: electronic alarm beep ('bp'), radio ('FM'), or one of the 4 nature sounds. Use the Next/Up key (4) [▶️] to scroll through options, then press the Alarm Set key (6) [?] to confirm.
- Beep: 'bp' [?]
- Radio: 'FM' (uses the last tuned station) [?]
- Nature Sounds: 'N1', 'N2', 'N3', 'N4' [?]
Visual: Display showing options like "Beep", "Radio 98.2", "Nature Sounds 1".
Setting Days:
Select the days for Alarm 1:
- All Days (1-7): Alarm set for every day of the week.
- Week Days (1-5): Alarm set for Monday to Friday.
- Weekend (6-7): Alarm set for Saturday and Sunday.
Use the Next/Up key (4) [▶️] to scroll through options, then press the Alarm Set key (6) [?] to confirm.
Visual: Display showing "All days 1-7", "Week days 1-5", "Weekend 6-7".
To exit alarm setting mode without setting Alarm 2, press the Alarm Set key (6) [?].
Setting Alarm 2 (In Standby mode)
Follow similar steps as Alarm 1:
Setting Time: Hour, then Minute.
Visual: Display showing "0:00 / 7:00" for hour, "7:15" for minute.
Setting Sound: Beep, Radio, or Nature Sound.
Visual: Display showing "Beep", "Radio 98.2", "Nature Sounds 1".
Setting Days: All Days (1-7), Week Days (1-5), or Weekend (6-7).
Visual: Display showing "All days 1-7", "Week days 1-5", "Weekend 6-7".
Alarm Enable/Disable (In Standby mode)
You can set up to two alarms. Select the desired combination by pressing the Alarm Set key (6) [?] once, twice, three, or four times in standby mode:
- Press x1: Alarm 1 only [? 1]
- Press x2: Alarm 2 only [? 2]
- Press x3: Alarm 1 & 2 [? 1 ? 2]
- Press x4: No Alarm [❌]
Visual: Display examples for each state.
Alarm Stop / Snooze
When an alarm sounds:
- Press the Snooze/Sleep/Dimmer key (5) [?] to delay the alarm by 9 minutes.
- Press the Function key (8) [⚙️] to stop the alarm completely.
Alarms (Beep, FM radio, Nature sound) start quietly and gradually increase in volume over 40 seconds (from 0 to volume 7). Use the Volume +/- keys (7 & 6) [?/?] to adjust the volume of the radio or nature track.
Visual: Display showing "06:45 AM" with Alarm 1 indicator, and volume adjustment example "Vol: 0-7 40s".
Dimmer Control
In Standby, FM, Bluetooth, Nature sound, and AUX IN modes, press the Snooze/Sleep/Dimmer key (5) [?] to adjust the display brightness in steps (from 100% down to Off).
Visual: Display showing brightness levels: 100%, 80%, 60%, 40%, 20%, OFF.
Modes of Operation
Your Daybreak can be used as a speaker for music playback via AUX IN or Bluetooth, as an FM radio, or to play pre-loaded Nature Sound Tracks. Use the Function key (8) [⚙️] to access these functions.
Visual: Icons for AUX, FM, BT, Nature Sounds.
Bluetooth Connection/Operation
- Use the Function key (8) [⚙️] to select Bluetooth mode. Ensure your device is in Bluetooth mode. The Daybreak will search for the last connected device, and the Bluetooth icon [?] will flash.
- If the last connected device is not available, the Daybreak will search for other devices and appear as "i-box Daybreak" in your device's Bluetooth menu.
- Select "i-box Daybreak" on your device. The "BT" icon will appear on the Daybreak's display when the connection is successful.
Visual: Device showing "Bluetooth SCAN On", then "1 Bluetooth device is connected", then "AVAILABLE DEVICES: i-box Daybreak", and finally "PAIRED DEVICES: i-box Daybreak Connected".
Playback Controls:
- Play/Pause: [▶️/⏸️]
- Previous Track: [◀️]
- Next Track: [▶️]
- Volume Up/Down: [?/?]
- Standby (long press >2s): [⚡]
To disconnect your device, press and hold the Play/Pause key (3) [▶️/⏸️] for 2 seconds.
Visual: Display showing "7:28 BT" then "7:28 BT >2s Disconnect".
FM Radio Operation/Presets
Use the Function key (8) [⚙️] to select FM mode.
Tuning:
- Long press the Previous/Down key (2) [◀️] or Next/Up key (4) [▶️] to scan for stations.
- Short press the same keys to fine-tune the frequency.
Visual: Display showing frequency tuning, e.g., "87.5FM" to "88.6FM".
Volume: Use the Volume +/- keys (7 & 6) [?/?] to adjust volume.
Standby: Long press the Function key (8) [⚡] to switch off the radio and go to standby mode.
Saving Presets:
- Long press the Play/Pause key (3) [▶️/⏸️] to enter preset saving mode.
- Press the Previous/Down key (2) [◀️] or Next/Up key (4) [▶️] to scroll through the 10 preset positions (P01-P10).
- Press the Play/Pause key (3) [▶️/⏸️] again to save the current station to the selected position.
Visual: Display showing "88.6FM P01 FM" then "P03 FM 93.0FM".
Playing Presets:
- Short press the Play/Pause key (3) [▶️/⏸️] to enter preset store mode.
- Press the Previous/Down key (2) [◀️] or Next/Up key (4) [▶️] to scroll through the 10 preset positions.
- Press the Play/Pause key (3) [▶️/⏸️] again to play the selected preset.
Visual: Display showing "P01 FM" then "P02 FM 88.6FM".
Sleep Function
Ideal for listening to the radio, Bluetooth audio, or nature sounds while drifting off to sleep. The Daybreak can be set to switch off automatically after a selected time (in minutes).
Play the desired audio source (FM radio, Bluetooth device, or nature sound track). Then, press the Snooze/Sleep/Dimmer key (5) [?] repeatedly to set the sleep timer:
- Press x1: 90 minutes
- Press x2: 60 minutes
- Press x3: 45 minutes
- Press x4: 30 minutes
- Press x5: 15 minutes
- Press x6: Sleep timer OFF
Visual: Display showing "90 FM", then "60 FM", "45 FM", "30 FM", "15 FM", "OFF".
Nature Sound Tracks
Choose from four soothing tracks recorded from nature, ideal for bedtime listening. Press the Function key (8) [⚙️] four times to access this mode:
- N1: Wind chimes [?]
- N2: Birdsong [?]
- N3: Thunderstorm [⛈️]
- N4: Campfire [?]
Visual: Display showing "N1 - 1", "N2 - 2", "N3 - 3", "N4 - 4".
AUX In Mode
Connect any audio device to the 3.5mm AUX IN socket (12) on the back of your Daybreak. Press the Function key (8) [⚙️] once to access this mode.
Select and play audio on the connected device. Playback controls are available on the Daybreak:
- Volume Up/Down: [?/?]
- Standby (long press >2s): [⚡]
Visual: Display showing "AUH AUX".
Headphone Jack
For private listening, connect your headphones to the 3.5mm jack socket (11) on the back panel to listen to any audio output from the Daybreak.
Charging Features
Wireless charging
If your smartphone has Qi wireless charging capability, use the charging panel on the top of the Daybreak to charge it.
Please Note: Wireless charging may interfere with radio reception. It is advised not to listen to FM radio during charging.
- Centre your smartphone on the cross [➕] in the middle of the charging panel (1).
- The wireless charging icon [?] will be displayed on the LCD panel while your phone is charging. Your phone's display will show the battery charge status.
Please Note: Your phone will not charge when the Daybreak is in backup mode (not powered by the adapter).
If problems occur when charging or if charging does not start:
- *Normally, your smartphone should be centered on the charging pad. However, some phones may need to be placed slightly off-center as the built-in wireless receiver may not be centered inside the phone. This varies by brand/model.
- Remove your smartphone from its case if the thickness of the case exceeds 5mm or if it contains metal.
- The charging time varies depending on the battery's charging capacity and its current residual capacity.
- Components may heat up during the charging process and will cool down slowly afterward.
USB charging ports
- You can charge two external devices by connecting them to the USB charging ports (13 & 14) on the back of your Daybreak.
- Your device's battery charge status will usually be shown on its display.
Notes:
- There may be some radio interference while charging.
- Charge devices using only one charging method at a time (wireless or USB).
- Do not attempt to charge the same device using the wireless charging function and one of the USB charging ports (13 or 14) simultaneously.
Backup batteries
Please Note: These batteries are for backup only and will not power your Daybreak; they save the time, date, and alarm settings when mains power is cut or disconnected.
The Daybreak has a backup battery feature. Insert 2x AAA batteries (not supplied) into the battery compartment on the underside of your Daybreak (see page 6). This ensures that time and alarm settings are remembered if the Daybreak is unplugged or experiences a power cut.
Specifications
- Power Adapter Input: 100-240V~50/60Hz
- Power Adapter Output: 9V 3.5A, 31.5W
- Wireless Charging: 10W
- USB Outputs: 2x 5V 2.1A
- Speaker Output: 2x 5W
- FM Frequency Range: 87.5 - 108MHz
- FM Presets: x10
- Backup Battery Requirement: 2x AAA 1.5V
Disclaimer
Firmware and/or hardware components are updated regularly. Therefore, some instructions, specifications, and pictures in this documentation may differ slightly from your particular situation. All items described in this guide are for illustration purposes only and may not apply to your particular situation. No legal right or entitlements may be obtained from the description made in this manual.
Declaration of Conformity
Philex Electronic Ltd. hereby declares that the radio equipment: model i-box Daybreak FM Radio Alarm Clock with Bluetooth Speaker and Wireless Charging for wireless reception in domestic premises is in compliance with the Radio Equipment Directive 2014/53/EU. The full text of the EU declaration of conformity is available at the following internet address: www.philex.com/doc
Technical support
For further help, advice, information, or live chat, visit www.iboxstyle.com or www.philex.com/support.
Waste electrical and electronic products should not be disposed of with household waste. Please recycle where facilities exist. Check with your Local Authority for recycling advice.
Distributed by: Philex Electronic Ltd., Kingfisher Wharf, London Road, Bedford, MK42 0NX, United Kingdom.
Made in China. © Philex Electronic Ltd 2020. v1.4
Visit: www.iboxstyle.com