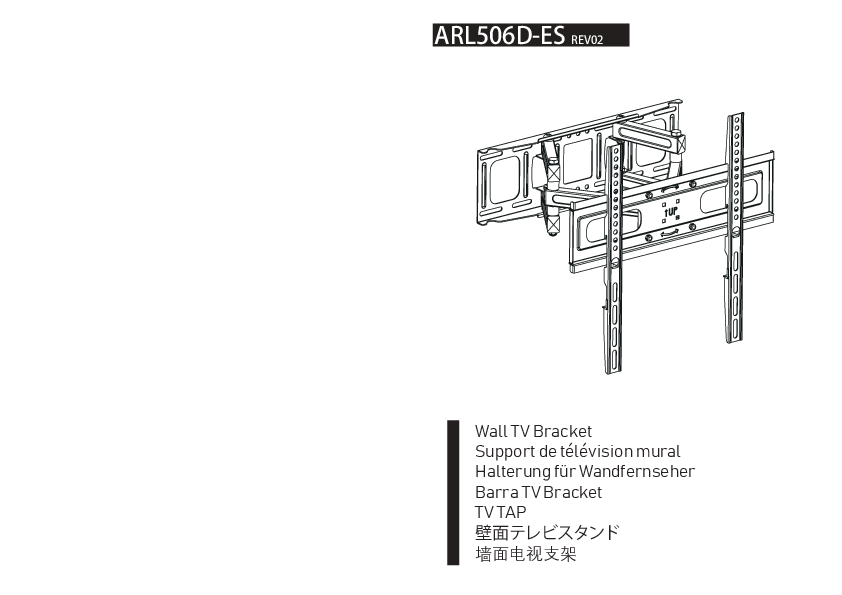
ARL506D-ES REV02
Wall TV Bracket
TV TAP
Important Safeguards
Please read these instructions carefully and retain them for future reference. If the product is transferred to a third party, this manual must also be included.
When using the product, basic safety precautions should always be followed to reduce the risk of injury, including the following:
- This product can be used by children aged 8 years and above, and persons with reduced physical, sensory or mental capabilities or lack of experience and knowledge if they have been given supervision or instruction concerning use of the appliance in a safe way and understand the hazards involved. Children shall not play with the product. Cleaning and user maintenance shall not be made by children without supervision.
- You will have to adjust this product after installation is complete.
- Do not exceed maximum listed weight capacity. Serious injury or property damage may occur.
- Because mounting surface materials can vary widely, it is imperative that you make sure the mounting surface is strong enough to handle the mounted product and equipment.
IMPORTANT: RETAIN FOR FUTURE REFERENCE: READ CAREFULLY.
Before First Use: Check for transport damages.
⚠️ DANGER: Risk of suffocation! Keep all packaging materials away from children. These materials are a potential source of danger, e.g. suffocation.
If you do not understand these instructions or problems related to the installation and use of the product, please refer to the product installation and use video.
Cleaning and Maintenance
Cleaning
- To clean, wipe with a soft, slightly moist cloth.
- Never use corrosive detergents, wire brushes, abrasive scourers, metal or sharp utensils to clean the product.
Maintenance
- Check the components regularly to make sure all screws and bolts are tightened.
- Store in a cool and dry place away from children and pets, ideally in original packaging.
- Avoid any vibrations and shocks.
Installation Instructions
STEP 1: Wall Fixation
STEP 1-A: Wood Stud Installation
This section details mounting the bracket to wood studs. Ensure the wall studs are properly spaced (typically 16 inches apart). Use the provided template to mark drilling holes. Minimum wood stud sizes are specified: nominal 4 inches (actual 3.5 inches) and nominal 2 inches (actual 1.5 inches).
Diagram shows a wall with vertical studs, a template being taped to the wall, and holes being marked for drilling.
STEP 1-B: Solid Concrete Wall Installation
This section details mounting the bracket to solid concrete or brick walls. Use the provided template to mark drilling holes. Ensure the wall plate assembly is securely fastened to the wall with all 4 LAG bolts firmly tightened to prevent unwanted movement. The bolt head must be kept UP during this step. This method is ONLY for concrete and brick walls, NOT for wood stud drywall.
Diagram shows drilling into concrete/brick walls, using wall plugs (W2), and lag bolts (W1) with washers (W3). It illustrates correct and incorrect mounting methods, emphasizing secure fastening.
STEP 2: Installation of TV Fixer
This step involves attaching the TV mounting arms to the TV. It shows two methods: one for 'Planar TV' and one for 'Curved TV'. The diagrams illustrate attaching the arms using screws T1-T6 and T7-T8, and for curved TVs, additional spacers T9-T10 might be used. Ensure cables do not restrict arm movement and check all fittings.
Diagrams show two sets of mounting arms being attached to TVs: one flat TV and one curved TV. Screws and washers are indicated.
STEP 3: Positioning and Components
This section details the components included in the package and how to set the position.
- Contents:
- 1 x Main Bracket Assembly
- 2 x Vertical TV Arms
- 3 x Wall Mounting Template
- U1 x U1 Wrench
- T1 (M4x16mm) x4
- T2 (M4x30mm) x4
- T3 (M6x16mm) x4
- T4 (M6x45mm) x4
- T5 (M8x16mm) x4
- T6 (M8x45mm) x4
- T7 Washers M5 x4
- T8 Washers M6 x4
- T9 Spacers L5mm x4
- T10 Spacers L10mm x4
- W1 Lag Bolts (5/16x2.25in) x4
- W2 Wall Plug x4
- W3 Washers M8 x4
Tools Needed: (Implied standard tools like screwdrivers and wrenches)
Hook Gears: There are two gears for the hook. Choose the right gear according to the individual.
Diagrams show the parts list with quantities and illustrations. It also illustrates two modes for the hook mechanism, indicating different gear selections.
Final Attachment: Put the hooked TV into the extension bar and lock the screw on the hook.
STEP 4: Horizontal Angle Adjustment
This step focuses on adjusting the horizontal angle of the mounted TV. It involves loosening screws, leveling the TV to ±3° horizontally, and then re-tightening the screws to lock the position.
Diagram shows loosening screws on the bracket, using a spirit level to indicate a ±3° horizontal adjustment range, and then locking the screws.
STEP 5: Locking
This step ensures all locking mechanisms are secured. It shows locking the tilt mechanism and securing the main bracket with screws.
Diagram shows a close-up of locking the tilt mechanism and securing the main bracket assembly.
Specifications
- Weight Capacity: 55KG (121Lbs) MAX/Each
- VESA Compatibility: Max: 400x400mm / 15.7x15.7 inches
Scope of Application: This bracket is designed for mounting TVs to walls.