File info: application/pdf · 2 pages · 3.14MB
Setup Guide How to install VTA it - Pro-Ject
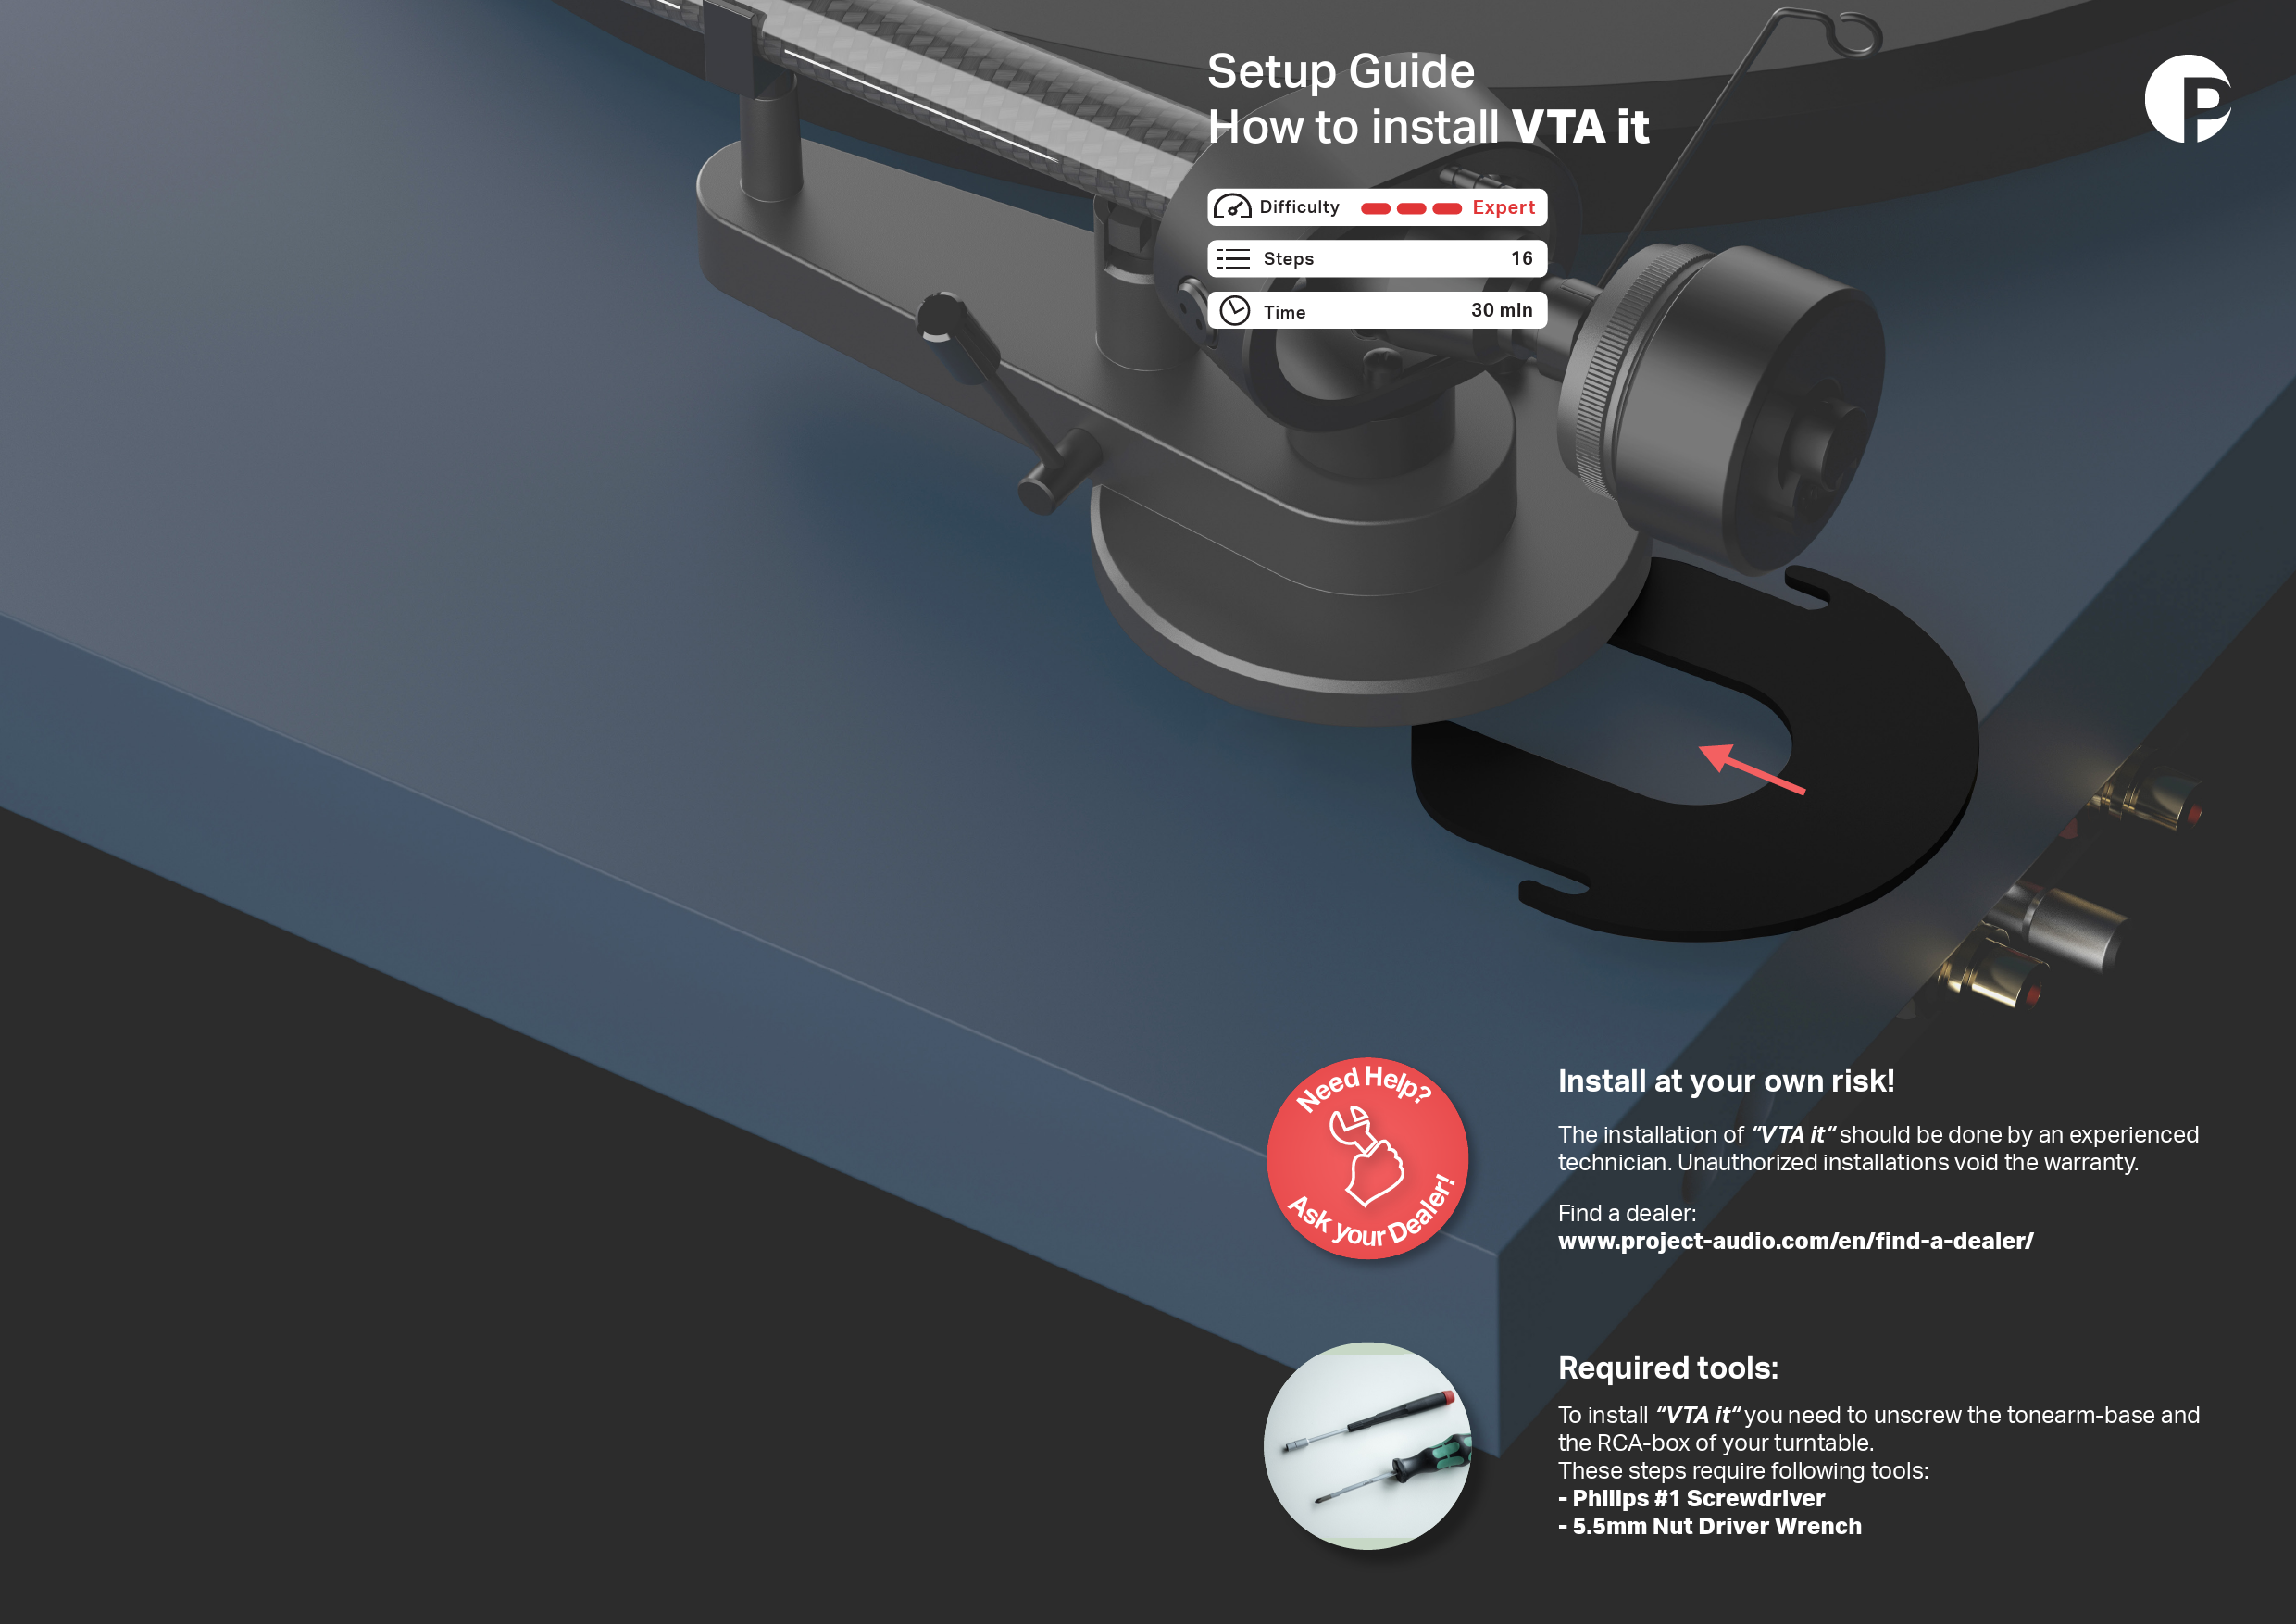
Setup Guide How to install VTA it To install "VTA it" you need to unscrew the tonearm-base and the RCA-box of your turntable. These steps require following tools: - Philips #1 Screwdriver - 5.5mm Nut Driver Wrench
Setup Guide How to install VTA it - Pro-Ject Audio Systems
To install "VTA it" you need to unscrew the tonearm-base and the RCA-box of your turntable. These steps require following tools: - Philips #1 Screwdriver.
1 2 3 4 5 6 7 8 9 10 11 12 13 Remove the counterweight and anti-skating weight from the tonearm. Secure the tonearm using the supplied red wire. Remove the main platter.
Full PDF Document

If the inline viewer fails, it will open the original document in compatibility mode automatically. You can also open the file directly.
Extracted Text
Setup Guide How to install VTA it

Difficulty Steps Time

Expert 16
30 min

N aler!

eed Help? Ask your De

Install at your own risk!
The installation of "VTA it" should be done by an experienced technician. Unauthorized installations void the warranty.
Find a dealer: www.project-audio.com/en/find-a-dealer/
Required tools:
To install "VTA it" you need to unscrew the tonearm-base and the RCA-box of your turntable. These steps require following tools: - Philips #1 Screwdriver - 5.5mm Nut Driver Wrench

1

2

3

4

Remove the counterweight and anti-skating weight from the tonearm. Secure the tonearm using the supplied red wire.

5

6

Remove the main platter.

Bring the turntable in an upright position to have access to both the upper- and underside.

Underside: remove upper screw while holding the tonearm from the other side.

7

8

Loosen the lower screw just a little to be able to rotate the RCA box.
9

10

Carefully rotate the RCA box...

... until the 5.5mm nut is accessible.
11

Using the PH1 and 5.5mm nut wrench, loosen the tonearm (base) by 3mm.
12

Loosen the upper nut by 3mm.
13

Check if the gap is sufficient.
14

Slide in the VTA spacer from behind until the spacer is flush with the arm base.
15

Tighten both nuts. Please make sure to hold the antiskating support with your finger while doing so.
16

Rotate the RCA box back to the initial position.

Tighten both screws.

Reseat main platter.

Remove the red securing wire and re-install counterweight and anti-skating weight.