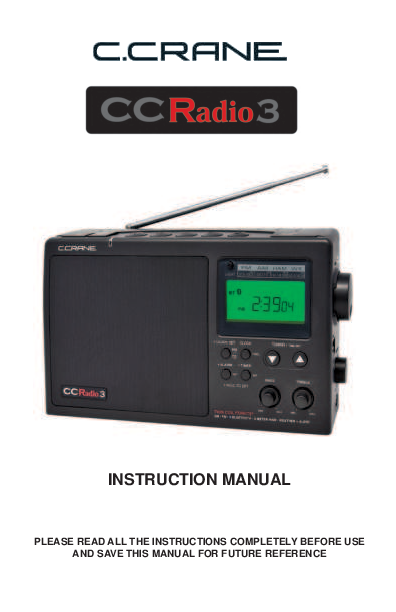
CCRadio 3 Instruction Manual
Please read all instructions completely before use and save this manual for future reference.
About the CCRadio 3
Thank you for purchasing the CCRadio 3. Please read through these instructions thoroughly before using the product.
The CCRadio 3 features many refinements and improvements requested by customers who have used previous versions of C. Crane radios. This radio is built for the highest performance on AM. Traditional FM reception is excellent, bringing in weak stations clearly. The CCRadio 3 also includes Bluetooth®, the NOAA Weather band with alert, and the 2-Meter Ham band.
The CCRadio 3 offers enhanced audio, accurately tuned for realistic human voices, and can also be adjusted for good musical performance. Five memory buttons on top of the radio make changing stations easier than front-mounted buttons.
For many radio listeners, the addition of the 2-Meter VHF Ham band will be their first experience with amateur (ham) radio. This band is valuable for communication, especially during local emergencies when power and cell phone service may be unavailable. Ham operators often use portable equipment as information beacons and communicate directly with agencies like the Red Cross. It is recommended to identify local 2-Meter frequencies used during emergencies and program them into the radio's memory locations.
The CCRadio 3 is designed for longevity, aiming to provide many years of learning, news, and entertainment. For questions, contact C. Crane or visit ccrane.com. If you encounter issues with a CCRadio 3 purchased elsewhere, contacting C. Crane may provide faster assistance.
For your future reference:
- Serial No. (Found inside battery compartment): ____________________
- Date of purchase / Name & address of dealer: _____________________
Unpacking
The box should contain the CCRadio 3, AC power cord, this manual, and a warranty card. If any items are missing or damaged, please contact C. Crane immediately. It is advisable to keep the original box in case the radio requires servicing.
Safety Instructions
Before Use
Please read the IMPORTANT SAFETY INSTRUCTIONS on pages 4 and 5 before use. It is important to read and understand all instructions.
WARNING: TO PREVENT FIRE OR ELECTRIC SHOCK HAZARD, DO NOT EXPOSE THIS PRODUCT TO RAIN OR MOISTURE.
Symbol Explanations:
- The lightning flash and arrowhead within a triangle is a warning sign alerting you of "DANGEROUS VOLTAGE" inside the radio.
- The "CAUTION: RISK OF ELECTRIC SHOCK DO NOT OPEN" symbol indicates that the radio back should not be removed by the user, as there are no user-serviceable parts inside. Refer servicing to qualified personnel.
- The exclamation point within a triangle is a warning sign alerting you of important instructions accompanying this radio.
General Precautions
- Before turning the unit on, set your volume control to a low setting.
- Slowly increase the sound until you can hear it comfortably and clearly without distortion.
- Long-term exposure to loud sounds may cause hearing damage. It is best to avoid high volume levels.
Operating Instructions and Warnings
- Read and understand all safety and operating instructions before the radio is operated.
- Retain these instructions for future reference.
- Heed all warnings on the appliance and in the operating instructions.
- Water and Moisture: Do not use the appliance near water, including bathtubs, washbowls, laundry tubs, kitchen sinks, wet basements, or swimming pools.
- Cleaning: Unplug the receiver from the AC power outlet before cleaning. Use only a dry cloth for cleaning the exterior.
- Placement: Do not place the radio on unstable carts, stands, brackets, or tables, as it may fall and cause serious personal injury or damage.
- Ventilation: Ensure the radio's location does not interfere with its proper ventilation. Avoid placing it on soft surfaces like beds, sofas, or rugs that may block openings. Do not place it in built-in situations like cabinets that reduce airflow.
- Heat: Never place the radio in direct sunlight, unventilated areas, or behind glass (e.g., a car's interior). Keep it away from heat sources like radiators, heat registers, stoves, or other heat-producing appliances.
- Power Cords: Position power cords to avoid being walked on, pinched, or having items placed on them. Pay attention to cords at plugs, receptacles, and where they exit the unit. Unplug by gripping the plug, not the cord. Use only the correct type of power source. Consult your dealer or local power company if unsure about your home's power supply.
- Do not overload wall outlets or extension cords, as this can cause fire or electrical shock. Never insert objects into the receiver through openings, as they may touch dangerous voltage points or short out parts.
- If the radio is left unattended and unused for long periods, unplug it from the wall outlet to prevent damage from lightning or power line surges.
- If the radio is left unattended and unused for long periods, remove the batteries to prevent leakage that could damage furniture or the radio.
- Do not attempt to service the receiver yourself. Removing the cover may expose you to dangerous voltage and will void the warranty. Refer all servicing to authorized service personnel.
- The receiver has a polarized plug (one blade wider than the other) for safety. It fits into the power outlet only one way. If you cannot insert it fully, try reversing the plug. If it still does not fit, contact an electrician to replace the outlet. Do not defeat the plug's safety purpose.
- The appliance should be serviced by qualified personnel when: the power supply cord or plug is damaged; objects have fallen or liquid has spilled into the radio; the radio has been exposed to rain; the radio does not operate normally or shows a marked change in performance; or the radio has been dropped or its enclosure damaged.
- Users should not attempt to service the appliance beyond what is described in the operating instructions. All other servicing should be referred to qualified service personnel. The symbol ⚠️ alerts you to important operation or servicing instructions.
- Antenna installations can be dangerous due to ladder use and potential falls. Antennas can be struck by lightning. C. Crane recommends licensed and insured installation by a qualified person.
- Long-term exposure to loud sounds may cause hearing damage. Avoid high volume levels when using headphones or earbuds, especially for extended periods.
Getting Started
Powering Your Radio
Before powering your radio, ensure you have read the Safety Instructions on pages 3 through 5.
The CCRadio 3 operates on (4) "D" size NiMH or alkaline batteries, or on 120V AC house current using the included power cord. Batteries are optional but necessary to retain timer, clock, and memory settings if the power cord is removed for more than three minutes. Lithium batteries are not recommended.
Rechargeable batteries work well, though the Battery Power Level Indicator may show a lower charge due to lower voltage.
AC Operation
Before plugging in the AC cord, verify your AC voltage is 120Volts/60Hz. If batteries are installed and the AC power cord is used, the batteries will automatically be disconnected.
Note: If the power cord is removed without turning the radio OFF, it will automatically revert to battery power.
Back of Radio: Insert the plug on the end of the supplied power cord securely into the AC power jack on the back of the radio.
Installing the Batteries
- Position the radio face down on a soft surface to protect it.
- Remove the battery compartment cover.
- Insert (4) "D" cell batteries into the compartment, ensuring the negative (-) end is against the spring.
- Replace the battery cover. The radio is now ready to operate.
Battery Replacement: The battery indicator displays battery level for approximately one second when the radio is switched off. After removing dead batteries, you have about three minutes to replace them before clock and memory information is lost (if the radio is not plugged in).
Display Symbols:
- A symbol showing a full battery indicates the batteries are full.
- A symbol showing a low battery indicates the batteries are low.
- A flashing battery symbol indicates the batteries need replacing.
Display Panel
The display panel features various indicators:
- 1) Weather Alert Modes: Indicates the status of weather alert modes.
- 2) Memory Location (1-5): Shows the selected memory preset.
- 3) Key Lock On/Off: Indicates if the key lock function is active.
- 4) Sleep Timer/Snooze Status: Shows the status of the sleep timer or snooze function.
- 5) Battery Symbol: Displays the battery status.
- 6) Battery Power Level Indicator and Signal Strength Meter: Shows battery level and signal strength.
- 7) Squelch Indicator: Indicates when the squelch function is active.
- 8) Timer Active Indicator: Shows when the timer function is active.
- 9) Clock Seconds: Displays the current seconds of the clock.
- 10) Frequency/Clock Display: Shows either the radio frequency or the current time.
- 11) Alarm Status and Type: Indicates if an alarm is set and its type.
- 12) AM/PM Indicator: Shows AM or PM for the time display.
- 13) Indicates Band In Use: Shows the currently selected radio band (AM, FM, VHF, WX).
- 14) AUX IN Indicator: Shows when an auxiliary device is connected.
- 15) Stereo Reception: Indicates if stereo reception is active.
- 16) Bluetooth: Shows the status of the Bluetooth connection.
- 17) Timer On/Off: Indicates if the timer is currently active.
Setting the Clock and Alarm
Setting the Clock
Please read this section carefully before starting. Set the time with the radio OFF. Follow these steps without pausing for more than 15 seconds at a time, or you will need to restart.
- Press and hold the Clock Set Button for two seconds, then release. The hour digit will flash.
- Use the Up/Down Tuning Buttons (/) to select the appropriate hour digit and AM or PM.
- Press the Clock Set Button again, then release. The minutes digits will flash. Use the Up/Down buttons to adjust the minutes.
- Press the Clock Set Button again, then release, to complete the time setting. This also sets the seconds to "00".
Setting the Alarm
The CCRadio 3 offers two alarm modes: waking to the radio or to a tone. The alarm can be set with the radio on or off. If the radio is off, the beep volume is reduced.
To Set the Type of Alarm:
Press and hold the Alarm Button until you hear a beep and see one of these symbols flashing on the display (-ALARM- or -ALARM-), then release.
- To wake with the radio: While "Alarm" is flashing, press and release the Clock Set Button until you see the -ALARM- symbol. When the alarm sounds, the radio will play the last selected station at the previously set volume.
- To wake with a multi-level tone: While "Alarm" is flashing, press and release the Clock Set Button until you see the -ALARM- symbol.
To Shut Off the Alarm Function:
Press and hold the Alarm Button until you hear a short beep and the alarm symbol disappears, then release.
To Set the Alarm Time:
- Press and hold the Alarm Button for two seconds, then release. The hour digit and Alarm symbol will flash.
- Use the Up/Down Tuning Buttons (/) to select the appropriate hour digit and AM or PM.
- Press the Alarm Button again, then release. Use the Up/Down Tuning Buttons to adjust the minutes.
- Press the Alarm Button again, then release, to complete the alarm setting.
Snooze Feature
When the buzzer alarm is sounding, pressing any button except the Power Button will temporarily stop the alarm for five minutes. The display will show small "Zs" and the Alarm symbol (above the bed icon) while in snooze mode. To shut off both the alarm and snooze feature, press the Power Button.
Sleep Timer Feature
The CCRadio 3 is equipped with a Sleep Timer that allows the radio to play for up to 120 minutes before shutting off. Selectable times include 120, 90, 60, 45, 30, and 15 minutes.
Press and hold the Power/Sleep Button until the pictograph of a person in bed and the number "120" are displayed. Holding the button down will cycle through the times. Release the button when the desired time is shown. The person-in-bed pictograph will appear, and the radio will shut off after the set time. To deactivate the Sleep Timer, simply turn the radio off using the Power Button.
Radio Operation
Tuning
The CCRadio 3 features four bands: AM, FM, 2-Meter Ham (VHF), and Weather (WX).
Manual Tuning
- Press the Power Button to turn on the radio.
- Select the band by pressing the AM/FM button or the Bluetooth/2-Meter/Weather Button on the top panel.
- A single press of the Up or Down Tuning Buttons (/) will change the frequency up or down for AM, FM, and Ham (VHF) bands, and the channel up or down for Weather. Each press adjusts frequency by 10 kHz (AM), 100 kHz (FM), or 5 kHz (Ham/VHF).
Scan Tuning
Press and hold the Tuning Up or Down Button (/) for more than 0.5 second. The radio will scan and stop automatically when it finds an active station. Scan Tuning does not work on the weather band and may stop on strong interference. Press and hold again to resume. For 2-Meter Ham scanning details, see page 16.
Rotary Tuning
Rotating the tuning knob changes AM/FM/Ham (VHF) frequency and weather band channel.
Memory Tuning
Five stations can be stored in memory for each of the four bands.
- Tune to the desired station or channel. Wait 5 seconds.
- Press and hold the desired Memory Button (1-5) for two seconds or until a beep is heard. The station or channel is now memorized. The display will show the memory number.
To recall a memorized station, select the correct band and briefly press and release the Memory Button. The radio will tune to the stored station.
Note: The large buttons on top are easy to locate. High-quality switches require a light touch. Control symbols above buttons are used only in Bluetooth mode.
Weather Alert System
The WEATHER ALERT modes can notify you of special weather-related emergencies. During emergencies or hazards, NOAA issues an emergency tone that triggers an audible and/or visual alarm on the radio.
Note: Hazard warnings are not available in all areas.
There are seven standard NOAA weather channels in the US and Canada, receivable up to 40 miles from transmitting stations.
- To listen to NOAA weather channels, turn the radio on, press the Bluetooth/2-Meter/Weather button until "WX" appears on the display. Extend the telescopic whip antenna vertically for clear reception.
- The display shows the weather channel number. Pressing the Tuning Up or Down Buttons (/) cycles through the seven programmed channels. Listen for local weather service broadcasts, which are updated daily. In severe weather emergencies, NOAA updates broadcasts more frequently and issues an alert tone.
The WEATHER ALERT mode allows you to listen to your favorite AM/FM station, Auxiliary or Bluetooth device, or 2-Meter Ham frequencies, or even have the radio off, and still receive an alert signal for special emergencies. There are three active WEATHER ALERT modes.
Notes:
- When activated, WEATHER ALERT consumes power even when the radio is turned off.
- If not using AC power, WEATHER ALERT will drain batteries. If batteries are dead and AC power is off, the WX Alert Alarm will not function.
Setting the Weather Alert
- To enter WEATHER ALERT mode, press and hold the Bluetooth/2-Meter/Weather button for two seconds. You will hear a short beep and see the alert symbol () on the display. When the radio is off, the beep volume is reduced.
- Mode 2 (WEATHER ALERT with NOAA Audio): Press and hold the Bluetooth/2-Meter/Weather button again for two seconds until a long beep. The symbol will be displayed. If the NOAA alert tone is issued, the red light flashes, and the radio switches to Weather Audio automatically.
- Mode 3 (WEATHER ALERT with flashing light and siren): Press and hold the Bluetooth/2-Meter/Weather button again for two seconds until a double beep. The symbol will appear, and the red light near the top of the radio will be continuously lit. If the NOAA alert tone is issued, the red light flashes, and a siren sounds for up to 1 minute. When the siren is active, pressing any button instantly switches the radio to Weather Audio and cancels the siren.
SPECIAL NOTE: If headphones are plugged in during a weather alert, audio to the headphones will be cut off, and the siren will sound through the radio's speaker.
Turning Off the Weather Alert:
Press the Bluetooth/2-Meter/Weather button again for two seconds. The alarm will go off, become inactive, and the ALERT symbol will disappear from the display.
In any active WEATHER ALERT mode, the weather receiver remains on, listening for an emergency tone from NOAA.
You may receive a periodic test tone from NOAA that causes an unexpected alarm. This is a test and usually occurs every Wednesday at noon, or when the agency tests its system. Pressing any button will shut off the alert tone. After an alert, the WEATHER ALERT light and/or siren will stay on for one minute or until turned off by pressing any button.
2-Meter Ham (VHF) Band (144 to 148 MHz)
The 2-Meter Ham Band is used by amateur radio operators for civil defense. It is crucial for emergency coordination after events like hurricanes or earthquakes. For many, the CCRadio 3 will be their first experience with ham radio.
The radio comes with preprogrammed popular frequencies in its five memory locations. These may vary by your location. The original preprogrammed frequencies are:
- 1) 146.520
- 2) 146.760
- 3) 146.880
- 4) 146.940
- 5) 147.000
You can program your own frequencies into memory at any time.
To scan the five memory channels in 2-Meter Ham mode, momentarily press both the Up and Down Tuning Buttons (/) at once. The radio will scan and stop on a voice transmission. Extend the telescopic antenna fully vertically. It is best to set the squelch level before scanning memory stations (see "Setting the Squelch").
Setting the Squelch
Background noise or static is normal on the 2-Meter Ham Band. Setting the squelch above the background noise level silences the radio until a transmission is detected. Set the squelch as low as possible (just before static becomes constant) to hear weak signals. Setting it too high may cause you to miss transmissions.
To adjust the squelch level, press and hold the main Tuning Knob for three seconds until the display changes. Turn the Tuning Knob clockwise from OFF through 12 (increasing squelch) until the radio becomes silent. Squelch operates on the 2-Meter Ham Band only.
Searching for a New Active Frequency
More frequencies may become active than are preprogrammed. You can search the 2-Meter Ham band by pressing and holding the Up or Down Tuning Button (/). You can also start scanning by pressing and releasing the main Tuning Knob. The radio will search the entire band and stop on an active frequency. You may wish to write down active frequencies.
During non-emergency times, you can listen to local ham radio operators. To learn more about becoming a Ham, contact the American Radio Relay League (ARRL) at 888-277-5289 or visit arrl.org for information on testing and locations.
C. Crane salutes all Hams who volunteer for emergency radio operations.
Default Clock/Frequency Setting
On AM and FM bands, the default display shows the frequency for about 5 seconds, then returns to the clock. You can change this to show only the frequency, or toggle between them by pressing the Clock/Freq button.
To change the display to show frequency by default: Turn on the power, press and hold the Clock/Freq button, then quickly press the Memory 1 button until you hear a beep. The frequency will now be displayed unless you press the Clock/Freq button, which will show the clock for about 5 seconds.
Reverse this process to return to the default clock display.
Bluetooth Operation
Bluetooth provides a convenient way to play audio from your phone, tablet, computer, or voice-controlled device through the CCRadio 3's speaker. Bluetooth works wirelessly up to about 50 feet, depending on obstructions.
Setup
Setup is required only once per Bluetooth device; settings are remembered thereafter.
- On the radio, press the Bluetooth/2-Meter/Weather Button several times until "BT" is displayed on the LCD screen to enter Bluetooth mode.
- Hold the #1 memory button (labeled "PAIR") for about 4 seconds until the BT icon (?) flashes on the LCD screen.
- On your device (phone, tablet, computer), enable Bluetooth.
- Open the list of Bluetooth devices and look for "CCRadio-3". Scan again if it's not listed.
- Select "CCRadio-3". Your device should indicate "Connected...".
Operation
When connected via Bluetooth, audio from your device will play through the CCRadio 3's speaker. Adjust volume on both the radio and your device for best sound.
You can control playback (pause, play, skip backwards/forwards) using the memory preset buttons on top of the radio:
- #3 button = Skip to Previous
- #4 button = Play/Pause
- #5 button = Skip to Next
Note: Button functionality may vary depending on the app or device.
Disconnect
To disconnect Bluetooth or allow a different device to connect, press and hold the #1 memory button for about 3-4 seconds until the BT icon (?) flashes on the LCD screen.
Display Light
Display Light on AC Power:
When plugged into AC power, the display light is always on unless turned off. The green LED bulbs last about 100,000 hours and use minimal energy. The light has three levels. Press and release the Light button to change the level or turn it off.
Display Light on Batteries:
When using batteries, press the light button to turn on the display light. It automatically turns off 2 minutes after the last button press.
Lock Switch
The Lock switch (located on the right side between the tuning and volume knobs) prevents accidental activation during transport. When pushed up, the Lock symbol (?) appears on the display. It can also disable all radio functions when turned on. Push the switch down to release the lock for normal operation.
Headphone Jack
A stereo or mono headphone with a 1/8" (3.5 mm) plug can be used. Inserting the headphone plug disconnects the speaker. FM audio is delivered in stereo through the headphones (?).
Reset Button
Occasionally, glitches may occur due to static electricity, unusual key presses, or power disruptions. To reset the radio, use the end of a paper clip or ballpoint pen and push it briefly into the reset hole on the bottom of the radio. This will reset the clock time and all stored memory stations.
Specifications
Frequency Coverage
- FM Band: 87.5 - 108 MHz Stereo
- AM Band: 520 - 1710 kHz
- Ham (VHF): 144 - 148 MHz
Weather Band:
- Channel 1: 162.400 MHz
- Channel 2: 162.425 MHz
- Channel 3: 162.450 MHz
- Channel 4: 162.475 MHz
- Channel 5: 162.500 MHz
- Channel 6: 162.525 MHz
- Channel 7: 162.550 MHz
Rotary Tuning Knob Resolution
- AM: 1 kHz
- FM: 50 kHz
- Ham (VHF): 5 kHz
- WX: 1 Channel
Power Source
- AC: 120 Volts 60Hz
- Batteries: (4) "D" size
Power Consumption
- AC Power: 8 Watts
- Battery Power: 40-50 mA DC
Audio
- 10% THD at output power @ 1.8 Watt AC typical @ 0.9 Watt Battery.
- Speaker: 5", 4 Ohm, 6 Watts.
Antenna
- FM, Ham (VHF) and Weather Band: Telescopic whip antenna (?).
- AM Band: Built-in Ferrite Bar - 7/16" dia. x 8" long (200 mm).
Dimensions
- 11" W x 6-1/2" H x 4" D (at the base).
Weight
- Approximately 3.8 pounds without batteries.
Audio & Recording Jacks
- AUX IN Jack: 300 - 1000mV RMS (line level) input from external audio source. Do not overload.
- LINE OUT Jack: 300 - 1000mV RMS (line output).
- Timer Activation Switch: Low impedance, transistor driven switch. Used for operation of external recording devices.
Note: Specifications are subject to change without notice.
Troubleshooting Guide
The CCRadio 3 will not turn on and none of the buttons work:
Check if the Lock Switch is in the "up" position. Push the switch down to release the lock and resume normal operation. (See Lock Switch on page 19).
The CCRadio 3 comes on by itself or changes to a different station while listening:
The Timer may be set. The word "TIMER" will appear on the display. To cancel the Timer setting, press and hold the Timer/Set button until you hear a short beep and the word "TIMER" disappears.
My radio shuts off after a few seconds or shows the letter "E" in the display:
This is likely due to low batteries. Replace them with a new set. If operating on AC power, check for solid connections at the wall outlet and the back of the radio, and ensure there is power at the wall outlet.
Stations won't hold in memory:
Memory button settings may be overwritten. When recalling a station, press and release the memory button quickly. If you hold it down too long, it will program the current station over the stored one. To program a new station, tune to it and press and hold the memory button for two seconds until a beep is heard. (See Memory Tuning on page 13).
The AM reception is poor inside of my building:
Building materials like brick, concrete, stucco, and aluminum siding can absorb or reflect AM signals. Spanish tiles or metal roofs can also be culprits. To test reception, take the radio outside, especially at night. If reception is better outside, an external AM antenna may be needed. Consult the AM Tuning and Listening Tips section (page 28) for antenna suggestions.
Poor reception on FM, Ham (VHF), or Weather band:
The CCRadio 3 uses a telescopic whip antenna (?) for these bands. Fully extend the antenna for best reception. Extending it straight up usually improves FM and weather broadcasts. The antenna must be fully extended to rotate. You can also try a piece of insulated wire (approx. 36" long) with about 1" of insulation removed from one end. Wrap the bare wire around the telescopic antenna or use an alligator clip. Experiment with wire orientation and antenna height for the strongest signal. The FM Reflect-2 Antenna by C. Crane is recommended.
Battery Power Level Indicator doesn't show full charge when using rechargeable batteries:
Rechargeable batteries (approx. 1.25 volts) will not show a full charge on the display, which is calibrated for alkaline batteries (1.5 volts). The radio will show a partial charge even if rechargeable batteries are fully charged.
Drop in volume or poor reception when tuning in an AM station / AM Alignment Procedure
The CCRadio 3 has a hidden AM Calibration Feature to "re-tune" for best AM reception. This procedure will reset memorized stations, time, and alarms. It is recommended when the radio is moved to a new location or every year or two to compensate for component aging. Calibration affects only the AM band.
- Turn the radio ON and switch to the "AM" band.
- Press and hold the "Clock" button for 6 seconds until the radio beeps and the red indicator light comes on. Release.
- Briefly tap the "Clock" button once.
- The display will show calibration starting at 1700 and moving to 520 in 100 kHz steps. Do not turn off the power during this procedure.
- After calibration, "Reset" the radio by pressing the RESET button on the bottom with a paper clip.
AM Radio Noise Problems and Possible Solutions
Annoying buzzes on AM radio are often caused by radio noise. Common culprits include:
- Dimmer switches (even in adjacent rooms).
- Lights: Fluorescent lights, "touch lamp" fixtures, automatic night lights, motion-activated outdoor lights, dying or blinking bulbs.
- Nearby electronics: Televisions, computers, cell phones, tablets, wireless chargers, C-Pap machines.
- Electronic bug and pest controllers.
- Faulty electrical switches.
- Radio scanners.
- Dirty insulators on nearby power poles.
- Electric blankets.
- Smoke detectors running on AC power (battery-operated units are OK).
Troubleshooting Steps:
- Turn off circuit breakers one by one to see if the noise stops and to isolate the source within your house.
- Using a battery-operated radio, check if interference comes from the AC 120V line, through the air, or both. Turn the radio to locate the direction of the noise by finding where it is loudest.
- If noise comes from outside, carry the radio around the neighborhood to check for its origin. Ask neighbors if they hear the same noise.
- If a power pole is suspected, call the utility company. Dirty power pole insulators can cause interference.
- Grounding can reduce hum from AC line noise. However, most radios lack a ground connection, and finding a good earth ground can be difficult.
For more detailed information, visit ccrane.com/radionoise.
AM Tuning & Listening Tips
The CCRadio 3 has an internal AM antenna. Best performance is achieved by swiveling the radio on its base for maximum signal pickup. This technique can also help nullify unwanted signals or radio noise.
Experimentation is key. The CCRadio 3 automatically fine-tunes its Twin Coil Ferrite® AM antenna for a few seconds after a station change in AM mode. The "signal" icon (?) will flash during this time. Wait for the signal icon to stop flashing or for 5 seconds after tuning before setting a preset.
The CCRadio 3 has an external antenna terminal for AM. If reception is better outside, use 50' of insulated wire attached to the AM antenna terminal and a ground wire attached to the ground terminal. Run the wire inside around a window or baseboard, or mount it outside at least three feet from a metal building. An inductive AM antenna placed on a windowsill or near the radio can also improve the signal.
SAFETY DIRECTIONS AND PRECAUTIONS FROM YOUR ANTENNA SUPPLIER SHOULD BE FOLLOWED TO PREVENT INJURY FROM LIGHTNING OR ANY ACCIDENT with all antennas.
The CCRadio 3 is made for distant or weak AM signal listening. Daytime reception is limited to about 300 miles. At dawn, dusk, and night, atmospheric conditions allow reception of stations thousands of miles away due to the ionosphere reflecting radio waves. Distant listening is called DXing. The National Radio Club (PO Box 473251, Aurora, CO 80047-3251) is devoted to DXing and can be found at www.nationalradioclub.org.
Accessories
Check with your dealer for the following accessories:
- Softspeaker®- 3: Amplified Pillow Speaker with In-Line Volume Control and Sleep Timer. Item #PS3.
- Twin Coil Ferrite® AM Antenna Signal Booster: Item #TWIN.
- FM Reflect-2 FM Dipole Antenna: Item #FMR2.
- CCRadio Carry Case: Custom made in the USA to fit and protect the CCRadio 2, 2E, and 3. Features a sturdy carry handle and a pouch for the power cord, Softspeaker, or earphones. The case does not interfere with radio operation. Item #CA3.
Logs
Personal Station Log
| City | Station Call Letters | Frequency | Date | Time |
|---|---|---|---|---|
2-Meter Ham Frequency Log
| Frequency | Location/Call Sign | Date | Time |
|---|---|---|---|
About C. Crane
C. Crane's radio division began soon after Bob and Sue Crane moved from the San Francisco Bay Area to the Redwood Country of Northern California. Settling in Fortuna, Bob was surprised by the limited radio reception. He spent time at a drafting table, missing his favorite San Francisco stations, which slowed his work.
After searching for a year, the Cranes found a simple AM antenna that provided excellent reception, even through trees. They decided to market this antenna, advertising it on the radio. The C. Crane radio division was soon established.
Over 30 years ago, Bob, Sue, and Grandma Faye were the first phone operators. Customer feedback guided them, and Bob and Sue grew C. Crane into a family-based business guided by strong ethics.
Starting with their first AM antenna, C. Crane became a premier electronics company, developing radios for listeners who prefer information, talk radio, and voice clarity. After experiencing several earthquakes, in 1992 they added radio and light products essential for emergency preparedness.
C. Crane products are known for quality and value, undergoing extensive testing. The "C" in C. Crane comes from Bob and Sue's middle names, both starting with "C".
FCC Compliance Information
Model: CCRadio 3
FCC ID: BYG CCR3
This device complies with Part 15 of the FCC Rules. Operation is subject to the following two conditions:
- This device may not cause harmful interference.
- This device must accept any interference received, including interference that may cause undesired operation.
Notice: Any changes or modifications not expressly approved by the party responsible for compliance could void the user's authority to operate the equipment.
C. Crane, Fortuna, CA 95540
Phone: 1-800-522-8863
Web: ccrane.com
© 2021 Copyright C. Crane. All rights reserved. No part of this booklet may be reproduced in any form or means without written permission from C. Crane.
Rev. 6
