Shine Master说明书-英文
File info: application/pdf · 17 pages · 1.54MB
Shine Master说明书-英文
ShineMaster User Manual - storage.ua.prom.st
1 About the user manual 1.1 Manual description 1.4 Manual usage Please read this manual carefully before using ShineMaster. At the same time, please keep this manual in a safe place so that operators and maintenance per…
ShineMaster User Manual
information and instructions for installation, operation, and maintenance. This user manual is copyrighted by Growatt. Any unit or individual may not excerpt or copy part or all of this user's manual without the written…
Full PDF Document

If the inline viewer fails, it will open the original document in compatibility mode automatically. You can also open the file directly.
Extracted Text
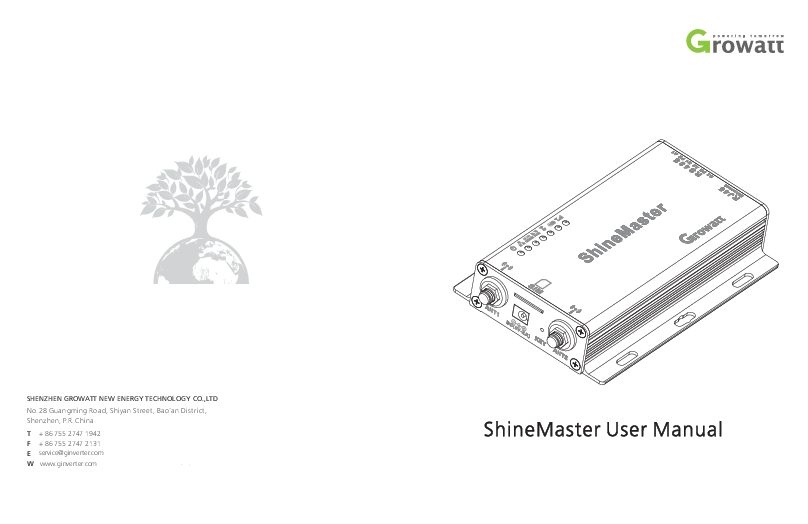
SHENZHEN GROWATT NEW ENERGY TECHNOLOGY CO.,LTD No.28 Guangming Road, Shiyan Street, Bao'an District, Shenzhen, P.R.China
T + 86 755 2747 1942 F + 86 755 2747 2131 E service@ginverter.com W www.ginverter.com

ShineMaster User Manual

CONTENT

1 About the user manual 2 Product description 3 Installation and
Connection

1.1 Manual description 1.2 Copyright statement 1.3 Applicable personnel 1.4 Manual use
2.1 Device Overview 2.2 Unpacking 2.3 ShineMaster Network
Introduction
3.1 ShineMaster installation environment
3.2 ShineMaster installation method 3.3 Connect to the photovoltaic device

4 ShineMaster built-in page parameter setting

4.1 ShineMaster IP address query 4.2 ShineMaster built-in page access 4.3 ShineMaster Status View 4.4 ShineMaster Datalogger managing 4.5 Baud Rate Setting 4.6 Server Address and Shine Master
IP setting

5 Server: Shineserver's
operation

5.1 Registration and login 5.2 View monitoring data 5.3 Add or Delete Monitoring devices,
change the ShineMaster Baud rate

6 Device Maintenance

6.1 Common faults and troubleshooting 6.2 Maintenance

7 Technical specifications

7.1 ShineMaster specification

8 Contact us

1 About the user manual
1.1 Manual description
Dear users, thank you very much for using the ShineMaster data logger (hereinafter referred to as ShineMaster) developed and produced by Shenzhen Growatt New Energy Co., Ltd. (hereinafter referred to as Growatt). We sincerely hope that this product will meet your needs and expect you give more opinions on the performance and function of the product. The purpose of this manual is to provide users with detailed product information and instructions for installation, operation, and maintenance.
1.2 Copyright statement
This user manual is copyrighted by Growatt. Any unit or individual may not excerpt or copy part or all of this user's manual without the written permission of the company. It may not be transmitted in any form, including materials and publications. Infringement must be investigated. The version of this manual is V1.1. Growatt owns the final interpretation right of this user manual. If there is any change in product parameters, appearance, packaging, etc., the latest information of the company shall prevail without notice.
1.3 Applicable personnel
This manual is for professional technicians who install, commission, and maintain the ShineMaster and for users who perform daily operations. This manual does not include electrical connections for inverters, combiner boxes, weather stations, smart meters, and anti-reflux devices, as well as related precautions. If necessary, refer to Growatt's corresponding user manual or instruction.
1.4 Manual usage
Please read this manual carefully before using ShineMaster. At the same time, please keep this manual in a safe place so that operators and maintenance personnel can find out. The contents of the manual will be continuously updated and corrected. It is inevitable that there will be slight inaccuracies or errors in the actual contents. Users should refer to the actual product purchased. The latest user manuals can be downloaded from www.ginverter.com, and can also be obtained through Growatt's sales or service channels.
1

2 Product description
2.1 Device Overview
M L K J I H G

F E

D
C A B

2.1.1 Interface

Fig.2-1

The interface of ShineMaster, as shown in figure 2-1 above. The functional description of each interface is shown in table 2-1.

2

Item A B C D E F

Name

Function

POWER

Power supply port

KEY

Reset button (temporarily unavailable)

SIM

SIM card slot

ANTENNA LAN

Antenna, used to receive wireless signals (Temporarily not supported)
RJ45 portConnect Shine ShineMaster to the local network area of Shine Server through RJ45 cable

RS-485

Two-way RS485 interface Table 2-1

2.1.2 Indicator Led
ShineMaster is equipped with seven LED indicators. The status of the ShineMaster can be displayed by the LED indicator. As shown in figure 2-1 and table 2-2 above.

3

Item G H I

Name Power LED Network LED Device LED

Function
Power indicator light, constant on means power supply is normal
Network light: 1: off means fail to obtain IP address; 2: flashing means connecting to the server; 3:on means connection to the server successfully
The number of the LED continuously flashing means the device number connected to the ShineMaster

J

Configuration LED

Flashing when configuration , if successful , the LED will be off temporarily unavailable

K

RF

RF signal indicator temporarily unavailable

L

WiFi

WiFi signal indicatortemporarily unavailable

M

2G/4G

2G/4G signal indicatortemporarily unavailable

table 2-2

2.2 Unpacking

2.2.1 Packing List
ShineMaster and accessories can be found as below figure 2-2

4

A

B

C

D

E

F

G

Fig 2-2

Item A B C D E F G

Name ShineMaster 5V power adapter Terminal RS485 Wall plastic column M3.5*20 screw ShineMaster user manual Ethernet cable
Table 2-4

Amount 1 pcs 1 pcs 1 pcs 4 pcs 4 pcs 1 pcs 1 pcs

5

2.2.2 Serial No. and Check Code
The ShineMaster serial No. S/N and check codeC/Cis ticked on the ShineMaster's package box, which have 10 digits mixed up with letters and numbers. the serial No. and check code for each device are unique, to identify each ShineMaster. When you want to upload the data of ShineMaster to the server, you need the serial No. and `check code' corresponding to register on the server
2.3 ShineMaster Network Introduction
ShineMaster supports network communication, which can be communicated via wired WLAN, wireless WiFi, 2G/4G, GPRS and cloud server. Upload the monitored data to the server of Growatt, and then access the server's domain name. Realize industrial common communication mode RS485 and wireless RF communication, also supports wired and wireless communication ways to monitor and set slave devices and perform online upgrades on devices. By accessing ShineMaster's internal IP address, you can enter the built-in page for parameter setting and device addition viewing (please refer to section 4.4 below). ShineMaster monitors the photovoltaic devices through RS485 and RF(temporarily not supported). The diagram below shows the schematic diagram of network monitoring through wired RS485. Note: The precondition of local access is that the address of PC and ShineMaster must be in the same domain, thereby building up a local monitoring system.
6

Fig 2-5 7

3 Installation and Connection
3.1 ShineMaster installation
The installation environment of ShineMaster and communication with other devices: (1) Indoor installation, temperature - 40 ~ 60 , avoid moisture and direct sunlight. (2) Cable RS485 in maximum 500m.
3.2 ShineMaster installation 3.2.1 Installation Procedure

The installation steps are as follows: (1) Install ShineMaster on a vertical plane or horizontal plane. (2) Connect cables between RS485 interface and RS485 interface on ShineMaster (please refer to 3.3.1 below for details) (3) Connect the network cable (insert the network line into the LAN interface on ShineMaster). (4) Connect the Power supply (connect the power cord to the Power interface on ShineMaster).
3.3 Connect to the photovoltaic device
ShineMaster can communicate with the inverter, weather station, smart meter, combiner box and other photovoltaic devices to achieve the purpose of data collection.
3.3.1 RS485 cable connection
1.ShineMaster (master) communicates with slave devices via RS485 wired connection. 485A+ on the RS485 port of the slave device corresponds to A1+ or A2+ on the ShineMaster 485 port, 485B- and ShineMaster 485 on the RS485 port of the slave device. Corresponding to B1- or B2-. The following is a schematic diagram of the connection between the ShineMaster and the inverter: Note: the RS485 shielded wire must be ground (PE) for long distance communication, so as not to affect the communication stability.

8

9

2. Note that the inverter also has an interface like the one below:
3.The inverters are connected to the ShineMaster via RS485 serial connection. Using the RS485 wired communication connection, the ShineMaster can monitor up to 32 inverters stably. 4.The ways of ShineMaster connection to Smart meter, combiner box and environmental monitor are similar to the connection of inverters. The weather station can be connected to the inverter in series, and the communication line of the smart meter can be directly connected to the ShineMaster RS485 port. Note: The weather station, combiner, and smart meter manufacturers must be designated by Growatt, otherwise monitoring will not be possible.
4 ShineMaster Internal Page
4.1 ShineMaster IP address query
1. Connect the PC computer and the ShineMaster LAN port to the network port of the router through the network cable so that they are in the same LAN.
10

2. Go to the router's management page and check the "Internet host list" to query the IP address of the ShineMaster IP address with the serial number of the ShineMaster as the device name. This IP address is the IP address assigned by the router to the ShineMaster. If you do not know how to do this, contact your network administrator to perform the operation. Note: The router needs to enable automatic IP assignment, that is, open the DHCP function 3. Enter the ShineMaster IP address in the browser to enter the ShineMaster internal page
4.2 ShineMaster built-in page access
Before accessing, check whether the communication cable between the devices is securely connected.then you can enter the ShineMaster IP address in the IE browser to access the built-in page of ShineMaster. As long as the ShineMaster is on the same domain as the computer you are accessing, you can access the Shine WebBox built-in server. 1.If the user successfully access the ShineMaster internal page, you can directly enter the built-in page login interface, as shown in Figure 4-1
Fig 4-1 2Enter the user name and password, the default login user name: admin password: admin, fill in and click on login to enter the Growatt ShineMaster system page.
11

4.3 ShineMaster Status View
Click the ShineMaster datalogger Status to view information such as the "System Status Information", "Serial Number", "Server Address", "Number of Connected Devices", etc. of the ShineMaster

4.4.1 Add device
(1) Before ShineMaster monitors photovoltaic equipment, it is necessary to enter the "ShineMaster Data Collector Settings" page of the built-in page to add devices.

4.4 ShineMaster Datalogger managing
Devices should be added in `ShineMaster datalogger setting' interface in internal page prior to monitoring
12

(2) In the second drop-down list, select the type of monitored device Device types parameter information: INVERTER: GROWATT Inverter; SDM120: single phase meter; SDM630: three phase meter; BatterBox: battery Box; Surveymeter: Survey Meter.
13

(4) Select "Add" and click Save.
(5) After successfully saving, enter the "Device Status" page to confirm whether the device is added successfully.

(3) In the third drop-down list, fill in the communication address of monitored device

4.4.2 Remove device
(1) Select the monitoring method for monitoring PV devices in the first drop-down list of "Add or Remove Devices". (2) In the second drop-down list, select the type of PV plant being monitored. (3) Fill in the PV device communication address in the third drop-down list. (4) Select "Del" and click Save to finish removing of the device. (5) After successfully saving, enter the "Device Status" page to confirm whether the device is successfully deleted. As shown in the picture:

14

15

Add and delete device: 1. When you need delete a device, all the options should be the same with the momemet you add this device like: 485 channel, device type, address, if you are not sure about this you can check the device status first. 2. When one address is occupied, you cannot just paste the new device, you have to delete the old device and use this address.
4.5 Baud Rate Setting
The Default two channels' Baud Rate are both 9600, you can adjust the Baud Rate for different scenarios. (1) Choose the Baud rate at the "Baud rate setting "Bar. (2) Choose the corresponding chanels RS485_1 or RS485_2. Set the Baud rate to 9600 as RS485_1

(1) ShineMaster's Default setting of the DHCP function is "ON" it will automatically get IP address.ShineMaster
(2) If you need a fixed IP address you need following steps (2.1) Turn off the "Dynamic IP" to shut down the DHCP function (2.2) Put in the fixed IP, network management, net mask and DNS then click "Save"

4.6 Server Address and Shine Master IP setting 4.6.1 Data logger IP Setting
16

4.6.2 Server Address Setting
The Server Address will choose two methods, one is IP and one is domain name, you can only use one at a time. (1) When you are using Server IP to connect the server please turn off the "domain name analysis function", set the server as 120.77.127.135.
17

(2) when you are using the domain name to connect server you can choose on at "Domain Name Analysis Function" set the server as server-cn.growatt.com

5 Server: Shineserver's operation
If needed to the datalogger and all monitoring devices for data display, monitoring, and set up parameters by the server, you need to first add datalogger to the server, when Shinemaster added to the server, if the subsequent need to modify some parameters of The datalogger or enable, disable a function can be done through the server.
5.1Registration and login
(1) Enter the address of the server on the computer browser to enter the ShineServer login page. If you are logging in for the first time, register the user name first. Enter the domain name access page, as shown in Figure 5-1. The Chinese user server domain name is: http://server-cn.growatt.com The overseas user server domain name is: http://server.growatt.com

Server port name and data upgrade interval are fixed cannot be changed
Caustion: 1If you add a device, after saving there is no refreshment, please disconnect the data logger and restart it.

18

19

Figure 5-1 Shine Server login page
(2) Register the user name and input the user information according to the pop-up. After the information is completed, click "Register". Note: "ShineMaster serial number" and "datalogger check code" seen on the package box.
20

5.2 View monitoring data

Fig 5-2

(1) After the registration is completed, it will automatically jump to the ShineServer main interface. Click "plant"  "plant data" , and the displayed information is the total power chart of the plant on the day. The drop-down list "Select collector" can be used to view the daily power chart of a single inverter in the power station.

21

5.3.1 Add or Delete Monitoring device
(1) In the Server page click the "Device Management" and then click "Data Logger". In this page click set the device updating icon.

Fig 5-3 (2) Click "plant"  "Device list" to see real-time data monitored by datalogger, "Inverter", "Weather station", "Smart Meter", and "Combined Box" "MAX" .
5.3 Add or Delete Monitoring devices, change the ShineMaster Baud rate
22

(2) Add one device, add one Growatt inverter set the 485 communication address is 1. 23

(3) Delete one device, just like following figure.
(4) Above adding or deleting devices if success following figure will pop out.
5.3.2 Change ShineMaster Baud rate.
24

(1) In the Server page click "Device Management" then click "Data Logger", click the Baud rate setting icon.
(2) Set chosen channel's baud rate.
(3) If success following figure will pop out.
Note: The second channel of Baud rate setting would be the same as the fist channel. 25

6 Device Maintenance

6.1 Reset ShineMaster
If you press the "reset" button for five seconds, it will erase all the registered device information. All the information for the server communication part will be kept.

6.2 Common faults and troubleshooting

Fault

Cause

Suggestion

Cannot enter the ShineMaster internal page

ShineMaster can not obtain the IP

1.Enable Router DHCP Function 2.PC and the ShineMaster must be in
the same domain.

ShineMaster built-in page "System Status Information" shows not connected

Unable to connect to server

1.Check whether the router network is connected to the Internet.
2.Check if the "server address" is correct The Chinese user server domain name is: http://server-cn.growatt.com The overseas user server domain name is: http://server.growatt.com

ShineMaster is online, but the monitored device is disconnected after logging in to the account

1.Monitor connection failed
2.No access to the built-in page to add equipment
3.Inconsistent Photovoltaic equipment address and added equipment address
4.Illegal PV device serial number

1.Check the communication line is in contact with the stability
2.Enter the built-in page "datalogger settings" to add photovoltaic devices
3.On the "Device Status" page of the built-in page, check whether the device's communication address is consistent with the added device.
4.Check whether the serial number of the monitored PV equipment is 10 digits. It can only contain English letters and numbers, and there are no illegal characters.

Long time no refresh interface after operation

Configuration page does not respond

Refresh the page or login in again.

26

6.3 Maintenance
1. Avoid frequent switching of power supply, gently handle, to prevent damage; 2. ShineMaster is a product for indoor use. Do not place ShineMaster in a humid environment or in direct sunlight.
7 Technical specifications

7.1 ShineMaster specification

General specification

Length * width * height Net Weight
Protection grade

130mm*84mm*25mm 180�g IP30

Operating environment Ambient temperature Installation

-40~ +60 Indoor

27

Communication Wireline communication Wirerless communication
RS485 communication distance

RS485 maximum stability monitoring 32 inverters
Not supported temporarily
500 meters maximum (twisted shielded cable)

8 Contact us
Growatt New Energy provides customers with a full range of technical support. Users can contact the nearest Growatt new energy office or customer service point, or they can contact the company's customer service center directly. Name: SHENZHEN GROWATT NEW ENERGY TECHNOLOGY CO.,LTD Address: No.28 Guangming Road, Shiyan Street, Bao'an District, Shenzhen, P.R.China Customer Service Hotline: +86 755 27471942 E-mail:service@ginverter.com Company website: www.ginverter.com

28