Introduction
This document provides instructions for the AIKE AK1205 Automatic Soap Dispenser.
Important Safety Instructions
❗ WARNING: Children should be used under adult supervision to prevent accidentally eating. Please don't throw away discarded batteries; recycle used batteries correctly. The unit contains microcomputers and electronic circuits; do not splash water.
⚠️ CAUTION: The unit includes electronic devices and a solenoid valve; please do not knock. Use caution when connecting or disconnecting lines. Clean the product with a soft cloth and neutral detergent, then wipe with a wrung-out cloth and dry with a soft cloth. Do not use water, detergent with particles, diluents, high-acid detergent, or nylon brushes, as this may damage the surface or internal components. Be careful not to damage the transparent cover over the induction window, as this can affect reaction effectiveness. Ensure the distance between the sensing window and the countertop is above 35cm when installing on a stainless steel countertop.
To ensure the unit works correctly and extends its lifespan:
- Read the user manual and instructions carefully before installation.
- Use only well-known brand AA batteries (6 pcs). Do not mix old and new batteries. Counterfeit or low-grade batteries may harm the unit's lifetime.
- Check that the wall surface is flat and clean before installation.
- Maintain a distance of more than 25cm from the bottom of the unit to tables or other objects.
- Installation instructions should be provided by a qualified person.
- Do not place reflective objects within the sensing distance under the unit.
- Avoid covering the unit with reflective objects (like mirrors or stainless steel) on the table against the bottom of the unit.
- For indoor use only.
Product Overview and Components
The AIKE AK1205 Automatic Soap Dispenser is designed for convenient and hygienic hand washing. Key components include:
- Key
- Cap
- Sealing Cap
- Fixed Bracket
- Battery Container
- Indicator Light
- Shell
- Bottom
- Liquid Outlet
- Sensor Window
- Batteries Container
- Drain Outlet
- Installation Panel
Dimensions: Height: 220mm, Width: 100mm, Depth: 110mm.
Installation Guide
Follow these steps to install your dispenser:
- Attach the mounting plate to the wall. Use a pencil to mark the positions for the three installation holes.
- Use a drill to bore three holes (approx. 6mm diameter) according to the marks. Insert the expansion screw heads into the corresponding holes.
- Align the mounting plate with the wall and secure it using the provided screws, ensuring they engage with the plastic wall plugs.
- Hook the dispenser unit onto the mounting plate in the correct direction and press firmly.
- Push down slightly on the unit to ensure it is securely attached to the mounting plate.
Tips: Ensure the distance between the sensing window and the countertop is above 35cm. When installing on a stainless steel countertop, ensure adequate clearance.
Operation
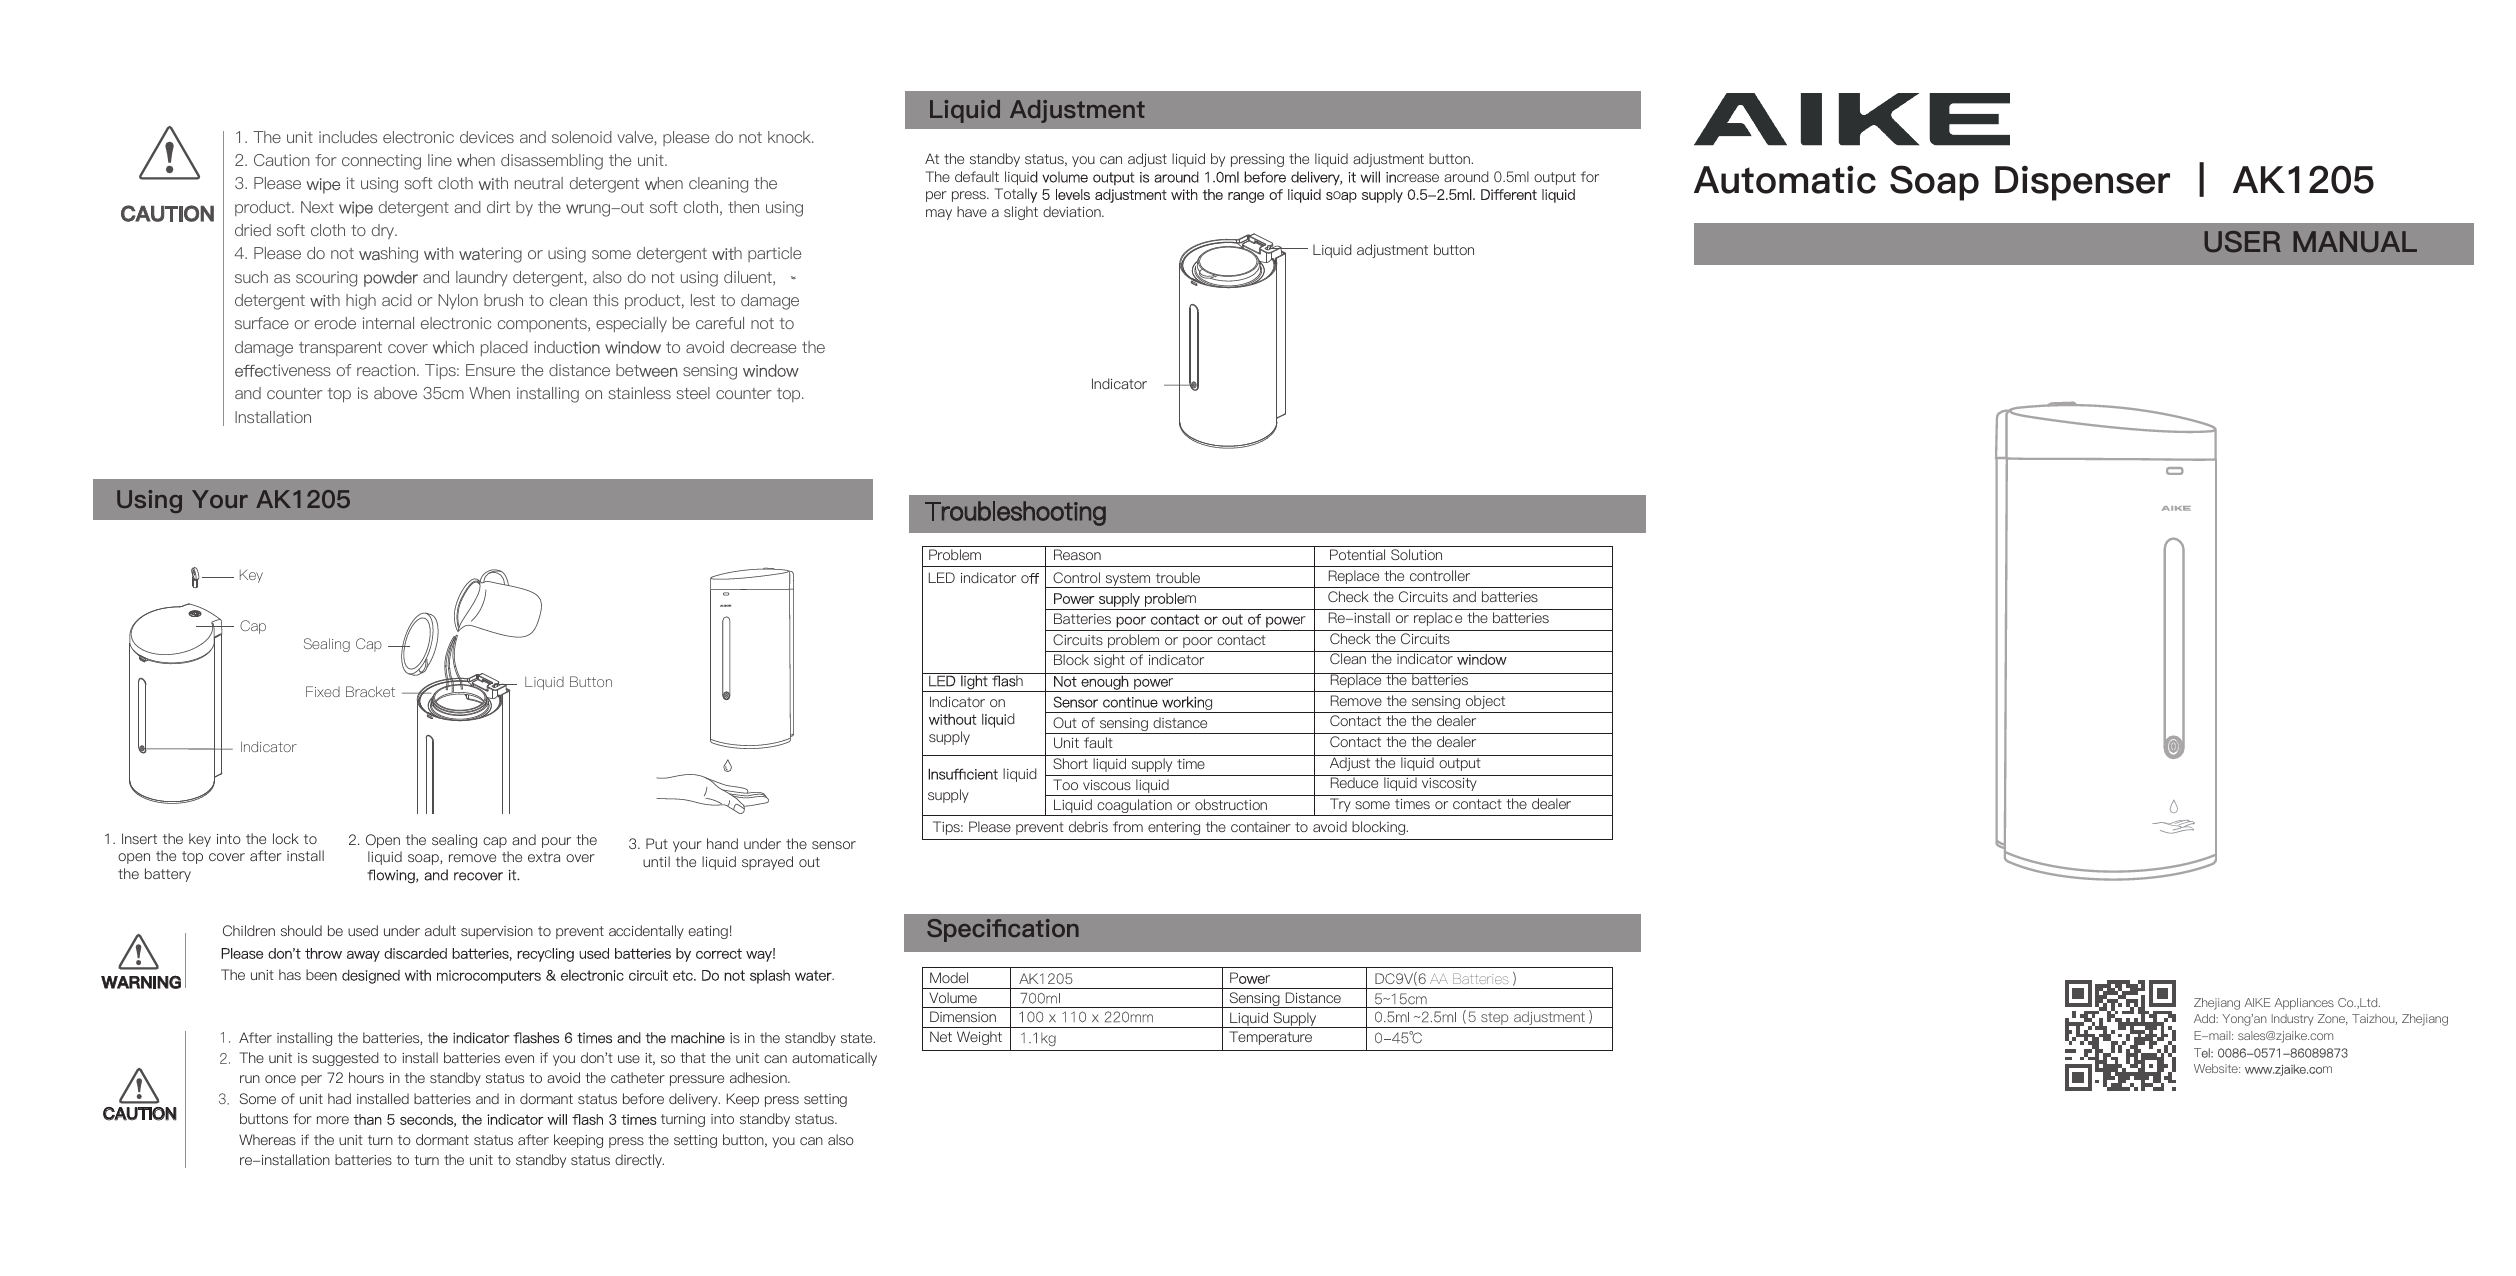
Liquid Adjustment
At standby status, you can adjust the liquid output by pressing the liquid adjustment button. The default liquid volume is approximately 1.0ml per dispense. Each press increases the output by about 0.5ml, offering a total of 5 adjustment levels ranging from 0.5ml to 2.5ml. The actual liquid volume may vary slightly depending on the soap type.
A diagram shows the liquid adjustment button and an indicator light on the dispenser.
Using the Dispenser
- Insert the key into the lock to open the top cover after installing the batteries.
- Open the sealing cap, pour liquid soap into the reservoir. Remove any excess overflowing soap and close the cap securely.
- Place your hand under the sensor to dispense liquid.
Battery Installation and Replacement
Battery Installation:
- Keep the unit body upright when the LED indicator is flashing.
- Unscrew the screws and pick out the battery container.
- Insert or replace with six standard AA batteries (DC 9V/6 AA Batteries). Put the container back and tighten the screws.
Notes:
- The unit is suggested to install batteries even if not in use, so that it can automatically run once every 72 hours in standby status to prevent catheter pressure adhesion.
- Some units may have batteries installed and be in dormant status before delivery. To activate, press and hold the setting button for more than 5 seconds until the indicator flashes 3 times, turning into standby status. If the unit enters dormant status after holding the setting button, re-installing batteries will turn the unit to standby status directly.
Troubleshooting
If you encounter issues with your dispenser, consult the following guide:
- Problem: LED indicator off
Reason: Control system trouble
Solution: Replace the controller. - Problem: LED light flash
Reason: Power supply problem / Batteries poor contact or out of power / Circuits problem or poor contact
Solution: Check the circuits and batteries. Re-install or replace the batteries. - Problem: Indicator on without liquid supply
Reason: Block sight of indicator / Not enough power / Sensor continue working / Out of sensing distance
Solution: Clean the indicator window. Replace the batteries. Remove the sensing object. - Problem: Insufficient liquid supply
Reason: Unit fault / Short liquid supply time / Too viscous liquid / Liquid coagulation or obstruction
Solution: Contact the dealer. Adjust the liquid output. Reduce liquid viscosity. Try some times or contact the dealer.
Tip: Please prevent debris from entering the container to avoid blocking.
Specifications
- Model: AK1205
- Volume: 700ml
- Dimension: 100 x 110 x 220mm
- Net Weight: 1.1kg
- Power: DC9V (6 AA Batteries)
- Sensing Distance: 5-15cm
- Liquid Supply: 0.5ml-2.5ml (5 step adjustment)
- Temperature: 0-45°C
Packing List
Your package should contain the following items:
- Unit x1
- Installation Panel x1
- ST4X25 Screw x3
- Expansion Screw x3
- Certification x1
- Key x1
- Installation Manual x1
Notes: Please ensure all items are present and in good condition before installation. If any items are missing or damaged, contact your dealer or manufacturer. Specifications are subject to change without prior notice. Handle main objects carefully when opening bags.
Manufacturer Information
Zhejiang AIKE Appliances Co., Ltd.
Address: Yong'an Industry Zone, Taizhou, Zhejiang
Email: sales@zjaike.com
Tel: 0086-0571-86089873
Website: www.zjaike.com