DAIKIN BRC1H Series OM-BRC1H71W Wired Remote Controller User Manual
File info: application/pdf · 86 pages · 2.74MB
Wired remote controller
Pairing with the remote controller 1. After the Bluetooth setting screen is displayed on the remote controller*, use this app to select the remote controller you want to connect to. * The last 6 digits of the Bluetooth…
Wired remote controller - Daikin Comfort
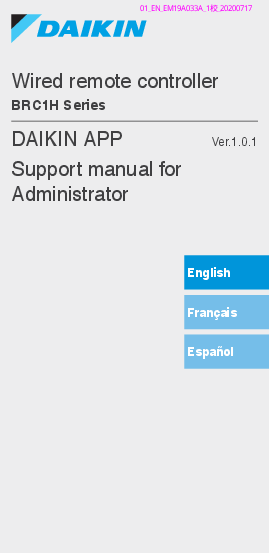
Support manual for 01 EN EM19A033A 1h! 20200717. CONTENTS Cautions for use ... Bluetooth and camera setting Set the device Bluetooth function to
Wired remote controller DAIKIN APP Support manual for ...
User selection. 6. Bluetooth and camera setting. 7. Terms of service ... ▷Do not turn off the Bluetooth function ... last version check, the app cannot be.
Full PDF Document

If the inline viewer fails, it will open the original document in compatibility mode automatically. You can also open the file directly.
Extracted Text
Wired remote controller
BRC1H Series

DAIKIN APP
Support manual for Administrator

Ver.1.0.1

English Fran�ais Espa�ol

CONTENTS
Cautions for use App startup Basic usage Manual setting mode Work history App menu Troubleshooting About display messages About trademarks and copyright

CONTENTS

Cautions for use

Cautions for use

1

App startup

Basic usage

Manual setting mode

Work history

App menu

Troubleshooting

About display messages

About trademarks and copyright

CONTENTS

Cautions for use

App startup

About devices that can be used

3

Language setting

5

User selection

6

Bluetooth and camera setting

7

Terms of service

8

Usage limitations

9

Basic usage

Manual setting mode

Work history

App menu

Troubleshooting

About display messages

About trademarks and copyright

CONTENTS

Cautions for use App startup

Basic usage

How to read this operation manual

10

Remote controller preparation

10

Pairing with the remote controller

13

How to use the app

16

Manual setting mode

Work history

App menu

Troubleshooting

About display messages

About trademarks and copyright

CONTENTS

Cautions for use App startup Basic usage

Manual setting mode

Manual setting mode

18

Filter auto clean

19

Auto draft prevention

21

Sensor settings

23

Setpoint configuration

27

Setpoint range limitation

30

Setback

32

Function lock

35

Date & time/DST

38

Celsius/Fahrenheit

41

Brightness control

43

Scale view setting

46

Work history

App menu

Troubleshooting

About display messages

About trademarks and copyright

CONTENTS

Cautions for use App startup Basic usage Manual setting mode

Work history

Setting log confirmation procedure

58

App menu

Troubleshooting

About display messages

About trademarks and copyright

CONTENTS

Cautions for use App startup Basic usage Manual setting mode Work history

App menu

Application version

60

Terms of use

61

Open source licenses

62

Application language

63

Application time

64

Troubleshooting

About display messages

About trademarks and copyright

CONTENTS

Cautions for use App startup Basic usage Manual setting mode Work history App menu

Troubleshooting

The app cannot be found

65

The app cannot be used

66

Communication with the remote controller is not possible

67

About display messages

About trademarks and copyright

CONTENTS
Cautions for use App startup Basic usage Manual setting mode Work history App menu Troubleshooting
About display messages
App screen (dialog displayed when writing to the remote controller) 71 About trademarks and copyright

CONTENTS

Cautions for use App startup Basic usage Manual setting mode Work history App menu Troubleshooting About display messages

About trademarks and copyright

About trademarks and copyright

74

1
Cautions for use
XXDAIKIN APP (hereafter referred to as "app") is an application provided by Daikin Industries, Ltd. which makes it simple to carry out RC settings of remote controllers made for industrial air conditioners.
XXCommunication fees which result from the download, update, or use of this app are the responsibility of the user. (This includes additional communication fees which result from updates of this app, re-setting of this app if not functioning correctly, etc.)

2
Cautions for use
XXApp user should be in close proximity to the remote controller. Do not use Bluetooth low energy connection around wireless LAN or other wireless equipment, around equipment which produces radio waves, or in environments with poor signal conditions. There is a possibility that connection will be interrupted frequently, communication speed may be significantly reduced and errors may occur.
XXDo not turn off the Bluetooth function of your smartphone while using this app.
XXIf worried about your smartphone being infected by a computer virus, we recommend that you install separate anti-virus software.

3
App startup
About devices that can be used
Please use this app on a device compatible with Bluetooth low energy communication, as this app uses Bluetooth low energy communication to write setting information to the remote controller. Also, please use a device with a rearfacing camera, as this app scans QR codes after startup depending on usage. � Compatible OS versions:
iOS 12.0 or higher Android 9.0 or higher
� Equipped with rear-facing camera
� Please use a smartphone compatible with BLE 4.2 or higher.

4
App startup
� This app can only connect with "BRC1H7" series wired remote controllers.
� This app is compatible with iOS Dark Mode. iOS 13 or higher is required to use Dark Mode.

5
App startup
Language setting
Select the language to display when using this app.

6
App startup
User selection
Select "Owner/Administrator".

7
App startup
Bluetooth and camera setting
Set the device Bluetooth function to available. If not set to available, this app cannot be used.

8
App startup
Terms of service
After initial startup and setting, upon reaching the end of initial setting, the terms of use of this app are displayed. Please read the terms of use to the end. You must agree to the terms of use to proceed with use of this app.

9
App startup
Usage limitations
Every time this app starts up, it performs a version check, so as a rule, please use it in an environment where internet connection is possible. If there is a newer version of this app, please update this app. If this app is not updated to the latest version, this app cannot be used.
Also, if the app is being used in an environment where internet connection is not possible and the app has been started more than 31 times since the last version check, the app cannot be used until a version check is performed again.

10
Basic usage
How to read this operation manual
Main : Represents the Main RC Sub : Represents the Sub RC
Remote controller preparation
For details on remote controller usage, refer to the installation manual included with the remote controller. Display the owner/administrator
menu screen When using this app, it is necessary to display the owner/administrator menu screen on the remote controller.
1. Display the basic screen on the
remote controller.
Cool
73

11
Basic usage
2. Press the center button on the
remote controller for 5 seconds or more, and display the information screen.
12:34
3. While the information screen is
displayed, press the center and left button (in that order), and keep them both pressed for 5 seconds or more to display the owner password input screen.
* If a password has been set, the password input screen will be displayed. If a password has not been set, this screen will not be displayed, and continue to step 4.
1 � � �

12
Basic usage
4. After the owner/administrator menu
screen is displayed, select the Bluetooth setting icon.
Bluetooth Setting

13
Basic usage
Pairing with the remote controller
1. After the Bluetooth setting screen is
displayed on the remote controller*, use this app to select the remote controller you want to connect to.
* The last 6 digits of the Bluetooth device address are displayed on the remote controller, select the same 6 digits that are also displayed on the app.
XX:XX:XX
-+

14
Basic usage
2. A 6 digit number is displayed on the
screens of both the remote controller and this app, so confirm that the displayed numbers are the same, then press "Pairing" on the remote controller side and press "Pairing" on the app side.
XXXXXX Pairing Cancel
-+

15
Basic usage
3. After pairing is complete, the
Administrator mode menu is displayed on the app.

16
Basic usage
How to use the app
CAUTION Once this app writes setting contents to the remote controller, the previous setting contents are overwritten.
From the app Installer Mode Menu, select one of the option below:
1. Manual setting mode
Select any remote controller and carry out setting.
2. Work history
Review settings log for the remote controller.
3. App menu
XXApplication version You can confirm the software version of the app.

17
Basic usage
XXTerms of use You can confirm the terms of use of the app.
XXOpen source licenses You can confirm the open-source software license this app uses.
XXApplication language You can change the language displayed by the app.
XXApplication time You can change whether the app displays time in 24-hour or 12-hour style.

18
Manual setting mode
Select the remote controller to perform settings on.

19

Manual setting mode
- Installer setting - RC settings - Indoor unit settings

Filter auto clean

Main

Set the time when you want to start the filter auto clean function. After all settings are complete, press the "Send to RC" button.

20
Manual setting mode
- Installer setting - RC settings - Indoor unit settings
XXTime span Set the time when you want the filter auto clean function to operate.
XXForbid filter auto clean Set the filter auto clean function to enable/disable.

21

Manual setting mode
- Installer setting - RC settings - Indoor unit settings

Auto draft prevention

Main

Set the auto draft prevention function, so that people are not directly hit by indoor unit discharge air. After all settings are complete, press the "Send to RC" button.

22
Manual setting mode
- Installer setting - RC settings - Indoor unit settings
XXAuto draft prevention Set the auto draft prevention function to enable/disable.

23

Manual setting mode
- Installer setting - RC settings - Indoor unit settings

Sensor settings

Main

Set the sensing sensor low mode function, which controls power consumption by gradually changing the internal set temperature after it detects that no people are present, or set the sensing sensor stop mode function, which stops operation of the air conditioner after it detects that no people are present and a fixed amount of time has elapsed. After all settings are complete, press the "Send to RC" button.

24
Manual setting mode
- Installer setting - RC settings - Indoor unit settings
XXSensing sensor low mode Set the sensing sensor low mode function to enable/disable.

25
Manual setting mode
- Installer setting
- RC settings
- Indoor unit settings
XXCool/Heat
Setpoint increment or decrement Set the setpoint increase or decrease of the cool/heat temperature. Increment or Decrement time Set the number of minutes after which the sensing sensor low mode function will begin if no people are detected and the air conditioner is in Cool/Heat mode. Setpoint high or low limit Set limits on the correction value (a setpoint high limit for cool and a setpoint low limit for heat).
XXSensing sensor stop mode Set the sensing sensor stop mode function to enable/disable.

26
Manual setting mode
- Installer setting - RC settings - Indoor unit settings
XXAuto off timer Set the number of hours after which the sensing sensor stop mode function will turn off the indoor unit if no people are detected.

27

Manual setting mode
- Installer setting - RC settings - RC settings

Setpoint configuration

Main

Setpoint mode and differential can be set when changeover is available. After all settings are complete, press the "Send to RC" button.

28
Manual setting mode
- Installer setting
- RC settings
- RC settings
XXSetpoint mode Set the setpoint mode. � Single The cool setpoint and heat setpoint will be made the same, and the room temperature will be kept close to this setpoint. � Dual The cool setpoint and heat setpoint will be made different, and the room temperature will be kept between the cool or heat setpoints.

29
Manual setting mode
- Installer setting
- RC settings
- RC settings
� None Set the cool temperature and heat temperature so that they do not restrict each other. When set to None, automatic cooling/heating changeover (Changeover) is unavailable.
XXSetpoint minimum differential Set the setpoint minimum differential between the cool and heat setpoints.

30

Manual setting mode
- Installer setting - RC settings - RC settings

Setpoint range limitation

Main

Limit the range of setpoints which can be set from the remote controller. After all settings are complete, press the "Send to RC" button.

31
Manual setting mode
- Installer setting
- RC settings
- RC settings
XXCool setpoint range Set the cool setpoint range.
* The displayed upper and lower limit values are values from the connected MAIN indoor unit.
XXHeat setpoint range Set the heat setpoint range.
* The displayed upper and lower limit values are values from the connected MAIN indoor unit.

32

Manual setting mode
- Installer setting - RC settings - RC settings

Setback

Main

To prevent the room temperature from becoming extremely high or low while the air conditioner operation is turned off, if the room temperature exceeds the setback setpoint or falls below it, operation is set to start automatically. After all settings are complete, press the "Send to RC" button.

33
Manual setting mode
- Installer setting - RC settings - RC settings
XXSetback Set the setback function to enable/ disable.

34
Manual setting mode
- Installer setting - RC settings - RC settings
XXCool setback Set the cool setback to enable/ disable.
XXCool setback setpoint Set the cool setback setpoint.
XXCool recovery differential Set the cool recovery differential.
XXHeat setback Set the heat setback function to enable/disable.
XXHeat setback setpoint Set the heat setback setpoint.
XXHeat recovery differential Set the heat recovery differential.

35

Manual setting mode
- Installer setting - RC settings - RC settings

Function lock

Main Sub

Partially limit the operation from the remote controller. After all settings are complete, press the "Send to RC" button.

36
Manual setting mode
- Installer setting
- RC settings
- RC settings
XXRC button Set the remote controller button operation to enable/disable.
XXUser menu item
Operation mode Set the ability to change operation modes to enable/disable. Fan speed Set the ability to change Fan speed to enable/disable. Airflow direction Set the ability to change airflow direction to enable/disable. Change setpoint Set the ability to change the setpoint to enable/disable.

37
Manual setting mode
- Installer setting
- RC settings
- RC settings
XXOperation mode
Auto Set operation mode Auto to enable/ disable. Cool Set operation mode Cool to enable/ disable. Heat Set operation mode Heat to enable/ disable. Fan Set operation mode Fan to enable/ disable. Dry Set operation mode Dry to enable/ disable.

38

Manual setting mode
- Installer setting - RC settings - RC display settings

Date & time/DST

Main Sub

Set the remote controller clock and daylight saving time. After all settings are complete, press the "Send to RC" button.

39
Manual setting mode
- Installer setting
- RC settings
- RC display settings
XXAutomatic clock setting Set automatic clock setting to enable/ disable. Not displayed when daylight saving time is displayed, or when connected to a centralized device. Not displayed and function not available if the daylight saving time setting is able to be changed.
XXDate and time Manually set the day and time.
* If Auto clock setting is set to unavailable, this setting is possible.
XXDaylight saving time Set the ability to change the daylight saving time setting to enable/disable.

40
Manual setting mode
- Installer setting - RC settings - RC display settings
XXDST start Set the date and time at which daylight saving time will start.
XXDST end Set the date and time at which daylight saving time will finish.

41

Manual setting mode
- Installer setting - RC settings - RC display settings

Celsius/Fahrenheit

Main Sub

Set the unit type with which the temperature is displayed on the app screen. After all settings are complete, press the "Send to RC" button.

42
Manual setting mode
- Installer setting - RC settings - RC display settings
XXCelsius/Fahrenheit Set the Celsius/Fahrenheit display.

43

Manual setting mode
- Installer setting - RC settings - RC display settings

Brightness control

Main Sub

Set the brightness level of the status indicator and remote controller LCD backlight. After all settings are complete, press the "Send to RC" button.

44
Manual setting mode
- Installer setting - RC settings - RC display settings
XXBack light brightness Set the remote controller LCD brightness level.

45
Manual setting mode
- Installer setting - RC settings - RC display settings
XXStatus indicator brightness (Back light on) Set the status indicator brightness level when the backlight is ON.
XXStatus indicator brightness (Back light off) Set the status indicator brightness level when the backlight is OFF.

46

Manual setting mode
- Installer setting - RC settings - RC display settings

Scale view setting

Main

Set the function to enable operation only by how high or low it is from the reference temperature without displaying the setpoint on the remote controller.

47
Manual setting mode
- Installer setting - RC settings - RC display settings
XXCool reference setpoint Set the reference setpoint when the operation mode is Cool.

48
Manual setting mode
- Installer setting - RC settings - RC display settings
XXHeat reference setpoint Set the reference setpoint when the operation mode is Heat.

49
Manual setting mode
- Service menu
XXError code reset After resolving the error, tap "Reset" to clear it from the error history display of the remote controller.

50

Manual setting mode

- Service menu

- Error history

Main

Display the error history saved in the remote controller and indoor unit. By selecting from the menu in the upper portion of the screen, you can switch between displaying the error history of the remote controller and indoor unit. By specifying the unit number of an indoor unit, you can confirm the error history of each indoor unit.
* For indoor unit error history, a maximum of 5 issues are displayed.
* For remote controller error history, a maximum of 10 issues are displayed.

51
Manual setting mode
- Service menu - Error history

52
Manual setting mode
- Service menu - Error history

53

Manual setting mode

- RC security

- Owner password

Main Sub

Set the password for the owner/ administrator. It is possible to make password entry required if the user wants to change functions that can be changed with owner/administrator authority.

[When password input is unavailable] If the toggle switch is available, the password setting screen will be displayed, so enter a 4 digit password.
* Be sure to make a memo of your password and keep it in a safe place. Please understand that, in case you forget your password, there is a possibility that we may not be able to help you.

54
Manual setting mode
- RC security - Owner password

55
Manual setting mode
- RC security - Owner password
[When password input is available] If "Change Password" is tapped, the password setting screen will be displayed, so enter a 4 digit password.

56
Manual setting mode
- RC security
- Owner password
* After changing your password, be sure to make a memo of your new password and keep it in a safe place. Please understand that, in case you forget your password, there is a possibility that we may not be able to help you.

57
Manual setting mode
- RC security - Owner password

58
Work history
Setting log confirmation procedure
You can confirm the setting log of the remote controller on which setting has been done. Date information is also displayed.
* A maximum of 50 historical data items are stored.
* It is not possible to re-edit historical data. * Items other than those upon which setting
had been carried out cannot be viewed.

59
Work history

60
App menu
Application version
You can confirm the software version of this app.

61
App menu
Terms of use
You can confirm the terms of use of this app.

62
App menu
Open source licenses
You can confirm the open-source software license which this app uses.

63
App menu
Application language
You can change the language displayed by this app. After language selection is complete, press the "<" button.

64
App menu
Application time
You can change whether this app displays time in 24-hour or 12-hour style. After time display selection is complete, press the "<" button.

65
Troubleshooting
The app cannot be found
� Is the Android device you are using equipped with Bluetooth and a rearfacing camera? XUnequipped Android devices will not display the app in the Google Play store list of apps.
� Is the OS version of the Android device you are using correct? XIf using an Android device with an OS older than 9.0.0, the app will not be displayed in the Google Play store list of apps.

66
Troubleshooting
The app cannot be used
� Has the app been started more than 31 times since a version check was performed?
* A version check is carried out when connecting to the App Store.
XPlease use in an environment where internet connection is possible.

67
Troubleshooting
Communication with the remote controller is not possible
� Are you carrying out settings in a location close to the remote controller? XThough Bluetooth low energy communication is possible even from distant locations, as a basic rule, please carry out work close to the operating remote controller.
� Are the Bluetooth function and camera function of the device set to ON? XSet the device Bluetooth function and camera function to ON.

68
Troubleshooting
� Is the Bluetooth setting screen displayed within the installer menu screen? XOn the remote controller, display the Bluetooth setting screen within the installer screen.
� Is the clock on the device correct? XSet the clock on the device correctly to the current time.

69
Troubleshooting
� Is the Bluetooth prohibition setting in the remote controller set to "Allow"? XSet to "Allow" in the Bluetooth prohibition setting area of the remote controller field setting menu.

70
Troubleshooting
� Is the device you are using charged? XPlease charge it. If the battery power is insufficient, there is a possibility that communication cannot be carried out well.
� Connection to the remote controller was possible before, but now connection is not possible. XUnregister the device on your smartphone. 1. Startup the settings application. 2. Select Bluetooth. 3. From the list of your devices, press the "i" button of the "UE878 RF MODULE". 4. Select "Unregister this device".

71

About display messages

App screen (dialog displayed when writing to the remote controller)

Contents X Device error

Error code

Message

Correction method

The Bluetooth function of the device is OFF

A-0001

The Bluetooth

From the setting

function of the device screen of the device,

is unavailable.

please make the

Bluetooth function

available.

The app is prohibited from giving its location information (Android only)

A-0002

To use this app, access to location information needs to be granted.

Please grant access to location information from the app information.

This device does not A-0004 This device does not Please use a

support Bluetooth

support Bluetooth. recommended device.

This device does

A-0005

not support camera

usage.

X Communication error

This device does not support camera usage.

Please use a recommended device.

Communication timed out

B-0001

Communication timed Move close to the

out.

remote controller

and perform settings

again.

The length of the frame is not within range

B-0002 Communication failed.

Move close to the remote controller and perform settings again.

A nonexistent command was received

B-0003 Communication failed.

Move close to the remote controller and perform settings again.

Inconsistent frame number

B-0004 Communication failed.

Move close to the remote controller and perform settings again.

Cannot receive due to communication volume exceeding the allotted memory area

B-0005

Communication failed.

Move close to the remote controller and perform settings again.

Pairing was interrupted

B-0006

Communication with the remote controller was interrupted.

Make the advertisement function on the remote controller available, perform pairing again, and then perform settings.

72

About display messages

Contents

Error code

Message

Correction method

There was a failure at B-0007 Communication

CRC check

failed.

Move close to the remote controller and perform settings again.

Received data is missing

B-0008 Reception failed.

Move close to the remote controller and perform settings again.

Connected to a nonsupported device

B-0009

It is a non-supported device.

This app can only connect to the Daikin Industries, Ltd. "BRC1H7" wired remote controller series.

The amount of

B-0010 The amount of data is

schedule data is

in error.

--

excessive

An error occurred in B-0011 Communication

part of the header

failed.

This app can only connect to the Daikin Industries, Ltd. "BRC1H7" wired remote controller series.

Processing sequence B-0012 Communication

error

failed.

--

X Setting failure

There was a setting failure due to an error on the device side

C-0001

Some kind of error Move close to the

occurred between the remote controller

remote controller and and perform settings

the indoor unit.

again.

If the same message is displayed, confirm the contents of the setting.

73

About display messages

Contents

Error code

Message

Correction method

Setting failed

C-0002 Contains a value that Confirm the contents

because the batch

cannot be set. Check of the setting.

sending function sent

the settings for the

a value that cannot

following functions.

be set on the device

� Field setting

side.

� Setpoint range

limitation

Enumerates functions that tried to set values which cannot be set, such as above.

1 If this app is not updated to the latest version, this app cannot be used. Also, if the app is being used in an environment where internet connection is not possible and the app has been started more than 31 times since the last version check, the app cannot be used until a version check is performed again.
2 Has the app been started more than 31 times since a version check was performed?
3 Though Bluetooth low energy communication is possible even from distant locations, as a basic rule, please carry out work close to the operating remote controller.

74
About trademarks and copyright
� "QR Code" is a trademark or registered trademark of DENSO WAVE INCORPORATED.
� "iOS" and "Apple Store" are trademarks or registered trademarks of Apple Inc.
� "Android" and "Google Play Store" are trademarks or registered trademarks of Google Inc.
� Bluetooth low energy and the Bluetooth low energy logo are trademarks of Bluetooth SIG, Inc.
� The contents of this manual are subject to change without prior notice.
� Other company names, product names, etc. noted here are trademarks or registered trademarks of other companies, or trademarks of this company. It should be noted that � and TM marks are not specified in the text.

EM19A033A (2007) HT