File info: application/pdf · 20 pages · 26.33MB
INSTALLATION MANUAL
Extracted Text
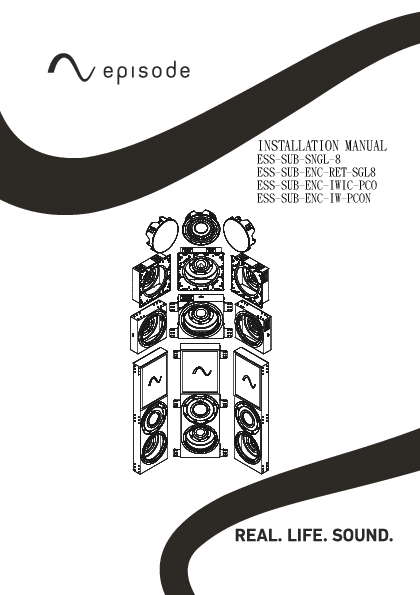
INSTALLATION MANUAL
ESS-SUB-SNGL-8 ESS-SUB-ENC-RET-SGL8 ESS-SUB-ENC-IWIC-PCO ESS-SUB-ENC-IW-PCON

page | 2
snapav.com Support 866.838.5052

page | 3

INTRODUCTION
Thank you for purchasing Episode� Signature speakers. Episode is one of the most highly-regarded brands of speakers available today. We appreciate your business and we stand committed to providing our customers with the highest degree of quality and service in the industry.
For optimal system performance, we recommend pairing them with our acclaimed Episode Signature speakers and Episode Subwoofer Amplifiers..
To complete installation, follow these guidelines.

SETUP
Subwoofer Placement
The placement and configuration of the subwoofer can affect its performance. All rooms are different and the strongest output will likely occur if you place your subwoofer in the front of the room or on the same wall or ceiling as your front channel / distributed speakers. Keep subwoofers about 2 feet away from corners and other surfaces that might interfere with or reflect sound, such as tall furniture.

CUTOUT DIMENSIONS
Refer to the chart below to verify the correct dimensions prior to cutting drywall.

Model ESS-SUB-SNGL-8

Cutout Dimension Mounting Depth

9.7"

3 7/8"

ESS-SUB-ENC-RET-SGL8

12" � 12"

3 7/8"

ESS-SUB-ENC-IW-PCON

9.7"

3 1/2

ESS-SUB-ENC-IWIC-PCO

9.7"

51/8"

Existing Construction Install
Free-air Subwoofer installations can be simplified by using Episode pre-construction brackets (sold separately). Install them prior to drywall to allow for precise placement of the subwoofer. Secure the wiring within reach of the bracket for easy access. If using the speaker as a free air installation, make a cutout for the speaker using the supplied template.

� 2019 Episode�

page | 4

Allow space for the bezel if installing near adjacent objects, or cut the hole in two steps as shown below.

OBSTRUCTION PLUG

1. Cut the drywall at a 45� angle so that if the speaker is too close to an obstruction, you can easily `plug' the hole.

2. If there are no obstructions, cut the drywall again, this time at a 90� angle.

g "no personal connection" to the original text, decided to use the lm as a ground-up reimagining of the story - a hero's journey with magical swords and ancient prophecies and a strong moral message about... following orders?
3. Insert the subwoofer into the cutout. Thin bezel round grille included with free-air subwoofer.

Using The Retrofit Backbox
Using an enclosure in combination with the free air subwoofer can improve overall system performance by controlling the air volume behind the wall. In addition to added performance, enclosures also aid in reducing transient noise to adjacent rooms. If using the retrofit enclosure (ESS-SUB-ENC-RET-SGL8) first make a cutout for the enclosure using the supplied template. Allow space for the bezel if installing near adjacent objects, or cut the hole in two steps as shown below.
Note: Wire the retrofit enclosure before placing and securing in the wall.

OBSTRUCTION PLUG

1. Cut the drywall at a 45� angle so that if the enclosure is too close to an obstruction, you can easily `plug' the hole.

2. If there are no obstructions, cut again at a 90� angle.

3. Wire the retrofit enclosure, then insert it into the space cut into the drywall.

snapav.com Support 866.838.5052

page | 5

DOG EARS VERTICAL

4. Secure the back box into the drywall by tightening the dog ears or using the frame of the enclosure to fasten to joists.
NOTE: Stud bays can be spanned vertically or horizontally with 2 subwoofer units without needing to cut the stud joist. Ensure the retrofit enclosure bezels butt up to one another and are in alignment so the dual sub grille will fit over the subs. See the specifications tables for optional grille accessories. Stud
Joint Fastener Locations

HORIZONTAL
Adding the Subwoofer to the Retrofit Enclosure
Wire the subwoofer to the pigtail contained within the enclosure before installing into the wall. Insert ESS-SUB-SNGL-8 after completing install of the retrofit enclosure(s).
IMPORTANT: Be sure to align the dog ears of the subwoofer to the markings shown on the enclosure. If not done properly, the dog ears may jam against the side, making the speaker very difficult to remove.
NEW CONSTRUCTION INSTALLATIONS
ESS-SUB-ENC-IW-PCON and ESS-SUB-ENC-IWIC-PCO enclosures are intended for install during the pre-construction phase in the home. These controll the air volume behind the wall, limit the footprint visible from the finished surface while also helping to reduce transient noise to adjacent rooms.
IMPORTANT: Consider placement of subwoofers early in the process and test the placement of the product in the room prior to installing drywall. Wire enclosures BEFORE drywall is installed.
Note: Take extra precautions to secure and dampen studs, drywall, pipes, wires, etc in the wall during the process of installing the pre-construction enclosure.

� 2019 Episode�

page | 6
ESS-SUB-ENC-IWIC-PCO (In Ceiling Back Box) Without extention Arms The ESS-SUB-ENC-IWIC-PCO is designed for in-ceiling and in-wall preconstruction applications. This enclosure only fits into a 2"� 6" stud bays and can be used in walls as well. The ESS-SUB-ENC-IW-PCON should be used if the wall is built with 2" � 4" studs. 1. Choose the location for the enclosure and install the brackets.
� 6
2. Secure the enclosure to the studs through the brackets.
� 6
With Extension Arms NOTE: The extension arms allow for installation in a stud bay spanning up to 24". Slotted holes allow for side-to-side adjustment within a stud bay prior to securing in the final position. 1. Choose a stud bay for installation of the back box using the extension
arms. 2. Attach the extension arms to the existing brackets on the enclosure,
using the supplied hardware.
� 6
� 6
snapav.com Support 866.838.5052

3. Secure the extention arms to the studs.

page | 7

ESS-SUB-ENC-IW-PCON
The ESS-SUB-ENC-IW-PCON is designed to expand air volume behind the wall for an improved sound performance. Follow the instructions below to install this enclosure before the drywall is installed. This enclosure is designed for use with 2" � 4" studs.

1. Choose a stud bay for installation of

� 6

the back box.

2. Leave approximately 4" of room at the bottom of the enclosure for easier wiring.

3. Secure the enclosure to the stud using the included brackets, again, taking extra precaution to ensure enclosure is tight to studs and drywall to avoid vibrations during use.

Note: By default the ESS-SUB-IW-PCON enclosure is configured for a single subwoofer in the lower location. To move the subwoofer to the upper location, swap the blank plate with the drywall flange. To convert the enclosure for use with dual subwoofers, replace the blank with the included second drywall flange.

� 2019 Episode�

BLANK

FLANGE

page | 8
Adding the Subwoofer to the Enclosure for ESS-SUB-ENC-IWIC-PCO and ESS-SUB-ENC-IW-PCON
Complete the instructions below once the drywall has been installed, using the drywall flange to cut out the opening in the sheetrock. 1. Prewire the subwoofer to the pigtails in the enclosure. 2. Insert the subwoofer into the enclosure. 3. Tighten the dogs to secure.

SECURING THE ESS-SUB-SNGLE-8 SUBWOOFER

Engage and Tighten

Spring Dog

1. Insert the subwoofer into the opening and turn the screw for each of the dogs one quarter turn clockwise to engage the spring mechanism.

PARKED Carrier
Spring Dog ENGAGED
Carrier Spring
Dog TIGHTENED

2. The subwoofer is now held in place, freeing up your hands so that you may continue to tighten the dogs safely.
3. Tighten to send the carrier to retrieve the dog until you feel resistance, but do not over tighten. If using a drill, use a low-torque setting.

snapav.com Support 866.838.5052

page | 9

Disengage and Remove

Carrier
Spring Dog TIGHTENED

! IMPORTANT: The dogs must be engaged AND tightened before attempting to remove the subwoofer. The dogs will not retract into the parked position if not fully engaged and tightened.
1. Turn each dog screw in a counterclockwise direction until the dog is in its original parked position.

Spring Dog
PARKED

2. Once the dogs are disengaged, the subwoofer is easily removed from the ceiling or wall.

� 2019 Episode�

page | 10
CONNECT
It is recommended to pair Episode Signature subwoofers and enclosures with Episode subwoofer amplifiers. The configuration, number of subwoofers, and size of the room presents several amplifier options from which to choose.
Small to Medium Room Connection Diagram The EA-AMP-SUB-1D-150 amplifier is recommended for spaces less than 1500 square ft up to 2500 square feet. 1. Connect receiver directly to the amplifier. 2. Connect speaker(s) to amplifier observing proper polarity (+ to + and � to � ).
ESS-SUB-SNGL-8 The amplifier EQ toggle should be set to A.

R CEN RS

L

SUB

LS

+ 12V Trigger Out

Switched Outlet

AVR/SOURCE

L (LFE)

R

IN

OUT

OUT DC 12V TRIGGER
A BC

ON BYPASS TRIGGER ON

CROSSOVER

PHASE

EQ

EQ

AUTO

IN

SETTINGS

MODE

POWER MODES 50 300 (LFE)

0 180

VOLUME

0

10

EA-AMP-SUB-1D-150

EA-AMP-SUB-1D-150

Designed and Engineered in USA Made in China
FUSE T3.15AL/250V 100-120V~60Hz/220-240V~50Hz 150WATTS

SUB 1

Total Impedance (Sub 1 + Sub 2) Minimum 4

SUB 2

100-120V AC

220-240V AC

+

ESS-SUB-SNGL-8

L (LFE)

R

IN

OUT

OUT DC 12V TRIGGER
A BC

ON BYPASS TRIGGER ON

CROSSOVER

PHASE

EQ

EQ

AUTO

IN

SETTINGS

MODE

POWER MODES 50 300 (LFE)

0 180

VOLUME

0

10

EA-AMP-SUB-1D-150

SUB 1

Total Impedance (Sub 1 + Sub 2) Minimum 4

SUB 2

Designed and Engineered in USA Made in China
FUSE T3.15AL/250V 100-120V~60Hz/220-240V~50Hz 150WATTS

100-120V AC

220-240V AC

snapav.com Support 866.838.5052

+
page | 11

R CEN RS

L

SUB

LS

+ 12V Trigger Out

Switched Outlet

L (LFE)

R

IN

OUT

AVR/SOURCE

EA-AMP-SUB-1D-150

OUT DC 12V TRIGGER
A BC

ON BYPASS TRIGGER ON

CROSSOVER

PHASE

EQ

EQ

AUTO

IN

SETTINGS

MODE

POWER MODES 50 300 (LFE)

0 180

VOLUME

0

10

EA-AMP-SUB-1D-150

SUB 1

Total Impedance (Sub 1 + Sub 2) Minimum 4

SUB 2

Designed and Engineered in USA Made in China
FUSE T3.15AL/250V 100-120V~60Hz/220-240V~50Hz 150WATTS

100-120V AC

220-240V AC

-

-

+

+

ESS-SUB-SNGL-8
ESS-SUB-ENC-IWIC-PCO / ESS-SUB-ENC-RET-SGL8 The amplifier EQ toggle should be set to C.

R CEN RS

L

SUB

LS

+ 12V Trigger Out

Switched Outlet

AVR/SOURCE

L (LFE)

R

IN

OUT

OUT

DC 12V TRIGGER

A BC

ON BYPASS TRIGGER ON

CROSSOVER

PHASE

EQ

EQ

AUTO

IN

SETTINGS

MODE

POWER MODES 50 300 (LFE)

0

180

VOLUME

0

10

EA-AMP-SUB-1D-150

EA-AMP-SUB-1D-150

Designed and Engineered in USA Made in China
FUSE T3.15AL/250V 100-120V~60Hz/220-240V~50Hz 150WATTS

SUB 1

Total Impedance (Sub 1 + Sub 2) Minimum 4

SUB 2

100-120V AC

220-240V AC

-

+

OR

ESS-SUB-ENC-IWIC-PCO or ESS-SUB-ENC-RET-SGL8 + ESS-SUB-SNGL-8

L (LFE)

R IN

OUT

OUT

DC 12V TRIGGER

IN

IR

UPDATE

� 2019 Episode�

OPERATE

EA-AMP-SUB-1D-500R

SUB 1

Total Impedance (Sub 1 + Sub 2) Minimum 4

SUB 2

Designed and Engineered in USA Made in China
FUSE T8AL/250V 100-120V~60Hz/220-240V~50Hz 500WATTS

100-120V AC

220-240V AC

page | 12
ESS-SUB-ENC-IW-PCON The amplifier EQ toggle should be set to B.

R CEN RS

L

SUB

LS

+ 12V Trigger Out

Switched Outlet

AVR/SOURCE

L (LFE)

R

IN

OUT

OUT DC 12V TRIGGER
A BC

ON BYPASS TRIGGER ON

CROSSOVER

PHASE

EQ

EQ

AUTO

IN

SETTINGS

MODE

POWER MODES 50 300 (LFE)

0 180

VOLUME

0

10

EA-AMP-SUB-1D-150

EA-AMP-SUB-1D-150

Designed and Engineered in USA Made in China
FUSE T3.15AL/250V 100-120V~60Hz/220-240V~50Hz 150WATTS

SUB 1

Total Impedance (Sub 1 + Sub 2) Minimum 4

SUB 2

100-120V AC

220-240V AC

ESS-SUB-ENC-IW-PCON + ESS-SUB-SNGL-8 (qty. 1)
-+

Medium to Large Room Connection Diagram L (LFE)

OUT
DC 12V TRIGGER

EA-AMP-SUB-1D-500R

Designed and Engineered in USA Made in China
FUSE T8AL/250V

100-120V~60Hz/220-240V~50Hz 500WATTS

R

OPERATE

The EA-AMP-SUB-1D-500 amplifier is recommended IN

OUT

IN

IR

UPDATE

SUB 1

Total Impedance (Sub 1 + Sub 2) Minimum 4

SUB 2

100-120V AC

220-240V AC

for

spaces

1500

square ft to over 2500 square feet.

1. Connect receiver directly to the amplifier.

2. Connect speaker(s) to amplifier observing proper polarity (+ to + and � to � ).

+
+
snapav.com Support 866.838.5052

page | 13
ESS-SUB-ENC-RET-SNGL8 Using the front panel of the subwoofer amplifier, select the "Dual8" preset EQ.

L (LFE)

R

IN

OUT

OUT
DC 12V TRIGGER

IN

IR

UPDATE

OPERATE

EA-AMP-SUB-1D-500R

Designed and Engineered in USA Made in China
FUSE T8AL/250V 100-120V~60Hz/220-240V~50Hz 500WATTS

SUB 1

Total Impedance (Sub 1 + Sub 2) Minimum 4

SUB 2

100-120V AC

220-240V AC

EA-AMP-SUB-1D-500

-

-

+

+

ESS-SUB-ENC-RET-SGL8

+

ESS-SUB-SNGL-8

L (LFE)

R IN

OUT

OUT

DC 12V TRIGGER

IN

IR

UPDATE

EA-AMP-SUB-1D-500

OPERATE

EA-AMP-SUB-1D-500R

SUB 1

Total Impedance (Sub 1 + Sub 2) Minimum 4

SUB 2

Designed and Engineered in USA Made in China
FUSE T8AL/250V 100-120V~60Hz/220-240V~50Hz 500WATTS

100-120V AC

220-240V AC

+-

+-

ESS-SUB-ENC-RET-SGL8 (qty. 4) + ESS-SUB-SNGL-8 (qty. 4)

+-

+-

� 2019 Episode�

R CEN RS

L

SUB

LS

page | 14

+ 12V Trigger Out

Switched Outlet

-
ESS-SUB-EN+ C-IWIC-PCO

Using the front panel of the subwoofer amplifier, select the "Dual8" preset L

OUT

CROSSOVER

PHASE

VOLUME

EA-AMP-SUB-1D-150

Designed and Engineered in USA

(LFE)

DC 12V

Made in China

EQ.

TRIGGER A BC

ON BYPASS TRIGGER ON

FUSE T3.15AL/250V 100-120V~60Hz/220-240V~50Hz 150WATTS

R

IN

OUT

EQ

EQ

AUTO

IN

SETTINGS

MODE

POWER MODES 50 300 (LFE)

0

180

0

10

SUB 1

Total Impedance (Sub 1 + Sub 2) Minimum 4

SUB 2

100-120V AC

220-240V AC

L (LFE)

R

IN

OUT

OUT
DC 12V TRIGGER

IN

IR

UPDATE

OPERATE

EA-AMP-SUB-1D-500R

Designed and Engineered in USA Made in China
FUSE T8AL/250V 100-120V~60Hz/220-240V~50Hz 500WATTS

SUB 1

Total Impedance (Sub 1 + Sub 2) Minimum 4

SUB 2

100-120V AC

220-240V AC

EA-AMP-SUB-1D-500

-

-

+

+

ESS-SUB-ENC-IWIC-PCO

+

ESS-SUB-SNGL-8

ESS-SUB-ENC-IW-PCON
-+
Using the front panel of the subwoofer amplifier, select the "Dual8" preset
EQ.

L (LFE)

R IN

OUT

OUT

DC 12V TRIGGER

IN

IR

UPDATE

OPERATE

EA-AMP-SUB-1D-500R

Designed and Engineered in USA Made in China
FUSE T8AL/250V 100-120V~60Hz/220-240V~50Hz 500WATTS

SUB 1

Total Impedance (Sub 1 + Sub 2) Minimum 4

SUB 2

100-120V AC

220-240V AC

EA-AMP-SUB-1D-500

ESS-SUB-ENC-IW-PCON + ESS-SUB-SNGL-8 (qty, 2)
+
+

snapav.com Support 866.838.5052

page | 15
Using the front panel of the subwoofer amplifier, select the "Dual8" preset EQ.

L (LFE)

R IN

OUT

OUT

DC 12V TRIGGER

IN

IR

UPDATE

EA-AMP-SUB-1D-500

OPERATE

EA-AMP-SUB-1D-500R

SUB 1

Total Impedance (Sub 1 + Sub 2) Minimum 4

SUB 2

Designed and Engineered in USA Made in China
FUSE T8AL/250V 100-120V~60Hz/220-240V~50Hz 500WATTS

100-120V AC

220-240V AC

ESS-SUB-ENC-IW-PCON (qty,2) + ESS-SUB-SNGL-8 (qty, 4)

-

-

+

+

-

-

+

+

FINE TUNE
To fine tune the system, leverage the rear panel of the subwoofer amplifier. EQ settings should be adjusted based on the size of the room and the size of the enclosure. Refer to the above sections for ideal EQ setting for each configuration. Crossover, phase and volume should also be adjusted to optimize performance of the system.

� 2019 Episode�

page | 16 SPECIFICATIONS

Product

ESS-SUB-SNGL-8

Connector Type

Gold-Plated Push Terminals

Frequesncy Response 30Hz - 300Hz

Nominal Impedance 8 ohms

Power Handling

150 W (RMS)/200W (Dynamic)

Sensitivity

85 dB

Speaker Grille

Steel Micro-Perf Mesh / White / low profile thin bezel

Woofer

6" Polypropylene cone woofer with vacuum-deposited titanium

Dimensions FInished 11" Diameter with Grille

Mounting Depth

3 7/8

Cutout Diameter

9.7"

Weight

6.5 lbs/ 2.96 kgs

Optional Accessories: Product Item Number:

Optional Pre-

ES-ESS-BRKT-IC-8

Construction Brackets

Optional Grille Kits

ES-ESS-GRLRND-IC-8-B

ES-ESS-GRLSQ-IC-8

ES-ESS-GRLSQ-IC-8-B

ES-ESS-GRLXRND-IC-8

Notes:
Round / thin bezel grille / Black Square (adaptor plate included) / thin bezel grille / White Square (adaptor plate included) / thin bezel grille / Black Round / Bezel-less grille / White

ES-ESS-GRLXRND-IC8-B ES-ESS-GLXSQ-IC-8
ES-ESS-GLXSQ-IC-8-B

Round / Bezel-less grille / Black
Square (adaptor plate included) / Bezel-less grille / White Square (adaptor plate included) / Bezel-less grille / Black

snapav.com Support 866.838.5052

page | 17

Optional Enclosures

ESS-SUB-ENC-RETSGL-8 ESS-SUB-ENC-IWIC-PCO
ESS-SUB-ENC-IW-PCON

Enclosure - Retrofit - minimum standard stud construction 2" x 4" - Single 8" Subwoofer installation
Enclosure - Pre-Construction - minimum standard stud construction 2" x 6" Single 8" Subwoofer installation
Enclosure - Pre-Construction - minimum standard stud construction 2" x 4" Single or Dual 8" Subwoofer installation

Product

ESS-SUB-ENC-RET-SGL-8

E S S - S U B - E N C - I W I C - ESS-SUB-ENC-IW-PCON PCO

Connector Type

Gold-Plated Push Terminals

Gold-Plated Push Terminals

Gold-Plated Push Terminals

Frequesncy Down to 22 Hz Response

Down to 20 Hz

Down to 19 Hz

Speaker Grille

Steel Micro-Perf Mesh / White / low profile thin bezel Included

Uses grille from ESS-SUB-SNGL-8 or optional ESS grilles

Optional ESS_GRLDSUB8-RET-WT and ESS-GRL-DSUB8-RET-BLK for dual retrofit subwoofer installations.

Uses grille from ESS-SUB-SNGL-8 or Optional ESS_GRL-DSUB8-RET-WT and ESS-GRL-DSUB8RET-BLK for dual retrofit subwoofer installations.

Enclosure 5/8"
Material Wall
Thickness

5/8"

5/8"

Internal Air 290 Volume (Cu. Inches)

500

1050

Dimensions FInished Diameter with Grille

14" � 14" � 4.25"

12.8" � 12.8" � 5.4" 43.4" � 12.8" � 3.3"

Mounting

3 7/8

Depth

51/8

31/2

Cutout

12" � 12"

9.7"

9.7"

Diameter

Weight

10.4 lbs/ 4.71 kgs

7.9 lbs/3.6 kgs

� 2019 Episode�

page | 18 WARRANTY
Limited Lifetime Warranty Episode� speakers have a Limited Lifetime Warranty. This warranty includes parts and labor repairs on all components found to be defective in material or workmanship under normal conditions of use. This warranty will not apply to products that have been abused, modified, or disassembled. Products to be repaired under this warranty must be returned to SnapAV or a designated service center with prior notification and an assigned Return Authorization number (RA).
CONTACTING TECHNICAL SUPPORT
866.838.5052 support@episodeaudio.com
snapav.com Support 866.838.5052

page | 19
� 2019 Episode�

� 2019 Episode� Rev: 190318-1750