User Manual for StarTech models including: PM1115UW, PM1115UWEU, Wireless N USB 2.0 Network Print Server
Manual Revision: 11/09/2021 User Manual For the latest information and specifications visit www.startech.com/PM1115UW Wireless N USB 2.0 Network Print Server
Sgcdn.startech.com View guide user manual › Url: https://sgcdn.startech.com/005329/media/sets/pm1115uwxx manual/pm1115uw manual
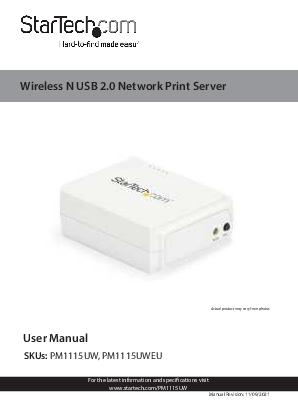
Wireless N USB 2.0 Network Print Server
Actual product may vary from photos
User Manual
SKUs: PM1115UW, PM1115UWEU
For the latest information and specifications visit www.startech.com/PM1115UW Manual Revision: 11/09/2021

Compliance Statements
FCC Compliance Statement
This equipment has been tested and found to comply with the limits for a Class B digital device, pursuant to part 15 of the FCC Rules. These limits are designed to provide reasonable protection against harmful interference in a residential installation. This equipment generates, uses and can radiate radio frequency energy and, if not installed and used in accordance with the instructions, may cause harmful interference to radio communications. However, there is no guarantee that interference will not occur in a particular installation. If this equipment does cause harmful interference to radio or television reception, which can be determined by turning the equipment off and on, the user is encouraged to try to correct the interference by one or more of the following measures: · Reorient or relocate the receiving antenna · Increase the separation between the equipment and receiver · Connect the equipment into an outlet on a circuit different from that to
which the receiver is connected · Consult the dealer or an experienced radio/TV technician for help
Industry Canada Statement
This Class B digital apparatus complies with Canadian ICES-003. Cet appareil numérique de la classe [B] est conforme à la norme NMB-003 du Canada. CAN ICES-3 (B)/NMB-3(B)
IC Radiation Exposure Statement
This equipment complies with IC RSS-102 radiation exposure limit set forth for an uncontrolled environment. This equipment should be installed and operated with minimum distance 20cm between the radiator and your body.
To view manuals, videos, drivers, downloads, technical drawings, and more visit www.startech.com/support
i

Déclaration d'exposition à la radiation
Cet équipement respecte les limites d'exposition aux rayonnements IC définies pour un environnement non contrôlé. Cet équipement doit être installé et mis en marche à une distance minimale de 20 cm qui sépare l'élément rayonnant de votre corps. L'émetteur ne doit ni être utilisé avec une autre antenne ou un autre émetteur ni se trouver à leur proximité. FCC ID: 2AA3I-PM1115UWB IC: 11232A-PM1115UWB
Use of Trademarks, Registered Trademarks, and other Protected Names and Symbols
This manual may make reference to trademarks, registered trademarks, and other protected names and/or symbols of third-party companies not related in any way to StarTech.com. Where they occur these references are for illustrative purposes only and do not represent an endorsement of a product or service by StarTech.com, or an endorsement of the product(s) to which this manual applies by the third-party company in question. Regardless of any direct acknowledgement elsewhere in the body of this document, StarTech.com hereby acknowledges that all trademarks, registered trademarks, service marks, and other protected names and/or symbols contained in this manual and related documents are the property of their respective holders.
To view manuals, videos, drivers, downloads, technical drawings, and more visit www.startech.com/support
ii

Safety Statements
Safety Measures
· Wiring terminations should not be made with the product and/or electric lines under power.
· Cables (including power and charging cables) should be placed and routed to avoid creating electric, tripping or safety hazards.
Mesures de sécurité
· Les terminaisons de câblâge ne doivent pas être effectuées lorsque le produit et/ou les câbles électriques sont sous tension.
· Les câbles (y compris les câbles d'alimentation et de chargement) doivent être placés et acheminés de façon à éviter tout risque électrique, de chute ou de sécurité


Misure di sicurezza
· I terminiali dei fili elettrici non devono essere realizzate con il prodotto e/o le linee elettriche sotto tensione.
· I cavi (inclusi i cavi di alimentazione e di ricarica) devono essere posizionati e stesi in modo da evitare pericoli di inciampo, rischi di scosse elettriche o pericoli per la sicurezza.
Säkerhetsåtgärder
· Montering av kabelavslutningar får inte göras när produkten och/eller elledningarna är strömförda.
· Kablar (inklusive elkablar och laddningskablar) ska dras och placeras på så sätt att risk för snubblingsolyckor och andra olyckor kan undvikas.
To view manuals, videos, drivers, downloads, technical drawings, and more visit www.startech.com/support
iii

Warning Statements
· Read the entire manual and ensure the instructions are fully understood before assembling and/or using this product.
· This product is intended for indoor use only and should not be used outdoors.
Varningsmeddelanden
· Läs hela manualen och se till att du förstår instruktionerna innan du börjar montera och använda produkten.
· Produkten är endast avsedd för användning inomhus och ska inte användas utomhus.
Waarschuwingen
· Lees de gehele handleiding en zorg dat u de instructies begrijpt voordat u dit product in elkaar zet en gebruikt.
· Dit product is alleen bedoeld voor binnengebruik en mag niet buiten worden gebruikt.
 ·   ·
Dichiarazioni di avvertenza
· Leggere l'intero manuale e assicurarsi di aver compreso tutte le istruzioni prima di iniziare ad assemblare e a utilizzare questo prodotto.
· Il prodotto è destinato all'uso in ambienti interni. Se ne sconsiglia l'impiego in ambienti esterni.
Avertissements
· Lisez tout le manuel et assurez-vous que vous comprenez les instructions avant de commencer à assembler et utiliser ce produit.
· Ce produit est uniquement destiné à une utilisation en intérieur et ne doit pas être utilisé à l'extérieur.
To view manuals, videos, drivers, downloads, technical drawings, and more visit www.startech.com/support
iv

Mensagens de aviso
· Leia todo o manual e certifique-se de que entende as instruções antes de começar a montar e a utilizar este produto.
· Este produto destina-se apenas a uma utilização no interior e não deve ser utilizado no exterior.
Advertencias de uso
· Lea todo el manual y asegúrese de haber comprendido bien las instrucciones antes de proceder con el ensamblaje y el uso de este producto.
· El uso de este producto es solo para interiores y no debe utilizarse en exteriores.
Warnhinweise
· Bevor Sie dieses Produkt montieren und verwenden, lesen Sie das gesamte Handbuch und vergewissern Sie sich, dass Sie die Anweisungen verstanden haben.
· Dieses Produkt ist nur zum Gebrauch in Innenräumen vorgesehen und sollte nicht im Freien verwendet werden.
To view manuals, videos, drivers, downloads, technical drawings, and more visit www.startech.com/support v

Table of Contents
Compliance Statements ........................................................................i Safety Statements ..................................................................................iii Warning Statements ..............................................................................iv Product Diagram ....................................................................................1
Front View .................................................................................................................................................... 1 Back View ..................................................................................................................................................... 1
Product Information ..............................................................................2
Requirements ............................................................................................................................................. 2 Package Contents ..................................................................................................................................... 2 Configurations............................................................................................................................................ 2
Installation ..............................................................................................3
Default Settings ......................................................................................................................................... 3 Basic Hardware Installation ................................................................................................................... 3 Hardware and Software Installation................................................................................................... 3
Operation ................................................................................................20
LED Indicators............................................................................................................................................. 20 Reset Button................................................................................................................................................ 20 Troubleshooting ....................................................................................................................................... 22
Warranty Information............................................................................25 Limitation of Liability ............................................................................25
To view manuals, videos, drivers, downloads, technical drawings, and more visit www.startech.com/support

Product Diagram
Front View

Back View

3 12

4 56 7

1

WAN LED

5

LED Indicators

2

WPS Button

6

3

Reset Button

7

4

DC Jack

USB-A Port RJ45 Port

To view manuals, videos, drivers, downloads, technical drawings, and more visit www.startech.com/support 1

Product Information
Requirements
For the latest product software, product information, technical specifications, manuals, and Declarations of Conformance, please visit: www.startech.com/PM1115UW www.startech.com/PM1115UWEU
Note: The Print Server does not support printing with HostBased Printers (e.g. CAPT, GDI, PPA).
Package Contents
· Wireless Print Server x 1 · Power Adapter x 1 · Product Insert x 1
Configurations

PS Admin Utility / Setup Wizard

Operating System
Windows® XP, Vista, 7, 8, 8.1, 10

Function
Install a single print server on a network

Embedded Web server

Windows, macOS, and Linux

To view manuals, videos, drivers, downloads, technical drawings, and more visit www.startech.com/support 2

Installation
Default Settings
· Username: admin · Password: (None) · Wireless Mode: Ad-Hoc (Peer-to-Peer) · SSID: PM1115UW · IP Address: 192.168.0.10
Basic Hardware Installation
1. Turn OFF the Power to the Printer.
2. Connect the Print Server to the Printer, using an appropriate USB Printer Cable.
3. Turn ON the Power to the Printer.
4. Connect the Power Adapter to the DC Jack, located on the back of the Print Server.
5. Wait ~40 seconds for the Print Server's Power On Self Test (POST) to complete.
6. (Optional) Connect an RJ45 Network Cable to the Print Server and to a Network Device (e.g. network switch or wall jack).
Hardware and Software Installation
The PM1115UW can be installed using two distinct methods.
Method 1: For a streamlined installation, follow the steps listed in the Basic Software Installation section. Please note that this method is only available in Windows.
To view manuals, videos, drivers, downloads, technical drawings, and more visit www.startech.com/support
3

Method 2: For other operating systems or for a more advanced setup in Windows, follow the steps listed in the Advanced Software Installation section.
Basic Software Installation
1. Connect an RJ45 Network Cable to the Print Server and to a Network Device (e.g. network switch or wall jack). Wait ~40 seconds for the boot up sequence to complete. The Printer will be connected in Step #13 of Basic Software Installation.
2. Install the Print Server (PS) Wizard application on the Computer that will be used for printing purposes. Connect this Computer to the Network, utilizing a Wi-Fi Connection or an Ethernet Cable. Confirm the Printer works while directly connected to the Computer, using a USB Cable, before continuing to the next step. If printing with a direct USB connection is unavailable, download the Drivers for the Printer from the manufacturer
Note: The PS Wizard application can be found by navigating to the following link(s): www.startech.com/PM1115UW www.startech.com/PM1115UWEU Navigate to the Drivers/Downloads tab and select [pm1115uw] usb wireless n print server.zip.
3. Right-click the PS Wizard Shortcut and select Run as Administrator. Select Yes to allow the software to run.
4. At the Welcome screen, select Next to begin the software installation. (Figure 1)
To view manuals, videos, drivers, downloads, technical drawings, and more visit www.startech.com/support
4

Figure 1
5. At the Select a Print Server screen, select Next to start searching for the Print Server (Figure 2). Select the desired Print Server then select Next. (Figure 3)
Note: If the Print Server is not detected, check the Network Connection.

Figure 2

Figure 3

To view manuals, videos, drivers, downloads, technical drawings, and more visit www.startech.com/support

5

6. (Optional )At the Change Settings screen, apply a Password to the Print Server's Web Interface by selecting Yes then enter the desired Password. The Web Interface is not password protected by default. Select Next. (Figure 4)
Figure 4
7. At the Basic Wireless Settings screen, change the Communication Type to Infrastructure. Change the SSID to the Name of the Wireless Network that the Print Server is to connect to. The other settings can be left unchanged. Select Next. (Figure 5)
Figure 5 6

8. At the Wireless Security screen, select the correct Authentication Type for the wireless network. The field for Encryption type will then appear. Input the Pre-shared Key, also known as the Wi-Fi Password, for the Network. (Figure 6) Note: The most common Encryption type is WPA2-PSK (CCMP), also known as WPA2-AES. This may vary, depending upon the Wireless Router.
Figure 6
To view manuals, videos, drivers, downloads, technical drawings, and more visit www.startech.com/support 7

9. At the TCP/IP Settings screen, select Specify an IP address. This gives the product a static IP. Enter the desired IP Address, Mask IP Address (subnet mask), and the Gateway IP Address information. Select Next. (Figure 7) Note: A Gateway IP Address is not typically required.
Figure 7
10. At the Confirm Settings screen, check for any configuration errors. Select Next. (Figure 8)
Figure 8 To view manuals, videos, drivers, downloads, technical drawings, and more visit www.startech.com/support
8

11. At the Select a Printer screen, select the desired Printer to use with the Print Server. If the desired Printer does not appear in the list, select Add New Printer and complete the steps required to add a new Printer. Select Next. (Figure 9)
Figure 9
12. At the Confirm Settings screen, check for any configuration errors. Select Next. (Figure 10)
Figure 10 To view manuals, videos, drivers, downloads, technical drawings, and more visit www.startech.com/support
9

13. At the Installation Complete! screen, select Finish. Disconnect the RJ45 Network Cable from the Print Server. Position the Print Server near the Printer. Connect the Power Adapter to the DC Jack, located on the back of the Print Server. Connect the Print Server to the Printer, using an appropriate USB Printer Cable. (Figure 11) Note: The RJ45 Network Cable is no longer required for the Print Server.
Figure 11
Upon completion of the Basic Software Installation steps, a Networked Printer can be added to any Computer within the Subnet by following the instructions in the Setting Up a Printer in Windows or Setting Up a Printer in macOS sections. Advanced Software Installation 1. Connect the Power Adapter to the DC Jack, located on the
back of the Print Server. 2. Wait ~40 seconds for the Print Server's Power On Self Test
(POST) to complete.
To view manuals, videos, drivers, downloads, technical drawings, and more visit www.startech.com/support
10

3. Connect an RJ45 Network Cable to the Print Server and to a Network Device (e.g. network switch or wall jack).
4. Set the Network Adapter on the Computer to the following settings:
· IP Address: 192.168.0.xxx · Subnet Mask: 255.255.255.0 · Gateway: N/A
5. Access the Web Graphic User Interface (GUI) for the Print Server by entering the following into the Address Bar of a Web Browser:
· 192.168.0.10
6. Log into the Web GUI using the following credentials, if prompted:
· Username: admin · Password: (none)
7. After logging in to the Web GUI, select the Setup tab then the TCP/IP sub-tab.
8. Select Use the following TCP/IP settings.
· Set the IP Address to an available IP address within the available address pool of the Network Device
· Set the Subnet Mask to the subnet mask of the Network Device. This Subnet Mask is typically 255.255.255.0
· Set the Default Router to the IP Address of the Network Device
9. Select Save & Restart at the bottom of the page. Allow the Print Server to Reboot.
Note: If the Print Server will be utilizing a Wired Ethernet Connection, the setup is complete.
To view manuals, videos, drivers, downloads, technical drawings, and more visit www.startech.com/support
11

10. Change the TCP/ IP Settings on the Computer's Network Adapter to match the Settings used in Step #8.
11. Access the Web GUI for the Print Server by entering the IP Address selected in Step #8.
12. If prompted, access the Web GUI for the Print Server by entering the Default Credentials listed in Step #5.
13. After logging in to the Web GUI, select the Setup tab then the Wireless sub-tab.
14. Select the Basic Settings section and change the Network Type from Ad-Hoc to Infrastructure.
15. Scroll down to the Site Survey section and select the Wireless Router's SSID from the List of SSIDs, using the Radio Buttons, located on the left-hand side of the page.
· If the Wireless Router's SSID does not display immediately, select the Refresh button.
16. Select Save & Restart, located at the bottom of the page. Allow the Printer Server to reboot.
17. Refresh the Internet Browser page to connect to the Web GUI.
18. If prompted, access the Web GUI for the Print Server by entering the Default Credentials listed in Step #5.
19. After logging in to the Web GUI, select the Setup tab then the Wireless sub-tab.
20. In the Basic Settings section, the SSID should now match the SSID of the Wireless Network. If the SSIDs do not match, return to Step #14.
To view manuals, videos, drivers, downloads, technical drawings, and more visit www.startech.com/support
12

21. In the Advanced Settings section, select the correct Authentication Type for the Wireless Network Device. Most networks use WPA2-PSK. However, this will vary depending on how the Wireless Network Device was configured.
Note: Consult the Manual for the Wireless Network Device to determine the best way to verify the Authentication Type.
22. In the Advanced Settings section, select the correct Encryption Type for the Wireless Network Device. Most networks default to the Encryption Type of AES (CCMP). However, this will vary depending on how the Wireless Network Device was configured.
Note: Consult the Manual for the Wireless Network Device to determine the best way to verify the Encryption Type.
23. In the Advanced Settings section, enter the Wi-Fi Password in the Network Security Key text box.
24. Select Save & Restart, located at the bottom of the page. Allow the Printer Server to reboot.
25. Refresh the Internet Browser page to connect to the Web GUI.
26. If prompted, access the Web GUI for the Print Server by entering the Default Credentials listed in Step #5.
27. After logging in to the Web GUI, select the Setup tab then the Wireless sub-tab.
To view manuals, videos, drivers, downloads, technical drawings, and more visit www.startech.com/support
13

28. The Wireless Network Information will now display in the Web GUI. In the Basic Settings section, the SSID should now match the SSID of the Wireless Network. If the SSIDs do not match, return to Step #14.
29. Disconnect the RJ45 Network Cable from the Print Server. Position the Print Server near the Printer. Connect the Power Adapter to the DC Jack, located on the back of the Print Server. Connect the Print Server to the Printer, using an appropriate USB Printer Cable. Note: The RJ45 Network Cable is no longer required for the Print Server.
Upon completion of the Advanced Software Installation steps, a Networked Printer can be added to any Computer within the Subnet by following the instructions in the Setting Up a Printer in Windows or Setting Up a Printer in macOS sections. Setting Up a Printer in Windows 1. Navigate to the Control Panel screen and select the Devices
and Printers icon. (Figure 12)
Figure 12
2. Select Add a Printer, located at the top of the screen.
To view manuals, videos, drivers, downloads, technical drawings, and more visit www.startech.com/support
14

3. On the Add a Device screen, select The printer that I want isn't listed. (Figure 13)
Figure 13
4. On the Add Printer screen, select Add a printer using a TCP/IP address or hostname. Select Next. (Figure 14)
Figure 14
To view manuals, videos, drivers, downloads, technical drawings, and more visit www.startech.com/support 15

5. On the Add Printer screen, under the Hostname or IP address field, enter the IP Address assigned to the Print Server. Select Next. Windows will detect the TCP/IP port and will transition to the next screen automatically. (Figure 15)
Figure 15
6. Set the Device Type field to Custom. Select Settings. (Figure 16)
Figure 16
7. On the Configure Standard TCP/IP Port Monitor screen, set the Protocol to LPR.
To view manuals, videos, drivers, downloads, technical drawings, and more visit www.startech.com/support 16

8. On the Configure Standard TCP/IP Port Monitor screen, under the LPR Settings field, enter lp1 into the Queue Name field. Select OK. (Figure 17)
Figure 17
9. The Add Printer screen will appear. Select Next. 10. Windows will attempt to automatically detect the Driver
for the Printer. · If Windows fails to detect the Driver for the Printer, select
the Printer's Manufacturer and Model from the Install the Printer Driver screen. · If the Printer's Manufacturer and Model do not appear in the Install the Printer Driver screen, select Windows Update to update the list of Printer Models. Please note, this update may take several minutes. When the Window's Update has completed, select the Printer's Manufacturer and Model from the Install the Printer Driver screen. 11. Windows will install the Driver for the Printer. When the installation is complete, select Finish.
To view manuals, videos, drivers, downloads, technical drawings, and more visit www.startech.com/support 17

Setting Up a Printer in macOS 1. Select the System Preferences screen. From the System
Preferences screen, select the Printers & Scanners icon. (Figure 18)
Figure 18
2. The Printers & Scanners screen will appear. From the Printers & Scanners screen, click the + icon, located on the left-hand side of the screen. (Figure 19)
Figure 19
To view manuals, videos, drivers, downloads, technical drawings, and more visit www.startech.com/support 18

3. The Add screen will appear. From the Add screen, under the Default tab, select the Printer and select the Add button. (Figure 20)
Figure 20
4. If the Printer does not appear, select the IP tab, located at the top of the screen. (Figure 21)
Figure 21
5. Enter the following credentials under the IP tab: · Address: (IP Address of the Print Server) · Protocol: Line Printer Daemon - LPD · Queue: lp1
To view manuals, videos, drivers, downloads, technical drawings, and more visit www.startech.com/support 19

6. The Wizard will automatically attempt to detect the Driver for the Printer. When the Wizard selects a Driver, select the Add button.
Operation
LED Indicators

LED

State

Status

Blinking for POST (Yellow)

USB On (Green) WLAN On (Yellow)

Indication
When power is connected, the Status LED Indicator will flash five times, and then go solid.
Connection established with a USB Printer
Wireless Network Connection established

Reset Button
Reboot the Print Server
1. Ensure the Power Adapter is connected to the DC Jack, located on the back of the Print Server, and that the Print Server is receiving power.
2. Press and release the Reset Button once.
Note: Resetting the Print Server will stop all ongoing/ pending printing jobs.

To view manuals, videos, drivers, downloads, technical drawings, and more visit www.startech.com/support 20

Print a Self-Test Page 1. Ensure the Power Adapter is connected to the DC Jack,
located on the back of the Print Server, and that the Print Server is receiving power. 2. Press the Reset Button for 8 Seconds, then Release the Reset Button. 3. A Test Page including the current print server settings will print. Reset to the Factory Default Settings
Warning! The following steps will erase all of the current Print Server settings. 1. Disconnect the Power Adapter from the DC Jack, located on the back of the Print Server. 2. Press and Hold the Reset Button while reconnecting the Power Adapter to the DC Jack, located on the back of the Print Server. Continue to Hold the Reset Button for 5 Seconds, then Release the Reset Button. The Print Server will restart with the Factory Default settings.
To view manuals, videos, drivers, downloads, technical drawings, and more visit www.startech.com/support
21

Troubleshooting
Power Related Issues

Problem
· The Print Server is not receiving adequate power.

Solution
· Inspect the Power Adapter Cable/ Connectors for damage.

· The Print Server is not receiving adequate power and/or the Print Server is running too hot
TCP/IP Troubleshooting

· Ensure the voltage of the AC Power Adapter matches the AC voltage of the Power Source.
Warning! Using an incompatible AC Power Adapter will damage the Print Server.

Problem
· The Print Server's IP Address is identical to the Computer's IP Address.

Solution
· Contact the Network Administrator to obtain an unused IP Address for the Print Server

To view manuals, videos, drivers, downloads, technical drawings, and more visit www.startech.com/support 22

Printing Issues

Problem
· Print jobs are sent to the print queue successfully, but fail to print.

Solution
· Possible explanations:
1. The Print Server Name/Print Queue configuration is incorrect.
2. The Print Server Name does not match the Name in the Print Server's memory.
3. The Power Adapter connected to the Print Server is loose or disconnected.
4. The Printer is off-line, jammed or out of paper.
· Solutions:
1. Check all the information in the Print Port Settings.
2. Check all the information for the Print Server by running PSAdmin.
3. Inspect the Power Adapter Cable/ Connectors for damage and ensure the Power Adapter is connected to the Print Server and to a Power Source.
4. Recheck the Print Server connection by running the PSAdmin.

To view manuals, videos, drivers, downloads, technical drawings, and more visit www.startech.com/support 23

· Print jobs start printing, but print very slowly or print unknown characters.
· The upgrading process indication bar stops and does not seem to proceed again while upgrading the print server.
· The Setup Wizard cannot find the Print Server.

· Possible explanation and solution:
· A Printer Driver is missing or is incompatible with that Printer. Using a Print Driver that is not specific for the Printer can cause printing errors. Install the proper Printer Driver. If these Printer Drivers are not available online, please contact the Printer Manufacturer.
· Possible Explanation:
· There might be a network problem. This causes the upgrading procedure to fail.
· Solutions:
· Check the Wireless Network Connection, especially from the Computer running the PSAdmin to the Print Server.
· Download the latest Software for the Print Server, located at one of the following locations: www.startech.com/PM1115UW www.startech.com/PM1115UWEU
· Possible Explanation:
· The Personal Firewall is blocking the Network Connection to the Print Server
· Solution:
· Disable the Personal Firewall or adjust the Network Security Level to a lower level
24

Warranty Information
This product is backed by a two-year warranty. For further information on product warranty terms and conditions, please refer to www.startech.com/warranty.
Limitation of Liability
In no event shall the liability of StarTech.com Ltd. and StarTech.com USA LLP (or their officers, directors, employees or agents) for any damages (whether direct or indirect, special, punitive, incidental, consequential, or otherwise), loss of profits, loss of business, or any pecuniary loss, arising out of or related to the use of the product exceed the actual price paid for the product. Some states do not allow the exclusion or limitation of incidental or consequential damages. If such laws apply, the limitations or exclusions contained in this statement may not apply to you.
To view manuals, videos, drivers, downloads, technical drawings, and more visit www.startech.com/support 25

Hard-to-find made easy. At StarTech.com, that isn't a slogan. It's a promise.
StarTech.com is your one-stop source for every connectivity part you need. From the latest technology to legacy products -- and all the parts that bridge the old and new -- we can help you find the parts that connect your solutions.
We make it easy to locate the parts, and we quickly deliver them wherever they need to go. Just talk to one of our tech advisors or visit our website. You'll be connected to the products you need in no time.
Visit www.startech.com for complete information on all StarTech.com products and to access exclusive resources and time-saving tools.
StarTech.com is an ISO 9001 Registered manufacturer of connectivity and technology parts. StarTech.com was founded in 1985 and has operations in the United States, Canada, the United Kingdom and Taiwan servicing a worldwide market.
Reviews
Share your experiences using StarTech.com products, including product applications and setup, what you love about the products, and areas for improvement.

StarTech.com Ltd.
45 Artisans Crescent
London, Ontario
N5V 5E9
Canada

StarTech.com LLP
4490 South Hamilton Road
Groveport, Ohio
43125
U.S.A.

StarTech.com Ltd.
Unit B, Pinnacle 15
Gowerton Road Brackmills,
Northampton
NN4 7BW
United Kingdom

StarTech.com Ltd.
Siriusdreef 17-27
2132 WT Hoofddorp
The Netherlands

FR: fr.startech.com DE: de.startech.com

ES: es.startech.com NL: nl.startech.com

IT: it.startech.com JP: jp.startech.com

To view manuals, videos, drivers, downloads, technical drawings, and more visit www.startech.com/support
Adobe PDF Library 16.0.3 Adobe InDesign 17.0 (Windows)