MIDNITE Hybrid Inverter / Charger MN3024DIY User Manual
File info: application/pdf · 39 pages · 12.69MB
10-527-1 MN3024DIY Manual REV A 2-23-21
10-527-1 MN3024DIY Manual REV A 2-23-21 - Midnite ...
MNS Hybrid Inverter: The energy conversion unit of the whole system. Specific system wiring method depends on the actual application scenario. Page 6. 6 of 39.
Please read all instructions and precautions in the manual carefully before installation and use. ØHigh voltages exist inside the MNS Hybrid Inverter.
Full PDF Document

If the inline viewer fails, it will open the original document in compatibility mode automatically. You can also open the file directly.
Extracted Text
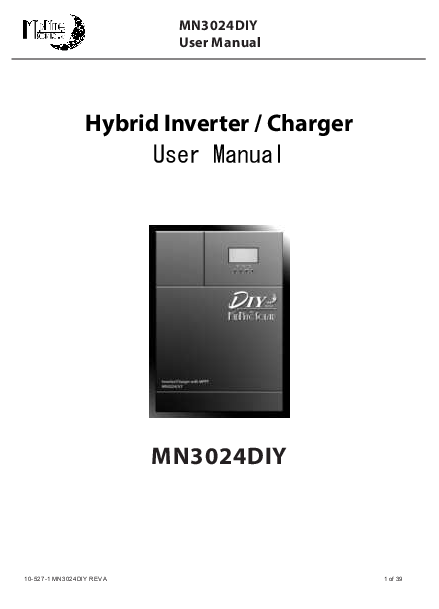
MN3024DIY User Manual
Hybrid Inverter / Charger User Manual

MN3024DIY

10-527-1 MN3024DIY REV A

1 of 39

MN3024DIY User Manual
Important safety instructions
Please keep this manual for future use. The MNS Hybrid Inverter System is an all-in-one solution for 120 volt AC production, battery charging from the AC input and a built-in MPPT PV Charge Controller
This manual contains all safety, installation and operating instructions for the MNS Hybrid Inverter.
Please read all instructions and precautions in the manual carefully before installation and use. �High voltages exist inside the MNS Hybrid Inverter. To avoid personal injury, users shall not disassemble the MNS Hybrid Inverter themselves. Contact our Midnite Solar technical support department if the unit is a need for repair. �Do not install the MNS Hybrid Inverter in harsh environments such as moist, oily, flammable, explosive, or heavily dusty areas. The unit is not rain-proof, do not install outside unless under cover where it will not be exposed to rain. �The mains input and AC output are high AC voltage, do not touch the wiring terminals. �The housing of the MNS Hybrid Inverter is hot when it is operating especially under full load. The exposed heatsink may be very hot, do not touch. �Do not open the terminal protective cover when the MNS Hybrid Inverter is operating. �It is necessary to install a proper external circuit breaker on the 120V AC in and PV in connections. The unit has an internal circuit breaker on the 120V AC in but an external circuit breaker is required in addition. �Always turn off all combiners and AC circuit breakers of the PV array, AC mains & battery before installing and/or adjusting the wiring of the MNS Hybrid Inverter. �After installation, check that all wire connections are tight to avoid terminal heating due to poor and a loose connection, which is dangerous and may cause fires. �The MNS Hybrid Inverter is for off-grid only. DO NOT Connect the AC OUTPUT to any source of AC including GRID and GENERATOR.

10-527-1 MN3024DIY REV A

2 of 39

MN3024DIY User Manual
CONTENTS
1. GENERAL INFORMATI ON...........................................................................................................4
1.1 PRODUCT OVERVIEW AND FEATURES................................................................................................... 4 1.2 BASIC SYSTEM INTRODUCTION........................................................................................................... 5 1.3 APPEARANCE.................................................................................................................................6
2. INSTALLATION INST RUCTIONS.................................................................................................7
2.1 INSTALLATION PRECAUTIONS ............................................................................................................ 7 2.2 WIRING SPECIFICATIONSAND CIRCUIT BREAKER SELECTION..................................................................... 8 2.3 INSTALLATION AND WIRING............................................................................................................. 11
3. OPERATING MODES .................................................................................................................17
3.1 CHARGING MODE ......................................................................................................................... 17 3.2 OUTPUT MODE ............................................................................................................................. 18
4. LCD SCREEN OPERATING INSTRUCTIONS .............................................................................19
4.1 OPERATION AND DISPLAY PANEL ..................................................................................................... 19 4.2 SETUP PARAMETERS DESCRIPTION ...................................................................................................22 4.3 BATTERY TYPE PARAMETERS............................................................................................................ 28
5. OTHER FUNCTIONS .................................................................................................................29
5.1 DRY NODE ...................................................................................................................................30 5.2 USB COMMUNICATION PORT.......................................................................................................... 30
6. PROTECTION ...........................................................................................................................31
6.1 PROTECTIONS PROVIDED................................................................................................................ 31 6.2 FAULT CODE MEANING ................................................................................................................... 33 6.3 TROUBLESHOOTING ............................... ...................................................................................... 34
7. SYSTEM MAINTENANCE..........................................................................................................35
8. TECHNICAL PARAMETERS ........................................................................................................36 9. WARRANTY ..................... ........................................................................................................39

10-527-1 MN3024DIY REV A

3 of 39

MN3024DIY User Manual
1. General information
1.1 Product overview and features
DIY series is a new a-ll-in- -one hybrid solar charger/ inverter, which integrates battery MPPT solar & AC input charging with sine wave output. Thanks to DSP control and advanced control algorithm, it has fast response speed, high reliability and high industrial standards.
Four charging modes are available, i.e. Only Solar, Mains Priority, Solar Priority and Mains & Solar hybrid charging; and two output modes are available, i.e. Inverter and Mains, to meet different application requirements.
The solar charging module applies the latest optimized MPPT technology to quickly track the maximum power point of the PV array in any environment and obtain the maximum energy of the solar panel in real time.
Through a state of the art control algorithm, the AC-DC charging module realizes fully digital voltage and current double closed loop control, with high control precision in a small volume. Wide AC voltage input range and complete input/output protections are designed for stable and reliable battery charging and protection.
Based on full-digital intelligent design, the DC-AC inverter module employs advanced SPWM technology and outputs pure sine wave to convert DC into AC. It is ideal for AC loads such as household appliances, power tools, industrial equipment, and electronic audio and video equipment. The product comes with a segment LCD display design which allows real-time display of the operating data and status of the system. Comprehensive electronic protections keep the entire system safer and more stable.
Features:
1. Full digital voltage and current double closed loop control, advanced SPWM technology,
pure sine wave output.
2. Two output modes: mains bypass and inverter output; uninterrupted power supply. 3. Available in 4 charging modes: Only Solar, Mains Priority, Solar Priority and Mains &
Solar hybrid charging.
4. Advanced MPPT technology with an efficiency of 99%. 5. Designed with a LCD screen and 3 LED indicators for dynamic display of system
data and operating status.
6. ON/OFF rocker switch for AC output control. 7. Power saving mode available to reduce no-load loss. 8. Intelligent variable speed fan to efficiently dissipate heat and extend system life. 9. Battery charging using PV solar or AC input, supporting use of lead-acid and lithium
battery technologies.
10. 360 � all-round protection with a number of protection functions. 11. Complete protections, including short circuit protection, over voltage and under
voltage protection, overload protection, reverse protection, etc.

10-527-1 MN3024DIY REV A

4 4 of 39

MN3024DIY User Manual
1.2 Basic system introduction The figure below shows the system application scenario of this product. A complete system consists of the following parts: 1. PV module: Converts light energy into DC power, and charges the battery
through the onboard MPPT solar charge controller, or to directly drive the inverter making AC power to drive the loads. (battery-less mode) 2. Mains or generator: Connected at the AC input, to power the loads while charging the battery. If the mains or generator is not connected, the system can also operate normally, and the load is powered by the battery and PV array. 3. Battery: Provided to ensure normal power supply to the system loads when solar energy is insufficient and the AC Main is not connected. 4. Household load: Allow connection of various household and office loads, including refrigerators, lamps, TVs, fans and air conditioners. 5. MNS Hybrid Inverter: The energy conversion unit of the whole system. Specific system wiring method depends on the actual application scenario.

PV Panel
Generator Or
Utility
10-527-1 MN3024DIY REV A

Extirnal Battery packs

Home Appliances 5 of 39

1.3 Appearance

MN3024DIY User Manual
14 13 12

11

10
1

2

8

3456789


AC input port


AC output port


USB communication port


RS485/CAN communication port


Dry contact port


Grounding screw


AC input breaker


Cooling fan


Battery port


ON/OFF rocker switch

11

PV port

12

Tou ch button

13

LED Indicator

14

LCD screen

10-527-1 MN3024DIY REV A

6 of 39

MN3024DIY User Manual
2. Installation Instructions
2.1Installation precautions
Be very careful when installing the battery. Wear safety glasses when installing a lead-acid flooded battery. If you come into contact with the battery acid, rinse with clean water immediately. Do not place metal objects near the battery to prevent short-circuit of the battery terminals. Hydrogen gas may be generated when the battery is charging. Please ensure good ventilation. When installing the unit, be sure to leave enough space around the MNS Hybrid Inverter for proper heat dissipation. Do not install the MNS Hybrid Inverter and lead-acid battery(s) in the same cabinet to avoid corrosion by sulfuric acid gas generated during battery operation. Only batteries that meet the requirements of the MNS Hybrid Inverter can be charged. Poorly connected connections and corroded wires may cause terminal heating which could melt the wire insulation, burn the surrounding materials, and even cause fires. So, make sure the terminals have been tightened, and the wires are secured with ties to avoid loose connections caused by shaking of wires during mobile applications. Avoid mounting in direct sunlight and where rainwater may get inside if mounting outside.. Even after the power is turned off, there is still high voltage inside the unit. Do not open or touch the internal components, and avoid related operations until the capacitor completely discharges. Do not install the MNS Hybrid Inverter in harsh environments such as moist, oily, flammable or explosive, or heavily dusty areas. Do NOT reverse polarity at the battery input terminals, otherwise it may damage the device and/or cause a fire. The mains AC input and AC output are high voltage, so please do not touch the wiring terminals. Keep fingers and tools away from the fan, do not touch it to prevent injury.

10-527-1 MN3024DIY REV A

7 of 39

MN3024DIY User Manual
2.2 Wiring specifications and circuit breaker selection
Wiring and installation must comply with national and local electrical codes. Recommended PV array wiring specifications and circuit breaker selection: Since the output current of the PV array is affected by the type, connection method and illumination angle of the PV module, the minimum wire diameter of the PV array is calculated according to its short-circuit current; refer to the short -circuit current value in the PV module specification (the short-circuit current is constant when the PV modules are connected in series; the short -circuit current is the sum of the short-circuit currents of all PV modules connected in parallel); the short - circuit current of the PV array shall not exceed the maximum input current.
 Refer to the table below for PV input wire diameter and switch:

Models MN3024DIY

Recommended PV wire size
8 AWG

Maximum PV

Recommended circuit breaker model number

40A

MNEDC40 or MNEPV40

Note: The series string voltage shall not exceed the maximum PV input open circuit voltage.

10-527-1 MN3024DIY REV A

8 of 39

MN3024DIY User Manual

 Refer to the table below for recommended AC input wire diameter and switch:

Model
MN3024DIY

Recommended AC Input Wiring Diameter

Maximum bypass input current

8 AWG

40A

Recommended circuit breaker type
MNEAC40

Recommended battery input wire diameter and switch selection

Model

Recommended battery wiring diameter

Rated battery discharge current

Maximum charge current

Recommended circuit breaker type

MN3024DIY

2 AWG

125A

100A

MNEDC125

10-527-1 MN3024DIY REV A

MNDC125 sold separately �A convenient clean box for DC breakers. �Comes with MNDC125 inverter battery breaker. �Can also hold up to five dinrail breakers. �Mounting for shunt �ETL listed for the USA and Canada �Bonded battery/inverter negative tie point �Equipment ground bus bar �compliment of conduit knock outs Dimensions: 17"H x 9"W x 3.5"D
9 of 39

MN3024DIY User Manual

 Recommended AC output wiring specifications and circuit breaker selection

Models MN3024DIY

Recommended AC output wiring
diameter
8mm 2/ 8AWG

Rated inverter AC
output
25A

Maximum bypass output
current
40A

Recommended circuit breaker type
2P--63A

Note: The wire gauge is for reference only. If the distance between the PV array and the MNS Hybrid Inverter or the distance between the MNS Hybrid Inverter and the battery is relatively long, using a bigger gauge wire can reduce the voltage drop to improve system performance.

Note: The above are only recommended wire gauge and circuit breaker. Please select the appropriate wire gauge and circuit breaker according to actual installation requirements. Note: Breakers are there to protect the wire not the electronics. Select wire size for the application, and then select breakers for the wire size. All MidNite Solar breakers are rated for continuous duty.

Recommended wire gauge and breaker size.
MNEPV Breakers are dinrail mount and fit in the MNDC125 enclosure.

Max Current

Wire gauge and breaker size Recommended MidNite Breaker

20 Amps 25 Amps

12 AWG � 20 Amp Breaker 10 AWG � 30 Amp Breaker

MNEDC20 MNEDC30

MNEPV20 MNEPV30

30 Amps

10 AWG � 30 Amp Breaker

MNEDC30

MNEPV30

40 Amps 50 Amps 60 Amps

8 AWG � 50 Amp Breaker 8 AWG � 50 Amp Breaker 6 AWG � 60 Amp Breaker

MNEDC40 MNEDC50 MNEDC60

MNEPV40 MNEPV50 MNEPV60

125 Amps

2 AWG � 125 Amp Breaker

MNEDC125

-

MNEPV Breakers are dinrail mount and fit in the MNDC125 enclosure.

10-527-1 MN3024DIY REV A

10 of 39

MN3024DIY User Manual

2.1Installation
Installation steps:

and

wiring

Step 1: Determine the installation position and the space for heat dissipation. Determine the

installation position of the MNS Hybrid Inverter, such as wall surface; when installing the MNS

Hybrid Inverter, ensure that there is enough air flowing through the heat sink, and space of at

least 200mm/8 inches to the left and right air outlets of the inverter are open to ensure natural

convection heat dissipation. Refer to the installation diagram of the unit as above.

Warning: Danger of explosion! Never install the MNS Hybrid Inverter and lead-acid
batteries in the same confined space! Also do not install in a confined place where battery gas may collect.

10-527-1 MN3024DIY REV A

11 of 39

Step 2: Remove the terminal cover

MN3024DIY User Manual

Step 3: Wiring

AC input / output wiring method:
 Prior to AC input/output wiring, disconnect the external circuit breaker and confirm that the wire used is the appropriate AWG. Please refer to Section 2.2 on pg. 8 "Wiring Specifications and Circuit Breaker Selection";  Properly connect the AC input wire according to the wire sequence and terminal position shown in the igure on the next page. Please connect the ground wire irst, and then the hot wire and then the neutral wire;

10-527-1 MN3024DIY REV A

12 of 39

MN3024DIY User Manual

Ground LLive

N Neutral

 Properly connect the AC output wire according to the wire sequence and terminal position shown in the figure below. Please connect the ground wire first, and then the hot wire and the neutral wire. The ground wire is connected to the grounding screw hole on the cabinet using a ring terminal or copper lug.
Ground LLive N Neutral

Note: The grounding wire shall be as large as possible (Not less than 10 AWG). The grounding point shall be as close as possible to the MNS Hybrid Inverter The shorter the grounding wire, the better.

10-527-1 MN3024DIY REV A

13 of 39

MN3024DIY User Manual
PV input wiring method:
 Prior to wiring, disconnect the external circuit breaker and confirm that the wire used is appropriate AWG. Please refer to Section 2.2 "Wiring Specifications and Circuit Breaker Selection";  Properly connect the PV input wire according to the wire sequence and terminal posi on shown in the figure below.

PV+: PV input positive pole

PV - : PV input negative pole

BATTERY wiring:  Prior to wiring, disconnect the external circuit breaker and confirm that the wire used is appropriate AWG. Please refer to Section 2.2 "Wiring Specifications and Circuit Breaker Selection". The BAT wire needs to be connected to the MNS Hybrid Inverter using a copper ring terminal either setscrew or crimp type is acceptable. Insure the crimp is tight if using crimp style to prevent excessive heat generation caused by excessive contact resistance from a loose terminal;
 Properly connect the BAT wire according to the wire sequence and terminal position shown in the figure on the next page.

10-527-1 MN3024DIY REV A

14 of 39

MN3024DIY User Manual

BAT +: Battery positive electrode

BAT - : Battery negative electrode

WarMnainingssi:nput, AC output and PV array are all high voltage. So, before wiring, be sure to disconnect the appropriate circuit breaker.  Be very careful during DC wiring; do not close the circuit breaker during wiring, and ensure that the "+" and "-" pole leads of each component are connected properly; a circuit breaker must be installed at the battery input terminals. Refer to Section 2.2 on pg. 9 "Wiring Specifications and Circuit Breaker Selection" to select a correct circuit breaker. Before wiring, be sure to disconnect the circuit breaker to prevent strong electric sparks and avoid battery short circuit; if the MNS Hybrid Inverter is used in an area with frequent lightning, it is recommended to install an external surge suppressors at the PV input terminal as well as the AC input and output. The MNSPD300DC is the correct model for the PV input and the MNSPD300AC for the AC input and output. Both sold separately Step 4: Check if the wiring is correct and tight. In particular, check if the battery polarity is reversed, if the PV input polarity is reversed and if the AC input is properly connected.

10-527-1 MN3024DIY REV A

15 of 39

Step 5: Install the terminals cover.

MN3024DIY User Manual

Step 6: Turn on the MNS Hybrid Inverter First, close the circuit breaker at the battery terminal, and then turn the rocker switch on the left side of the machine to the "ON" position. The "AC/INV" indicator flashing indicates that the inverter is working normally. Close the circuit breakers of the PV array and the AC Mains. Finally, turn on AC loads one by one to avoid overcurrent caused by a large momentary load from turning on loads all at once. Now, the unit goes into normal operation. Note: If power is supplied to different AC loads, it is recommended to first turn on the load with a large surge current. After the load is stable, turn on the load with a small surge current. Note: If the MNS Hybrid Inverter does not work properly or the LCD indicator is abnormal, refer to Chapter 6 to handle the error.

10-527-1 MN3024DIY REV A

16 of 39

MN3024DIY User Manual
3. Operating modes
3.1 Charging mode
1) PV priority: PV module will charge the battery preferentially, and the battery is charged by the Mains only when the PV system fails. During the day, solar energy is fully used to charge, while at night, it renverts to the Mains. This can maintain battery level, and is ideal for areas where the grid is relatively stable and electricity price is relatively high.
2) Mains priority: The Mains supply is preferentially used to charge the battery. Only when the Mains are not available, the PV charging will be activated.
3) Hybrid charging: PV and mains hybrid charging. PV MPPT charging is a priority, and when PV energy is insufficient, the mains supply supplements. When the PV energy is sufficient again, the main s stop charging. This is the fastest charging mode, suitable for the areas where the power grid is unstable, providing sufficient backup power supply at any time.
4) Only Solar (Only Solar): Only PV charging, without Mains charging. This is the most energy efficient way in which the battery is charged, and is usually used in areas with good lighting conditions.

10-527-1 MN3024DIY REV A

17 of 39

MN3024DIY User Manual
3.2 Output mode
 PV priority mode: Loads are powered by the PV module and battery. Diversified charging mode and output mode are optional. When PV priority mode is selected, utilization of green solar energy can be maximized to achieve energy saving and emission reduction. Switch to mains supply when the PV charging is not available. This mode maximizes the use of solar energy while maintaining battery power, suitable for use in the areas with relatively stable grid.
 Mains priority mode: Switch to inverter only when the mains are not available . Then, the unit is equivalent to a backup UPS, suitable for areas with unstable grid.
 Inverter priority mode: Switch to mains supply only when the battery is under voltage. This mode maximizes the use of DC power and is best suited for areas with a stable grid.

10-527-1 MN3024DIY REV A

18 of 39

MN3024DIY User Manual
4. LCD screen operating instructions
4.1 Operation and display panel
The operation and display panel is as shown below, including 1 LCD screen, 3 indicators and 4 operation buttons.

Operation buttons introduction Function buttons SET UP DOWN ENT

Description
Enter/Exit Settings menu Previous choice Next choice
Confirm /Enter Options under the settings menu,

Indicators introduction Indicators
AC/INV

Colors Yellow

CHARGE FAULT

Green Red

Description Steady on : M ains output
Flash: Inverter output Flash: Battery charging Steady on : Charging completed Steady on : Fault state

10-527-1 MN3024DIY REV A

19 of 39

LCD screen introduction

MN3024DIY User Manual

Icons

Functions Indicates that the AC input terminal has been connected to the grid Indicates that the AC input mode in APL mode (wide voltage range) Indicates that the PV input terminal has been connected to the solar panel Indicates that the machine has been connected to the battery:
indicates that the remaining battery is 0%~24% ;
indicates that the remaining battery is 25%~49% ;
indicates that the remaining battery is 50%~74% ;
indicates that the remaining battery is 75%~100% . Indicates that the battery type of the machine is a lithium battery

Icons

Functions
Indicates that the inverter circuit is working
Indicates that the machine is in the Mains Bypass mode
Indicates that the AC output is in an overload state
Indicates the percentage of AC output loads:
indicates that the load percentage is 0%~24% ;
indicates that the load percentage is 25%~49%,
indicates that the load percentage is 50%~74%,
indicates that the load percentage is  75%. Indicates that the buzzer is not enabled

10-527-1 MN3024DIY REV A

20 of 39

MN3024DIY User Manual

Indicates that the current battery type of the unit is a lead acid battery Indicates that the battery is in charging state Indicates that the AC/PV charging circuit is working
Indicates that the AC output terminal has an AC voltage output

Indicates that the unit has an alarm
Indicates that the unit is in a fault condition Indicates that the unit is in setup mode
The parameters displayed in the middle of the screen: 1. In the non -setup mode, the alarm or fault code is displayed. 2. In the set up mode, the currently set parameter item code is displayed.

Parameters display on the left side of the screen: input parameters

Indicates AC input

Indicates PV input

Indicates inverter circuit

This icon is not displayed

Display battery voltage, battery charge total current, mains charge power, AC input voltage, AC input frequency, PV input voltage, internal heatsink temperature, software version

Parameters display on the right side of the screen: Output parameters

Indicates output voltage, output current, output active power, output apparent power, battery discharge current, software version; in setup mode, displays the set parameters under the currently set parameter item code

Arrow display


The arrow is not displayed

Indicates the grid is supplying power
to the load

Indicatesthe grid supplying power to
the charging circuit

Indicates PV module supplying
power to the charging circuit

Indicates the charging circuit
charging the battery terminal


The arrow is not display ed

Indicates the battery terminal


supplying power to the inverter

circuit

Indicates the inverter circuit
supplying power to the load

10-527-1 MN3024DIY REV A

21 of 39

MN3024DIY User Manual

Real -time data viewing method On the LCD main screen, press the " UP" and " DOWN " buttons to scroll through the real-time data of the machine.

Page

Parameters on the left side of the screen

INPUT BATT V 1
(Battery input voltage )

PV TEMP  2
(PV charger heatsink temperature )

PV INPUT V 3
(PV input voltage )

INPUT BATT A 4
(Input battery current )

INPUT BATT KW 5
(Battery input power )

AC INPUT Hz 6
(AC input frequency )

AC INPUT V 7
(AC input voltage )

INPUT V 8
(For m aintain )

INV TEMP

9

(AC charge or battery discharge

heatsink temperature )

10

APP software version

11

M odel PV Voltage Rating

12

Model Battery Voltage Rating

Parameters in the
middle of the screen
Fault code

Parameters on the right side of the screen
OUTPUT LOAD V (Output load voltage )
PV OUTPUT KW (PV output power)
PV OUTPUT A (PV output current ) OUTPUT BATT A (Battery output current) OUTPUT BATT KW (Battery output power ) AC OUTPUT LOAD Hz (AC output frequency ) AC OUTPUT LOAD A (AC output load current ) OUTPUT LOAD KVA (Load apparent power)
INV OUTPUT LOAD KW (Load active power )
Bootloader software version Model PV Current Rating
Model Outp ut Power Rating

4.2 Setup parameters description
Buttons operation instructions: Press the "SET" button to enter the setup menu and exit the setup menu. After entering the setup menu, the parameter number [00] will flash. At this point, press the "UP" and "DOWN" buttons to select the code of parameter item to be set. Then, press the "ENT" button to enter the parameter editing mode, and the value of the parameter is flashing. Adjust the value of the parameter with the "UP" and "DOWN" buttons. Finally, press the "ENT" button to complete the parameter editing and return to the parameter selection state.

10-527-1 MN3024DIY REV A

22 of 39

MN3024DIY User Manual

Parameter no. 00 01
02
03
04 05

Parameter name
Exit setting menu

Settings [00] ESC

[01] SOL

Output source priority

[01] UTI default

[01] SBU

Output Frequency

[02] 50.0 [02] 60.0

AC Input Voltage Range

[03] APL [03] UPS default

Battery Power to Utility Setpoint

[04] 23.0 default

Utility to Battery Power
Setpoint

[05] 28.0V default

Description
Exit the setup menu
PV priority mode , switching to the Mains when the PV fails or the battery is lower than the set value of parameter [04]. Mains priority mode, switching to inverter only when the mains fail . Inverter priority mode, switching to the mains only when the battery is under voltage or lower than the set value of parameter [04]. Bypass self - adaptation; when the mains are connected, it automatically adapts to the mains frequency; when the mains iare disconnected, the output frequency can be set through this menu. The default output frequency of the 230V machine is 50HZ, and the 120V machine 60HZ. Wide mains input voltage range of 230V machine: 90~280V Mains input voltage range of 120V machine: 90~140V Narrow mains input voltage range of 230V machine: 170~280V Mains input voltage range of 120V machine: 90~140V When the parameter [01] =SOL/SBU, the battery voltage is lower than the set value, and the output is switched from the inverter to the mains. Setting range: 22V~ 26V. When the parameter [01] =SOL/SBU, the battery voltage is higher than the set value, and the output is switched from the mains to the inverter. Setting range: 24V~ 30V.

10-527-1 MN3024DIY REV A

23 of 39

MN3024DIY User Manual

Parameter no. 06
07
08

Parameter name
Charger source priority
Max charger current
Battery Type

Settings [06] CSO [06] CUB
[06] SNU default
[06] OSO [07] 80A default
[08] USE [08] SLd [08] FLd [08] GEL default
[08] LF07/LF08/LF09

Description
PV priority charging ; when not PV is unavailable, charging from the mains is started.
M ains priority charging; When charging from the mains is not available PV charging is started.
PV and Mains hybrid charging; PV charging is a priority, and when the PV energy is insufficient, the Mains charging supplements. When the PV energy is sufficient, the Mains charging stops. Note: Only when the Mains bypass output is loaded, the PV charging and the mains charging can work at the same time. When the inverter is in use, only the PV charging can be started. Only PV charging, with the Mains charging not activated.
Max charger current (AC charger+PV charger). Setting range: 0~140A
User- defined ; all battery parameters can be set. Sealed lead - acid battery ; absorption charge Voltage: 28.2, float charge voltage: 27.6V
Vented lead- acid battery; absorption charge voltage: 29.2V, float charge voltage: 27.6V
Colloidal lead- acid battery; absorption charge voltage: 28.4V float charge voltage: 27.6V
Lithium iron phosphate battery LF 07/LF08/LF09 , corresponding to 7 strings,8 strings and 9 strings of lithium iron phosphate battery; for 7 strings, default absorption charge voltage is 24.8V; for 8 strings, default absorption charge voltage is 28.4V; for 9 strings, default absorption charge voltage is 31.8V adjustable

10-527-1 MN3024DIY REV A

24 of 39

MN3024DIY User Manual

Parameter no.

Parameter name

Settings [08] NCA

Description
Ternary lithium battery; Default absorption voltage is 28.4V adjustable.

Battery boost

Boost (absorb) charge voltage setting; the setting

[09] 28.8V

09

charge

range is 24~29.2V with a step of 0.2V for

default

voltage

user- defined battery and lithium battery.

Boost (absorb) charge maximum time setting, which

means the maximum charging time to reach

the set voltage of parameter [09] during

Battery boost

10

[10] 120 default constant-voltage charging. The setting range is

charge time

5min~900min, with a step of 5 minutes. It is

valid for user -defined battery and lithium

battery.

Battery

Float charge voltage, setting range:

floating

[11] 27.6V

11

24V~ 229.V, step: 0.2 V, valid when battery type

charge

default

is user - defined.

voltage

Over -discharge voltage ; when the battery

Battery over

voltage drops to the set point, after the delay

discharge

the time set by parameter [13] the inverter will

12

[12] 21V default

voltage (delay

stop inverting. Setting range is20V~ 24V, with

off)

a step of 0.2V. It is valid for user - defined

battery and lithium battery.

Over-discharge delay time; when the battery

voltage is lower than the parameter [12], the

Battery over

inverter output will be turned off after the time

13

discharge

[13] 5S default

set by this parameter is delayed.

delay time

The setting range is 5S~55S, with a step of 5S. It is valid for user-defined battery and

lithium battery.

Battery undervoltage alarm point ; when the

battery voltage is lower than the point, an

Battery under

undervoltage alarm is given , and the output is

14

[14] 22V default

voltage alarm

not turned off; the setting range is 02V~ 26V,

with a step of 0.2V. It is valid for user -defined

battery and lithium battery .

10-527-1 MN3024DIY REV A

25 of 39

MN3024DIY User Manual

Parameter no. 15
16 17 18 19 20 21
22
23

Parameter name
Battery discharge limit voltage
Battery equalization
enable
Battery equalization
voltage Battery equalized
time
Battery equalized time out
Battery equalization
interval Battery equalization immediately
Power saving mode
Restart when over load

Settings
[15] 20V default [16] DIS
[16] ENA default [17] 29.2V default
[18] 120 default
[19] 120 default
[20] 30 default [21] DIS
[21] ENA default [22] DIS default
[22] ENA
[23] DIS

Description
Battery discharge limit voltage; when the battery voltage is lower than the point, the output is turned off immediately ; t he setting range is 20V~ 26V, with a step of 0.2V. It is valid for user - defined battery and lithium battery. Equalizing charge is disabled Equalizing charge is enabled, only valid for vented lead-acid battery and sealed lead- acid battery Equalizing charge voltage; setting range : 24V~ 29.2V, with a step of 0.2V; valid for vented lead - acid battery and sealed lead - acid battery Equalizing charge time ; setting range : 5min~900min, with a step of 5 minutes; valid for vented lead-acid battery and sealed lead acid battery Equalizing charge delay ; setting range : 5min~900min, with a step of 5 minutes ; valid for vented lead - acid battery and sealed lead acid battery Equalizing charge derating time, 0~30days, with a step of 1 day ; valid for vented lead -acid battery and sealed lead -acid battery Stop equalizing charge immediately.
Start equalizing charge immediately.
Power saving mode disabled . When the power saving mode is enabled, if there is no load or less than 50W , the inverter output is turned off after a delay for a certain period of time. When the load is more than 50W, the inverter automatically restarts. Automatic restart when overload is disabled. If an overload occurs and the output is turned off, the unit will not restart .

10-527-1 MN3024DIY REV A

26 of 39

MN3024DIY User Manual

Parameter no.
24
25 26 27 28 29 35 36

Parameter name
Restart when over
temperature
Alarm enable Beeps while
primary source is interrupted Bypass output when over
load Max AC charger current
Split Phase
Battery undervoltage
recovery point
Max PV charger current

Settings
[23] ENA default
[24] DIS
[24] ENA default [25] DIS
[25] ENA default [26] DIS
[26] ENA default [27] DIS
[27] ENA default [28] 80A default [29] DIS default
[29] ENA [35] 27V default
[36] 60A default

Description
Automatic restart when overload is enabled. If an overload occurs and the output is turned off, the unit will restart after a delay of 3 minutes . After it reaches 5 cumulative times, the unit will not restart. Automatic restart when over temperature is disabled. If an over -temperature shutdown occurs, the unit will not restart.
Automatic restart when over temperature is enabled. If an over -temperature shutdown occurs, the unit will restart when the temperature drops. Alarm is disabled Alarm is enabled Alarm beep is disabled when the status of the main input source changes Alarm beep is enabled when the status of the main input source changes Automatic switchover to mains on overload is disabled. Automatic switchover to mains on overload is enabled.
Max AC charger current. Setting range: 0~ 80A
Supply for industrial frequency transformer (disabled) Supply for industrial frequency transformer (enabled)
After a low voltage shutdown the unit will restart after the battery voltage reaches this setpoint.
Max PV charger current. Setting range: 0~ 60A

10-527-1 MN3024DIY REV A

27 of 39

MN3024DIY User Manual

4.3 Battery type parameters

For Lead - acid Battery :

Battery type
Parameters Overvoltage disconnection voltage Equalizing charge voltage

Sealed lead acid battery (SLD)
30V 29.2V

Absorption charge voltage
Float charge voltage

28.8V 27.6V

Undervoltage alarm voltage
Low voltage disconnection voltage
Discharge limit voltage

22V 21.2V 21V

Over - di scharge delay time

5s

Equalizing charge duration

120 minutes

Equalizing charge interval

30 days

Absorption charge duration

120 minutes

Colloidal lead acid battery
(GEL)

Vented lead acid battery
(FLD)

User - defined (User)

30V

31V

1830V

28.4V 27.6V 22V 21.2V 21V
5s
-
120 minutes

29.6V

1830V

29.2V

1830V
(Adjustable)

27.6V

1830V
(Adjustable)

22V

1830V
(Adjustable)

21.2V

1830V
(Adjustable)

21V

1830V
(Adjustable)

5s 120 minutes
30 days 120 minutes

130s
(Adjustable)
0600
minutes (Adjustable)
0250 days
(Adjustable)
10600
minutes (Adjustable)

10-527-1 MN3024DIY REV A

28 of 39

MN3024DIY User Manual

For Lithium Battery :

Battery type
Parameters Overvoltage disconnection voltage Equalizing charge voltage

Ternary lithium battery (N 06 )
30V
24.6V
(Adjustable)

Absorbtion charge 24.6V

voltage

(Adjustable)

Ternary lithium battery (N 07 )
30V
28.7V
(Adjustable)
28.7V
(Adjustable)

Float charge voltage

24.6V
(Adjustable)

28.7V
(Adjustable)

Undervoltage alarm voltage
Low voltage disconnection voltage
Discharge limit voltage
Over discharge delay time Equalizing charge duration

19.2V
(Adjustable)
18.0V
(Adjustable)
16.8V
30s
(Adjustable)
-

Equalizing
-
charge interval

Absorption charge duration

120
minutes (Adjustable)

22.4V
(Adjustable)
21.0V
(Adjustable)
19.6V
30s
(Adjustable)
-
-
120
minutes (Adjustable)

Lithium iron phosphate battery (LF07)

Lithium iron phosphate battery (LF08)

30V

30V

Lithium iron phosphate battery (LF09)

-
User defined
(User)

33V

1830V

24.6V
(Adjustable)
24.6V
(Adjustable)
24.6V
(Adjustable)
21.6V
(Adjustable)
21V
(Adjustable)
20.4V
30s
(Adjustable)
-
-
120
minutes (Adjustable)

28.4V
(Adjustable)
28.4V
(Adjustable)
28.4V
(Adjustable)
24.8V
(Adjustable)
24.4V
(Adjustable)
24.2V
30s
(Adjustable)
-
-
120
minutes (Adjustable)

31.8V
(Adjustable)
31.8V
(Adjustable)
31.8V
(Adjustable)
27.8V
(Adjustable)
27.4V
(Adjustable)
27.2V
30s
(Adjustable)
-
-
120
minutes (Adjustable)

1830V
1830V
(Adjustable)
1830V
(Adjustable)
1830V
(Adjustable)
1830V
(Adjustable)
1830V
(Adjustable)
130s
(Adjustable)
0600
minutes (Adjustable)
0250
days (Adjustable)
10600
minutes (Adjustable)

10-527-1 MN3024DIY REV A

29 of 39

Normally Closed
Common
Normally Open

MN3024DIY User Manual
5. Other functions
5.1 Dry contact
Working principle: This dry contact can start and stop the generator to charge the battery. Normally, the terminals are that the NC-N point is closed and the NO - N point is open;  When the battery voltage reaches the low voltage disconnection point, the relay coil is energized, and the terminals turn to that the NO - N point is closed while NC - N point is open. At this point, NO-N point can drive resistive loads: 125VAC/1A, 230VAC/1A, 30VDC/1A.
5.2 RS485/CAN communication port
This port is an RS485/CAN communication port; CAN communication is an optional function, which is not available in the standard unit
This port is an RS485 communication port which comes with two functions:  It allows direct communication with the optional host computer, through this port, and enables monitoring of the equipment running status and setting of some parameters on the computer;  It also allows direct connection with the host computer with the optional RS485 to Bluetooth communication module through this port. After the module is selected, you can connect the all - in -one solar charge inverter through the mobile phone Bluetooth APP, on which you can view the operating parameters and status of the device.
As shown in the figure: Pin 1 is 5V power supply, Pin 2 is GND, Pin 7 is RS485-A, and Pin 8 is RS485-B ; Pin 5 is CAN- H, and Pin 6 is CAN-L ;
5.3 USB communication port
This is a USB communication port, which can be used for USB communication with the optional PC host software . To use this port, you should install the corresponding "USB to serial chip CH340T driver" and APP in the computer.

10-527-1 MN3024DIY REV A

30 of 39

MN3024DIY User Manual

6. Protection

6.1 Protections provided

No.

Protections

Description

PV current /power 1
limiting protection

PV night reverse -

2

current protection

When charging current or power of the PV array configured exceeds the PV rating, it will charge at the rated value.
At night, current is prevented from flowing back into the panels.

Mains input over

3

voltage protection

Mains input under

4

voltage protection

Battery over 5
voltage protection

When the mains voltage exceeds 280V (230V model) or 140V (120V model), the mains charging will stop and the unit will switch to inverter mode.
When the mains voltage is lower than 170V (230V model /UPS mode ) or 90V (120V model or APL mode ), the mains charging will stop and the unit will switch to inverter mode.
When the battery voltage reaches the overvoltage disconnection point, the PV and the mains will automatically stop charging the battery to prevent damage to the battery from overcharging.

Battery low voltage

6

protection

When the battery voltage reaches the low voltage threshold, the unit will stop inverting to prevent damage to the batteries from being over discharged.

Load output short 7
circuit protection
Heat sink over 8 temperature
protection

Overload

9

protection

When a short- circuit fault occurs at the load output terminal , the AC output is immediately turned off and turned on again after 1 second .
When the internal temperature is too high, the unit will stop charging and discharging; when the temperature returns to normal, charging and discharging will resume.
When an overload occurs, the unit will immediately stop the AC output. The unit will try again after three minutes. After five tries, the unit won't try again until the unit is powered down and restarted. Refer to the technical parameters table for information on settings.

10-527-1 MN3024DIY REV A

31 of 39

MN3024DIY User Manual

PV reverse polarity

10

protection

When the PV polarity is reversed, the unit will not be damaged.

AC reverse 11
protection

Prevents the inverter output from backfeeding into the AC input.

Bypass over current

12

Built -in AC input overcurrent protection circuit breaker.

protection

Battery input over 13
current protection

When the battery current into the inverter exceeds the current limit for one minute, the inverter stops and switches to AC bypass mode.

Battery input

14

protection

Charge short

15

protection

If the battery is connected backward or the there is a short circuit, the battery input fuse will blow reducing the risk of damage or fire.
If a short circuit or an excessive overload occurs when charging the battery, charging will stop.

10-527-1 MN3024DIY REV A

32 of 39

6.2 Fault code meaning

Fault code
01  02  03  04  05  06  07  08  09  10  11  12  13  14  15  17  19  20  21  22  23  26  29

Fault name
BatVoltLow BatOverCurrSw BatOpen BatLowEod BatOv erCurrHw BatOverVolt BusOverVoltHw BusOverVoltSw PvVoltHigh PvBuckOCSw PvBuckOCHw bLineLoss OverloadBypass OverloadInverter AcOverCurrHw InvShort OverTemperMppt OverTemperInv FanFail EEPROM ModelNumErr RlyShort BusLow

MN3024DIY User Manual

Output Affected?

Description

Yes

Battery undervoltage alarm

Battery discharge average current Yes
overcurrent software protection

Yes

Battery not -connected alarm

Yes

Battery undervoltage stop discharge alarm

Yes

Battery overcurrent hardware protection

Yes

Charging overvoltage protection

Yes

Bus overvoltage hardware protection

Yes

Bus overvoltage software protection

No

PV over voltage protection

No

Buck overcurrent software protection

No

Buck overcurrent hardware protection

No

Mains power down

Yes

Bypass overload protection

Yes

Inverter o verload protection

Yes

Inverter overcurrent hardware protection

Yes

Inverter short circuit protection

No

Buck heatsink over temperature protection

Yes

Inverter heatsink over temperature protection

Yes

Fan failure

Yes

Memory failure

Yes

Model setting error

Inverted AC Output Backfeed to Bypass AC Yes
Input

Yes

Internal battery boost circuit failure

10-527-1 MN3024DIY REV A

33 of 39

6.3 Troubleshooting

MN3024DIY User Manual

Faults
No display on the screen
Battery overvoltage protection Battery undervoltage protection Fan failure Heat sink over temperature protection

Handling measures
Check if the battery circuit breaker or the PV circuit breaker are closed; if the switch is in the "ON" state; press any button on the screen to exit the screen sleep mode.
Measure if the battery voltage exceeds rating, and turn off the PV array and Mains circuit breakers.
Charge the battery until it returns to the low voltage disconnect ion recovery voltage.
Check if the fan is not turning or blocked by foreign objects.
When the temperature of the device is cooled below the recovery temperature, normal charge and discharge control will resume.

Bypass overload pro tection, inverter overload protection

 Reduce the use of power equipment;  Restart the unit to resume load output.

Inverter short circuit protection
PV overvoltage
Battery missing alarm

 Check the load connection carefully and clear any short circuit faults.  Re- power up to resume load output.
Use a multimeter to check if the PV input voltage exceeds the maximum allowable input voltage rated .
Check if the battery is not connected or if the battery circuit breaker is not closed.

10-527-1 MN3024DIY REV A

34 of 39

MN3024DIY User Manual
7. System maintenance
 In order to maintain the best long - term performance, it is recommended to conduct the following checks twice a year.
1. Make sure that the airflow around the unit is not blocked and remove any dirt or debris from the heat sink.
2. Check that all exposed wires are not damaged by exposure to sunlight, friction with other objects around them, dryness, damage by insects or rodents, etc., repair or replace if necessary.
3. Verify the consistency of indication and display with the operation of the device. Please pay attention to the display of any faults or errors, and take corrective actions as necessary.
4. Check all wiring terminals for corrosion, insulation damage, signs of high temperature or burning/discoloration, and tighten the screws.
5. Check for dirt, nesting insects and corrosion, and clean up as required. 6. If the surge suppressor has failed, replace in time to prevent lightning damage to the unit
or other equipment.
Warning: Danger of electric shock! When doing the above operations, make sure that all power supplies of the unit have been disconnected, and all capacitors have been discharged, and then then check or operate accordingly!
 MidNite Solar AKA MNS does not assume any liability for damage caused by:  Improper use or improper installation, or location. (exposed to the elements)
 Open circuit voltage of the PV module exceeds the maximum allowable input voltage rating.
 Temperature in the operating environment exceeds the limited operating temperature range.
 Disassemble and repair of the MNS Hybrid Inverter without permission.
 Force majeure: Damage that occurs in transportation or handling of the MNS Hybrid Inverter.

10-527-1 MN3024DIY REV A

35 of 39

MN3024DIY User Manual

8. Technical parameters

Model
AC mode Rated input voltage
Input voltage range
Frequency
Frequency Range
Overload/short circuit protection Efficiency
Conversion time (bypass and inverter)
AC reverse protection Maximum bypass overload current Inverter mode Output voltage waveform Rated output power (VA) Rated output power (W) Power factor Rated output voltage (Vac) Output voltage error Output frequency range (Hz)

MN3024DIY
110/ 120Vac (90Vac- 140Vac) � 2% 50Hz/ 60Hz (Auto detection) 47�0.3Hz ~ 55�0.3Hz (50Hz); 57�0.3Hz ~ 65�0.3Hz (60Hz);
Circuit breaker >95%
10ms (typical)
Available
40A
Pure sine wave 3000 3000 1
120Vac � 5%
50Hz � 0.3Hz 60Hz � 0.3Hz

10-527-1 MN3024DIY REV A

36 of 39

MN3024DIY User Manual

Maximum Efficiency

>92 %

Overload protection

(102% < load <1 10%) � 10%: report error and turn off the output after 5 minutes; (110% < load < 1 25%) � 10%: report error and turn off the output after 10 seconds; Load >125 % � 10%: report error and turn off the output after 5 seconds;

Peak power Loaded motor capability Rated battery input voltage
Battery voltage range
Power saving mode AC charging Battery type

3000 VA 1HP
24V (Minimum starting voltage 22V) Undervoltage alarm/shutdown voltage/overvoltage alarm /overvoltage recovery... settable on LCD screen)
Load  50W
Lead acid or lithium battery

Maximum charge current (Settable)
Charge cur rent error Charge voltage range Short circuit protection Circuit breaker specifications Overcharge protection
PV charging
Maximum PV open circuit voltage PV operating voltage range MPPT voltage range

0-40A � 5Adc 20 �33Vdc Circuit breaker and blown fuse
30A Alarm and turn off charging after 1 minute
100Vdc 30- 100Vdc 30- 95Vdc

10-527-1 MN3024DIY REV A

37 of 39

MN3024DIY User Manual

Battery voltage range Maximum output power PV charg ing current range (can be set) Charging short circuit protection Wiring protection

20 �33Vdc 1400W 0-60A
fuse Reverse polarity protection

Hybrid charging Max charger current specificatio ns (AC charger+PV charger)

Max charger current (settable)

0-100A

Certified specifications
Certification EMC certification level Operating temperature range Storage temperature range Humidity range
N oise Heat dissipation Communicati on interface
Size (L*W*D)
Weight (kg)

CE(EN62109- 1) EN61000 , C2
- 15�C to 55 �C
- 25�C ~ 60 �C 5% to 95% (Conformal coating protection)
 60dB Forced air cooling, variable speed fan USB/RS485(Bluetooth/WiFi/GPRS)/Dry node control
378mm*280mm*103mm 6.2

All-in-one solar charge inverter 10-527-1 MN3024DIY REV A

38 38 of 39

MN3024DIY User Manual
MIDNITE SOLAR INC. LIMITED WARRANTY
MidNite Solar DIY inverters, DIY sheet metal enclosures, DIY breaker boxes and DIY accessories
MidNite Solar Inc. warrants to the original customer that its products shall be free from defects in materials and workmanship. This warranty will be valid for a period of ONE (1) year for all DIY series inverters, DIY sheet metal enclosures, DIY breaker boxes and DIY accessories.
At its option, MidNite Solar will repair or replace at no charge any MidNite product that proves to be defective within such warranty period. This warranty shall not apply if the MidNite Solar product has been damaged by unreasonable use, accident, negligence, service or modification by anyone other than MidNite Solar, or by any other causes unrelated to materials and workmanship. The original consumer purchaser must retain original purchase receipt for proof of purchase as a condition precedent to warranty coverage. To receive inwarranty service, the defective product must be received no later than two (2) weeks after the end of the warranty period. The product must be accompanied by proof of purchase and Return Authorization (RA) number issue d by MidNite Solar.
For an RMA number contact MidNite Solar Inc., (360) 403-7207. Purchasers must prepay all delivery costs or shipping charges to return any defective MidNite Solar product under this warranty policy. Except for the warranty that the products are made in accordance with, the specifications therefore supplied or agreed to by customer:
MIDNITE SOLAR MAKES NO WARRANTY EXPRESSED OR IMPLIED, AND ANY IMPLIED WARRANTY OF MERCHANTABILITY OR FITNESS FOR A PARTICULAR PURPOSE WHICH EXCEEDS THE FOREGOING WARRANTY IS HEREBY DISCLAIMED BY MIDNITE SOLAR AND EXCLUDED FROM ANY AGREEMENT MADE BY ACCEPTANCE OF ANY ORDER PURSUANT TO THIS QUOTATION. MIDNITE SOLAR WILL NOT BE LIABLE FO R ANY CONSEQUENTIAL DAMAGES, LOSS OR EXPENSE ARISING IN CONNECTION WITH THE USE OF OR THE INABILITY TO USE ITS GOODS FOR ANY PURPOSE WHATSOEVER. MIDNITE SOLAR'S MAXIMUM LIABILITY SHALL NOT IN ANY CASE EXCEED THE CONTRACT PRICE FOR THE GOODS CLAIMED TO BE DEFECTIVE OR UNSUITABLE.
Products will be considered accepted by customer unless written notice to the contrary is given to MidNite Solar within ten (10) days of such delivery to customer. MIDNITE SOLAR is not responsible for loss or damage to products owned by customer and located on MIDNITE SOLAR'S premises caused by fire or other casualties beyond MIDNITE SOLAR's control. This warranty is in lieu of all other warranties expressed or implied.

10-527-1 MN3024DIY REV A

MIDNITE SOLAR INC. Email: info@midnitesolar.com
PH: 360-403-7207 FAX: 360-691-6862

39 of 39