WIFI MANUAL - AirCon Direct
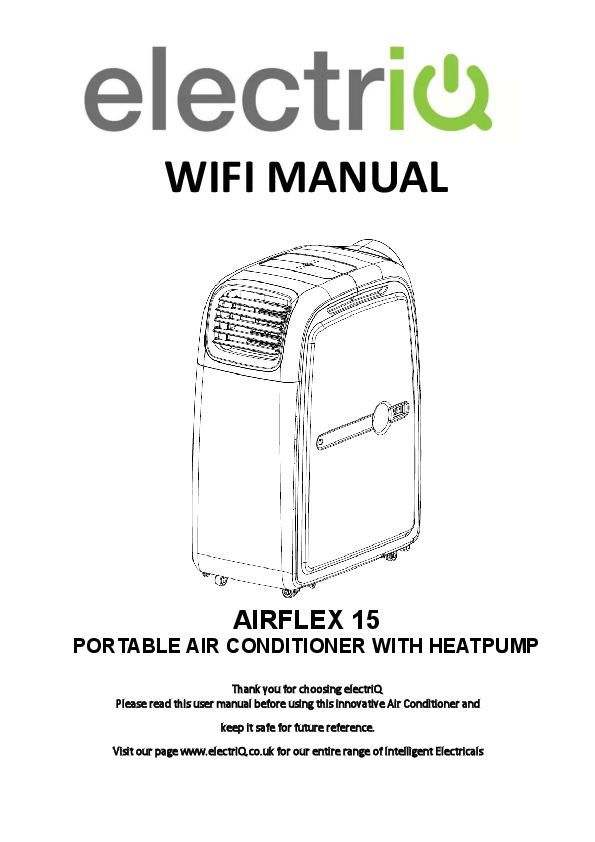
WIFI MANUAL. AIRFLEX 15. PORTABLE AIR CONDITIONER WITH HEATPUMP. Thank you for choosing electriQ. Please read this user manual before using ...
WIFI MANUAL - AppliancesDirect
WIFI MANUAL AIRFLEX 15 PORTABLE AIR CONDITIONER WITH HEATPUMP Thank you for choosing electriQ Please read this user manual before using this innovative Air Conditioner and keep it safe for future reference. Visit our pa…
WIFI MANUAL - Electriq
3 SETTING UP YOUR HOME WITHIN THE APP TUYA is designed so it can work with a large number of compatible smart devices within your home. It can also be set up to work with multiple devices within different houses As such…
Full PDF Document

If the inline viewer fails, it will open the original document in compatibility mode automatically. You can also open the file directly.
Extracted Text
WIFI MANUAL
AIRFLEX 15
PORTABLE AIR CONDITIONER WITH HEATPUMP
Thank you for choosing electriQ Please read this user manual before using this innovative Air Conditioner and
keep it safe for future reference. Visit our page www.electriQ.co.uk for our entire range of Intelligent Electricals

BEFORE YOU START
 Ensure your router provides a standard 2.4ghz connection.  If your router is dual band ensure that both networks have different network names (SSID). The
provider of your router / Internet service provider will be able to provide advice specific to your router.  Place the air conditioner as close as possible to the router during setup.  Once the app has been installed on your phone, turn off the data connection, and ensure your phone
is connected to your router via wifi.
DOWNLOAD THE APP TO YOUR PHONE
Download the "TUYA SMART" app, from your chosen app store, using the QR codes below, or by searching for the app in your chosen store.

Android

IOS

CONNECTION METHODS AVAILABLE FOR SETUP

The air conditioner has two different setup modes, Quick Connection and AP (Access Point). The quick connection is a quick and simple way to set the unit up. The AP connection uses a direct local wifi connection between your phone and the air conditioner to upload the network details.

Before starting the setup, with the air conditioner plugged in, but turned off, press and hold the speed button for 5 seconds (until you hear a bleep) to enter the wifi connection mode.

Please ensure your device is in the correct wifi connection mode for the connection type you are attempting, the flashing of the wifi light on your air conditioner will indicate this.

Connection Type Quick Connection AP (Access Point)

Frequency of Flashes Flashes twice per second Flashes once per three seconds

CHANGING BETWEEN CONNECTION TYPES
To change the unit between the two wifi connection modes, hold the Speed button for 5 seconds.
1

REGISTER THE APP
1. Press on the register button at the bottom of the screen.

2. Read the Privacy policy and press the Agree Button.

3. Enter your email address or phone number and press continue to register.

4. A verification code will be sent by the method selected in step 3. Enter the code into the app.

5. Type in the password you would like to create. This needs to be 6-20 characters, with letters and numbers.

2. The app is now registered. It will automatically log you in following reqistration.

2

SETTING UP YOUR HOME WITHIN THE APP
TUYA is designed so it can work with a large number of compatible smart devices within your home. It can also be set up to work with multiple devices within different houses As such during the setup process, the app requires that different areas are created and named to allow easy management of all your devices. When new devices are added, they are assigned to one of the rooms you have created.
CREATING ROOMS

1. Press on the ADD HOME button.

3. Type in a name for your home,
4. Press on the location button to select the location of your home. (See SETTING YOUR LOCATION below)
5. New rooms can be added by pressing the ADD ANOTHER ROOM option at the bottom. (See ADD ANOTHER ROOM below)
6. Untick any rooms that are not required on the app.
7. Press DONE in the top right corner.

SETTING YOUR LOCATION
Use your finger to move the orange HOME symbol.
When the symbol is in the approximate location of your home, press the confirm button in the top right corner.

ADD ANOTHER ROOM
Type in the name of the room, and press Done in the top right corner

3

CONNECTING USING QUICK CONNECTION
Before initiating the connection, make sure the unit is in standby mode, with the WIFI light flashing twice per second. If not follow the instructions for changing the connection mode. Also ensure your phone is connected to the wifi network. (We advise turning mobile data off during setup)

1. Open app and press "+" to add device, or use the add device button

2. Select the type of device as "Air Conditioner" within the Home Appliance tab.

3. Ensure the wifi light on the air conditioner is flashing twice per secondthen press on
the orange button at the bottom of the screen to confirm.

4. Enter your wifi password and press confirm.

5. This will then transfer the settings to the air conditioner. Wait for this to complete. If this fails, retry. If still unsuccessful please review the troubleshooting section for further help.

4

CONNECTING USING AP MODE (ALTERNATIVE METHOD)
Before initiating the connection, make sure the unit is in standby mode, with the wifi light flashing once per second. If not follow the instructions for changing the wifi connection mode. Also ensure your phone is connected to the wifi network. (We advise turning mobile data off during setup)

1. Open app and press "+" to add device, or use the add device button

2. Select the type of device as "Air Conditioner" within the Home Appliance tab.

3. Press on the AP mode button in the top right of the screen.

4. Ensure the wifi light on the air conditioner is slowly flashing (once per three seconds), then press on the orange button at the bottom of the screen to confirm

5. Enter your wifi password and press confirm.

6. Go to network settings in your phone and connect to the "SmartLife xxx" connection. There is no password to enter. Then return back to the app to complete setup.

This will then transfer the settings to the air conditioner. Once the connection process has completed, go back to the network settings on your phone to ensure your phone has reconnected to your wifi router.
5

CONTROLLING YOUR DEVICE THROUGH THE APP
THE HOME SCREEN
Change Home: If you have a number of units at different houses, you can change between them
Environmental information: Provides outdoor temperature and humidity based on the location details entered
Rooms: Use to view the units set up within each room
Smart Scene: Allows you to program intelligent behaviour based on the internal and external environment

Add Device: Add a device to the app, and go through the setup process.
Room Management: Allows rooms to be added, removed or renamed.
Add Device: Add a device to the app, and go through the setup process.
Profile: Provides the option for changing settings, and adding devices using a QR code provided by a friend.

Each device has its own entry on the home screen to allow the user to either quickly turn the unit on or off, or to enter the device screen to make other changes.
DEVICE SCREEN

Name of Air Conditioner: Press to enter the Device Screen
6

ON / OFF Button: Use to quickly turn the unit on or off.

DEVICE SCREEN

The device screen is the main control screen for the air conditioner, providing access to the controls to amend the functions and settings

Back: Returns to the Home Screen

Edit Name: Use to change the name of the air conditioner.

ON / OFF Button: Use to turn the unit on or off.

Desired Temperature Down Button: Use to decrease the desired temperature
Current Room Humidity: Displays the current room humidity

18

Desired Temperature UP Button: Use to increase the desired temperature.
Current Room Temperature: Displays the current room temperature
Function Tabs: Change other settings for the air conditioner.

MODE: Change the operating mode of the air conditioner between Cooling, Heating*, Dehumidify and Fan
SPEED: Use to change the Fan speed between Low, Medium and High

TIMER: Use to add an off timer while the unit is running, or an on timer while the unit is turned off
FUNCTION: Use to change other features on the air conditioner.

NOTES:
 Due to the design of the air conditioner, when changing between heating and cooling modes in the app, the hot and cold air outlets must also be physically swapped on the unit.
 Due to continuous development of the app, the layout and available features may be subject to change.
7

SMART SCENES
Smart Scenes is a powerful tool providing the option to customise the operation of the air conditioner based both on conditions within the room and outside influences. This gives the user the option of specifying much more intelligent actions. These are split into two catagories Scene and Automation.
SCENE
Scene allows for a one touch button to be added to the Home screen. The button can be used to change a number of settings in one go, and can change all the settings within the unit. A number of scenes can easily be setup, allowing the user to easily change between a number of preset configurations.
Below is an example of how to set up a scene:

1. Press on the Smart Scene tab at the bottom of the Home screen

2. Press on the Plus in the top right corner to add a smart scene.

3. Select Scene to create a new Scene

4. Press the Pen next to "Please Enter Scene Name" to input the name for your Scene
Show on Dashboard: Leave this on if you require the scene to be displayed as a button on the Home Screen
Press the Red Plus to add the action required. Then select the air conditioner from the list of devices.

5. Chose the function, set the value for the function, and then press the back button in the top right corner, to return to the previous screen.

6. Once all the functions required have been added, press the Save button in the top right corner to finalise and save your new Scene
8

AUTOMATION
Automation allows an automatic action to be set up for the device. This can be triggered by the Time, indoor temperature, humidity of the room, weather conditions, and a range of other influences.

1. Press on the Smart Scene tab at the bottom of the Home screen

2. Press on the Plus in the top right corner to add a smart scene.

3. Select Automation to create a new Automation Scene

6. Chose the function, set the value for the function, and then press the back button in the top right corner, to return to the previous screen.

4. Setup is very similar to the scene setup on the previous page, and includes an extra section for specifying a trigger for the scene to start.

5. Select the condition when the automation should start. A number of triggers can be combined.

Press the Pen next to "Please Enter Scene Name" to input the name for your Scene

Press the Red Plus next to "When any condition is satisfied" to add the trigger

Press the Red Plus next to "Execute following actions" to add the action required. Then select the air conditioner from the list of devices.

7. Once all the functions required have been added, press the Save button in the top right corner to finalise and save your new scene.

The automation is now set up, it can be turned on and off using the toggle on the image shown on step 2.

9

PROFILE TAB
The profile tab gives you the option to edit both your detail, and use the added features of the unit.
CHANGING THE NAME OF YOUR DEVICE
When in any of the device screens further settings for the device can be accessed, by pressing on the three dots in the top right hand corner. The top option within this allows you to change the name of the device to something relevant to the use of the product, such as "Living Room Air Conditioner". Within the menu, you also have the option of setting up a pattern lock or change your password.
DEVICE SHARING
This allows you to share access to the controls of your air conditioner with friends and family.
INTEGRATION
This allows the unit to be integrated with your favourite home automation hardware such as Google Home and the Amazon Echo.
CONNECTION TROUBLESHOOTING
1. Check whether the device is powered on and is in the correct wifi connection mode, if not please refer to the CHANGING BETWEEN CONNECTION MODES section on page 12.
2. Ensure the wifi password has been entered into the app correctly (Case sensitive) 3. Check that the phone is connected to the wifi you are connecting the device to. 4. Ensure the network you are connecting it to is 2.4Ghz (5Ghz wifi networks are not supported),
and that there is a strong wifi signal to the item. 5. If your router is dual band, ensure that the 2.4ghz network has a different network name (SSID).
Further advice on changing router settings will be available from your Internet service provider / Router manufacturer. 6. Check the settings on the router. Encryption should be WPA2-PSK and authorisation type should be set to AES 7. Try using the alternative connection method. i.e. If connection is failing when attempting to connect through CF mode, try AP mode.
10

electriQ UK SUPPORT

www.electriQ.co.uk/support

Please, for your own convenience, make these simple checks before calling the service line.
1. Has the unit been standing upright for at least 2 hours? 2. Is the unit plugged into the mains? 3. Is the fuse OK? 4. Switch the unit off and wait three minutes to see if the issue is resolved. Restart the unit. 5. Check if the water tank is full. 6. Was the troubleshooting guide followed?
If the unit still fails to operate call: 0871 620 1057 or complete the online form
Office hours: 9AM - 5PM Monday to Friday
Unit J6, Lowfields Business Park, Lowfields Way, Elland
West Yorkshire, HX5 9DA

DECLARATION OF CONFORMITY
Hereby, electriQ declares that this Portable air conditioner is in compliance with Directive 2014/53/EU. The full text of the EU declaration of conformity is available at the following internet address:
https://www.electriQ.co.uk/content/declaration-of-conformity

11