BRINK 450053 Air 70 (Plus) Instruction Manual
File info: application/pdf · 44 pages · 7.35MB
Brink |
Air 70 - Brink Climate Systems
Air 70 Rev. G 5 The Brink Air 70 is a decentral heat recovery ventilation unit for application in an exterior wall. The maximum ventilation capac
Extracted Text
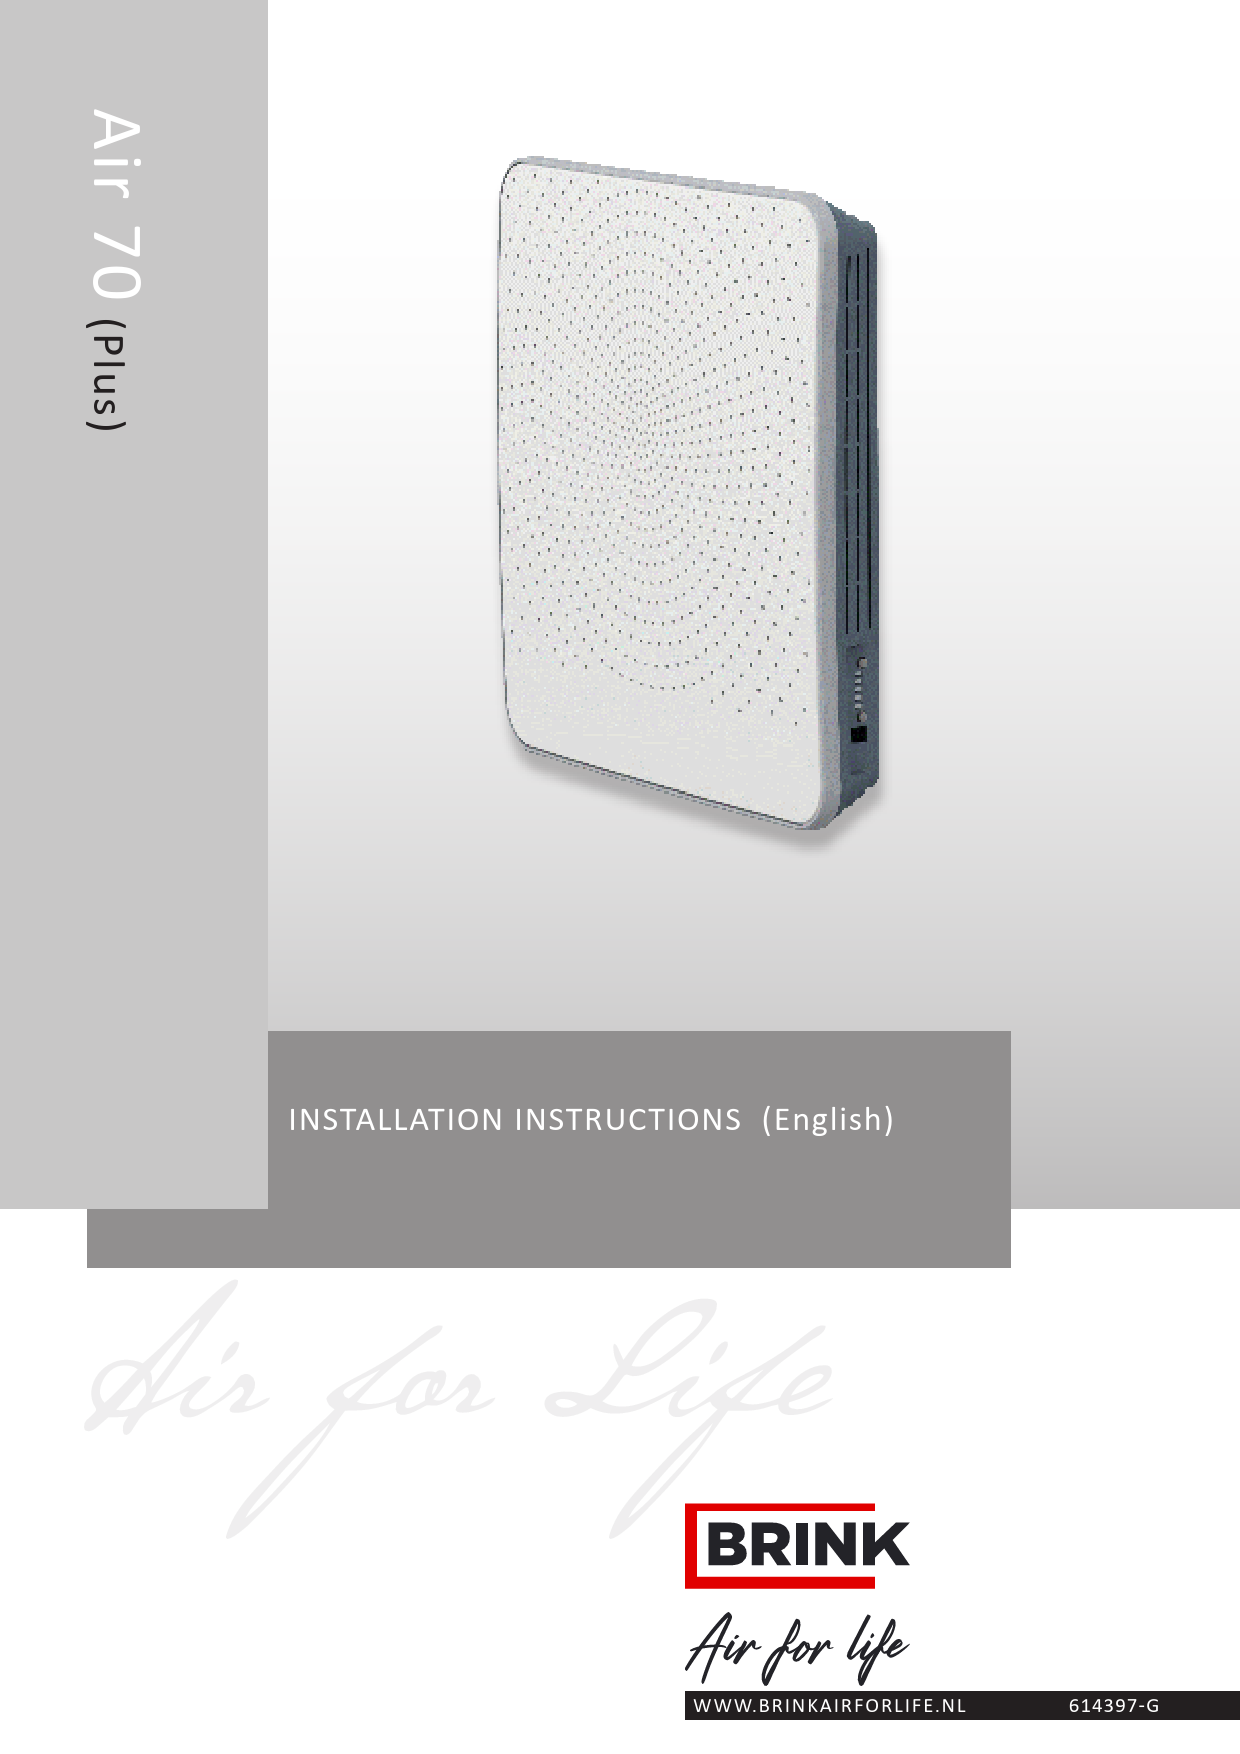
Air 70 (Plus)

INSTALLATION INSTRUCTIONS (English)

W W W. B R I N K A I R F O R L I F E . N L

614397-G

Installation instructions
Heat recovery appliance Air 70 (Plus)
STORE NEAR THE APPLIANCE
This appliance may be used by children as of 8 years of age, persons with reduced physical or mental capacities, and persons with limited knowledge and experience if they are supervised or have received instructions on how to use the appliance safely and are aware of the possible dangers. Children younger than 3 years of age must be kept away from the appliance, unless they are under constant supervision. Children between the ages of 3 and 8 may only switch the appliance on or o , but only if supervised or if they have received clear instructions on the safe use of the appliance and understand the possible dangers, on the condition that the appliance has been placed and installed in the normal position for use. Children between the ages of 3 and 8 may not insert the plug into the socket, nor clean or make changes to the settings of the appliance, nor carry out any maintenance on the appliance that would normally be carried out by the user. Children may not play with the appliance. If you need a new power cable, always order the replacement from Brink Climate Systems B.V. To prevent dangerous situations, a damaged mains connection must only be replaced by a quali ed e pert
GB

Table of contents

1 1.1 1.2 2 3 3.1 3.2 3.3 4 4.1 4.2 4.3 4.4 5 5.1 5.2 5.3 5.4 5.5 5.5.1 5.5.2 5.5.3 5.5.4 5.5.5 6 6.1 6.2 6.3 6.4 6.5 7 7.1 8 8.1 8.2 9 9.1 9.2 10 10.1 10.2 10.3 10.3.1 10.3.2 10.4 10.5 10.6 10.7 10.8 11 11.1 12 12.1 13 13.1

Delivery...................................................................................................................................................................... 1 Scope of delivery........................................................................................................................................................ 1 Accessories Air 70...................................................................................................................................................... 2

Application................................................................................................................................................................ 5

Version....................................................................................................................................................................... 6 Technical information.................................................................................................................................................. 6 Dimensions................................................................................................................................................................. 6 Exploded view appliance............................................................................................................................................ 7

Operation................................................................................................................................................................... 8 Description.................................................................................................................................................................. 8 Bypass conditions....................................................................................................................................................... 8 Frost safety................................................................................................................................................................. 8 Air 70 Plus version...................................................................................................................................................... 8

Installation................................................................................................................................................................. 9 Installation general ..................................................................................................................................................... 9 Placing the appliance ................................................................................................................................................. 9 Painting output grill front cover................................................................................................................................... 9 Installation sequence.................................................................................................................................................. 9 Electric connections.................................................................................................................................................... 15 Connecting the power plug......................................................................................................................................... 15 Connecting the optional multiple switch (only for Plus version).................................................................................. 15 Connection eBus connector (only for Plus version).................................................................................................... 15 Connection optional On/O switch ............................................................................................................................. 16 Connection MODBUS connector (only for Plus version)............................................................................................ 16

Putting into operation .............................................................................................................................................. 17 Powering the or taking the voltage from the appliance............................................................................................... 17 Switching the appliance on and o ............................................................................................................................. 17 Setting the air owrate................................................................................................................................................ 18 Reset factory settings................................................................................................................................................. 18 Other settings installer................................................................................................................................................ 18

Fault ........................................................................................................................................................................... 19 Trouble shooting......................................................................................................................................................... 19

Maintenance.............................................................................................................................................................. 21 Cleaning lters............................................................................................................................................................ 21 Installer maintenance ................................................................................................................................................. 22

Electric circuit........................................................................................................................................................... 27 Wiring diagram Basic pcb........................................................................................................................................... 27 Wiring diagram Plus pcb............................................................................................................................................. 27

Electric connections accessories........................................................................................................................... 28

Mounting Plus pcb...................................................................................................................................................... 28

Connecting RH (humidity) sensor (only possible for Plus pcb) .................................................................................. 28

Connection examples multiple switch......................................................................................................................... 28

Multiple switch with lter indication............................................................................................................................. 29

Wireless remote control (without lter indication) ....................................................................................................... 29

Connecting Connecting

CexOte2rsneanl ssowrit(cohnl(yonployspsoibslesibfoler

Plus pcb).................................................................................................. for Plus pcb) ............................................................................................

30 30

Connecting Brink Home i module (only possible for Plus pcb)................................................................................... 31

Connecting Air 70 on MODBUS (only possible for Plus pcb) ..................................................................................... 31

Linking appliances through eBus (only possible for Plus pcb) ................................................................................... 33

Incident setting......................................................................................................................................................... 34 Shutting o air supply an exhaust in case of incidents............................................................................................... 34

Service ...................................................................................................................................................................... 35 Exploded view ............................................................................................................................................................ 35

Setting values ........................................................................................................................................................... 36 Setting values when using the Brink service tool ....................................................................................................... 36

Declaration of conformity ........................................................................................................................................ 37 ErP-values................................................................................................................................................................. 38 Recyclen.................................................................................................................................................................... 39

Air 70 Rev. G

Chapter 1 Delivery
1.1 Scope of delivery Before starting installation of the heat recovery appliance, check that it has been supplied in complete and undamaged condition. The scope of delivery of the decentral heat recovery appliance type Air 70 comprises two assemblies ( 1 - 6) and (7). The two assemblies consist of the following components:
1 Front cover 2 Interior section Air 70 3 Exchanger/ fan combination Air 70 4 Wall sleeve 5 Calamities cap (folded, stowed in appliance) 6 Concise manual + mounting hardware 7 Exterior section Air 70 for wall thickness 500-600 mm; nish SS or white

7

4

85

3

2

1

6

5

Air 70 Rev. G

1

1.2 Accessories
Article description
Plus-pcb

Chapter 1 Delivery

CO2 sensor RH (humidity) sensor Brink home i module On/O switch (internal) Filter kit F7 (2x G4/ 1 x F7)

4-way switch with lter indication Transmitter wireless remote control 2 positions (with battery) Transmitter wireless remote control 4 positions (with battery) Receiver wireless remote control (for battery version) Kit wireless remote control 2 positions (1 transmitter & 1 receiver) Kit wireless remote control 4 positions (1 transmitter & 1 receiver)
Brink service tool

2

Air 70 Rev. G

Article code 450104 450101 450102 450103 450105 450109 540262 532170 532171 532172 52173 532174 531961

Chapter 1 Delivery
Article description
Extension kit 250 mm for wall thickness 270-300 mm; nish SS or white
248
Extension kit 200 mm for wall thickness 300-350 mm; nish SS or white
218
Extension kit 150 mm for wall thickness 350-400 mm; nish SS or white
168
Extension kit 100 mm for wall thickness 400-450 mm; nish SS or white
118
Extension kit 50 mm for wall thickness 450-500 mm; nish SS or white
68

Article code 451054 white (RAL9010) 452054 SS
451053 white (RAL9010) 452053 SS
451052 white (RAL9010) 452052 SS
451051 white (RAL9010) 452051 SS
451050 wit (RAL9010) 452050 SS

Air 70 Rev. G

3

4

Air 70 Rev. G

Chapter 2 Application

The Brink Air 70 is a decentral heat recovery ventilation unit for application in an exterior wall. The maximum ventilation capacity of the appliance is 70 m3/h.
Features Air 70: air quantity ad ustable using control buttons lter indication on the appliance a frost protection system that also at low outdoor temperatures ensures that the appliance's performance remains optimal and, if necessary, activates the standard preheater low sound level comes as standard with automatic bypass valve low energy consumption high e ciency
The performance and the energy consumption of the Air 70 depend on the air quantity setting as well as on the lter fouling.
The Air 70 is available in two types: Air 70 Air 70

Compared to the standard Air 70, the Air 70 Plus has a more advanced control pcb with additional connection options for, among others, RH (humidity) sensor, CO2-sensor, multiple switch or Brink Home i module. These installation instructions describe both the standard Air 70 and the Air 70 Plus. Please state the correct type when ordering an appliance. For dimensions, see �3.2.
The Air 70 comes ready to plug in with a 230 V mains plug and a connection for the Brink service tool on the outside of the appliance.
The appliance comes with an emergency cap. In the event of an emergency for which the air supply and exhaust to the atmosphere must be shut o , the emergency cap must be placed. This cap is stored in the appliance. Before placing the cap, rst the appliance must be switched o (pull the mains plug or, if installed, put the On/O switch to 0). See �11.1 for more detailed information.
Always remove this calamity cap before switching the appliance back on!

Warning The preheater and the Control pcb carry 230 V. Always take the voltage from the appliance
by pulling the mains plug when working on the appliance.

Air 70 Rev. G

5

398

3.1 Technical information Supply voltage [V/Hz] Protection degree Dimensions (w x h x d) [mm] Duct diameter through the wall [mm] Weight [kg] Filter class Fan setting (factory setting) Ventilation capacity [m3/h] Rated power [W] Rated current [A] Max. rated current [A] Cos
3.2 Dimensions 600 mm
398
65

Chapter 3 Version

Air 70

230/50

Interior section IP20/ Exterior cover IPX4

See 3.2

�250

12 (13.5 with exterior cover)

2 x G4 (exhaust) & 1x G4 (supply)

1

2

3

4

5

15

25

40

55

70

4.2

5.3

8.0

14.0

23.5

0.05

0.07

0,10

0.15

0.23

1,3

0.34

0.34

0.36

0.40

0.45

355
Q

315

E tension kit (for e planation kits see

1.2

Size Q [mm]

Basic appliance

without e tension kit

85

(Wall thickness 500-600 mm

451050/ 452050 (Wall thickness 450-500 mm

135

451051/ 452051 (Wall thickness 400-450 mm

185

451052/ 452052 (Wall thickness 350-400 mm

235

451053/ 452053 (Wall thickness 300-350 mm

285

451054/ 452054 (Wall thickness 270-300 mm

315

6

Air 70 Rev. G

Chapter 3 Version

3.3 E ploded view appliance

1

23 4 5 6 7 8 9

10

11

12

13

23 22 21 20 19 18 17

16

15

14

1 Front cover 2 Exhaust air lter G4 (2 units) 3 Indoor temperature sensor 4 Supply air lter G4 (1 unit) 5 Bypass motor 6 Bypass with mounted bypass slide 7 Heat exchanger 8 EPP housing (2 parts) 9 Outdoor temperature sensor 10 PVC Wall sleeve �250 mm 11 Mounting plate exterior cover 12 Exterior cover
* These parts are not visible in the picture

13 Maximum safety preheater 14 Preheater 15 Fan 16 Internal condensate discharge

17

Control buttons rpm control/ appliance on and o

lterreset/ switching the

18 Service connector 19 LEDs (5x) 20 Control pcb 21 Mains plug 230 V. 22 Plus pcb (option) 23 Optional On/O switch

Air 70 Rev. G

7

Chapter 4 Operation

4.1 Description
The appliance comes plug and play and operates fully automatically. The exhaust air from indoors heats up the fresh, clean outdoor air. That saves energy while fresh air is supplied to the dwelling.

The control system has ve preprogrammed ventilation modes.

4.2 Bypass conditions
The appliance features a bypass function. The bypass is intended to lead the cooler outdoor air around the exchanger during the night after a hot summer's day. That way the cooler outdoor air directly enters the dwelling. The bypass motor ac-

tivates the bypass slide when the bypass conditions are satised. Then there is only a mechanical exhaust air ow through the heat exchanger, so that under these conditions -undesiredheat recovery does not occur.

Bypass open Bypass closed

Bypass conditions
- The outdoor temperature is higher than 16�C and - the outdoor temperature is lower than the indoor temperature in the dwelling and - the temperature in the dwelling is higher than the bypass temperature (standard setting 24�C)
- The outdoor temperature is lower than 16�C or - the outdoor temperature is higher than de indoor temperature in the dwelling or - the temperature from the dwelling is lower than the bypass temperature minus the set hysteresis
temperature; the factory setting for this temperature is 22�C (24.0�C minus 2.0�C).

4.3 Frost safety To prevent freezing of the heat exchanger at extremely low outdoor temperatures, the Air 70 features intelligent frost control. The built-in preheater is activated when the outdoor temperature drops below -1.5�C. That guarantees proper balanced ventilation at all times.
4.4 Air 70 Plus version. The Air 70 is also available as "Plus" version. This version features a second control pcb with additional connectors (X8 - X19) with more connection options for several applications.
See � 9.2 for more information about the connection options of the Plus pcb connectors X8 - X15.
The "Plus" print connector is "clicked" directly on the control pcb.
The appliance with only a basic pcb can also be ad usted afterwards in a simple manner to a Plus version

Only when the outdoor temperature drops so low that the preheater capacity is insu cient, the ventilation capacity is reduced to protect the exchanger from freezing over.
Just like the Control pcb connectors, the Plus connectors are accessible after the front cover has been removed (see �8.1 item 2); then the cover that protects the electronics can be unscrewed (see �5.4 item 6). One breakout tab is available at the rear for connecting the plus pcb with components outside the appliance.
The Plus pcb must always be "signed on" to the Control pcb, DIP switch 1 must be ON (see �10.1)

8

Air 70 Rev. G

Chapter 5 Installation

5.1 Installation general Installing the appliance 1. Setting up the appliance (�5.2 and �5.4) 2. Electric connection (�5.5)
Connecting the mains power and, if necessary, the eBus connection
Installation must take place in compliance with:
5.2 Setting up the appliance The Air 70 can directly be mounted using the screws supplied for that purpose.
In addition, the following must be observed. The appliance must be mounted at a pitch of 3� 1 towards the outside. The installation room must be frost free. The interior and exterior covers must be level.

uality requirements ventilation systems dwellings uality requirements balance ventilation dwellings Regulations for ventilation of dwellings and residential buildings Safety provisions for low-voltage installations Any additional regulations of the local power companies The Air 70 installation instructions
The appliance must be cut to the correct length to match the wall thickness. To allow lter cleaning and maintenance, a free space must be provided of at least 70 cm at the front of the appliance and a free headroom of 1.8 m. Do not place the appliance above a window or door because droplets or icicles may form at the underside of the outdoor cover.

B B
C
��  �

�  = Clean outdoor air into the dwelling
= Exhaust "foul" indoor air to atmosphere


C
A D
C

B C

5.3 Painting outlet grill front cover If required, the outlet grill of the front cover can be painted in a di erent colour. Standard colour is RAL 9003. The synthetic outlet grille is made of PC/ABS; Consult your paint supplier for the use of the correct type of paint. Make sure that all holes of the outlet grill remain open!
Unscrew 8 screws on the inside to remove the outlet cover; then the outlet grille can be removed from the front cover.

A = Minimum height > 800 mm B = Spacing > 100 mm C = Spacing > 300 mm D = Free space for appliance> 750 mm
Outlet grille

8x) Torx T10

Air 70 Rev. G

9

Chapter 5 Installation

5.4 Installation sequence
DRILL HOLE IN WALL
Before you start drilling verify the presence of pipes in the wall Be careful when drilling to prevent the hole in the inner wall to prevent outbreak of pieces from wall / plaster
1 There are two ways required the hole for mounting appliance can be drilled in the wall, namely:  A hole with a diameter of �280 mm at right angles through the wall,  A hole with a diameter of �260 mm at an angle of 3 �.
Hole of �280 mm drilling at right angle
90� ( 1�)

�280 mm

E terior wall

�280 mm

Y Hole of �260 mm at a angle of 3�

MOUNTING WALL SLEEVE AND EXTERIOR COVER

2

WALL THICKNESS BETWEEN 500 MM AND 600 MM (with wall thickness between 270 mm and 500 mm go to

point 3)

2a

Y

90�

Cut wall sleeve at length X. (Wall sleeve = 614 mm) X = Y + 34 mm Wall thickness > 580 mm; wall sleeve does not have to be shortened!

Example Wall thickness = 535 mm Cut length = 535 + 34 = 569 mm

2b

Align the wall sleeve with separating wall.

Aligning here! Locate wall sleeve at top of drilled hole!
separating wall

0 mm

93� ( 1�)

wall sleeve

�260 mm
10

�260 mm

3� ( 1�)

E terior wall
Y

Separating wall
Wedges (These are not required if the hole in the wall has already been drilled at a pitch!)

Air 70 Rev. G

Wall sleeve to be sealed all around using moistureresistant sealant.
E terior wall

Chapter 5 Installation

2c

3 WALL THICKNESS BETWEEN 270 MM AND 500 MM

3a

Y

90�

4

Cut wall sleeve at length X

X = Y + imensions e tension kit + 16 mm

Refer to �1.2 for the dimensions of the extension kit.

Example Wall thickness = 420 mm Cut length = 420 + 118 + 16 = 554 mm 2d

4x) 5 x 60 mm hook up
Cable

0 mm

3b

Align the wall sleeve with separating wall.

Aligning here! Locate wall sleeve at top of drilled hole!
Separating wall

wall sleeve

2e

Wall sleeve to

3� ( 1�)

be sealed all around using

moisture-resist-

ant sealant.

1x Torx T15

Separating wall

E terior wall

Wedges (These are not required if the hole in the wall has already been drilled at a pitch!)

Air 70 Rev. G

11

Chapter 5 Installation

3c

Torx T15

3h

2x

4x) 5 x 40 mm

>

3d 3e 3f 3g
12

2
Center relative to wall sleeve!

3i

A

Lead the cable through wall sleeve!
B

Torx T15

C

1x

3j
hook up
B A

3k

Air 70 Rev. G

1x Torx T15

Chapter 5 Installation

MOUNTING INDOOR UNIT
4
Align template with top of drilled hole!
Template (On packaging
interior part)

7

Cable

X2

Make sure that also the ground wire of the preheater is mounted on terminal X1 (see also �9.1)

Only drill these holes for a

8

permanent mains supply; see �5.5.4

5
4x) 3,5x38mm

1
2x Torx T15
2

9 6
2

2x Torx T15
1

Air 70 Rev. G

Place cable to exterior cover neatly in the special groove!
13

10 TOP
�
Z

Chapter 5 Installation 13
14

wall sleeve
Z

bottom cam

15

11

12 TOP
Z
Z = ma . 100 mm (for size Z see gure 10 14

X5

16

�

1

2
90�

�

Z

17 For electric connections of the appliance, see �5.5.

After making the electric connections to the appliance, it can be put into operation; see �6.1

Air 70 Rev. G

Chapter 5 Installation

5.5 Electric connections
5.5.1 Connecting the power plug
The appliance can be connected to an easily accessible, earthed wall socket with the plug that is mounted to the appliance. The electric installation must comply with the requirements of your power company.
Make allowance for the 175 W preheater.

Warning The preheater and the Control pcb carry 230 V. Always take the voltage from the appliance by pulling the mains plug when working on the appliance.

5.5.2 Connecting the optional multiple switch (only possible for Plus version
An optional 4-way switch is connected to the modular connector type RJ12; connection X13 to plus pcb. This connector is accessible after removing the front cover (see respectively �8.1 item 2).
If a 4-way switch is connected, the settings according to the table below will be linked to the ventilation modes of the Air 70. The current ventilation mode can only be changed with the push buttons on the appliance when the switch is on setting 1.

Position 4-way switch
1 2 3

Ventilation mode Air 70 1
3 5

* Setting 1 of the 4-way switch is a non-switched setting (current ventilation mode = setting as per appliance).

Plus pcb
modular connector X13 on Plus pcb

Control pcb

Refer to diagrams �10.3.1 to �10.3.2 for connection examples multiple switch.

5.5.3 Connecting the eBus connector (only possible for Plus version The Air 70 uses the eBus protocol. The Plus pcb is tted with two 2-pole (detachable) screw connectors X14 and X15 for making the eBus connection.
The eBus protocol may for instance be used to link (cascade control) appliances (see �10.8). Because of polarity sensitivity, always connect contacts X1-1 to X1-1 and contacts X1-2 to X1-2; the appliance will not work when these contacts are interchanged.
Plus pcb
eBus connector X14/ X15 on Plus pcb

Control pcb

Air 70 Rev. G

15

Chapter 5 Installation

5.5.4 Connecting optional On/O switch
If the Air 70 is connected to a permanent 230 V power source, the appliance - both the basic and the Plus versions - must be equipped with the optionally available two-pole On/O switch. It can be placed in the appliance on the left-hand side; a breakout opening for this switch is provided.
At the location of this permanent power supply, a hole must be made in the wall behind the appliance for a unction box. The exact location of the unction box is indicated on the drilling template used to drill the holes from inside the unit (see �5.4 item 4).
Refer to the installation instructions that come with this switch for the electric connection of this On/O switch.

Breakout opening switches
Position junction bo 230 V

5.5.5 Connecting MODBUS connector (only possible for Plus version The Air 70 supports the MODBUS protocol. A 3-pole (detachable) screw terminal X11 is available on the plus pcb for connecting a MODBUS link. MODBUS can be used to connect the appliance to a building automation system.
Plus pcb
MODBUS connector X11 on Plus pcb

Control pcb Control pcb

16

Air 70 Rev. G

Chapter 6 Putting into operation

6.1 Powering the or taking the voltage from the appliance
- Connect the appliance to, or disconnect it from, the mains power by inserting or pulling the mains plug or, if the optional mains switch is installed, by setting this switch to 1 or 0 respectively.
As soon as the power is turned on or if the appliance is reset to factory settings, a self-test will be performed. During this self-test, all LEDs are blinking green simultaneously. Operating the appliance is not possible during the self-test. The self-test takes at least 4 and no more than 9 minutes. If a fault is detected during the self-test, a fault message with blinking red LEDs will appear directly after the self-test (see �7.1).

Powering the appliance

� Option

0 1

or

�
�

Taking the voltage from the appliance

Option

�

0 1

or

6.2 Switching the appliance on and o - Switching on and o with push buttons on the appliance.
Switching off the appliance for 30 minutes

+

+

Switching on the appliance within 30 minutes

+

+

+

10 s.

>5s.

-

-

Green LED of set ventilation mode blink Fast

Switching off

+

+

-
>5s.

-

-

Green LED of set ventilation mode light up during 10 seconds and then they go out.

Switching on

+

+

+

10 s.

>10s.

-

-

Green LED of set ventilation mode blink Slow

>10s.

-

-

-

Green LED of set ventilation mode light up during 10 seconds and then they go out.

Air 70 Rev. G

17

Chapter 6 Putting into operation

6.3 Setting the air quantity
Ex factory, the air quantity of the Air 70 is set at 25 m3/h. With the aid of two push buttons, the air quantity can be set to 15 m3/h, 25 m3/h, 40 m3/h, 55 m3/h or 70 m3/h respectively.

Green LEDs indicate the ventilation mode for a short period after operating the buttons; 10 seconds later these LEDs go out again.

Green LEDs

+

+

-

-

INCREASE AIR UANTIT

DECREASE AIR UANTIT

+

+

+

+

+

+

>>10 s.

-
15 m3/h

-
25 m3/h

-
40 m3/h

-
55 m3/h

6.4 Reset factory settings

Holding down the two push buttons for at least 15 seconds will

reset the appliance to the factory settings. As soon as the push

buttons are released, all three LEDs will simultaneously blink

+

green 3x successively. All changed settings have now been re-

set to the initial values that the Air 70 came with ex factory. All

stored fault messages have been deleted and the lter mes-

sage has also been reset.

-

-

-

70 m3/h

+
Press the "+" button and "-" button simultaneously 15 s.
-
3

6.5 Other settings installer
Various other settings of the Air 70 can also be modi ed. This requires use of the Brink service tool. An overview of settings to be modi ed can be found in �13.1.

Please refer to the manual that comes with the Brink service tool for more detailed information and methods for modifying these other Air 70 settings

18

Air 70 Rev. G

Chapter 7 Faults

7.1 Trouble shooting When the appliance's control system detects a fault, that is indicated by one or several blinking red LEDs.
If one red LED is lit permanently, the lter must be cleaned or replaced; see �8.1.
The appliance makes a distinction between a fault at which the appliance keeps running (limitedly) and a serious (locking) fault for which the fan is switched o .
The appliance remains in this fault mode until the problem in question has been solved. then the appliance will reset itself (Auto reset).

Non-locking fault When the appliance detects a non-locking fault, it will still keep running (limitedly).
Locking fault When the appliance detects a locking fault, it will no longer work. The red LED on the multiple switch (if applicable) will be blinking. Contact the installer to remedy this fault. A locking fault cannot be remedied by taking the voltage from the appliance; rst the fault must be solved.

Fault code (blinking red LEDs

Fault code when using service tool

Cause

Action appliance

Action installer

+

Fan is switched o

Take the voltage from the appliance

104

Fan (locking fault)

Preheater is switched o If applicable, the Bypass is shut o and blocked

Check the fan wiring Replace wiring or fan Put voltage back on appliance

Restart every 5 minutes

Fault has automatically been reset

-

+

Take the voltage from the appliance

Check heat exchanger with bypass

103

Bypass

Appliance keeps running Bypass is blocked

valve & bypass motor Replace heat exchanger with bypass valve & bypass motor

-

Put voltage back on appliance Fault has automatically been reset

+

-

106

Temperature sensor from atmosphere (locking fault)

Fan is switched o Preheater is switched o If applicable, the Bypass is shut o and blocked

Take the voltage from the appliance Check sensor wiring Replace wiring or sensor Put voltage back on appliance Fault has automatically been reset

+

Take the voltage from the appliance

107

Temperature sensor from dwelling

If applicable, the Bypass is shut o and blocked

Check sensor wiring Replace wiring or sensor Put voltage back on appliance

-

Fault has automatically been reset

Air 70 Rev. G

19

Chapter 7 Fault

Fault code (blinking red LEDs
+

Fault code when using service tool

Cause

113

Preheater

-

Action appliance

Action installer

Appliance keeps running, fan speed goes down

Take the voltage from the appliance Check preheater wiring Replace wiring or preheater Put voltage back on appliance Fault has automatically been reset

+

Take the voltage from the appliance

Appliance keeps running

Check sensor wiring

109

CO2 sensor

CO2 control system deactivated

Replace wiring or sensor Put voltage back on appliance

-

Fault has automatically been reset

+

Take the voltage from the appliance

Appliance keeps running

Check sensor wiring

111

Humidity sensor

RH control system deacti- Replace wiring or sensor

vated

Put voltage back on appliance

Fault has automatically been reset
-

+
-

115

Plus pcb defective (locking fault)

Fan is switched o Preheater is switched o If applicable, the Bypass is shut o and blocked

Take the voltage from the appliance Check connection Plus pcb Replace the Plus pcb Put voltage back on appliance Fault has automatically been reset

+

Take the voltage from the appliance

117

14-pole connector X5 not connected

Appliance is not working

Place the 14-pole connector on X5 (see 9.1) Put voltage back on appliance

Fault has automatically been reset
-

+

114

4-way switch closure between terminals

-

Fault code 0: No error Fault code 116: ISM7 module communication error Fault code 152: Error Flash memory

Appliance keeps running on position 1

Take the voltage from the appliance Check connection 4-way switch Replace if necessary 4-way switch Put voltage back on appliance Fault has automatically been reset

20

Air 70 Rev. G

Chapter 8 Maintenance

8.1 Cleaning lters User maintenance is limited to periodically cleaning or replacing the lters. The lters do not have to be cleaned until it is indicated by the red LED. It is not permitted to use the appliance without lters!
1
+

Filter message
-
2

option
2�

4
�1 �2 �3 �4

At the rst 3 lter messages, clean the lters using a vacuum cleaner; at every 4th lter message, replace the lters (at least 1 x per year) !
5

�

�

� �

6

�

1

1
�

�

2

3

2

1

�

�

7 Reset lter counter
+

-
+
3x -
Air 70 Rev. G

Press the "+" button and "-" button simultaneously 3 s.

+

+

10 s.

-

-

21

Chapter 8 Maintenance

8.2 Installer maintenance Installer maintenance includes cleaning the heat exchanger and fans. Dependent on the conditions, this must done once a year.
1 Switch o the power.

3 Remove the lters.
2 1

�

= Option
0 1 2 Remove the front cover
2�
1
�
22

�

�

�
4 Take 14-pole X5 from the Control pcb.
X5
5 Carefully slide the inner section forward out of the appliance.
Air 70 Rev. G

Chapter 8 Maintenance

6 a. Take the 2 sealing rings from the inner section. b. Take the bypass cable connector from the bypass motor. c. Take the temperature sensor cable (with connector) from the groove in the top section.

8 Take the 4-pole connector from the fan housing.

b.

a. c.

7 Take the upper and lower section from each other to make the heat exchanger and sensor housing accessible.

9 Take the fan section and the heat exchanger from the EPP section (A). Then slide the fan section and the heat exchanger from each other (B).
A

� �

�

B�

�

Air 70 Rev. G

23

� �
�

Chapter 8 Maintenance

10 Use a vacuum cleaner and a soft brush to clean both the fan section and the heat exchanger.

12 Slide the cleaned heat exchanger and the fan section into each other (A) and install them in the bottom EPP section (B). Make sure that the arrows on the housing are directly facing each other again after installation!

A

�

B

11 If possible, use low-pressure air (max. 0.5 bar) to clean the exchanger's interior.
bypass motor

13 Reconnect the fan cable.

ma . 0,5 bar

14 Remount the two EPP sections. "CLICK"

�

24

Air 70 Rev. G

Chapter 8 Maintenance

15 a.
b. c.

Carefully mount the two rubber rings in the special grooves; the rings are symmetrical so the installation orientation is not relevant. Reconnect the bypass motor connector. Place the bypass cable and the connector back into the special groove.

b.

17 Make sure that the inner section closes up properly against the exterior cover seal.
� TOP

�
a. c.
18 Reconnect the 14-pole to the fan cable.

16 Slide the completely assembled inner section back into the appliance; make sure the cable from the exterior cover is neatly placed in the special groove TOP
X5
19 Install new lters; note the position of the arrows on the lters.

�

�

� �

Air 70 Rev. G

25

Chapter 8 Maintenance

20 Place the front cover back on the appliance.

22 Reset the lter counter after the lters have been replaced/ cleaned (see �8.1 item 7).

�
1 2
21 Reconnect the 230 V to the appliance.

�

�

�

or
= Option 0 1

26

Air 70 Rev. G

Chapter 9 Electric diagram

9.1 Wiring diagram basic pcb

L N PE

X1
12 3

N L

X2 X3 X4

X5

X6

X7

12

12 1234 1 2 3 4 5 6 7

1 23 4

12

(+) (-)

5 678
n.c.

8 9 10 11 12 13 14 5 6 7 8

n.c.

G

Plus pcb CO2-sensor RH-sensor No application
ON

12 3

12

C2 C1

C3

C1 C2 C3

230VAC 50Hz
A
B
C1 = Brown C2 = Blue C3 = Green/Yellow

7 6 5 4 32 1 14 13 12 11 10 9 8

12

F

C
12

D

E

X4 X5

1234

X6 X7

X1 X2 X3

Basic pcb
A = Preheater with max safety B = Service connector C = Outdoor temperature sensor 10K NTC D = Indoor temperature sensor 10K NTC E = Fan F = Stepper motor bypass G = Coupling connector with Plus pcb

9.2 Wiring diagram Plus-pcb

X17 X18

SCL 5V GND SDA Clock 3,3V GND Data GND RS485-A RS485-B Input GND +24V Gnd 1 2 3 LED - ebus + ebus - ebus + ebus

X8 X9
12 1234

X10
1 23 4

X11 X12 X13 X14 X15
1 2 3 12 123456 12 12

12 1234 1234 123 12

J

K

L

MN

12 12
P

O

1

2

3

X16 X17 X18 X19

1 23 4

1234 5 1234

5 678

n.c. 6 7 8 9 10

X19

n.c.

1 2 34 5 678

1234
R

X16

X11 X10
X9 X8

X15 X14
X13 X12

Plus pcb
J = No application K = Connection CO2 sensor L = Connection RH sensor M= Modbus connection 1 ([WHUQDOVZLWFKRQR O = Connection 4-way switch P = Ebus connections Q = Coupling connector with met control pcb R = Ebus + power Brink home i module

Air 70 Rev. G

27

Chapter 10 Electric connections accessories

10.1 Mounting Plus pcb
C
230V 50Hz

A = Air 70

B = Control pcb

C = Plus pcb

The "Plus" print connector is "clicked" directly on the

control pcb.

D = Set dipswitch on control pcb for Plus pcb

A

Set dipswitch 1 to ON

DIP switch 1 at ON on Plus pcb B
ON
D
1234

10.2 Connecting RH (humidity sensor (only possible with Plus pcb
A = Air 70 B = Plus pcb C = Control pcb D = RH sensor; clamp on the indicated position in the appli-
ance D = The cable that comes with RH sensor; connect the con-
nector mounted on the cable to pcb connection X10 F = Set dipswitch on control pcb for RH sensor;
Set dipswitch 3 to ON

D A Plus pcb

B

RH-sensor

C
ON

X10
E
230V 50Hz

F
1234

brown gwrheiteen yellow

If the RH sensor (humidity sensor) measures an increase of the RH for a number of minutes, the ventilation capacity is automatically increased to ventilation mode 5. When the relative humidity drops again, the appliance will return to the original ventilation mode after 5 minutes. It makes no difference here at which ventilation mode the Air 70 or, if applicable, the connected 4-way switch is set. The factory setting of the ventilation modes and the sensitivity of the RH sensor can be changed with the aid of the Brink service tool, see �13.1.

28

Air 70 Rev. G

Chapter 10 Electric connections accessories

10.3 Connection e amples multiple switch (only possible for Plus pcb A multiple switch can be connected to the modular connector X13 of the Renovent Excellent. This modular connector is directly accessible after removing the front cover and the electronics cover (see �8.1) .
10.3.1 Multiple switch with lter indication (only possible with Plus pcb

B

RJ12/6

RJ12/6
B

Wire colours C1 - C6 may vary dependent on

A

the type of modular cable used.

C

X13

Note: For the modular cable that is used, the "tab" of both modular connectors must be mounted facing the mark on the modular cable.

X13

230V

50Hz

A = Air 70 %  0XOWLSOHVZLWFKZLWK�OWHULQGLFDWLRQ C = Modular cable

The 4-way switch can also be used to activate a 30-minutes boost mode by putting the switch to setting 3 for less than 2 seconds and directly turning it back to setting 1 or 2. The boost mode can be reset by putting the switch to setting 3 for longer than 2 seconds or by switching it to absence ( ) mode. The boost setting is equivalent to ventilation mode 5.

10.3.2 Wireless remote control (without lter indication / (only possible with Plus pcb

B

D

E

F

A

A = Air 70 B = Receiver for wireless remote control

C

X13

C = Modular cable D = Transmitter with 4 settings

D = Transmitter with 2 settings

E = Any additional 2- or 4-settings transmitters (A maximum

of 6 transmitters can be signed on to 1 receiver)

X13

230V

50Hz

Air 70 Rev. G

29

Chapter 10 Electric connections accessories

10.4 Connecting CO2 sensor (only possible with Plus pcb

A = Air 70

B = Plus pcb

D

F

C = Control pcb D = CO2VHQVRU�[ZLWKVFUHZRQWKHLQGLFDWHGSRVLWLRQLQWKH

appliance

E = Cable supplied with CO2 sensor; Connect the connector mounted on the cable to pcb connection X9

F = Set dipswitch on control pcb for CO2 sensor; set dipswitch

A

2 to ON

X9
E

B Plus pcb

C

CO2-sensor

X9
230V 50Hz

ON
F
1234

yellow green white brown

1200 ppm (default)

The CO2 control system only works when the Air 70 is set to ventilation mode 1 or 2. If the CO2 sensor measures an increase of the CO2 value, the ventilation capacity is automatically increased. When the CO2 value decreases, the ventilation capacity will automatically be reduced again (see pictures). The factory setting (default) of the ventilation modes and the CO2 value can be changed with the aid of the Brink service tool, see �13.1.

Ventilation mode 1

1200 ppm (default)

Ventilation mode 2

400 ppm (default)

15 m3/h (default)

40 m3/h (default)

400 ppm (default)

10.5 Connecting e ternal switch (only possible for Plus pcb

25 m3/h (default)

55 m3/h (default)

A = Air 70
$Q2Q2VZLWFKFDQEHFRQQHFWHGWRWHUPLQDO; When the contact closes, the fan stops. This is can be XVHGIRULQVWDQFHZKHQD�UHSODFHLVOLJKWH
A
X12

X12

230V

50Hz

30

Air 70 Rev. G

Chapter 10 Electric connections accessories

10.6 Connecting the Brink home i module (only possible for Plus pcb

A = Air 70

B = Plus pcb

C = Control pcb

F

D = Brink Home i module; mount over the Plus pcb us-

ing the supplied bracket

A

E = Cable supplied with Brink home i module;

D

Connect the connector mounted on the cable to pcb

B

connection X19

X19
Refer to the documentation supplied with this kit for more
C information about application of the Brink home i module and on how to connect it.

E
X19
230V 50Hz

10.7 Connecting Air 70 on MODBUS (only possible for Plus pcb
The plus pcb of the Air 70 can directly be connected to a MODBUS network (see �9.2). When using ModBus control, the installation must comply with RS485 protocol (max 32 devices on 1Bus line, then use ampli ers, minimum core diameter wiring, use twisted pair wiring, preferably shielded, loop wiring through from device to device (make 1 line) not in a star connection, max 2 terminating resistors at the beginning and end of the network line, etc.).
Con guring the Modbus is only possible with the service tool. Make sure that the latest service tool is installed as it is now on the website. The following parameters are set by default: - Slave Address = 11 - Speed = 1 => 19200 Baud - Parity = 1 => Even parity
- Modbus Interface = 1 (do nothing about it, ust leave it like that)
Note: When MODBUS is active, the ventilation mode of the appliance cannot be changed using the push buttons or, if applicable, the connected 4-way switch! In addition, any connected RH or CO2 sensor will not work!
MODBUS will only function as from software versions S1.07.01 (control pcb) and S1.01.03 (plus pcb).
After con guration, just turn the power o and on again to ensure that everything is properly con gured.
Readout and setting parameters: Please note that the addressing is direct and an o set does not have to be given as with the Brink-connect !! Default communication settings: 19200 Baud Even - parity. Read register 4002 as a test and you will get the value 32 back. Setting the ow can be done ust as with the brink-connect with register 6011 and then set the value 4 there. Then you can enter a value between 15 and 70 with register 6001.

Air 70 Rev. G

31

Chapter 10 Electric connections accessories

Setting values

MODBUS adress

Description

Correction factor

Signed

Values / Comments

4002 Appliance Type

-

no 32 = ventilation

4004 Appliance version (basic/plus)

-

no 1 = basis / 2 = plus

4009 Current temp. sensor "from atmosphere" 0.1

yes -

4010 Current temp. sensor "from dwelling"

0.1

yes -

4028 Current ventilation capacity supply [m3/h]

1

Function 4029 Current ventilation capacity exhaust [m3/h]

1

Code

4030 Position bypass valve

1

no no no 0=initialising/1=>open/2=>close/ 3=open/4=closed/255= position. unknown)

0 06 & 0 03

4031 4037 4038

Operation bypass valve Status preheater Preheater power [%]

1

no 0=auto mode/ 1=bypass valve closed/ 2=bypass valve open

1

no 0= initialising/ 1= not active/ 2= active/ 3= test mode/ 255= position

0.1

no -

4039 Current fault code

0.1

no HRV appliance fault code ( 0 = no fault)

4040 Filter message

-

no 0 = Filter clean / 1 = Filter fouled

4070 Alarm contact

1

- 0 = Not activated / 1 = Activated

4071 Internal CO2 sensor value

1

--

4072 Internal RH sensor value

0.1

--

4080 Systeem status

-

--

The function codes 0x06 can be written in "write single register"; also for 0x03 "read holding register".

If the Air 70 must be activated through MODBUS, the MODBUS address 6013 must be set to 4, then the required air owrate can be set.
Note: If the power to the Air 70 has been interrupted, both the MODBUS address 6013 and the desired air owrate must be set again!

Setting values

MODBUS adress

Description

Correction factor

Signed

Values / Comments

Function Code

1000 6001

MODBUS slave address Set ventilation capacity [ [m3/h]

-

no 1 - 247/ Set as standard at 11(Set only during installation procedure)

1

no 15 - 70 m3/h

0 06 & 0 03

6006 6007 6012

Operation bypass valve Filter reset (command) Reset Air 70 (commando)

-

no 0=auto mode/ 1=bypass valve closed/ 2=bypass valve open

-

no 1 = lterreset

-

no 1 = HRV appliance reset

6013 Remote control (commando)

-

no

0 = Ventilation owrate as per Brink HRV appliance/ 4 = Ventilation ow rate as per MODBUS

The function codes 0x06 can be written in "write single register"; also for 0x03 "read holding register".

32

Air 70 Rev. G

Chapter 10 Electric connections accessories

10.8 Coupling Air70 appliances with eBus (only possible for Plus pcb

A

B1

B2

C

C

C

D

D

D

X14/X15

E
230V 50Hz

E
230V 50Hz

The ventilation mode of the master appliances is copied by the slave appliances.

A

= Air 70 Master appliance

B1 - B* = Air 70 Slave appliance

C

= Control pcb

D

= Plus pcb

E

= Two-core low-voltage cable

230V 50Hz
A maximum of 5 appliances can be linked through eBus (1 Master + 4 Slaves max.)

Important: Because of polarity sensitivity, always interconnect eBus terminals X14-1 and 15-1 and interconnect terminals X14-2 and X15-2. The ventilation mode can only be set on the master appliance. All appliances will run in the ventilation mode set on the master appliance. After a change in the ventilation mode through the master appliance, it may take a minute before the ventilation mode has been taken over by the slave appliances.

Setting master and slave
1 To set an Air 70 appliance as master or slave, rst hold down the top push button during 5 seconds.
All LEDs will now alternately blink red and green.

2
Use the two push buttons to select which appliance must be master and which appliance must be slave. While making this selection, the LEDs remain blinking alternately red and green.

+

+

+

++

++

++

++

-

-

-

--

--

--

--

+

Master

Slave 1

Slave 2

Slave 3

Slave 4

5 sec. -

+

+

-

-

3
Store the selection by holding down the two push buttons during at least 3 seconds. The stored setting will blink green three times.

+

+

> 3 sec.

Now also set the other linked appliances in the same way.

When the selection is not stored within 10 seconds

-

-

the selection will be made undone- and the appliance


 3x ZLOOUHWXUQWRWKHPRVWUHFHQWO\VWRUHGPRGL�FDWLRQ

Air 70 Rev. G

33

Chapter 11 Incident situation

11.1 Incident setting

The appliance comes with a calamity cap. If in the event of an

5

incident, the air supply and exhaust to the atmosphere should

be shut o , the appliance must be switched o (pull the mains

plug or, if available, set the On/O switch to 0), place the emer-

gency cap which is stored (folded up) in the appliance.

Always remove this calamity cap before switching the appliance back on!

1

Close with calamities cap all openings to the outside!!

When the incident situation has ended, the calamity

6

cap can be removed from the appliance.

2

2�

1
�
7 3

approx 3 cm

8

4

�

�
1 2

34

Air 70 Rev. G

Chapter 12 Service

12.1 E ploded view
When ordering parts, in addition to the article code number (see exploded view), please state the appliance type, the serial number, the year of production and the name of the part:
N. B.: Appliance type, serial number and year of production are stated on the identi cation plate behind the front cover on the electronics cover.

E ample Appliance type Serial number
ear of production Part Article code
uantity

: Air 70 : 450001210301 : 2021 : Fan : 536003 : 1

7b 11

10

9

8

1

7a

6

5

Important: If the mains cable is damaged, it must

only be replaced by the special cable,

2

available from the manufacturer or you service centre!

3

If in an already installed appliance with a production date before 1

4

July 2016 the control pcb must be replaced, the option pcb, if ap-

plicable, must also be replaced!

No. 1 2 3 4 5 6 7a & 7b 8 9 10 11

Article description Wall sleeve Control pcb Mains cable Front cover Option pcb (only for Air 70 plus) Filter kit (2x G4 & 1x G4 �180) Temperature sensor Set sealing rings (2x �210 mm, 1x �180 mm & 1x �75 mm) Heat exchanger with bypass valve & bypass motor EPP housing (2 sections) Fan (with housing)

Article code 460110 536000 531978 536005 450104 536006 536004 536009 536002 536008 536003

Air 70 Rev. G

35

Chapter 13 Setting values

Set values when using the Brink service tool

When connecting the Brink service tool, various set values can be modi ed. The service tool must be connected to the Air 70 service connector. Refer to the table below for set values to be modi ed.

DESCRIPTION Most recently set ventilation mode Ventilation mode 1 Ventilation mode 2 Ventilation mode 3 Ventilation mode 4 Ventilation mode 5 Bypass temperature Operation bypass Maximum lter ow Bypass temperature hysteresis
DESCRIPTION
Sensitivity RH sensor
Low setting CO2 sensor High setting CO2 sensor Bus address
Slave number

FACTORY SETTING
2 15 m3/h 25 m3/h 40 m3/h 55 m3/h 70 m3/h 24.0�C
0
54000 m3/h 2.0 �C
FACTORY SETTING PLUS PCB
0
400 1200
8
0

SETTING RANGE
1, 2, 3, 4 or 5 15 m3/h - 70 m3/h 15 m3/h - 70 m3/h; but higher than set value mode 1 15 m3/h - 70 m3/h; but higher than set value mode 2 15 m3/h - 70 m3/h; but higher than set value mode 3 15 m3/h - 70 m3/h; but higher than set value mode 4 15.0�C - 35.0�C 0 (= Bypass automatic) 1 (= Bypass permanently inactive) 2 (= Bypass permanently active) 0 - 200000 m3/h 0.0�C - 5.0�C
SETTING RANGE
+2 most sensitive +1 0 basic setting RH sensor -1 -2 least sensitive 400 - 1200 ppm 400 - 1200 ppm 0 - 8 (0 = Master)
0 - 4 0 = master 1 - 4 = slave number

STEP 1 1 m3/h 1 m3/h 1 m3/h 1 m3/h 1 m3/h 0.5�C
1000 m3/h 0.5�C STEP
25 ppm 25 ppm 1 1

MODBUS slave adres

11

1 t/m 247

1

MODBUS speed MODBUS parity MODBUS interface

4

0 - 3

1

0 - 2

1

0 - 2

0 = 9600 Baud/ 1 = 19k2 Baud (default) 2 = 38k4 Baud/ 3 = 56k Baud

1

0 = No parity (extra stopbit)

1 = Even parity (default, 1 stopbit)

1

2 = Odd parity (1 stopbit)

0 = not supported

1 = Air 70 (default)

1

2 = not supported

36

Air 70 Rev. G

Chapter 13 Declaration of Conformity

DECLARAT I ON OF CON FORM I T Y

Manufacturer: Address:
Product:

Brink Climate Systems B.V.
PO box 11 NL-7950 AA Staphorst, The Netherlands
Heat recovery appliance type: Air 70 Air 70 Plus

The product described above complies with the following directives:
2014/35/EU (low voltage directive) 2014/30/EU (EMC directive) RoHS 2011/65/EU (substances directive) 2009/125/EG (1253/1254 EU (EU ErP directive))
The product bears the CE label:

Staphorst, 24-03-21
A. Hans, Managing director

Modi cations reserved Brink Climate Systems B.V. continuously strives after improvement of products and reserves the right to change the speci cations without
prior notice.

Air 70 Rev. G

37

Cha pt e r 1 3 ErP-va lue s

Productdatasheet conform Ecodesign (EU , nr. 1254/2014 (Anne IV

Supplier: Model:

Climate zone

Type of control

Average

Manual switch Local demand control with sensor

Manual switch Cold
Local demand control with sensor

Warm

Manual switch Local demand control with sensor

Type of ventilation unit: Fan

Type of heat exchanger:

Thermal e ciency:

Maximum ow rate:

Electric power input:

Sound power level Lwa:

Reference ow rate :

Reference pressure di erence:

Speci c Power Input (SEL):

Control factor:

Leakage

Internal External

SEC-Value in kWh/m�/a
-35,60 -38,34 -70,70 -74,40 -12,87 -15,06

Brink Climate Systems B.V.

Air 70 (Plus

Type of control

The annual electricity consumption (AEC in kWh

The annual heating saved (AHS in kWhT

A

296

4232

A

226

4332

A+

833

8278

A+

763

8474

E

251

1913

E

181

1959

Ventilation unit with heat recovery Variable speed EC fan

Recuperative plastic cross-counter ow heatexchanger

79%

70 m�/h

29 W

40 dB(A)

49 m�/h

0 Pa

0,2 Wh/m�

1,0 in combination with manual switch

0,65 in combination with local demand control with sensor

3,9%

0,3%

Position lterwarning:

Through LED indicator on the appliance/ On the Manual switch (led) Attention For optimal energy e ciency and a proper operation a regular lter inspection,
cleaning or replacement is necessary.

Internet address for Assembly instructions: Sensitivity to air pressure uctuations :
Airtightness (between indoor & outdoor) : Bypass:

http://www.brinkclimatesystems.nl/installateurs/kenniscentrum/Documentatie.aspx 9,0% 6,9%
es; with Bypass

* Measurements executed by TZWL according to the EN 13141-8 standard (TZWL-report M.84.09.204.AK, February 2016). ** Measurements executed by Peutz (Peutz report A3032-1-RA-001, February 2016) at 70% 0f 55 m3/h.

Classi cation from 1 anuary 2016

SEC Class (,,Average climate") A+ (highest e ciency) A B C D E (less e ciency)

SEC in kWh/m�/a SEC < -42 -42 SEC < -34 -34 SEC < -26 -26 SEC < -23 -23 SEC < -20 -20 SEC < -10

38

Air 70 Rev. G

Chapter 13 Recycling
Recycling Sustainable materials are used in the manufacture of this appliance. The packaging should be disposed of in a responsible manner and inaccordance with governmental regulations.

Air 70 Rev. G

39

BRINK CLIMATE SYSTEMS B.V.

O 11 NL 79 AA S

W

W

T. 31

46 99 44

F. 31

46 94

.

.

.

T N 79 1SN S

T N

WWW.BRINKAIRFORLIFE.NL

614397 G M

1