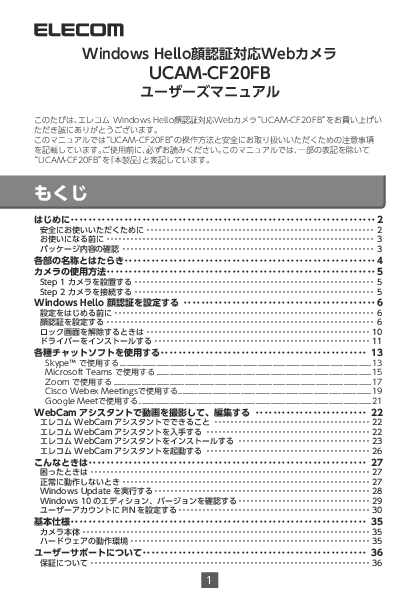
ELECOM UCAM-CF20FB Windows Hello Compatible Webcam User's Manual
Model: UCAM-CF20FB
Publication Date: January 25, 2021, 1st Edition
Manufacturer: ELECOM CO., LTD.
Introduction
Thank you for purchasing the ELECOM Windows Hello compatible webcam, "UCAM-CF20FB". This manual describes the operating procedures and safety precautions for the "UCAM-CF20FB". Please read it carefully before use. For the purpose of this manual, "UCAM-CF20FB" will be referred to as "this product".
Safety Precautions
Explanation of Symbols:
- [Warning] Failure to observe the precautions indicated by this symbol may result in death or serious injury.
- [Caution] Failure to observe the precautions indicated by this symbol may result in injury or damage to other equipment.
- [Prohibited] Indicates actions that must not be performed.
- [Must Do] Indicates actions that must be performed.
- [Important] Provides important information or tips.
- [Note] Provides helpful information or references.
Please read the precautions described here to prevent injury, malfunction, or fire.
Warnings
- If water or foreign objects enter the product, immediately stop using it and disconnect it from the computer. Continued use may cause fire or electric shock.
- If the product overheats, emits smoke, or has an unusual odor, immediately stop using it, shut down the computer, and after confirming it is cool enough to handle without burning yourself, disconnect it from the computer. Then, contact your retailer or the Elecom Information Center. Continued use may cause fire or electric shock.
- Do not drop or strike the product. If the product is damaged, immediately stop using it and disconnect it from the computer. Then, contact your retailer or the Elecom Information Center. Continued use with a damaged product may cause fire or electric shock.
- Do not disassemble or modify the product. This may cause fire, electric shock, or malfunction. It will also void the warranty.
- Do not dispose of the product in fire. This may cause rupture, fire, or injury.
Cautions
- Do not place the product in the following locations:
- Inside a car exposed to direct sunlight, or in places exposed to direct sunlight.
- Near heaters or other high-temperature areas.
- Humid or condensation-prone areas.
- Uneven or vibrating surfaces.
- Near magnets or other sources of magnetic fields.
- Dusty areas.
- This product is not waterproof. Do not use or store it where it may come into contact with water or liquids. Water splashes, juice, coffee, steam, sweat, etc., can cause malfunction.
- Do not use this product with equipment where a malfunction could cause serious consequences.
- Dispose of this product in accordance with local ordinances and laws.
Before Use
Please confirm the following points before using the product.
Installation Precautions
- Connect to a USB-A port that can supply 5V and 500mA.
- Depending on the structure of your notebook computer or display, the product may not be securely fixed with the stand. In such cases, place it on a flat surface.
- When installing, ensure there is enough slack in the cable and avoid stretching it taut. If the cable is stretched, the product may fall and damage itself or other equipment.
- When changing the camera's direction, always hold the stand part with your hand. Forcing it may cause the product to detach from its mounting position and fall, potentially damaging itself or other equipment.
- Do not attach the camera to uneven or structurally weak surfaces. Doing so may cause the product to fall and damage itself or other equipment.
- When securing the camera, avoid mounting it on soft or weak parts. Attaching it to unstable locations may cause the product to fall and damage itself or other equipment.
Precautions for Use
- Do not touch the camera lens with your fingers. If dust adheres, remove it with a commercially available lens blower.
- Depending on your chat software, video chat may not be available at VGA resolution or higher.
- Depending on your internet connection environment, some software may not be usable.
- Hardware processing performance may affect audio quality and video processing.
- Due to the nature of this product, it may become unrecognized when your computer enters standby, hibernation, or sleep mode. Please disable these features before use.
- If the product becomes unrecognized, disconnect it from the computer and reconnect it.
- Do not use power-saving modes on your computer while using the camera. If you intend to use power-saving modes, close the applications you are using with the camera beforehand.
- This product is for use in Japan only. Use outside of Japan is not covered by warranty or support services.
- This product is for USB 2.0 only. It is not compatible with USB 1.1 interfaces.
Care
If the product becomes dirty, wipe it with a soft, dry cloth.
Using volatile liquids such as thinner, benzine, or alcohol may cause discoloration or degradation.
Package Contents
Check that the following items are included in the product package. If any items are missing or damaged, please contact your retailer or the Elecom Information Center.
- Camera Body: 1 unit
Names and Functions of Each Part
A diagram shows the webcam with labels:
- Camera Lens: Captures images.
- LED: Lights up white when capturing images.
- Built-in Microphone: Captures audio from this opening.
- Infrared Illuminator for Face Recognition: Flashes during recognition. The visibility of infrared light may vary by individual.
- Joint Part: Allows for up and down movement.
- Multi-Stand: Used to attach the camera to a display or as a base for placement on flat surfaces.
- USB Connector: Connects to the computer's USB-A port.
How to Use the Camera
Step 1: Camera Setup
Position the camera and adjust its angle up or down. Attaching it to the top of a display is recommended.
Attaching to a laptop or display: A diagram shows the multi-stand clipping onto the edge of a screen.
Placing on a flat surface: A diagram shows the webcam resting on its stand on a table.
Step 2: Connecting the Camera
- Insert the camera's USB connector into the computer's USB-A port.
- You can connect or disconnect the USB connector while the computer is powered on.
- Ensure you insert the USB connector in the correct orientation; do not force it.
- The driver will be installed automatically. Your product is now ready for use.
Proceed to the item you wish to use:
Setting up Windows Hello Face Recognition
Before Setup
- To use face recognition, you must update Windows 10 to the latest version via Windows Update. If Windows Update is disabled on your computer, please perform it manually. (See "What to do when: Run Windows Update").
- For face recognition on the following Windows 10 editions, you need to install drivers downloaded from the Elecom website:
- Windows 10 Enterprise 2016 LTSB
- Windows 10 IoT Enterprise 2016 LTSB
- Windows 10 Enterprise 2015 LTSB
- Windows 10 IoT Enterprise 2015 LTSB
- If you are unsure of your Windows 10 edition and version, you can check it using the following method. (See "What to do when: Check Windows 10 Edition/Version").
- To set up Windows Hello face recognition, you must first set a PIN for your Windows 10 sign-in. If you have not set a PIN, please set one. (See "What to do when: Set PIN for User Account").
The following steps are for Windows version "20H2". The screens may differ in other versions, but the procedure is the same.
Setting up Face Recognition
To set up Windows Hello face recognition, you must first set a PIN. For PIN settings, please refer to "What to do when: Set PIN for User Account" in the "What to do when" section.
- Click the Start button [Start] in the lower-left corner of the screen, and then click the Settings icon [Settings]. A screenshot shows the Windows Start menu with the Settings icon highlighted.
Setting up Face Recognition (Continued)
- Click "Account". The "Account" screen will be displayed. A screenshot shows the Windows Settings window with "Account" selected in the left pane.
- Click "Sign-in options". A screenshot shows the "Sign-in options" screen with "Windows Hello Face Recognition" visible.
- Click "Windows Hello Face Recognition" and then click Set up. The "Windows Hello Setup" screen will appear. A screenshot shows the "Windows Hello Setup" screen with the "Set up" button highlighted.
Setting up Face Recognition (Continued)
- Click Get started.
- Enter your PIN. A "Windows Security" prompt appears asking for your PIN.
- The camera will display your image. Look straight ahead as instructed. Wait for registration to complete.
Setting up Face Recognition (Continued)
- When "Everything is complete." is displayed, face recognition setup is finished. Click Close. A screenshot shows the "Windows Hello Setup" completion screen.
If you click Improve recognition, the camera image screen will appear again. If you wear glasses, you can improve recognition accuracy by allowing the computer to recognize you both with and without glasses.
- Follow steps 1-4 and click "Windows Hello Face Recognition". The message "You're ready to sign in with your face." indicates that face recognition has been set up correctly. A screenshot shows the "Sign-in options" screen with "Windows Hello Face Recognition" enabled.
When Unlocking the Lock Screen
- Face the computer's camera directly. When your face is recognized, "Hello, [User Name]." will be displayed. A screenshot shows the Windows lock screen with a greeting.
- Click the mouse or press the Enter key on the keyboard. The lock screen will be removed, and the desktop will be displayed.
Installing the Driver
This driver is exclusively for the editions listed below. Face recognition can be used without installing this driver on other editions.
- Windows 10 Enterprise 2016 LTSB
- Windows 10 IoT Enterprise 2016 LTSB
- Windows 10 Enterprise 2015 LTSB
- Windows 10 IoT Enterprise 2015 LTSB
Downloading the Driver
To obtain the driver for face recognition, please visit the following Elecom website and download the installation program:
https://www.elecom.co.jp/r/220
Search for "UCAM-CF20FB Driver".
Installing the Driver
Before Installation:
- Connect the camera to your computer and ensure it is ready for use.
- Log in with a user account that has administrator privileges.
- It is recommended to close all Windows programs (application software) before proceeding.
- Download the file "UCAM-CF20FB_Driver_vX.X.zip" and extract it to your desktop or another location.
- Double-click "Setup(.exe)" in the extracted folder. The installer will launch.
- If the "User Account Control" screen appears, click Yes.
- Click Install. A screenshot shows the driver setup wizard's welcome screen.
Installing the Driver (Continued)
- Click Next.
- Check the "Restart now" option and click Finish. Depending on your computer's status, a restart may not be necessary and the installation will complete without prompting for a restart. A screenshot shows the driver setup wizard's completion screen with the restart option.
After the computer restarts, it will be ready for face recognition setup. Next, proceed with face recognition setup.
→ Set up Windows Hello Face Recognition: Set up Face Recognition
Using Various Chat Software
Please configure your camera settings within your chat software. The following describes the setup for representative chat software.
For other chat software, please refer to their respective manuals.
Skype™
The following describes the setup using "Skype for Windows Desktop". The screen may differ for the Store app version, but the steps are the same.
- Ensure the camera is connected to your computer and launch Skype.
- Click your "User Profile". A screenshot shows the Skype interface with the profile icon highlighted.
- Click "Settings". A screenshot shows the Skype settings menu with "Settings" highlighted.
Skype™ (Continued)
- Set "Audio/Video" as follows.
- If multiple cameras are connected, select "ELECOM 2MP Webcam" under "Video" > "Camera". A screenshot shows the Skype video settings with the camera selection dropdown.
- Under "Audio" > "Microphone", select the audio device to use. If using the built-in microphone, select "Microphone (Webcam Internal Mic)". A screenshot shows the Skype audio settings with the microphone selection dropdown.
You can now use this product with Skype.
Microsoft Teams
- Ensure the camera is connected to your computer and launch Microsoft Teams.
- Click your "User Profile". A screenshot shows the Microsoft Teams interface with the profile icon highlighted.
- Click "Settings". A screenshot shows the Microsoft Teams settings menu with "Settings" highlighted.
Microsoft Teams (Continued)
- Set "Devices" as follows.
- If multiple cameras are connected, select "ELECOM 2MP Webcam" under "Camera". A screenshot shows the Microsoft Teams device settings with the camera selection dropdown.
- Under "Microphone", select the audio device to use. If using the built-in microphone, select "Microphone (Webcam Internal Mic)". A screenshot shows the Microsoft Teams audio settings with the microphone selection dropdown.
You can now use this product with Microsoft Teams.
Zoom
- Ensure the camera is connected to your computer and launch Zoom.
- Click the Settings icon [⚙️]. A screenshot shows the Zoom main window with the settings icon highlighted.
- Select "Video".
- If multiple cameras are connected, select "ELECOM 2MP Webcam" under "Camera". A screenshot shows the Zoom video settings with the camera selection dropdown.
Zoom (Continued)
- Select "Audio".
- Under "Microphone", select the audio device to use. If using the built-in microphone, select "Microphone (Webcam Internal Mic)". A screenshot shows the Zoom audio settings with the microphone selection dropdown.
You can now use this product with Zoom.
Cisco Webex Meetings
- Ensure the camera is connected to your computer and launch Cisco Webex Meetings.
- Click "Start meeting". A screenshot shows the Webex Meetings start screen.
- Click the arrow next to "Video options". A screenshot shows the Webex meeting setup screen with video options.
Cisco Webex Meetings (Continued)
- If multiple cameras are connected, select "ELECOM 2MP Webcam" under "Camera". A screenshot shows the Webex meeting setup screen with camera selection.
- Click the arrow next to "Audio options".
- Under "Microphone", select the audio device to use. If using the built-in microphone, select "Microphone (Webcam Internal Mic)". A screenshot shows the Webex meeting setup screen with microphone selection.
You can now use this product with Cisco Webex Meetings.
Google Meet
- Access the Google Meet website in your web browser and log in.
- Click the Settings button [⚙️] in the upper right corner of the screen. A screenshot shows the Google Meet interface with the settings icon highlighted.
- Click "Audio", then select the microphone device to use. If using the built-in microphone, select "Microphone (Webcam Internal Mic)". A screenshot shows the Google Meet audio settings.
- If multiple cameras are connected, click "Video", then select "ELECOM 2MP Webcam" under "Camera". A screenshot shows the Google Meet video settings.
You can now use this product with Google Meet.
Shooting and Editing Videos with Webcam Assistant
The "Elecom Webcam Assistant" is software that allows you to utilize the camera more effectively.
What You Can Do with Elecom Webcam Assistant
- Video/Photo Shooting: You can shoot videos and photos for blogs and save them directly to your computer, making it easy to edit and use them.
- Basic Editing Features: Includes features for title insertion, basic trimming, subtitle addition, and BGM insertion, allowing for easy editing without separate video editing software.
- YouTube Upload: You can easily upload edited videos to YouTube.
Getting Elecom Webcam Assistant
To get "Elecom Webcam Assistant", visit the Elecom website below and download the installation program:
http://www.elecom.co.jp/support/download/peripheral/pccamera/assistant/soft/index.html
Installing Elecom Webcam Assistant
Before Installation:
- Connect the camera to your computer and ensure it is ready for use.
- Log in with a user account that has administrator privileges.
- It is recommended to close all Windows programs (application software) before proceeding.
- Download the file "ElcWebCamUtlDLxxx(.zip)" and extract it to your desktop or another location. (Note: "xxx" may vary depending on the version.) If your environment requires it, clicking "Open file" after downloading will extract it.
- Double-click "ElcWebCamUtlDLxxx(.exe)" in the extracted folder. (Note: "xxx" may vary depending on the version.)
- The installer downloader will launch. Click Download. A screenshot shows the downloader window.
Installing Elecom Webcam Assistant (Continued)
- When the download is complete, the following screen will appear. Check the box for "Run the downloaded module" and click OK. A screenshot shows the downloader completion screen.
The installer will launch.
If the "User Account Control" screen appears, click Yes.
- Click Next.
- Click Next.
- Click Install. A screenshot shows the InstallShield Wizard setup screen.
Installing Elecom Webcam Assistant (Continued)
- When the installation is finished, click Finish. A screenshot shows the InstallShield Wizard completion screen.
The installation of Elecom Webcam Assistant is now complete.
Launching Elecom Webcam Assistant
- Launch "Elecom Webcam Assistant" by clicking its icon on the desktop or navigating through the [Start] menu: [All Apps] - [ELECOM] - [WebCam Assistant].
If the camera is not connected, the following message will appear: "The device is not connected or may already be in use." Click OK.
Clicking OK will launch Webcam Assistant. In this case, you cannot shoot videos or photos, but you can still use the editing and YouTube upload features.
- Elecom Webcam Assistant launches. The main window displays options for video shooting, photo shooting, and editing.
For detailed instructions on editing videos and photos, and for YouTube uploads, please refer to the Help file. Click the [?] icon on the main screen to view the Help file.
What to Do When
If You Have Trouble
If you encounter issues with settings or operations, please access the support portal via the URL or QR code below.
You can find helpful information on our support portal.
When Not Operating Properly
Product Not Recognized or Operating
- If the product is connected via a USB hub, try connecting it directly to the computer's USB-A port without using a USB hub, to ensure stable power supply.
- Disconnect and reconnect the product from the USB-A port. If it is still not recognized correctly and the following message appears, shut down the computer, try connecting the product to a different USB-A port, and then restart the computer.
Screenshot description: A message "USB device not recognized" is shown, indicating that a USB device connected to the computer is not functioning properly and is not recognized by Windows. The time and date are also displayed.
If the issue persists, please contact your retailer or the Elecom Information Center.
Camera Image Not Displayed or Distorted
- Your chat software settings may be incorrect.
- Please check the image using Webcam Assistant.
- If the image is displayed correctly in Webcam Assistant but not in your chat software, check the manual or support information for your chat software.
- If the image is not displayed correctly even in Webcam Assistant, there may be an issue with your computer or camera. Contact your retailer or the Elecom Information Center.
No Sound or Recording
- Your chat software settings may be incorrect.
- If the issue persists, please contact your retailer or the Elecom Information Center.
Running Windows Update
To use face recognition, you need to update Windows 10 to the latest version via Windows Update. If Windows Update is disabled on your computer, please perform it manually.
- Click the Start button [Start] in the lower-left corner of the screen, and then click the Settings icon [Settings]. A screenshot shows the Windows Start menu with the Settings icon highlighted.
- Click "Update & Security". The "Update & Security" screen will be displayed. A screenshot shows the Windows Settings window with "Update & Security" selected.
- Select "Windows Update". Click Check for updates to run Windows Update. A screenshot shows the Windows Update screen with the "Check for updates" button highlighted.
Checking Windows 10 Edition and Version
If you are unsure of your Windows 10 edition and version, please check it using the following method.
- Click the Start button [Start] in the lower-left corner of the screen, and then click the Settings icon [Settings]. A screenshot shows the Windows Start menu with the Settings icon highlighted.
- Click "System". The "System" screen will be displayed. A screenshot shows the Windows Settings window with "System" selected.
- Select "About" and check the "Windows specifications" section for your edition and version. A screenshot shows the "About" screen with "Windows specifications" detailing Edition, Version, OS build, etc.
Setting a PIN for Your User Account
To set up Windows Hello face recognition, you need to set up a PIN for your user account. Follow the steps below to set up a PIN.
The following steps are for Windows 10 version "20H2".
- Sign in to the user account for which you want to create a PIN.
- Click the Start button [Start] in the lower-left corner of the screen, and then click the Settings icon [Settings]. A screenshot shows the Windows Start menu with the Settings icon highlighted.
- Click "Account". The "Account" screen will be displayed. A screenshot shows the Windows Settings window with "Account" selected.
- Click "Sign-in options". A screenshot shows the "Sign-in options" screen.
Setting a PIN for Your User Account (Continued)
- Click "Windows Hello PIN", then click Add. A screenshot shows the "Sign-in options" screen with "Windows Hello PIN" highlighted and the "Add" button.
- Click Next on the "PIN to create" screen. A screenshot shows the "PIN to create" prompt.
Setting a PIN for Your User Account (Continued)
- Enter your user account password and click Sign in. The "Enter password" screen is displayed.
The "PIN setup" screen will appear. If you are setting a PIN for a local account, a screen prompting "First, verify your account password." will appear. Enter your user account password and click OK.
Setting a PIN for Your User Account (Continued)
- Enter your new PIN and confirm it in the "PIN confirmation" field.
Checking "Include letters and numbers" allows PINs with the following requirements:
- 4 to 127 characters.
- Allows uppercase letters, lowercase letters, numbers, and special characters.
- Patterns like "123456" or "111111" are not allowed.
- Click OK. Your PIN will be created. A screenshot shows the PIN creation confirmation.
Setting a PIN for Your User Account (Continued)
- Follow steps 1-4 and click "Windows Hello PIN". The message "You're ready to sign in with your PIN." indicates that the PIN has been set up correctly. A screenshot shows the "Sign-in options" screen with "Windows Hello PIN" enabled.
Basic Specifications
Camera Unit
| Item | Specification |
|---|---|
| Image Sensor | 1/6-inch CMOS Sensor |
| Effective Pixels | Approx. 2.0 Megapixels |
| Focus Method | Fixed Focus |
| Recording Pixels | Max. 1920 x 1080 Pixels |
| Max Frame Rate | 30FPS |
| Color Depth | 16.77 Million Colors (24bit) |
| Shooting Angle | Diagonal 80 degrees |
| Built-in Microphone | Digital Silicon MEMS (Monaural), Omnidirectional |
| Interface | USB 2.0 (Type-A Male) |
| Cable Length | Approx. 1.5m |
| External Dimensions | Approx. W100.0 mm x D64.0 mm x H26.5 mm (excluding cable) |
| Supported OS | Windows 10 To use face recognition, Windows 10 must be updated to the latest version via Windows Update. For face recognition on the following Windows 10 editions, drivers downloadable from the Elecom website are required:
Compatibility information is based on our verification environment at the time of confirmation. Complete compatibility with all devices, OS versions, and applications is not guaranteed. |
Hardware Operating Environment
To use this product, the following environment is required.
| Item | Requirements |
|---|---|
| CPU | Intel® Core™ i3 1.2GHz or equivalent |
| Main Memory | 1GB or more |
| HDD Space | 1GB or more |
In addition, the system must meet the requirements of any software used concurrently.
User Support
Frequently Asked Questions (FAQ):
Visit www.elecom.co.jp/support and check "Product Q&A".
Contact by Phone/FAX (Navi Dial):
Elecom Information Center
TEL: 0570-084-465 FAX: 0570-050-012
[Reception Hours] 10:00 AM - 7:00 PM (Open daily)
Search for setup methods for various devices:
Search for "Ere-sapo" (えれさぽ) for setup guides.
This product is for domestic Japan use only. Elecom is not responsible for issues arising from use outside of Japan. Support is provided only in Japanese. For inquiries from outside Japan, please contact the local retailer in your country of purchase.
Warranty Information
Warranty Period: 6 Months
Please keep your proof of purchase (receipt, delivery note, etc.) as it is required for warranty claims.
Warranty Coverage:
- Repairs: Elecom will repair or replace the product free of charge for malfunctions occurring under normal usage conditions within the warranty period (calculated from the date of purchase). If the warranty period has expired, repairs will be charged.
- Exclusions from Free Warranty: The following cases are not covered by the warranty:
- Failure to submit proof of purchase and the malfunctioning product. (Proof of purchase includes receipts or delivery notes that confirm the purchase date, store, and model number.)
- Tampering or alteration of the proof of purchase.
- Purchasing the product as used (including purchases from second-hand shops or auctions).
- Malfunctions caused by modification, disassembly, or repair by third parties other than Elecom or its designated agents.
- Malfunctions caused by connecting or using the product with equipment other than those specified by Elecom.
- Malfunctions caused by usage conditions exceeding normal household or office environments (e.g., extreme temperature, humidity, vibration).
- Malfunctions caused by impact, drops, or other physical stress during transportation after purchase.
- Malfunctions caused by external factors such as earthquakes, fires, lightning, floods, natural disasters, public hazards, or voltage surges.
- Other circumstances deemed not eligible for free repair or replacement.
- Repair Request: Please bring the product and proof of purchase to your retailer, or send it to our repair center.
- Shipping Costs: Shipping costs to the Elecom repair center are the customer's responsibility. Please ensure proper packaging and use a trackable shipping method (e.g., courier or registered mail) to prevent loss. Elecom is not responsible for damage or loss during transit.
- Replacement: If the same model cannot be replaced, Elecom may provide a replacement with a product of equivalent or superior performance.
- Returned Parts: Old parts or products exchanged under warranty or paid repair will not be returned.
Disclaimer:
- Elecom's liability for damages due to product malfunction is limited to the purchase price of the product, except in cases of Elecom's intentional misconduct or gross negligence.
- Elecom is not liable for consequential, incidental, indirect, or punitive damages, lost profits, or data loss resulting from product malfunction.
Scope of Validity:
- This warranty is valid only in Japan.
