22 mai 2021 — These operating instructions are intended for the following target groups: project devel‐ opers (planners, developers, designers), installers, electricians, ...
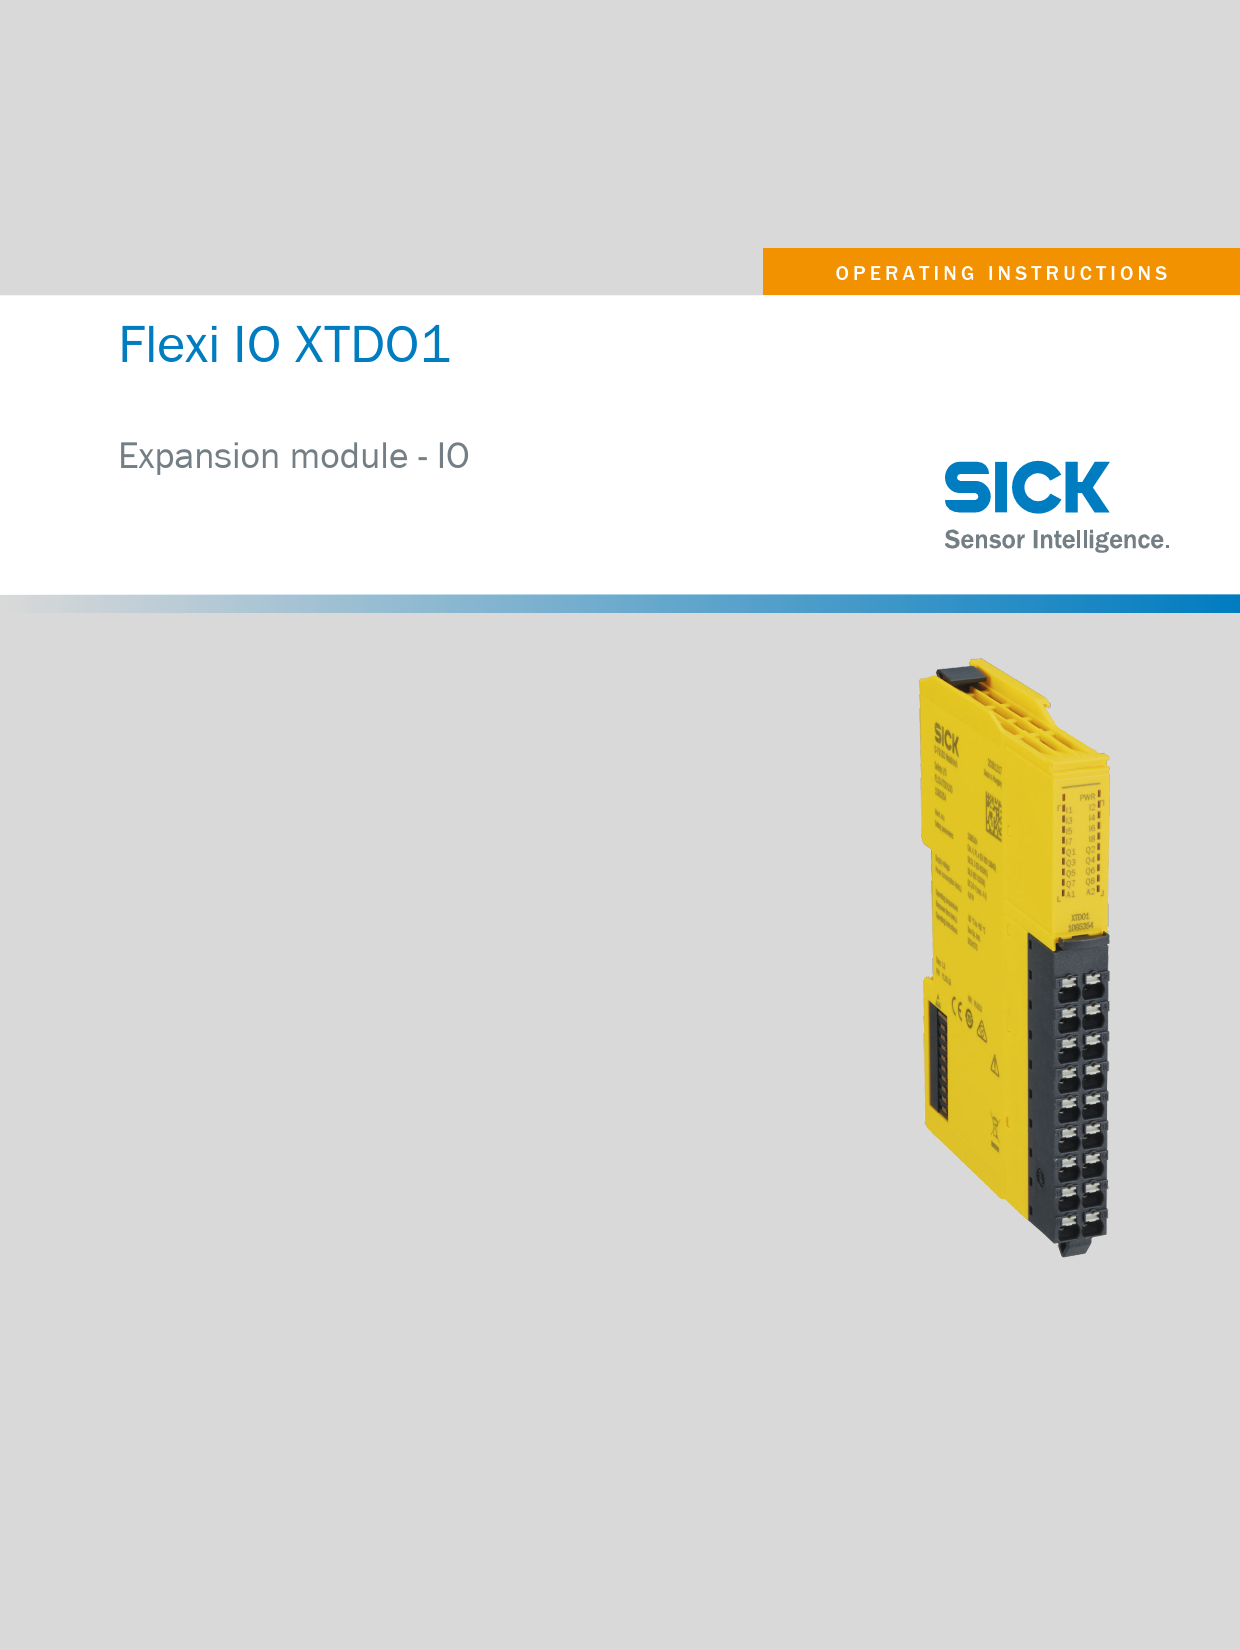
Flexi IO XTDO1 Expansion module - IO OPERATING INSTRUCTIONS Described product Flexi IO XTDO1 Manufacturer SICK AG Erwin-Sick-Str. 1 79183 Waldkirch Germany Legal information This work is protected by copyright. Any rights derived from the copyright shall be reserved for SICK AG. Reproduction of this document or parts of this document is only permissible within the limits of the legal determination of Copyright Law. Any modi- fication, abridgment or translation of this document is prohibited without the express written permission of SICK AG. The trademarks stated in this document are the property of their respective owner. © SICK AG. All rights reserved. Original document This document is an original document of SICK AG. 2 O P E R A T I N G I N S T R U C T I O N S | Flexi IO XTDO1 8024583/1BMF/2021-05-12 | SICK Subject to change without notice Contents CONTENTS 1 About this document........................................................................ 5 1.1 Purpose of this document........................................................................ 5 1.2 Scope......................................................................................................... 5 1.3 Target groups and structure of these operating instructions................ 5 1.4 Further information................................................................................... 6 1.5 Symbols and document conventions...................................................... 6 2 Safety information............................................................................ 8 2.1 General safety notes................................................................................ 8 2.2 Intended use............................................................................................. 8 2.3 Improper use............................................................................................. 8 2.4 Requirements for the qualification of personnel.................................... 8 3 Product description........................................................................... 10 3.1 Configuration of the safety controller...................................................... 10 3.2 Overview of the module............................................................................ 11 3.3 Configuration and function...................................................................... 11 3.4 Status indicators....................................................................................... 12 4 Project planning................................................................................ 13 4.1 Manufacturer of the machine.................................................................. 13 4.2 Operating entity of the machine.............................................................. 13 4.3 Design........................................................................................................ 13 4.4 Electrical integration................................................................................. 15 4.4.1 Internal circuitry....................................................................... 15 4.4.2 Safety outputs.......................................................................... 15 4.5 Testing plan............................................................................................... 16 5 Mounting............................................................................................. 17 5.1 Safety......................................................................................................... 17 5.2 Mounting procedure................................................................................. 17 5.3 Module exchange...................................................................................... 17 6 Electrical installation........................................................................ 19 6.1 Safety......................................................................................................... 19 6.2 Device connection.................................................................................... 19 6.3 Coding........................................................................................................ 21 6.3.1 Coding front connector and module....................................... 22 7 Commissioning.................................................................................. 23 7.1 Check during commissioning and modifications.................................... 23 8 Operation............................................................................................ 24 8.1 Regular thorough check........................................................................... 24 8024583/1BMF/2021-05-12 | SICK Subject to change without notice O P E R A T I N G I N S T R U C T I O N S | Flexi IO XTDO1 3 CONTENTS 9 Maintenance...................................................................................... 25 9.1 Regular thorough check........................................................................... 25 10 Troubleshooting................................................................................. 26 10.1 Status indicators....................................................................................... 26 10.2 Possible faults........................................................................................... 27 11 Decommissioning............................................................................. 31 11.1 Disposal..................................................................................................... 31 12 Technical data.................................................................................... 32 12.1 Data sheet................................................................................................. 32 12.2 Dimensional drawings.............................................................................. 36 13 Ordering information........................................................................ 37 13.1 Scope of delivery....................................................................................... 37 13.2 Ordering information for main module.................................................... 37 13.3 Ordering information for expansion module........................................... 37 13.4 Ordering information for accessories...................................................... 37 14 Annex.................................................................................................. 39 14.1 Compliance with EU directives................................................................. 39 15 List of figures..................................................................................... 40 16 List of tables....................................................................................... 41 4 O P E R A T I N G I N S T R U C T I O N S | Flexi IO XTDO1 8024583/1BMF/2021-05-12 | SICK Subject to change without notice ABOUT THIS DOCUMENT 1 1 About this document 1.1 Purpose of this document These operating instructions contain the information required during the life cycle of the safety controller. Operating instructions of the safety controller must be made available to all people who work with the device. 1.2 Scope Product This document applies to the following products: · Product code: Flexi IO XTDO1 · "Operating instructions" type label entry: 8024570 Document identification Document part number: · This document: 8024583 · Available language versions of this document: 8024570 You can find the current version of all documents at www.sick.com. Other documents relevant for the product Table 1: Available documents Document Title Operating instructions Flexi Compact safety control- ler Operating instructions FLX3-XTDI1 Expansion module for safety controllers Operating instructions FLX3-XTDO1 Expansion module for safety controllers Operating instructions FLX0-GPNT1 Expansion module for safety controllers Operating instructions FLX0-GETC1 Expansion module for safety controllers Operating instructions Flexi Loop Safe Series Con- nection Hardware Operating instructions Flexi Loop in the Safety Designer Software Competence brochure Guide for Safe Machinery Part number 8024573 8024571 8024570 8024567 8024566 8015834 8018174 8008007 1.3 Target groups and structure of these operating instructions These operating instructions are intended for the following target groups: project devel- opers (planners, developers, designers), installers, electricians, safety experts (such as CE authorized representatives, compliance officers, people who test and approve the application), operators, and maintenance personnel. 8024583/1BMF/2021-05-12 | SICK Subject to change without notice O P E R A T I N G I N S T R U C T I O N S | Flexi IO XTDO1 5 1 ABOUT THIS DOCUMENT These operating instructions are organized by the life phases of the device: project planning, mounting, electrical installation, commissioning, operation and maintenance. The table below shows the target groups and how for many applications these are typically divided up between the manufacturer and the entity operating the machine in which the device is to be integrated: Area of responsibility Manufacturer Operating entity Target group Specific chapters of these operating instruc- tions 1) Project developers Project planning, page 13 (planners, developers, Technical data, page 32 designers) Installers Mounting, page 17 Electricians Electrical installation, page 19 Safety experts Project planning, page 13 Commissioning, page 23 Technical data, page 32 Operators Troubleshooting, page 26 Maintenance staff Troubleshooting, page 26 Ordering information, page 37 1) Chapters not listed here are intended for all target groups. All target groups must follow all of the safety and warning instructions in all chapters of the operating instructions! In other applications, the operating organization is also the manufacturer of the equip- ment with the corresponding allocation of the target groups. 1.4 Further information www.sick.com The following information is available via the Internet: · This document in other languages · Data sheets and application examples · CAD files and dimensional drawings · Certificates (such as the EU declaration of conformity) · Guide for Safe Machinery. Six steps to a safe machine · Safety Designer (software for configuring safety solutions made by SICK AG) 1.5 Symbols and document conventions The following symbols and conventions are used in this document: Safety notes and other notes DANGER Indicates a situation presenting imminent danger, which will lead to death or serious injuries if not prevented. WARNING Indicates a situation presenting possible danger, which may lead to death or serious injuries if not prevented. CAUTION Indicates a situation presenting possible danger, which may lead to moderate or minor injuries if not prevented. 6 O P E R A T I N G I N S T R U C T I O N S | Flexi IO XTDO1 8024583/1BMF/2021-05-12 | SICK Subject to change without notice ABOUT THIS DOCUMENT 1 NOTICE Indicates a situation presenting possible danger, which may lead to property damage if not prevented. NOTE Indicates useful tips and recommendations. Instructions to action b The arrow denotes instructions to action. 1. The sequence of instructions for action is numbered. 2. Follow the order in which the numbered instructions are given. The check mark denotes the result of an instruction. 8024583/1BMF/2021-05-12 | SICK Subject to change without notice O P E R A T I N G I N S T R U C T I O N S | Flexi IO XTDO1 7 2 SAFETY INFORMATION 2 Safety information 2.1 General safety notes This chapter contains general safety information about the safety controller. Further safety information is provided in the respective chapters to cover the specific situations in which the product may be used. DANGER If the device is not integrated in the way intended by the manufacturer, the protective function of the device can be impaired. The dangerous state may be ended too late. b Plan the integration of the safety component in accordance with the machine requirements, see "Project planning", page 13. 2.2 Intended use The Flexi Compact safety controller is a freely configurable control for safety applica- tions. Sensors and switching elements (e.g. light curtains, laser scanners, switches, sensors, encoders, emergency stop pushbuttons) are connected to the safety controller and are linked logically. The corresponding actuators of the machines or systems can be switched off safely via the switching outputs of the safety controller. Incorrect use, improper modification or manipulation of the module will invalidate any warranty from SICK; in addition, any responsibility and liability of SICK AG for damage and secondary damage caused by this is excluded. The product is only suitable for use in industrial environments. 2.3 Improper use Among others, the safety controller is not suitable for the following applications: · Outdoors · Underwater · In explosion-hazardous areas · In residential areas 2.4 Requirements for the qualification of personnel The protective device must be planned in, installed, connected, commissioned, and serviced by qualified safety personnel only. Project planning For project planning, a person is considered qualified when he/she has expertise and experience in the selection and use of protective devices on machines and is familiar with the relevant technical rules and work safety regulations. Mechanical mounting, electrical installation, and commissioning For the task, a person is considered qualified when he/she has the expertise and experience in the relevant field and is sufficiently familiar with the application of the protective device on the machine to be able to assess whether it is in an operationally safe state. 8 O P E R A T I N G I N S T R U C T I O N S | Flexi IO XTDO1 8024583/1BMF/2021-05-12 | SICK Subject to change without notice SAFETY INFORMATION 2 Operation and maintenance For operation and maintenance, a person is considered competent when he/she has the expertise and experience in the relevant field and is sufficiently familiar with the application of the protective device on the machine and has been instructed by the machine operator in its operation. 8024583/1BMF/2021-05-12 | SICK Subject to change without notice O P E R A T I N G I N S T R U C T I O N S | Flexi IO XTDO1 9 3 PRODUCT DESCRIPTION 3 Product description 3.1 Configuration of the safety controller Configuration of the safety controller A safety controller comprises the following components: · A main module · Up to 12 optional expansion modules (excluding maximum 1 gateway) CV I2 I1 I4 I3 I6 I5 I8 I7 I10 I9 I12 I11 X2 X1 X4 X3 PIW1R4 I13 I16 I15 I18 I17 I20 I19 X6 X5 X8 X7 Q2 Q1 Q4 Q3 A2 A1 PWIR2 I1 I4 I3 I6 I5 I8 I7 Q2 Q1 Q4 Q3 Q6 Q5 Q8 Q7 A2 A1 PWIR2 I1 I4 I3 I6 I5 I8 I7 Q2 Q1 Q4 Q3 Q6 Q5 Q8 Q7 A2 A1 PWIR2 I1 I4 I3 I6 I5 I8 I7 Q2 Q1 Q4 Q3 Q6 Q5 Q8 Q7 A2 A1 PWIR2 I1 I4 I3 I6 I5 I8 I7 Q2 Q1 Q4 Q3 Q6 Q5 Q8 Q7 A2 A1 PWIR2 I1 I4 I3 I6 I5 I8 I7 Q2 Q1 Q4 Q3 Q6 Q5 Q8 Q7 A2 A1 PWIR2 I1 I4 I3 I6 I5 I8 I7 Q2 Q1 Q4 Q3 Q6 Q5 Q8 Q7 A2 A1 PWIR2 I1 I4 I3 I6 I5 I8 I7 Q2 Q1 Q4 Q3 Q6 Q5 Q8 Q7 A2 A1 PWIR2 I1 I4 I3 I6 I5 I8 I7 Q2 Q1 Q4 Q3 Q6 Q5 Q8 Q7 A2 A1 PWIR2 I1 I4 I3 I6 I5 I8 I7 Q2 Q1 Q4 Q3 Q6 Q5 Q8 Q7 A2 A1 PWIR2 I1 I4 I3 I6 I5 I8 I7 Q2 Q1 Q4 Q3 Q6 Q5 Q8 Q7 A2 A1 PWIR2 I1 I4 I3 I6 I5 I8 I7 Q2 Q1 Q4 Q3 Q6 Q5 Q8 Q7 A2 A1 FLEXIcompact 3 2 1 Figure 1: Example maximum configuration 1 Main module 2 Expansion module - gateway 3 IO expansion module Complementary information · The gateway and IO expansion modules can be arranged arbitrarily. 10 O P E R A T I N G I N S T R U C T I O N S | Flexi IO XTDO1 8024583/1BMF/2021-05-12 | SICK Subject to change without notice 3.2 Overview of the module 1 PRODUCT DESCRIPTION 3 PWIR2 I1 I4 I3 I6 I5 I8 I7 Q2 Q1 Q4 Q3 Q6 Q5 Q8 Q7 A2 A1 2 3 4 5 Figure 2: FLX3-XTDO1 IO expansion module 1 Release element of the module 2 Status indicators (LEDs) 3 Front connector unlocking 4 Front connector with terminals 5 Backplane bus 3.3 Configuration and function Prerequisites · The module can only be operated with a main module. Configuration Table 2: Interfaces of the module Description Safety capable inputs Safety capable outputs Quantity 8 8 Function The module is a safe digital input/output expansion module. The module offers the following functions: · Monitoring of the connected safety devices · Switching of the connected safety devices · Special IO functions (e.g., fast shut off) Complementary information · Safety outputs have test pulses for detecting short-circuits in the wiring. · Voltage is supplied to the module via the backplane bus. Communication with the main module of the safety controller also occurs via the backplane bus. · Voltage is supplied directly to the safety outputs Q via A1 / A2 on the module. 8024583/1BMF/2021-05-12 | SICK Subject to change without notice O P E R A T I N G I N S T R U C T I O N S | Flexi IO XTDO1 11 3 PRODUCT DESCRIPTION 3.4 Status indicators Status indicators PWIR2 I1 I4 PWR I3 I6 I5 I8 I7 Q2 I1 I2 Q1 Q4 Q3 Q6 Q5 Q8 I3 I4 Q7 A2 A1 I5 I6 I7 I8 Q1 Q2 Q3 Q4 Q5 Q6 Q7 Q8 A1 A2 XTDO1 1085354 Figure 3: LEDs for indicating the status The arrangement of the status indicators corresponds to the arrangement of the termi- nals. Status indicator Table 3: Status indicator Labeling PWR I1 ... I8 Q1 ... Q8 Color Green/Red Green Green Function Device status 1 Safety capable input 1 ... 8 Safety capable output 1 ... 8 1 Does not indicate whether the local auxiliary supply at A1 and A2 for the safety outputs is currently within the supply voltage range. Further topics · "Troubleshooting", page 26 12 O P E R A T I N G I N S T R U C T I O N S | Flexi IO XTDO1 8024583/1BMF/2021-05-12 | SICK Subject to change without notice PROJECT PLANNING 4 4 Project planning 4.1 Manufacturer of the machine DANGER Failure to comply with manufacturer's obligations Hazard due to lack of effectiveness of the protective device b Carry out a risk assessment before using the safety controller. b Do not manipulate, open or modify the components of the safety controller. b Make sure the safety controller is only repaired by the manufacturer or by some- one authorized by the manufacturer. Improper repair can lead to a loss of the protective function. 4.2 Operating entity of the machine DANGER Failure to observe operator obligations Hazard due to lack of effectiveness of the protective device b Changes to the machine and changes to the hardware or the logic programming of the safety controller necessitate a new risk assessment. The results of this risk assessment may require the entity operating the machine to meet the obligations of a manufacturer. b Apart from the procedures described in this document, the components of the safety controller must not be opened or modified. b Do not carry out any repair work on components. Improper repair of the safety controller can lead to a loss of the protective function. 4.3 Design Mounting · The safety controller must be protected against condensation and conductive contamination, e.g. IP54 control cabinet. · Mounting on a 35 mm × 7.5 mm mounting rail in accordance with IEC 60715. · The mounting rail is connected to the functional earth. · Mounting rail is mounted on a mounting plate. · Mounting plate is connected to functional earth. · Mounting in a vertical orientation (on a horizontal mounting rail). · Take suitable ESD protection measures. Air circulation To ensure sufficient air circulation and cooling, sufficient distance must be kept in the control cabinet above and below the module. Provide an adequate clearance in front of the module (front side) for the connected cables. 8024583/1BMF/2021-05-12 | SICK Subject to change without notice O P E R A T I N G I N S T R U C T I O N S | Flexi IO XTDO1 13 30 4 PROJECT PLANNING 25 Figure 4: Clearances for adequate air circulation Required distance: · Above and below the module: 30 mm · In front of the module: 25 mm 30 14 O P E R A T I N G I N S T R U C T I O N S | Flexi IO XTDO1 8024583/1BMF/2021-05-12 | SICK Subject to change without notice 4.4 4.4.1 Electrical integration Internal circuitry PROJECT PLANNING 4 4.4.2 Figure 5: Internal circuitry XTDO Safety outputs Important information WARNING Ineffectiveness of the protective device In the event of a fault, a single safety output (Q) can switch off after a delay or briefly switch to High. The response time increases depending on the configuration of the output. The dangerous state may not be stopped or not be stopped in a timely manner in the event of non-compliance. b Take the increased response time into consideration in the risk analysis. b Take the possible reduced safety level into consideration in the risk analysis. Fault detection by testing The following faults can be detected by testing an element: · Short-circuits between any of the safety outputs. You can detect a cross-circuit between the safety outputs of 12 sequential mod- ules. · Short circuits to 24 V DC (to High) on safety outputs. · Actuator wiring short-circuits to 24 V. 8024583/1BMF/2021-05-12 | SICK Subject to change without notice O P E R A T I N G I N S T R U C T I O N S | Flexi IO XTDO1 15 4 PROJECT PLANNING Further topics · "Device connection", page 19 · "Configuring elements" 4.5 Testing plan Testing plan The manufacturer of the machine and the operating entity must define all required thorough checks. The definition must be based on the application conditions and the risk assessment and must be documented in a traceable manner. In addition, the device must be checked for correct functioning after each change to the configuration. b When defining the thorough check, please note the following: ° ° ° Define the type and execution of the thorough check. Define the frequency of the thorough check. Notify the machine operators of the thorough check and instruct them accordingly. The following thorough checks are often defined in connection with a protective device: · Thorough check during commissioning and modifications · Regular thorough check Thorough check during commissioning and modifications The following points are helpful when planning the thorough check: · Does the thorough check have to be completed by qualified safety personnel? · Can the thorough check be completed by personnel specially qualified and author- ized to do so? · Does the thorough check have to be documented in a traceable manner? · Can the thorough check be carried out according to a check list? · Do the machine operators know the function of the protective device? · Have the machine operators been trained to work on the machine? · Have the machine operators been notified about modifications to the machine? b Define all guidelines for the thorough check. Regular thorough check The following points are helpful when planning the thorough check: · Which thorough check must be carried out and how is it carried out? · How often does the thorough check have to be carried out? · Do the machine operators have to be notified of the thorough check and do they need to be instructed accordingly? b Define all guidelines for the thorough check. 16 O P E R A T I N G I N S T R U C T I O N S | Flexi IO XTDO1 8024583/1BMF/2021-05-12 | SICK Subject to change without notice MOUNTING 5 5 Mounting 5.1 Safety WARNING Electrical voltage There is a risk of injury from electrocution while connecting the devices. b Disconnect the power for the entire plant/machine. WARNING Unintended start of the plant/machine The plant/machine could inadvertently start while you are connecting the devices. b Disconnect the power for the entire plant/machine. NOTICE Enclosure rating IP20 only applies if the front connector is mounted. 5.2 Mounting procedure For information on the mounting process, please see the operating instructions: · "Flexi Compact" (SICK part number 8024573) 5.3 Module exchange Approach 1. Disconnect module and the connected components from all voltage sources. 2. Take front connector with connected cables off the defective device: Press the unlocking mechanism of the front connector downwards and pull out the front connector. Figure 6: Dismantle front connector 3. Dismantle the defective module. 8024583/1BMF/2021-05-12 | SICK Subject to change without notice O P E R A T I N G I N S T R U C T I O N S | Flexi IO XTDO1 17 5 MOUNTING 4. Mount new module. 5. Mount front connector with connected cables to the new module: First mount in the module with bent hook and then engage in the housing. Click Figure 7: Mount the front connector The front connector engages with an audible click. 18 O P E R A T I N G I N S T R U C T I O N S | Flexi IO XTDO1 8024583/1BMF/2021-05-12 | SICK Subject to change without notice ELECTRICAL INSTALLATION 6 6 Electrical installation 6.1 Safety WARNING Electrical voltage There is a risk of injury from electrocution while connecting the devices. b Disconnect the power for the entire plant/machine. WARNING Unintended start of the plant/machine The plant/machine could inadvertently start while you are connecting the devices. b Disconnect the power for the entire plant/machine. NOTICE Enclosure rating IP20 only applies if the front connector is mounted. 6.2 Device connection Prerequisites Electrical connection requirement: · Electrical installation is performed in accordance with EN 60204-1. · The mounting rail is connected to the functional earth. · The voltage supply and connected signals meet the requirements for extra-low voltages with safe separation (EN 60664) or NEC Class 2 (UL 1310). · The external voltage supply must be capable of buffering brief power failures of 20 ms as specified in EN 60204-1. Suitable power supply units are available as accessories from SICK. · Galvanically isolate the battery-operated 24 V power circuit from the circuit of the safety controller using an enclosed DC-DC transducer in accordance with EN 1175 (e.g., when using on an automated guided vehicle). · The GND of all connected devices must have the same potential as A2 of the main module. Exceptions are actuators which are connected to an expansion module with its own voltage supply. · The GND connections of the actuators to the safety outputs are in star formation with the GND connection of the voltage supply. 8024583/1BMF/2021-05-12 | SICK Subject to change without notice O P E R A T I N G I N S T R U C T I O N S | Flexi IO XTDO1 19 6 ELECTRICAL INSTALLATION Pin assignment 1 I1 3 I3 5 I5 7 I7 9 Q1 11 Q3 13 Q5 15 Q7 17 A1 2 I2 4 I4 6 I6 8 I8 10 Q2 12 Q4 14 Q6 16 Q8 18 A2 Figure 8: Terminals on front connector Table 4: Front connector pin assignment Terminal Pin assignment 1 I1 2 I2 3 I3 4 I4 5 I5 6 I6 7 I7 8 I8 9 Q1 10 Q2 11 Q3 12 Q4 13 Q5 14 Q6 15 Q7 16 Q8 17 A1 18 A2 Description Safety capable input Safety output 24 V voltage supply of outputs Q1 to Q8 1) GND voltage supply of outputs Q1 to Q8 1) 1) The voltage can be supplied using a separate power supply unit without a reference potential to the main module. 20 O P E R A T I N G I N S T R U C T I O N S | Flexi IO XTDO1 8024583/1BMF/2021-05-12 | SICK Subject to change without notice Complementary information 13 16 15 ELECTRICAL INSTALLATION 6 Figure 9: Eyelet on front connector 1 Eyelet for cable tie Connected cables can be fastened to the front connector eyelet using a cable tie. This relieves the strain on the cables. Further topics · "Electrical integration", page 15 6.3 Coding Overview You can code the front connector and its modules. A uniquely coded front connector only fits a uniquely coded module. Coding prevents the front connectors from getting mixed up. Coding options · 1-of-7 coding: 7 front connectors can be uniquely coded. Coding 1234567 Front connector 1 CCCCCC Front connector 2 CCCCCC ... ... Front connector 7 CCCCCC · 2-of-7 coding: 21 front connectors can be uniquely coded. Coding 1234567 Front connector 1 C C C C C Front connector 2 CC C C C ... ... Front connector 6 C C C C C Front connector 7 CCCCC ... ... · 3-of-7 coding: 35 front connectors can be uniquely coded. Coding 1234567 Front connector 1 C C C C Front connector 2 C C C C ... ... Front connector 5 C C C C Front connector 6 C C C C ... ... 8024583/1BMF/2021-05-12 | SICK Subject to change without notice O P E R A T I N G I N S T R U C T I O N S | Flexi IO XTDO1 21 6 ELECTRICAL INSTALLATION 6.3.1 Coding front connector and module Prerequisites · Slotted screwdriver 3.5 mm × 0.6 mm · Diagonal cutter Approach Each front connector contains seven coding ribs. The modules have seven coding elements each for each front connector. 1. Remove the coding ribs on the front connector with wire cutters. 2. Insert the slotted screwdriver vertically on the left next to the respective coding element. 3. Tip the coding element to the right with a slotted screwdriver. The coding element engages. Complementary information You can not reattach a removed coding rib to the front connector. If you turn a coding element on a module several times, it can break off. This means there is no active coding function in this case. However, you can continue to use the module. 22 O P E R A T I N G I N S T R U C T I O N S | Flexi IO XTDO1 8024583/1BMF/2021-05-12 | SICK Subject to change without notice COMMISSIONING 7 7 Commissioning 7.1 Check during commissioning and modifications The test is intended to ensure that the hazardous area is monitored by the protective device and any attempted access to the hazardous area is prevented. b Carry out the checks according to the instructions from the manufacturer of the machine and from the operating entity. 8024583/1BMF/2021-05-12 | SICK Subject to change without notice O P E R A T I N G I N S T R U C T I O N S | Flexi IO XTDO1 23 8 OPERATION 8 Operation 8.1 Regular thorough check The test is intended to ensure that the hazardous area is monitored by the protective device and any attempted access to the hazardous area is prevented. b Carry out the checks according to the instructions from the manufacturer of the machine and from the operating entity. 24 O P E R A T I N G I N S T R U C T I O N S | Flexi IO XTDO1 8024583/1BMF/2021-05-12 | SICK Subject to change without notice MAINTENANCE 9 9 Maintenance 9.1 Regular thorough check The test is intended to ensure that the hazardous area is monitored by the protective device and any attempted access to the hazardous area is prevented. b Carry out the checks according to the instructions from the manufacturer of the machine and from the operating entity. 8024583/1BMF/2021-05-12 | SICK Subject to change without notice O P E R A T I N G I N S T R U C T I O N S | Flexi IO XTDO1 25 10 TROUBLESHOOTING 10 Troubleshooting 10.1 Status indicators Possible indications Table 5: PWR and CV indications Display PWR Display CV Main module o o Ö Red / green (1 Hz) Ö Green (1 Hz) Ö Red / green (1 Hz) o see table 6, page 26 see table 6, page 26 O Green Ö Red (1 Hz) see table 6, page 26 o Ö Red (2 Hz) o O Red o Description Measures No supply voltage Self-test is in progress or the safety con- troller is being initializing. Application is ready to run. Application is running. A recoverable external error is present at this module. Application is running. b Check terminals A1 and A2. b Switch on the supply voltage to the main module. b Press the start button in the configura- tion software. b Check the cabling of the flashing inputs and outputs. Configuration is invalid. b Check the module type and version. b Adjust the configuration using the con- figuration software. b Run diagnostics using the configuration software. Critical error, presumably at this module. b Switch the supply voltage off and then The application was stopped. All outputs of on again. the safety controller are switched off. b If the fault persists, replace the mod- ule. b Run diagnostics using the configuration software. Critical error, presumably at another mod- b Switch the supply voltage off and then ule. on again. The application was stopped. All outputs of b If the fault persists, replace the mod- the safety controller are switched off. ule where the PWR Ö is showing red (2 Hz). b Run diagnostics using the configuration software. o LED off. Ö LED flashes. O LED illuminates. Table 6: CV indications Display CV Description o see table 5, page 26 O Yellow Configuration is verified. Ö Yellow (1 Hz) Configuration is not verified. Ö Yellow (2 Hz) Ö Yellow (lights up every 2 s) See the Flexi Compact Safety Controller operat- ing instructions (8024573) See the Flexi Compact Safety Controller operat- ing instructions (8024573) Measures b Verify the configuration using the configura- tion software. o LED off. Ö LED flashes. O LED illuminates. 26 O P E R A T I N G I N S T R U C T I O N S | Flexi IO XTDO1 8024583/1BMF/2021-05-12 | SICK Subject to change without notice TROUBLESHOOTING 10 Table 7: I indications (safety capable input) Display I Description o Input is inactive (LOW). O Green Input is active (HIGH). Ö Green (1 Hz) in sync Input is inactive (LOW) and a recoverable exter- with the red PWR indi- nal error is present. cation Ö Green (1 Hz) in sync Input is active (HIGH) and a recoverable external with the green PWR error is present. indication Measures b Check cabling of the flashing inputs. A shortcircuit to GND or cable break may be present. b Check cabling of the flashing inputs. A shortcircuit to 24 V or a cross-circuit to another signal may be present. o LED off. Ö LED flashes. O LED illuminates. Table 8: Q indications (safety output) Display Q Description Measures o Output is inactive (LOW). O Green Output is active (HIGH). Ö Green (1 Hz) in sync Output is inactive (LOW) and a recoverable exter- with the red PWR indi- nal error is present. cation b Check cabling of the flashing outputs. A shortcircuit to GND or a cross-circuit between out- puts may be present. b If all indicators of the configured outputs are flashing, check the supply voltage of the A1 and A2 terminals. Ö Green (1 Hz) in sync Output is active (HIGH) and a recoverable exter- with the green PWR nal error is present. indication b Check cabling of the flashing outputs. A shortcircuit to 24 V or a cross-circuit between out- puts may be present. o LED off. Ö LED flashes. O LED illuminates. Complementary information The input and output indicators display the status of the terminals with a refresh rate of approx. 50 ms. Further topics · "Status indicators", page 12 10.2 Possible faults Important information NOTE If a fault response can result in an undesired valid status, you should evaluate the associated status bits in the logic to initiate suitable measures. Possible faults and their causes Table 9: Faults in the logic Fault Responses Voltage supply A1 / A2 · Safety controller switches to the of the main module is No supply voltage status lower than the operat- · Voltage supply module status bit = ing range 0 · Status indicators are off Causes · Fault in the voltage supply · Line break · Interruption due to a fuse 8024583/1BMF/2021-05-12 | SICK Subject to change without notice O P E R A T I N G I N S T R U C T I O N S | Flexi IO XTDO1 27 10 TROUBLESHOOTING Fault Responses Causes Voltage supply of the main module is higher than the operating range · Safety controller switches to the critical error status · Internal error module status bit = 0 · Fault in the voltage supply · Short-circuit to other volt- age-carrying line Table 10: Faults in the safety capable inputs (I) Fault Responses Causes Electro-mechanical switch/safety switch (EMSS), safety sen- sors with test input, Flexi Loop: safety capable input is Low instead of High · Process data bit of the affected input = 0 · Short-circuit to another line e.g., GND · Error in the sensor · Line break Electro-mechanical switch/safety switch (EMSS), safety sen- sors with test input, Flexi Loop: test pulses from the asso- ciated test output X are not detected correctly (short-circuit detection) · Process data bit of the affected input = 0 · Status Ix process data status bit = 0 · Module status bit of the affected Status Ix input = 0 · Short-circuit to other volt- age-carrying line · Error in the sensor (for exter- nally tested sensors) Dual-channel elec- · Process data bit of the affected tro-mechanical safety input = 0 switch (EMSS), safety · Status Ix, ly dual-channel evaluation sensors with moni- process data status bit = 0 tored semiconductor · Module status bit of the affected outputs (OSSD): equiv- Status Ix, ly dual-channel evaluation alent/complementary input = 0 safety capable inputs exhibit different/the same values. · Short-circuit to another line e.g., GND · Error in the sensor · Line break · Discrepancy time · Sequence error Safety pressure mats: safety capable input is Low instead of test pulse signal from the associated test output X · Process data bit of the affected input pair = 0 · Status Ix process data status bit = 0 · Module status bit of the affected Status Ix input = 0 · Line break Test output sensor · Line break Sensor safety capable input Safety pressure mats: · Process data bit of the affected Only one of the two input = 0 safety inputs is High instead of test pulse · Status Ix, ly dual-channel evaluation process data status bit = 0 signal from the associ- · Module status bit of the affected ated test output X Status Ix, ly dual-channel evaluation input = 0 · Short-circuit to other volt- age-carrying line Internal error detected · Safety controller switches to the · Internal device error in input evaluation critical error status · Internal error module status bit = 0 28 O P E R A T I N G I N S T R U C T I O N S | Flexi IO XTDO1 8024583/1BMF/2021-05-12 | SICK Subject to change without notice TROUBLESHOOTING 10 Table 11: Faults in the safety outputs (Q) Fault Responses Causes Auxiliary voltage sup- ply A1 / A2 for the safety outputs is lower than the operating range · All safety outputs of the module are switched off · Output voltage supply process data status bit = 0 · Auxiliary voltage supply module sta- tus bit = 0 · Fault in the voltage supply · Line break · Interruption due to a fuse Auxiliary voltage sup- ply A1 / A2 for the safety outputs is higher than the oper- ating range · Internal error module status bit = 0 · Fault in the voltage supply · Auxiliary voltage supply module sta- · Short-circuit to other volt- tus bit = 0 age-carrying line Output voltage level is Low instead of · Associated output/associated output pair is switched off · Short-circuit or resistance drop under load High when the output · Depending on the load, the · Short-circuit to another line is "On", overload/over- affected output may pulsate tem- e.g., GND current1) 2) porarily until the final switch-off · Status Qx short-circuit to Low process data status bit = 0 · Status Qx short-circuit to Low module status bit = 0 Output voltage level is High instead of Low when the output is "Off"3) Test pulses are not detected correctly when the output is "On"3) 5) · All safety outputs of the module are switched off · Output voltage supply process data status bit = 04) · Status Qx short-circuit to High proc- ess data status bit = 0 · Status Qx short-circuit to High mod- ule status bit = 0 · Short-circuit to other volt- age-carrying line · Short-circuit to other volt- age-carrying line · Capacitive load too high Internal error detected · Safety controller switches to the · Internal device error critical error status · Capacitive load too high · Internal error module status bit = 0 1) Depending on the voltage supply used, an overcurrent can also result in the voltage supply dropping out. 2) Reset of the error: set the process data bit of the safety output to 0. 3) Reset of the error: the process data bits for all safety outputs of the module are simultaneously 0 and the output level is Low. 4) In the case of a High instead of a Low on a safety output, the supply to all safety outputs is switched off internally. If the cause of a short-circuit is in the wiring to 24 V, then the affected signal remains High and all other signals switch to Low. Check if this is an undesired but valid signal value for the receiver, e.g., for the switching of the monitoring case of a SICK safety laser scanner by means of a complementary signal. 5) Depending on the size of the capacitive load, this may lead in certain cases to an incorrect interpretation as an internal error since the effect on the output voltage is only temporary. Critical error status Consequences of the critical error status: · All applications are stopped. · All safety outputs are switched off. · All process data = 0 · Evaluation of the process data status bits in the logic is no longer possible. · Only limited diagnostics can be performed in the critical error status. Alternatives to resetting the critical error status: · Restart by switching the voltage supply off and on again · Software reset using the configuration software Complementary information The status indicators and diagnostic messages may provide additional information. 8024583/1BMF/2021-05-12 | SICK Subject to change without notice O P E R A T I N G I N S T R U C T I O N S | Flexi IO XTDO1 29 10 TROUBLESHOOTING Further topics · "Status indicators", page 26 · "Input elements" 30 O P E R A T I N G I N S T R U C T I O N S | Flexi IO XTDO1 8024583/1BMF/2021-05-12 | SICK Subject to change without notice DECOMMISSIONING 11 11 11.1 Decommissioning Disposal Approach b Always dispose of unusable devices in accordance with national waste disposal regulations. Complementary information SICK will be glad to help you dispose of these devices on request. 8024583/1BMF/2021-05-12 | SICK Subject to change without notice O P E R A T I N G I N S T R U C T I O N S | Flexi IO XTDO1 31 12 TECHNICAL DATA 12 12.1 Technical data Data sheet Safety-related parameters Table 12: Safety-related characteristic data - safety capable inputs (I) Safety capable inputs (I) Single-channel Dual channel Without test pulses1) With test pulses Without test pulses2) Safety integrity SIL 2 level (IEC 61508) SIL 3 SIL 3 SIL claim limit (IEC 62061) SILCL 2 SILCL 3 SILCL 3 Cate- Category 3 gory (ISO 13849- 1) Category 4 Category 4 Performance PL d PL e PL e level (ISO 13849-1) PFHD (h-1) PFDavg MTTFD ISO 13849-1 [years] 1 × 10⁻⁹ 4 × 10⁻⁵ 500 1 × 10⁻⁹ 4 × 10⁻⁵ 500 0.5 × 10⁻⁹ 4 × 10⁻⁵ 500 TM ISO 13849-1 20 20 20 [years] With test pulses SIL 3 SILCL 3 Category 4 PL e 0.5 × 10⁻⁹ 4 × 10⁻⁵ 500 20 1) If you are using single-channel safety inputs (I) without test pulses for a safety-related application, then a protected or separate cabling is required for these safety inputs in order to achieve the safety-related characteristics. Reason: Short-circuits to the supply voltage or cross-circuits are not detected. 2) If you are using dual-channel safety capable inputs (I) without test pulses, the safety function must be requested at least once a year. Table 13: Safety-related characteristic data - CPU logic processing CPU logic processing Safety integrity level (IEC 61508) SIL 3 SIL claim limit (IEC 62061) SILCL 3 Category (ISO 13849-1) Category 4 Performance level (ISO 13849-1) PL e PFHD (h-1) PFDavg MTTFD ISO 13849-1 [years] 3 × 10⁻⁹ 20 × 10-5 500 TM ISO 13849-1 20 [years] 32 O P E R A T I N G I N S T R U C T I O N S | Flexi IO XTDO1 8024583/1BMF/2021-05-12 | SICK Subject to change without notice TECHNICAL DATA 12 Table 14: Safety-related characteristic data - safety outputs (Q) Safety outputs (Q) Single-channel1) Dual channel Without test pulses2) 3) With test pulses Without test pulses2) 3) Safety integrity SIL 3 level (IEC 61508) SIL 3 SIL 3 SIL claim limit (IEC 62061) SILCL 3 SILCL 3 SILCL 3 Category (ISO 13849-1) With test pulses on all safety outputs of a module Category 4 Without test pulses on one or more safety outputs of a module Category 3 Category 3 Category 4 Performance PL e PL e PL e level (ISO 13849-1) PFHD (h-1) 5 × 10⁻⁹ 0.5 × 10⁻⁹ 5 × 10⁻⁹ PFDavg 30 × 10-5 4 × 10⁻⁵ 30 × 10-5 MTTFD ISO 500 500 500 13849-1 [years] TM ISO 13849-1 20 20 20 [years] With test pulses SIL 3 SILCL 3 Category 4 Category 4 PL e 0.5 × 10⁻⁹ 4 × 10⁻⁵ 500 20 1) If you are using single-channel safety outputs (Q) for a safety-related application, then a protected or separate cabling is required for these safety outputs in order to achieve the safety-related characteristics. Reason: While short-circuits to the supply voltage or cross-circuits to other outputs can be detected, no other option to switch-off the device exist. 2) If you are using single-channel or dual-channel safety outputs (Q) without test pulses, then a protected or separate cabling is required for these safety outputs in order to achieve the safety-related characteristics. Reason: Short-circuits to the supply voltage or cross-circuits to other outputs are not detected in the switched-on state without test pulses. This also applies if an output is used for a non-safety related application. Reason: Even if an internal hardware error is detected, the switch-off capability of the other safety outputs may be impaired by reverse currents. 3) If you are using single-channel/dual-channel safety outputs (Q) without test pulses for a safety-related application, then one of the following measures is required in order to achieve the safety-related charac- teristics: · Restart the safety controller once a year. · Manually switch off all safety outputs simultaneously for min. 2 s once a year. The supply voltage to the outputs must be within the operating range during this manual test. General data Table 15: General data Climatic conditions Ambient operating temperature At altitudes up to 2,000 m above sea level 25 °C ... +55 °C 8024583/1BMF/2021-05-12 | SICK Subject to change without notice O P E R A T I N G I N S T R U C T I O N S | Flexi IO XTDO1 33 12 TECHNICAL DATA At altitudes up to 2,000 m above sea level ... 3,000 m above sea level At altitudes 3,000 m above sea level ... 4,000 m above sea level Storage temperature Air humidity Operating altitude Mechanical strength Vibration resistance Shock resistance, single shock Operating data Protection class Immunity to interference Emitted interference Connections Connection type Wire cross-section Housing Enclosure rating Contamination rating Control device type Weight (± 5%) 25 °C ... +50 °C 25 °C ... +45 °C 25 °C ... +70 °C 10% ... 95%, non-condensing Max. 4,000 m above sea level 5 Hz ... 200 Hz / 1 g (EN 60068-2-6) 15 g, 11 ms (EN 60068-2-27) III (EN 61140) EN 61000-6-2 EN 61000-6-4 Spring terminals Single wire or fine-stranded wire: 0.14 mm² ... 1.5 mm² Fine-stranded wire with ferrule: a) with plastic ferrule max. 1.0 mm² b) without plastic ferrule max. 1.0 mm² AWG according to UL/CSA: 26 ... 14 For UL and CSA applications: Use copper conductors only min. rated for 85°C. IP20 (EN 60529) 2 (IEC 61010-1) Open device (IEC 61010-2-201) 111 g Voltage supply (A1 / A2) Table 16: Voltage supply Supply voltage UB Tolerance of supply voltage +24 V DC 30% / +25% (16.8 V ... 30 V) Type of supply voltage PELV or SELV The supply current must be limited externally to max. 4 A either by the voltage supply unit used, or by means of a fuse. Max. power loss 4.9 W Current consumption at nominal volt- 100 mA age (without outputs) Short-circuit protection 1) Max. 4 A/Min. 30 V Safety fuse with triggering characteristic: slow-blow UL/CSA applications: UL-listed fuse according to UL 248-14 required Overvoltage category II (EN 61131-2) 34 O P E R A T I N G I N S T R U C T I O N S | Flexi IO XTDO1 8024583/1BMF/2021-05-12 | SICK Subject to change without notice TECHNICAL DATA 12 Type of terminal connections Spring terminals 1) Take into account the following when designing the voltage supply for the safety controller: · Current consumption at nominal voltage (without outputs) of all station modules · Peak current consumption of all electric consumers connected via the safety controller outputs The maximum permissible supply current depends, amongst other things, on the ambient temperature and must not exceed the permitted value of 8 A (Ta = 55 °C). Take into consideration the effect of lack of ventilation or the power loss in cables or other devices on the ambient temperature in the control cabinet. Safety capable inputs (I) Table 17: Technical data for the safety capable inputs (I) Input voltage High 11 V DC ... 30 V DC Input voltage Low 3 V DC ... +5 V DC Max. input voltage range 1) 60 V DC ... +60 V DC Input current high 2.1 mA ... 6 mA Input current Low 1.9 mA Reverse current at input in case of loss of ground connection2) 100 µA Input capacitance 15 nF Discrepancy time 4 ms ... 30 s, configurable 1) No damage to the input in this voltage range. 2) Do not connect any other safety capable inputs in parallel if the reverse current could lead to a High state on the other input. Safety outputs (Q) Table 18: Technical data for the safety outputs (Q) Type of output PNP semiconductor, short-circuit protected Output voltage High Max. output voltage Low 1) UB 3 V DC ... UB 50 V DC ... 30 V DC Maximum reverse voltage at Low 2) 3 V DC Leakage current Low Normal operation < 1 mA Dual channel < 2 mA Fault 3) < 1 mA Output current Max. 2 A Sum current Isum TU 55 °C Test pulse width4) 4 A < 650 µs or deactivated Test pulse interval 190 ms Cross-circuit detection using test pulses5) Cable resistance Max. 2.5 (z. B. 100 m × 1.5 mm² = 1.2 ) Output current, dual-channel out- Max. 1 A per output puts Load capacity 0.5 µF Load capacity when connected via diode 1,000 µF Inductive load at nominal voltage @2 A 100 mH 8024583/1BMF/2021-05-12 | SICK Subject to change without notice O P E R A T I N G I N S T R U C T I O N S | Flexi IO XTDO1 35 12 TECHNICAL DATA 12.2 @1 A @0.5 A 1.6 H 20 H 1) Max. 30 V DC, to avoid damaging the output. Max. 50 V DC, for fast switch-off of inductive loads. 2) Higher voltages are evaluated as a cross-circuit fault 3) In the event of a fault (GND line open circuit) and with a load resistance of at least 2.5 k, no more than the specified leakage current flows on the safety output. For lower load resistances, the leakage current may be greater however the output voltage will be < 5 V in this case. A downstream device, for example a relay or a FPLC (fail-safe programmable logic controller) must detect this state as Low. 4) When activated, the outputs are tested regularly (brief switching to Low). When selecting the downstream control elements, ensure that the test pulses with the specified parameters do not result in a switch-off, or deactivate the test pulses on the outputs yourself. 5) Safety outputs (Q) with test pulses only detect cross-circuits reliably (i.e. already in the switched-on state and not just after a switch-off) if these values for the supply cable and the connected control element are not exceeded. Otherwise further measures will be required, for example protected or separate cabling. (See also EN 60204 Electrical equipment of machines, Part 1: General requirements.) Dimensional drawings 16 89,6 14 85,5 64,4 120,7 124,7 128,3 78,4 Figure 10: Dimensional drawing 36 O P E R A T I N G I N S T R U C T I O N S | Flexi IO XTDO1 8024583/1BMF/2021-05-12 | SICK Subject to change without notice ORDERING INFORMATION 13 13 13.1 13.2 13.3 13.4 Ordering information Scope of delivery · Expansion module - IO · Front connector · Safety note · Operating instructions for download: www.sick.com Ordering information for main module Table 19: Ordering information for main module Part Type code CPUc1 main module FLX3-CPUC100 · 20 safety capable inputs · 8 test outputs · 4 safety outputs CPUc2 main module FLX3-CPUC200 · 20 safety capable inputs · 8 test outputs · 4 safety outputs · Ethernet interface (female RJ45 Ethernet connector) for Modbus® TCP Ordering information for expansion module Ordering information for IO expansion module Table 20: Ordering information for IO expansion module Part Type code Expansion module XTDI1 FLX3-XTDI100 · 8 safety capable inputs · 8 test outputs Expansion module XTDO1 FLX3-XTDO100 · 8 safety capable inputs · 8 safety outputs Ordering information for gateway expansion module Table 21: Ordering information for gateway expansion module Part Type code GPNT1 PROFINET-IO gateway FLX0-GPNT100 GETC1 EtherCAT® gateway FLX0-GETC100 Ordering information for accessories Table 22: Ordering information for accessories Part Front connector with opening for SmartPlug · 16 spring terminals Type code FLX0-ACC0300 Part number 1085349 1085351 Part number 1085353 1085354 Part number 1085356 1085357 Part number 6069666 8024583/1BMF/2021-05-12 | SICK Subject to change without notice O P E R A T I N G I N S T R U C T I O N S | Flexi IO XTDO1 37 13 ORDERING INFORMATION Part Front connector · 18 spring terminals SmartPlug Housing end cap Type code FLX0-ACC0200 FLX3-SMPL100 FLX0-ACC0400 Part number 6066285 2106852 5340579 38 O P E R A T I N G I N S T R U C T I O N S | Flexi IO XTDO1 8024583/1BMF/2021-05-12 | SICK Subject to change without notice ANNEX 14 14 14.1 Annex Compliance with EU directives EU declaration of conformity (extract) The undersigned, representing the manufacturer, herewith declares that the product is in conformity with the provisions of the following EU directive(s) (including all applicable amendments), and that the standards and/or technical specifications stated in the EU declaration of conformity have been used as a basis for this. Complete EU declaration of conformity for download You can call up the EU declaration of conformity and the current operating instruc- tions for the protective device by entering the part number in the search field at www.sick.com (part number: see the type label entry in the "Ident. no." field). 8024583/1BMF/2021-05-12 | SICK Subject to change without notice O P E R A T I N G I N S T R U C T I O N S | Flexi IO XTDO1 39 15 LIST OF FIGURES 15 List of figures 1. Example maximum configuration.............................................................................. 10 2. FLX3-XTDO1 IO expansion module............................................................................11 3. LEDs for indicating the status....................................................................................12 4. Clearances for adequate air circulation.................................................................... 14 5. Internal circuitry XTDO................................................................................................15 6. Dismantle front connector......................................................................................... 17 7. Mount the front connector......................................................................................... 18 8. Terminals on front connector.....................................................................................20 9. Eyelet on front connector........................................................................................... 21 10. Dimensional drawing.................................................................................................. 36 40 O P E R A T I N G I N S T R U C T I O N S | Flexi IO XTDO1 8024583/1BMF/2021-05-12 | SICK Subject to change without notice LIST OF TABLES 16 16 List of tables 1. Available documents.....................................................................................................5 2. Interfaces of the module............................................................................................11 3. Status indicator...........................................................................................................12 4. Front connector pin assignment................................................................................20 5. PWR and CV indications............................................................................................. 26 6. CV indications............................................................................................................. 26 7. I indications (safety capable input)........................................................................... 27 8. Q indications (safety output)......................................................................................27 9. Faults in the logic........................................................................................................27 10. Faults in the safety capable inputs (I)....................................................................... 28 11. Faults in the safety outputs (Q)................................................................................. 29 12. Safety-related characteristic data - safety capable inputs (I).................................. 32 13. Safety-related characteristic data - CPU logic processing........................................32 14. Safety-related characteristic data - safety outputs (Q).............................................33 15. General data............................................................................................................... 33 16. Voltage supply............................................................................................................. 34 17. Technical data for the safety capable inputs (I)....................................................... 35 18. Technical data for the safety outputs (Q)..................................................................35 19. Ordering information for main module......................................................................37 20. Ordering information for IO expansion module.........................................................37 21. Ordering information for gateway expansion module...............................................37 22. Ordering information for accessories........................................................................ 37 8024583/1BMF/2021-05-12 | SICK Subject to change without notice O P E R A T I N G I N S T R U C T I O N S | Flexi IO XTDO1 41 16 LIST OF TABLES 42 O P E R A T I N G I N S T R U C T I O N S | Flexi IO XTDO1 8024583/1BMF/2021-05-12 | SICK Subject to change without notice LIST OF TABLES 16 8024583/1BMF/2021-05-12 | SICK Subject to change without notice O P E R A T I N G I N S T R U C T I O N S | Flexi IO XTDO1 43 8024583/1BMF/2021-05-12/en Australia Phone +61 (3) 9457 0600 1800 33 48 02 tollfree E-Mail sales@sick.com.au Austria Phone +43 (0) 2236 62288-0 E-Mail office@sick.at Belgium/Luxembourg Phone +32 (0) 2 466 55 66 E-Mail info@sick.be Brazil Phone +55 11 3215-4900 E-Mail comercial@sick.com.br Canada Phone +1 905.771.1444 E-Mail cs.canada@sick.com Czech Republic Phone +420 234 719 500 E-Mail sick@sick.cz Chile Phone +56 (2) 2274 7430 E-Mail chile@sick.com China Phone +86 20 2882 3600 E-Mail info.china@sick.net.cn Denmark Phone +45 45 82 64 00 E-Mail sick@sick.dk Finland Phone +358-9-25 15 800 E-Mail sick@sick.fi France Phone +33 1 64 62 35 00 E-Mail info@sick.fr Germany Phone +49 (0) 2 11 53 010 E-Mail info@sick.de Greece Phone +30 210 6825100 E-Mail office@sick.com.gr Hong Kong Phone +852 2153 6300 E-Mail ghk@sick.com.hk Hungary Phone +36 1 371 2680 E-Mail ertekesites@sick.hu India Phone +91-22-6119 8900 E-Mail info@sick-india.com Israel Phone +972 97110 11 E-Mail info@sick-sensors.com Italy Phone +39 02 27 43 41 E-Mail info@sick.it Japan Phone +81 3 5309 2112 E-Mail support@sick.jp Malaysia Phone +603-8080 7425 E-Mail enquiry.my@sick.com Mexico Phone +52 (472) 748 9451 E-Mail mexico@sick.com Netherlands Phone +31 (0) 30 229 25 44 E-Mail info@sick.nl New Zealand Phone +64 9 415 0459 0800 222 278 tollfree E-Mail sales@sick.co.nz Norway Phone +47 67 81 50 00 E-Mail sick@sick.no Poland Phone +48 22 539 41 00 E-Mail info@sick.pl Romania Phone +40 356-17 11 20 E-Mail office@sick.ro Russia Phone +7 495 283 09 90 E-Mail info@sick.ru Singapore Phone +65 6744 3732 E-Mail sales.gsg@sick.com Detailed addresses and further locations at www.sick.com Slovakia Phone +421 482 901 201 E-Mail mail@sick-sk.sk Slovenia Phone +386 591 78849 E-Mail office@sick.si South Africa Phone +27 10 060 0550 E-Mail info@sickautomation.co.za South Korea Phone +82 2 786 6321/4 E-Mail infokorea@sick.com Spain Phone +34 93 480 31 00 E-Mail info@sick.es Sweden Phone +46 10 110 10 00 E-Mail info@sick.se Switzerland Phone +41 41 619 29 39 E-Mail contact@sick.ch Taiwan Phone +886-2-2375-6288 E-Mail sales@sick.com.tw Thailand Phone +66 2 645 0009 E-Mail marcom.th@sick.com Turkey Phone +90 (216) 528 50 00 E-Mail info@sick.com.tr United Arab Emirates Phone +971 (0) 4 88 65 878 E-Mail contact@sick.ae United Kingdom Phone +44 (0)17278 31121 E-Mail info@sick.co.uk USA Phone +1 800.325.7425 E-Mail info@sick.com Vietnam Phone +65 6744 3732 E-Mail sales.gsg@sick.com SICK AG | Waldkirch | Germany | www.sick.comAntenna House PDF Output Library 7.0.1574